- Adjust white balance, light, HSL, vignette easily
- Built-in 3D LUT templates and royalty free music library available
- Low Requirement of computer hardware
- Intuitive user interface & powerful video editing features
- Upload to YouTube, Facebook and Vimeo directly or save to devices
- 300+ built-in stunning visual effects including stylish transitions, filters, and overlays

 100% Security Verified | No Subscription Required | No Malware
How to Change Colors in Adobe After Effects?

Sep 01, 2025• Proven solutions
 TL;DR:
Adobe After Effects provides professional editors with highly granular color correction tools like the Change to Color effect and Channel Mixer, while Wondershare Filmora offers an accessible alternative for beginners through AI-driven object isolation and cross-platform grading.
● Adobe After Effects requires a manual approach to color manipulation, relying on applying the "Change to Color" effect to alter specific object hues using a From/To color picker, adjusting RGB sliders within the Channel Mixer, or applying the Spot Exposure tool on an adjustment layer for localized corrections.
● Wondershare Filmora is targeted at beginners seeking an easier learning curve, featuring an "AI Smart Cutout" desktop tool that automatically isolates key video subjects so users can seamlessly replace the background with solid colors without manual masking.
● Unlike After Effects, Filmora supports mobile editing workflows via dedicated iOS and Android applications, enabling users to apply built-in LUT presets, manipulate HSL sliders, and adjust exposure or color wheels directly from their smartphones.
Ask AI for a summary
 ChatGPT
 Perplexity
 Gemini
 Claude
 Grok
Grok
In professional video editing, you cannot just rely on AI to enhance your visuals. To ensure the process goes right, manual input is important to an extent. Adobe After Effects is a well-known editing tool that offers extensive manual and automated color-changing options to its users. This article dives into the processes of how to change color in After Effects and explores a better alternative for this adjustment.
You may also like: How to Make and Use a Green Screen Easily?
Part 1. Exploring the Methods to Change Colors in After Effects
Adobe After Effects is an advanced editor that allows you to apply subtle color changes to complete hue transformation. This platform offers you various methods for changing video colors. The following section covers the main methods of transforming video hues using this tool:
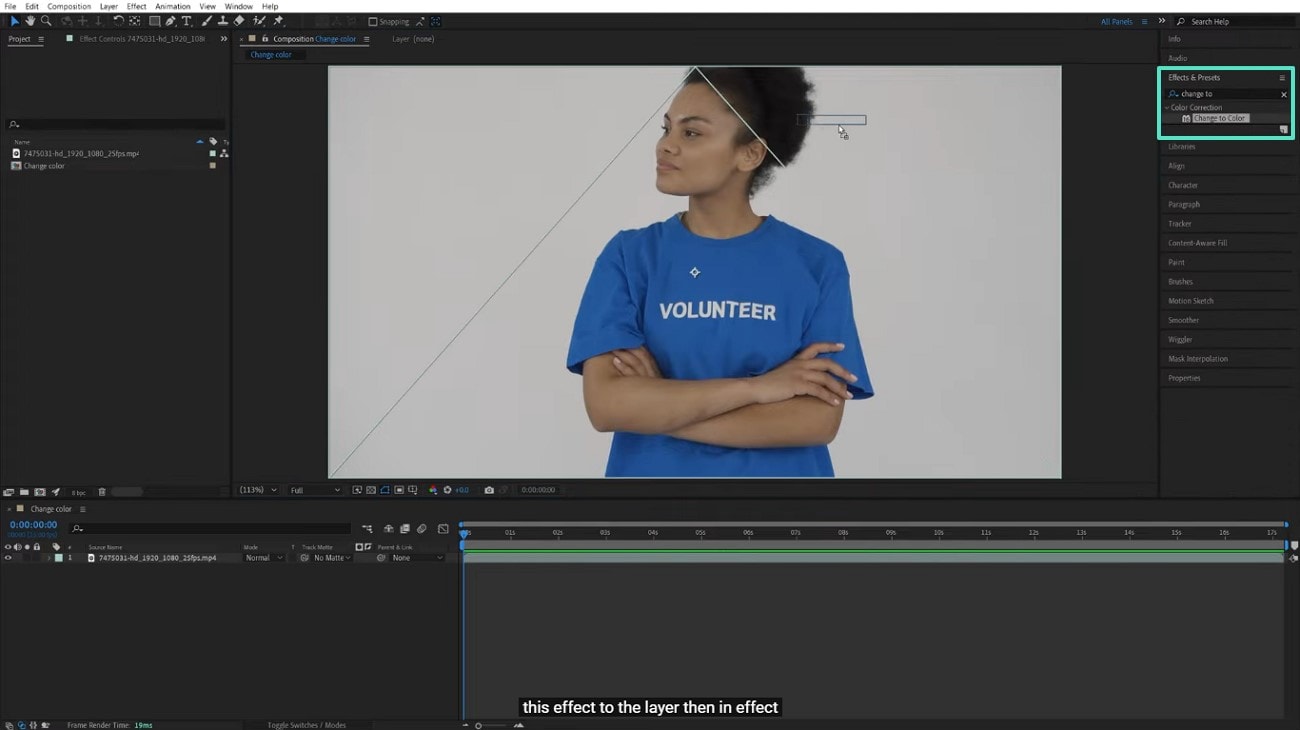
Method 1. Applying the Change to Color Effect
The first method is a combination of automated and manually driven operations. It allows you to change the color of an entire object, which is ideal for displaying the available colors in your product for online businesses. Once applied, you can adjust the hue and lightness percentages of the object to get the custom outlook. Follow the steps below to learn how to use this method to change the color of an image After Effects:
- Step 1. To start, import a video and drag it to the timeline to access the right panel. Here, search for and apply the "Change to Color" effect in the "Effects and Presets" section.
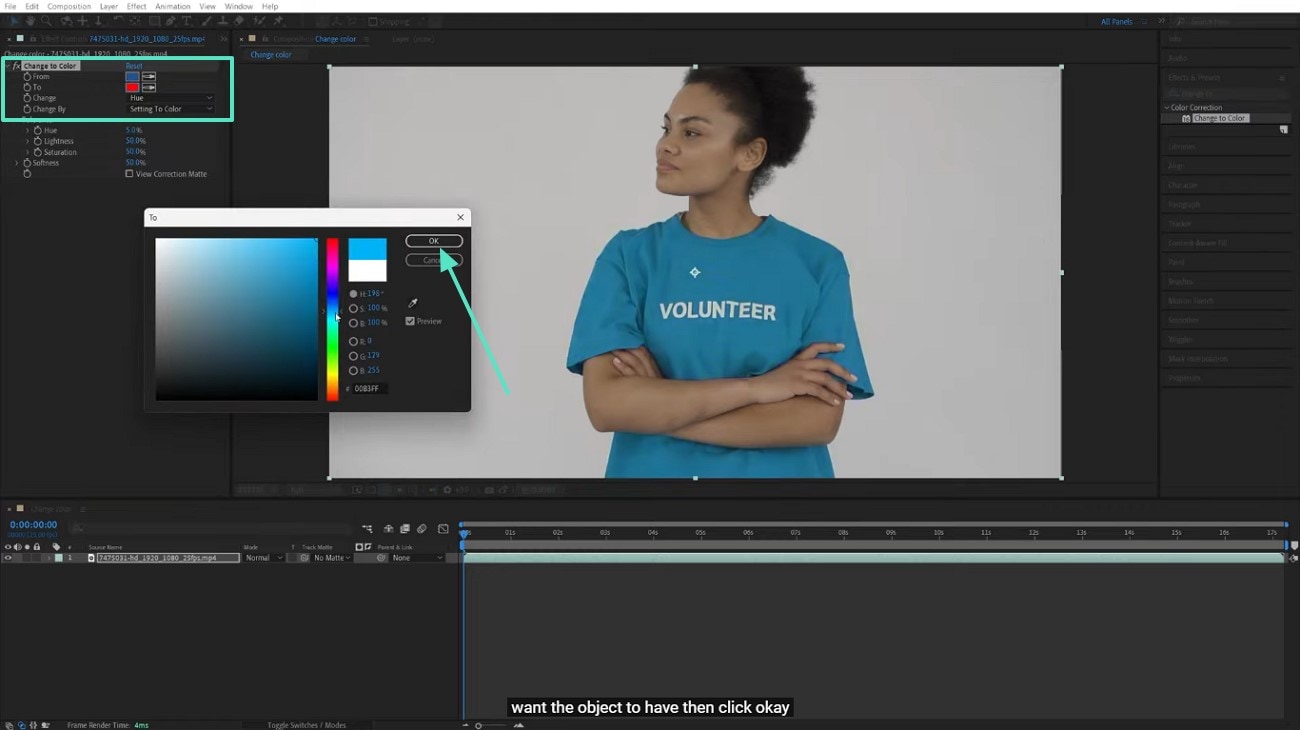
- Step 2. Using the "Change to Color" panel on the left side, select the "From" option and use the color picker to select the color of the object. Now, select the color you need to apply to the selected object using the "To" menu.
Method 2. Using Presets to Fix Desaturated Colors
If your video has a desaturation of colors, it can be fixed promptly using the After Effects change color effect. This method gives you the liberty to select whichever effect you want to resolve the color issues. The following steps cover a guide on using After Effects to solve the desaturated colors problem:
- Instructions. After importing the video into the After Effects interface, access the right panel to search for "Color." When the list of color presets appears, apply the asset that fixes your color saturation.

Method 3. Exploring the Clarity Effect
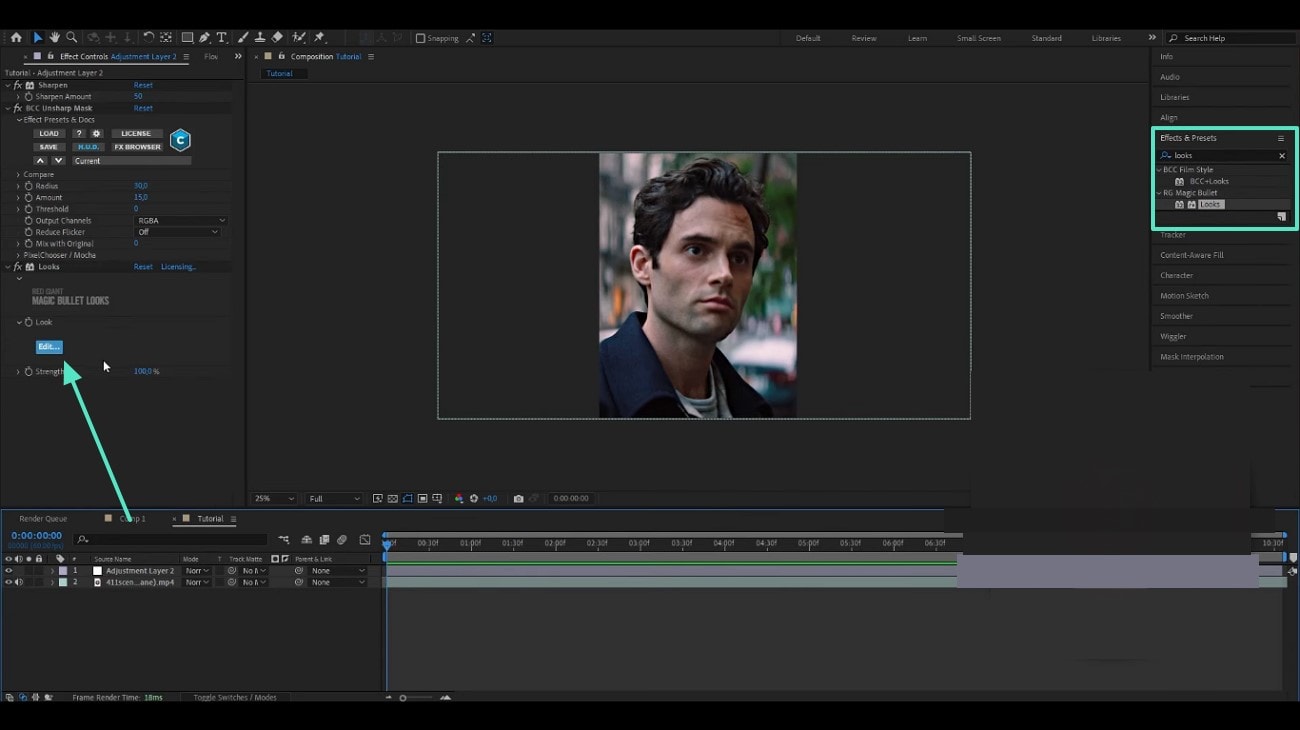
When looking for extensive manual color adjustment, using the Clarity Effect is the ideal method. This method offers you numerous tools that refine the colors in your video, making it look polished and professional. The following guide explains how to change color in After Effects using this method:
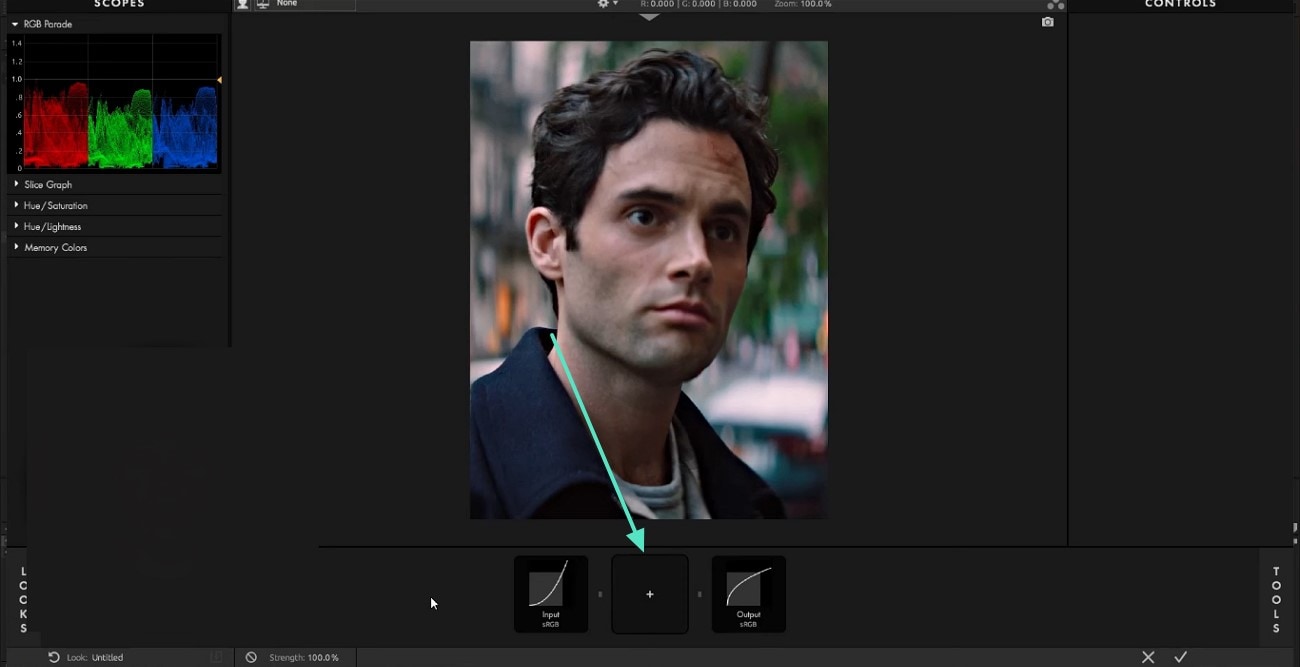
- Step 1. First, access the right panel to search for the "Looks" effect and press "Edit" from the left to start the process.
- Step 2. On being directed to the next window, click the "+" icon at the bottom of the screen to unveil a collection of tools on the right.
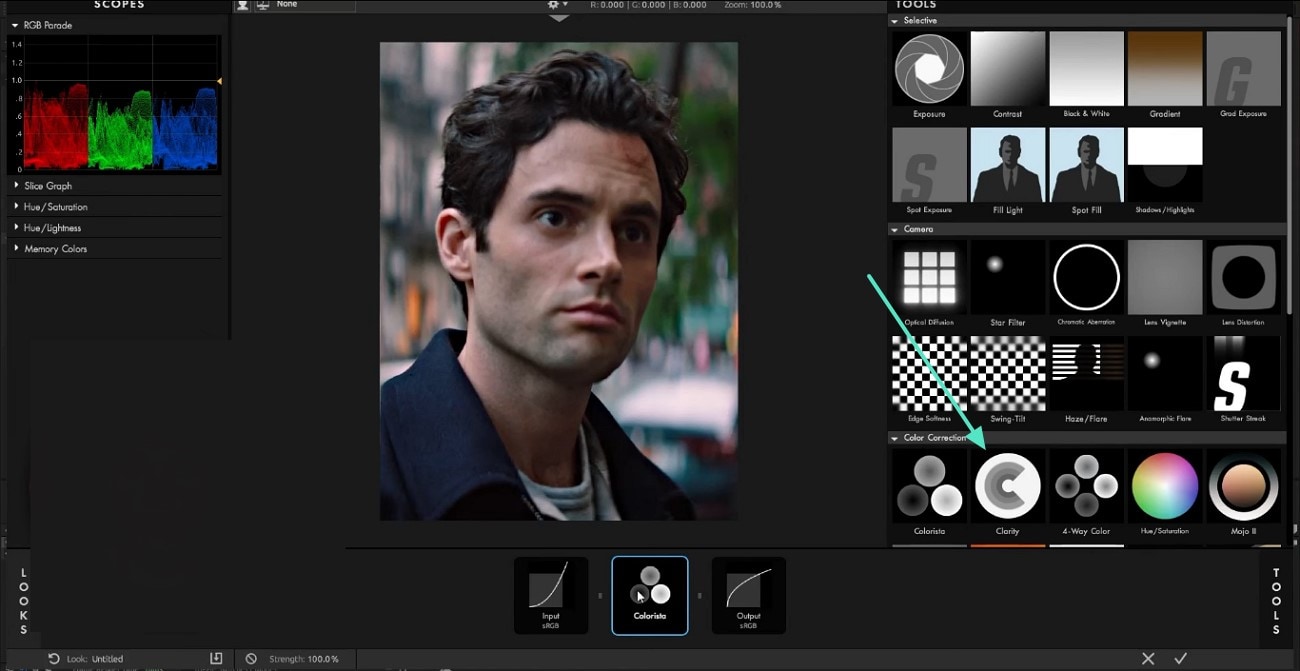
- Step 3. Here, click the "Clarity" effect and wait for the color adjustment window to appear.
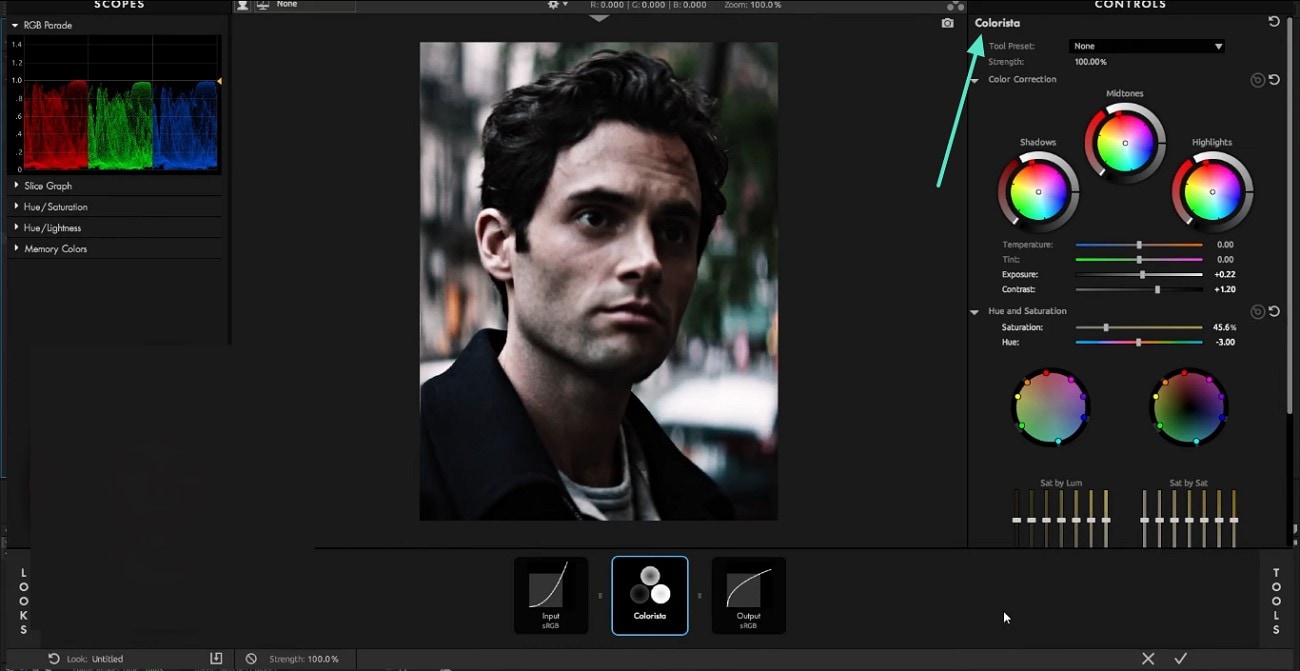
- Step 4. Using the "Colorista" panel on the right, adjust the colors manually as needed.
Method 4. Discovering the Channel Mixer Settings for Color Adjustment
The next method that can be used is by manually adjusting the colors through the Channel Mixer. This tool allows you to adjust the red, green, and blue colors of the video for a refined look. Follow the steps below to learn how to change the color of something in After Effects using this tool:
- Step 1. To begin the process, access the "Channel Mixer" tool from the Looks effect.

- Step 2. When the "Channel Mixer" panel opens in the right section, use the respective sliders to adjust the red, blue, and green colors of the video.

Method 5. Applying the Spot Exposure Tool to Fix the Colors
To create variations in the exposure of your video frame, use the Spot Exposure tool. Using this tool, users can adjust the exposure of certain areas of the frame to create a dynamic look. The following section covers a guide on using this After Effects change color effect:
- Step 1. First, create an adjustment layer to the video using the main interface of the tool. Next, search for "Looks" under the Effects and Presets section to access the next window. Under the Tools section, locate and select the "Spot Exposure" effect.

- Step 2. Using the right panel of the next screen, adjust the "Color Balance" using the designated wheel.

Method 6. Adjusting the Color Curves Manually
Users looking for precise color adjustments can use the color curves in After Effects. Using this tool, you can make minor to major color changes to your videos effortlessly. Once you have made the color adjustment, you can save it as a preset. To benefit from this After Effects change color method, follow the steps below:
- Instructions. Once you have imported a video into After Effects, navigate to the "Effects and Presets" from the right panel. Using the search bar, search for "Curves" and adjust the curve manually on the left side.

Part 2: Looking into an After Effects Alternative for Color Correction
After learning how to change color in After Effects, we explored that this tool might not be fit for beginners. Wondershare Filmora is a user-friendly video editor that offers an intuitive interface to adjust video colors. It offers a desktop and a mobile version to help users of all types benefit from its color correction features.
Using the Desktop Version for Color Correction
With the desktop version, users can avail themselves of the built-in filter presets for automated color adjustments. When looking for manual color grading, this tool offers an extensive suite of adjustment settings. However, the desktop version of Filmora provides 2 methods for changing the color of a video.
Method 1. Applying the AI Smart Cutout Feature for Color Setting
For a professional impact, changing the video background color is a good idea. This replaces color After Effects method allows users to isolate the key object from a video and play with its background. Besides choosing a solid color, you can also apply built-in background options. Follow the guide below for detailed instructions on using this method:
- Step 1. Initiate a New Project to Start. First, select the "New Project" button from the main interface of Filmora to "Import" a video to the next screen.

- Step 2. Enable the Smart Cutout Features to Isolate the Key Video Object. Now, access the "AI Tools" from the right panel to enable the "Smart Cutout" feature. Now, press the "Click to Start Smart Cutout" button to navigate to the next window.

- Step 3. Draw a Brush Stroke to Isolate the Object. Using the right panel, adjust the brush size and draw over the object to isolate it. Press the "Click to Start Smart Cutout" button to "Save" the settings.

- Step 4. Replace the Video Background with a Solid Color. From the "Basic" video settings, enable the "Background" option and choose the desired solid color to change the video color.

 secure download

Method 2. Using the Manual Color Adjustment Features
If you want to change the video color without isolating any object, you can do so using Filmora.
- Step 1. Select an LUT Preset. First, access the "Color" section from the right panel and enable the "LUT" option from the "Basic" section. Now, use the designated menu to select the desired LUT preset and apply it to the video.

- Step 2. Adjust the Color Using the Color Option. For a precise hue adjustment, enable the "Color" button and manually adjust the settings using the designated sliders.

- Step 3. Apply the HSL Settings for a Subtle Color Change. To subtly change the color highlights and shadows, enter the "HSL" panel and adjust the colors by dragging the sliders.

- Step 4. Use the Curves to Add Perfection. From the "Curves" panel on the right, set the curve dots to achieve the desired color outlook.

- Step 5. Make Extensive Color Changes Using the Color Wheels. To make major color changes to the video, open the "Color Wheels" section on the right. This wheel will enable you to select the highlights and the midtones of the video.

secure download
Using the Mobile App for Color Adjustments
If you need your color adjustments on the go, use the Filmora App [iOS/Android]. Using this application, you can set the light exposure settings for a vibrant video result. These adjustments allow you to completely customize the video color. Follow the guide below to learn how to change the color of the image in After Effects alternative:
- Step 1. Import a Video to Start a New Project. First, open the main interface of the Filmora App and tap "New Project" to import a video.

- Step 2. Adjust the Exposure and the Contrast of the Video. From the editing interface, open the "Adjust" tab and set the "Exposure" and "Contrast" by dragging their designated sliders.

- Step 3. Make More Settings to Adjust the Color. Using the same screen, swipe and drag the "Saturation," "Vibrance," and "Highlight" sliders.

- Step 4. Set the Video's Temperature and Tone to Refine Color. To give a final polish to the color of your video, enter the "Temperature" and "Tone" options to adjust them.

- Step 5. Apply the HSL Color Settings to Enhance the Appeal. For extensive color adjustments, enter the "HSL" tab and adjust the hue, saturation, and lightness of the desired color tones.

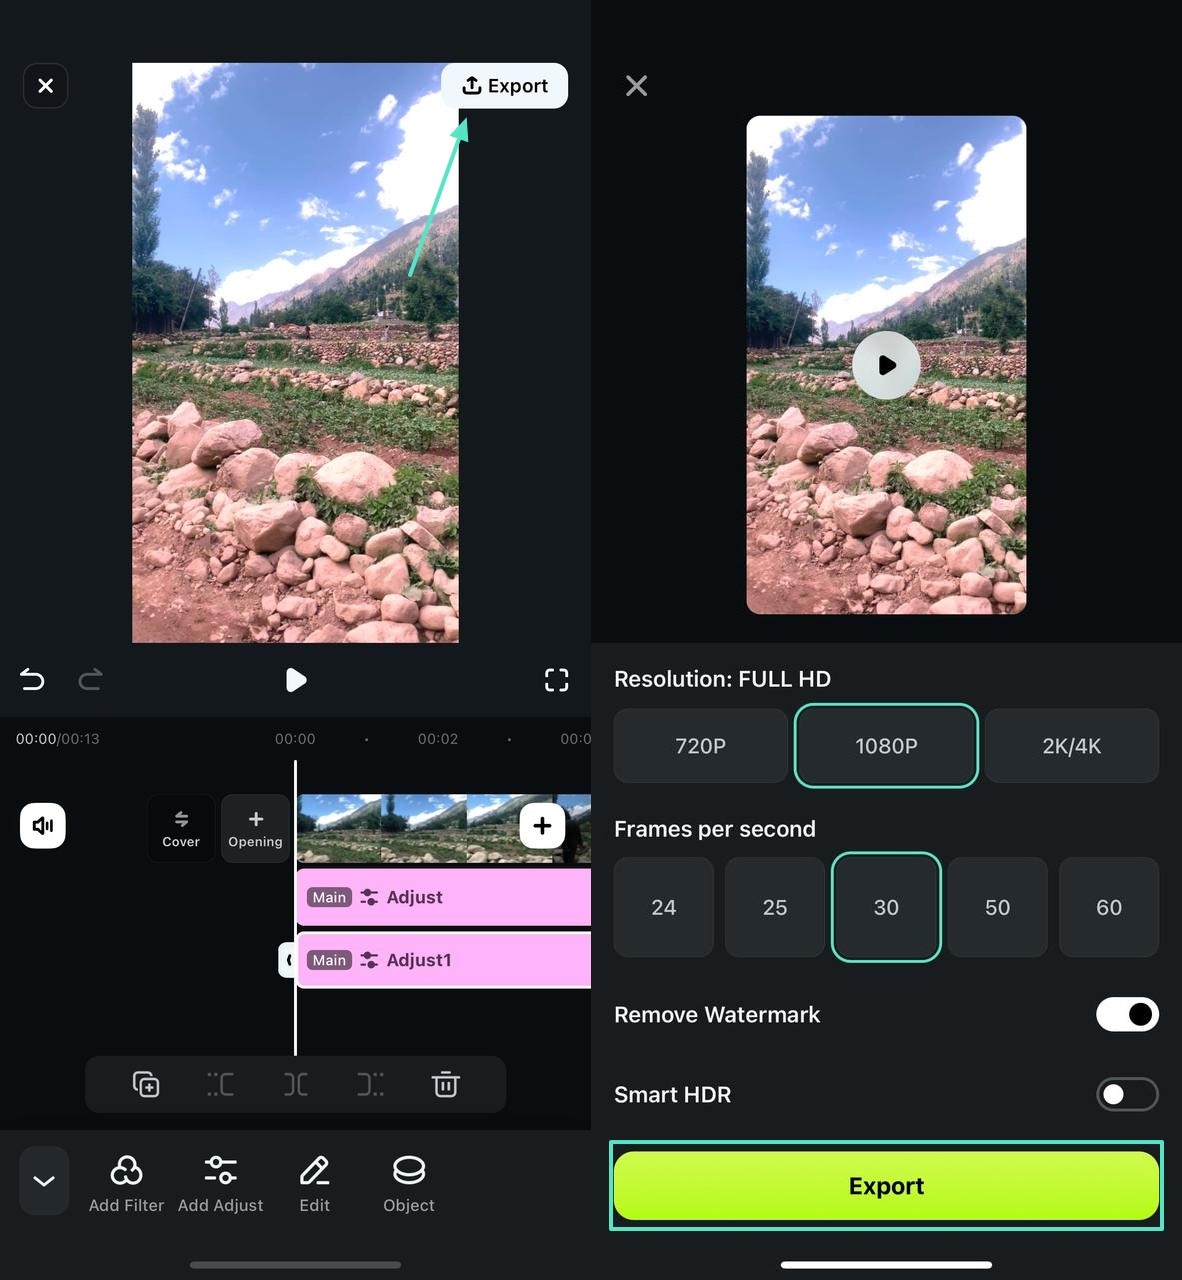
- Step 6. Export the Video to End the Process. Once you are done correcting the colors, tap the "Export" button at the top right to save the video in your desired resolution and frame rate.
secure download
Conclusion
Wrapping up, this article covered the details of the After Effects change color effects. We explored the various methods of correcting video colors using this tool. After a detailed dive into its functionality, we concluded that this tool does not have a user-friendly interface for beginners.
Wondershare Filmora is a robust video editing alternative that offers advanced tools while keeping the interface easy to use. It allows users to adjust the video colors using the background removal and extensive color grading methods.
Using a white balance card is often a better solution If you want to adjust the colors to a specific context. So, in this article, we will show you how you can use the white balance card to make the c
by Benjamin Arango Dec 15, 2025 20:21 PM
Benjamin Arango
staff Editor
