Have you ever faced challenges while trying to replace footage in After Effects? This guide is here to help. Replacing footage smartly in After Effects is critical for keeping your projects streamlined and up-to-date.
Whether swapping out old clips or updating a video's soundtrack, the right approach can save you time and maintain your edits. We'll walk you through the steps to replace footage effectively, ensuring your edits transfer seamlessly to the new clip.
This guide will also highlight the best alternative to After Effects to make video editing simple and efficient. Get ready to enhance your editing workflow with these essential techniques.
In this article
Part 1. Step-by-Step Guide to Replacing Footage in After Effects
After Effects lets you swap the source of a video with a new file while keeping the same In and Out points in the timeline and project panel. This means you can switch a video clip with another one or change its soundtrack to a different language.
Any edits you made to the original will still apply to the new clip. Here's a quick guide on how to do this in After Effects:
Step 1: Select the Clip
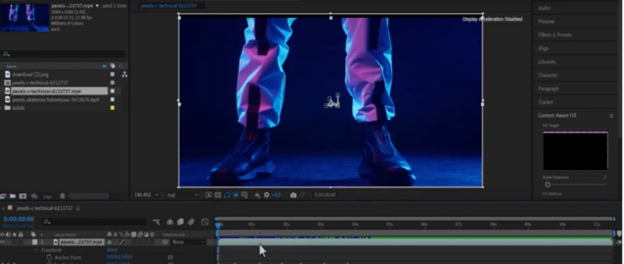
In the Project Assets panel, select the clip you want to replace with a new source in After Effects.
Step 2: Replace Footage
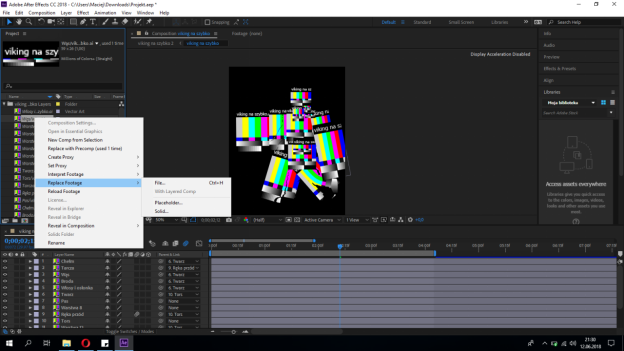
Click on the clip to replace the footage. Alternatively, Ctrl-click or right-click on the clip and choose 'Replace Footage.'
Step 3: Footage Replaced Successfully
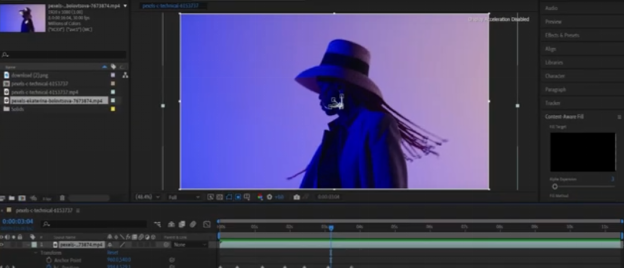
Click on the new file in the Replace dialog box and press 'Open.' This action will swap out the old clip for the new one, linking the new clip to all instances where the old one was used.
The Other Ways to Replace Footage in After Effects
Besides the method mentioned above, two other ways exist to replace footage in After Effects.
- Use Shortcuts to Replace Footage
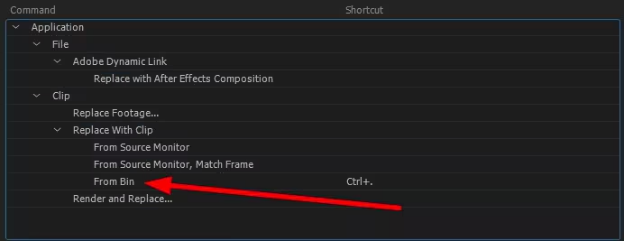
Swapping or adding footage in After Effects is straightforward. You can quickly change or add footage using two shortcuts: CMD + / on Mac or CTRL + / on PC to insert a clip into the composition.
If you want to replace one layer with different footage, first select the layer in the composition. Then, choose the new clip in the project. For Mac, press CMD + OPTION + /, and for PC, press CTRL + ALT + /.
- Use Proxy to Improve Preference
Proxies in After Effects use low-resolution versions of movies or stills for quicker previews. They're great for handling larger files by reducing their size. To create a proxy, click on the project video clip, select 'Create Proxy,' and then choose 'Movie' or 'Still.'
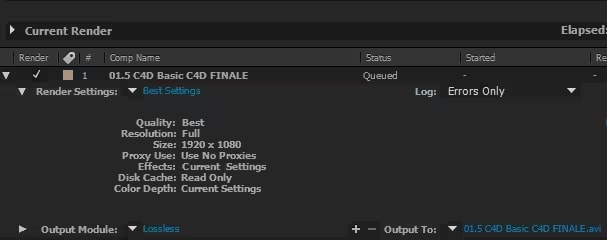
Next, the Render Queue opens, allowing you to set up the proxy's Output Module and Render Settings. The Output setting can be JPEG or another format, but the Render setting is a half-size draft by default.
Once the proxy render finishes, a square icon next to the footage indicates the proxy is active. To deactivate the proxy, click the square to change to an outline.
Now that you know how to replace footage in After Effects, let’s explore an alternative.
Part 2. The Best Alternative to After Effects - Wondershare Filmora🔥
Are you looking for a user-friendly video editing tool without skimp-on features? Wondershare Filmora is what you need. This software excels in providing tools that simplify editing while offering rich functionalities.
Filmora's simple interface makes it easy for beginners and experienced editors to navigate and quickly master. It supports various video formats, making it highly compatible with various media types.
It also boasts multiple creative options, such as transitions, effects, and templates, to enhance any video project, ensuring professional-quality results even for those with limited technical skills.
Key Features of Filmora:
- Planar Tracking: Achieve precise motion tracking to seamlessly attach text, graphics, or effects to moving objects. Learn more about Planar Tracking.
- AI Smart Mosaic: Automatically blur or pixelate faces, license plates, or sensitive information using AI for enhanced privacy. Discover AI Smart Mosaic.
- Drag-and-Drop Editing: Simplifies editing by effortlessly adding and arranging clips in the timeline. Learn more about how to edit videos in Filmora.
- Advanced Editing Tools: For in-depth video adjustments, access features like keyframing, color correction, and noise reduction. Check this Advanced Editing Tools Guide.
- Pre-Made Templates: Choose from various templates for titles and transitions to speed up your editing process. Find Ready-to-Use Templates.
You can also find all the latest features of Filmora here.
Level Up Your Videos with Filmora's Planar Tracking Technology
Planar Tracking is a technique used in video editing and visual effects to track flat surfaces in a video. It accurately follows objects on a two-dimensional plane, like billboards or screens. This tool is perfect for advanced video tasks like obscuring license plates or replacing billboard content.
Below is the step-by-step guide to using planar tracking in your videos on Windows.
Step1Import and Add Media Files to the Timeline
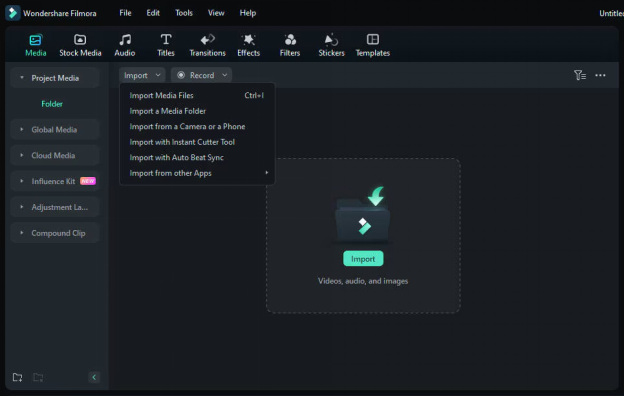
Open the app on your computer. Then, "import" your media files into Wondershare Filmora and add them to the timeline.
Step2Locate Planar Tracking
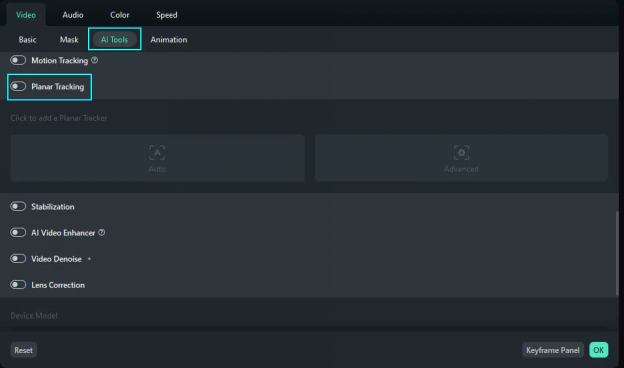
Double-click the clip on the timeline to access the editing panel. Go to Video > AI Tools and click the button next to Planar Tracking to turn on the feature.
Step3Choose a Planar Tracker
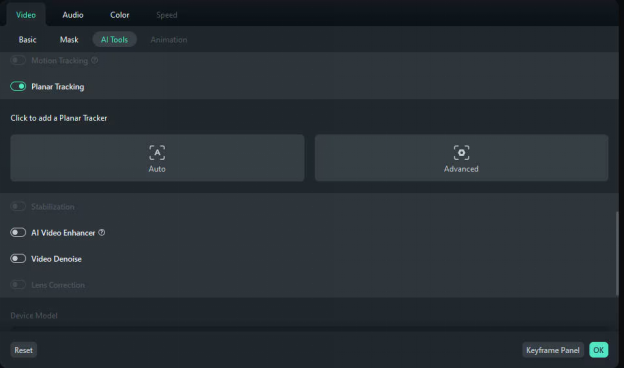
TwoPlanar Tracker modes are available, so you can select the one that best fits your needs.
- Auto Planar Tracker Mode
Step1 Select and Adjust Tracking Points
Tap on "Auto mode" on the panel. In the preview window, choose the target you want to track, then adjust the four tracking points accordingly.

Step2 Start Tracking
Click Start to initiate tracking once you adjusted the tracking points.

This action will switch to rendering mode, allowing only one clip on the timeline at a time.

Step3 Preview Tracking Points
Once tracking is finished, play the video on the timeline to ensure the four tracking points accurately follow the target object. If there are inaccuracies, you can adjust them frame by frame.

You can select to hide or show the tracker in the settings panel.

- Advanced Planar Tracker Mode
Step1 Select and Adjust Tracking Points
Click Advanced Mode on the panel. In the preview window, choose the target you want to track and adjust the four tracking points.

In the panel, you can also adjust the accuracy level.

Step2 Start Tracking
Choose from four options to best match your video clips for tracking. The frame-by-frame analysis is recommended for videos with a lot of shaking. You can stop the tracking by clicking anywhere in the software.

This will be entered in Render Mode.

Step3 Preview Tracking Points
After tracking is completed, play the video on the timeline to check if the four tracking points accurately follow the target object. You can hide or show the tracker in the panel as needed.

If any part of the tracking is off, adjust and re-analyze from the frame where the error starts. For videos with heavy shaking, use frame-by-frame analysis. This lets you adjust each frame for accurate tracking results.

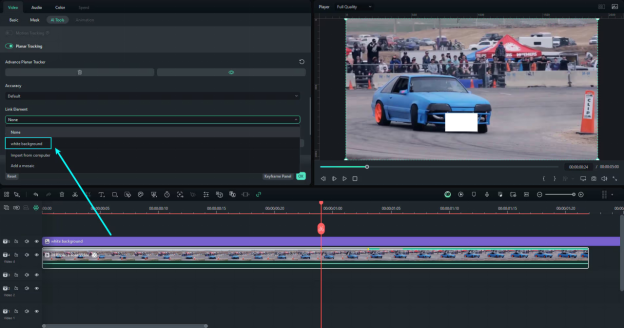
Step4Select Linked Elements
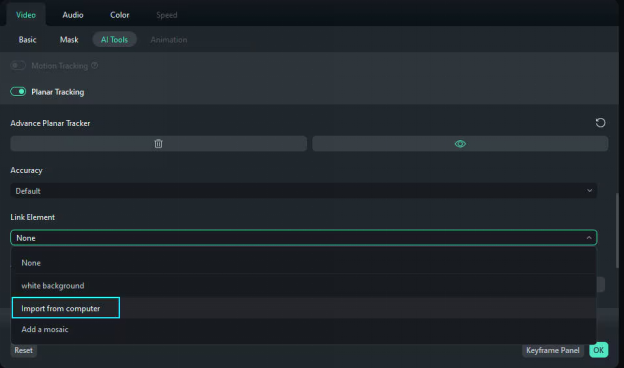
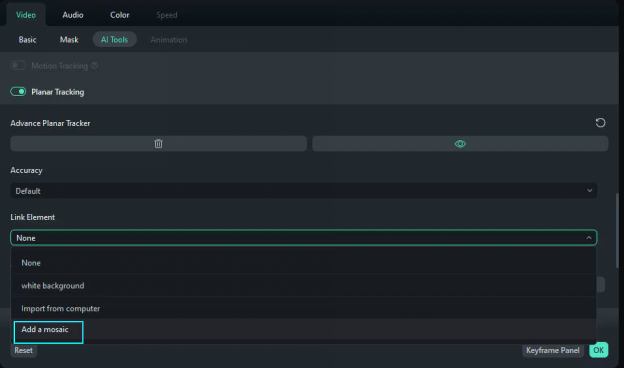
You can link elements by selecting timeline clips, importing media from a computer, or applying mosaics.
Timeline Clip: After adding videos or images to the timeline, choose the clip above the current one in the dropdown menu.
Import Media: Click "Import from Computer" to add local images and videos.
Mosaic: Click "Add a mosaic" and apply it.
Once an element is Image nameed, it will be labeled as a " link" icon. Next, add "Corner Pin" properties to the linked clip."
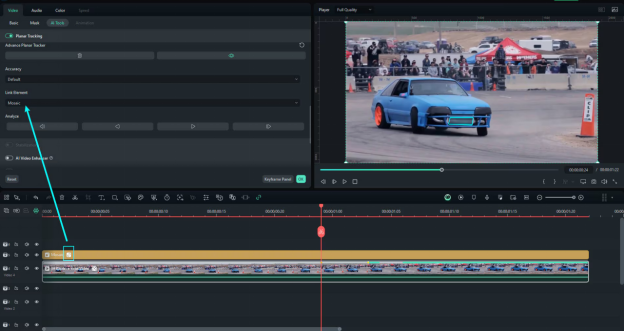
Step5Adjust Linked Elements Parameters
Adjust the transformation settings of the linked elements, such as Scale and Position, to achieve the desired size and placement on the tracking plane.
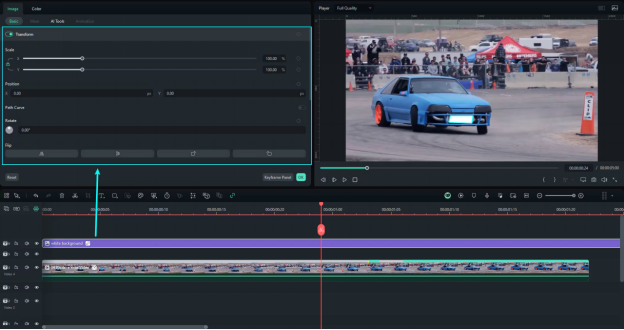
Step6Export and Share
Once you're done editing, click ""Export"" and select your preferred format to save.
That’s all about the method. You can also watch this video to learn about Planar tracking technology.
Wondering which tool you should use? Worry not! Next, we will compare After Effects and Wondershare Filmora.
Part 3. Which Tool is the Best: After Effects or Wondershare Filmora
| Feature | Wondershare Filmora | After Effects |
| User Suitability | Beginners and intermediate users need a user-friendly interface with robust yet less complex video editing tools. | Professional editors and animators who require advanced motion graphics and compositing capabilities. |
| Complexity Level | Moderate - Designed to be intuitive, allowing users to quickly grasp basic and some advanced video editing techniques without extensive training. | High - Offers a steep learning curve due to its comprehensive suite of professional tools and features. |
| Common Use Cases | Home videos, content creation for social media, and basic to moderately complex projects that benefit from creative effects, transitions, and straightforward editing tools. | Complex video projects involving high-level visual effects, motion tracking, and compositing. Suitable for film, TV, and professional multimedia projects. |
| Key Features | Drag-and-drop editing, broad format compatibility, built-in stock media, one-click effects, and preset templates. | Advanced keyframing, deep compositing options, extensive plug-in support, 3D modeling, and real-time animation tools. |
| Performance | Optimized for smoother performance on less powerful computers, making it accessible to a wider range of users. | Requires a robust system to handle complex processes, potentially leading to higher hardware investments |
| Cost | More cost-effective with both subscription and perpetual license options, appealing to users with budget considerations | Subscription-based, typically higher cost due to its professional-grade features. |
| Ease of Use | Very user-friendly, with a simple interface and a quick learning curve. | Not beginner-friendly; it requires time and training to master. |
| Support and Resources | Comprehensive help center, tutorials, and a growing community that provides useful tips for new users. Also offers good customer support. | Extensive tutorials and a large community of professional users. Offers detailed documentation and professional support. |
| Customizability | Less customizable than After Effects but offers enough flexibility for most users. | Highly customizable workspace and workflow, with options for customizing tool panels and shortcuts. |
Summary
After comparing After Effects and Wondershare Filmora, it's clear that each has its strengths tailored to different users.
After Effects is ideal for professionals needing advanced features for complex projects, but it has a steep learning curve and higher costs. On the other hand, Wondershare Filmora is a more accessible and cost-effective option that is perfect for beginners and intermediate users.
It offers a user-friendly interface and a variety of easy-to-use features that simplify the video editing process. Wondershare Filmora is recommended for most users, especially those looking for a straightforward, efficient tool without needing professional-grade complexity.
Let’s conclude our discussion!
Conclusion
Knowing how to replace footage in After Effects for precise video edits is crucial. However, After Effects might be too complex and expensive for some, this is where Wondershare Filmora steps in.
Filmora is simpler and more affordable, making it great for beginners and intermediate users. It lets you swap footage easily and improve your videos. If you want to edit videos without hassle and still get professional results, choose Wondershare Filmora.
It simplifies video editing, making your projects look great with less effort. Give Filmora a try and see how easy and effective editing can be.


