


 100% Security Verified | No Subscription Required | No Malware

The modern camera devices nowadays have become more capable and highly advanced. With just a snap of a finger, you can surely take stunning snaps or record breathtaking footage. In terms of quality, you can be sure that most of the outputs carry the highest appraisal. But hold on. At some point, it’s still important to point out that raw footage must always be post-produced. You never know. Some undetected color settings might ruin its beauty later on. Don’t worry. Many video editing apps out there are equipped with powerful color-correction features.
In this respect, the color correction on Final Cut Pro is indeed among the best. Why so? Simply because this software has tons of tools that you can use to balance, normalize, correct, and enhance color settings. Yes. You can certainly do all these things once you familiarize yourself with its fundamental functions and navigation. There are lots of Final Cut Pro color correction tutorials out there. Choose one that best suits your current situation and try to read its content. For sure, you’ll get to know your way around it within a short period of time.
In this article, we will delve into the highlights and benefits of color correction on Final Cut Pro. We will also provide a short guide on how to use this feature in quick and easy steps. Lastly, we will give you the best alternative option that works like the Final Cut Pro color correction tool. Continue reading below to learn more.
In this article
Exploring the Main Elements of Final Cut Pro Color Correction
Final Cut Pro can definitely do a lot for you. It is capable enough to support both basic and professional video editing. There are many Final Cut Pro features that you’ll surely find so useful and beneficial. One of which is color correction. In case you’re unaware, color correction on Final Cut Pro is one of the best in this regard. You’re given tons of options and tools on the platform to perform this kind of procedure and obtain promising results. Is it hard to navigate color correction on Final Cut Pro? Well, we’re not going to deny that this process is not a walk in the park. But don’t worry. Once you grasp how it generally works, you’ll surely find it very easy to navigate and control. To get started, check out the list below and learn about the main elements of Final Cut Pro color correction. Read the items very carefully and find out how each of them can specifically help you in this regard.
Color Wheels

Like the others, the Final Cut Pro color correction tool also has a set of color wheels. Yes. It offers a total of four color wheels to help users neutralize the color distribution in their video projects. For instance, you can use the global color wheel to adjust the general colors of your clips. The other three settings are specifically tailored to a certain function. The shadow color wheel for shadows, the highlight color wheel for highlights, and the mid-tone color wheel for mid-tones. Yes. That is one part of the Final Cut Pro color correction tool. Make sure that you use all of them whenever you do such procedures on this platform. One way or another, it will help you achieve the video effect you desire the most.
Color Board

Another tool from the Final Cut Pro color correction feature is the color board. It’s somewhat similar to the color wheels because the color board also targets global settings, shadows, mid-tones, and highlights. You can adjust them from here if you want to make changes to your videos. However, take note that the color board configures not only the color but also the saturation and exposure. Yes. Basically, you get the option to adjust the saturation, exposure, and color of the global, mid-tones, shadows, and highlights. Can it be considered as an advantage? If you learn how to use them properly, then we can definitely say that they are advantages. Don’t worry. If you’re a beginner, you may try to use a Final Cut Pro preset for color correction. Just find a previously used or stored preset and apply it to your project. If you do that, you don’t need to calibrate the color board. It will be automatically adjusted based on the preset settings.
Color Curves

Let’s say you need more advanced options to obtain your desired color setting configuration. Don’t worry. It’s not a big deal. The Final Cut Pro color correction offers a color curves panel. You can generally use it to make precise and accurate tonal adjustments. At the moment, it has luma, red, green, and blue curves. Just examine how to adjust each of them and then try it on your next video project. For sure, you can make beautiful video effects by simply playing around these curves. Don’t worry. There are tons of tutorials online that can give you adequate information about this tool. Read them very carefully and keep the information in your mind.
Scopes Library

Aside from the actual video preview, Final Cut Pro also offers lots of visual tools you can use as guides. Among them are the Waveform Monitor, Waveform Parade, Vectorscope, and Histogram. All these instruments have a specific function in this regard. Therefore, try to explore them once in a while. It will surely make color correction on Final Cut Pro easier on your part. Don’t worry. There are lots of tutorials out there that can help you learn the basics of Final Cut Pro scopes library. Just read them to help you get started. If you have a Final Cut Pro on your computer, then you can try the actual procedure as you go along. Begin your learning journey with Vetroscope. It’s a common visual tool that provides saturation and hue information. If you’re doing color correction a lot on Final Cut Pro, Vetroscope can take your experience to another level.
Hue/Saturation Curves

Regarding color correction and color grading, hue and saturation are among the main elements. Hue is the actual color property that you see in the output, while saturation is the intensity level of hue. Both of them go hand in hand always when doing color correction and color grading. That being the case, Final Cut Pro provides a specific panel where users can configure these settings. Yes. You can access and calibrate the hue and saturation curves when doing color correction on Final Cut Pro. Don’t worry. It’s a lot simpler compared to other tools. If you need to make adjustments, all you have to do is move the pointers around the panel. Yes. For the most part, it’s just as simple as that. However, keep in mind that the adjustments must be accurate and precise. Otherwise, the result will not be that promising. Try to find a Final Cut Pro color correction tutorial that covers this discussion. Read it very carefully and keep the information in your mind. Once you’re ready, open the software on your computer and experiment with the hue/saturation curves. It will not be a walk in the park first. But don’t stop. You will get there soon, too.
Color Correction Presets

Is it possible to automate the Final Cut Pro color correction? In actuality, there is. You can use auto color correction on Final Cut Pro. For instance, you may try the Analyze and Fix, Balance Color, or Match Color. Once enabled, Final Cut Pro will do the work for you even without too much manual intervention on your end. On the same note, you may also apply a color correction preset to your video projects. It can be a specific color setting from your previous work or imported LUT. Yes. There is no problem with that. However, you have to choose the preset you’re going to use for the Final Cut Pro color correction. Make sure that it matches the quality of your raw video clips very well.
How to Use Final Cut Pro Color Correction Quickly and Easily?
As previously implied, it’s not that hard to learn the basics of color grading on Final Cut Pro. You just generally need to understand its fundamental functions in order to make changes and adjust some significant calibrations. Do you want to try it on your end? If so, then find the tutorial provided below and follow the indicated steps accordingly.
Step 1: Launch the Final Cut Pro application on your Mac. After that, import the media assets you’re going to use for this project and then arrange them in the timeline panel.
Step 2: Click on the first clip and then move the playhead to a specific timeline in order to view your output in the preview.
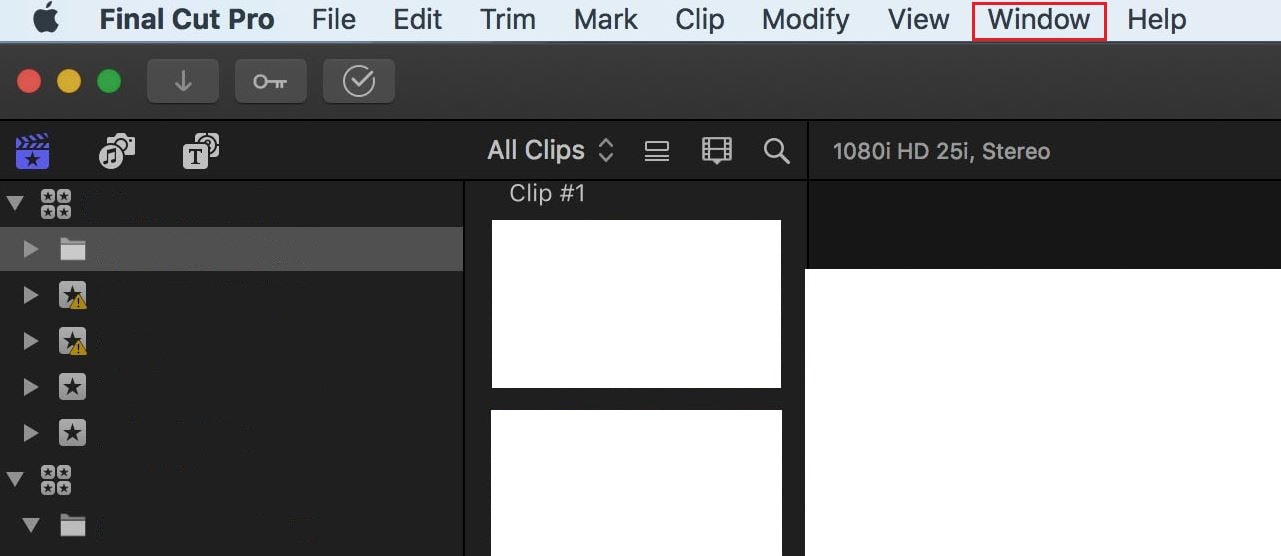
Step 3: After that, it’s time to start the color correction on your Final Cut Pro. To do that, go to the top menu bar and then click Window. From there, select Go To and then tap Color Inspector afterward
Step 4: Click the Enhancement icon right below the preview panel and then select Show Color Inspector.
Step 5: Subsequently, tap the Color icon to access the Final Cut Pro color correction tools. Once done, you can now start the color correction process on your Final Cut Pro. Simply click on the drop-down menu and choose your preferred tool, like Color Board, Color Wheels, Color Curves, and Hue/Saturation Curves. From there, you can configure the settings based on your preferences and creative ideas.

Step 6: After the configuration, play and check the video. If you’re satisfied with the result, go ahead and export the output. Tap File > Share > Export File to render the video and save a copy to your computer.
Wondershare Filmora: A Great Alternative to Final Cut Pro Color Correction

There is no doubt that color correction on Final Cut Pro is not only effective but is also very convenient. Why so? Simply because almost everything you need to correct and balance the color settings is already there. You just have to explore the available options and make the proper calibrations. However, some people don’t have access to Final Cut Pro color correction, especially those who use Windows computers. Is there another way to experience its functions on their end? The short answer is absolutely yes. If you’re in the same situation, you may try to use some alternative video editing apps. One of the best options in this regard is Wondershare Filmora. It’s a powerful content creation tool capable of producing stunning and high-quality videos. As for color correction, Wondershare Filmora offers lots of options you can easily modify. Do you want to try it now? If so, read the tutorial below and follow the provided instructions accordingly.
Step 1: Download Wondershare Filmora from its official website. Right after, install it on your computer.
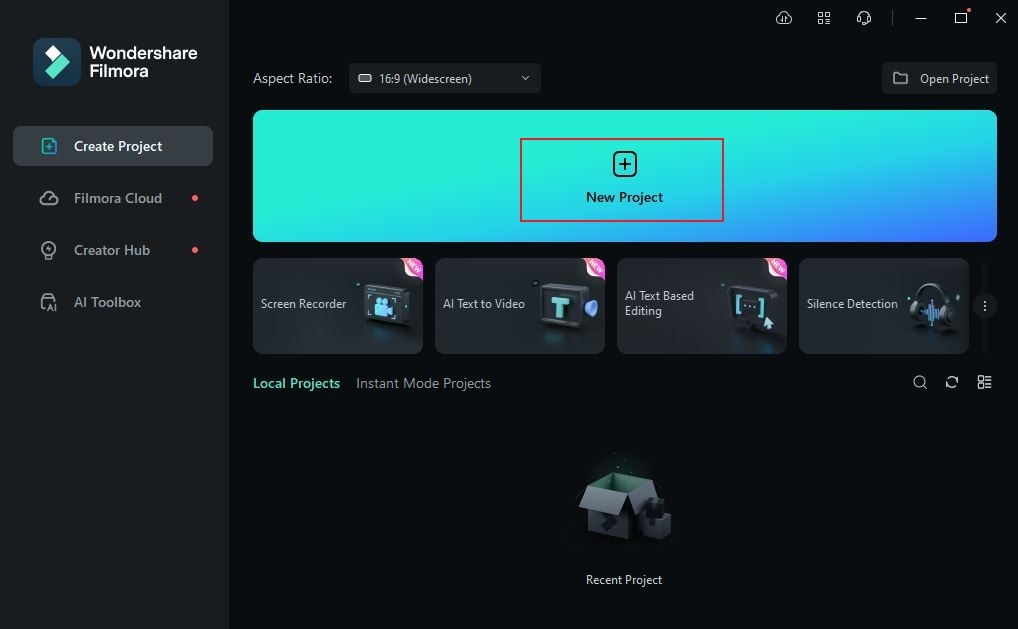
Step 2: Launch the newly installed video editor on your desktop afterward. Once it fully loads up, go to the main dashboard and then click New Project to start editing. Alternatively, open an existing session under Recent Projects if there is any.
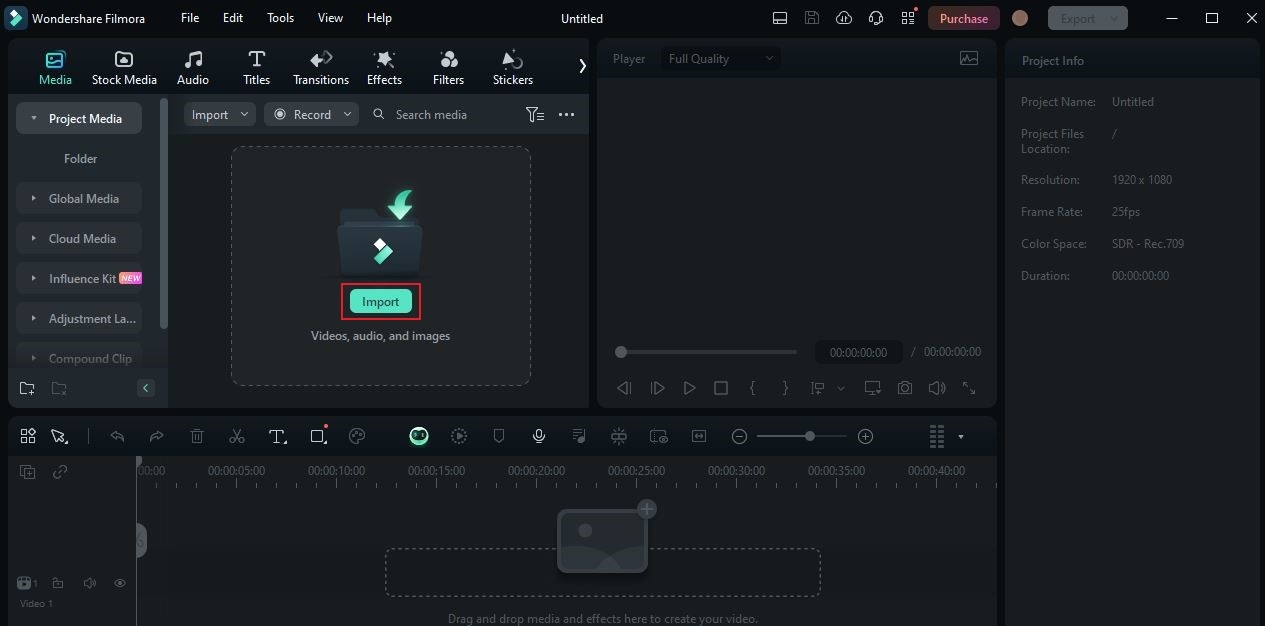
Step 3: After that, access the Elements Panel and then click Import under the Media tab. Upload all the files you’re going to use for this project. Don’t worry. Depending on the size and type of the media assets, this process will only take a few minutes to complete.
Step 4: Grab and drag the files individually all the way to the Editor Panel. Arrange them in your desired order and finalize the settings of each.
Step 5: At this point, it’s about time to start the actual color correction process. To do that, simply click the first clip in the timeline. Immediately, a new panel will be displayed on the right-side corner. From there, tap Color.
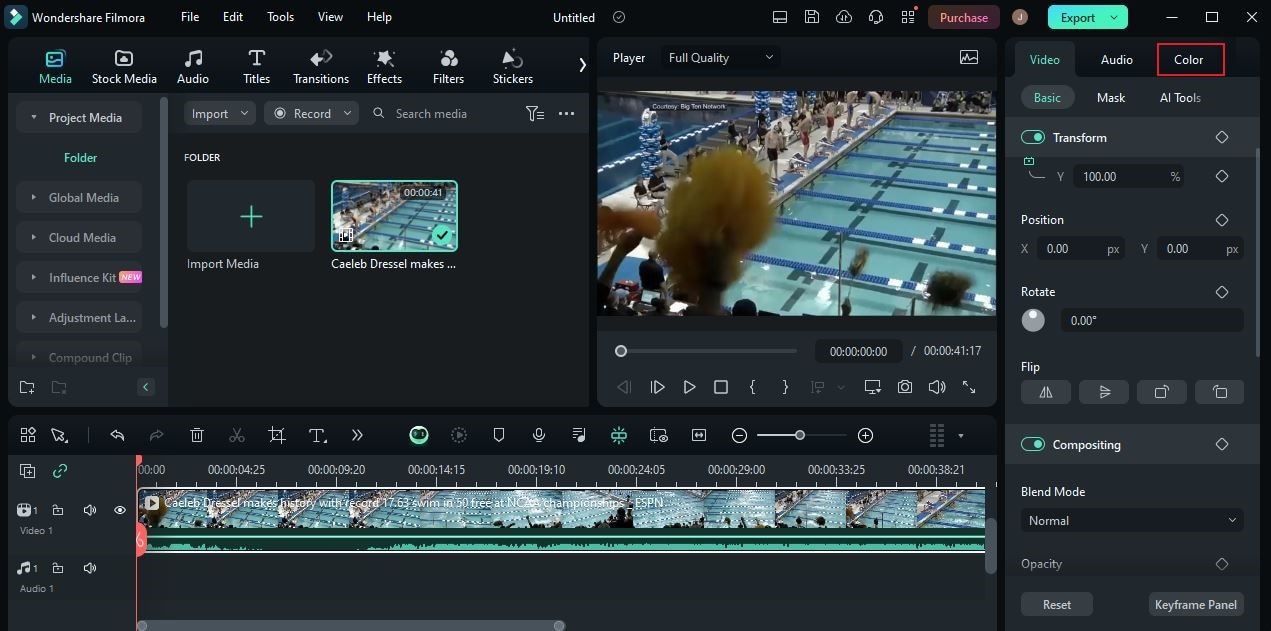
Step 6: Go to the Basic tab afterward and access the color correction tools. From there, you may configure the main color correction settings, such as Color, Light, Sharpness, and Vignette. Don’t worry. It’s indeed a walk in the park. Just switch on the radio button next to them and then make your desired changes by dragging the slider from left to right or vice versa. If you prefer to use some visual guides, you may enable the Video Scopes and choose your preferred tool. Among the available options are Histogram, Vectorscope, Waveform, and Parade.

Step 7: Once completed, click on the HSL tab for more color setting options. From there, choose your preferred color for the video project and then adjust its Hue, Saturation, and Luminance level according to your liking. If you need more advanced tools, simply go to Curves and Color Wheels. Yes. Similar to the Final Cut Pro color correction feature, Wondershare Filmora also offers this kind of option to users. Just explore the tools on your end and make the most of them.
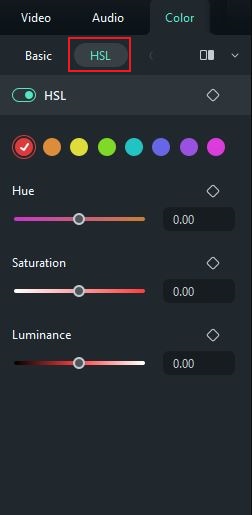
Step 8: Play and check the output afterward. If you’re satisfied with the outcome, click Export to render the video and save a copy to your computer. Otherwise, don’t hesitate to make a few revisions to the color settings until you achieve your desired result.
Conclusion
Color correction is a very salient part of the entire video editing process. It’s the ultimate key to obtaining high-quality outcomes from this kind of activity. Don’t worry. Tons of video editors nowadays provide intuitive facilities to help you navigate and make changes in this regard. One of which is the Final Cut Pro color correction tool. It is equipped with almost everything you need to balance and enhance the color settings of your videos. On the one hand, you may also try Wondershare Filmora if you wish to explore other available options. It works like the Final Cut Pro color correction tool in many ways. Just explore the platform and take advantage of the color correction features it has to offer.
