For the Best Results, Use the Latest Version.
-
Preparations
-
Account
-
Get Started & Basic Settings
-
Compatibility & Tech Specs
-
Performance Settings
-
-
Creating Projects
-
Creating New Projects
-
-
Importing & Recording
-
Video Editing for Windows
-
Basic Video Editing
- Enable/Disable Clip in Windows
- Magnetic Timeline for Windows
- Dual Monitor Setup for Video Editing on Windows
- Select All Clips on Timeline for Windows
- Manage Timeline and Tracks on Windows
- Auto Ripple for Windows
- Split & trim video
- Crop & Pan & Zoom Video in Filmora for Windows
- Compositing
- Change Video Speed on Windows
- Playing videos in reverse
- Mark In and Mark Out for Windows
- Markers for Windows
- Group editing
- Customizable Backgrounds for Videos and Images in Windows
- Video snapshot
- Using Freeze Frame in Filmora for Windows
- Logo Reveal For Windows
- Auto Enhance in Filmora for Windows
- Applying drop shadow
- Adjustment layer for Windows
- Apply Transforming for Windows
- Video Editing Ruler – Windows
-
Advanced Video Editing
- Drawing Tools for Windows | Filmora Guide
- Create Multi-Camera Clip in Filmora for Windows
- Compound Clip for Windows
- Multi-Clip Editing for Windows
- Filmora Motion Blur | Windows
- Video Chapters in Filmora on Windows
- Filmora Flicker Removal Guide | Windows
- Apply mask to video
- Creating a PIP Effect for Windows
- Keyframe Graph Editor for Windows
- Add animation keyframing for Windows
- Keyframe Path Curve for Windows
-
AI-Powered Video Editing
- Smart Scene Cut for Windows
- Smart Short Clips for Windows
- AI Face Mosaic for Windows
- Filmora AI Eye Contact- Windows
- AI Video Enhancer for Windows
- AI Text-to-Video for Windows
- Planar Tracking for Windows
- AI Idea to Video for Windows
- Filmora Image to Video for Windows
- Filmora Image to Prompt for Windows
- Instant Cutter Tool for Windows
- AI Extend
- Filmora AI Relight - Windows
- Filmora AI Image Enhancer Guide - Windows
- AI Script to Video Guide for Windows
- AI Text-Based Editing for Windows
- AI Mate Editing for Windows
- Instant Mode in Filmora
- ChatGPT Plugin - AI Copywriting
- AI Smart Cutout for Windows
- Lens correction on Windows
- Auto Reframe Video for Windows
- AI Portrait Cutout
- Scene detection feature
- AI Smart Masking for Windows
- Motion Tracking on Windows
- Video Stabilization for Windows
- AI Video/Photo Object Remover for Windows
- AI Smart Search for Windows
- AI Skin Tone Protection for Windows
- AI Image for Windows
- Chroma key (green screen)
- Super Slow Motion with Optical Flow for Windows
- Video Denoise for Windows
-
-
Audio Editing for Windows
-
Basic Audio Editing
-
Advanced Audio Editing
-
AI-Powered Audio Editing
- Auto synchronization
- AI Sound Effects in Filmora for Windows
- Smart BGM Generation on Windows
- AI Voice Enhancer in Filmora
- AI Voice Cloning in Wondershare Filmora
- AI Music Generator for Windows
- Audio To Video
- AI Vocal Remover for Windows
- AI Auto Beat Sync for Windows
- AI Audio Stretch for Windows
- AI Audio Denoise for Windows
- Silence Detection on Windows
-
-
Text Editing for Windows
-
Basic Text Editing
-
Advanced Text Editing
-
AI-Powered Text Editing
-
-
Video Customizations
-
Video Effects
-
Audio Effects
-
Transitions
-
Stickers
-
Filters
-
Color Editing
-
Animations
-
Templates
-
Asset Center
-
-
Exporting & Share & Cloud Backup
Audio To Video
Audio To Video is a technology where users upload audio, and AI automatically generates matching video content. The AI analyzes the audio and creates visuals that align with its tone and message, simplifying the process of creating synchronized audio-visual content.
For a complete overview of this feature, explore the details in the guide:
How to Generate Video Content
Here is a step-by-step guide for you:
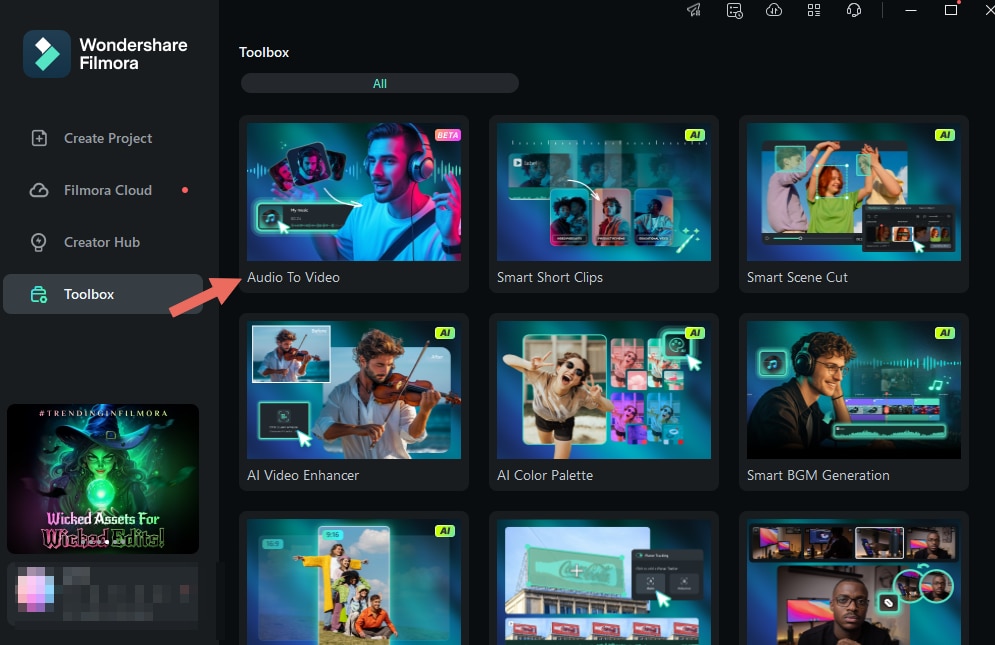
Step 1: Launch Filmora and Click Audio To Video
Launch Filmora on your computer. On the launch page, select the Audio To Video.
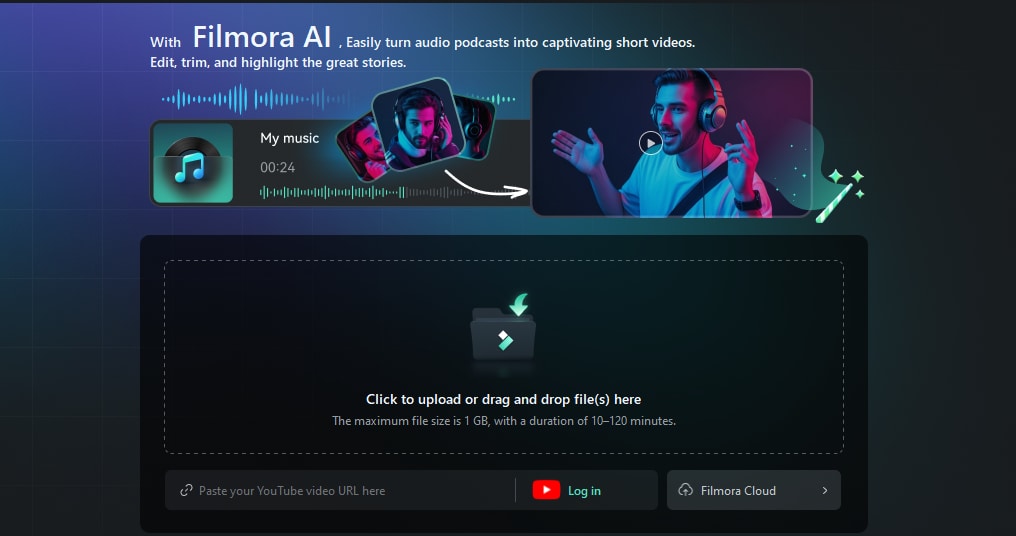
Step 2: Upload Audio Files
After clicking Audio To Video, you can upload or drag and drop your audio files.
Step 3: Start Generating Video Content
When uploading a video, you need to manually select the video source language. You can select the type of content in your video and set the Ratio, Duration, and Number of generated. And also adjust the screen settings.
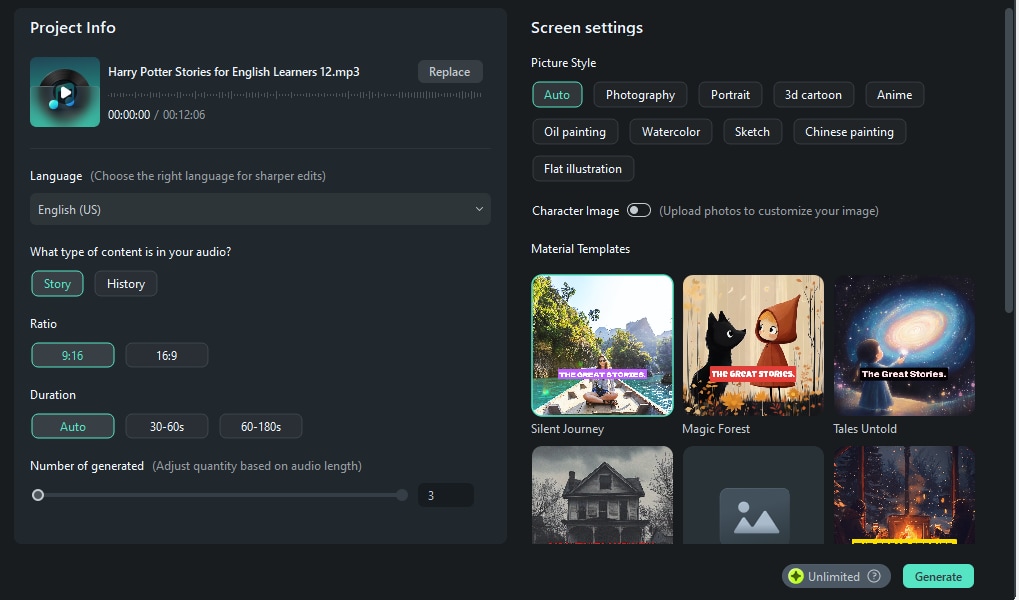
When you have everything set up, you can click Generate.
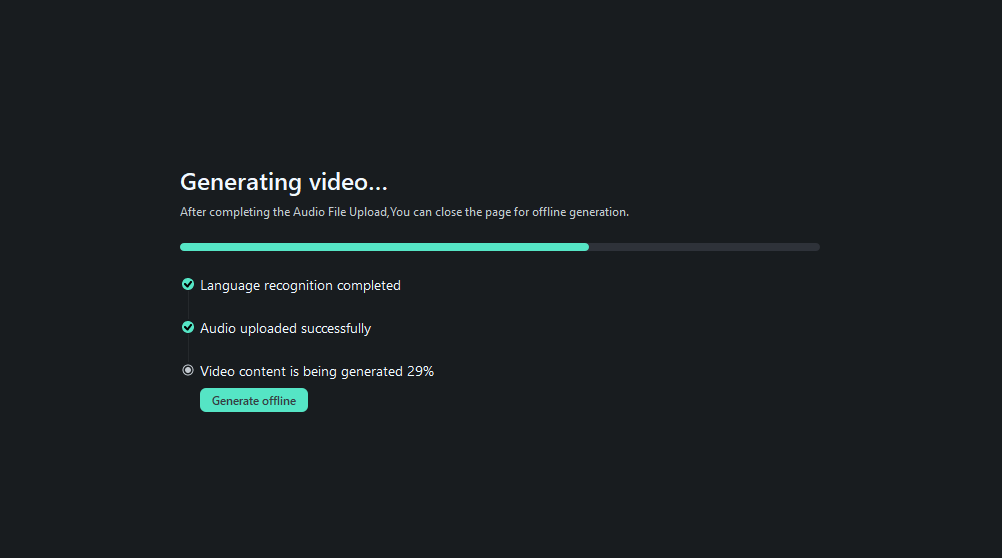
Tips: You can click on Generate offline to have the video content generated in the background.
Step 4: Choose Your Video
Based on the uploaded audio and selected settings, the system will generate multiple results and assign a rating according to the platform's rules.
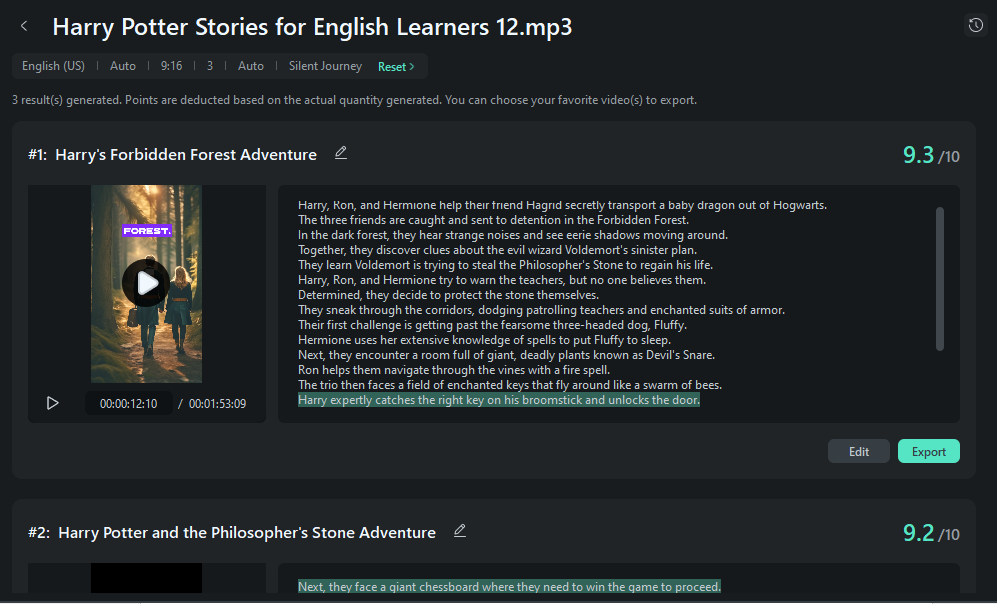
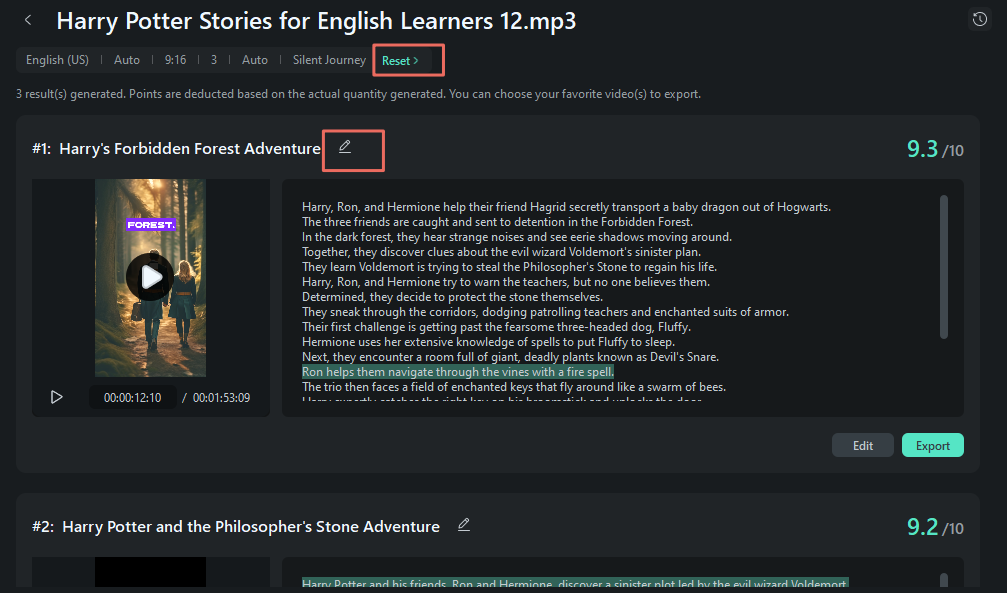
Tips:
- You can also click "Reset" to regenerate it.
- You can retitle the generated video.
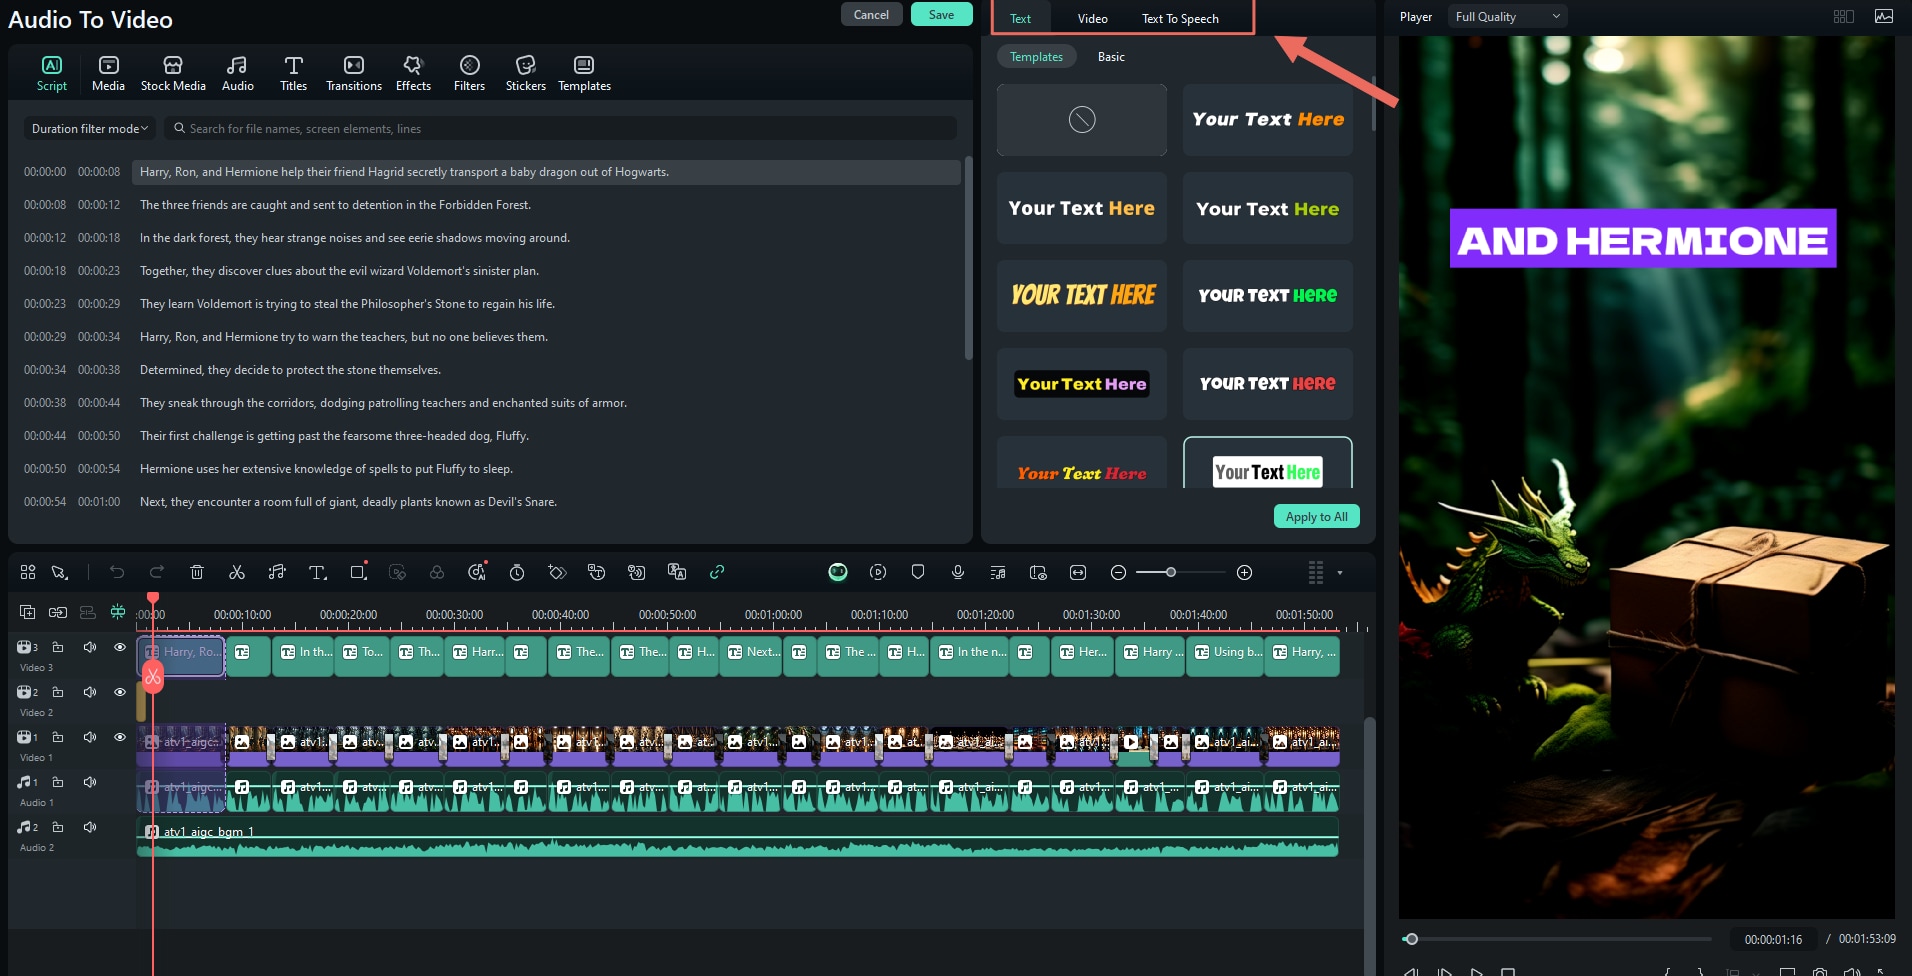
Step 5: Edit Your Video
Clicking "Edit" will take you to the editing panel, where you can either use or hide specific captions in Select Mode or view the script by timecode for more precise editing in Time Code Mode.
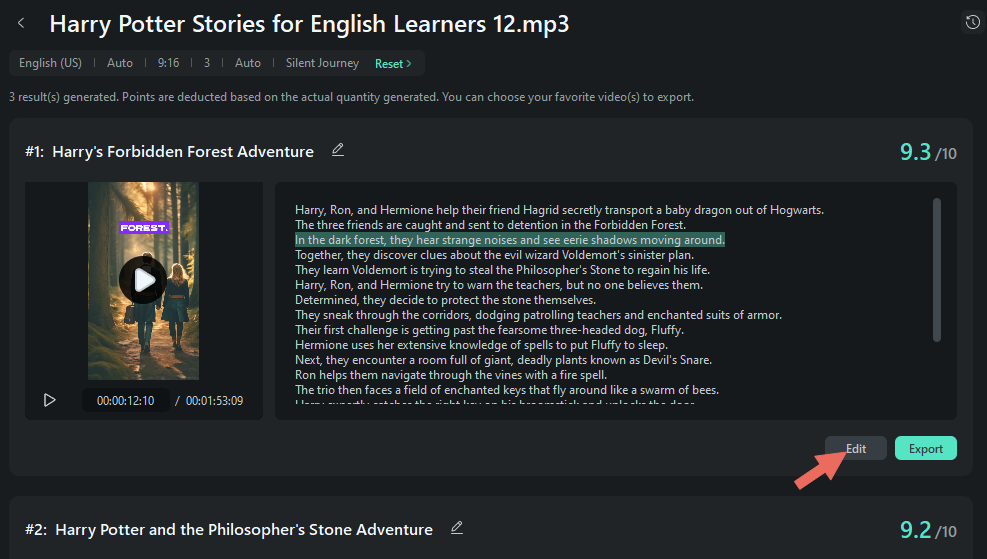
You can edit text and video and If you're not happy with the current speech or want to add more dialogue, you can use the Text-to-Speech feature to create new voiceovers from the text.
📌Note:
To ensure transparency and compliance when using Filmora's AI features, please be aware of the following:
- The software interface will clearly identify all content created by AI.
- For traceability, exported or downloaded AI-generated assets may include a visible or invisible watermark.
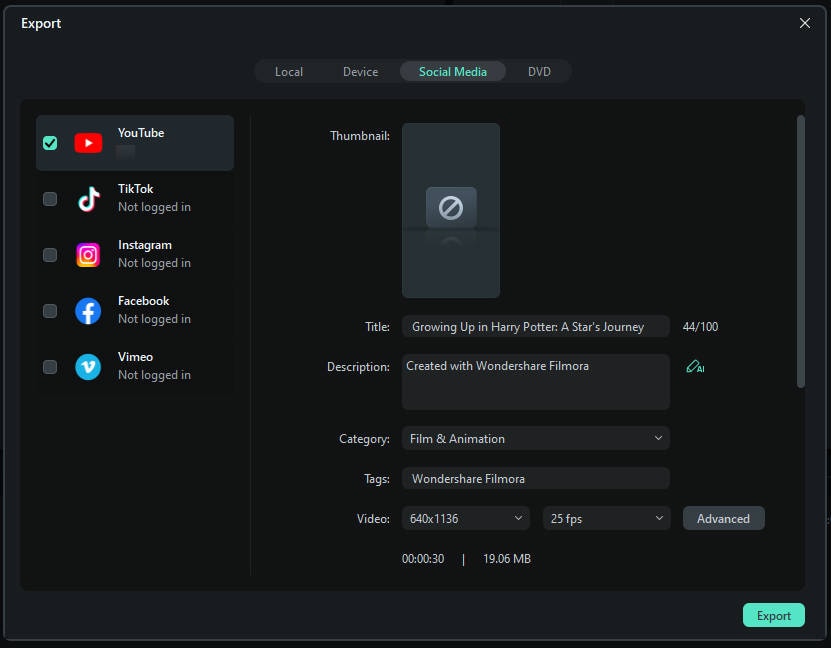
Step 6: Export Your Shorts
Finally, open the Export window, select the social media platform (YouTube, Vimeo, TikTok) for your video upload, and customize settings such as the title, description, category, resolution, and more.
Related Posts
Featured Articles
Best 6 Apps to Make Video Flyers – Static to Dynamic in Minutes
No design skills? No problem! Check out our guide to learn how to use advanced software for making flyers to create professional results.
How To Blur a Face With Adobe Premiere Elements [2026]
In this article, we will explore how to blur faces using Adobe Premiere Elements and discover why Filmora is a top choice for easy, professional video editing.
How to Fix Grainy Videos: Everything You Need to Know
Want to remove grain from a video? Discover the best tools for Windows, macOS, iOS, and Android devices.
Recommended User Guide
AI Auto Beat Sync for Windows
This is a guide about auto beat-sync in Filmora.
AI Vocal Remover for Windows
Keeping in view the interest of the audience and editors' needs, Filmora added the Vocal Remover tool.
Smart BGM Generation on Windows
Smart BGM Generation leverages AI to create customized music in real-time. By analyzing user preferences and context, it produces tailored soundtracks for various applications like videos and games. Utilizing deep learning, the technology generates harmonious music based on mood and activity, allowing for quick and high-quality results.
