For the Best Results, Use the Latest Version.
-
Preparations
-
Account
-
Get Started & Basic Settings
-
Compatibility & Tech Specs
-
Performance Settings
-
-
Creating Projects
-
Creating New Projects
-
-
Importing & Recording
-
Video Editing for Windows
-
Basic Video Editing
- Enable/Disable Clip in Windows
- Magnetic Timeline for Windows
- Dual Monitor Setup for Video Editing on Windows
- Select All Clips on Timeline for Windows
- Manage Timeline and Tracks on Windows
- Auto Ripple for Windows
- Split & trim video
- Crop & Pan & Zoom Video
- Compositing
- Change Video Speed on Windows
- Playing videos in reverse
- Mark In and Mark Out for Windows
- Markers for Windows
- Group editing
- Customizable Backgrounds for Videos and Images in Windows
- Video snapshot
- Using freeze frame
- Logo Reveal For Windows
- Apply auto enhance
- Applying drop shadow
- Adjustment layer for Windows
- Transforming
- Video Editing Ruler – Windows
-
Advanced Video Editing
- Drawing Tools for Windows | Filmora Guide
- Create Multi-Camera Clip
- Compound Clip for Windows
- Multi-Clip Editing for Windows
- Filmora Motion Blur | Windows
- Filmora Flicker Removal Guide | Windows
- Apply mask to video
- Creating a PIP effect
- Keyframe Graph Editor for Windows
- Add animation keyframing for Windows
- Keyframe Path Curve for Windows
-
AI-Powered Video Editing
- Smart Scene Cut for Windows
- Smart Short Clips for Windows
- AI Face Mosaic for Windows
- Filmora AI Eye Contact- Windows
- AI Video Enhancer for Windows
- AI Text-to-Video for Windows
- Planar Tracking for Windows
- AI Idea to Video for Windows
- Filmora Image to Video for Windows
- Filmora Image to Prompt for Windows
- Instant Cutter Tool for Windows
- AI Extend
- Filmora AI Relight - Windows
- Filmora AI Image Enhancer Guide - Windows
- AI Script to Video Guide for Windows
- AI Text-Based Editing for Windows
- AI Mate Editing for Windows
- Create with instant mode
- ChatGPT Plugin - AI Copywriting
- AI Smart Cutout
- Lens correction on Windows
- Auto reframe video
- AI Portrait Cutout
- Scene detection feature
- AI Smart Masking for Windows
- Make motion tracking
- Video Stabilization for Windows
- AI Video/Photo Object Remover for Windows
- AI Smart Search for Windows
- AI Skin Tone Protection for Windows
- AI Image for Windows
- Chroma key (green screen)
- Super Slow Motion with Optical Flow for Windows
- Video Denoise for Windows
-
-
Audio Editing for Windows
-
Basic Audio Editing
-
Advanced Audio Editing
-
AI-Powered Audio Editing
-
-
Text Editing for Windows
-
Basic Text Editing
-
Advanced Text Editing
-
AI-Powered Text Editing
-
-
Video Customizations
-
Video Effects
-
Audio Effects
-
Transitions
-
Stickers
-
Filters
-
Color Editing
-
Animations
-
Templates
-
Asset Center
-
-
Exporting & Share & Cloud Backup
Marked Favorites for Windows
Wondershare Filmora has already allowed users to mark their favorite effects, templates, and stickers. However, the new upgrade has improved the system, and now users can do much more than add graphics to favorites. To know more about this functionality and how to access it, keep reading this guide:
Customizing Marked Favorites
With the addition of tags, users can now customize their favorite stickers in different categories, and given below is a detailed overview of how to do it:
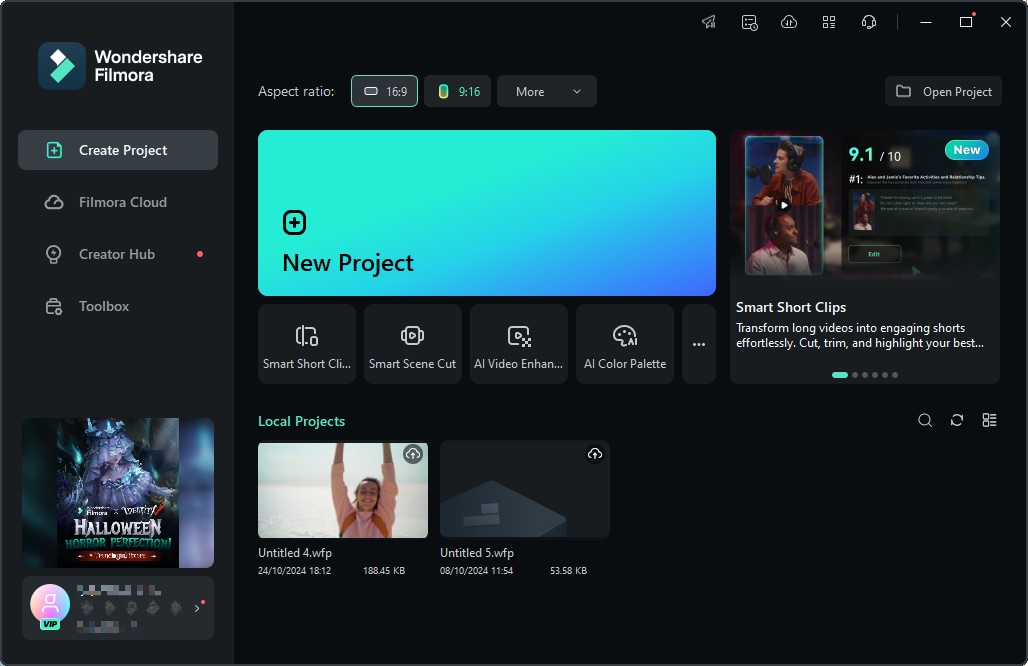
Step 1: Initiate a New Project in Filmora
Following a successful download of Filmora, login to your account and, navigate towards the left panel, click the "Create Project" option. From the options appearing on the main screen, click "New Project".
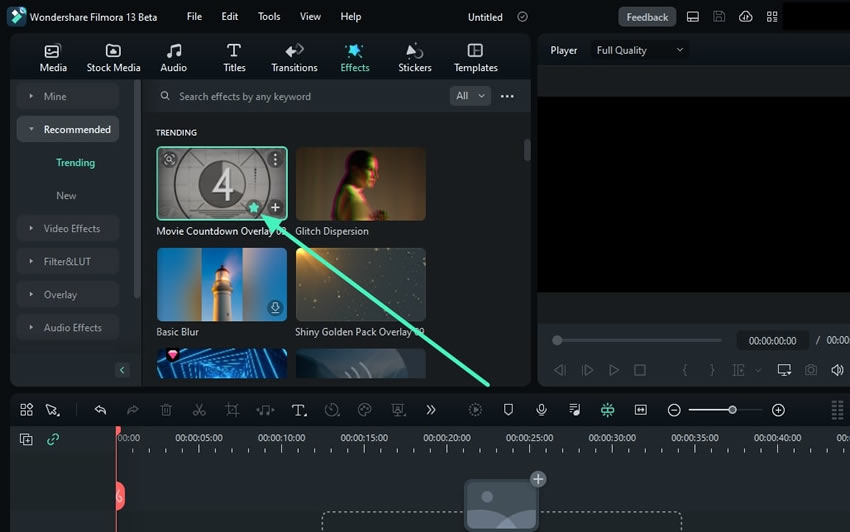
Step 2: Add a Graphic Element to Favorites
Now, pick a graphic you want to add, which can be an effect, sticker, music, or anything. Once you select the graphic tab, go to the elements below and mark your favorites by clicking the "Star" icon.
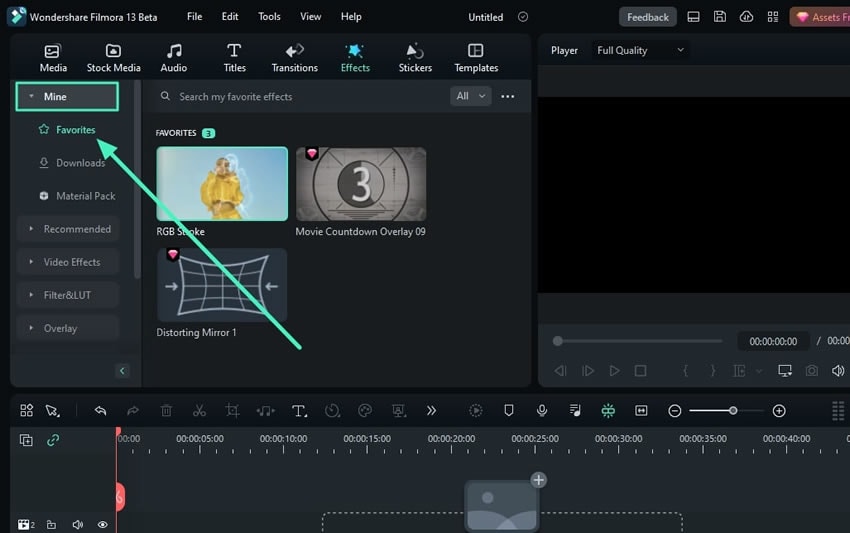
Step 3: Go to the Marked Favorites
While staying in the same graphic tab, navigate towards the "Mine" category on the left side and expand it. From the given options, select "Favorites" and hover towards one of the marked favorites.
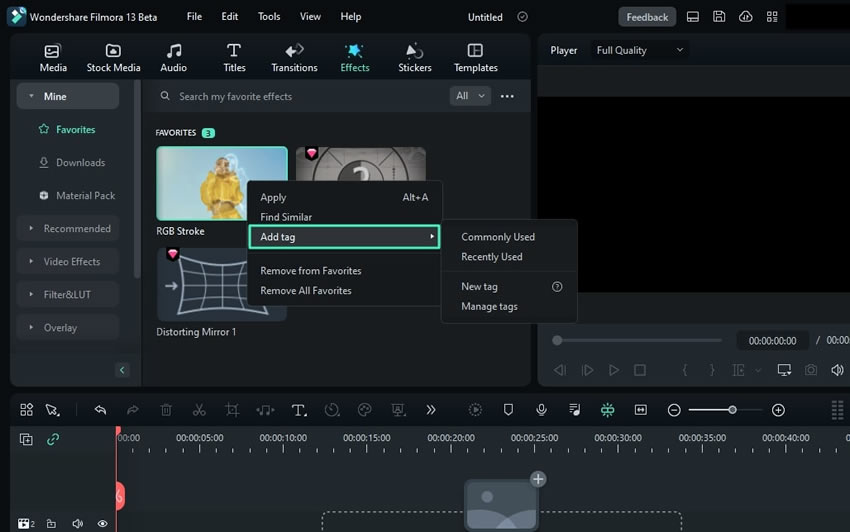
Step 4: Assign Tags to Marked Favorites
Afterward, right-click on this favorite, and from the options, choose "Add Tag", and you'll see multiple options there. You can categorize your favorite elements in two tags named "Recently Used" and "Commonly Used". These categories will be displayed at the top of the favorites section.
Step 5: Customizing a Tag
Furthermore, you can add a personal category by selecting "New Tag". Once you click the "New Tag" option, a pop-up will appear where you can customize the name for your tag and click "OK" to proceed. You will be able to access or see the new tag at the top of the favorites section with other tag categories. From there, if you want to create a new tag, you can do it by clicking the "+" option.

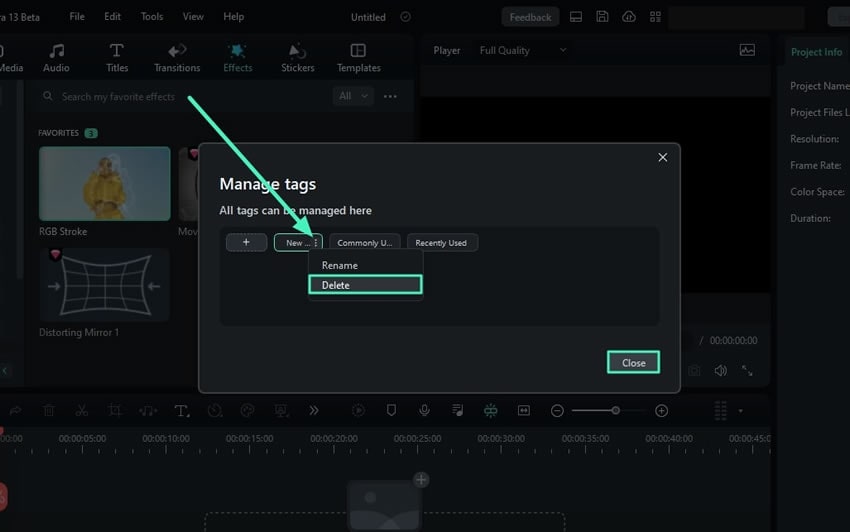
Step 6: Delete or Rename a Tag
If you are unsatisfied with the name of the tag or want to remove it, choose the "Manage Tag" option. A small manage tags window will appear; go to the tag's name, click on the "Three Dots" icon, and rename or delete it. This method allows you to customize a tag or add your marked favorites to a tab.
Related Posts
Featured Articles
How to Loop a Video in After Effects (4 Easy Methods with Comparison)
Looping a video in After Effects can be simple or complex, depending on the method. This guide covers 4 AE techniques plus an easy Filmora alternative.
Top 10 Audio Normalizers for Windows - Don't Miss It!
Audio normalization is a feature that can be used to increase the overall volume of a file. There are the top 10 audio normalizers that offer sound normalization without diminishing the sound quality of a file.
The Ultimate Guide to Discord GIF Size Optimization
Tired of uploading errors on Discord when sending and sharing GIFs? A dependable GIF compressor for Discord can save you time and frustration.
Recommended User Guide
Preview render files on Win
Preview Render Files win
Change playback quality
Change Playback Quality Win
Keyboard shortcuts list
Use this handy list to reference keyboard shortcuts for Filmora and even print a PDF of the keyboard shortcuts. You can also use the visual keyboard layout to customize the shortcuts and assign multiple shortcuts to a command.
