
 100% Security Verified | No Subscription Required | No Malware

One of Adobe’s flagship products is certainly Premiere Pro. It is considered to be a top tool for video editing, offering many features and options for users to utilize. It is a complicated program to master, and if you want to become a professional video editor in Premiere Pro, prepare to devote some time to learning it.
Today, we will discuss cool transition effects in Premiere Pro. These effects occur between two different scenes in video footage, and their main purpose is to either ease the viewer into the next scene or create something dynamic and surprising. They are very versatile, so let’s jump into the action.
Stick around until the end of the text for a super alternative option.
In this article
Top 5 Premiere Pro Transition Effects
Without further ado, here are the top 5 transition effects that you can find in Premiere Pro.
Fade In/Fade Out

We must begin the list with one of the most commonly used transition effects: fade-ins and fade-outs. Their versatility makes them very cool.
These are very common in video production and filmmaking. You can use them in all sorts of scenarios, whether you are working on something serious or something lighthearted. You can make a long or short fade effect, depending on your needs.
Ink Transitions

Ink transitions are suspenseful, and they used to be very tough to make. Now, you can add them with a click of a mouse.
They are a very creative way to transition between two scenes. In terms of use cases, several creators use this transition effect in title sequences, where you need to showcase the title and the people involved in the project. It is very cool; no doubt about that.
Spin

Here’s a fun transition effect. The spin transition is mostly used in videos that are not too serious. It is a cool way to transition between two cool scenes, for instance.
This effect is perfect for commercials, short videos, and generally any video that is short and wants to keep the viewer’s attention throughout. However, if you are making a serious video, you can use it to show that a character’s mind is twisting and that they are not feeling well.
Zoom

The zoom transition is used almost as often as the fade effect, making this one a very popular choice in the video editing community. It is a subtle yet effective way to transition between two scenes.
You can use it in short videos, movies, funny scenes, serious scenes, and literally anywhere you want. Just don’t overdo it and use it too often.
Glitch

The glitch transition effect has been gaining popularity ever since the first Matrix movie came out. This was a long time ago, and today, this effect is very popular and very cool.
You can use it in all sorts of scenarios, but generally, it is reserved for videos that deal with technology in some way, be it a new tech review video, or a post-apocalyptic cyberpunk-inspired movie. Let your creativity run wild with this one.
Adding transitions in Premiere Pro is easy, but continuing with your video editing efforts takes knowledge. Luckily, we have a solution for you. There is a tool out there that offers almost everything Premiere Pro offers but is packaged in a more intuitive and user-friendly manner.
Let us introduce you to Filmora.
Use Filmora to Add Cool Transition Effects

 secure download

Filmora is a powerful video editing tool developed by Wondershare. It has all the features you would expect from a video editing solution in 2025 and beyond, and on top of that, it is packed with useful AI features. Apart from video editing capabilities, it also has image and audio editing features.
When it comes to adding cool transition effects, Filmora is as easy to use as you can imagine. Download Filmora and install it on your PC. When the installation runs its course, open the program.
Powerful AI video editor for all creators

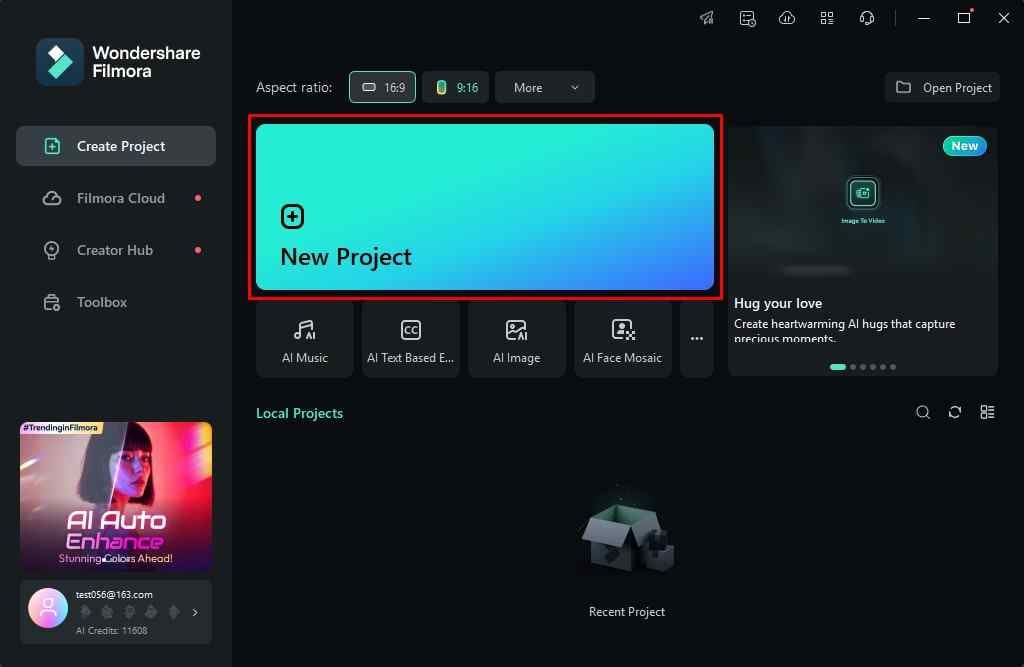
Step 1: Click on New Project.
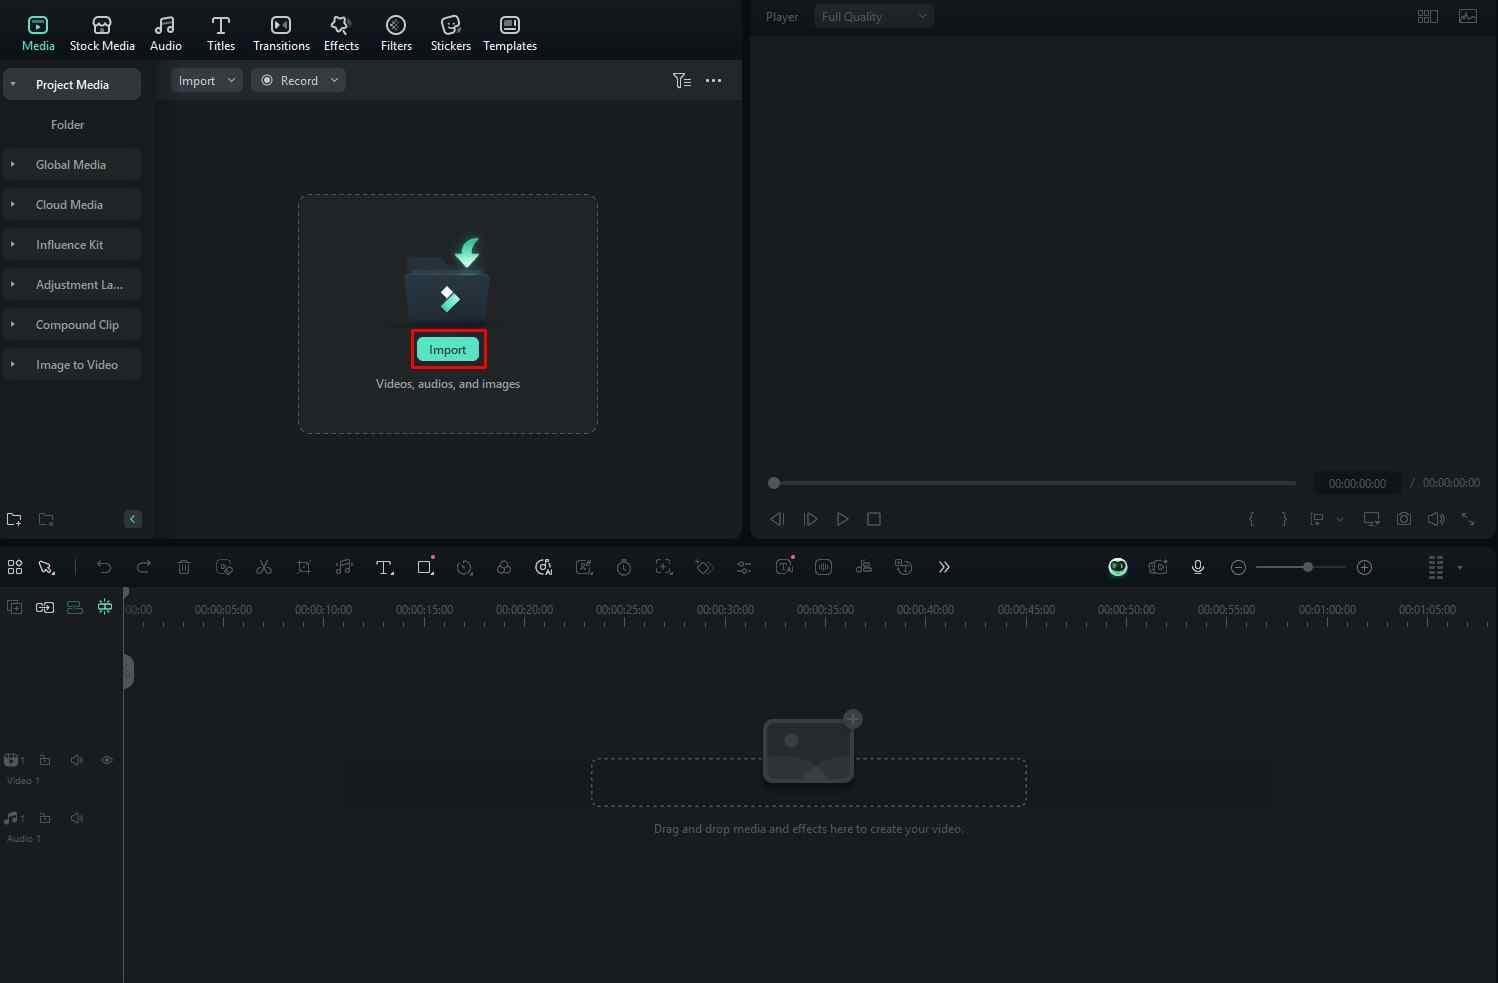
Step 2: Click on Import and two or more files so that you can add a transition effect between them.
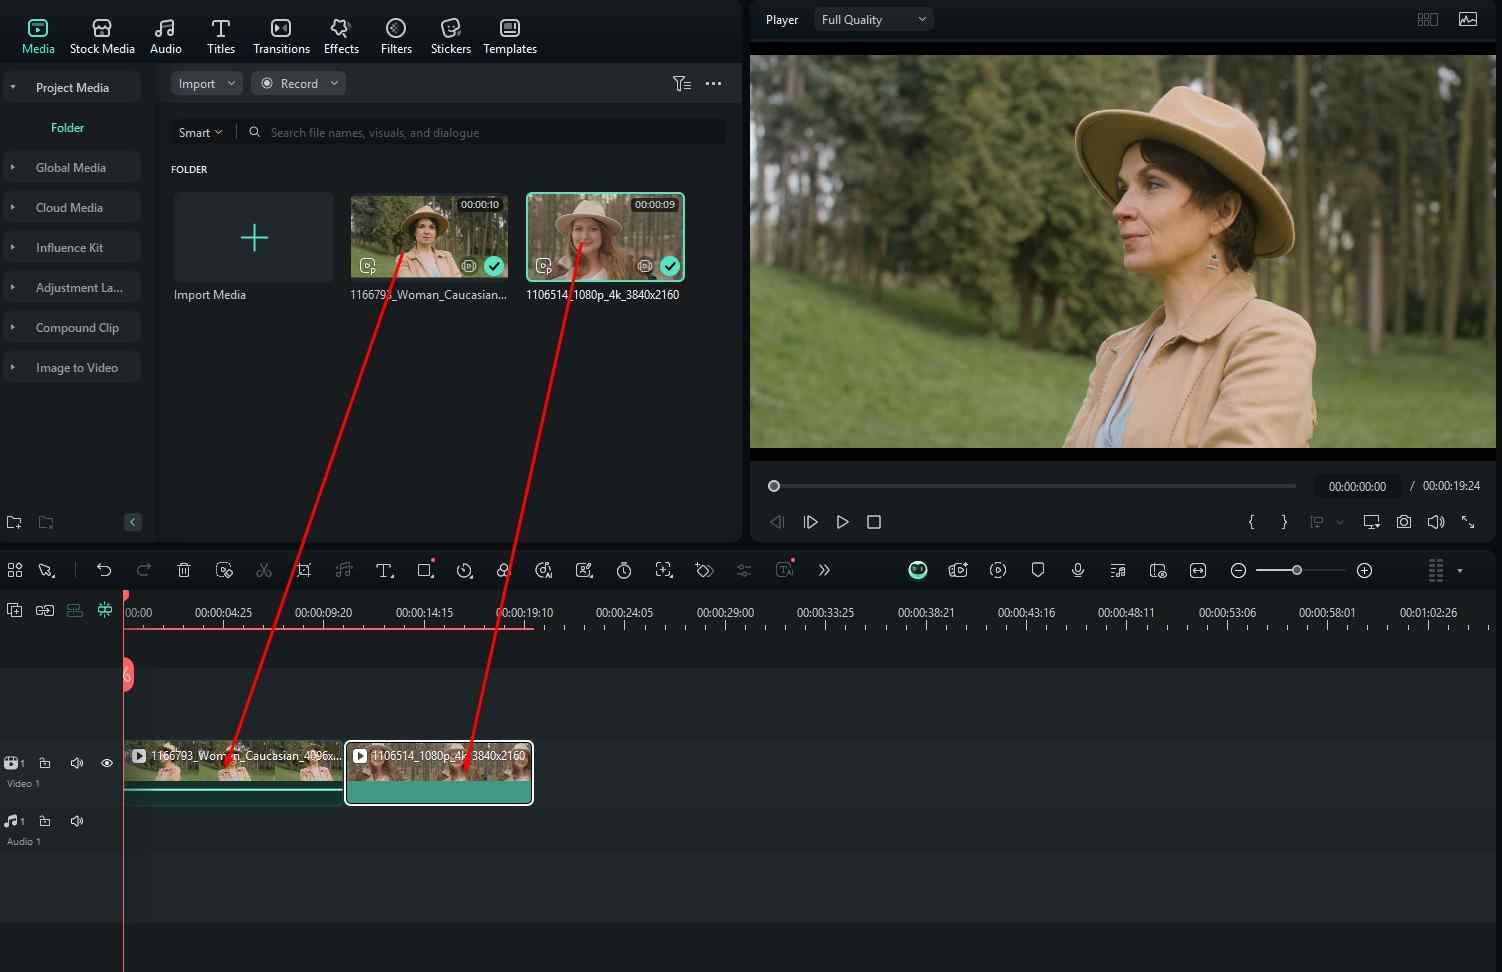
Step 3: Add the videos (or images) to the timeline, one after the other.
Step 4: Click on Transitions, find an option that suits you, and drag it to the timeline between the two videos (or images).
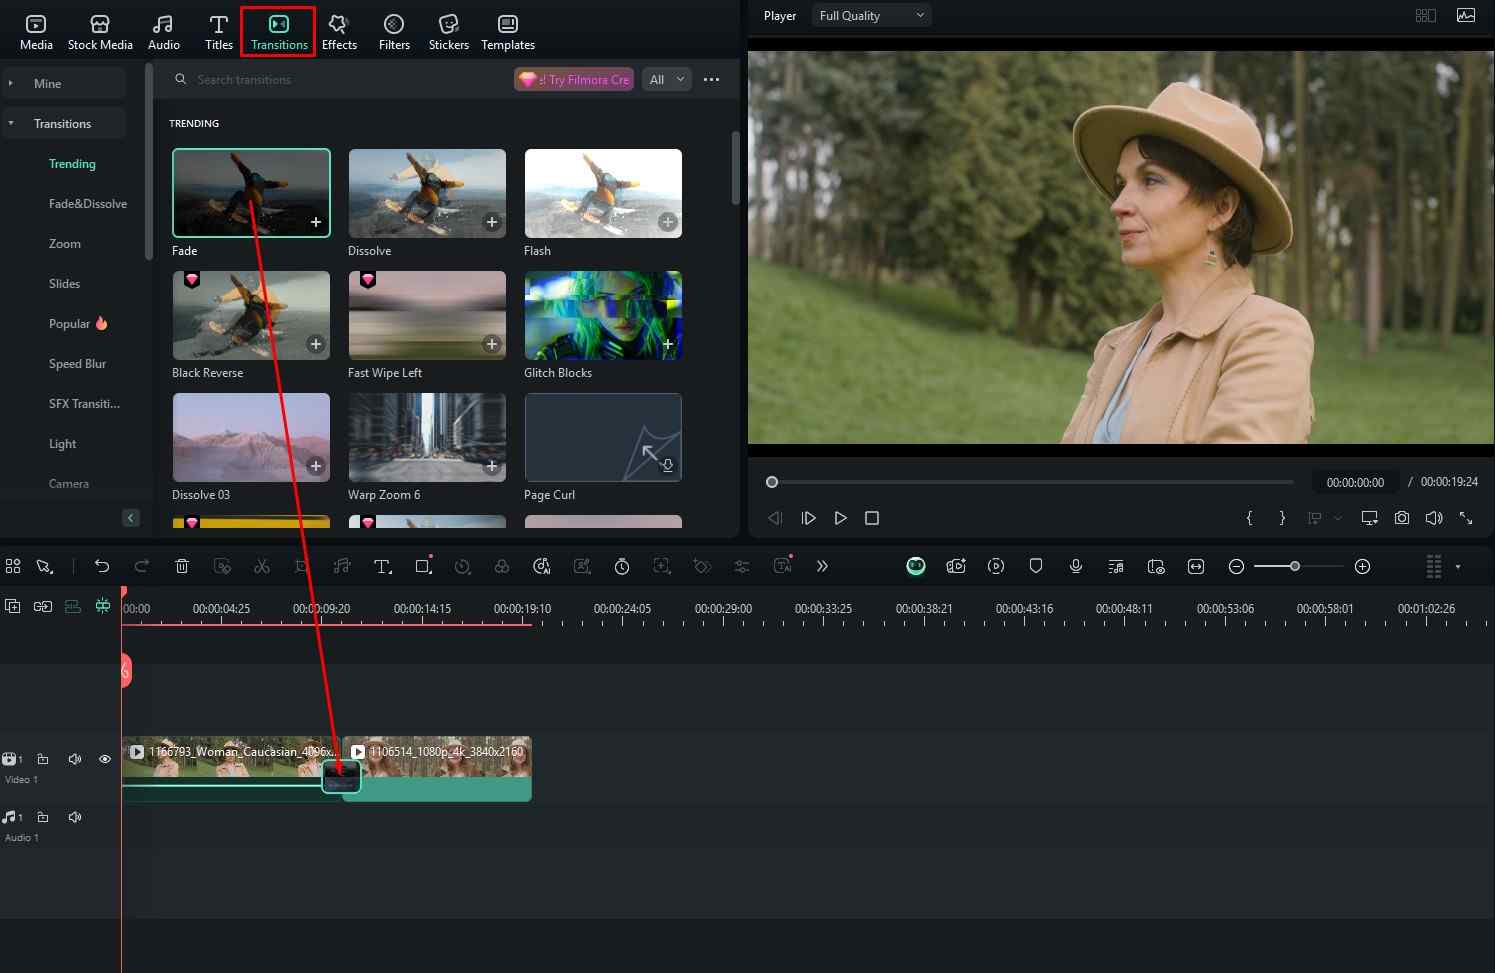
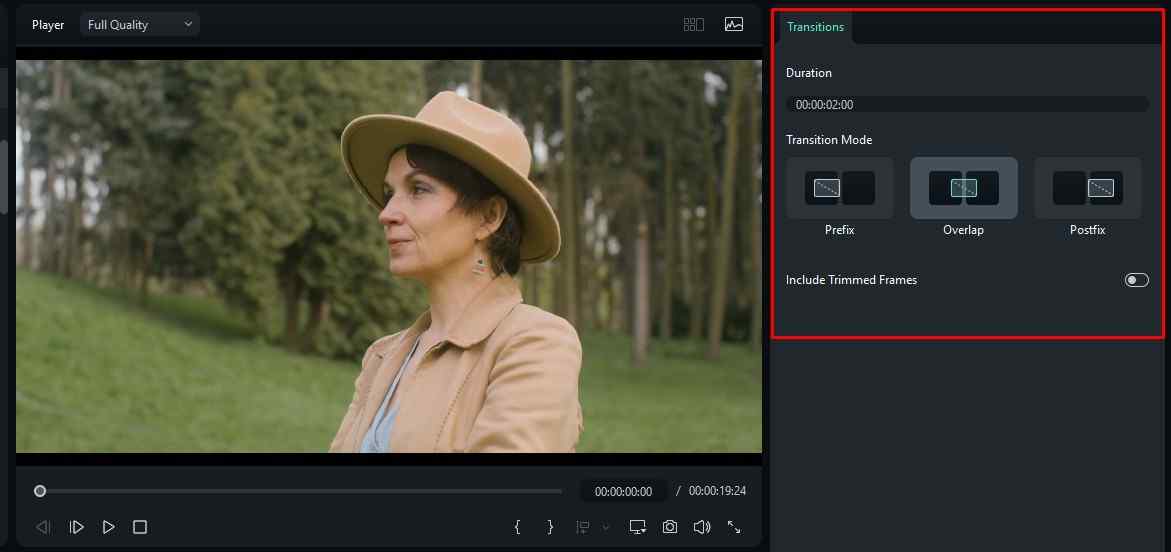
You can adjust the effect on the right side of the screen. Check the screenshot below for more information.
You can just as easily add effects to your video. Here’s how to do it.
Step 1: Click on Effects and then find something that you like. Drag it to the timeline above the video (or image).
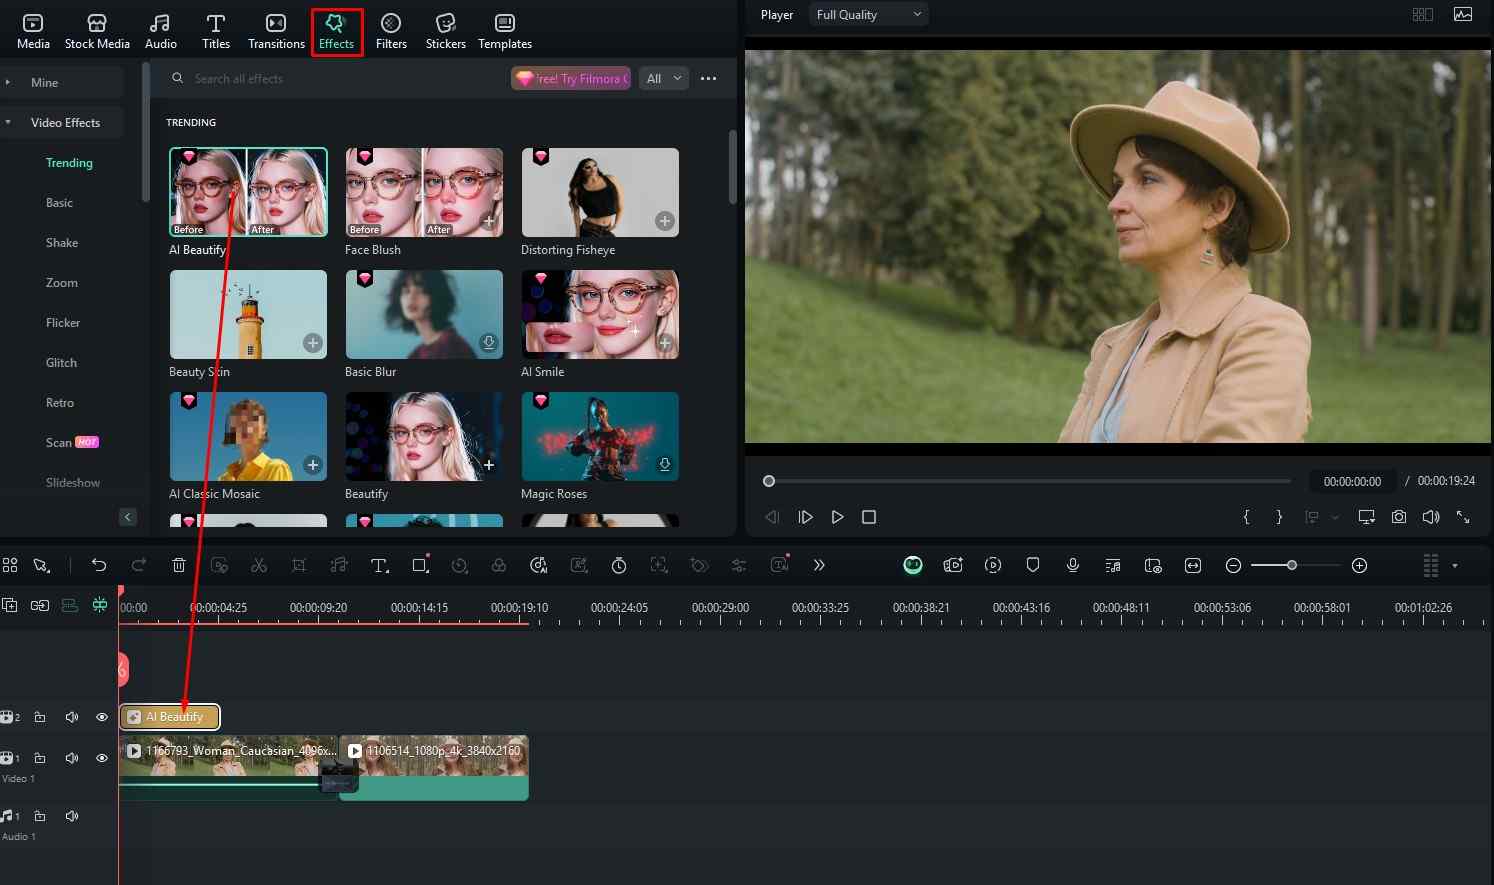
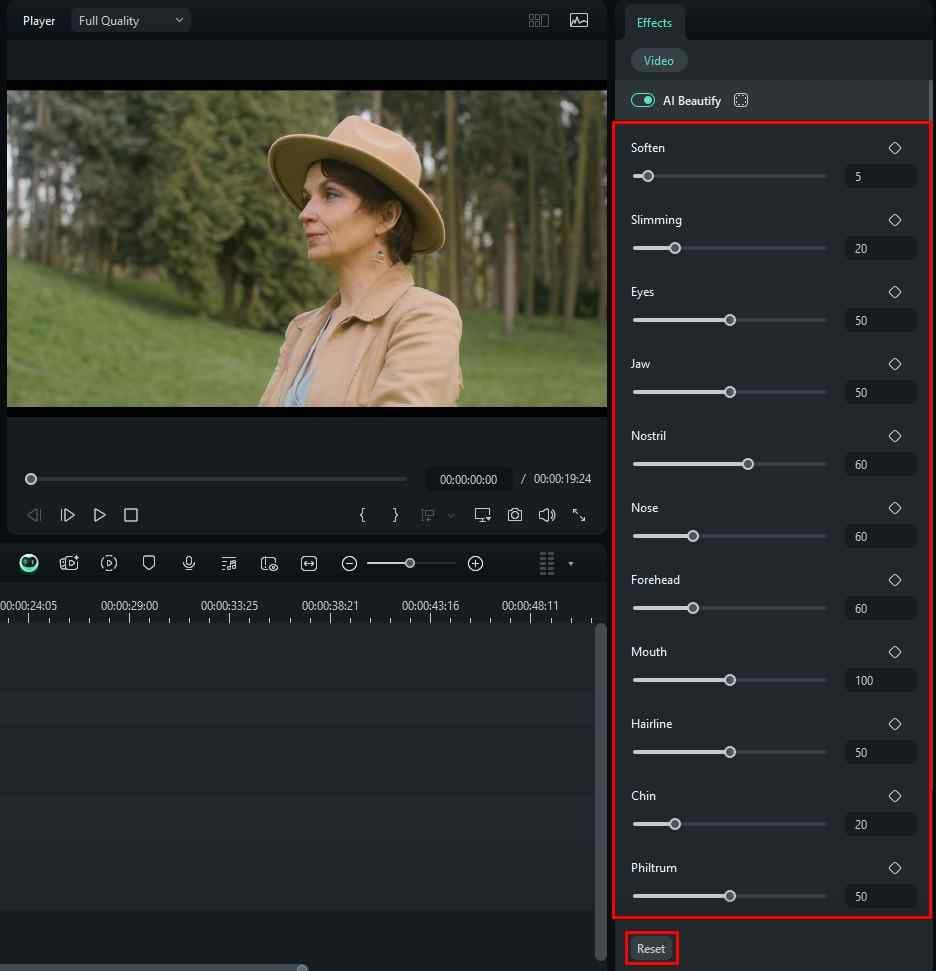
Step 2: Adjust various parameters (depending on the chosen effect) on the right. You will always find a reset button, if you want to revert back to the default settings.
Do you see how easy it is to use Filmora? Whatever you set out to do, be it a fast short video or a slow and long podcast, you can edit it to perfection with Filmora. To prove our claim even further, we will list some AI features that will aid your video editing efforts and streamline your workflow by saving time.
Filmora Offers Powerful AI Features that Can Complement Transition Effects
In the text below, we will talk about three AI features offered by Filmora. Please note that the list of AI features goes on and on, and it would take a long time to list and talk about all of them. Instead, we went with three options, just to illustrate how easy (and fun) it is to use Filmora for video, image, and audio editing tasks.
AI Video Enhancer
Do you remember those TV shows from the early 2000s, like CSI Miami? In these shows, they examine footage from a crime scene on a supercomputer and then enhance it to reveal the tiniest details. Of course, at the time, this was impossible in reality, but not anymore.
In Filmora, click on a video file in the timeline, and on the right, click on AI Tools. Scroll down until you find the AI Video Enhancer, and click on Generate.
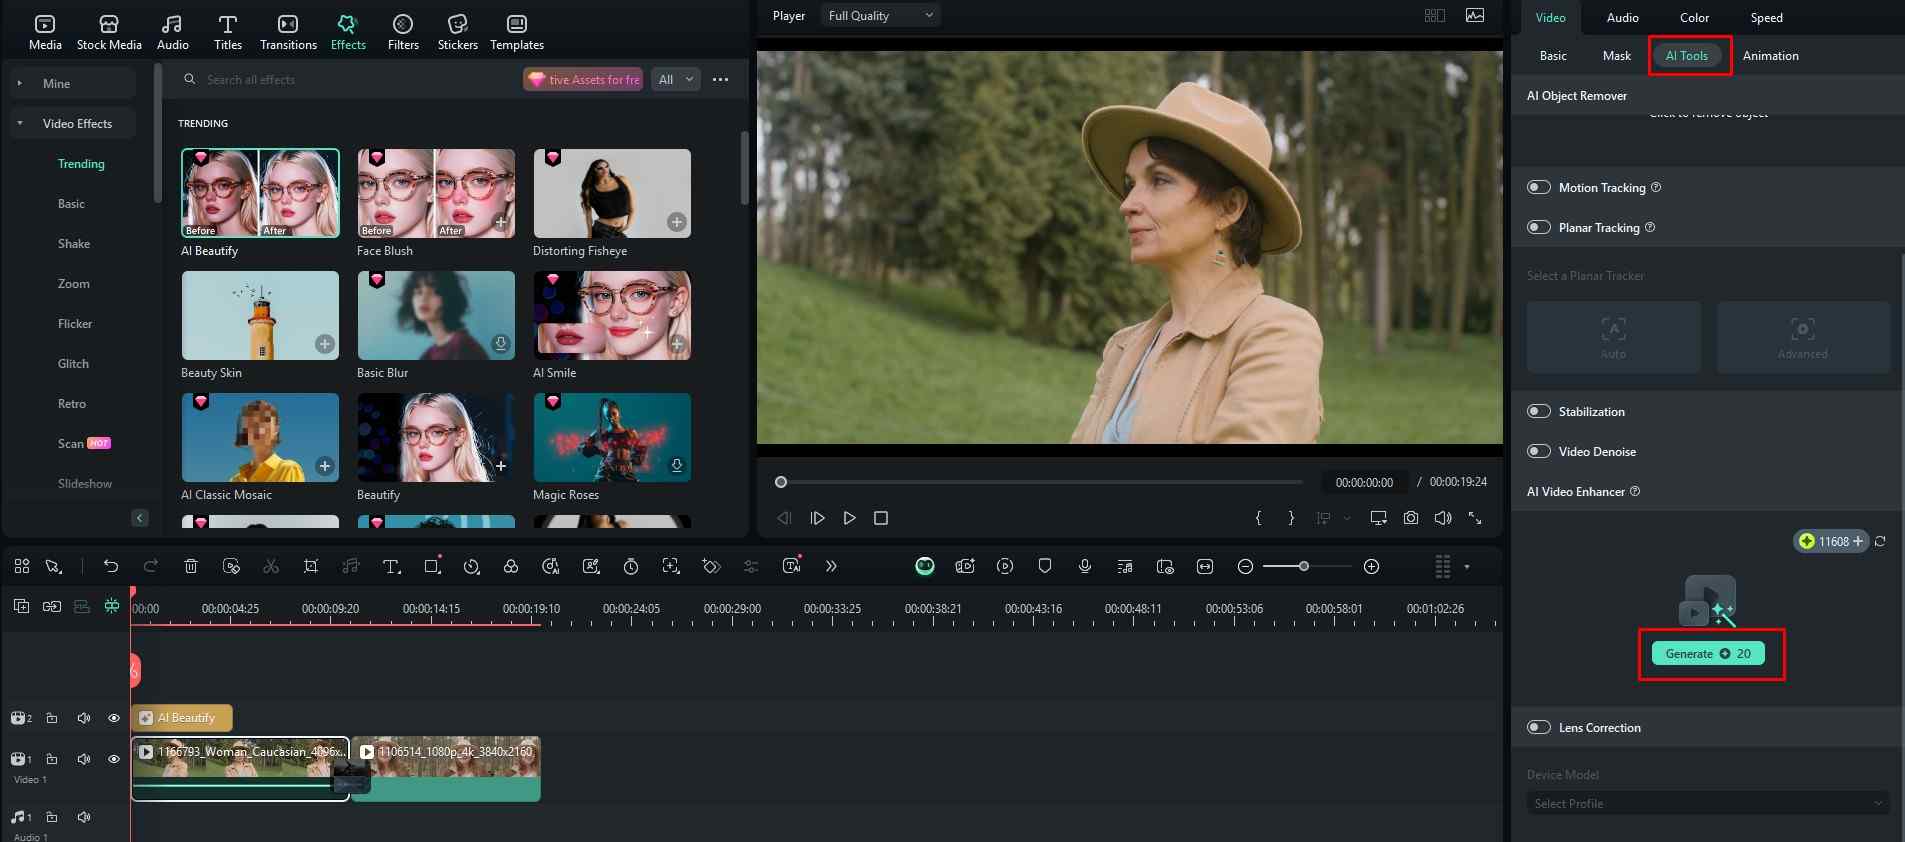
You will need to give the AI some time to check the video footage frame by frame and enhance it. After a short while, your video will have a better resolution, better colors, and better frame rate, and it will be completely enhanced in every way.
AI Object Remover
Perhaps you want to delete something that’s bothering you from a scene. Instead of having to reshoot everything, you can use the AI Object Remover and simply eliminate that pesky object from the entire video. Here’s how it works.
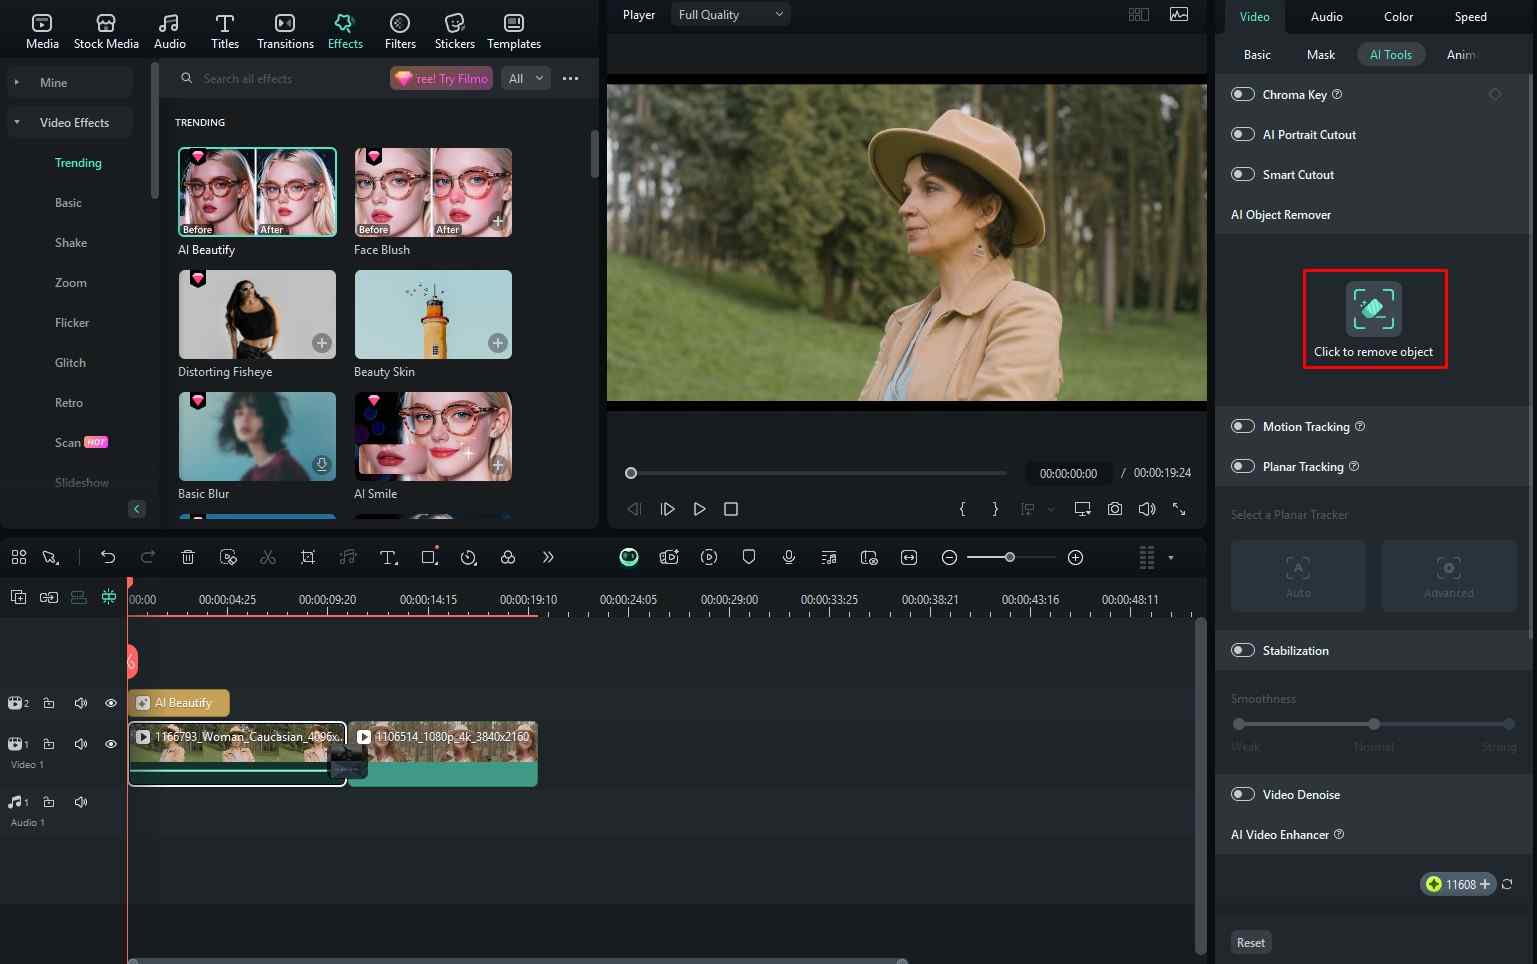
Step 1: In the same menu as the one where you found the AI Video Enhancer, you will also find the AI Object Remover. Click on Click to remove object.
Step 2: In the new window, select the part of the image that you want to remove, and click on Remove.
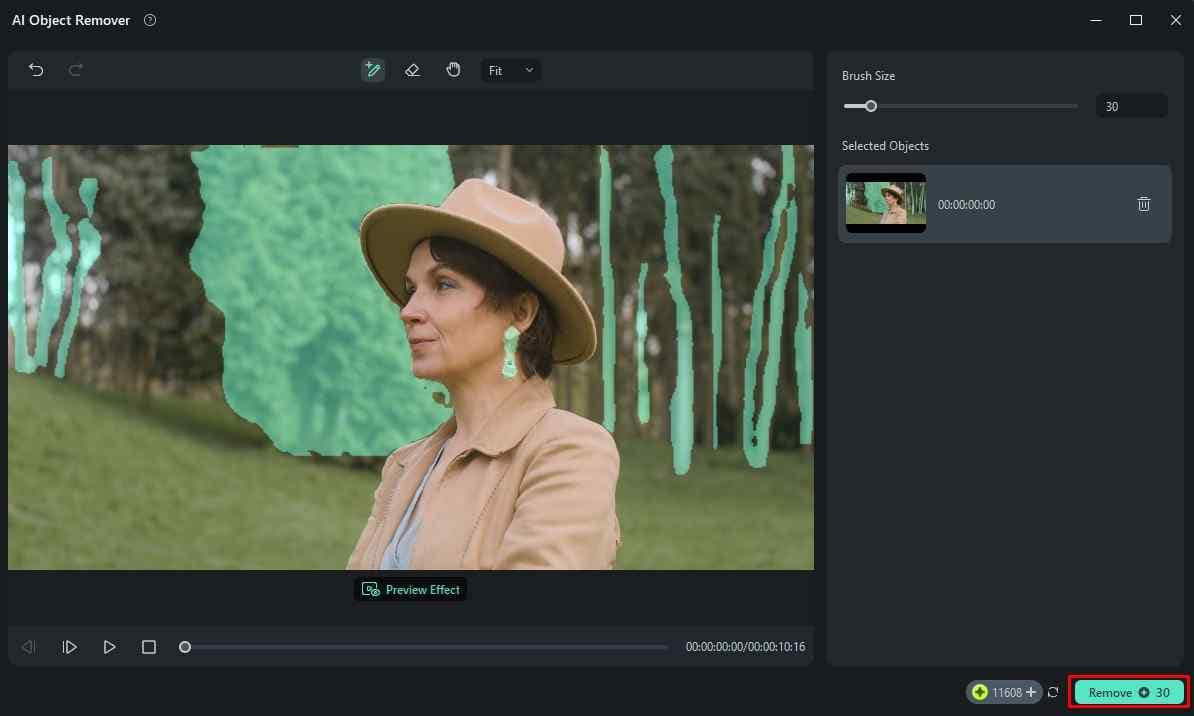
The AI will work its magic, and the unwanted objects will disappear from the video.
AI Text to Video
Imagine that you are working on something, and you need some video footage that you cannot find elsewhere. You know how to explain what you want, but you cannot find it. Well, in Filmora, you can tell the AI what you want, and Filmora will generate the video for you. Here’s how it works.
Step 1: From the welcome screen, go to Toolbox, and then click on AI Text to Video.

Step 2: Type the prompt, and, when you are done, click on Text to Video.

After a few minutes, the AI will generate the video and create an entire project for you in Filmora. You can then tweak or heavily edit the result until you get what you want.
As you can see, everything is an easy two-step or three-step process with Filmora.
Conclusion
Premiere Pro is certainly an excellent tool. It is very powerful, and many professional video editors use it. However, Filmora is slowly but surely dominating the market, as the intuitive interface is perfect for beginners. If you are a professional who is used to working in Premiere Pro, we would still suggest that you give Filmora a shot to see what we are talking about.
