For the Best Results, Use the Latest Version.
-
Preparations
-
Account
-
Get Started & Basic Settings
-
Compatibility & Tech Specs
-
Performance Settings
-
-
Creating Projects
-
Creating New Projects
-
-
Importing & Recording
-
Video Editing for Windows
-
Basic Video Editing
- Enable/Disable Clip in Windows
- Magnetic Timeline for Windows
- Drawing Tools fo Windows
- Dual Monitor Setup for Video Editing on Windows
- Select All Clips on Timeline for Windows
- Dual Monitor Setup for Video Editing on Mac
- Manage Timeline and Tracks
- Auto Ripple for Windows
- Split & trim video
- Crop & Pan & Zoom Video
- Compositing
- Change video playback speed
- Playing videos in reverse
- Mark In and Mark Out for Windows
- Markers for Windows
- Group editing
- Customizable Backgrounds for Videos and Images in Windows
- Video snapshot
- Using freeze frame
- Logo Reveal For Windows
- Apply auto enhance
- Applying drop shadow
- Adjustment layer for Windows
- Transforming
- Video Editing Ruler – Windows
-
Advanced Video Editing
-
AI-Powered Video Editing
- Smart Scene Cut for Windows
- Smart Short Clips for Windows
- AI Face Mosaic for Windows
- AI Video Enhancer
- AI Text-to-Video for Windows
- Planar Tracking
- AI Idea to Video for Windows
- Image to Video for Windows
- Instant Cutter Tool for Windows
- AI Extend
- AI Script to Video Guide for Windows
- AI Text-Based Editing for Windows
- AI Mate Editing for Windows
- Create with instant mode
- ChatGPT Plugin - AI Copywriting
- AI Smart Cutout
- Lens correction
- Auto reframe video
- AI Portrait Cutout
- Scene detection feature
- AI Smart Masking for Windows
- Make motion tracking
- Stabilization
- AI Video/Photo Object Remover for Windows
- AI Smart Search for Windows
- AI Skin Tone Protection for Windows
- AI Image for Windows
- Chroma key (green screen)
- Super Slow Motion with Optical Flow for Windows
- Video Denoise for Windows
-
-
Audio Editing for Windows
-
Basic Audio Editing
-
Advanced Audio Editing
-
AI-Powered Audio Editing
-
-
Text Editing for Windows
-
Basic Text Editing
-
Advanced Text Editing
-
AI-Powered Text Editing
-
-
Video Customizations
-
Video Effects
-
Audio Effects
-
Transitions
-
Stickers
-
Filters
-
Color Editing
-
Animations
-
Templates
-
Asset Center
-
-
Exporting & Share & Cloud Backup
Auto Highlight
Auto Highlight is used to automatically extract the highlights from a clip. This will save your time when trimming your video and get the best parts from it more easily.
If you are a user of short video platforms like YouTube Shorts or TikTok, or a social media user, this guide will teach you how to quickly extract and upload video content to social media.
Step 1: Locate Auto Highlight
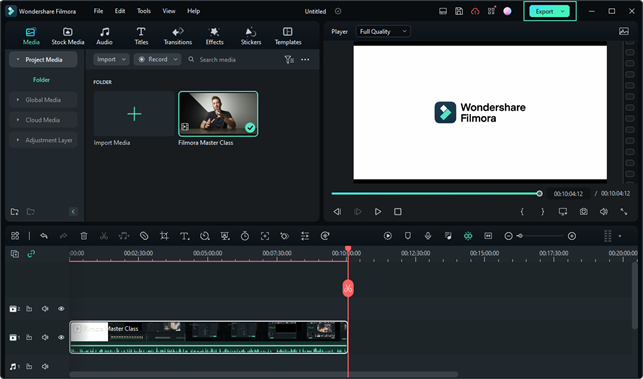
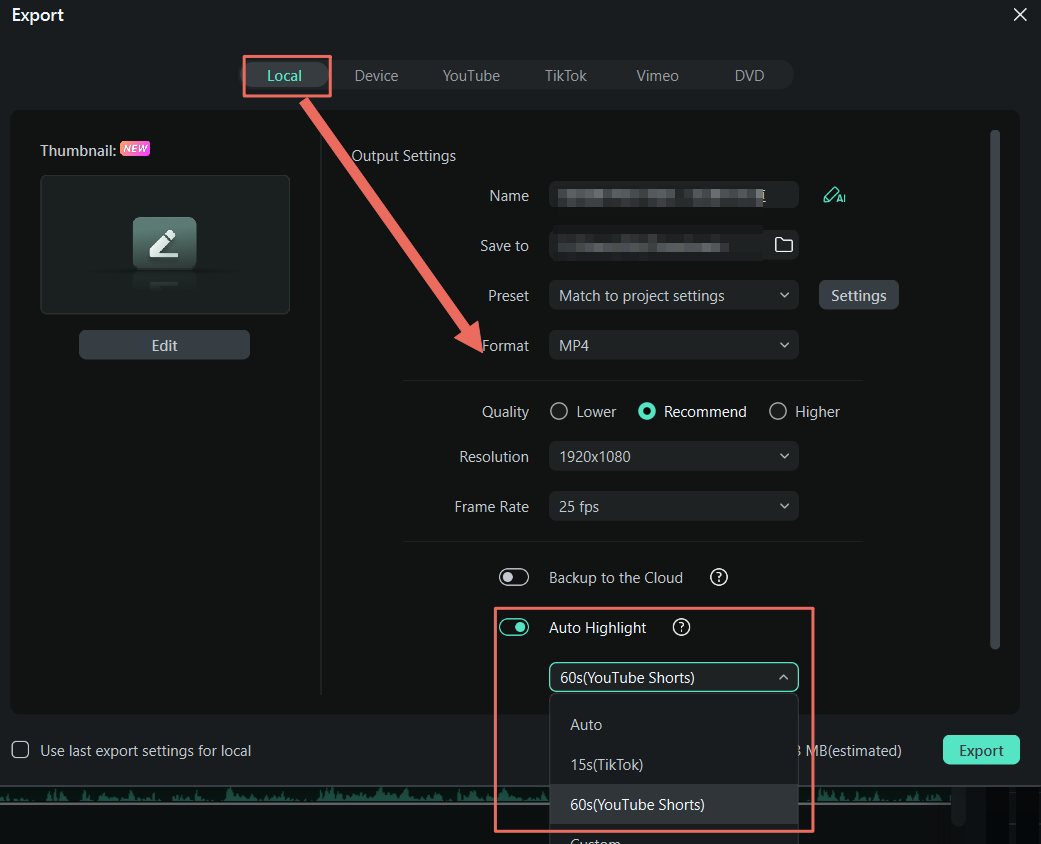
Import and add your video clip to the timeline, go to Export < Local < MP4, you will see the Auto Highlight feature.

Step 2: Enable the Auto Highlight Options
In the Export to MP4 interface, you can choose to tick the Auto Highlight check box. After ticking the check box, you can choose to export with Auto, 15s Tiktok, 60s Youtube Shorts option. Or you can Custom by yourself.

Related Posts
Featured Articles
How to Motion Blur on CapCut Desktop | Online | Mobile?
If you are curious about how to motion blur on the CapCut desktop, online, and in the app, here are the details.
English Speech-to-Text: Everything You Need to Know
If you want to learn how to use English speech-to-text tools, here’s everything you need to know.
Explore Halloween Video Filters to Transform Your Scary Videos
Searching for amazing Halloween video filters to transform your spooky video this season? Then this article is the best fit for you!
Recommended User Guide
Workflow of exporting
Workflow and Overview for Exporting filmora
Video Compressor on Windows
Learn how to convert video files to smaller sizes without any noticeable loss in quality with Filmora.
