For the Best Results, Use the Latest Version.
-
Preparations
-
Account
-
Get Started & Basic Settings
-
Compatibility & Tech Specs
-
Performance Settings
-
-
Creating Projects
-
Creating New Projects
-
-
Importing & Recording
-
Video Editing for Windows
-
Basic Video Editing
- Enable/Disable Clip in Windows
- Magnetic Timeline for Windows
- Drawing Tools fo Windows
- Dual Monitor Setup for Video Editing on Windows
- Select All Clips on Timeline for Windows
- Dual Monitor Setup for Video Editing on Mac
- Manage Timeline and Tracks
- Auto Ripple for Windows
- Split & trim video
- Crop & Pan & Zoom Video
- Compositing
- Change video playback speed
- Playing videos in reverse
- Mark In and Mark Out for Windows
- Markers for Windows
- Group editing
- Customizable Backgrounds for Videos and Images in Windows
- Video snapshot
- Using freeze frame
- Logo Reveal For Windows
- Apply auto enhance
- Applying drop shadow
- Adjustment layer for Windows
- Transforming
- Video Editing Ruler – Windows
-
Advanced Video Editing
-
AI-Powered Video Editing
- Smart Scene Cut for Windows
- Smart Short Clips for Windows
- AI Face Mosaic for Windows
- AI Video Enhancer
- AI Text-to-Video for Windows
- Planar Tracking
- AI Idea to Video for Windows
- Image to Video for Windows
- Instant Cutter Tool for Windows
- AI Extend
- AI Script to Video Guide for Windows
- AI Text-Based Editing for Windows
- AI Mate Editing for Windows
- Create with instant mode
- ChatGPT Plugin - AI Copywriting
- AI Smart Cutout
- Lens correction
- Auto reframe video
- AI Portrait Cutout
- Scene detection feature
- AI Smart Masking for Windows
- Make motion tracking
- Stabilization
- AI Video/Photo Object Remover for Windows
- AI Smart Search for Windows
- AI Skin Tone Protection for Windows
- AI Image for Windows
- Chroma key (green screen)
- Super Slow Motion with Optical Flow for Windows
- Video Denoise for Windows
-
-
Audio Editing for Windows
-
Basic Audio Editing
-
Advanced Audio Editing
-
AI-Powered Audio Editing
-
-
Text Editing for Windows
-
Basic Text Editing
-
Advanced Text Editing
-
AI-Powered Text Editing
-
-
Video Customizations
-
Video Effects
-
Audio Effects
-
Transitions
-
Stickers
-
Filters
-
Color Editing
-
Animations
-
Templates
-
Asset Center
-
-
Exporting & Share & Cloud Backup
AI Translation for Windows
Wondershare Filmora's AI translation feature can effectively translate multiple sources of languages into your desired one. Following are the proper directions to access and use the AI translation option of Filmora Windows:
How to Translate Videos in Filmora?
Step 1: Launch Filmora and Initiate a New Project
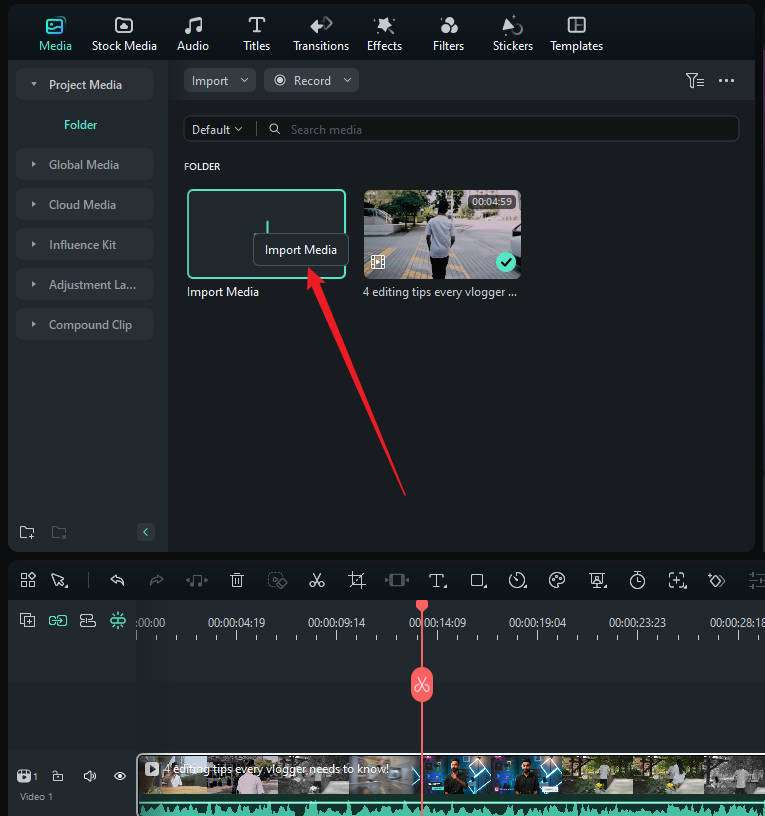
To start, launch Filmora on your desktop and continue to select the "New Project" button from the homepage. When directed to the editing window, select the "Import" button in the media panel and import your required video content.
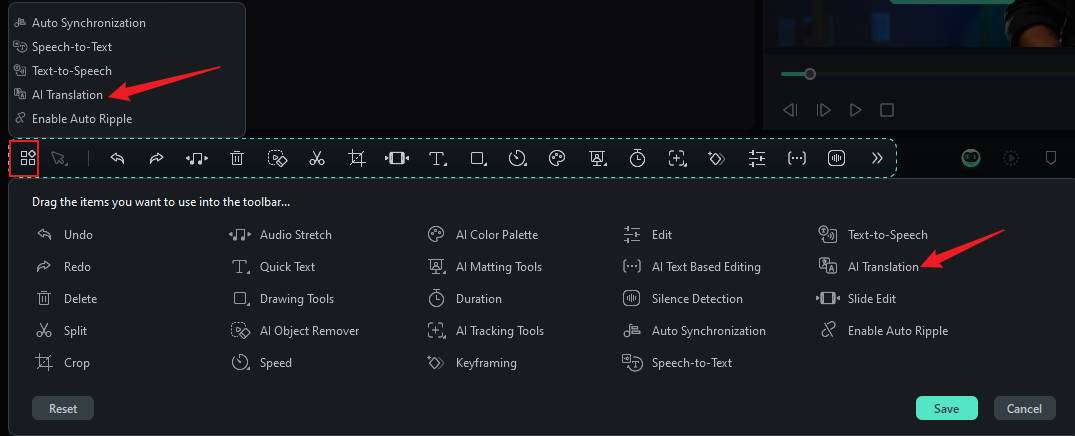
Step 2: Add Video To Timeline and Access AI Translation Feature
As you drag and drop the video content into the timeline, navigate to the toolbox and find AI translation, then drag and move it above the timeline.
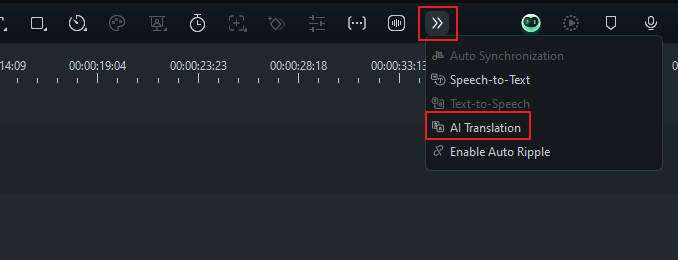
Alternatively, you can expand the editing box and click the AI Translation icon.
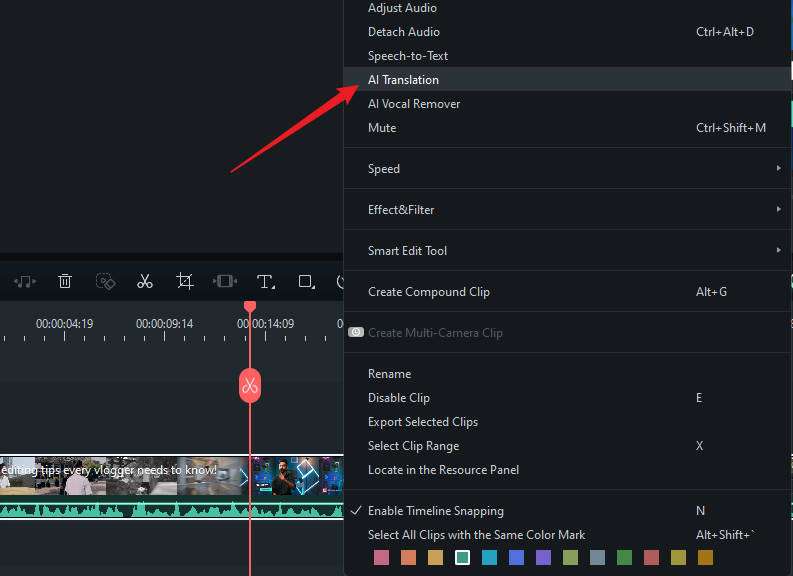
In addition, you can right-click on the video in the timeline and choose the "AI Translation" option from the dropdown menu.
Step 3: Set Parameters for Translation
Once you choose AI Translation, a dialogue box will appear.
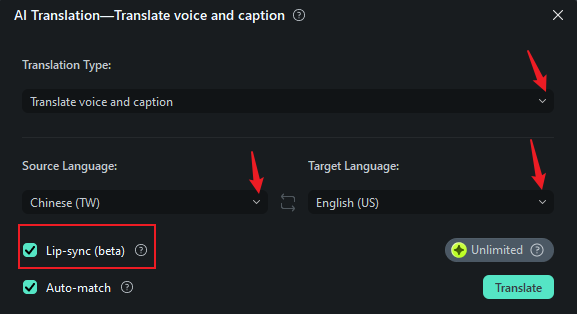
- Translation Type: Choose "Translate voice and text" or "Only translate text."
- Source Language: choose the video language from the dropdown lists.
- Target Language: select from 14 different languages.
- Auto match: match the transcription to the timeline. (This option is on by default)
Step 4: Start Translating Videos
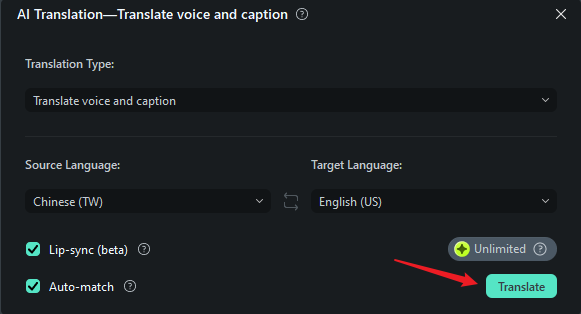
After all settings are done, click translate to start translating videos.
Step 5: Wait and Export the Final Results
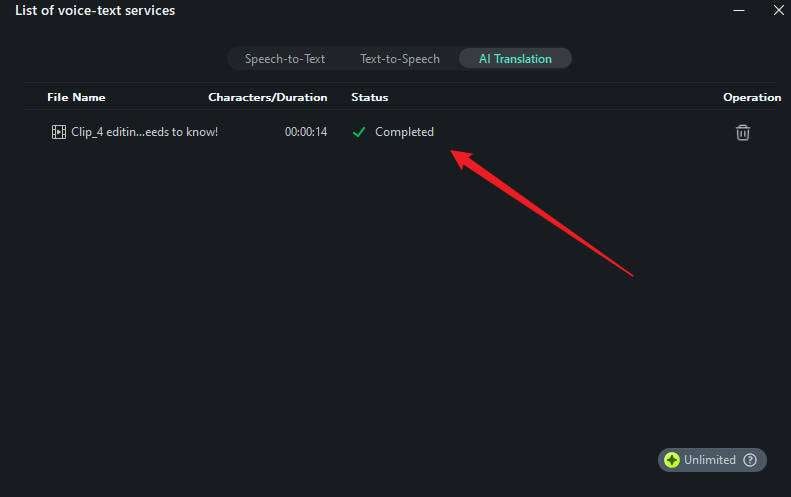
A pop-up screen will appear showing the translation processes. Wait until you get the "Completed" status, which means the translation is done. Finally, you can close this dialogue box and play your media to see results. Later, proceed to the top-right side and use the "Export" button to save the media on your device.
📌Note:
To ensure transparency and compliance when using Filmora's AI features, please be aware of the following:
- The software interface will clearly identify all content created by AI.
- For traceability, exported or downloaded AI-generated assets may include a visible or invisible watermark.
Related Posts
Featured Articles
How to Connect Discord to Platforms Like YouTube, Instagram, or Twitch
Follow our guide on how to connect YouTube, Twitch, or other platforms to Discord. By the end, you can build stronger connections across multiple platforms and promote your content seamlessly!
How to Add Subtitles to Videos on Android Devices
Download Filmora and follow our step-by-step guide on how to add subtitles to a video on Android. Find out why we should add subtitles and what types of content benefit them.
Create Killer Rhymes with the Top Rap Lyrics Generators
Discover the best rap lyrics generators to create original rap verses, lines, and songs. Use online rap lyric makers to unlock your creativity and write your next hit.
Recommended User Guide
Speech to Text/Text to Speech/SRT
These features enhance the dubbing and subtitle editing experience and improve editing efficiency.
Auto Caption Feature Guide | Filmora Windows
Do you wish to add dynamic subtitle effects to your video? Learn how Wondershare Filmora makes this easy with an auto-captioning effect within Speech-to-Text.
