For the Best Results, Use the Latest Version.
-
Preparations
-
Account
-
Get Started & Basic Settings
-
Compatibility & Tech Specs
-
Performance Settings
-
-
Creating Projects
-
Creating New Projects
-
-
Importing & Recording
-
Video Editing for Windows
-
Basic Video Editing
- Enable/Disable Clip in Windows
- Magnetic Timeline for Windows
- Dual Monitor Setup for Video Editing on Windows
- Select All Clips on Timeline for Windows
- Manage Timeline and Tracks on Windows
- Auto Ripple for Windows
- Split & trim video
- Crop & Pan & Zoom Video
- Compositing
- Change Video Speed on Windows
- Playing videos in reverse
- Mark In and Mark Out for Windows
- Markers for Windows
- Group editing
- Customizable Backgrounds for Videos and Images in Windows
- Video snapshot
- Using freeze frame
- Logo Reveal For Windows
- Apply auto enhance
- Applying drop shadow
- Adjustment layer for Windows
- Transforming
- Video Editing Ruler – Windows
-
Advanced Video Editing
- Drawing Tools for Windows | Filmora Guide
- Create Multi-Camera Clip
- Compound Clip for Windows
- Multi-Clip Editing for Windows
- Filmora Motion Blur | Windows
- Filmora Flicker Removal Guide | Windows
- Apply mask to video
- Creating a PIP effect
- Keyframe Graph Editor for Windows
- Add animation keyframing for Windows
- Keyframe Path Curve for Windows
-
AI-Powered Video Editing
- Smart Scene Cut for Windows
- Smart Short Clips for Windows
- AI Face Mosaic for Windows
- Filmora AI Eye Contact- Windows
- AI Video Enhancer for Windows
- AI Text-to-Video for Windows
- Planar Tracking for Windows
- AI Idea to Video for Windows
- Filmora Image to Video for Windows
- Filmora Image to Prompt for Windows
- Instant Cutter Tool for Windows
- AI Extend
- Filmora AI Relight - Windows
- Filmora AI Image Enhancer Guide - Windows
- AI Script to Video Guide for Windows
- AI Text-Based Editing for Windows
- AI Mate Editing for Windows
- Create with instant mode
- ChatGPT Plugin - AI Copywriting
- AI Smart Cutout
- Lens correction on Windows
- Auto reframe video
- AI Portrait Cutout
- Scene detection feature
- AI Smart Masking for Windows
- Make motion tracking
- Video Stabilization for Windows
- AI Video/Photo Object Remover for Windows
- AI Smart Search for Windows
- AI Skin Tone Protection for Windows
- AI Image for Windows
- Chroma key (green screen)
- Super Slow Motion with Optical Flow for Windows
- Video Denoise for Windows
-
-
Audio Editing for Windows
-
Basic Audio Editing
-
Advanced Audio Editing
-
AI-Powered Audio Editing
-
-
Text Editing for Windows
-
Basic Text Editing
-
Advanced Text Editing
-
AI-Powered Text Editing
-
-
Video Customizations
-
Video Effects
-
Audio Effects
-
Transitions
-
Stickers
-
Filters
-
Color Editing
-
Animations
-
Templates
-
Asset Center
-
-
Exporting & Share & Cloud Backup
Custom Color Layer for Windows
If you want to set a unique mood for your video montage while enhancing the color tone across all clips, this new feature in Filmora is for you. The custom color layer feature allows you to create and apply your own solid or gradient color layers over your video clips for creative effects and color grading. You can generate your own solid overlays and save them as custom to apply instantly in future videos.
The feature is ideal for mood settling, creating brand consistency, and stylization across clips. To learn how to use this feature, read the steps mentioned below:
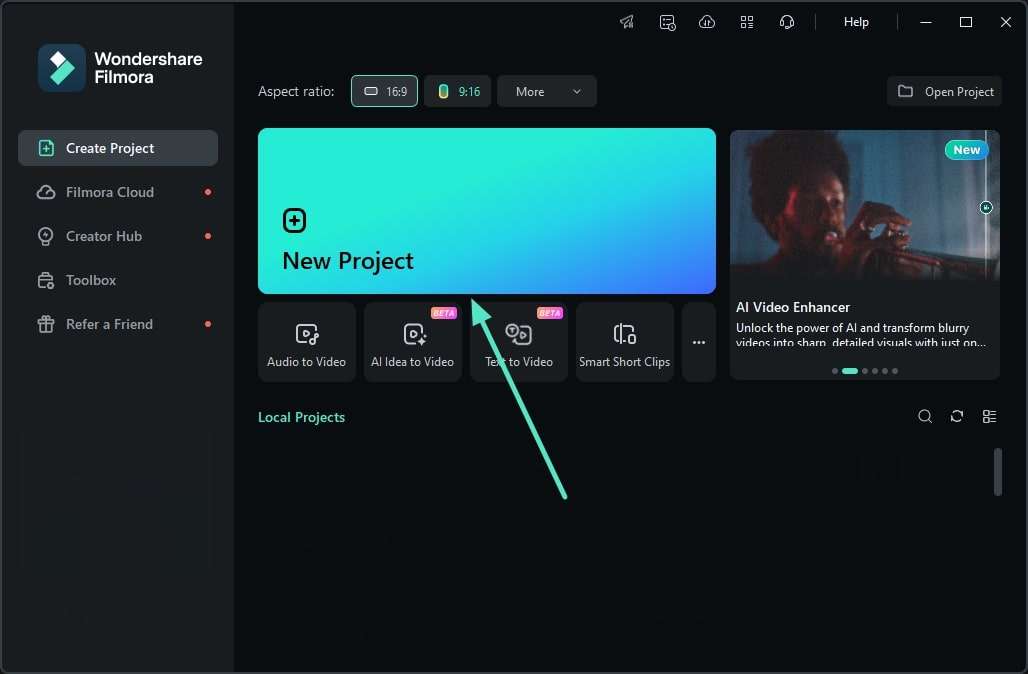
Step 1: Launch Filmora and Create a New Project
To begin the process, launch Wondershare Filmora on your device and press the New Project option from the homepage. Next, import the videos of your choice on which you want to apply color grading.
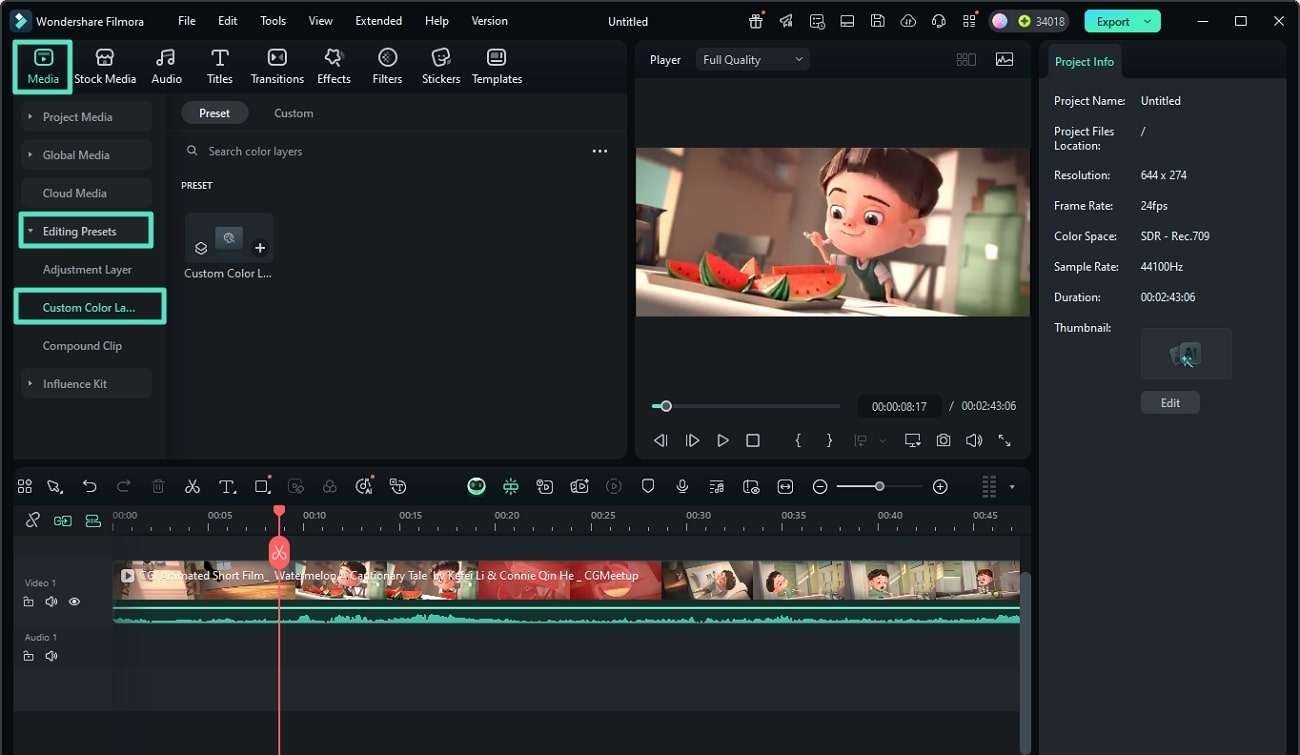
Step 2: Access the Custom Color Layer Option
In the editing interface of Filmora, head to the Media section from the top toolbar and enable the Editing Presets section. Next, click on the Custom Color Layer option to enable the customization window.
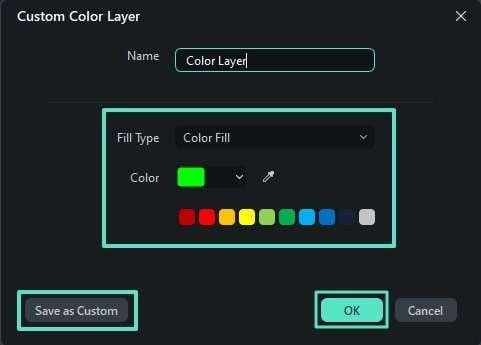
Step 3: Customize the Color Layer and Save
Name the layer and expand the Fill Type to choose your desired filling style. Next, select the shade by accessing the Color option. Once the color for the layers is selected, tap on the Save as Custom option. Rename the custom layer and press the OK button to save the changes.
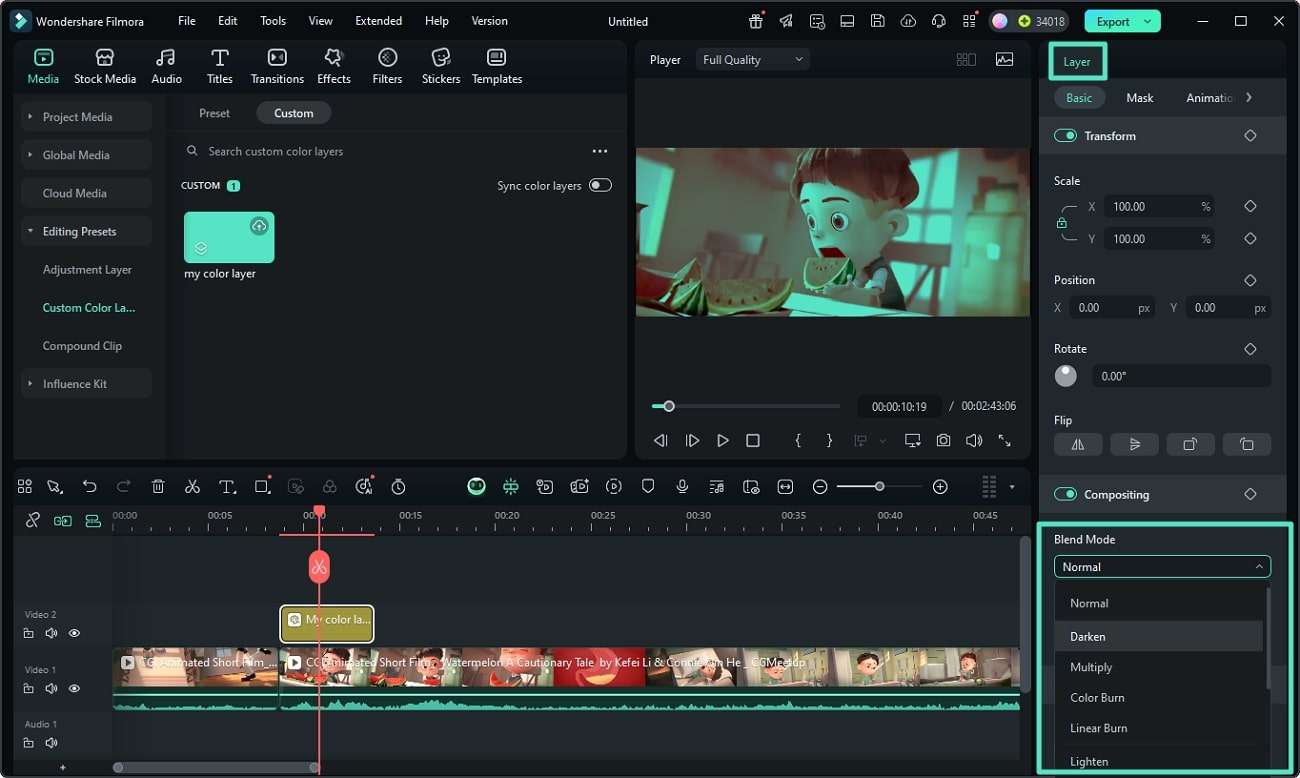
Step 4: Apply The Custom Color Layer to the Clips
To apply the layer, drag it to the editing timeline in the area of the video or press the + icon to apply it. Head to the Layer panel on the right side and choose the Blend Mode by expanding its drop-down menu.
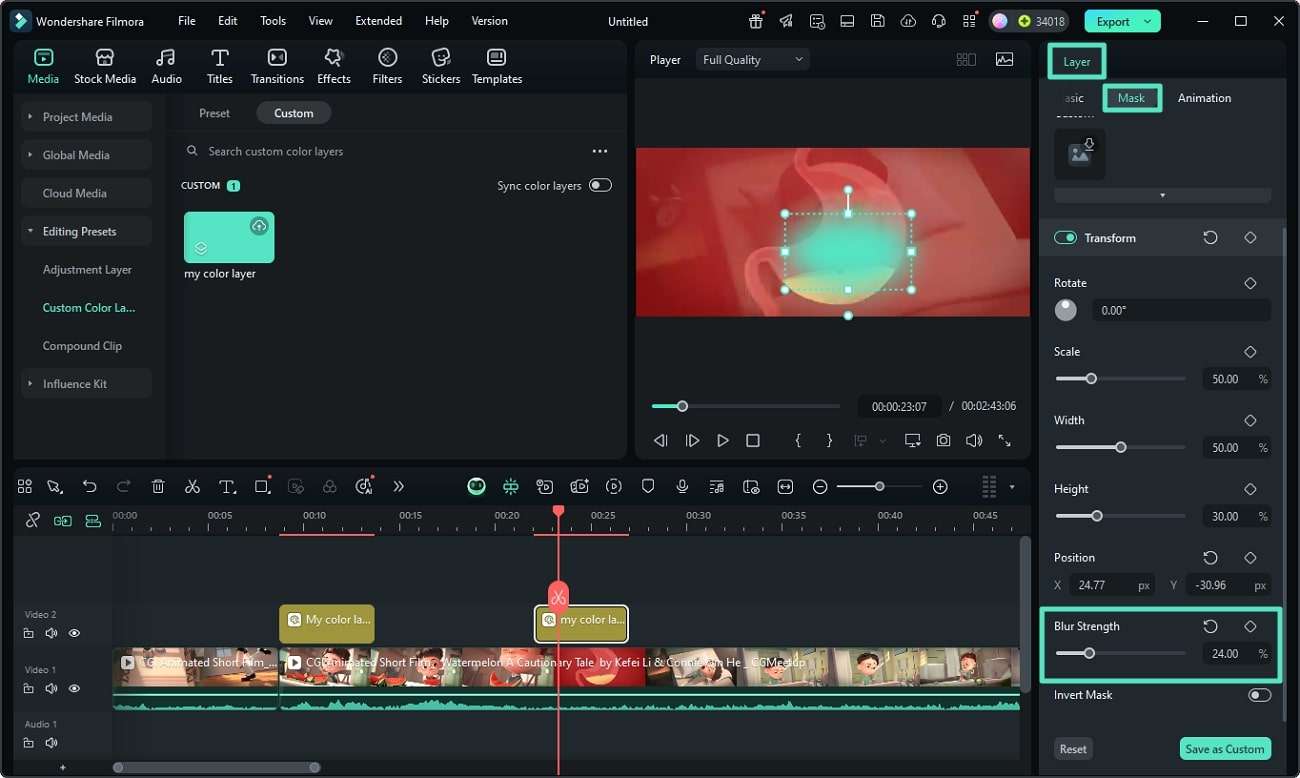
Step 5: Apply Color Layer as Mask
Lead into the Layer panel on the right and enable the Mask section. Choose the shape of the mask and adjust different attributes like Blur Strength.
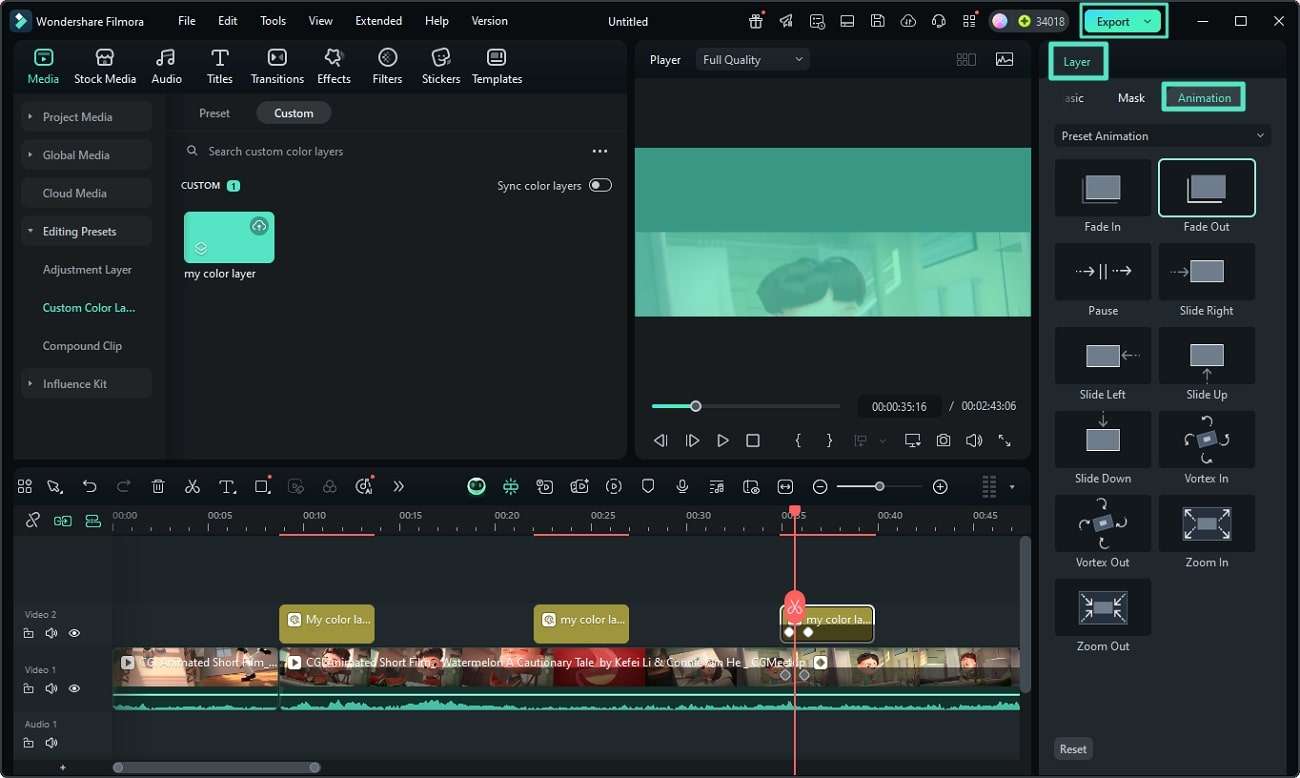
Step 6: Add Animation to the Layer
Access the Animation section from the Layer panel after applying the layer to a specific segment of the video. Now select the preset for animation to apply to the layer, preview the results in the preview window and finally press the Export button to save the final results.
Related Posts
Featured Articles
Make Fun: How to Make Yourself Look Old in Minutes
See your past and future self instantly using the three top old-face filter apps. Our AI age filter guide will show you how to watch yourself age from baby to adult in seconds.
Top 3 Ways to Share a YouTube Video on Instagram
Wondering how to share a YouTube video on Instagram? Discover the three best ways, including a time-saving, AI-powered method.
How To Add Stickers to Photos in 6 Easy Methods[2026]
Adding stickers to photos can add the extra flair you need to capture viewers’ attention or the extra creativity you need in expressing yourself online.
Recommended User Guide
Preset Color Adjustment
Learn how to adjust color, light, LUT in Filmora
Color Comparison View
While maintaining your content's integrity, Filmora offers dedicated color comparison functionality for clip editing.
