For the Best Results, Use the Latest Version.
-
Preparations
-
Account
-
Get Started & Basic Settings
-
Compatibility & Tech Specs
-
Performance Settings
-
-
Creating Projects
-
Creating New Projects
-
-
Importing & Recording
-
Video Editing for Windows
-
Basic Video Editing
- Enable/Disable Clip in Windows
- Magnetic Timeline for Windows
- Dual Monitor Setup for Video Editing on Windows
- Select All Clips on Timeline for Windows
- Manage Timeline and Tracks on Windows
- Auto Ripple for Windows
- Split & trim video
- Crop & Pan & Zoom Video in Filmora for Windows
- Compositing
- Change Video Speed on Windows
- Playing videos in reverse
- Mark In and Mark Out for Windows
- Markers for Windows
- Group editing
- Customizable Backgrounds for Videos and Images in Windows
- Video snapshot
- Using Freeze Frame in Filmora for Windows
- Logo Reveal For Windows
- Auto Enhance in Filmora for Windows
- Applying drop shadow
- Adjustment layer for Windows
- Apply Transforming for Windows
- Video Editing Ruler – Windows
-
Advanced Video Editing
- Drawing Tools for Windows | Filmora Guide
- Create Multi-Camera Clip in Filmora for Windows
- Compound Clip for Windows
- Multi-Clip Editing for Windows
- Filmora Motion Blur | Windows
- Video Chapters in Filmora on Windows
- Filmora Flicker Removal Guide | Windows
- Apply mask to video
- Creating a PIP Effect for Windows
- Keyframe Graph Editor for Windows
- Add animation keyframing for Windows
- Keyframe Path Curve for Windows
-
AI-Powered Video Editing
- Smart Scene Cut for Windows
- Smart Short Clips for Windows
- AI Face Mosaic for Windows
- Filmora AI Eye Contact- Windows
- AI Video Enhancer for Windows
- AI Text-to-Video for Windows
- Planar Tracking for Windows
- AI Idea to Video for Windows
- Filmora Image to Video for Windows
- Filmora Image to Prompt for Windows
- Instant Cutter Tool for Windows
- AI Extend
- Filmora AI Relight - Windows
- Filmora AI Image Enhancer Guide - Windows
- AI Script to Video Guide for Windows
- AI Text-Based Editing for Windows
- AI Mate Editing for Windows
- Instant Mode in Filmora
- ChatGPT Plugin - AI Copywriting
- AI Smart Cutout for Windows
- Lens correction on Windows
- Auto Reframe Video for Windows
- AI Portrait Cutout
- Scene detection feature
- AI Smart Masking for Windows
- Motion Tracking on Windows
- Video Stabilization for Windows
- AI Video/Photo Object Remover for Windows
- AI Smart Search for Windows
- AI Skin Tone Protection for Windows
- AI Image for Windows
- Chroma key (green screen)
- Super Slow Motion with Optical Flow for Windows
- Video Denoise for Windows
-
-
Audio Editing for Windows
-
Basic Audio Editing
-
Advanced Audio Editing
-
AI-Powered Audio Editing
- Auto synchronization
- AI Sound Effects in Filmora for Windows
- Smart BGM Generation on Windows
- AI Voice Enhancer in Filmora
- AI Voice Cloning in Wondershare Filmora
- AI Music Generator for Windows
- Audio To Video
- AI Vocal Remover for Windows
- AI Auto Beat Sync for Windows
- AI Audio Stretch for Windows
- AI Audio Denoise for Windows
- Silence Detection on Windows
-
-
Text Editing for Windows
-
Basic Text Editing
-
Advanced Text Editing
-
AI-Powered Text Editing
-
-
Video Customizations
-
Video Effects
-
Audio Effects
-
Transitions
-
Stickers
-
Filters
-
Color Editing
-
Animations
-
Templates
-
Asset Center
-
-
Exporting & Share & Cloud Backup
Optimized Screen Recording for Windows
Filmora's Optimized Screen Recording feature makes capturing tutorials, gameplay, meetings, presentations, and online content more flexible and beginner-friendly. With multiple recording modes, users can quickly capture exactly what they need with minimal setup.
The feature also includes beginner guidance, customizable recording settings, camera enhancements, and smart memory for previously selected recording areas to improve efficiency. Whether you are creating professional tutorials or casual recordings, Filmora streamlines the entire process with an intuitive and user-focused recording experience.
Entrances to Record in Filmora
Method 1.
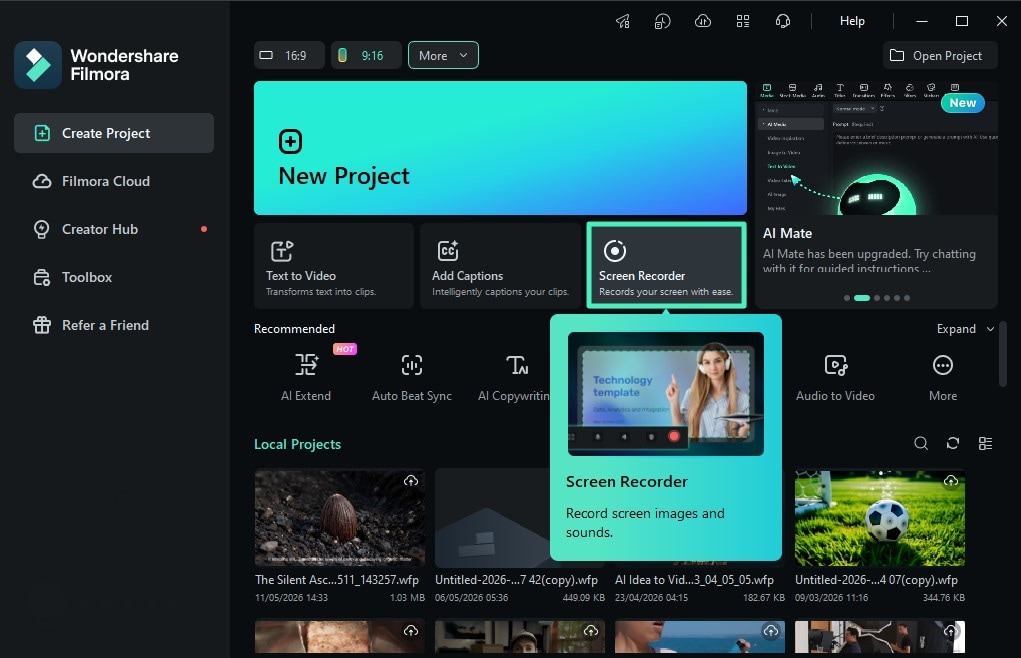
Launch Filmora on your device and locate the Screen Recorder option directly from the startup window to begin instantly.
Method 2.
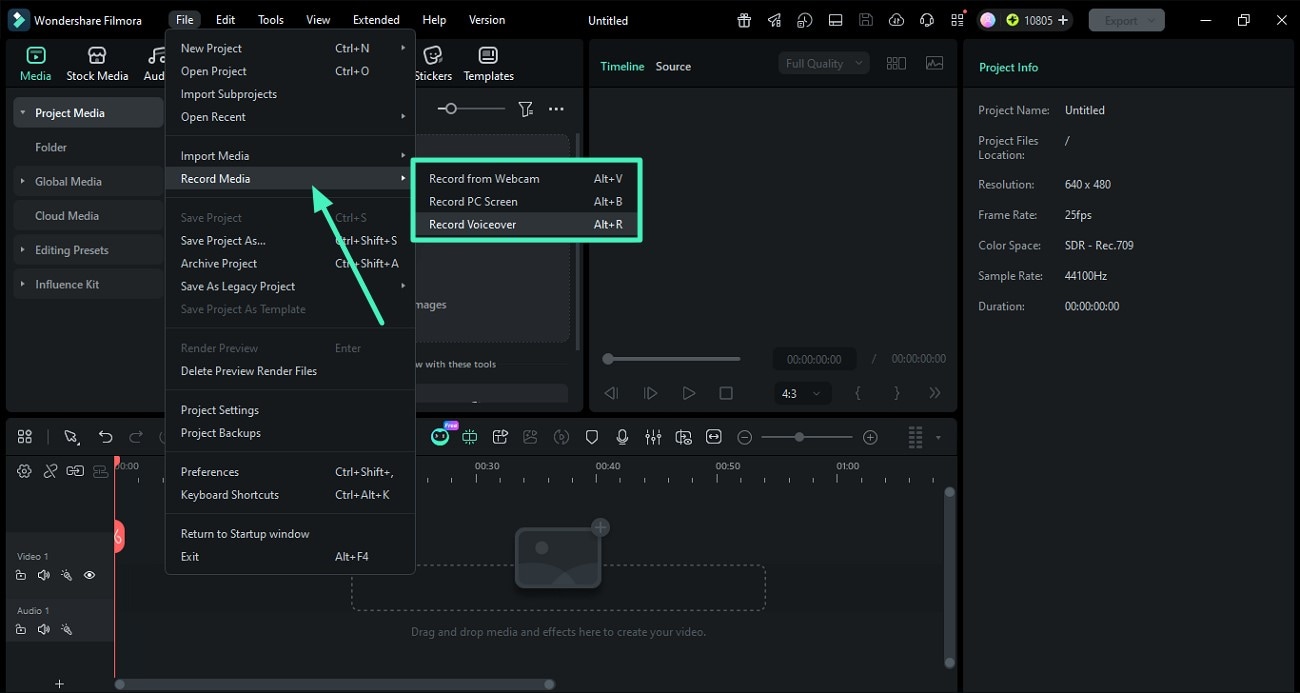
Enter the editing interface and click File > Record Media. From the expanded menu, choose between Record PC Screen, Record Voiceover, or Record from Webcam.
Method 3.
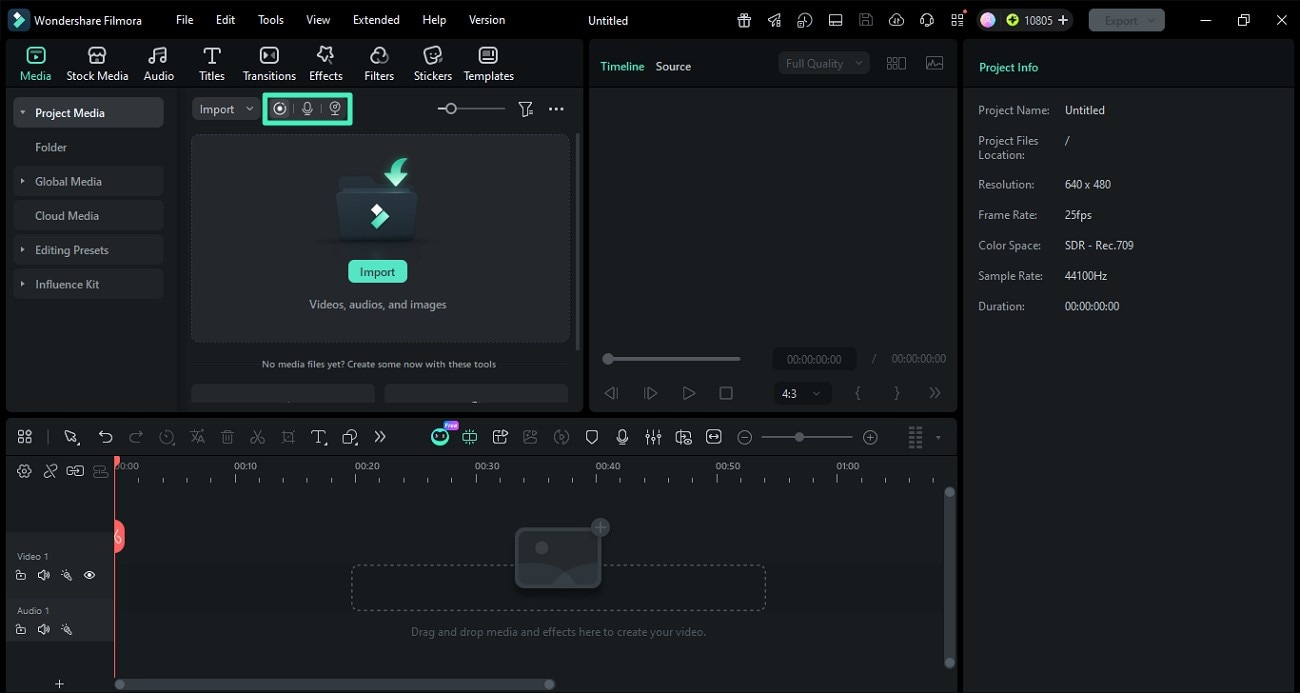
Access the top toolbar and click the Media option. Under this section, select from Record PC Screen, Record Voiceover, or Record from Webcam.
Steps to Record in Filmora
As discussed, Filmora provides a comprehensive suite to record the screen of your PC effortlessly. Follow the steps provided below to learn how to use the screen recording feature of Filmora:
Index
Step 1. Select the Recording Mode
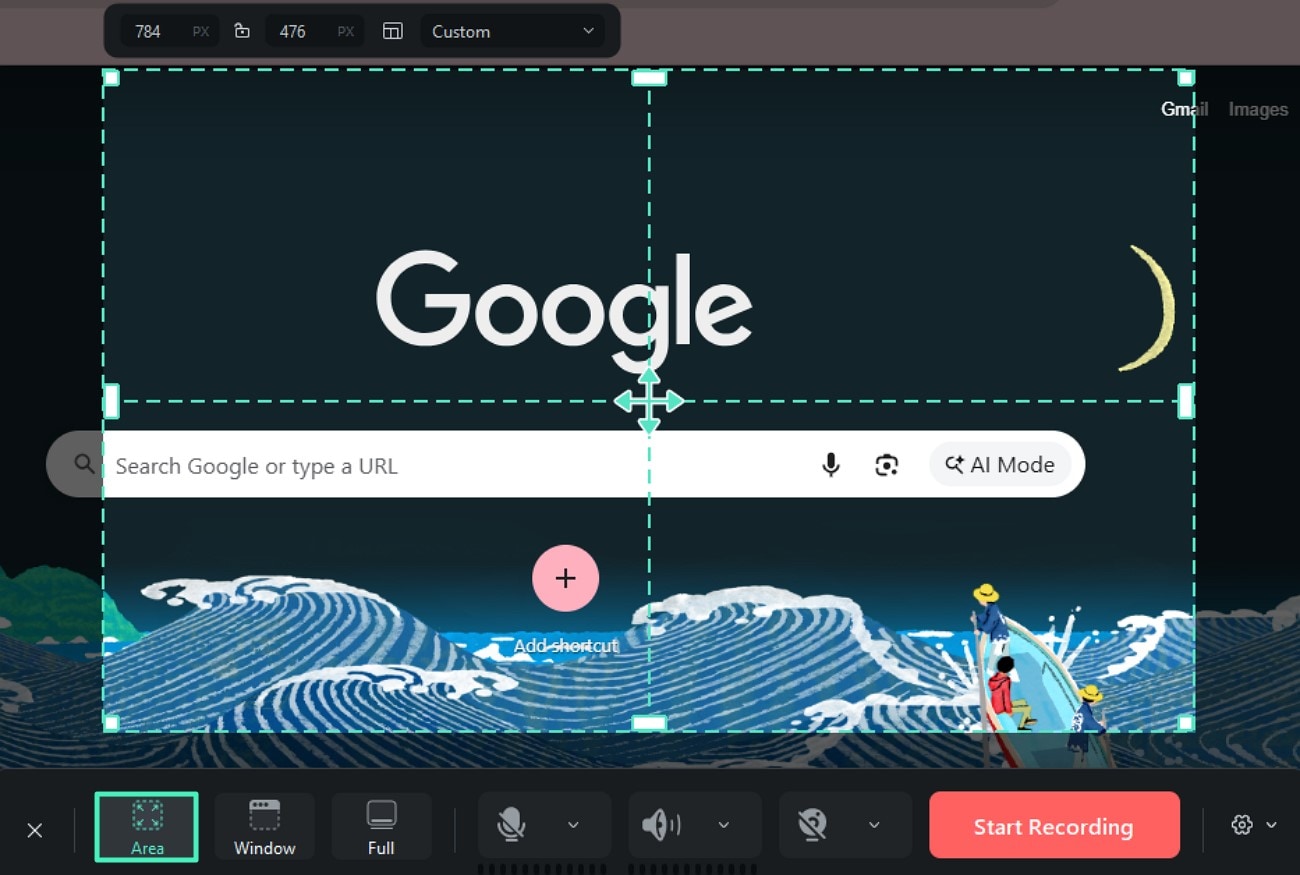
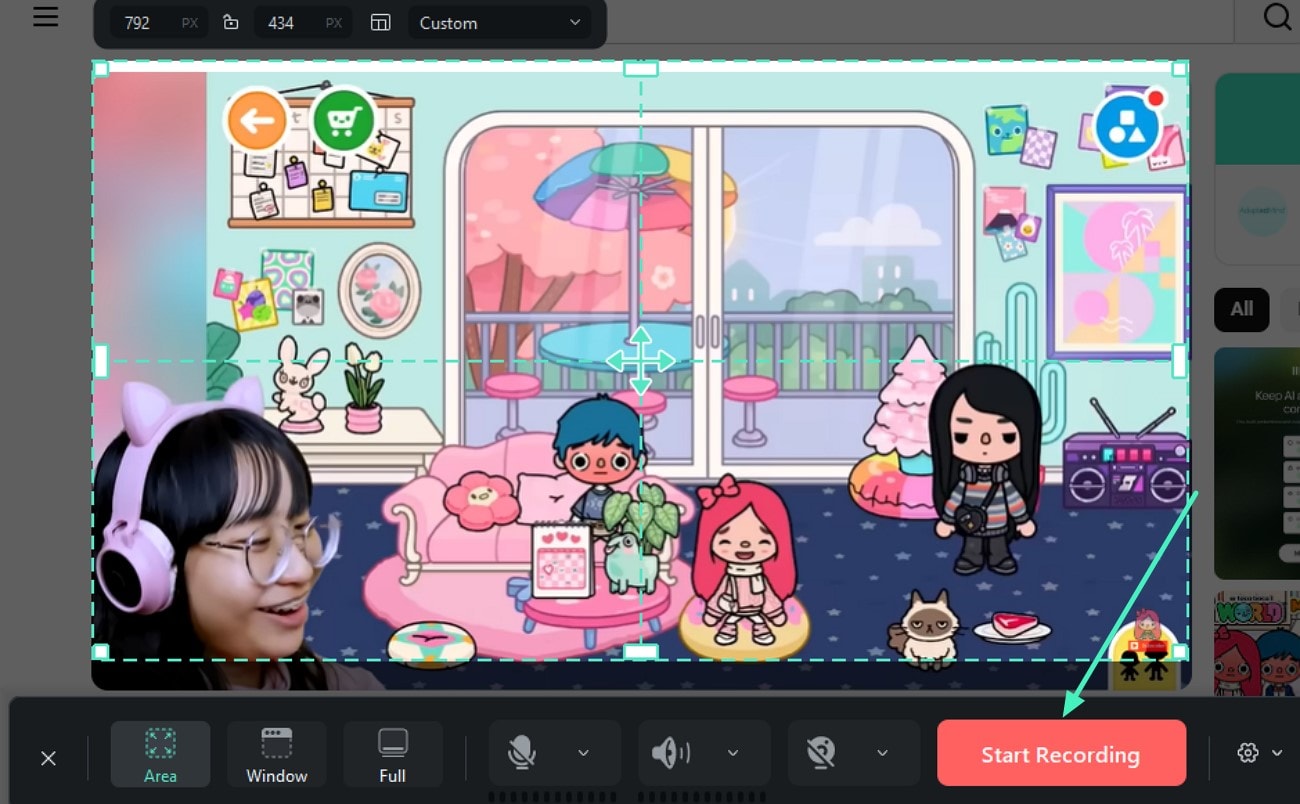
After opening the screen recorder, choose your preferred recording mode from Area Recording, Full Screen Recording, or Window Recording. If you want to record only a specific part of the screen, select the Area Recording option. Click and drag the cursor to define the custom recording area according to your preference.
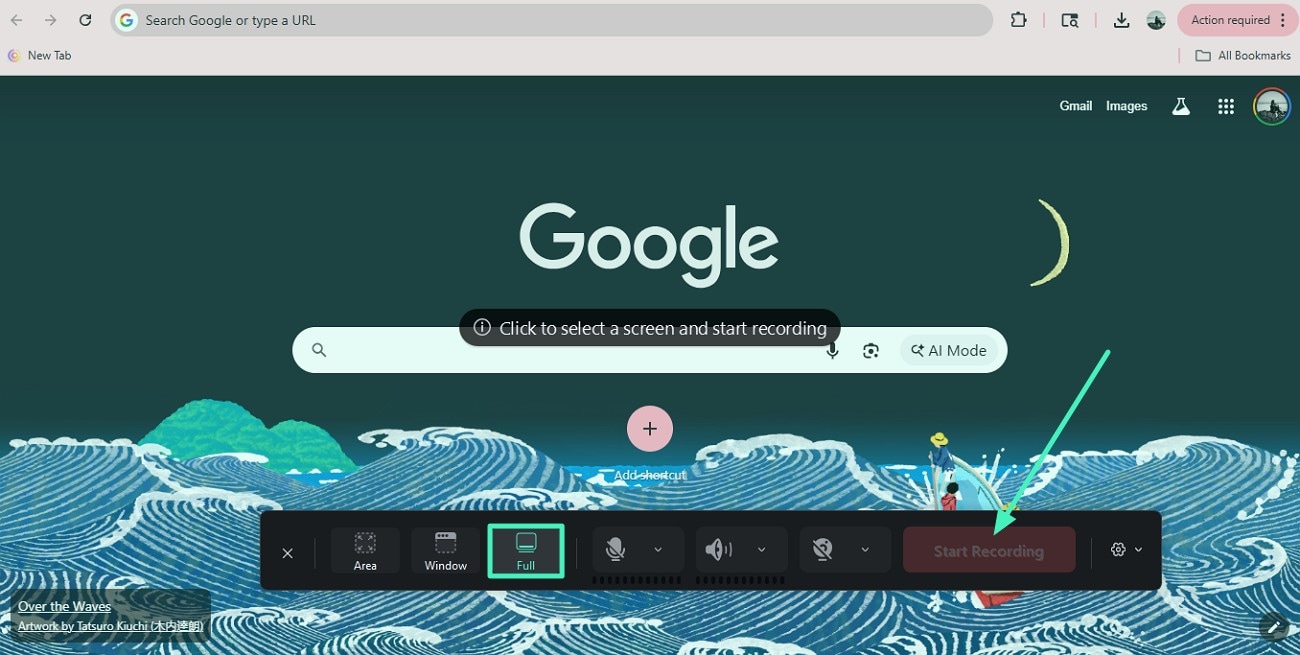
Step 2. Select Full Screen Recording Mode
To capture the entire display, choose the Full Screen Recording mode. Filmora highlights available screens with a light green overlay to help you identify the recording display. Click the desired screen to confirm your selection.
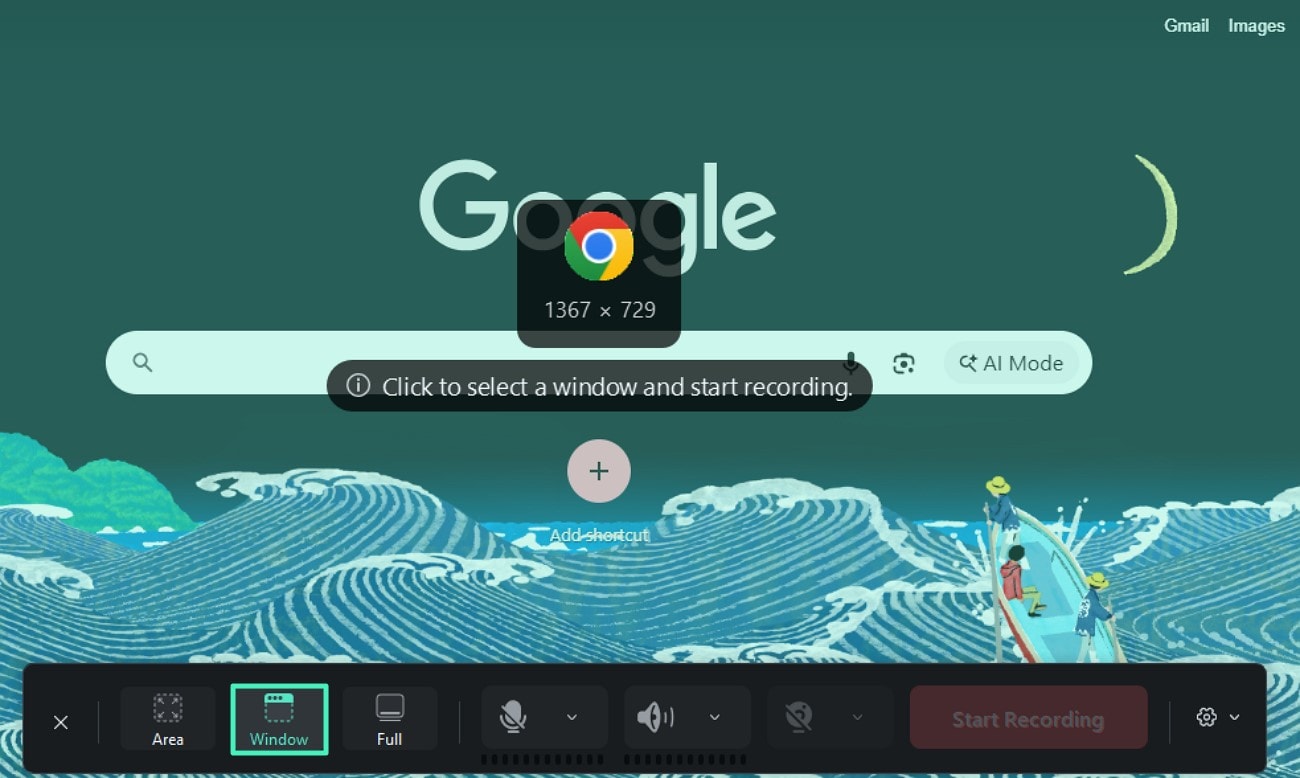
Step 3. Enable Window Recording Mode
For recording a specific application window, select the Window Recording mode. Move the mouse cursor across open windows, and Filmora will automatically detect the target window based on the cursor position and window hierarchy.
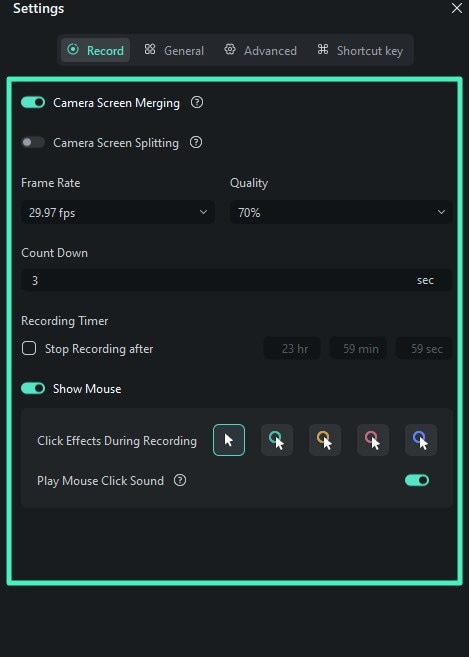
Step 4. Configure Recording Settings
Expand the settings panel from the right side to customize options like frame rate, recording quality, countdown timer, and mouse click effects before starting the capture process. Once all settings are configured, click the Start Recording button to begin capturing your screen activity.
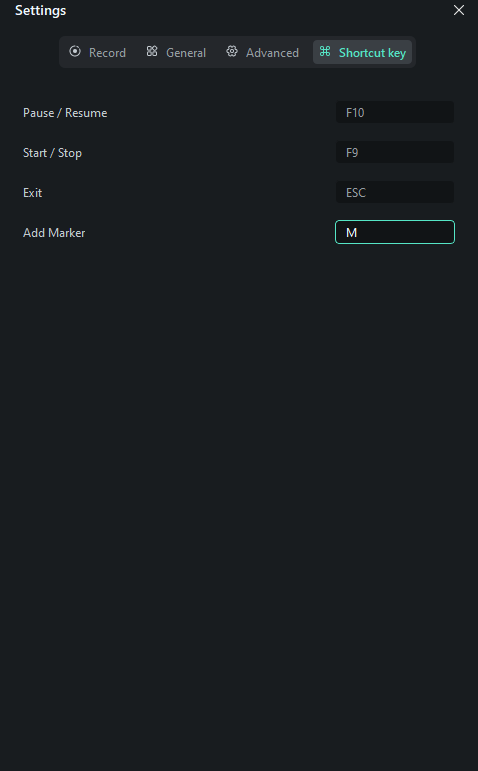
During long recordings, you can now add markers in real time (e.g., press M) to flag key moments. After importing the recording to the timeline, those markers appear automatically so you can quickly jump to the parts to keep, cut, or refine—boosting both presentation and editing efficiency.
Step 5. Customize Camera Display Options
If the Camera option is enabled, a floating camera preview window will appear on the screen. Hover over the preview to access display tools like background blur or background removal. After selecting the preferred effect, press the Start Recording button to start recording with the camera overlay enabled. Once the recording is completed, press the Stop button.
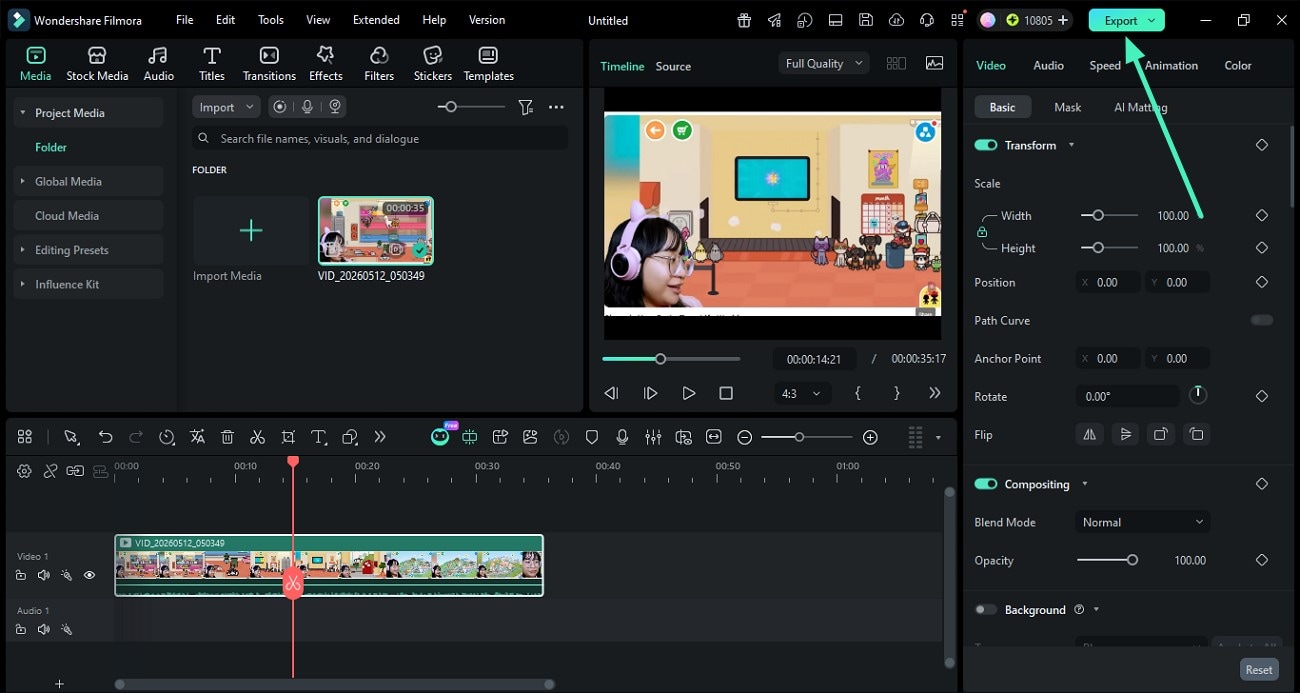
Step 6. Preview Recorded Video and Export
Once the video is successfully recorded, it will be automatically imported to the editing timeline. Make basic or advanced edits with Filmora and save the final results using the Export button.
Related Posts
Featured Articles
How to Animate Charts in After Effects?
Master After Effects chart animation with our tutorial, then discover Filmora's faster method: upload spreadsheet → instant animated charts. Compare AE vs Filmora. Try free!
Best MP3 Audio Recorders (Desktop, Online, and Mobile)
If you're looking for the best MP3 audio recorders that can capture quality sound, here are the top 8 options.
Educational Videos for Students: Benefits, Top Picks, and How to Create Effective Content
Discover the benefits of educational videos for students, explore top picks for all grade levels, and learn how to create engaging content for effective learning.
