For the Best Results, Use the Latest Version.
Filmora User Guide for Mac
-
Preparations for Mac
-
Account (Mac)
-
Get Started & Basic Settings (Mac)
- Release notes for Mac
- Latest Versions and Features for Mac
- Get Started on Mac - Full Guide
- Download/register/uninstall on Mac
- Panel Layout on Mac
- Keyboard shortcuts on Mac
- Touchbar on Mac
- Change playback quality on Mac
- Render preview files on Mac
- Manage Timeline on Mac
- Media for use on Mac
- Logo Reveal For Mac
- Marked Favorites for Mac
-
Compatibility & Tech Specs (Mac)
-
Performance Settings (Mac)
-
-
Creating Projects - Mac
-
Creating New Projects (Mac)
-
-
Importing & Recording - Mac
-
Importing (Mac)
-
Recording (Mac)
-
-
Video Editing for Mac
-
Basic Video Editing for Mac
- Edit Live Photos on Mac
- Enable/Disable Clip for Mac
- Magnetic Timeline For Mac
- Dual Monitor Setup for Video Editing on Mac
- Select All Clips on Timeline for Mac
- Auto Ripple for Mac
- Split & Cut Videos on Mac
- Compositing on Mac
- Crop and zoom on Mac
- Playback Zoom Level for Mac
- Change Speed on Mac
- Play Video in Reverse on Filmora for Mac
- Mark In and Mark Out for Mac
- Markers for Mac
- Group Clips in Filmora for Mac
- Customized Backgrounds for Videos and Images in Mac
- Video snapshot on Mac
- Freeze Frame on Mac
- Auto enhance on Mac
- Applying Drop Shadow for Mac
- Adjustment Layer for Mac
- Mark Clips in Filmora for Mac
- Video Editing Ruler – Mac
- Apply Transforming for Mac
-
Advanced Video Editing for Mac
- Text Animation Path for Mac
- Create Multi-Camera Clip for Mac
- Filmora Motion Blur | Mac
- Drawing Tools for Mac | Filmora Guide
- Compound Clips for Mac
- AI Video Enhancer for Mac
- Video Chapters in Filmora for Mac
- Filmora Flicker Removal Guide | Mac
- Multi-Clip Editing for Mac
- Keyframe Graph Editor for Mac
- Add Animation Keyframing in Filmora for Mac
- Mask on Mac
- PIP (Picture in Picture) in Filmora on Mac
-
AI-Powered Video Editing for Mac
- Smart Scene Cut for Mac
- Smart Short Clips for Mac
- Filmora AI Eye Contact - Mac
- Filmora Image to Video for Mac
- AI Idea to Video for Mac
- AI Text-to-Video for Mac
- Instant Cutter Tool on Mac
- AI Face Mosaic for Mac
- Filmora Image to Prompt for Mac
- Keyframe Path Curve for Mac
- Filmora AI Image Enhancer Guide – macOS
- Planar Tracking for Mac
- Filmora AI Relight - Mac
- AI Extend For Mac
- AI Script-to-Video for Mac
- AI Text-Based Editing in Mac
- Create With Instant Mode on Mac
- ChatGPT Plugin - AI Copywriting on Mac
- AI Smart Cutout in Filmora for Mac
- Auto reframe on Mac
- Lens Correction in Filmora for Mac
- AI Portrait Cutout on Mac
- Scene detection on Mac
- AI Smart Masking for Mac
- AI Mate Editing for Mac
- Motion Tracking on Mac
- Video Stabilization for Mac
- AI Video/Photo Object Remover for Mac
- AI Smart Search for Mac
- AI Skin Tone Protection for Mac
- Green screen on Mac
- Super Slow Motion with Optical Flow for Mac
- AI Stylizer for Mac
- Video Denoise for Mac
-
-
Audio Editing for Mac
-
Basic Audio Editing for Mac
-
Advanced Audio Editing for Mac
-
AI-Powered Audio Editing for Mac
- Audio To Video for Mac
- AI Sound Effect for Mac
- Smart BGM Generation on Mac
- AI Voice Enhancer for Mac
- Audio Stretch for Mac
- AI Audio Denoise for Mac
- Auto Synchronization on Mac
- AI Vocal Remover for Mac
- AI Auto Beat Sync for Mac
- AI Music Generator for Mac
- AI Voice Cloning on Mac
- Silence Detection on Mac
-
-
Text Editing for Mac
-
Basic Text Editing for Mac
-
Advanced Text Editing for Mac
-
AI-Powered Text Editing for Mac
-
-
Video Customizations for Mac
-
Video Effects (Mac)
-
Audio Effects (Mac)
-
Transitions (Mac)
-
Stickers (Mac)
-
Filters (Mac)
-
Color Editing (Mac)
-
Animations (Mac)
-
Templates (Mac)
-
Asset Center (Mac)
-
-
Exporting & Share & Cloud Backup - Mac
Filmora Tutorial Videos
Filmora 13 & 14 User Guide in PDF
Filmora 12 User Guide in PDF
Filmora 11 User Guide in PDF
Filmora 9 & 10 User Guide
Screen Recording for Mac
Filmora for Mac delivers an upgraded screen recording experience that helps users capture webinars, tutorials, presentations, gameplay, and online meetings with ease. Featuring multiple recording methods and flexible capture modes, the tool is designed to simplify recording workflows for both beginners and experienced creators.
Users can personalize recording settings, enable webcam overlays, and quickly reuse previous recording selections for a smoother experience. With its intuitive controls and streamlined interface, Filmora makes professional-quality screen recording accessible on Mac devices.
Ways to Access Screen Recording in Filmora
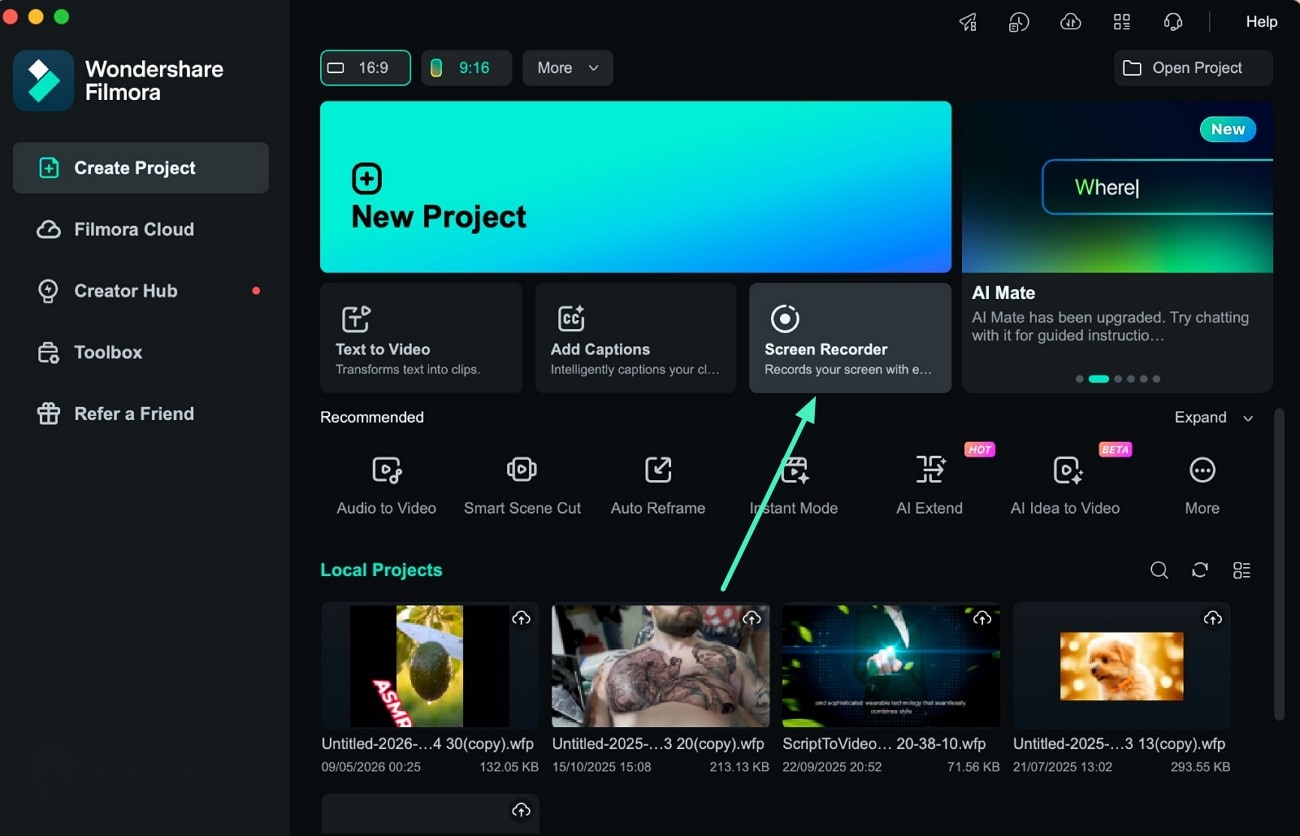
Method 1.
Open Filmora on your Mac and locate the Screen Recorder feature directly from the welcome screen to start recording immediately.
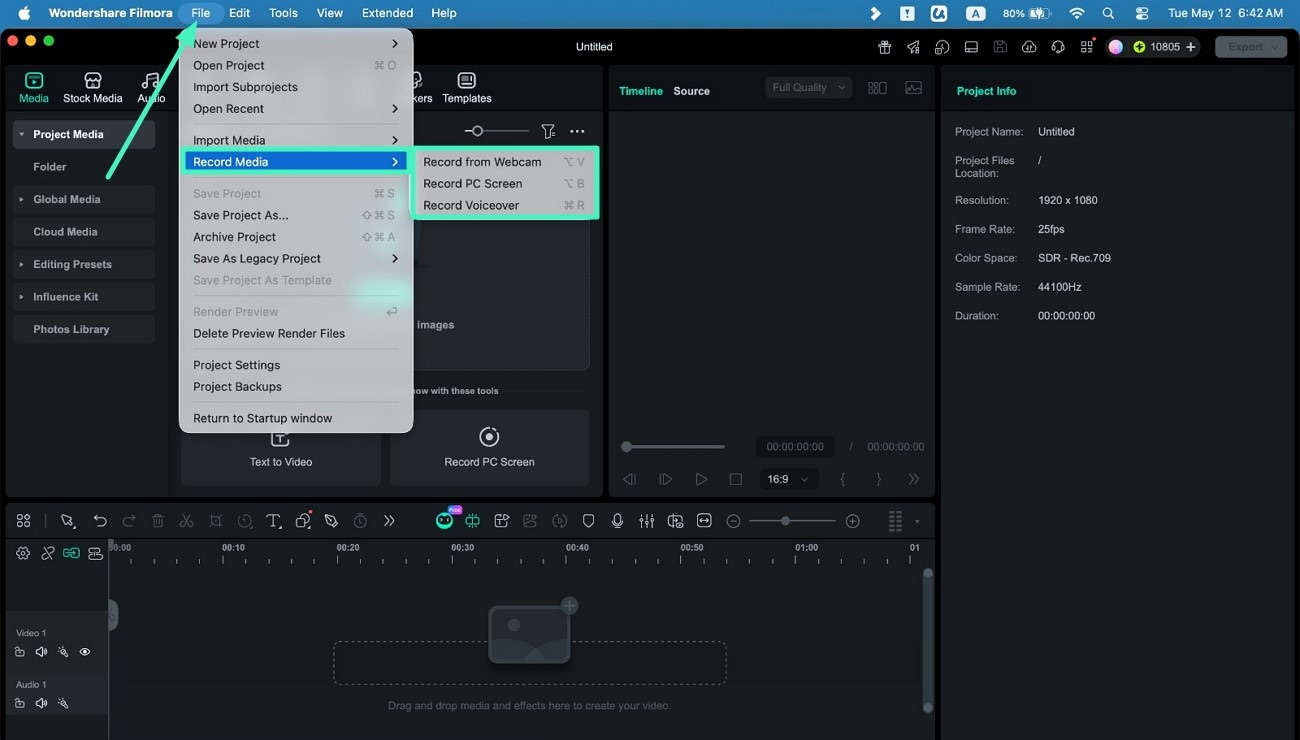
Method 2.
Within the editing workspace, click the File option and choose the Record Media option. Select the preferred option, including Record PC Screen, Record Voiceover, or Record from Webcam.
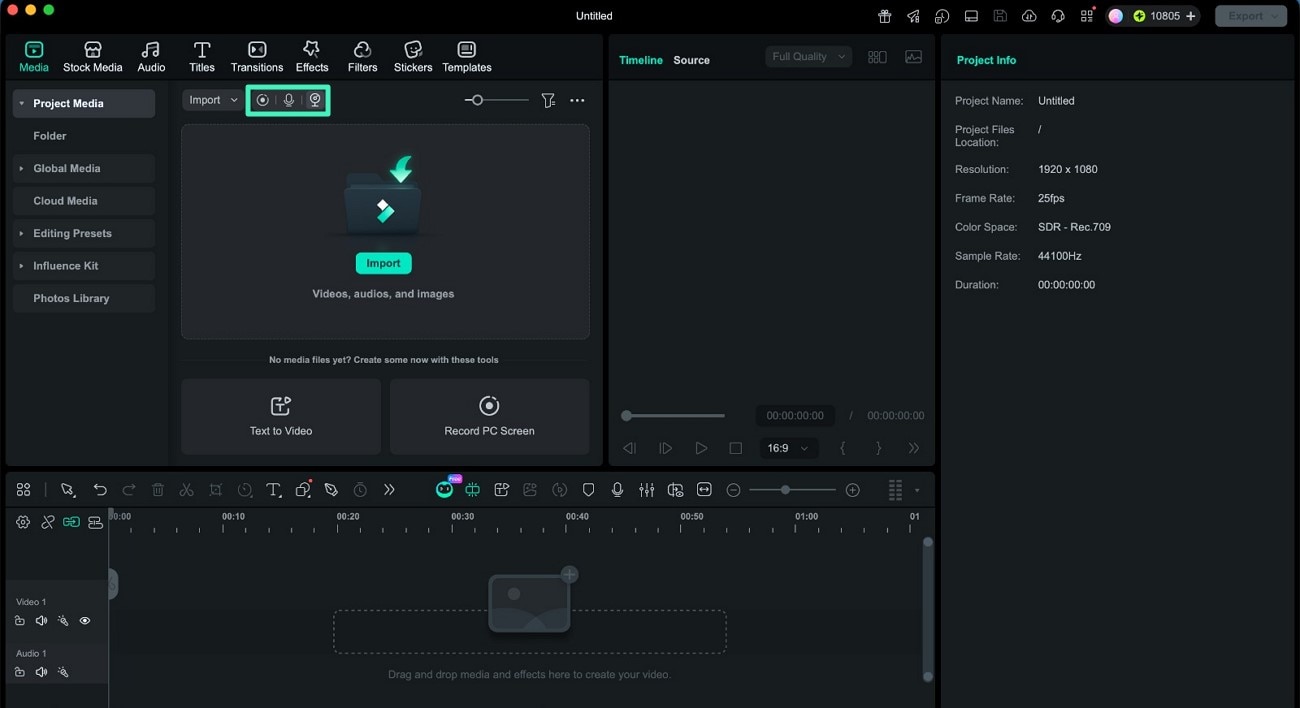
Method 3.
Navigate to the top menu bar and choose the Media tab. From here, select options like Record PC Screen, Record Voiceover, or Record from Webcam.
How to Record Screen in Filmora on Mac
As mentioned above, Filmora provides a complete set of tools for capturing your Mac screen efficiently. Follow the steps below to learn how to use the built-in screen recording feature:
Index
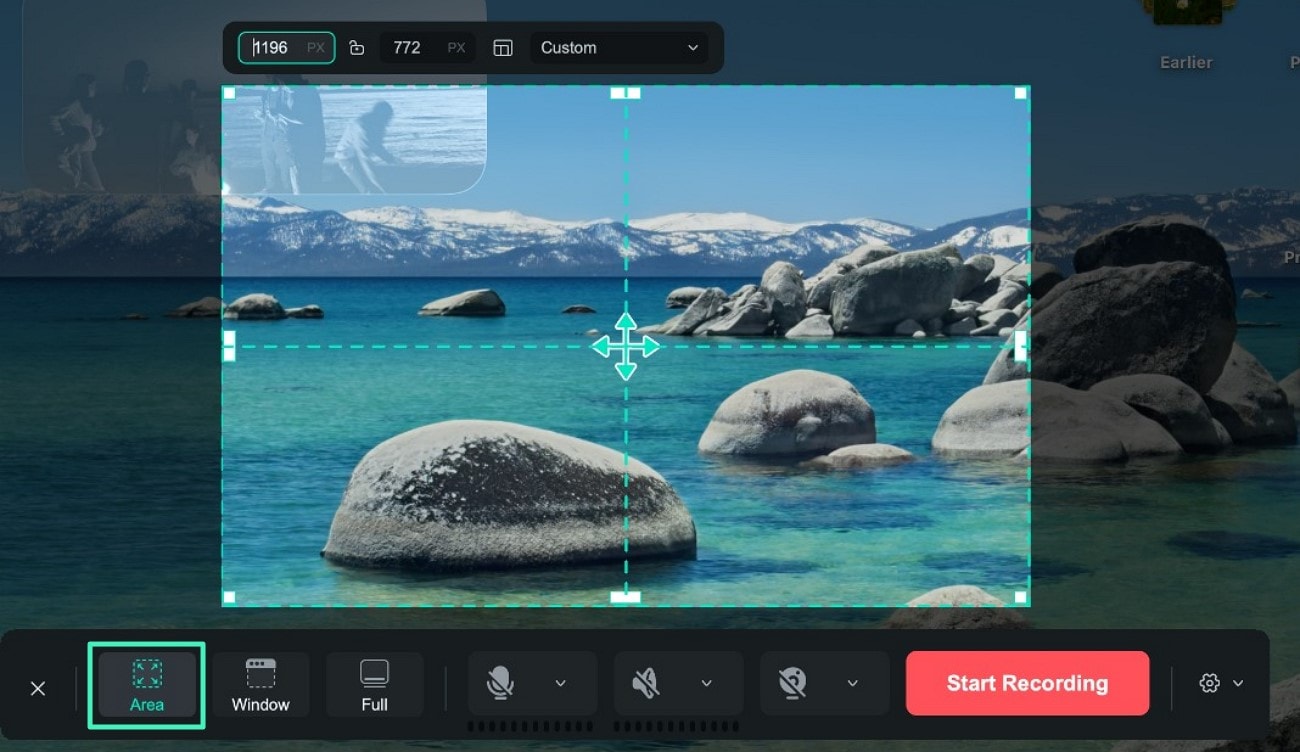
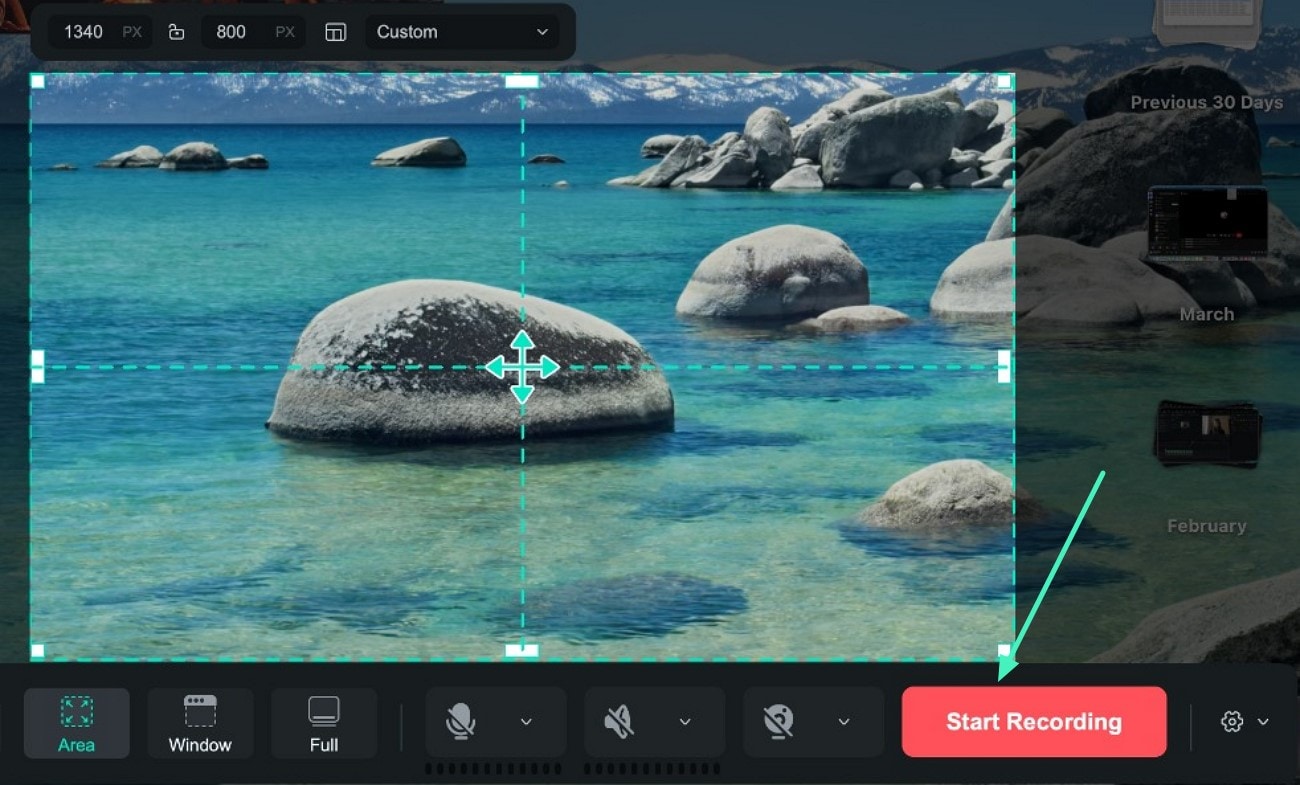
Step 1. Pick the Preferred Recording Mode
After entering the recorder interface, select the desired mode from Area Recording, Full Screen Recording, or Window Recording. To record a custom section, choose Area Recording and drag the cursor to adjust the recording frame according to your needs.
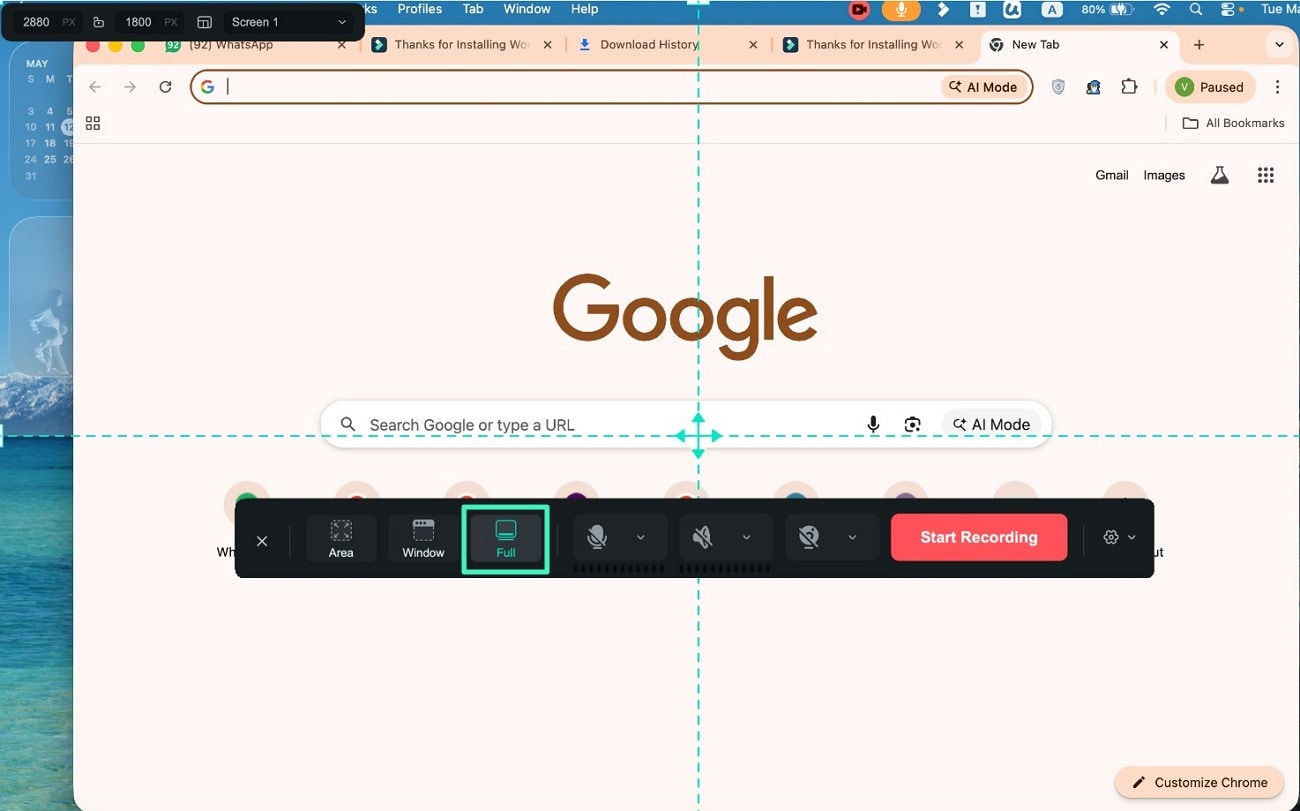
Step 2. Use Full Screen Capture
To record the entire display, switch to Full Screen Recording. Filmora highlights available displays on the screen, allowing you to click and confirm the monitor you want to capture.
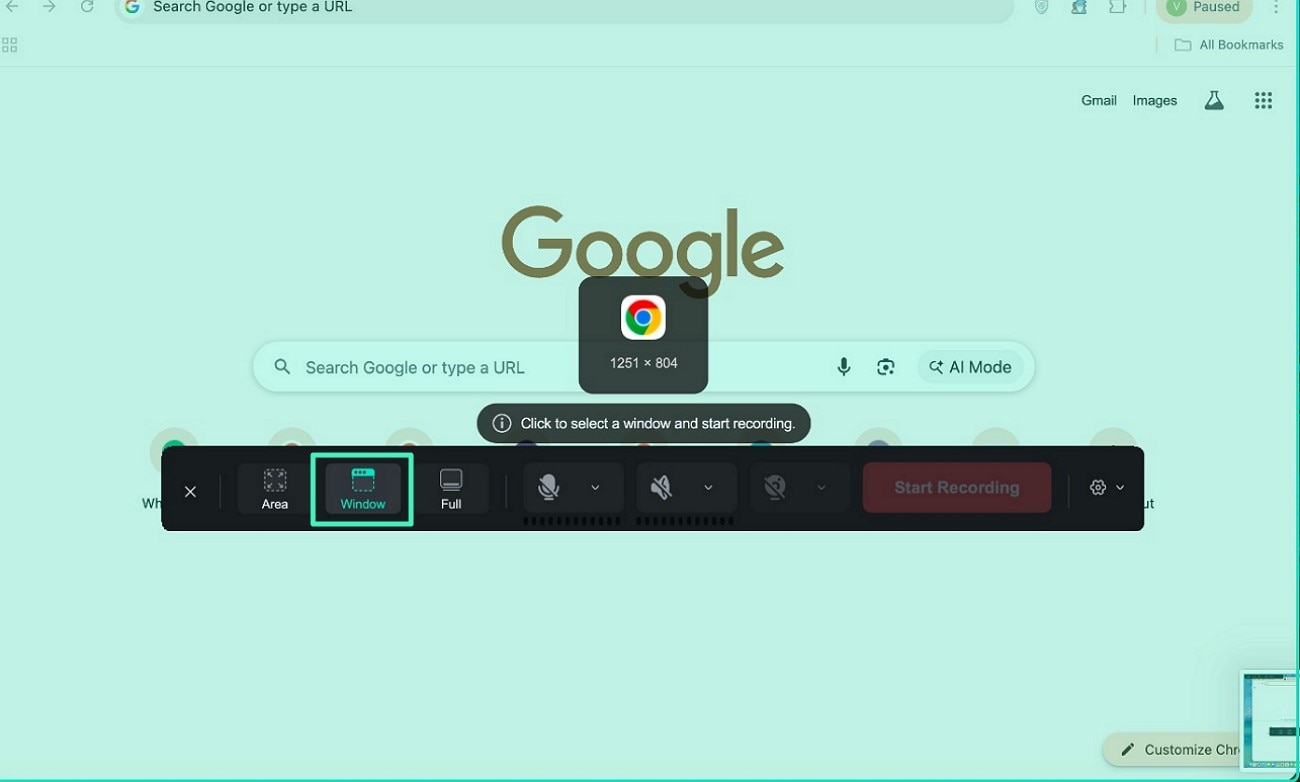
Step 3. Select a Specific Window
Choose Window Recording if you only want to capture a specific application window. Hover the cursor across open apps, and Filmora automatically detects the selected window for recording.
Step 4. Adjust Recording Preferences
Open the settings panel to customize recording options like frame rate, output quality, recording countdown, and mouse click visibility. After finalizing the settings, click the Start Recording button to begin capturing.
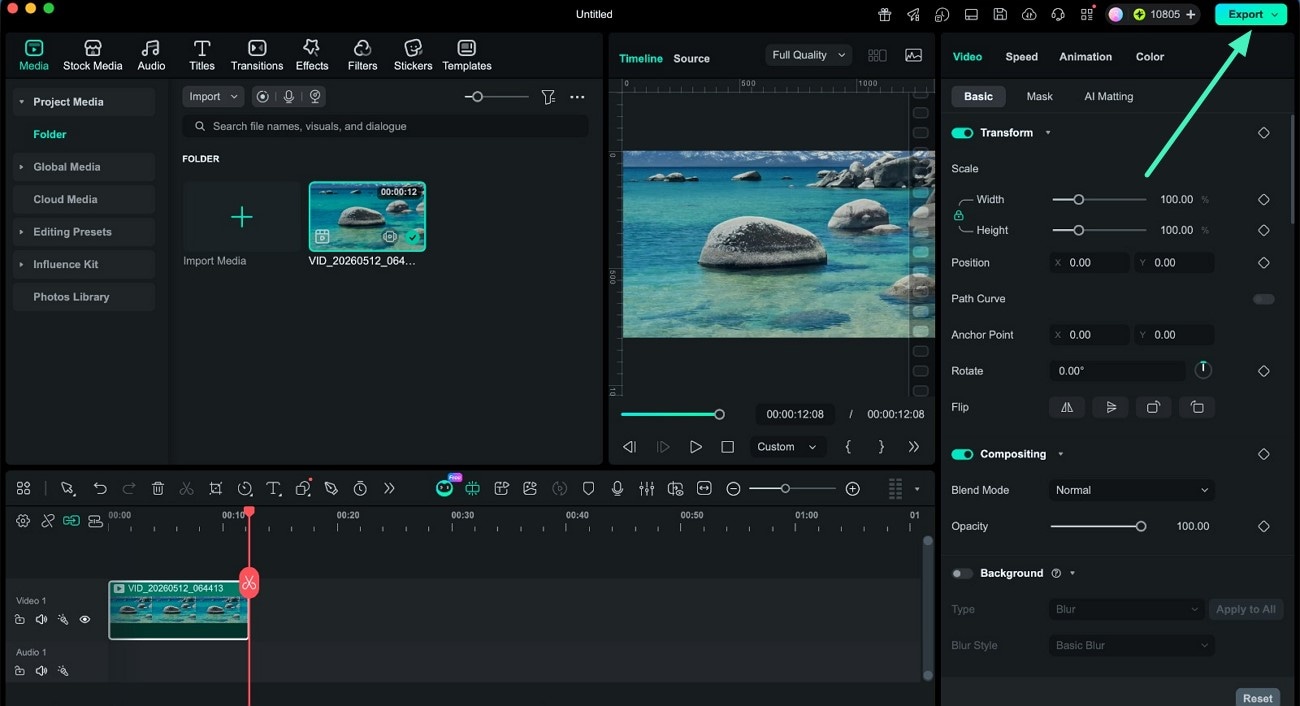
Step 6. Review and Export the Recording
After stopping the recording, the captured video is automatically added to Filmora’s editing timeline. Enhance the video with edits, transitions, or effects, then click the Export button to save the finished file to your Mac.
Related Posts
Featured Articles
Learn more popular articles from Wondershare.
How to Add a Logo in Premiere Pro: From Static Watermarks to Stunning Animated Logos
Want to give your mundane brand logos a dynamic touch? Read this article to learn how to add a logo in Premiere Pro, along with its alternative.
How to Add Captions to YouTube Videos: Top 3 Methods + Bonus
Learn how to edit YouTube captions right on the platform and use a more professional option.
Best Secret Voice Recorder Apps For Android & iOS [2026]
Are you searching for resources to capture audio without letting anyone know? Read this article to learn about the best secret voice recorder apps of all time.
Recommended User Guide
Learn how to use more features.
