Filmora Image to Video for Mac
The Image-to-Video functionality in Filmora for Mac allows you to create compelling visual content by converting your mundane images into video masterpieces. The new Filmora update has added the Veo 3 model, which creates high-quality video with audio from images. Apart from that, you can select templates from a vast library and transform your imported content into anything.
📌Note:
The V3.1 and Sora2 models used for Filmora's image-to-video features will be available after version 15.1.0.
Entry 1. Acquire the Video Generation Section
Mode 1. Image to Video - Veo 3
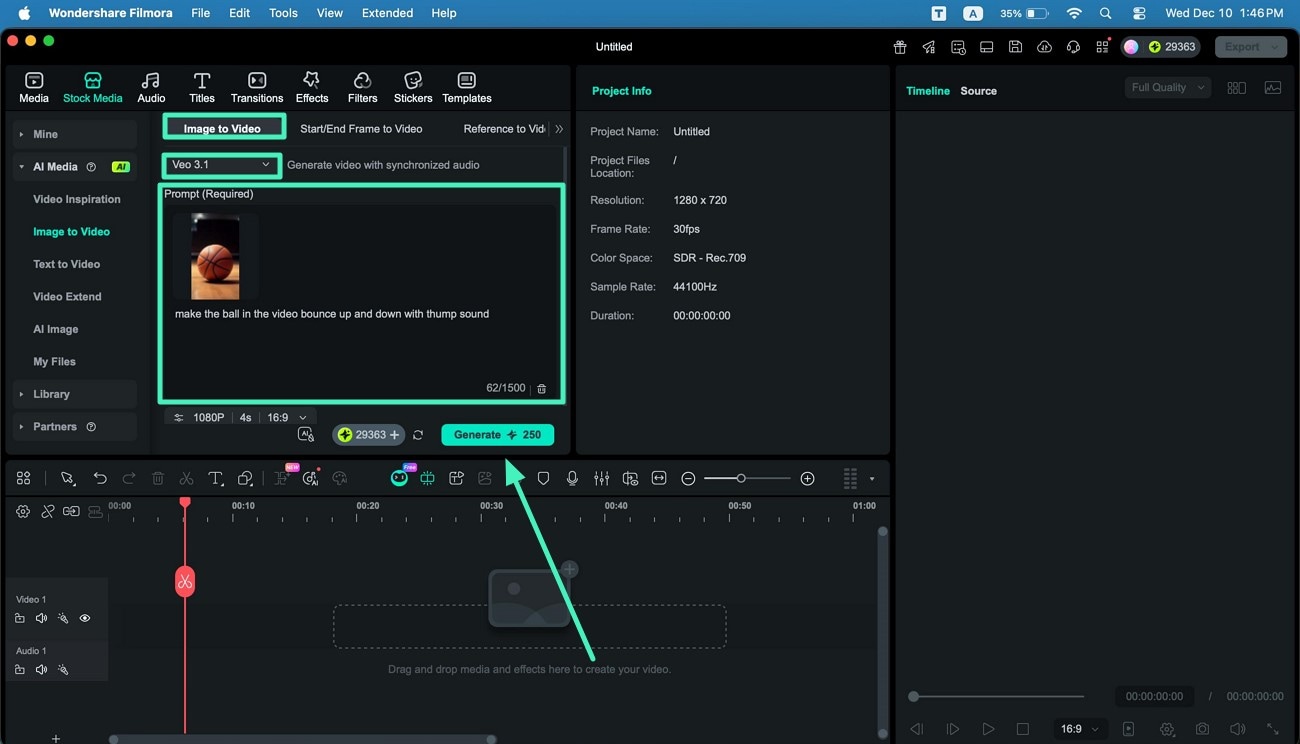
Step 1. Choose Image to Video - Veo 3 for Video Generation
After accessing the Image to Video section from the Stock Media panel, opt for the Image to Video section within AI Media and enable the Image to Video - Veo 3 section. Next, add the image you want to convert and enter the text requirements below. Define the Resolution and Duration of the image generation and enable the AIGC Usage Agreement toggle. Finally, press the Generate button to start the generation.
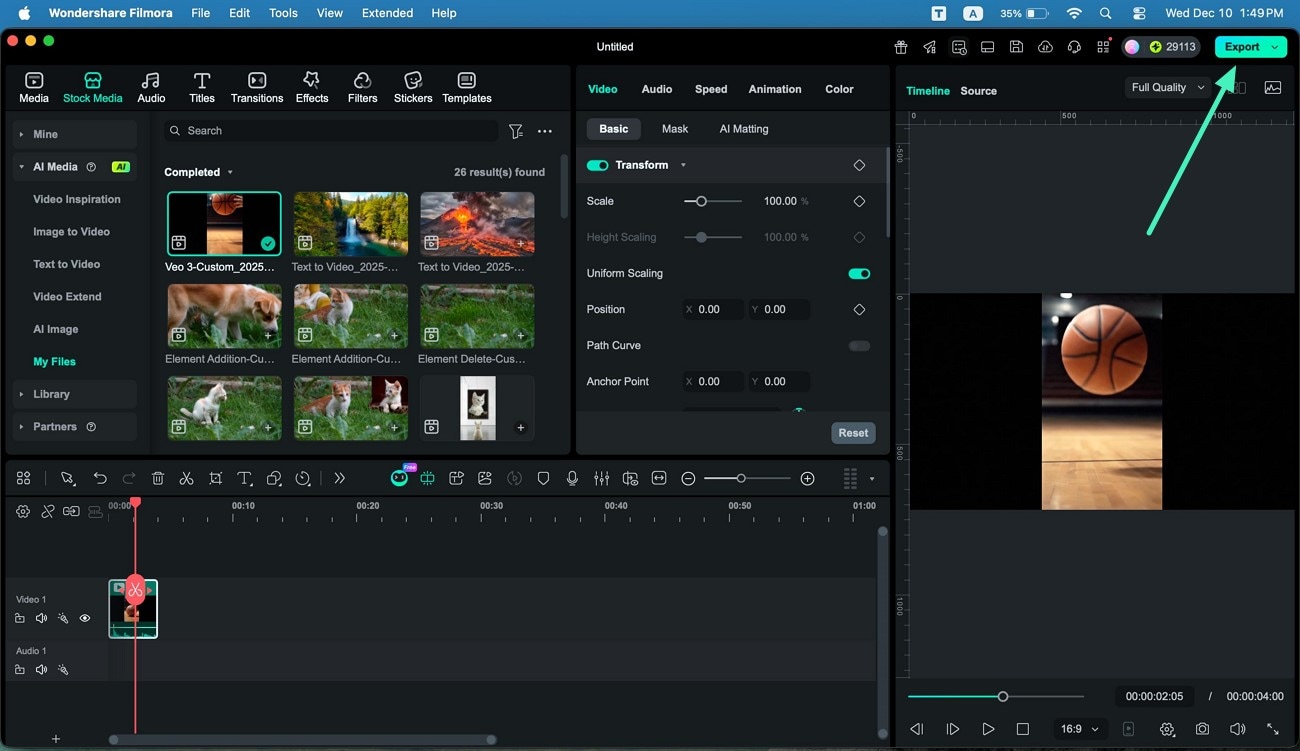
Step 2. Preview the Generated Video and Save
Preview the video once it is generated within the preview window and hit the Export button to successfully save it to your system.
Mode 2. Image to Video – Sora 2
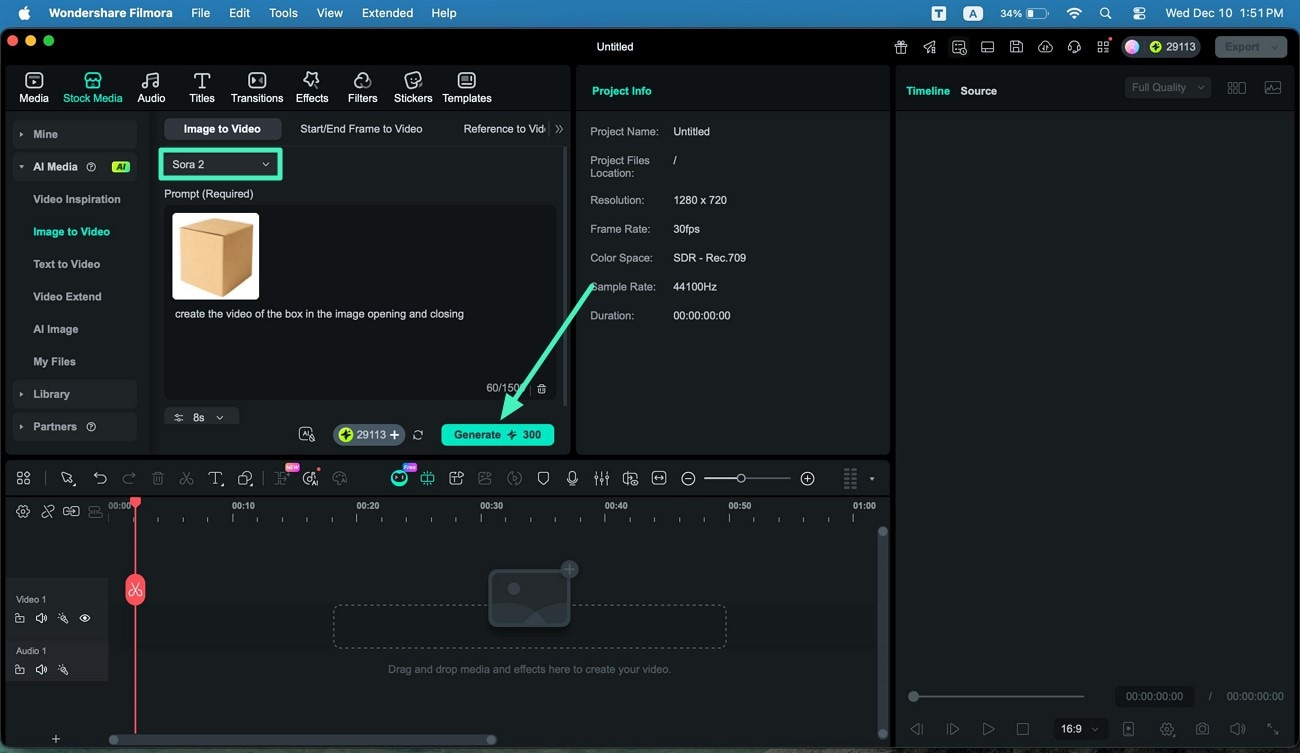
Step 1. Select the Sora 2 Model
Open the mode dropdown and pick the Sora 2 option. Upload your chosen image, enter your text prompt, and then click the Generate button inside the interface to begin processing.
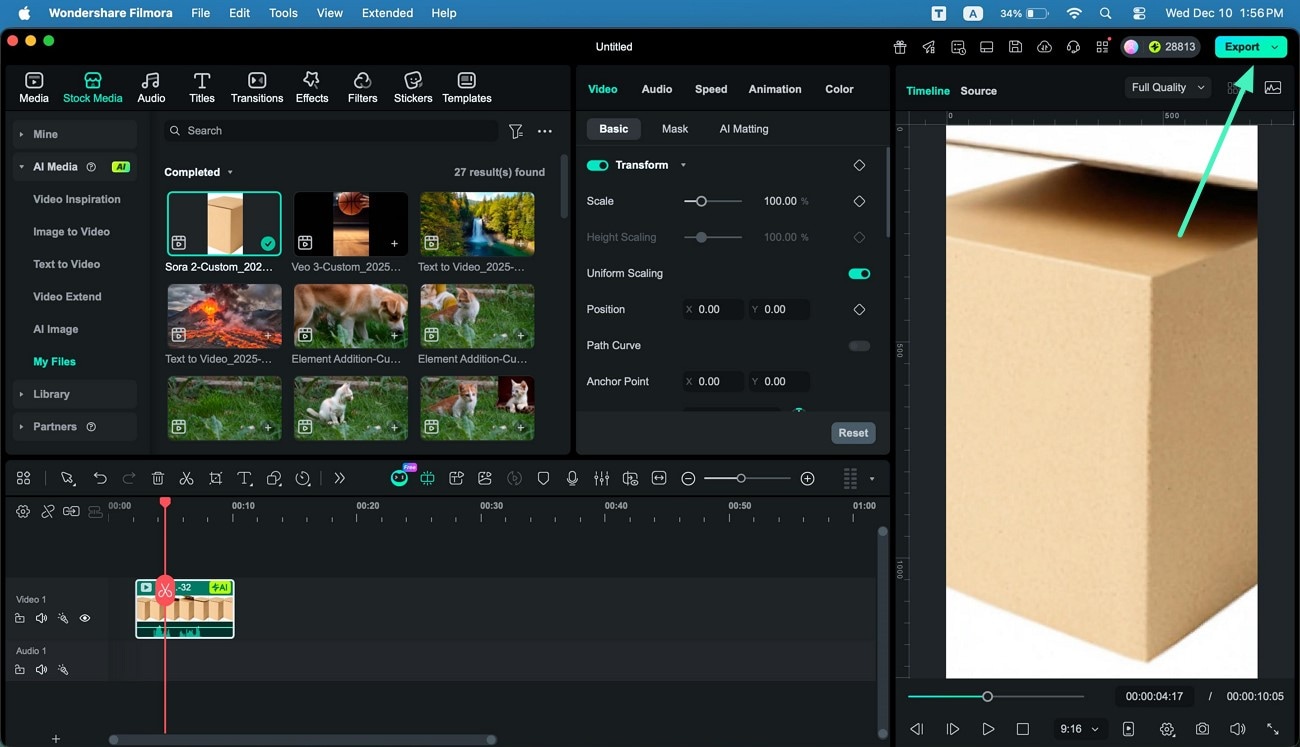
Step 2. Review and Adjust the Output
After Filmora finishes generating the video, refine it with the available editing tools. When you’re satisfied, press the Export button in the top-right corner to save your creation.
Mode 3. Image to Video – Standard 2.0
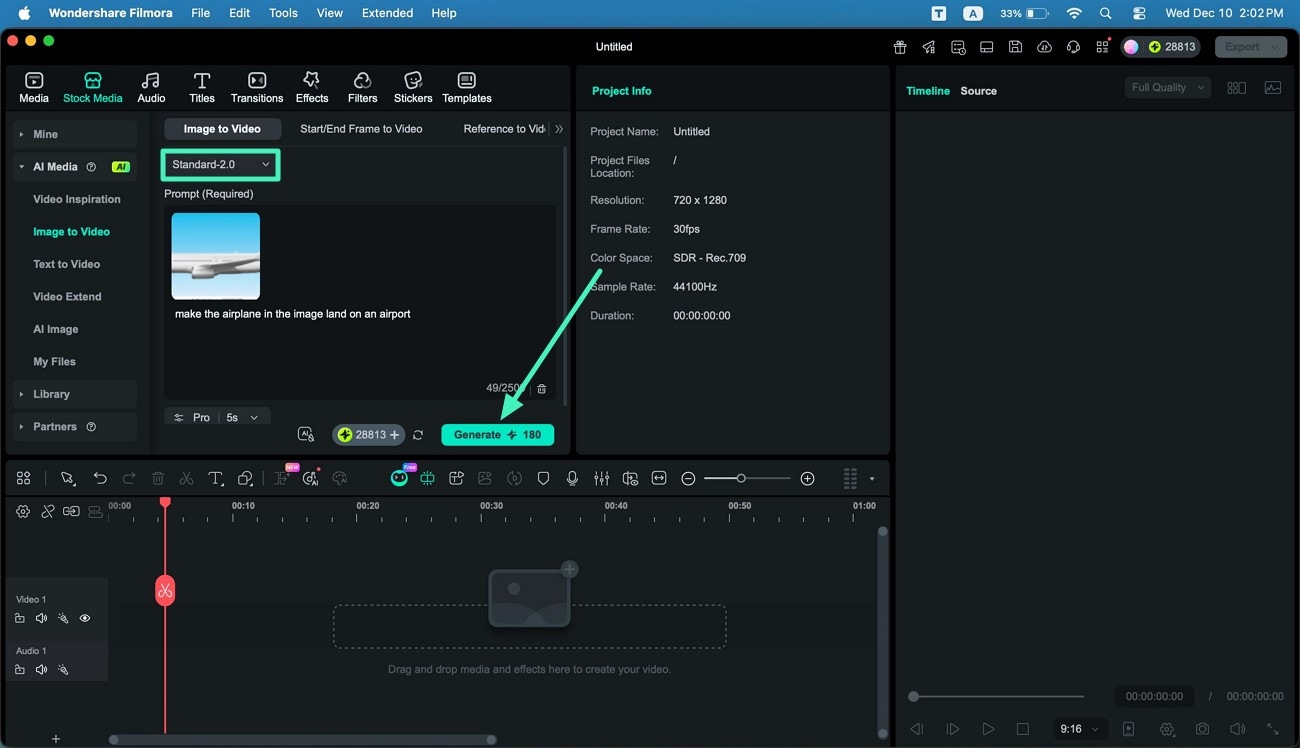
Step 1. Enable Standard 2.0 Mode
From the Image-to-Video section, open the mode dropdown and choose Standard 2.0. Insert the image you want transformed and write your instructions in text. After setting your details, click Generate to start.
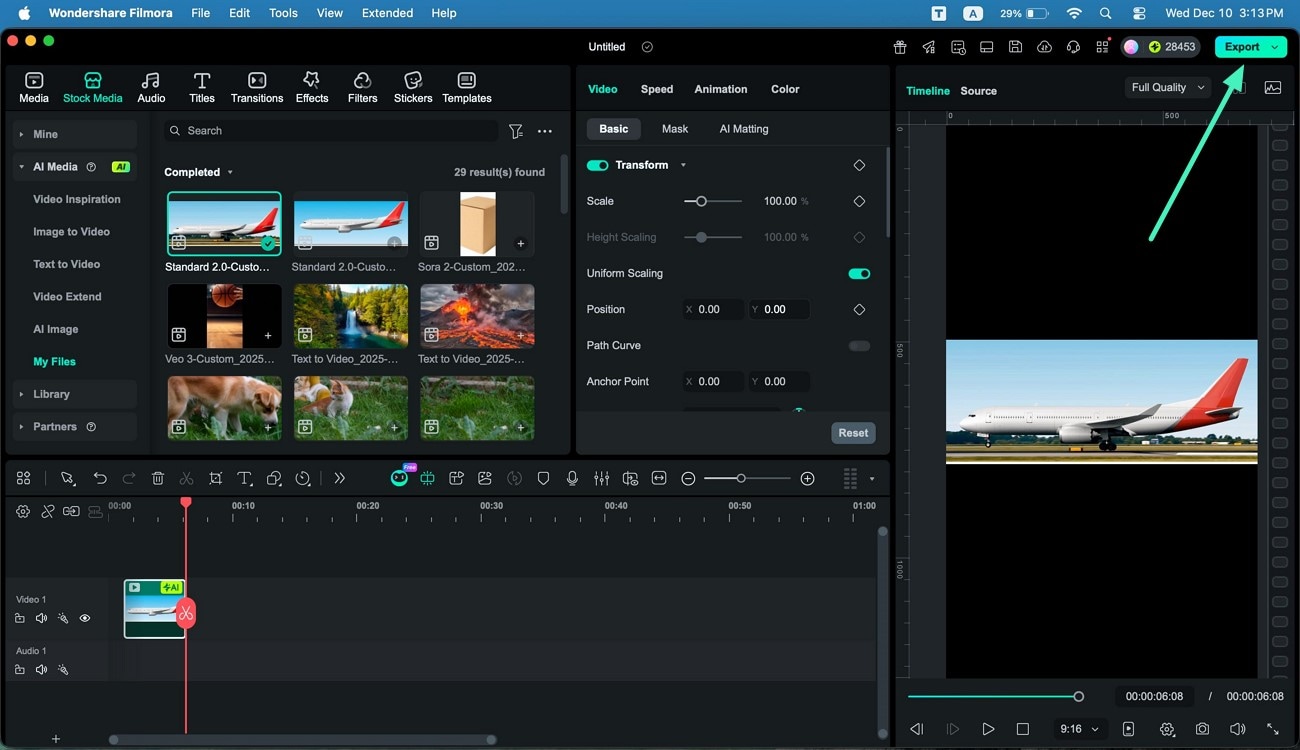
Step 2. Preview, Edit, and Save
Once the clip is produced, watch it in the preview window or fine-tune it with Filmora’s editing tools. When finished, hit Export to store the final video.
Mode 4. Image to Video – Standard 1.0
Step 1. Navigate to Standard 1.0
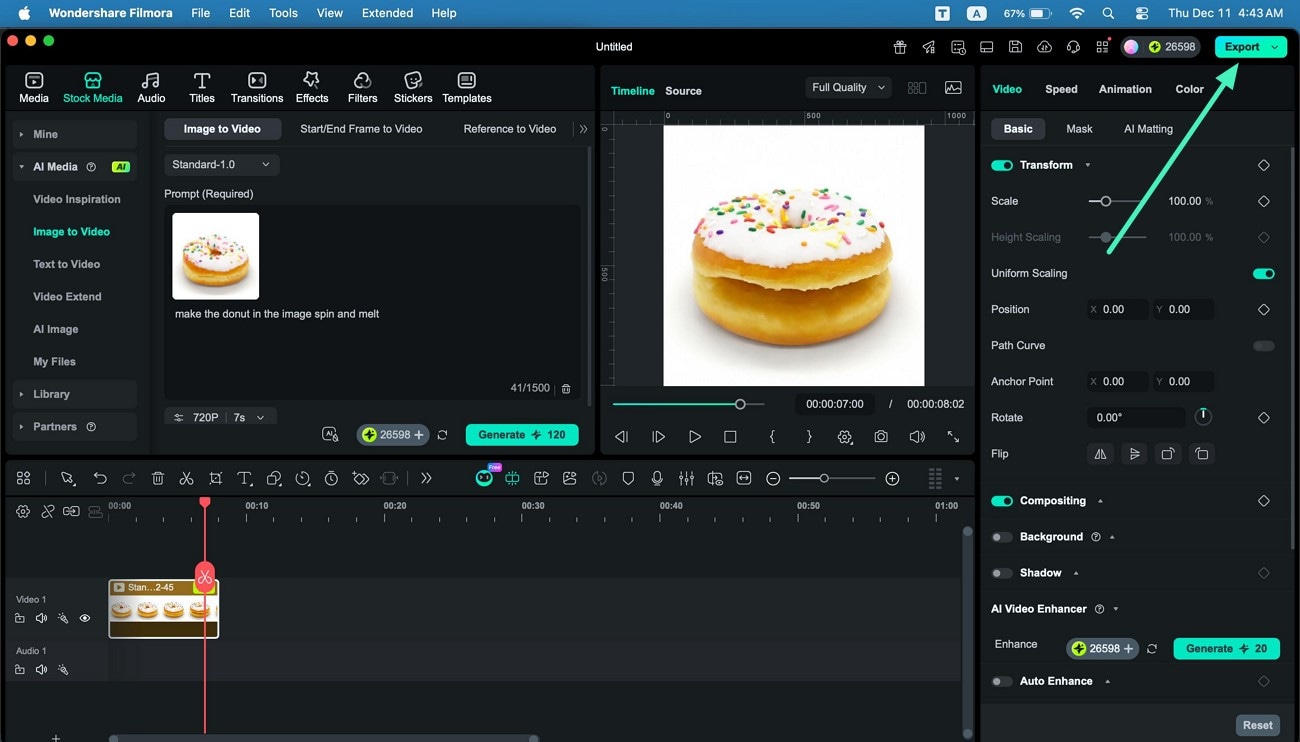
Enter the Image-to-Video feature and pick the Standard 1.0 mode from the dropdown list. Upload your image and specify your text requirements. Then choose your preferred Duration and Resolution before selecting Generate.

Step 2. Enhance and Export the Video
After Filmora completes the generation, adjust the video using any editing options you need. When everything looks right, click Export to download the completed file to your device.
Mode 5. Start/End Frame to Video
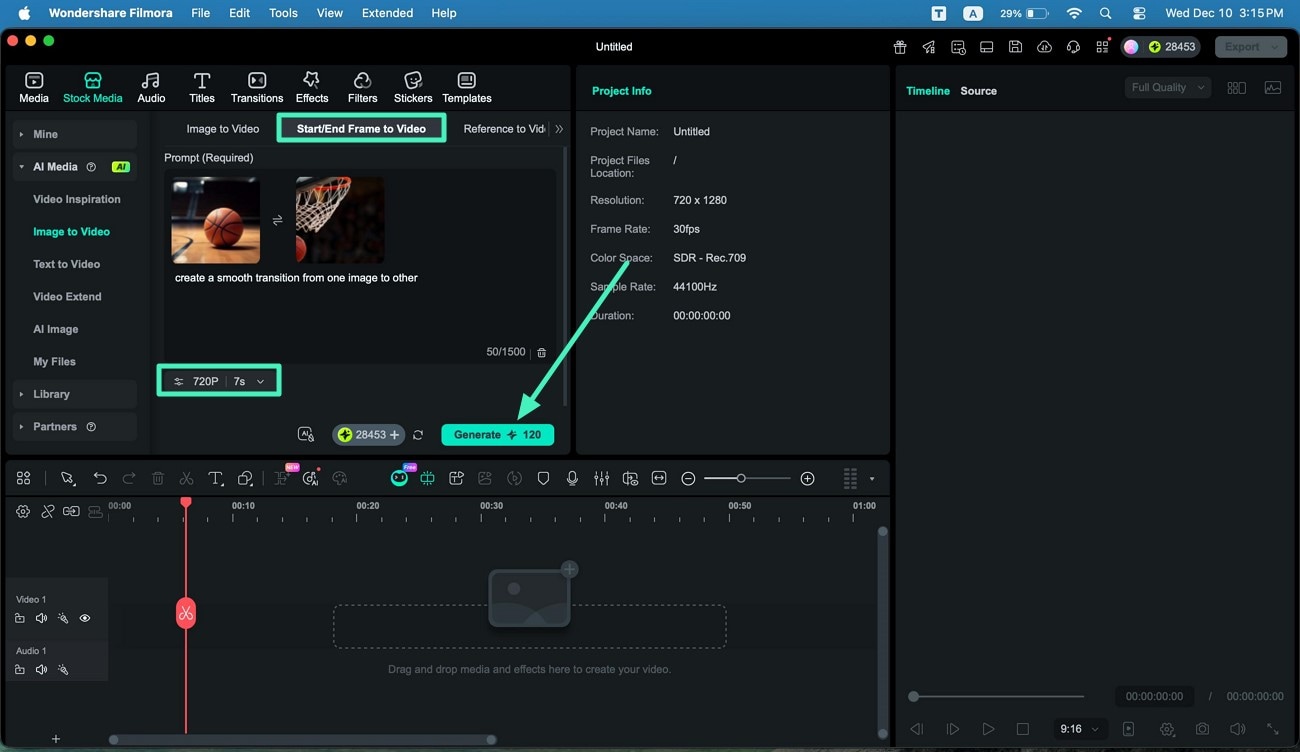
Step 1. Insert Frame Images and Generate
Navigate to the Start/End Frame to Video section and add the start and end images into the designated fields. Next, type the text prompt, define other essential parameters, and hit the Generate button to execute the image-to-video generation process.
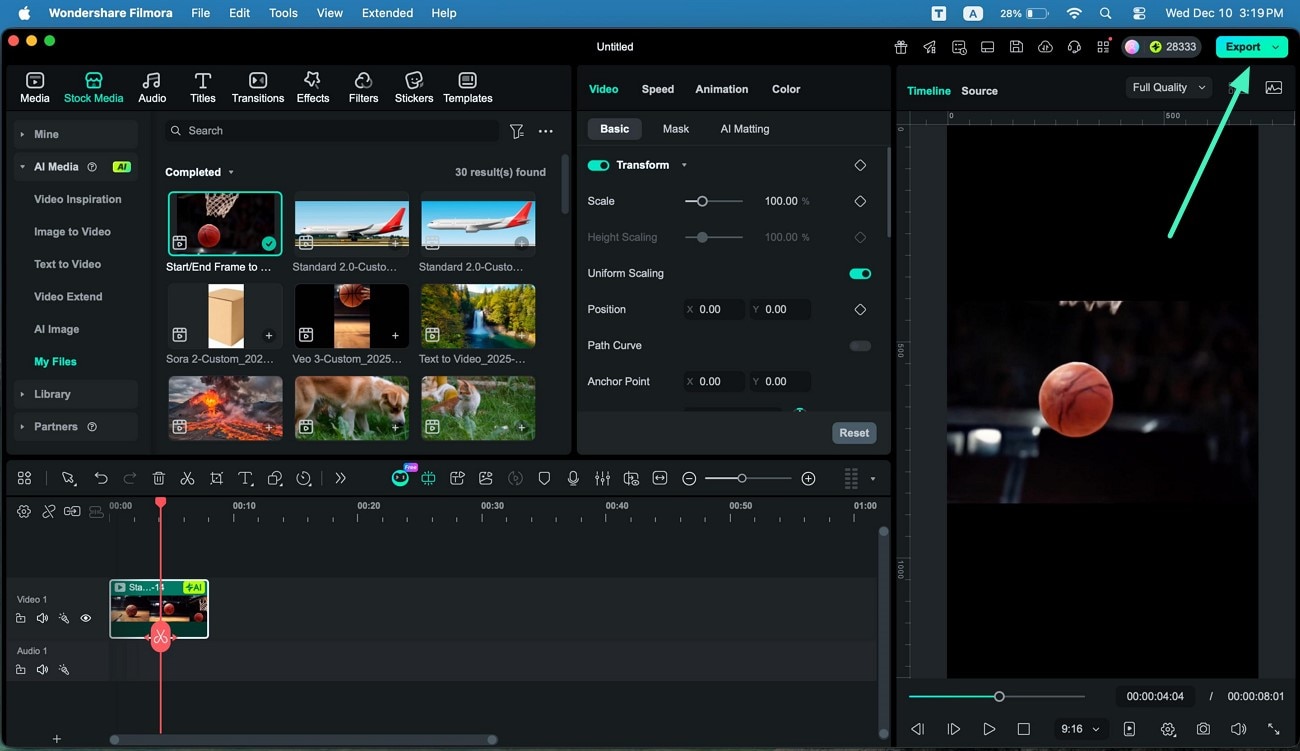
Step 2. Play the Video and Export
Once the video is generated, add elements according to your requirements and press the Export button to export the video to your device.
Mode 6. Reference to Video
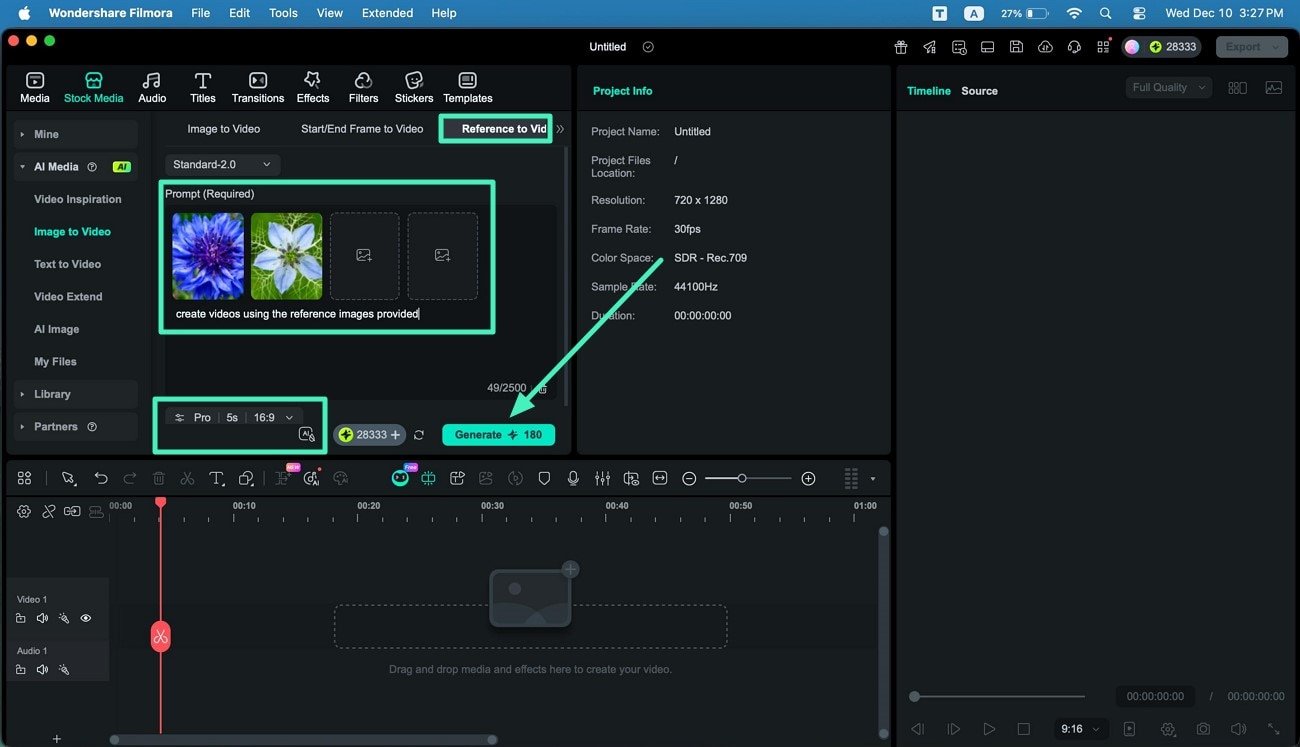
Step 1. Start by Adding Reference Images and Then Generate
Begin the process by adding reference images under the Reference to Video section and input the text prompt. Next, choose the Resolution, Duration and Aspect Ratio along with the AIGC Usage Agreement toggle before pressing the Generate button.
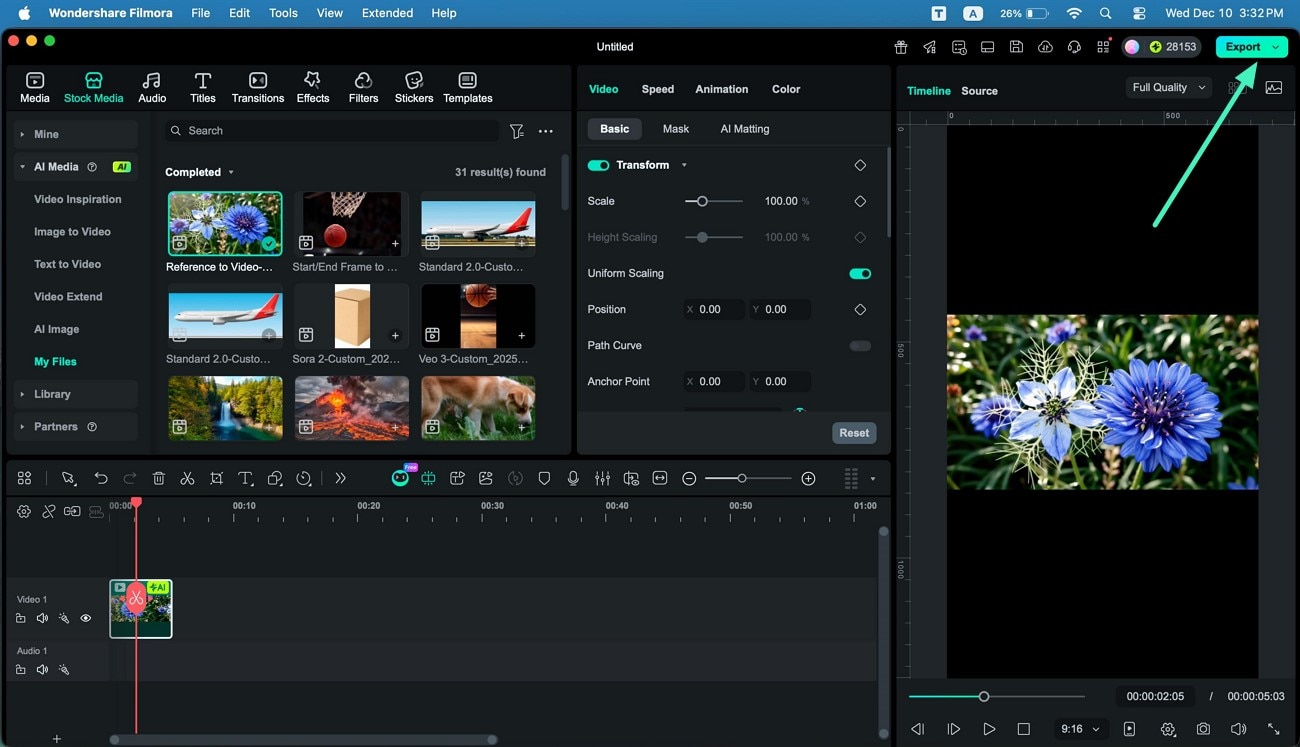
Step 2. Make Changes to the Video And Save
When the video is created, play it within the preview window and make changes if required. Finally, head to the top-right corner of the interface and press Export to save the video.
Mode 7. Video Editing Element
This feature allows you to merge images and videos to create a video with various changes. You can replace an element with another one or delete an existing one by inserting the corresponding image.
Add Element
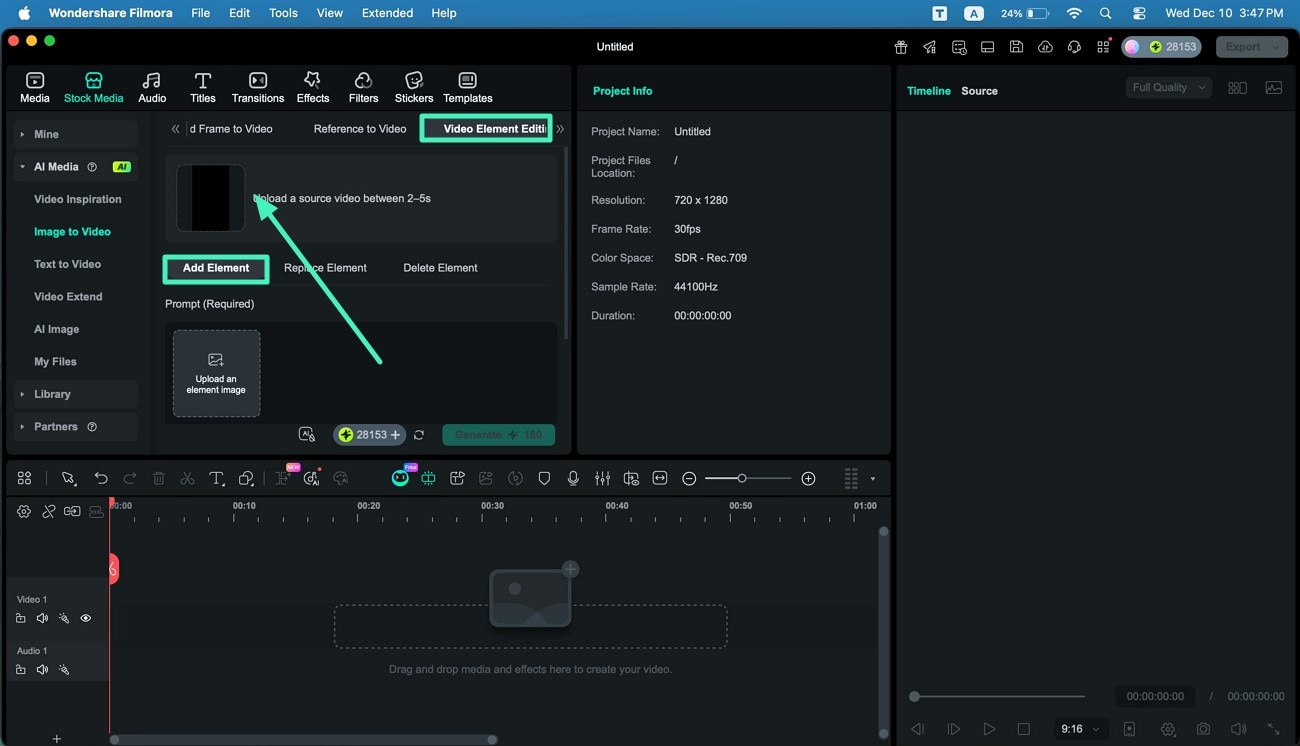
Step 1. Select Video Element Editing and Add Element
Access the Video Element Editing section within the Image to Video tab, enable the Add Element option, and import the source video using the designated option.
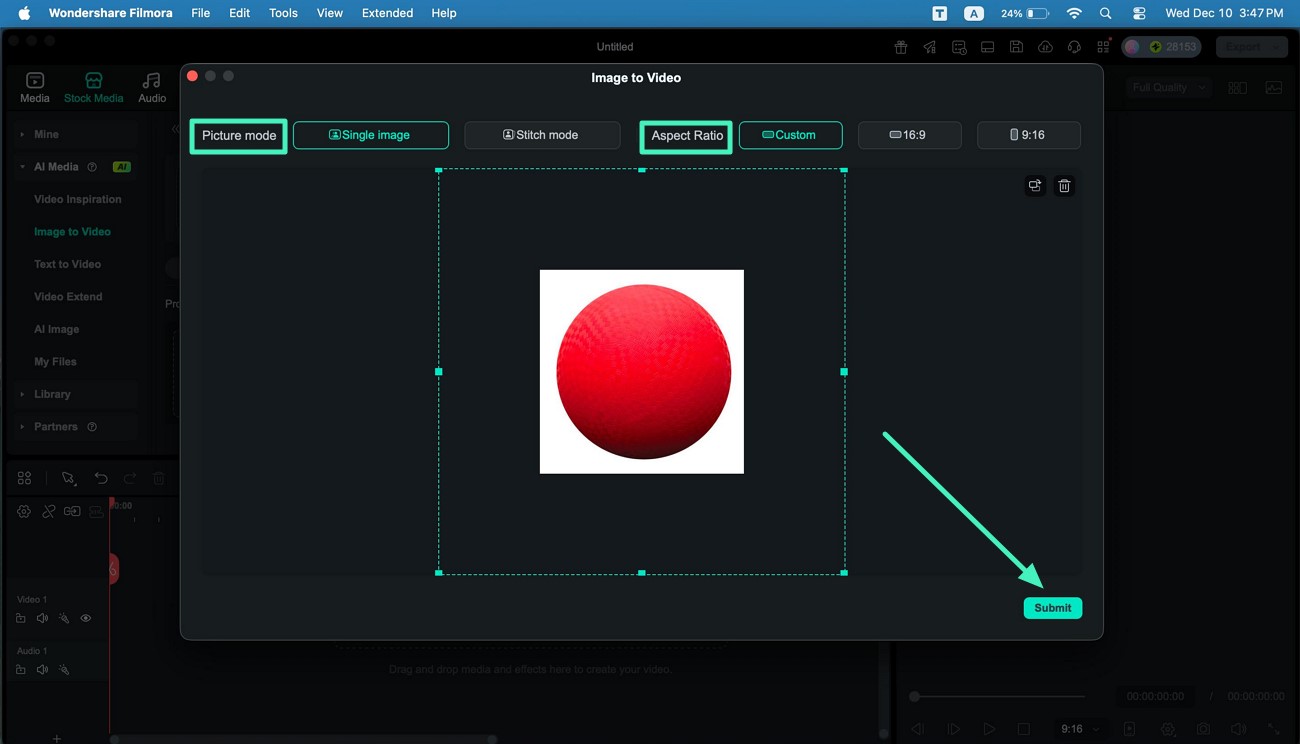
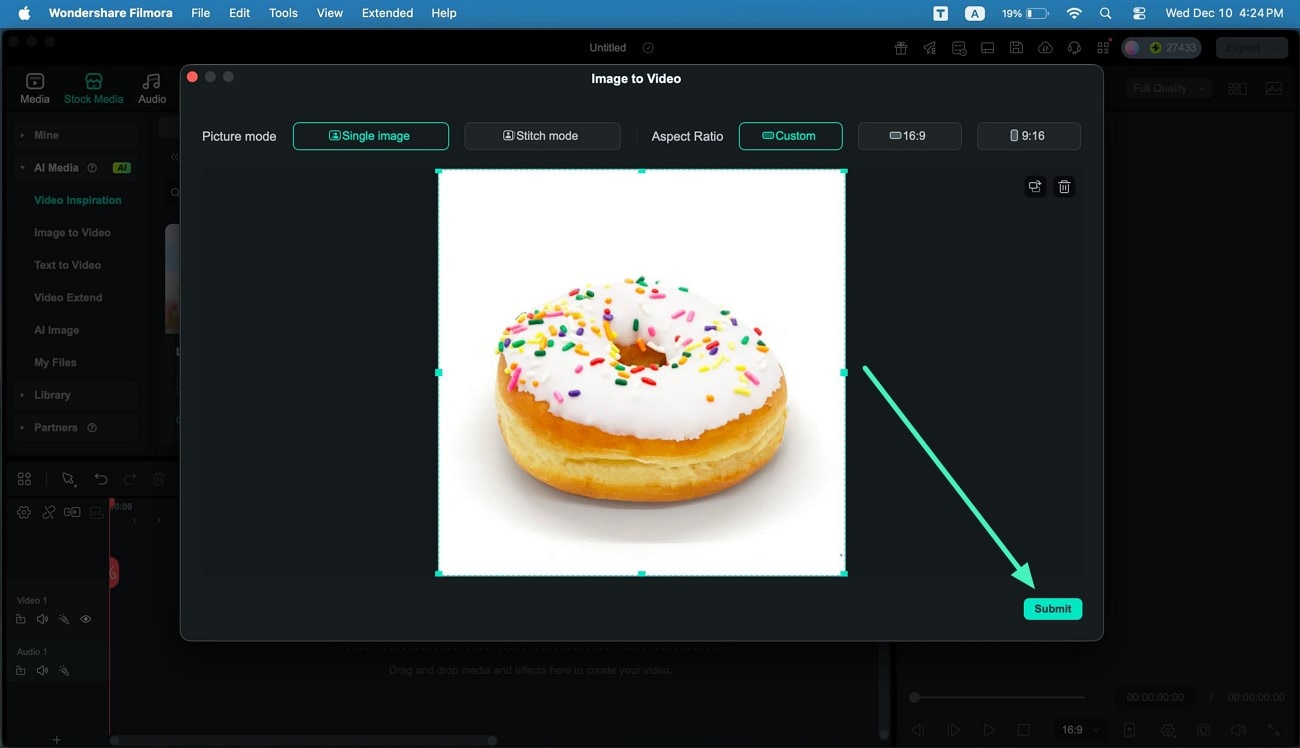
Step 2. Add Image After Cropping
Upload the image to add as an element, choose the Picture Mode, and select the Aspect Ratio. Save the applied changes by clicking on the Submit button located at the bottom.
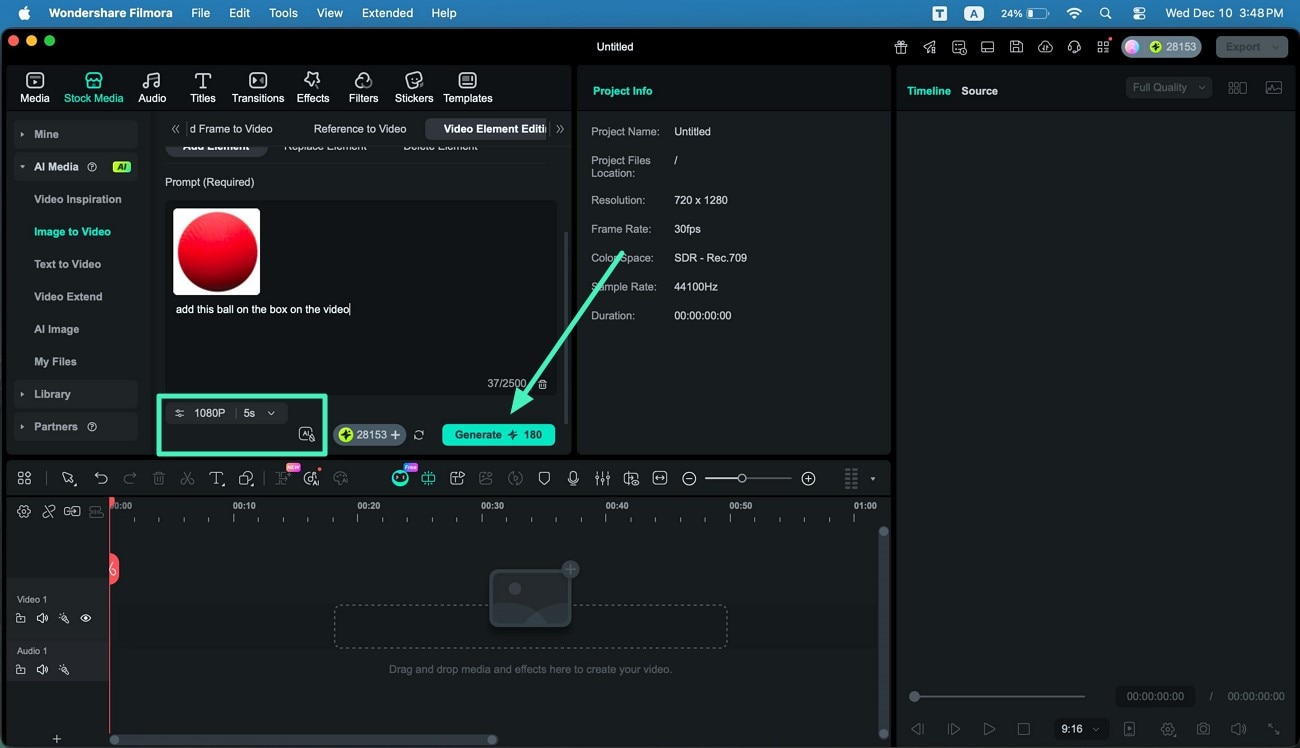
Step 3. Add Prompt and Configure Settings
Once the media is imported, enter the text prompt and expand Settings to set Duration and Resolution. After enabling AIGC Usage Agreement option, hit the Generate button located within the interface to start the process.
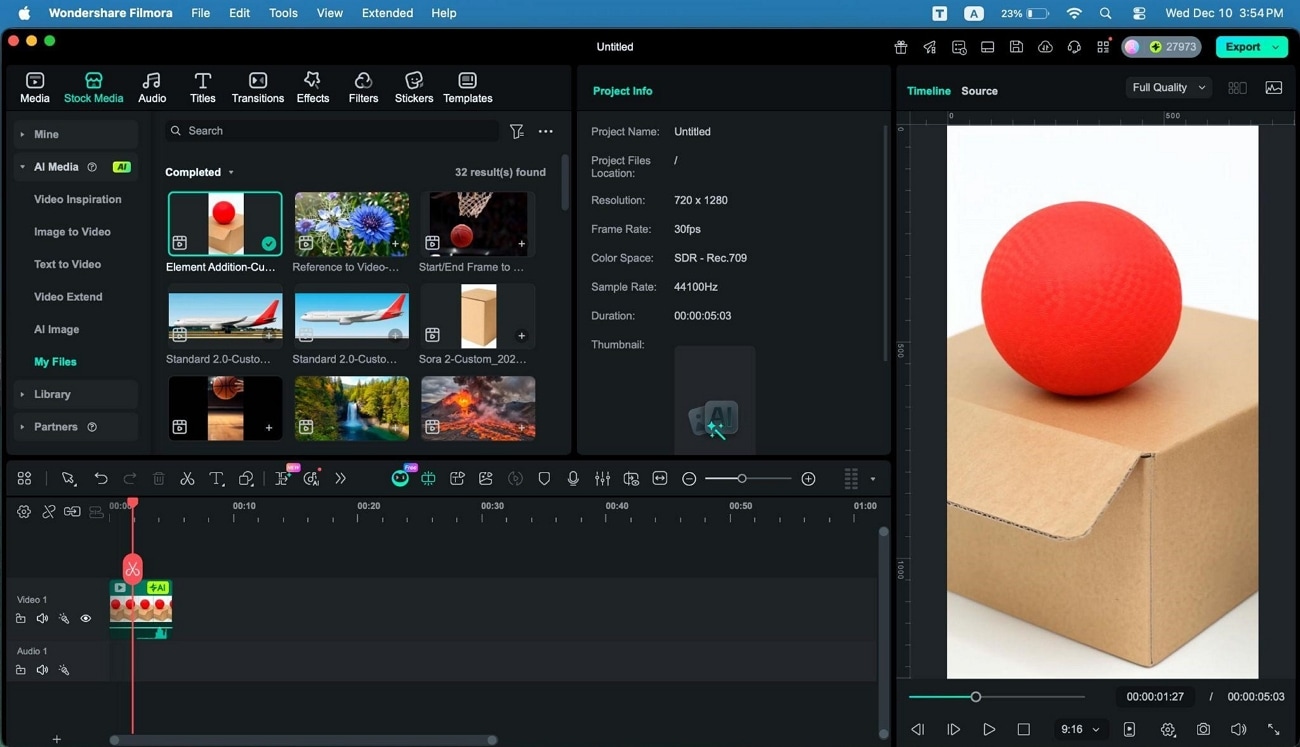
Step 4. Edit the Video and Export
After generation, drag the video to the timeline for further editing using Filmora's enhancements. Finally, click Export at the top right to save the completed video.
Replace Element
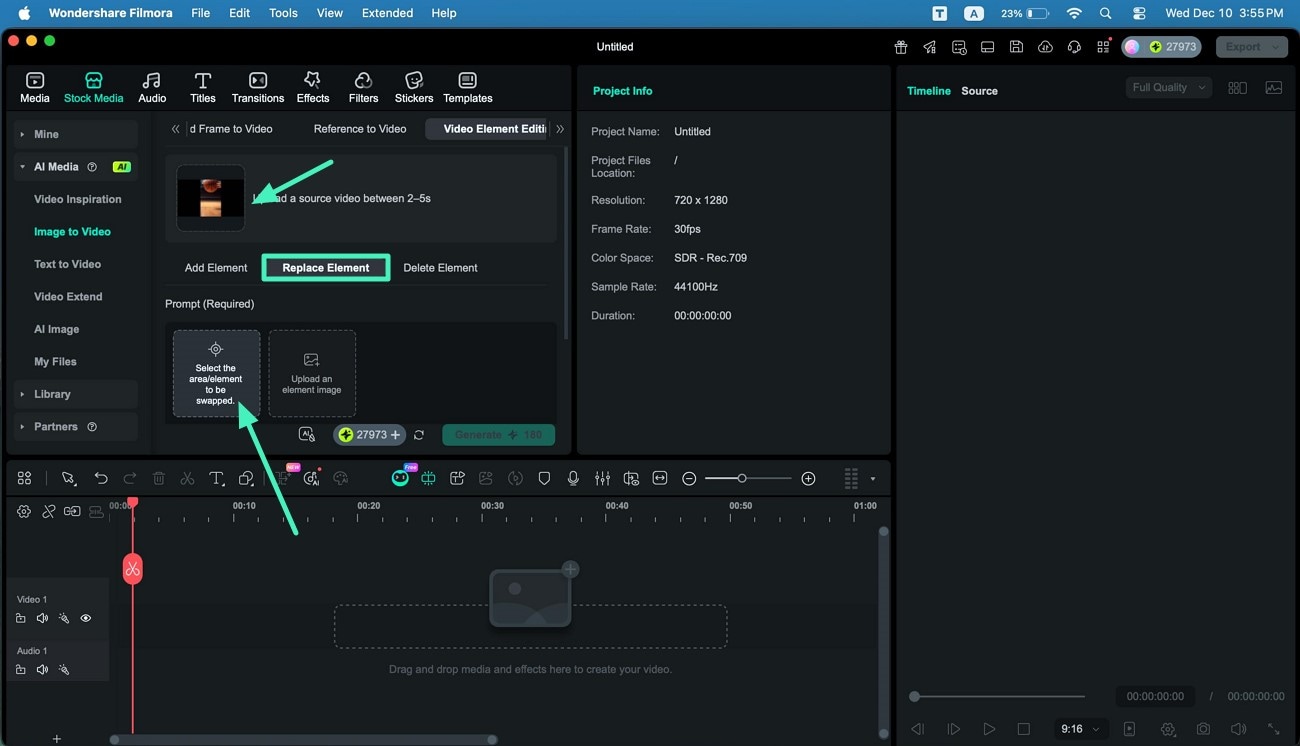
Step 1. Access Replace Element and Add Video
Open the Replace Element section and add the video in which you want to swap an element. Then, click on Select the Area to be Swapped option to enter the following interface.
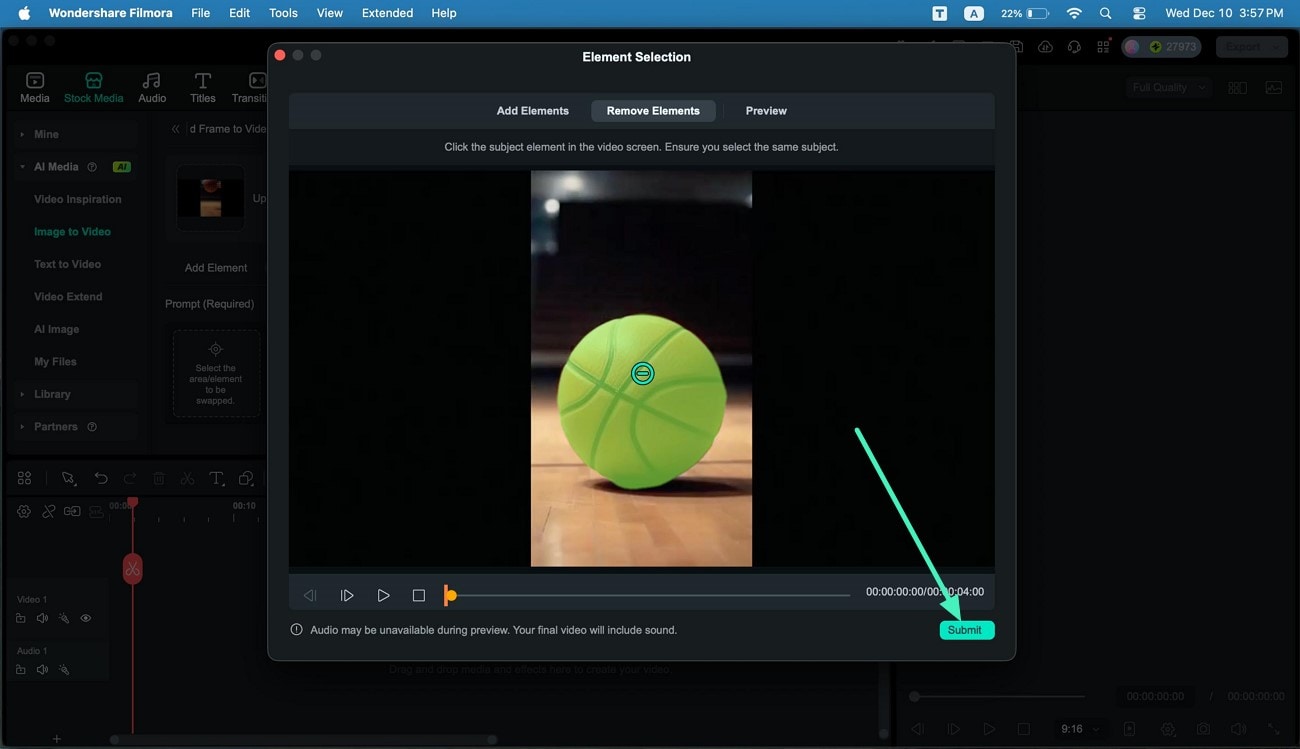
Step 2. Select the Area to be Replaced
In the next window, make the selection for the element you want to remove by clicking on it. Hit the Submit button to save the selection made.
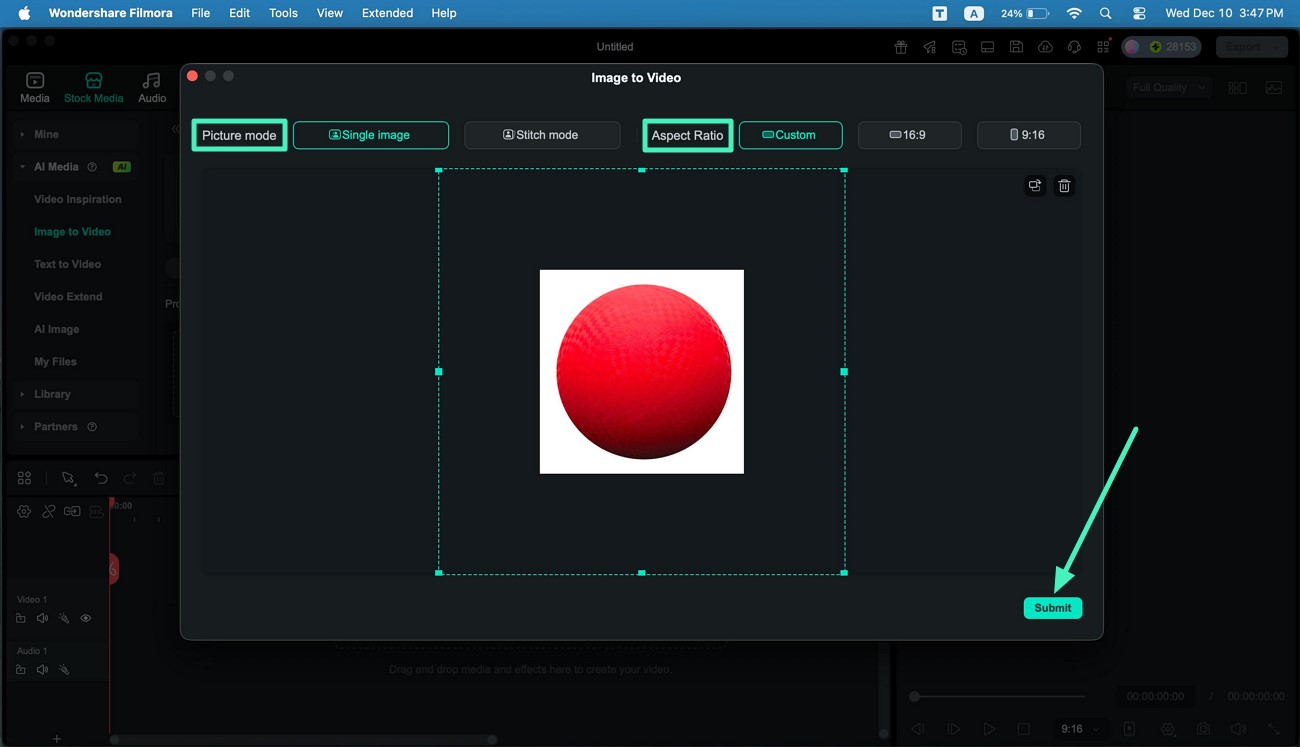
Step 3. Add an Image of the New Element
Once the element is specified, add the image for the element which needs to be induced in the video. Import the image of the element, select Picture Mode and Aspect Ratio, then hit Submit.
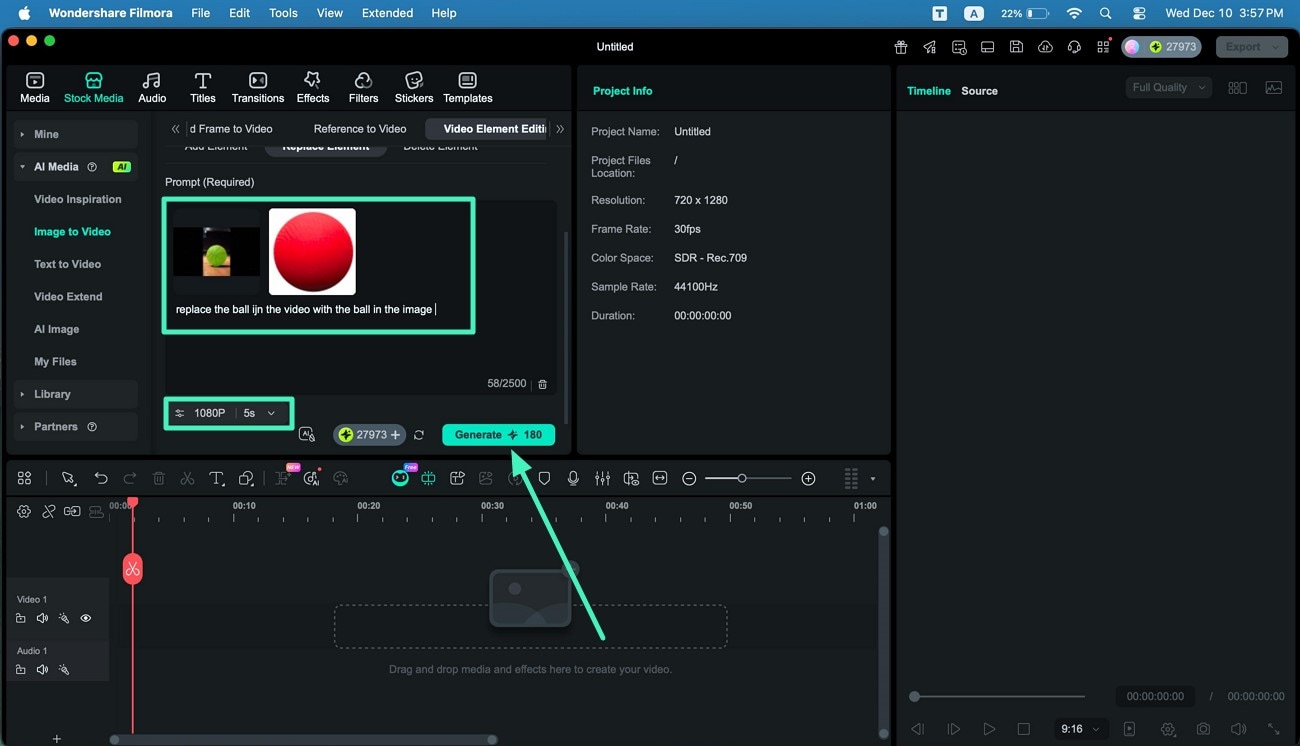
Step 4. Input Text Prompt and Generate Video
Provide the text prompt with details in the designated text field, set Duration and Resolution, and click Generate to begin replacing the element.
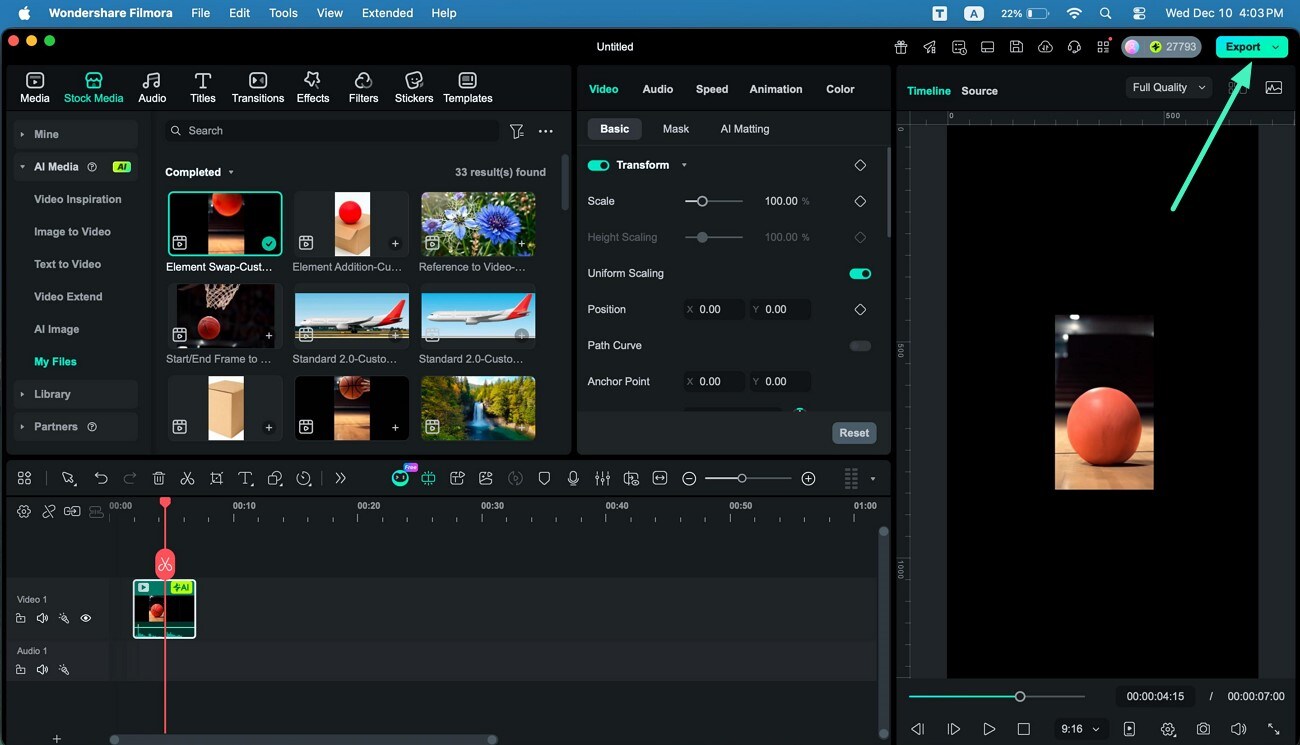
Step 5. Modify Video and Save
Add the generated video to the timeline to apply edits using Filmora's editing tools. Finally, click Export to successfully save the video to your device.
Delete Element
Step 1. Start By Accessing Delete Element Mode
Go to the Delete Element mode under Video Editing Element and add the video where you want to remove the element using the designated option.
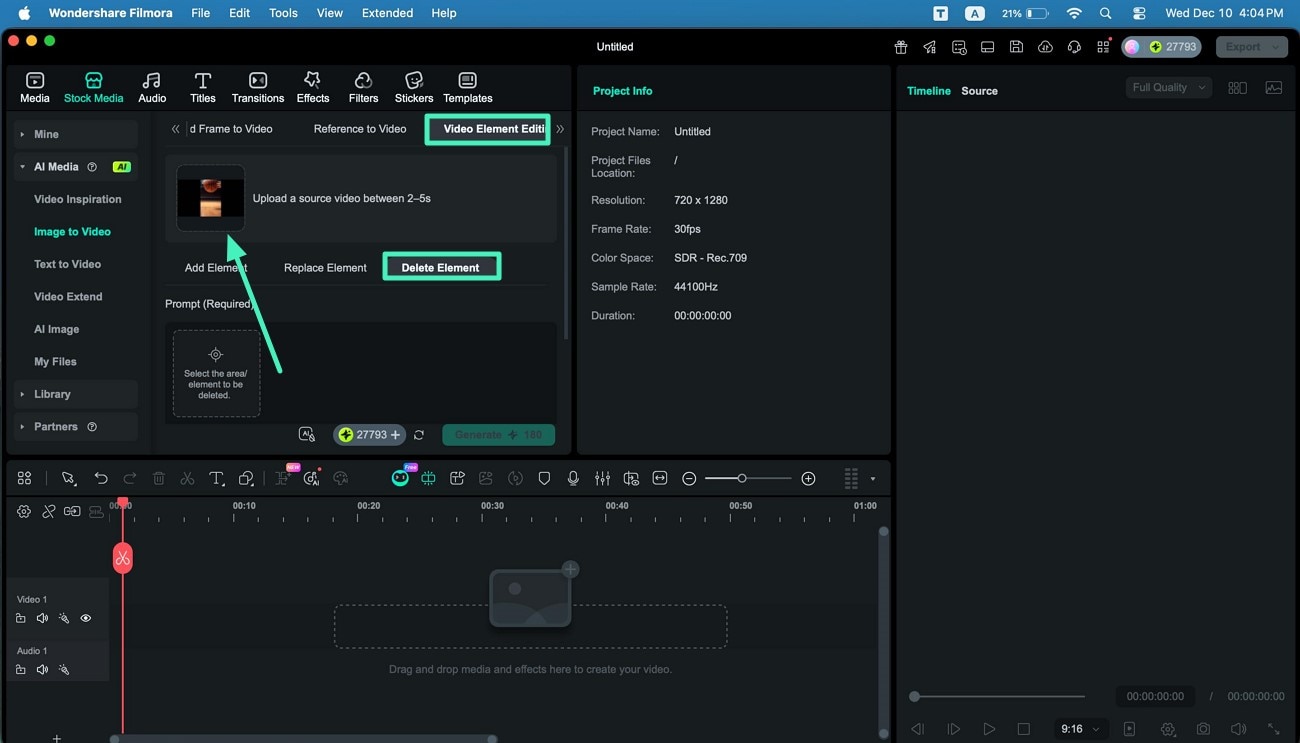
Step 2. Select the Element To Be Removed
In the following interface, select the element that you want to remove by clicking on it and pressing the Submit button.

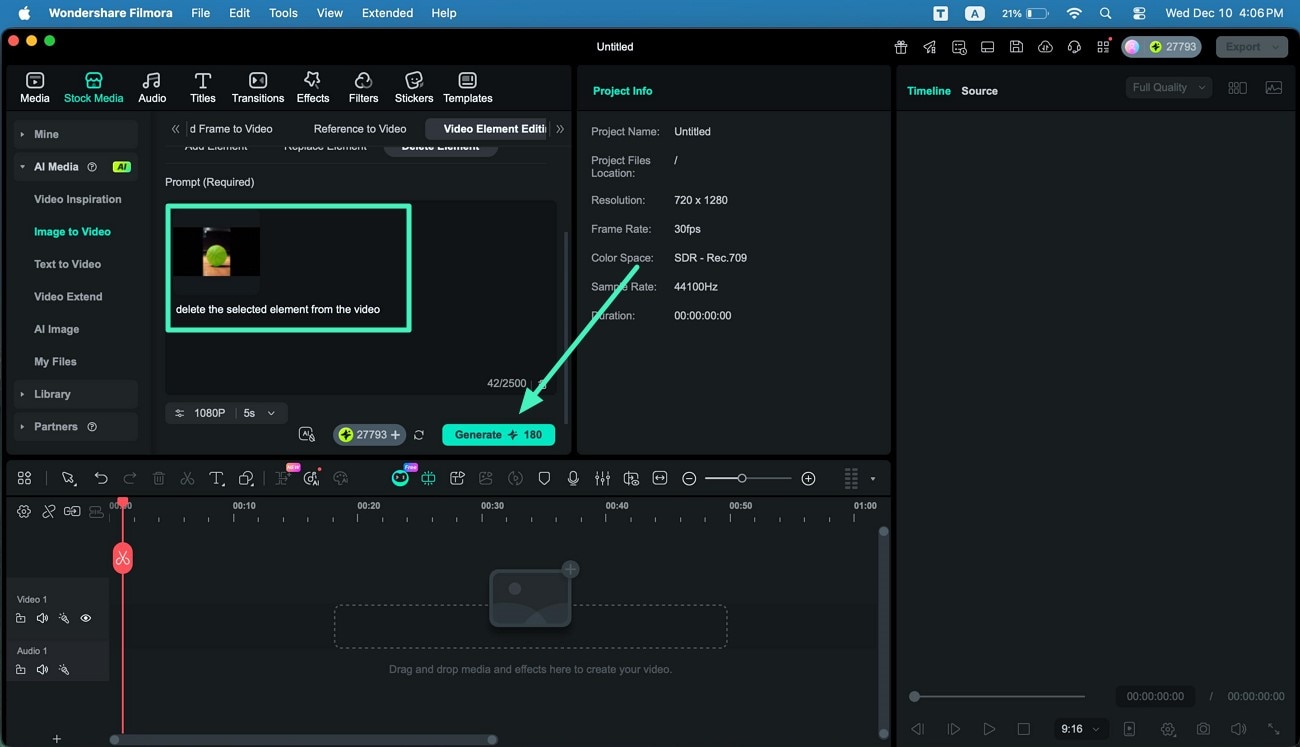
Step 3. Add Text Requirement and Generate
Moving forward, enter the text prompt specifying your requirements in the text field and configure video settings. Finally, press the Generate button located below to start the element removal process.
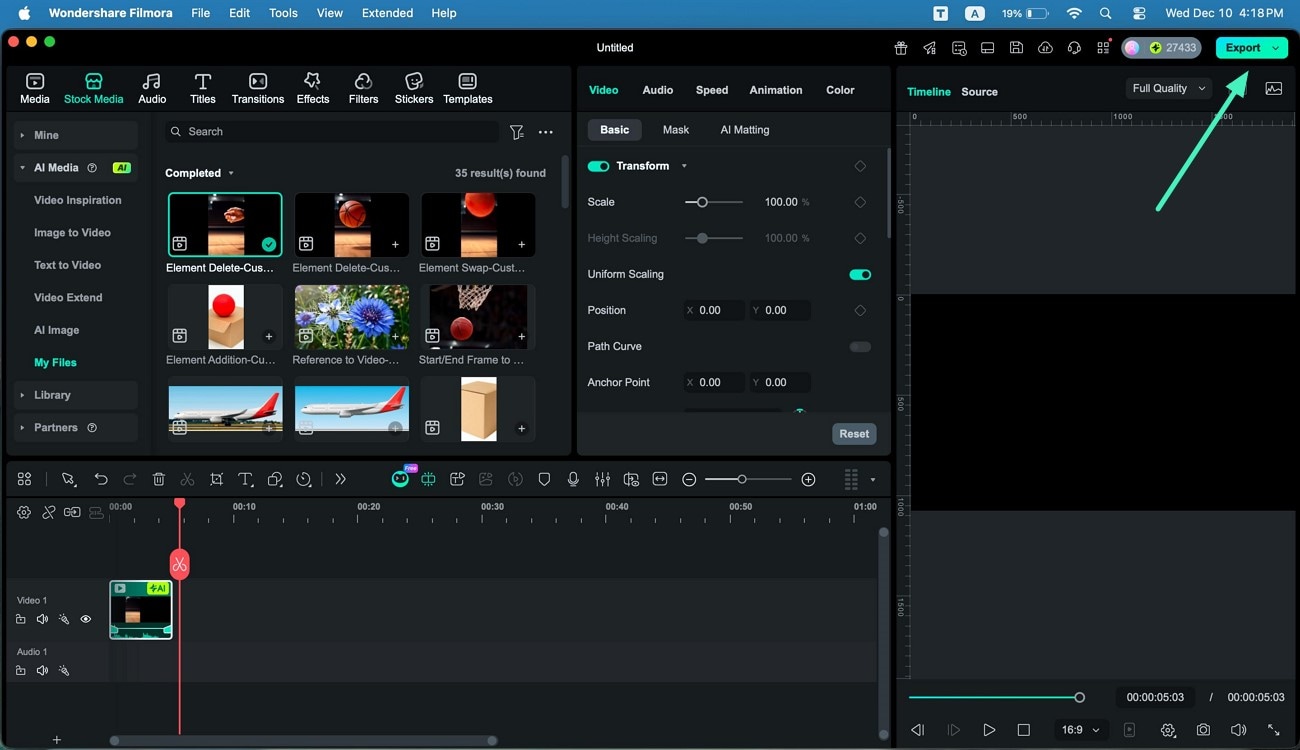
Step 4. Review and Edit the Generated Video
Once completed, drag the video to the editing interface for any necessary adjustments. Click Export to save the final video to your device.
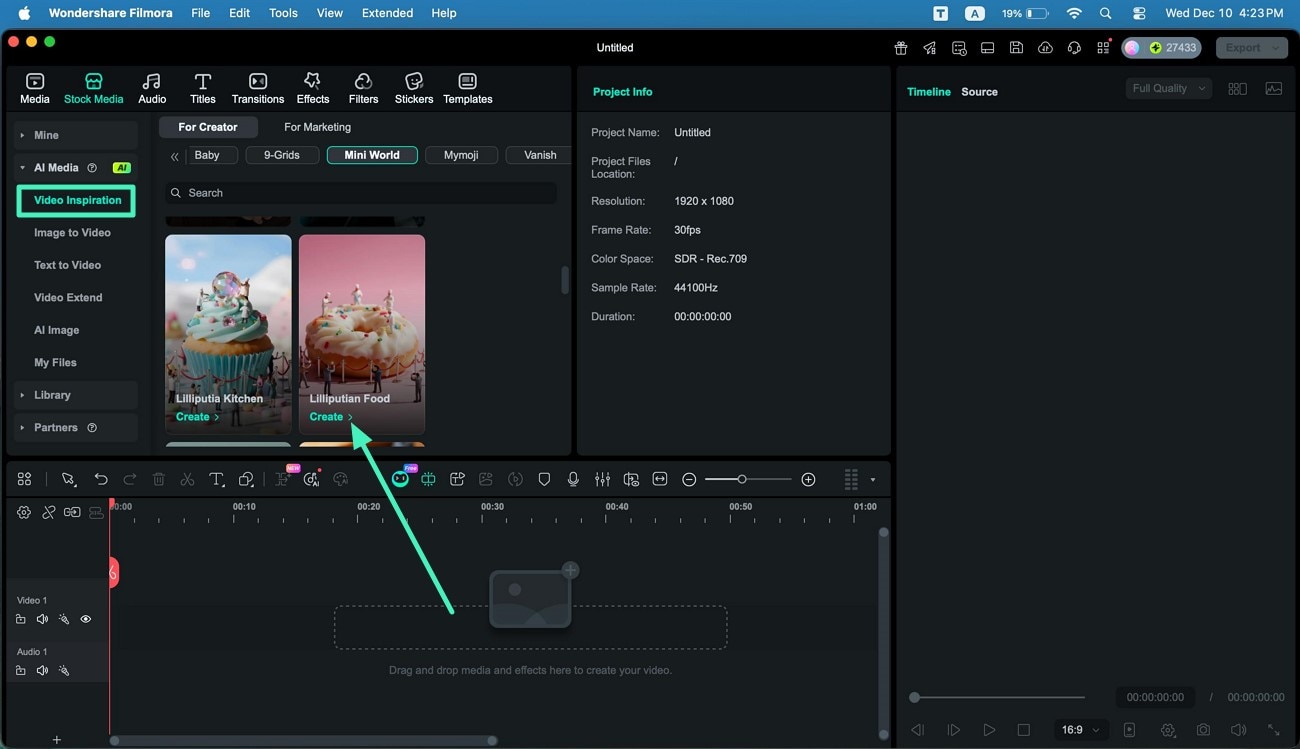
Entry 2. Choose Video Inspiration
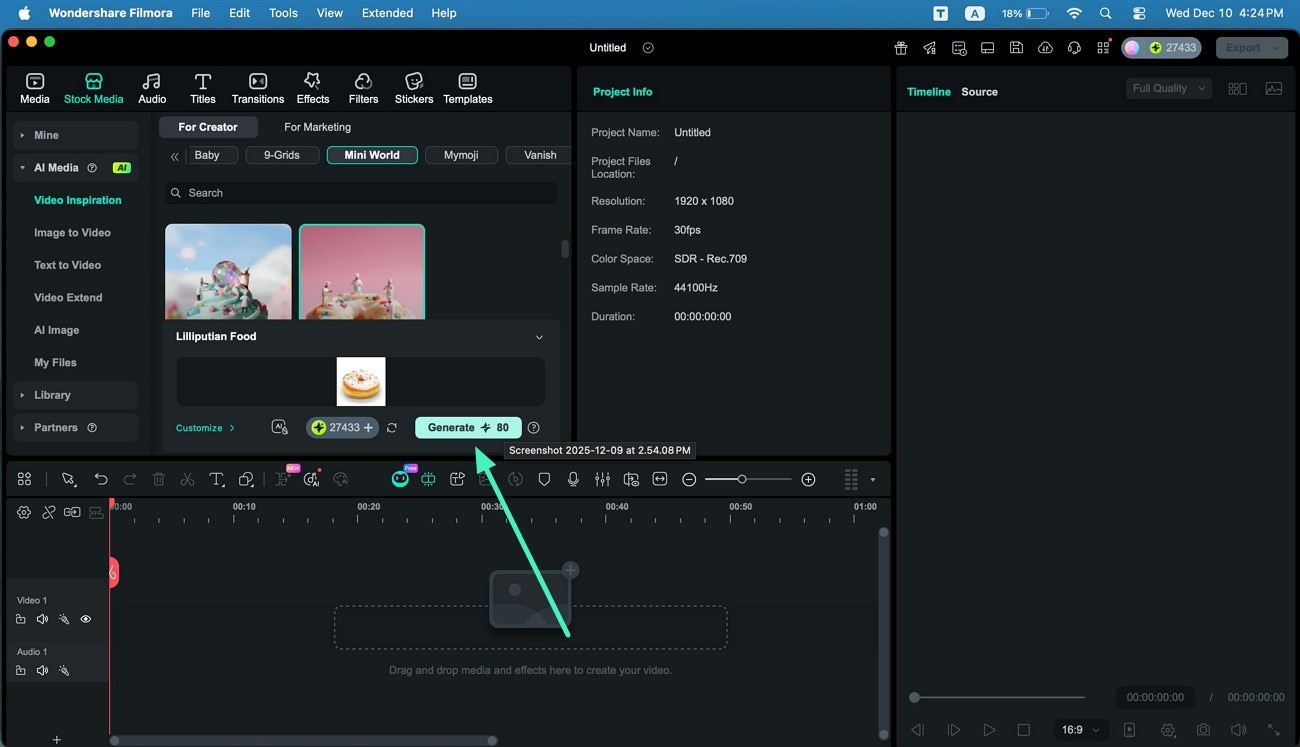
Step 1. Choose the Template From the Inspiration Section
After accessing the Video Inspiration section from the left, choose the template and press the Create option.
Step 2. Insert Your Image and Choose Aspect Ratio
Add the image you want to transform and select the mode and aspect ratio in the following window. Hit the Submit button to save the changes.
Step 3. Start Video Generation Process
Once the image is added, hit the Generate button to start the process for image-to-video conversion.
Step 4. Check the Results and Save Video
After the final results are generated, click on the Play icon within the preview window to review the results and hit the Export button to save the generated video to your Mac device.

