For the Best Results, Use the Latest Version.
-
Preparations for Mac
-
Account (Mac)
-
Get Started & Basic Settings (Mac)
- Release notes for Mac
- Latest Versions and Features for Mac
- Get Started on Mac - Full Guide
- Download/register/uninstall on Mac
- Panel Layout on Mac
- Keyboard shortcuts on Mac
- Touchbar on Mac
- Change playback quality on Mac
- Render preview files on Mac
- Manage timeline on Mac
- Media for use on Mac
- Logo Reveal For Mac
- Marked Favorites for Mac
-
Compatibility & Tech Specs (Mac)
-
Performance Settings (Mac)
-
-
Creating Projects - Mac
-
Creating New Projects (Mac)
-
-
Importing & Recording - Mac
-
Importing (Mac)
-
Recording (Mac)
-
-
Video Editing for Mac
-
Basic Video Editing for Mac
- Edit Live Photos on Mac
- Enable/Disable Clip for Mac
- Magnetic Timeline For Mac
- Select All Clips on Timeline for Mac
- Auto Ripple for Mac
- Split & cut videos on Mac
- Compositing on Mac
- Crop and zoom on Mac
- Playback Zoom Level for Mac
- Change speed on Mac
- Play video in reverse on Mac
- Mark In and Mark Out for Mac
- Markers for Mac
- Group clips on Mac
- Customized Backgrounds for Videos and Images in Mac
- Video snapshot on Mac
- Freeze frame on Mac
- Auto enhance on Mac
- Applying Drop Shadow for Mac
- Adjustment Layer for Mac
- Mark clip on Mac
- Video Editing Ruler – Mac
- Apply Transforming for Mac
-
Advanced Video Editing for Mac
-
AI-Powered Video Editing for Mac
- Smart Scene Cut for Mac
- Smart Short Clips for Mac
- Image to Video for Mac
- AI Idea to Video for Mac
- AI Text-to-Video for Mac
- Instant Cutter Tool on Mac
- AI Face Mosaic for Mac
- Keyframe Path Curve for Mac
- Planar Tracking for Mac
- AI Extend For Mac
- AI Script-to-Video for Mac
- AI Text-Based Editing in Mac
- Create With Instant Mode on Mac
- ChatGPT Plugin - AI Copywriting on Mac
- AI Smart Cutout for Mac
- Auto reframe on Mac
- Lens correction on Mac
- AI Portrait Cutout on Mac
- Scene detection on Mac
- AI Smart Masking for Mac
- AI Mate Editing for Mac
- Motion Tracking on Mac
- Stabilize video on Mac
- AI Object Remover For Mac
- AI Smart Search for Mac
- AI Skin Tone Protection for Mac
- Green screen on Mac
- Super Slow Motion with Optical Flow for Mac
- AI stylizer on Mac
- Video Denoise for Mac
-
-
Audio Editing for Mac
-
Basic Audio Editing for Mac
-
Advanced Audio Editing for Mac
-
AI-Powered Audio Editing for Mac
- Audio To Video for Mac
- AI Sound Effect for Mac
- Smart BGM Generation for Mac
- AI Voice Enhancer for Mac
- Audio Stretch for Mac
- AI Audio Denoise for Mac
- Auto synchronization for Mac
- AI Vocal Remover for Mac
- Auto Beat Sync on Mac
- AI Music Generator for Mac
- How to Perform AI Voice Cloning in Wondershare Filmora?
- Silence detection on Mac
-
-
Text Editing for Mac
-
Basic Text Editing for Mac
-
Advanced Text Editing for Mac
-
AI-Powered Text Editing for Mac
-
-
Video Customizations for Mac
-
Video Effects (Mac)
-
Audio Effects (Mac)
-
Transitions (Mac)
-
Stickers (Mac)
-
Filters (Mac)
-
Color Editing (Mac)
-
Animations (Mac)
-
Templates (Mac)
-
Asset Center (Mac)
-
-
Exporting & Share & Cloud Backup - Mac
Color Comparison View for Mac
In the pursuit of editing, color maintenance upholds the integrity of your content, and Filmora presents its Color Comparison View for you to master color editing. This feature allows users to compare their video content's original and post-editing outlooks.
To separate the differences in your clips, you can employ any of the following four methods that suit your preferences the best. For a detailed guide on understanding the Color Comparison functionality in Filmora, read below:
Index
Method 1: Via the Upper Toolbar
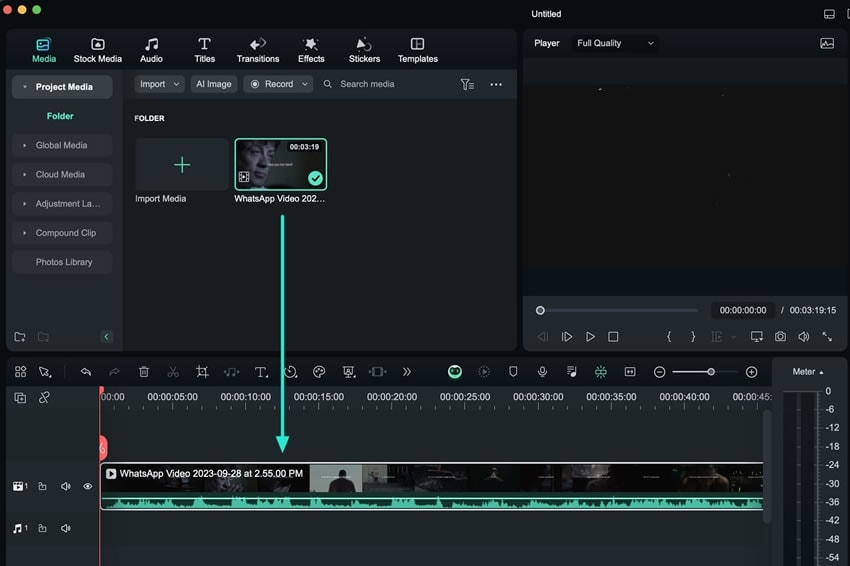
Step 1: Place Media on the Timeline
Once you have created a "New Project" within Filmora after its launch, proceed towards the import of your files using the "Command + I" keys. After importing, use your cursor to select and drag the imported media onto the timeline.
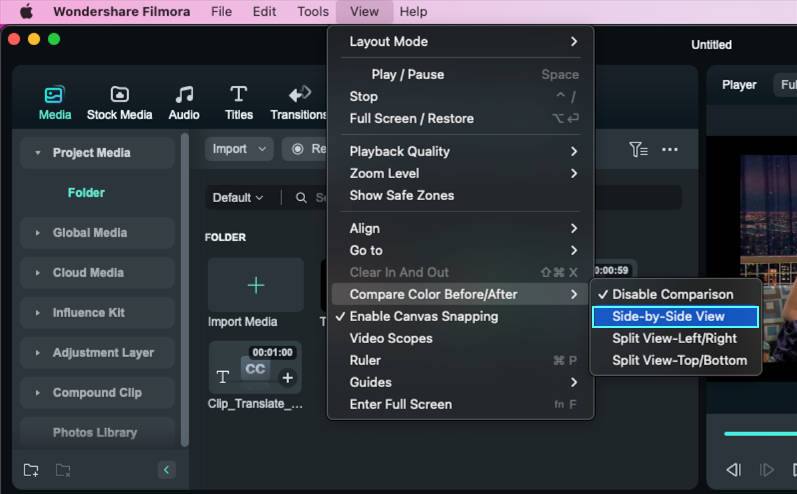
Step 2: Activation of the Color Comparison Feature
After selecting the clip in the timeline, direct your attention towards the top toolbar and select the "View" tab. From the appearing dropdown menu, select the "Compare Color Before/After" option. Further, select the layout style for the color comparison window from "Side-by-Side View", "Split View Left/Right", and "Split View Top/Bottom".
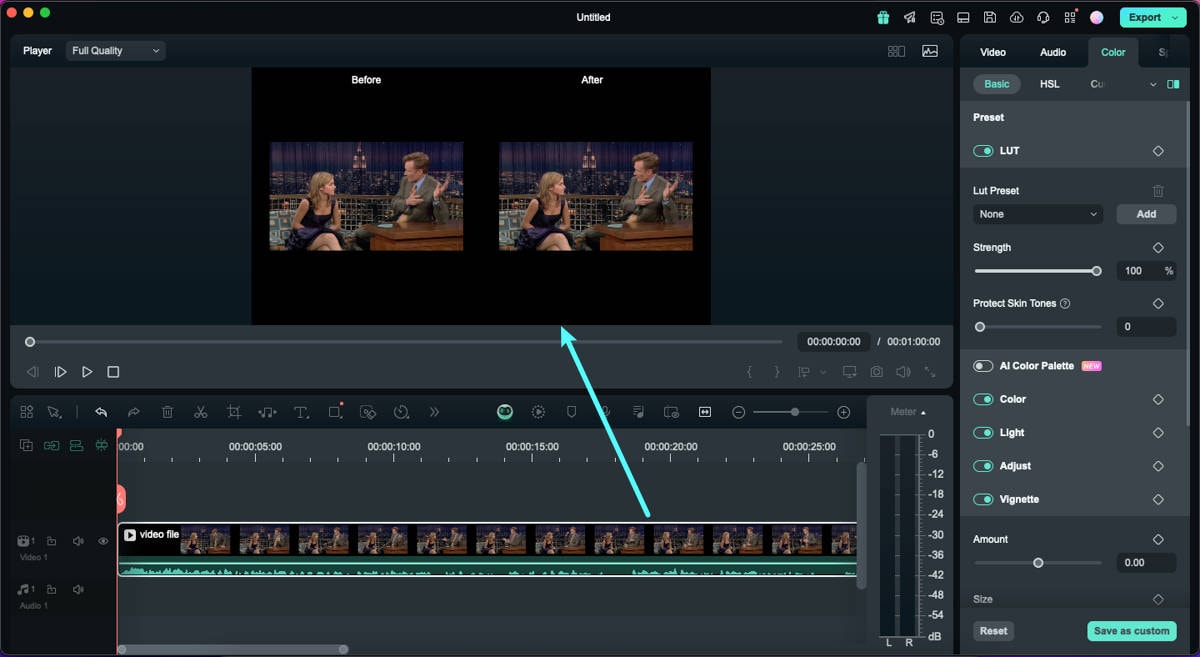
Step 3: Editing Within the Color Comparison Mode
Once the layout has been customized, a new window displays the color comparison between your pre and post-edited video. You can observe or enhance the changes from there and exit this window by clicking the "Color Comparison Layout" icon at the color editing panel.
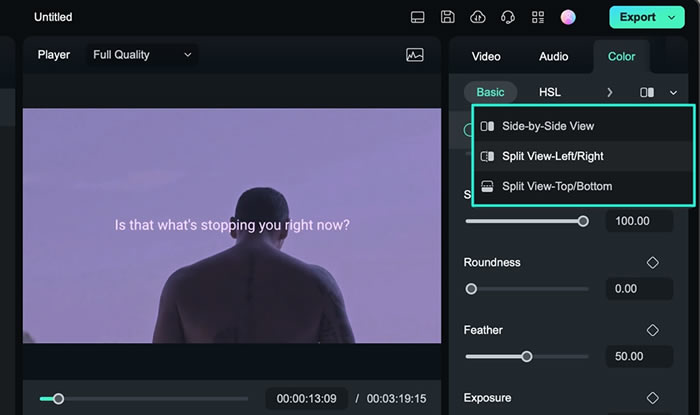
Method 2: Via the Settings Panel
After the import of media in the timeline panel, select it directly towards the "Color" tab at the left settings panel. From there, expand the "Color Comparison Layout" icon and choose a layout to activate this view.
Method 3: Via the Timeline Toolbar
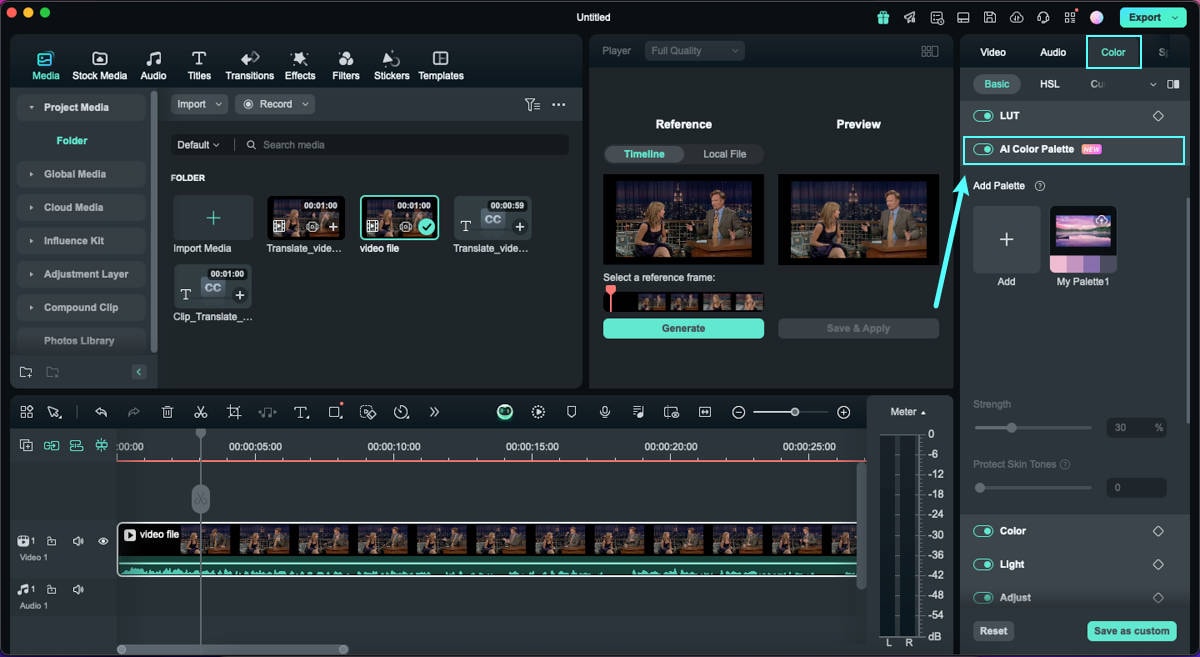
Upon placing your media in the timeline, select it and reach the timeline toolbar. From there, direct your attention to the "AI Color Palette" icon and click it. Upon clicking it, a small color comparison display will appear in the Preview section.

Method 4: Through Color Settings
Another method that you can consider for comparing the color within a video clip is through the "Color" settings. As you select the clip and continue into the respective section, scroll down and enable the "AI Color Palette" option. Proceed to click the "Comparison View" button to enable the comparison view settings for Filmora.
Related Posts
Featured Articles
How To Make an Amazing Video For Your Graduation Party [2025]
Graduation parties are a great way to celebrate an important milestone in life. The article below explores a graduation video maker to fulfill this purpose.
Best MP3 Audio Recorders (Desktop, Online, and Mobile)
If you're looking for the best MP3 audio recorders that can capture quality sound, here are the top 8 options.
Top 5 Video Editors To Embrace Thanksgiving Volunteering Moments
Want to share your Thanksgiving volunteering experience on social media? Then explore the article to get the video editor to help you create such stunning videos!
Recommended User Guide
AI Color Palette for Mac (Color Match)
Learn how to match the color.
Preset Color Adjustment for Mac
When using Filmora, you can harness the power of many options to enhance its color tones.
Custom Color Layer for Mac
This guide shows how to use the Custom Color Layer in Filmora for Mac to enhance mood, style, and consistency across your videos.
