
For the Best Results, Use the Latest Version.
Filmora User Guide for Mac
-
Preparations for Mac
-
Account (Mac)
-
Get Started & Basic Settings (Mac)
- Release Notes for Mac
- Latest Version and Features for Mac
- Get Started on Mac - Full Guide
- Download/register/uninstall on Mac
- Panel Layout on Mac
- Keyboard Shortcuts in Mac
- Touchbar on Mac
- Change playback quality on Mac
- Render preview files on Mac
- Manage Timeline in Mac
- Media for use on Mac
- Logo Reveal For Mac
- Marked Favorites for Mac
-
Compatibility & Tech Specs (Mac)
-
Performance Settings (Mac)
-
-
Creating Projects - Mac
-
Creating New Projects (Mac)
-
-
Importing & Recording - Mac
-
Importing (Mac)
-
Recording (Mac)
-
-
Video Editing for Mac
-
Basic Video Editing for Mac
- Edit Live Photos on Mac
- Enable/Disable Clip for Mac
- Magnetic Timeline For Mac
- Dual Monitor Setup for Video Editing on Mac
- Select All Clips on Timeline
- Auto Ripple for Mac
- Split & Cut Videos on Mac
- Compositing on Mac
- Crop and zoom on Mac
- Playback Zoom Level for Mac
- Change Speed on Mac
- Play Video in Reverse on Filmora for Mac
- Mark In and Mark Out for Mac
- Markers for Mac
- Group Clips in Filmora for Mac
- Customized Backgrounds for Videos and Images in Mac
- Video Snapshot for Mac
- Freeze Frame on Mac
- Auto enhance on Mac
- Applying Drop Shadow for Mac
- Adjustment Layer for Mac
- Mark Clips in Filmora for Mac
- Video Editing Ruler – Mac
- Apply Transforming for Mac
-
Advanced Video Editing for Mac
- Keyframe Motion Blur for Mac
- Camera Tracking for Mac
- Keyframe Path Curve for Mac
- Text Animation Path for Mac
- Create Multi-Camera Clip for Mac
- Filmora Motion Blur | Mac
- Drawing Tools for Mac | Filmora Guide
- Track Matte for Mac
- Compound Clips for Mac
- 360° Video Reframing for Mac
- AI Video Enhancer for Mac
- Video Chapters in Filmora for Mac
- Filmora Flicker Removal Guide | Mac
- Multi-Clip Editing for Mac
- Keyframe Graph Editor for Mac
- Create Multi-Screen Videos in Filmora on Mac
- Animation Keyframing for Mac
- Masking in Filmora on Mac
- PIP (Picture in Picture) in Filmora on Mac
-
AI-Powered Video Editing for Mac
- Smart Scene Cut for Mac
- Smart Short Clips for Mac
- Filmora AI Eye Contact - Mac
- Filmora Image to Video for Mac
- AI Idea to Video for Mac
- AI Text to Video for Mac
- AI Media Analysis for Mac
- Instant Cutter Tool on Mac
- AI Face Mosaic for Mac
- Filmora Image to Prompt for Mac
- Filmora AI Image Enhancer Guide – macOS
- Planar Tracking for Mac
- Filmora AI Relight - Mac
- AI Extend For Mac
- AI Script-to-Video for Mac
- AI Text-Based Editing in Mac
- Create With Instant Mode on Mac
- ChatGPT Plugin - AI Copywriting on Mac
- AI Smart Cutout in Filmora for Mac
- Auto reframe on Mac
- Lens Correction in Filmora for Mac
- AI Portrait Cutout for Mac
- Scene detection on Mac
- AI Smart Masking for Mac
- AI Mate Editing for Mac
- Motion Tracking on Mac
- Video Stabilization for Mac
- AI Video/Photo Object Remover for Mac
- AI Smart Search for Mac
- AI Skin Tone Protection for Mac
- Green screen on Mac
- Super Slow Motion with Optical Flow for Mac
- AI Stylizer for Mac
- Video Denoise for Mac
-
-
Audio Editing for Mac
-
Basic Audio Editing for Mac
-
Advanced Audio Editing for Mac
-
AI-Powered Audio Editing for Mac
- Audio To Video for Mac
- AI Sound Effect for Mac
- Smart BGM Generation on Mac
- AI Voice Enhancer for Mac
- Audio Stretch for Mac
- AI Audio Denoise for Mac
- Auto Synchronization on Mac
- AI Vocal Remover for Mac
- AI Auto Beat Sync for Mac
- AI Music Generator for Mac
- AI Voice Cloning on Mac
- Silence Detection on Mac
-
-
Text Editing for Mac
-
Basic Text Editing for Mac
-
Advanced Text Editing for Mac
-
AI-Powered Text Editing for Mac
-
-
Video Customizations for Mac
-
Video Effects (Mac)
-
Audio Effects (Mac)
-
Transitions (Mac)
-
Stickers (Mac)
-
Filters (Mac)
-
Color Editing (Mac)
-
Animations (Mac)
-
Templates (Mac)
-
Asset Center (Mac)
-
-
Exporting & Share & Cloud Backup - Mac
Filmora 15 User Guide in PDF
Filmora 13 & 14 User Guide in PDF
Filmora 12 User Guide in PDF
Filmora 11 User Guide in PDF
Filmora 9 & 10 User Guide
Apply Drop Shadow for Mac
Drop Shadow in Filmora for Mac is a visual effect that adds depth and dimension to text, images, or video elements by creating a soft shadow behind them. This feature helps objects stand out clearly from the background, improving readability and overall visual impact. It is commonly used in titles, captions, and graphics to make them more professional and eye-catching. Users can adjust shadow distance, blur, opacity, and direction to achieve the desired look.
Add Drop Shadow to Image and Video
Drop Shadow is especially useful for enhancing flat designs and improving contrast. Follow the steps provided below to learn how to use this feature:
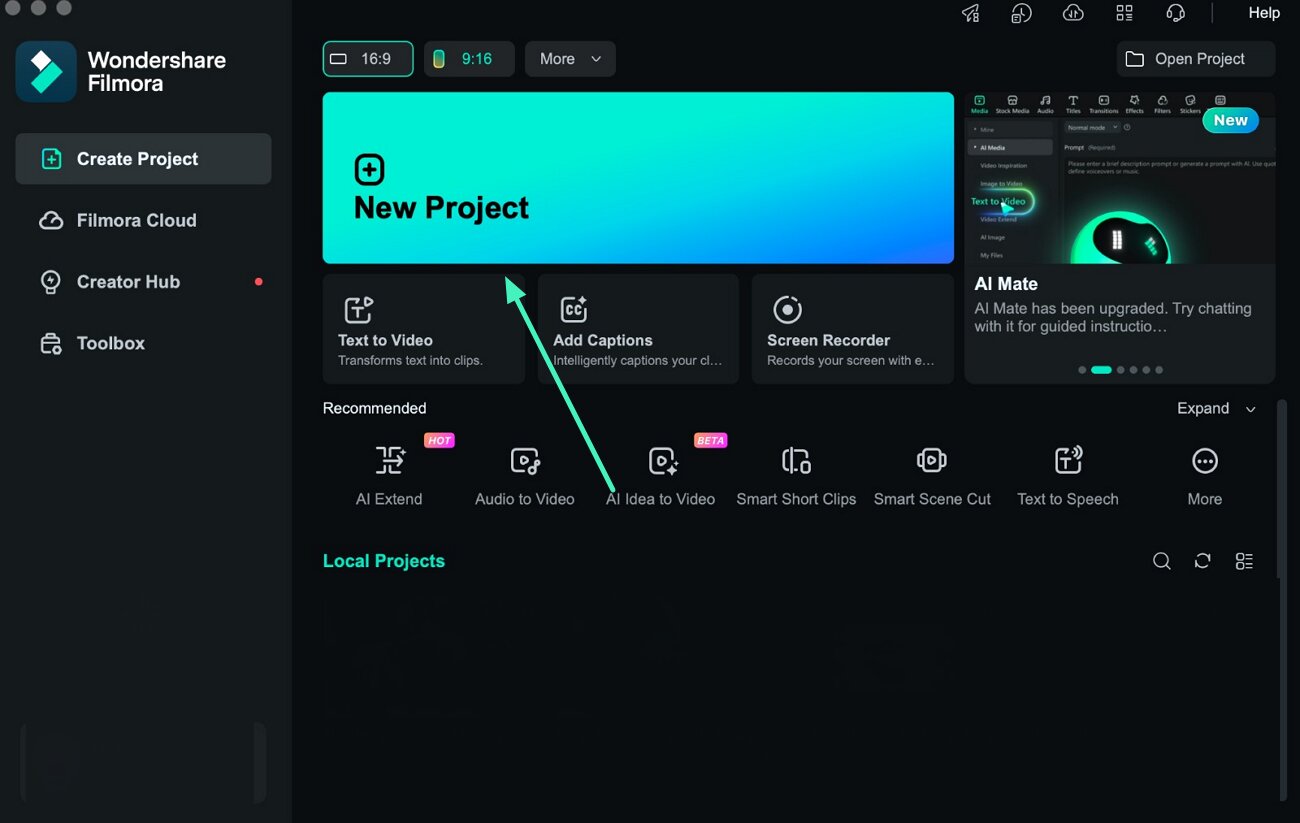
Step 1. Import Media to Timeline
Open Filmora, create a new project, and bring your video or image into the timeline. Place the PIP (picture-in-picture) clip on the track above and adjust its size, position, and mask as needed.
Step 2. Enable “Drop Shadow” Feature
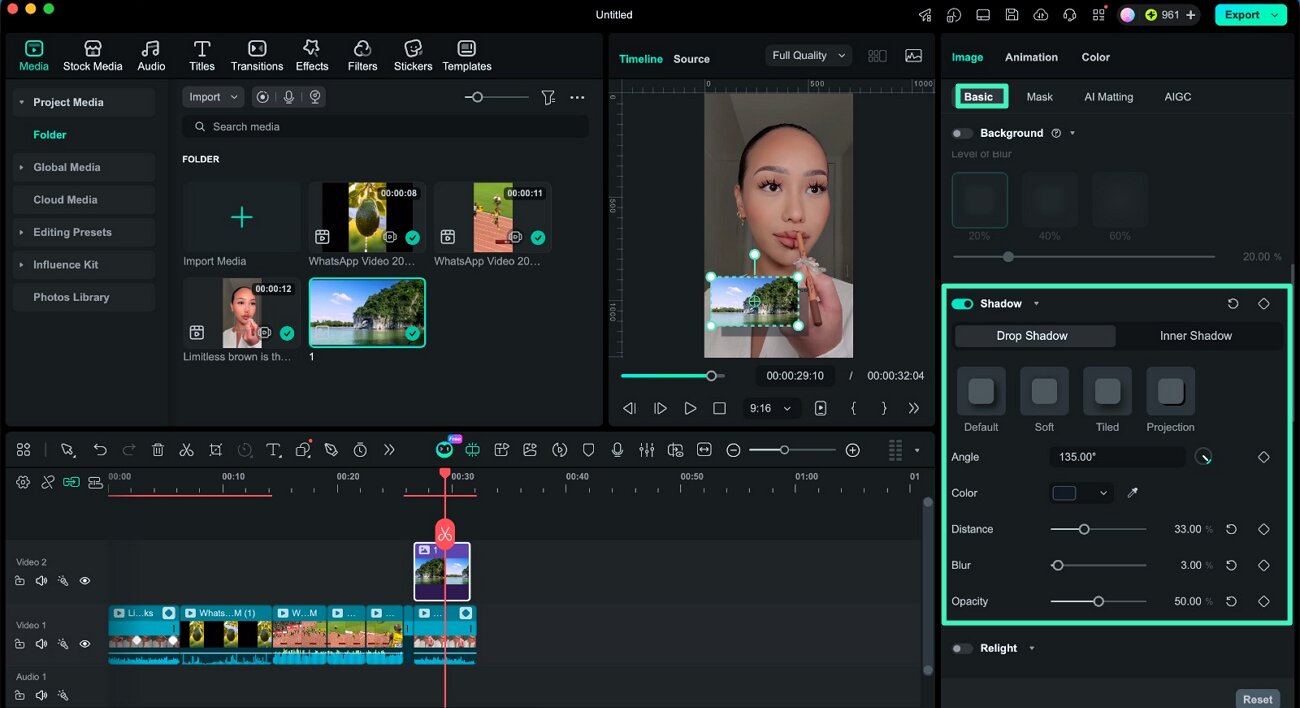
Select the PIP clip, and a settings panel will appear on the right. Go to the Basic option and toggle on Shadow. Now choose the Drop Shadow option to activate the effect. Choose a shadow style from the options provided. Adjust the angle by rotating the control, pick a color, and fine-tune Distance, Blur, and Opacity.
Add Keyframes to Drop Shadow
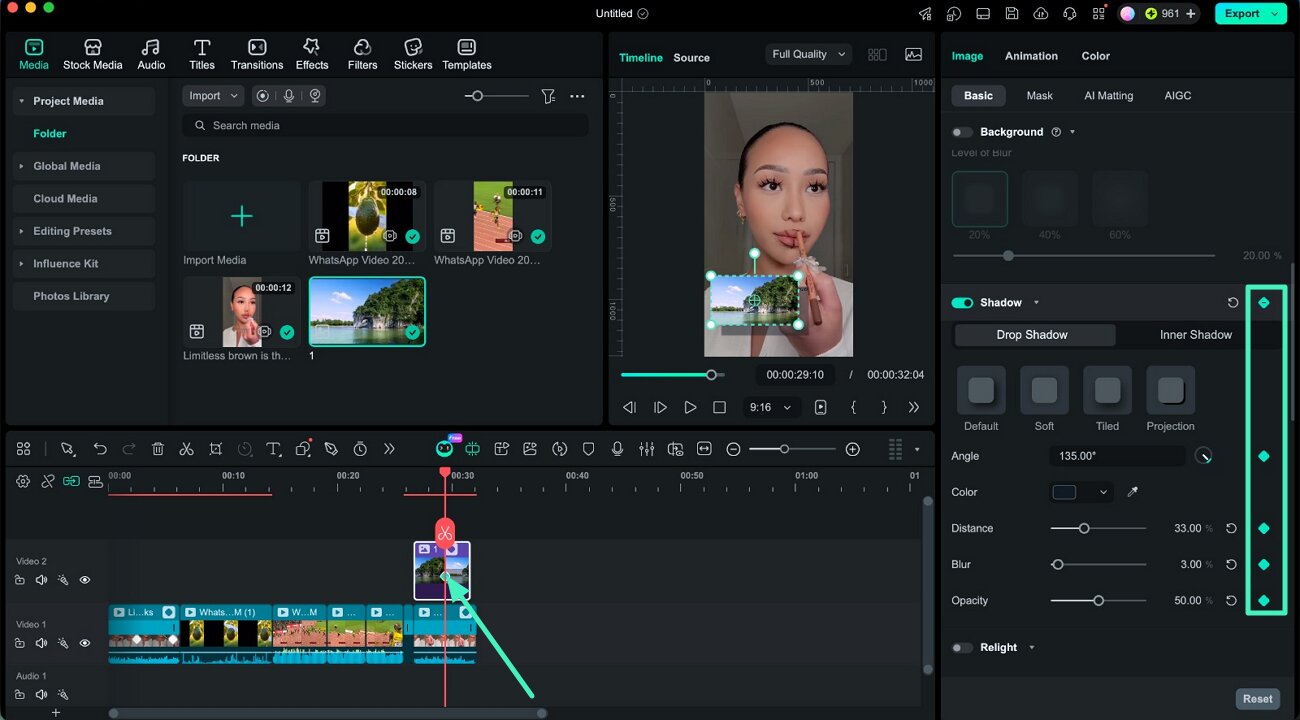
Step 1. Set Initial Keyframe
Move the playhead to your desired starting point. After adjusting shadow settings, click the diamond icon next to Drop Shadow to create the first keyframe.
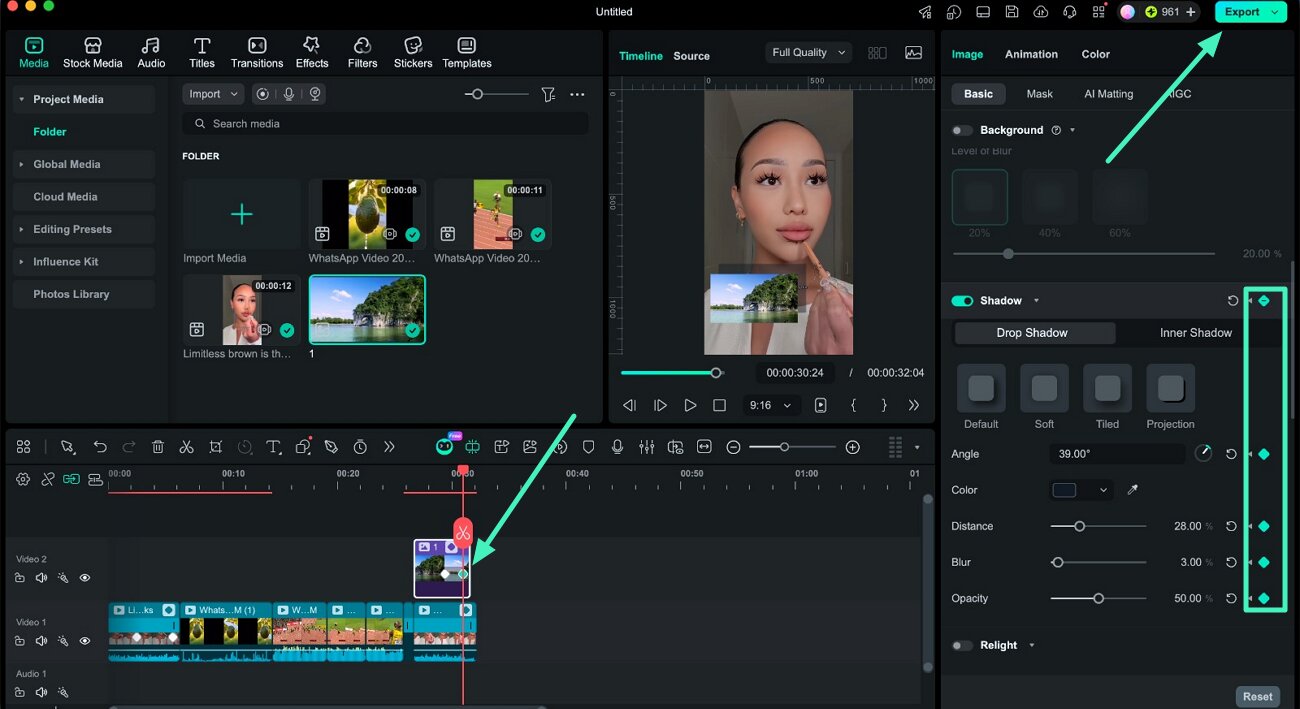
Step 2. Insert Additional Keyframes
Move the playhead to another point and adjust the shadow again, then add another keyframe. Ensure at least two keyframes are added. Once done, hit the Export button to save the results.
Related Posts
Featured Articles
Learn more popular articles from Wondershare.
How To Add Objects to Videos With AI
Learn how to add objects to videos with AI using a new feature, similar to Kling, that lets you insert, swap, or delete elements effortlessly.
Video to Live Photo Converter Online & Offline [2026]
Looking for platforms to convert your video to a live photo online & offline? Read this article to kickstart bringing your videos to life using live photos.
VideoProc: Free Editing Tool for Creators – Features and Benefits Explained
VideoProc Vlogger is a free video editor for all creators. This guide will explore its features, benefits, and compare it with Filmora. Find the best fit for your projects!
Recommended User Guide
Learn how to use more features.
Mark In and Mark Out for Mac
While editing in Filmora, users have the option to specify in and out points within their video clips.
Video Editing Ruler – Mac
If you are looking to make precise scaled editing on your videos, Filmora has launched its video editing ruler feature for Mac users.
Select All Clips on Timeline
Knowing how to select clips both forwards and backwards on the timeline is essential. This feature allows you to select multiple clips at once, saving you time and effort when editing larger projects.
