For the Best Results, Use the Latest Version.
-
Preparations for Mac
-
Account (Mac)
-
Get Started & Basic Settings (Mac)
- Release notes for Mac
- Latest Versions and Features for Mac
- Get Started on Mac - Full Guide
- Download/register/uninstall on Mac
- Panel Layout on Mac
- Keyboard shortcuts on Mac
- Touchbar on Mac
- Change playback quality on Mac
- Render preview files on Mac
- Manage Timeline on Mac
- Media for use on Mac
- Logo Reveal For Mac
- Marked Favorites for Mac
-
Compatibility & Tech Specs (Mac)
-
Performance Settings (Mac)
-
-
Creating Projects - Mac
-
Creating New Projects (Mac)
-
-
Importing & Recording - Mac
-
Importing (Mac)
-
Recording (Mac)
-
-
Video Editing for Mac
-
Basic Video Editing for Mac
- Edit Live Photos on Mac
- Enable/Disable Clip for Mac
- Magnetic Timeline For Mac
- Dual Monitor Setup for Video Editing on Mac
- Select All Clips on Timeline for Mac
- Auto Ripple for Mac
- Split & cut videos on Mac
- Compositing on Mac
- Crop and zoom on Mac
- Playback Zoom Level for Mac
- Change Speed on Mac
- Play video in reverse on Mac
- Mark In and Mark Out for Mac
- Markers for Mac
- Group Clips in Filmora for Mac
- Customized Backgrounds for Videos and Images in Mac
- Video snapshot on Mac
- Freeze Frame on Mac
- Auto enhance on Mac
- Applying Drop Shadow for Mac
- Adjustment Layer for Mac
- Mark clip on Mac
- Video Editing Ruler – Mac
- Apply Transforming for Mac
-
Advanced Video Editing for Mac
- Text Animation Path for Mac
- Create Multi-Camera Clip for Mac
- Filmora Motion Blur | Mac
- Drawing Tools for Mac | Filmora Guide
- Compound Clips for Mac
- AI Video Enhancer for Mac
- Filmora Flicker Removal Guide | Mac
- Multi-Clip Editing for Mac
- Keyframe Graph Editor for Mac
- Add Animation Keyframing in Filmora for Mac
- Mask on Mac
- PIP (picture in picture) on Mac
-
AI-Powered Video Editing for Mac
- Smart Scene Cut for Mac
- Smart Short Clips for Mac
- Filmora AI Eye Contact - Mac
- Filmora Image to Video for Mac
- AI Idea to Video for Mac
- AI Text-to-Video for Mac
- Instant Cutter Tool on Mac
- AI Face Mosaic for Mac
- Filmora Image to Prompt for Mac
- Keyframe Path Curve for Mac
- Filmora AI Image Enhancer Guide – macOS
- Planar Tracking for Mac
- Filmora AI Relight - Mac
- AI Extend For Mac
- AI Script-to-Video for Mac
- AI Text-Based Editing in Mac
- Create With Instant Mode on Mac
- ChatGPT Plugin - AI Copywriting on Mac
- AI Smart Cutout for Mac
- Auto reframe on Mac
- Lens correction on Mac
- AI Portrait Cutout on Mac
- Scene detection on Mac
- AI Smart Masking for Mac
- AI Mate Editing for Mac
- Motion Tracking on Mac
- Video Stabilization for Mac
- AI Object Remover For Mac
- AI Smart Search for Mac
- AI Skin Tone Protection for Mac
- Green screen on Mac
- Super Slow Motion with Optical Flow for Mac
- AI Stylizer for Mac
- Video Denoise for Mac
-
-
Audio Editing for Mac
-
Basic Audio Editing for Mac
-
Advanced Audio Editing for Mac
-
AI-Powered Audio Editing for Mac
- Audio To Video for Mac
- AI Sound Effect for Mac
- Smart BGM Generation for Mac
- AI Voice Enhancer for Mac
- Audio Stretch for Mac
- AI Audio Denoise for Mac
- Auto Synchronization on Mac
- AI Vocal Remover for Mac
- AI Auto Beat Sync for Mac
- AI Music Generator for Mac
- AI Voice Cloning on Mac
- Silence detection on Mac
-
-
Text Editing for Mac
-
Basic Text Editing for Mac
-
Advanced Text Editing for Mac
-
AI-Powered Text Editing for Mac
-
-
Video Customizations for Mac
-
Video Effects (Mac)
-
Audio Effects (Mac)
-
Transitions (Mac)
-
Stickers (Mac)
-
Filters (Mac)
-
Color Editing (Mac)
-
Animations (Mac)
-
Templates (Mac)
-
Asset Center (Mac)
-
-
Exporting & Share & Cloud Backup - Mac
Group Clips in Filmora for Mac
Grouping clips in Filmora for Mac helps editors organize multiple video segments into a single unit on the timeline for easier management and smoother editing. This feature is especially useful when working with complex projects, as it allows you to move, adjust, or edit several clips together without handling them individually. You can also ungroup clips whenever needed or make cuts while keeping them linked for better workflow control.
Index
Steps to Use Group Clips
Filmora provides simple tools to group, ungroup, and edit multiple clips efficiently. Follow the steps mentioned below to manage grouped clips on Mac:
How to Group Clips in Filmora for Mac
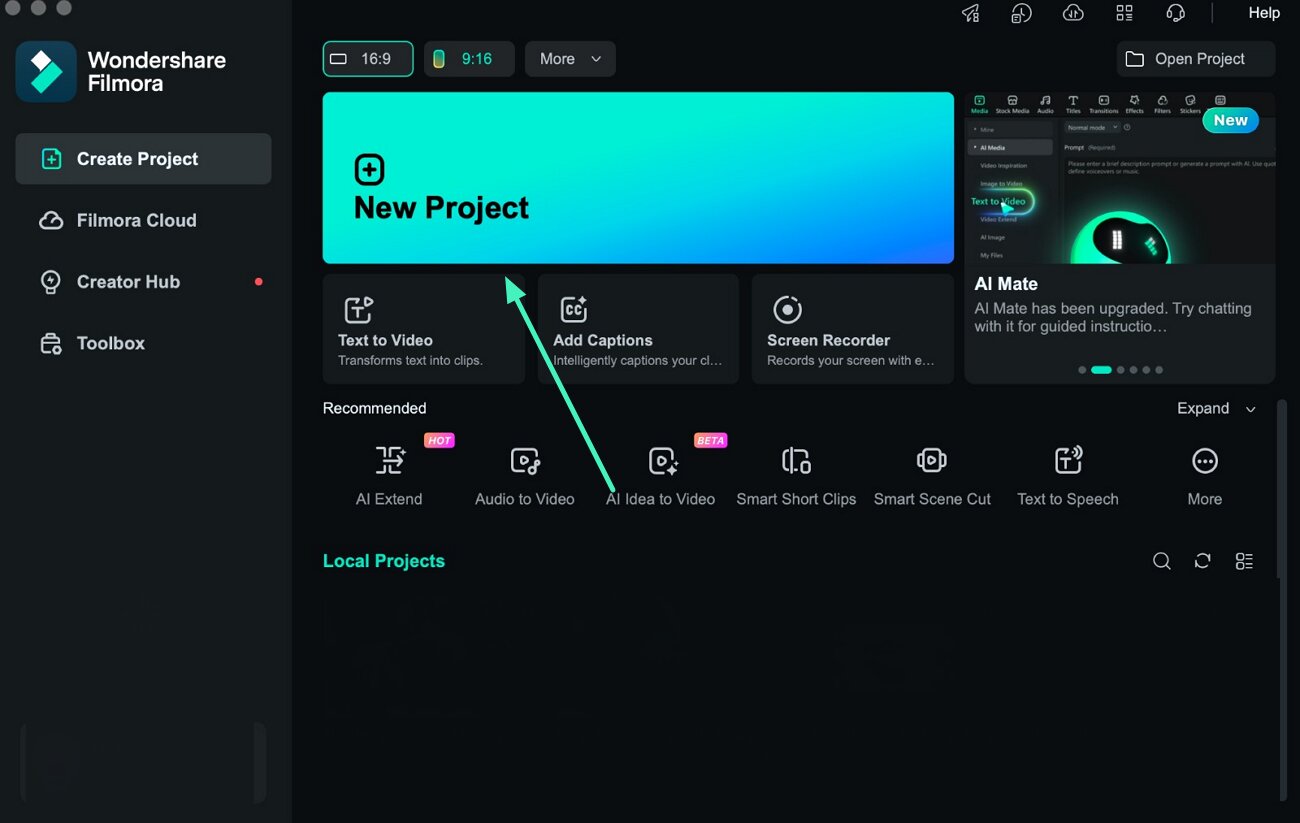
Step 1. Create a New Project and Import Clips
Launch Wondershare Filmora on your Mac and click on New Project from the startup screen. Import your video files into the media library and drag them onto the timeline where you want to begin editing.
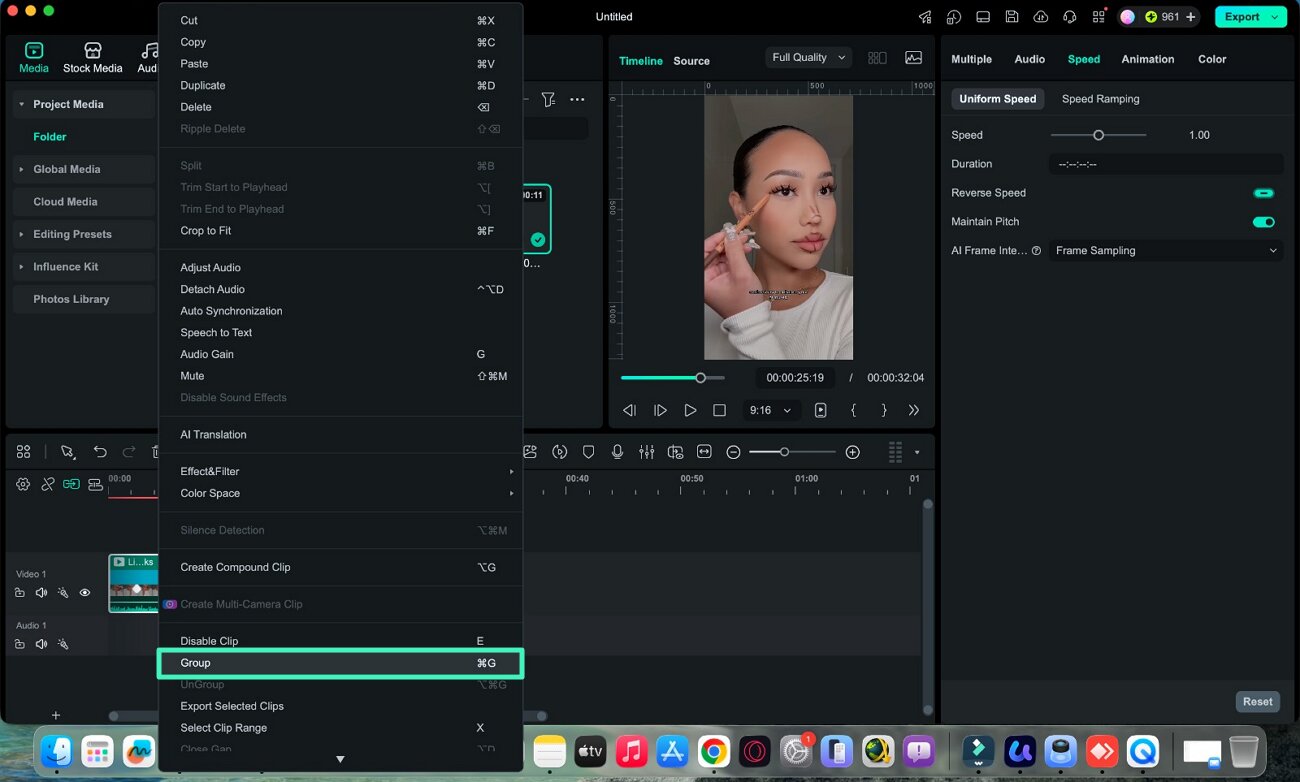
Step 2. Select Multiple Clips on the Timeline
Click and drag your cursor over the clips you want to group or hold the Command key and select each clip individually on the timeline to highlight multiple items at once. Right-click on any of the selected clips and choose the Group option from the menu. This will combine all selected clips into a single, grouped unit that can be moved or edited together.
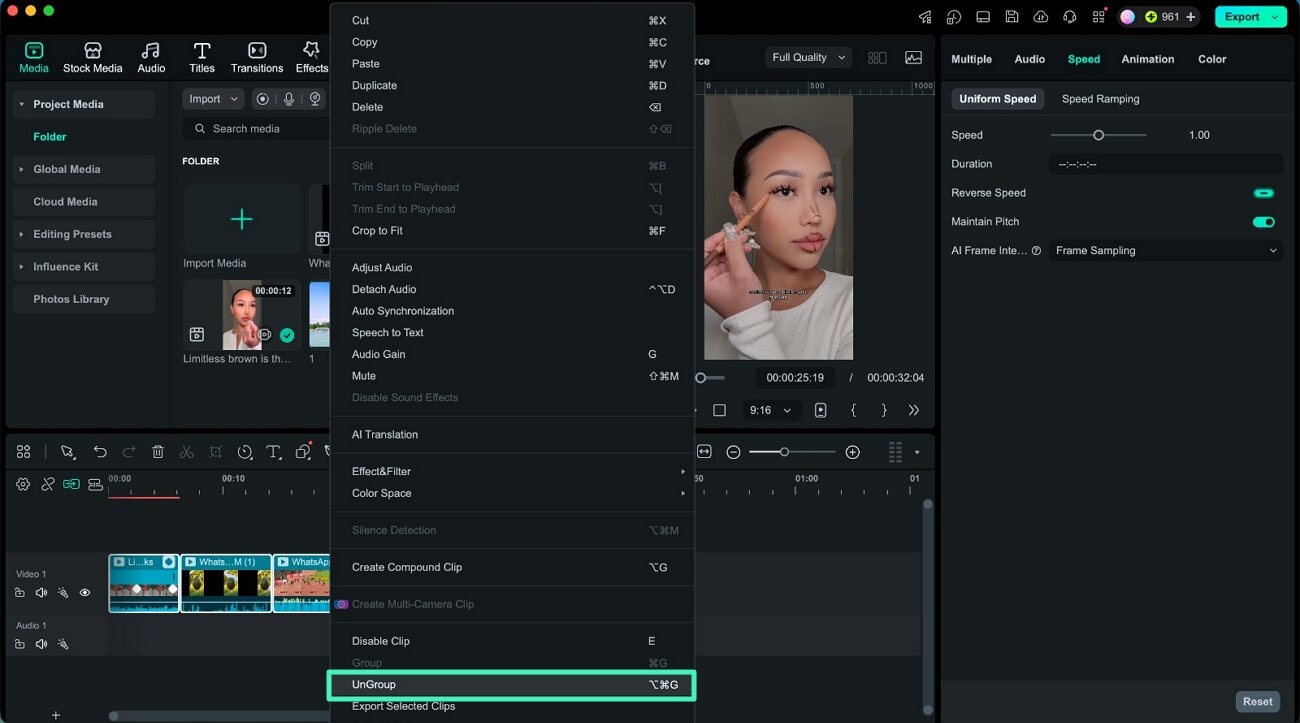
How to Ungroup Clips in Filmora for Mac
Click on the grouped clips in the timeline to highlight them as a single unit. Right-click on the grouped section and select the Ungroup option. The clips will immediately separate, allowing individual editing and repositioning.
How to Make a Cut in a Group
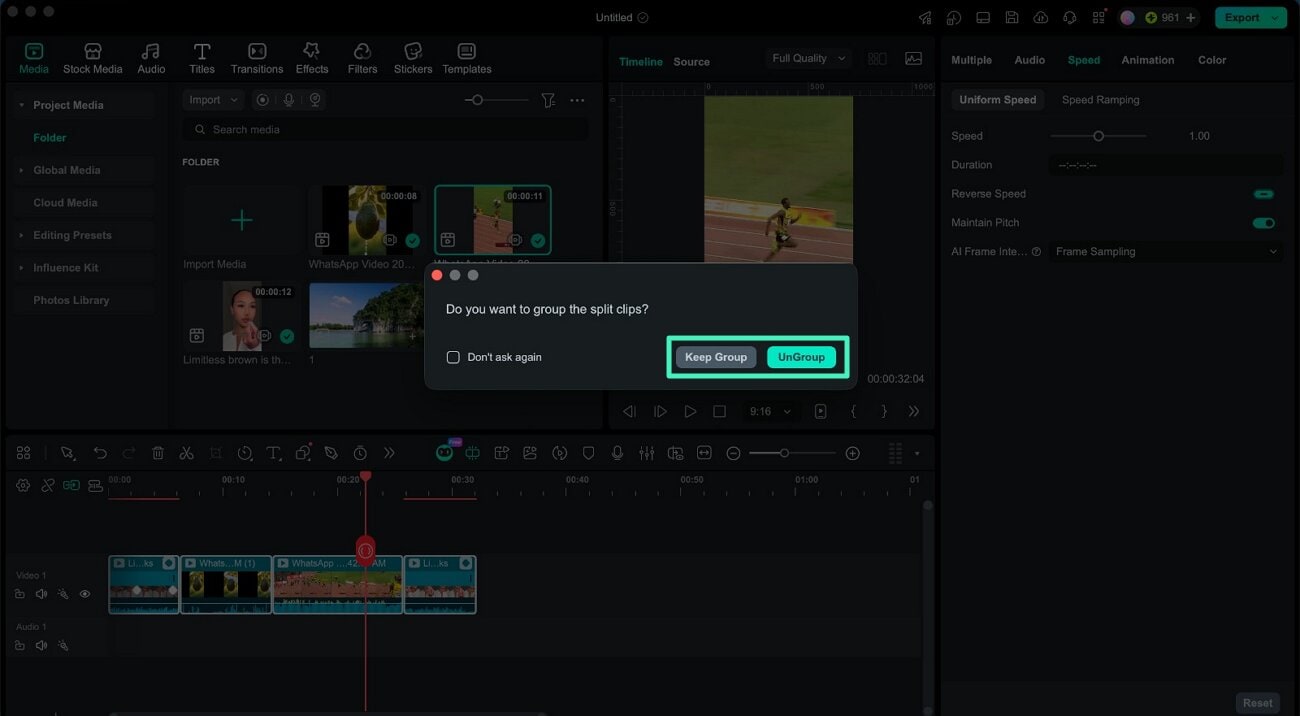
Step 1. Use the Scissor Tool on the Group
Select the grouped clips and click the scissor icon on the timeline to activate the cut tool. The system will highlight the entire group for editing.

Step 2. Choose Cut Option
A prompt will appear asking whether to ungroup or keep the group while cutting. Select Keep Group to ensure all clips stay linked even after the cut or choose Ungroup if you want them separated after editing.
Related Posts
Featured Articles
Best 9 Screen Recorders for Android | With Pros and Cons
Which screen recorder is best for Android? Check our best screen video recorders for your Android phone and effortlessly catch your high-quality screen recordings!
How To Add Moving Text to a Video [Updated 2026]
This in-depth tutorial shows you how to include moving text into a video. It provides guidance and step-by-step directions for improving your videos.
How to Edit Video with Color Grading & Correction
Understand color grading and color correction. Find a stepwise guide on how to edit a video with color correction using the best editing software.
Recommended User Guide
Apply Transforming for Mac
With Filmora for Mac, you can rotate, flip, scale, and change position in video transform.
Adjustment Layer for Mac
This guide shows how to add one layer to adjust several clips. The effects applied to an adjustment layer affect all layers below it in the layer stacking order. You only need to edit the layer, dragging the transitions and effects on the layer, to apply the effects to the layers below it.
Video Editing Ruler – Mac
If you are looking to make precise scaled editing on your videos, Filmora has launched its video editing ruler feature for Mac users.
