For the Best Results, Use the Latest Version.
-
Preparations for Mac
-
Account (Mac)
-
Get Started & Basic Settings (Mac)
- Release notes for Mac
- Latest Versions and Features for Mac
- Get Started on Mac - Full Guide
- Download/register/uninstall on Mac
- Panel Layout on Mac
- Keyboard shortcuts on Mac
- Touchbar on Mac
- Change playback quality on Mac
- Render preview files on Mac
- Manage timeline on Mac
- Media for use on Mac
- Logo Reveal For Mac
- Marked Favorites for Mac
-
Compatibility & Tech Specs (Mac)
-
Performance Settings (Mac)
-
-
Creating Projects - Mac
-
Creating New Projects (Mac)
-
-
Importing & Recording - Mac
-
Importing (Mac)
-
Recording (Mac)
-
-
Video Editing for Mac
-
Basic Video Editing for Mac
- Edit Live Photos on Mac
- Enable/Disable Clip for Mac
- Magnetic Timeline For Mac
- Select All Clips on Timeline for Mac
- Auto Ripple for Mac
- Split & cut videos on Mac
- Compositing on Mac
- Crop and zoom on Mac
- Playback Zoom Level for Mac
- Change speed on Mac
- Play video in reverse on Mac
- Mark In and Mark Out for Mac
- Markers for Mac
- Group clips on Mac
- Customized Backgrounds for Videos and Images in Mac
- Video snapshot on Mac
- Freeze frame on Mac
- Auto enhance on Mac
- Applying Drop Shadow for Mac
- Adjustment Layer for Mac
- Mark clip on Mac
- Video Editing Ruler – Mac
- Apply Transforming for Mac
-
Advanced Video Editing for Mac
-
AI-Powered Video Editing for Mac
- Smart Scene Cut for Mac
- Smart Short Clips for Mac
- Image to Video for Mac
- AI Idea to Video for Mac
- AI Text-to-Video for Mac
- Instant Cutter Tool on Mac
- AI Face Mosaic for Mac
- Keyframe Path Curve for Mac
- Planar Tracking for Mac
- AI Extend For Mac
- AI Script-to-Video for Mac
- AI Text-Based Editing in Mac
- Create With Instant Mode on Mac
- ChatGPT Plugin - AI Copywriting on Mac
- AI Smart Cutout for Mac
- Auto reframe on Mac
- Lens correction on Mac
- AI Portrait Cutout on Mac
- Scene detection on Mac
- AI Smart Masking for Mac
- AI Mate Editing for Mac
- Motion Tracking on Mac
- Stabilize video on Mac
- AI Object Remover For Mac
- AI Smart Search for Mac
- AI Skin Tone Protection for Mac
- Green screen on Mac
- Super Slow Motion with Optical Flow for Mac
- AI stylizer on Mac
- Video Denoise for Mac
-
-
Audio Editing for Mac
-
Basic Audio Editing for Mac
-
Advanced Audio Editing for Mac
-
AI-Powered Audio Editing for Mac
- Audio To Video for Mac
- AI Sound Effect for Mac
- Smart BGM Generation for Mac
- AI Voice Enhancer for Mac
- Audio Stretch for Mac
- AI Audio Denoise for Mac
- Auto synchronization for Mac
- AI Vocal Remover for Mac
- Auto Beat Sync on Mac
- AI Music Generator for Mac
- How to Perform AI Voice Cloning in Wondershare Filmora?
- Silence detection on Mac
-
-
Text Editing for Mac
-
Basic Text Editing for Mac
-
Advanced Text Editing for Mac
-
AI-Powered Text Editing for Mac
-
-
Video Customizations for Mac
-
Video Effects (Mac)
-
Audio Effects (Mac)
-
Transitions (Mac)
-
Stickers (Mac)
-
Filters (Mac)
-
Color Editing (Mac)
-
Animations (Mac)
-
Templates (Mac)
-
Asset Center (Mac)
-
-
Exporting & Share & Cloud Backup - Mac
ChatGPT Plugin - AI Copywriting on Mac
Any product or service that looks into selling itself in the market looks into creating text that explains its operations. This call-to-action text is often referred to as copywriting, which has been present in the market for quite a long time. While its utility has increased, the need to optimize it has become the need of the hour. AI Copywriting has introduced itself as a go-to solution for effective copywriting in a qualitative environment.
Wondershare Filmora offers its dedicated AI Copywriting tool for generating video scripts, titles, and captions with the help of ChatGPT. Find out how to use this particular feature on the latest Filmora:
Before Video Creation
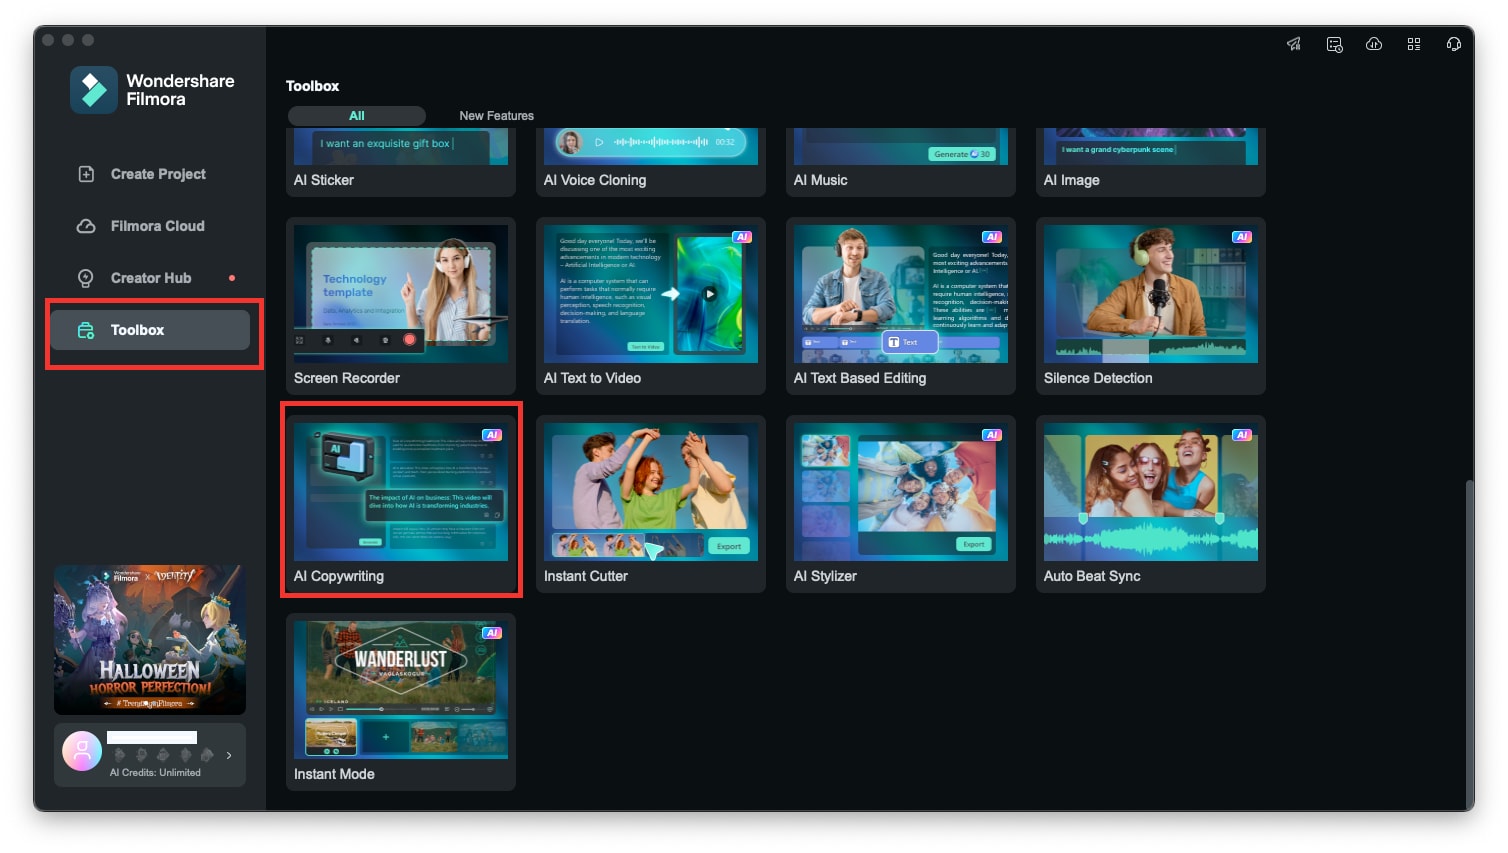
Step 1: Start Wondershare Filmora on Mac and Launch AI Copywriting Tool
You have to launch Wondershare Filmora on your Mac and continue into the "Toolbox" category. After opening the respective section, look for the "AI Copywriting" button on the homepage to launch the specific tool.
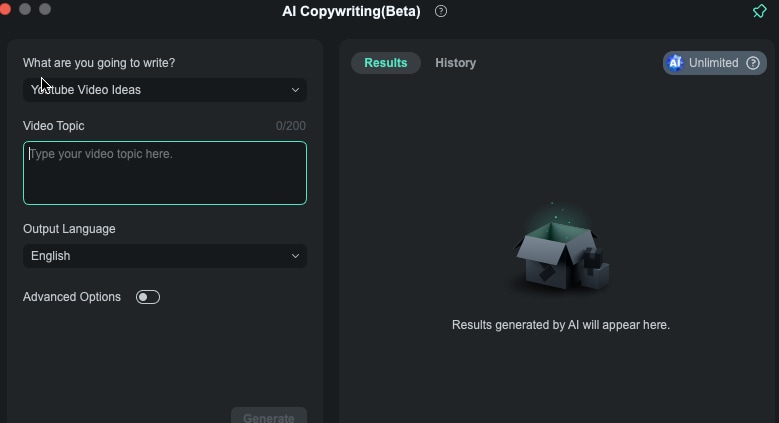
Step 2: Provide Questions For Creating Video Script and More
To use Filmora AI Copywriting, choose the content type, specify your video topic, select the output language, generate the text, and review and edit it as necessary.
During Video Editing
Step 1: Start the Project and Edit The Video
After opening Wondershare Filmora on Mac, continue to select the option of "New Project" in the "Create Project" section. Follow through the editing interface and apply the required elements to create the perfect video for yourselves.
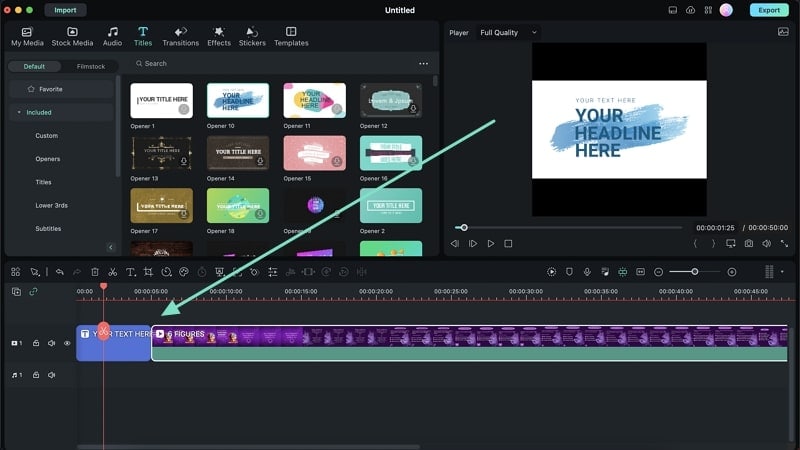
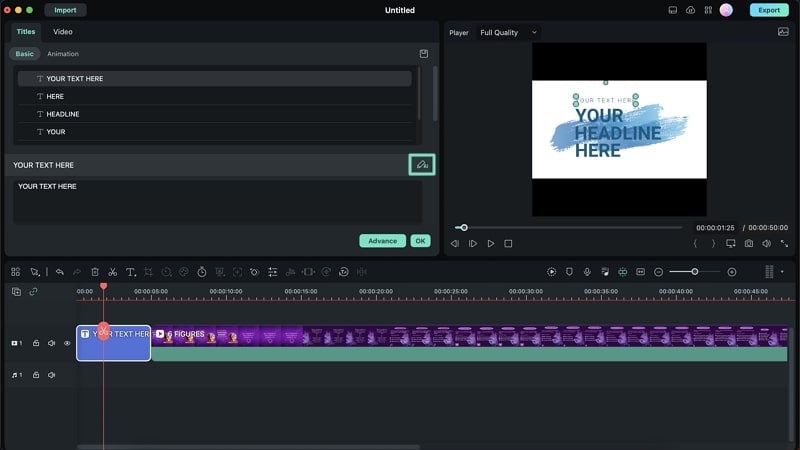
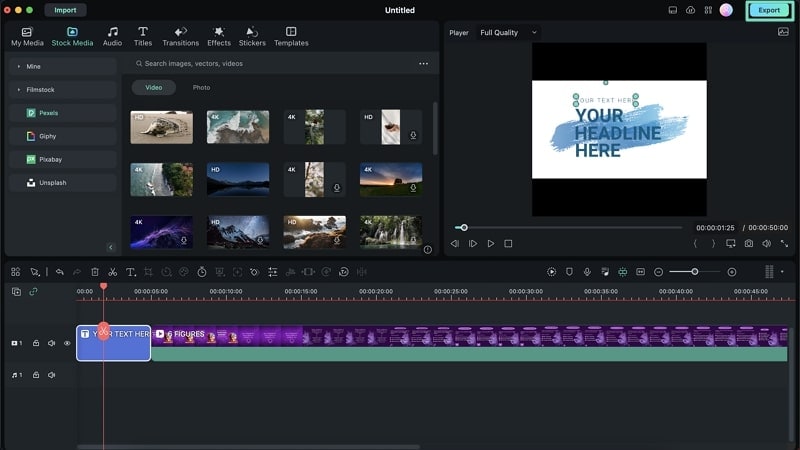
Step 2: Add Text and Implement AI Copywriting Feature
However, when adding text to the video, you can utilize the AI Copywriting feature offered by the platform. Although you can utilize this feature before creating a video, it can also be used during editing. After adding text to the timeline, double-click on the added text to open its customization options. Look for the "AI" icon the in the options to launch the AI copywriting function.
After Video Editing
Step 1: Proceed to Export the Final Video
After creating and editing an entire video, you can also consider utilizing the AI Copywriting feature for creating captions and other titles for the video. As you lead to export the video, click the "Export" button on the top-right screen. This will open a new window where you can define all the export settings.
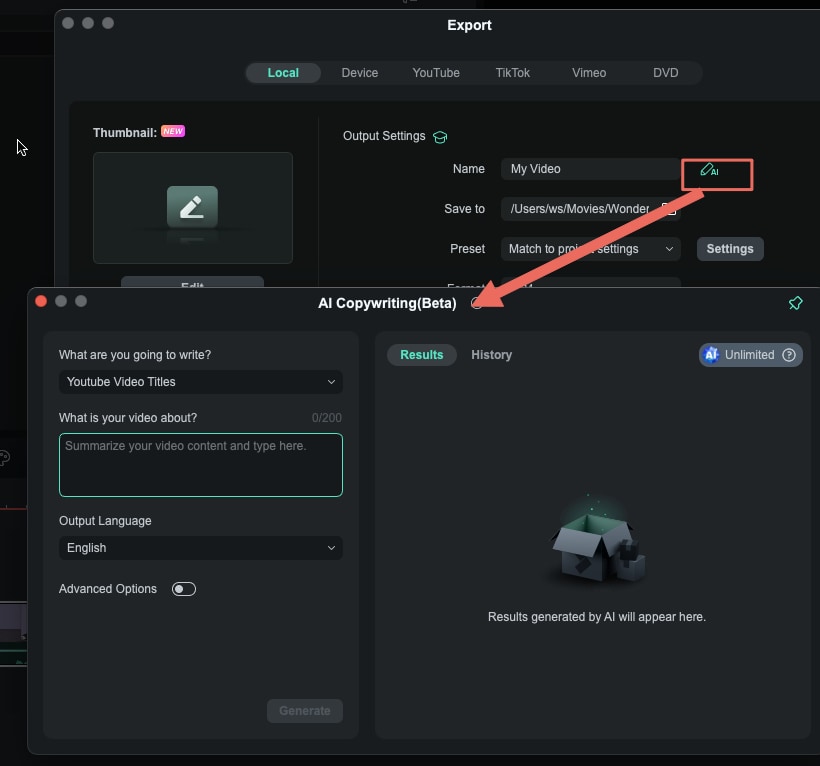
Step 2: Launch AI Copywriting Feature Before Exporting
Once in the export window, select the "AI" button adjacent to the "Name" tab on the screen to open the AI Copywriting feature. After opening the tool, create a suitable name for your video. Summarize your video's content in the window and then click "Generate."
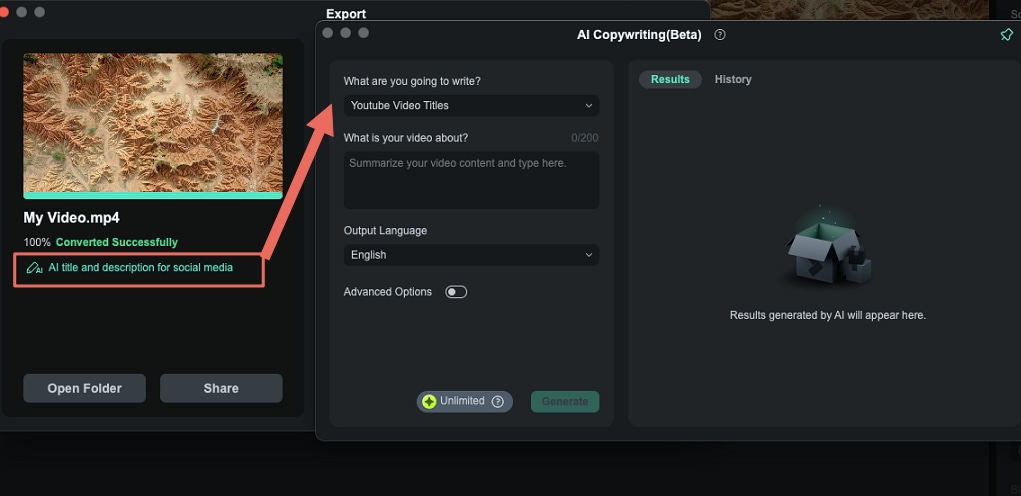
Step 3: Use AI Copywriting For Social Media Content
When you click the "Export" button for the final time, you will be prompted to a screen where the video is rendered. Here, you are provided with the option of "AI title and description for social media," which can help you create a proper title and description for social media posting. This AI Copywriting feature is quite helpful in getting hold of things that are small but take up a lot of time.
Related Posts
Featured Articles
10 Best Free Passport Photo Makers in 2025 (Online & Desktop)
Create a compliant passport photo for free! Discover the top 10 online & desktop passport photo makers. Crop, resize, and edit your photo to meet official requirements in seconds. Try these free tools now!
In-Depth Alight Motion Review 2025: Is It Worth Your Time?
Get the full scoop on Alight Motion — a leading mobile motion graphics editor. Explore its features, performance, and user experience to decide if it fits your editing needs.
Luxury Real Estate Marketing Ideas to Consider in 2025
Looking for exciting luxury home marketing ideas? Want to enter the high-end real estate market? Check out our guide on marketing ideas for million-dollar homes.
Recommended User Guide
AI Skin Tone Protection for Mac
Cameras can sometimes capture skin flaws we want to hide, and the new updates in Filmora can assist you.
Smart Short Clips for Mac
Explore this guide to discover an easy way to convert your long videos into viral shorts on Mac.
