For the Best Results, Use the Latest Version.
-
Preparations for Mac
-
Account (Mac)
-
Get Started & Basic Settings (Mac)
- Release notes for Mac
- Latest Versions and Features for Mac
- Get Started on Mac - Full Guide
- Download/register/uninstall on Mac
- Panel Layout on Mac
- Keyboard shortcuts on Mac
- Touchbar on Mac
- Change playback quality on Mac
- Render preview files on Mac
- Manage Timeline on Mac
- Media for use on Mac
- Logo Reveal For Mac
- Marked Favorites for Mac
-
Compatibility & Tech Specs (Mac)
-
Performance Settings (Mac)
-
-
Creating Projects - Mac
-
Creating New Projects (Mac)
-
-
Importing & Recording - Mac
-
Importing (Mac)
-
Recording (Mac)
-
-
Video Editing for Mac
-
Basic Video Editing for Mac
- Edit Live Photos on Mac
- Enable/Disable Clip for Mac
- Magnetic Timeline For Mac
- Dual Monitor Setup for Video Editing on Mac
- Select All Clips on Timeline for Mac
- Auto Ripple for Mac
- Split & Cut Videos on Mac
- Compositing on Mac
- Crop and zoom on Mac
- Playback Zoom Level for Mac
- Change Speed on Mac
- Play Video in Reverse on Filmora for Mac
- Mark In and Mark Out for Mac
- Markers for Mac
- Group Clips in Filmora for Mac
- Customized Backgrounds for Videos and Images in Mac
- Video snapshot on Mac
- Freeze Frame on Mac
- Auto enhance on Mac
- Applying Drop Shadow for Mac
- Adjustment Layer for Mac
- Mark Clips in Filmora for Mac
- Video Editing Ruler – Mac
- Apply Transforming for Mac
-
Advanced Video Editing for Mac
- Text Animation Path for Mac
- Create Multi-Camera Clip for Mac
- Filmora Motion Blur | Mac
- Drawing Tools for Mac | Filmora Guide
- Compound Clips for Mac
- AI Video Enhancer for Mac
- Filmora Flicker Removal Guide | Mac
- Multi-Clip Editing for Mac
- Keyframe Graph Editor for Mac
- Add Animation Keyframing in Filmora for Mac
- Mask on Mac
- PIP (Picture in Picture) in Filmora on Mac
-
AI-Powered Video Editing for Mac
- Smart Scene Cut for Mac
- Smart Short Clips for Mac
- Filmora AI Eye Contact - Mac
- Filmora Image to Video for Mac
- AI Idea to Video for Mac
- AI Text-to-Video for Mac
- Instant Cutter Tool on Mac
- AI Face Mosaic for Mac
- Filmora Image to Prompt for Mac
- Keyframe Path Curve for Mac
- Filmora AI Image Enhancer Guide – macOS
- Planar Tracking for Mac
- Filmora AI Relight - Mac
- AI Extend For Mac
- AI Script-to-Video for Mac
- AI Text-Based Editing in Mac
- Create With Instant Mode on Mac
- ChatGPT Plugin - AI Copywriting on Mac
- AI Smart Cutout in Filmora for Mac
- Auto reframe on Mac
- Lens Correction in Filmora for Mac
- AI Portrait Cutout on Mac
- Scene detection on Mac
- AI Smart Masking for Mac
- AI Mate Editing for Mac
- Motion Tracking on Mac
- Video Stabilization for Mac
- AI Object Remover For Mac
- AI Smart Search for Mac
- AI Skin Tone Protection for Mac
- Green screen on Mac
- Super Slow Motion with Optical Flow for Mac
- AI Stylizer for Mac
- Video Denoise for Mac
-
-
Audio Editing for Mac
-
Basic Audio Editing for Mac
-
Advanced Audio Editing for Mac
-
AI-Powered Audio Editing for Mac
- Audio To Video for Mac
- AI Sound Effect for Mac
- Smart BGM Generation on Mac
- AI Voice Enhancer for Mac
- Audio Stretch for Mac
- AI Audio Denoise for Mac
- Auto Synchronization on Mac
- AI Vocal Remover for Mac
- AI Auto Beat Sync for Mac
- AI Music Generator for Mac
- AI Voice Cloning on Mac
- Silence Detection on Mac
-
-
Text Editing for Mac
-
Basic Text Editing for Mac
-
Advanced Text Editing for Mac
-
AI-Powered Text Editing for Mac
-
-
Video Customizations for Mac
-
Video Effects (Mac)
-
Audio Effects (Mac)
-
Transitions (Mac)
-
Stickers (Mac)
-
Filters (Mac)
-
Color Editing (Mac)
-
Animations (Mac)
-
Templates (Mac)
-
Asset Center (Mac)
-
-
Exporting & Share & Cloud Backup - Mac
Speech to Text, Text to Speech & SRT on Mac
Filmora for Mac offers powerful Speech-to-Text (STT), Text-to-Speech (TTS), and SRT subtitle tools that simplify dubbing and subtitle creation. STT converts spoken audio into accurate captions, making videos more accessible and easier to understand. TTS transforms written text into natural-sounding voiceovers using AI voices. Along with SRT support, these features help creators edit subtitles, improve narration, and streamline video production for professional-quality results.
Index
Using Speech-to-Text (STT) on Mac
The Speech-to-Text feature in Filmora for Mac automatically generates subtitles from audio, saving time and improving editing efficiency.
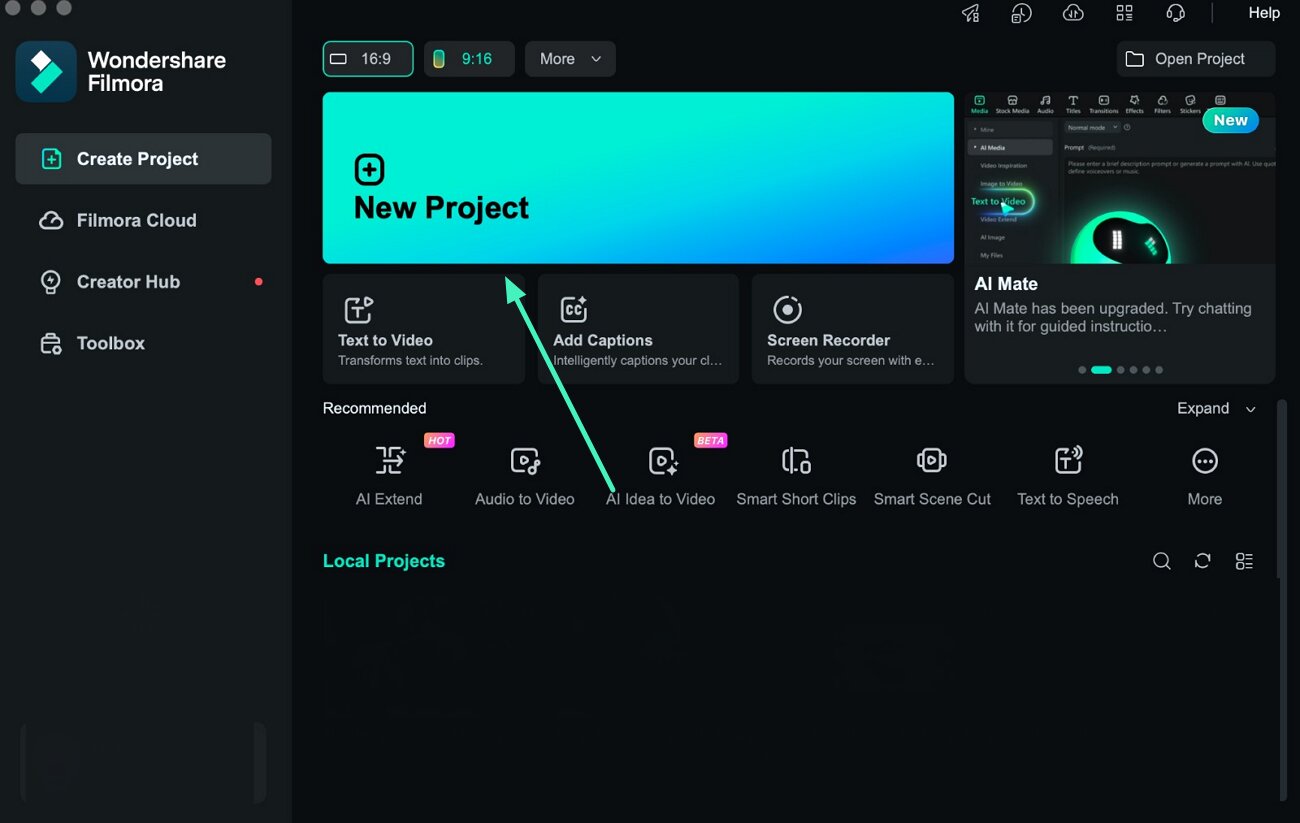
Step 1. Start a New Project
Launch Wondershare Filmora on your Mac and click New Project from the home screen. Import your video file and drag it onto the timeline to begin editing.
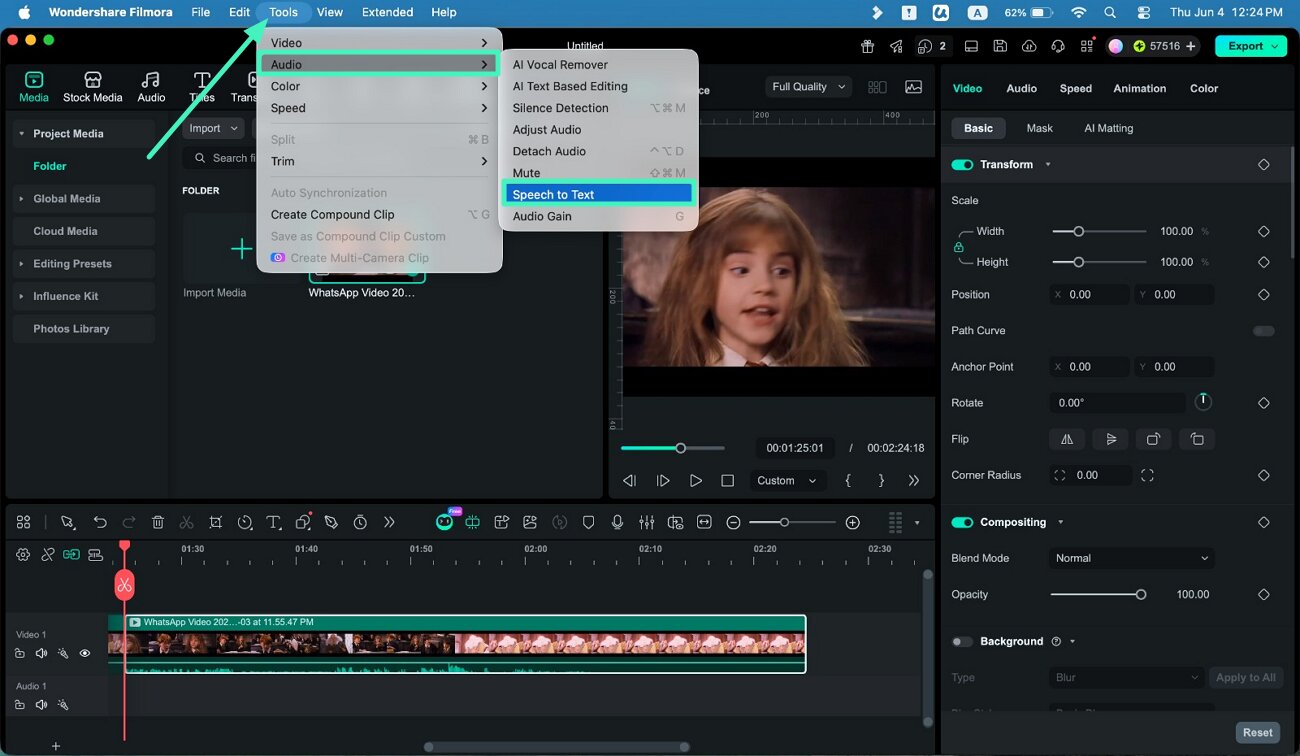
Step 2. Open Speech-to-Text Tool
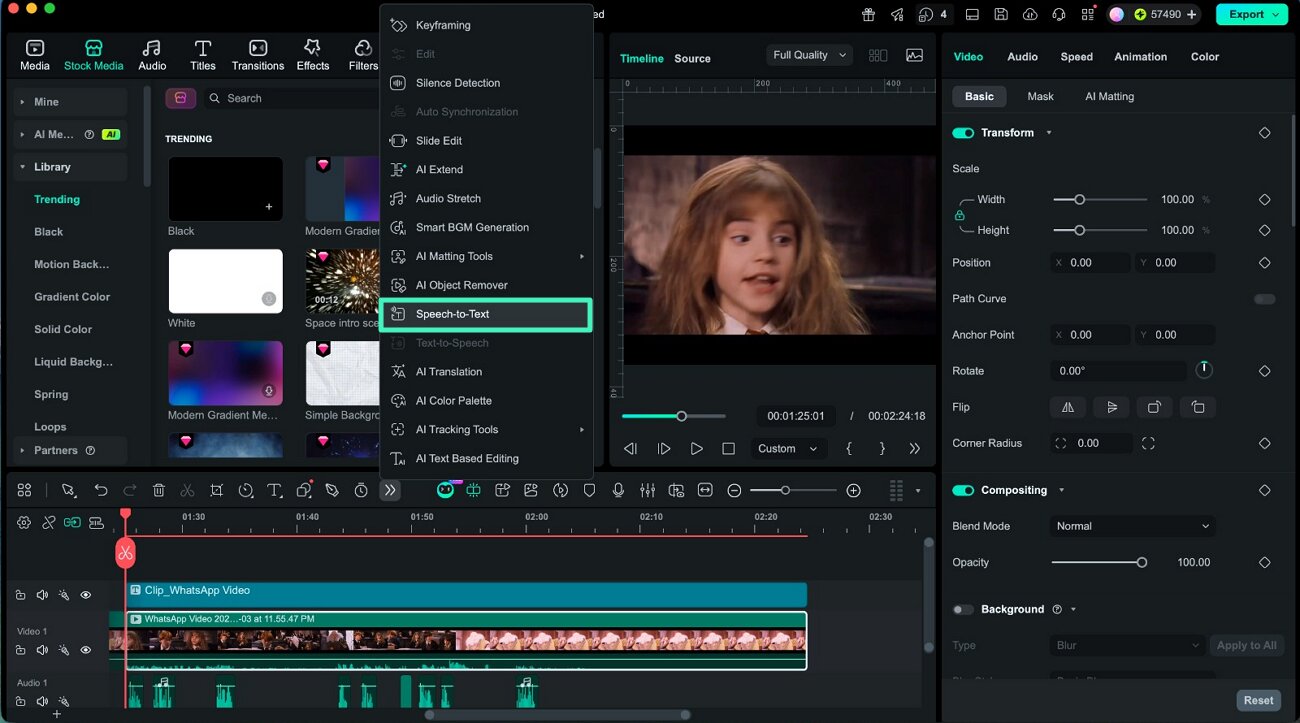
Select the audio or video clip in the timeline, then open Tools from the top menu bar. Select Audio and then Speech to Text from the expanded list.
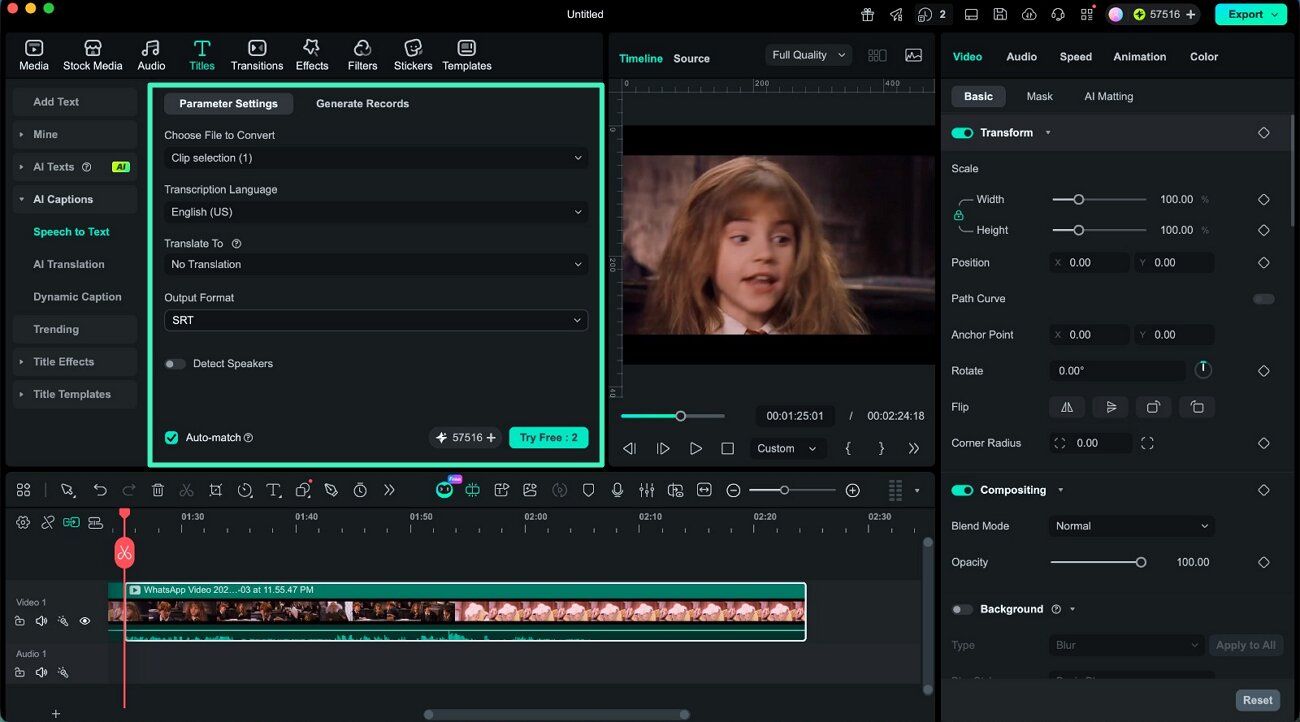
Step 3. Set Language and Generate Captions
Choose the desired language from the dropdown menu and select output format as SRT if needed. Click the Generate button to start converting speech into text.
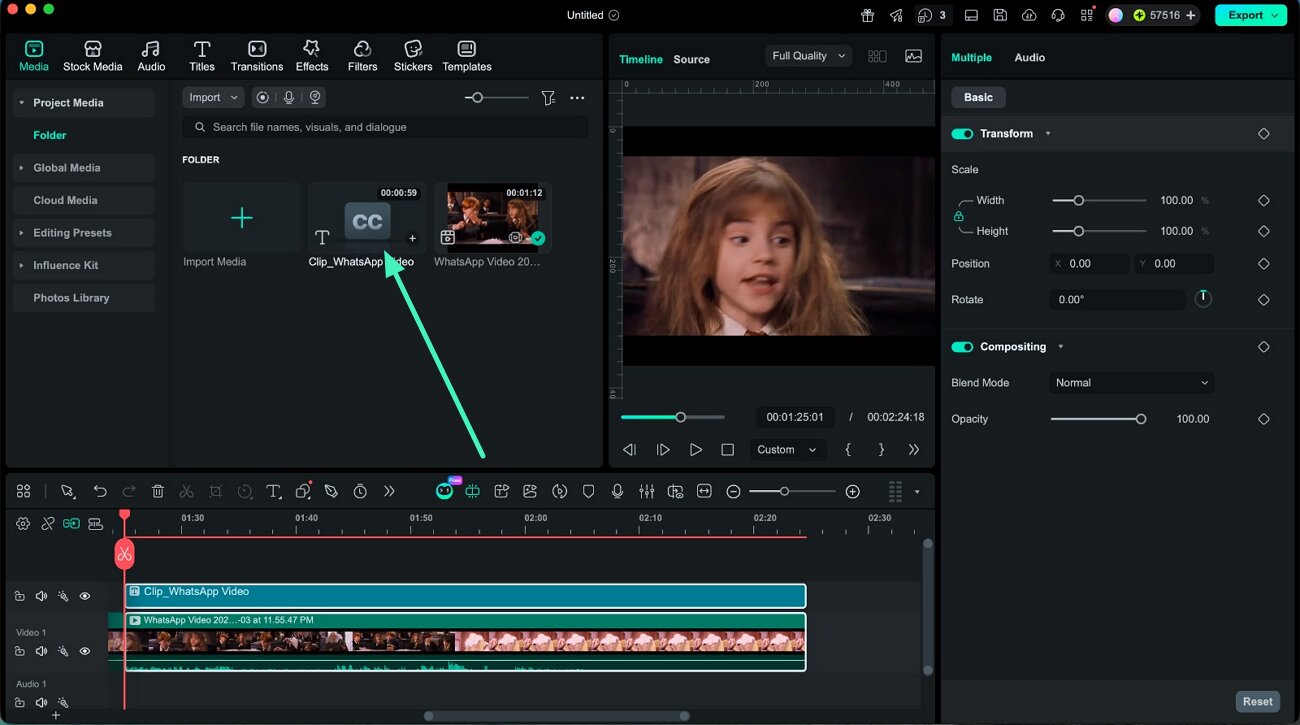
Step 4. Preview and Apply Subtitles
Once the captions are generated, preview them in the timeline. If everything looks correct, apply them to your video and proceed with further editing or export.
Other Ways to Access the Speech-to-Text Feature
From Homepage
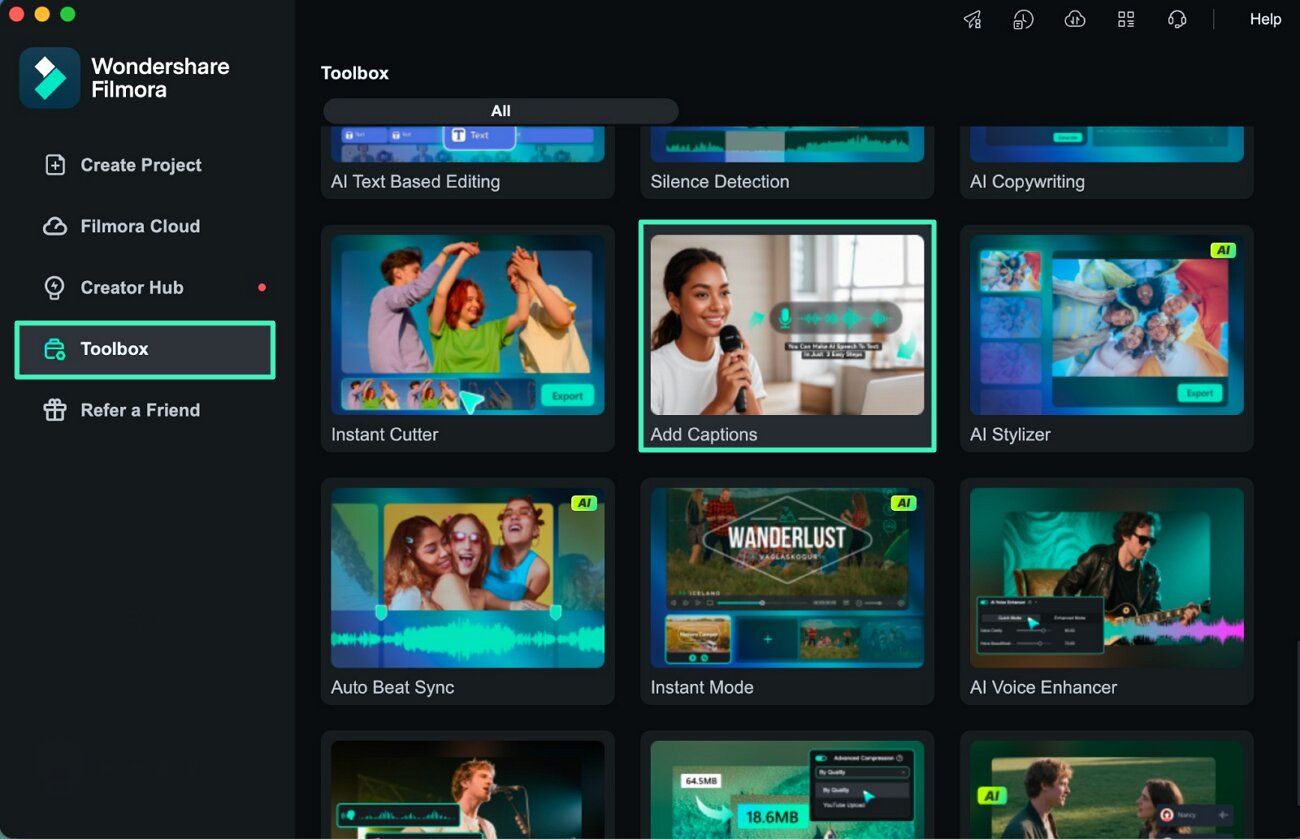
Instructions. After launching Filmora on your Mac, go to the left panel and open the Toolbox. From there, find the Add Captions option and click it to start the Speech-to-Text tool.
From Tools Menu
Instructions. In the top menu bar, click on Tools to expand the available options. Select Speech to Text from the list to open the conversion panel.

From Timeline Toolbar
Instructions. Import your video to the timeline, then use the toolbar above it. Click on the Speech to Text option to activate the feature directly.
Text to Speech in Filmora for Mac
Filmora for Mac also allows users to convert written text into natural-sounding voiceovers using the Text-to-Speech (TTS) feature. This helps creators add narration in different languages without recording audio manually.
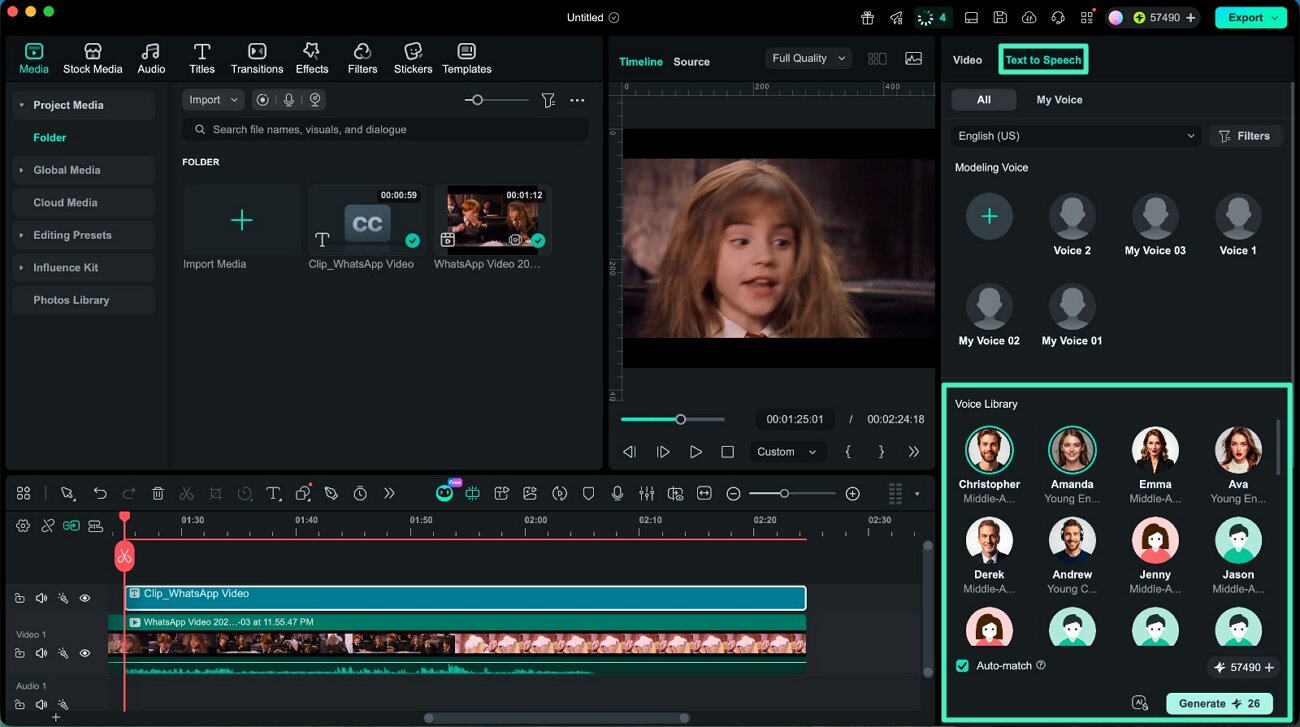
Step 1. Select Voice and Generate Speech
Import your media and text into Filmora, then open the Text to Speech panel from the left side. Choose a voice from the available options or use the Voice Cloning feature to create a custom voice. Click Generate to process the audio.
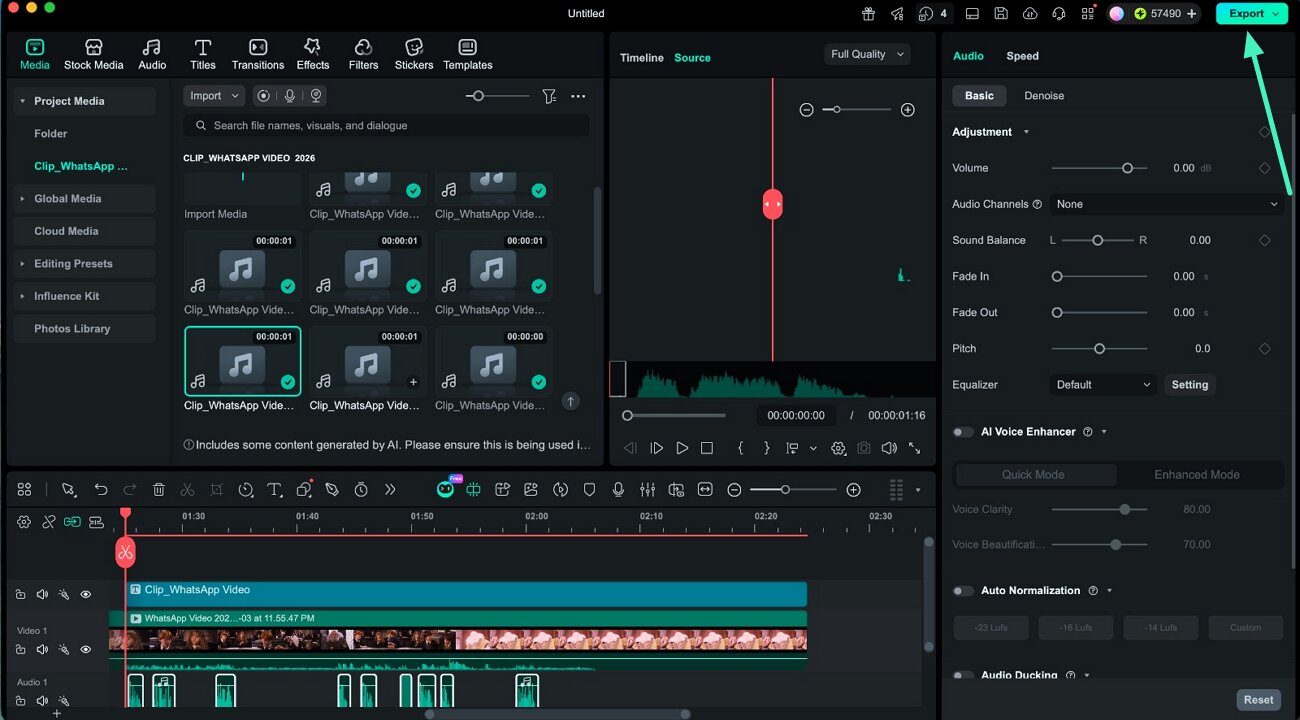
Step 2. Preview and Export Audio
After the voice is generated, drag it to the timeline and align it with your content. Preview the narration in the player window, and once satisfied, click Export to save the final output.
Related Posts
Featured Articles
Updated | Learn All About Lip-Syncing in Animation
Want to know how to create lip-sync animation and bring your characters to life? Read this guide, where we discuss some easy techniques to accomplish that.
How to Make Funny Videos Using a Funny Video Editor
Creating funny videos doesn't have to be hard when you've got the right funny video editor on hand. We’ll help you figure out how to make a funny video by yourself, step by step.
Witch Filter: Turn Your Photo into a Witch or Wizard with AI
Discover the best free AI filter to instantly witchify photos and videos! Transform your Halloween content with spooky effects—convert photos and videos to witches using Filmora Mobile. Try it now!
Recommended User Guide
AI Translation in Filmora Mac
Wondershare Filmora’s AI Translation tool can translate your video into any language for a wider content reach and more views. This is a guide about Filmora's AI Translation
Auto Caption Guide for Mac
Being an editor, you might need the option of converting your video captions into interactive content. Learn how auto caption helps users in Filmora editing.
