For the Best Results, Use the Latest Version.
-
Preparations for Mac
-
Account (Mac)
-
Get Started & Basic Settings (Mac)
- Release notes for Mac
- Latest Versions and Features for Mac
- Get Started on Mac - Full Guide
- Download/register/uninstall on Mac
- Panel Layout on Mac
- Keyboard shortcuts on Mac
- Touchbar on Mac
- Change playback quality on Mac
- Render preview files on Mac
- Manage timeline on Mac
- Media for use on Mac
- Logo Reveal For Mac
- Marked Favorites for Mac
-
Compatibility & Tech Specs (Mac)
-
Performance Settings (Mac)
-
-
Creating Projects - Mac
-
Creating New Projects (Mac)
-
-
Importing & Recording - Mac
-
Importing (Mac)
-
Recording (Mac)
-
-
Video Editing for Mac
-
Basic Video Editing for Mac
- Edit Live Photos on Mac
- Enable/Disable Clip for Mac
- Magnetic Timeline For Mac
- Select All Clips on Timeline for Mac
- Auto Ripple for Mac
- Split & cut videos on Mac
- Compositing on Mac
- Crop and zoom on Mac
- Playback Zoom Level for Mac
- Change speed on Mac
- Play video in reverse on Mac
- Mark In and Mark Out for Mac
- Markers for Mac
- Group clips on Mac
- Customized Backgrounds for Videos and Images in Mac
- Video snapshot on Mac
- Freeze frame on Mac
- Auto enhance on Mac
- Applying Drop Shadow for Mac
- Adjustment Layer for Mac
- Mark clip on Mac
- Video Editing Ruler – Mac
- Apply Transforming for Mac
-
Advanced Video Editing for Mac
-
AI-Powered Video Editing for Mac
- Smart Scene Cut for Mac
- Smart Short Clips for Mac
- Image to Video for Mac
- AI Idea to Video for Mac
- AI Text-to-Video for Mac
- Instant Cutter Tool on Mac
- AI Face Mosaic for Mac
- Keyframe Path Curve for Mac
- Planar Tracking for Mac
- AI Extend For Mac
- AI Script-to-Video for Mac
- AI Text-Based Editing in Mac
- Create With Instant Mode on Mac
- ChatGPT Plugin - AI Copywriting on Mac
- AI Smart Cutout for Mac
- Auto reframe on Mac
- Lens correction on Mac
- AI Portrait Cutout on Mac
- Scene detection on Mac
- AI Smart Masking for Mac
- AI Mate Editing for Mac
- Motion Tracking on Mac
- Stabilize video on Mac
- AI Object Remover For Mac
- AI Smart Search for Mac
- AI Skin Tone Protection for Mac
- Green screen on Mac
- Super Slow Motion with Optical Flow for Mac
- AI stylizer on Mac
- Video Denoise for Mac
-
-
Audio Editing for Mac
-
Basic Audio Editing for Mac
-
Advanced Audio Editing for Mac
-
AI-Powered Audio Editing for Mac
- Audio To Video for Mac
- AI Sound Effect for Mac
- Smart BGM Generation for Mac
- AI Voice Enhancer for Mac
- Audio Stretch for Mac
- AI Audio Denoise for Mac
- Auto synchronization for Mac
- AI Vocal Remover for Mac
- Auto Beat Sync on Mac
- AI Music Generator for Mac
- How to Perform AI Voice Cloning in Wondershare Filmora?
- Silence detection on Mac
-
-
Text Editing for Mac
-
Basic Text Editing for Mac
-
Advanced Text Editing for Mac
-
AI-Powered Text Editing for Mac
-
-
Video Customizations for Mac
-
Video Effects (Mac)
-
Audio Effects (Mac)
-
Transitions (Mac)
-
Stickers (Mac)
-
Filters (Mac)
-
Color Editing (Mac)
-
Animations (Mac)
-
Templates (Mac)
-
Asset Center (Mac)
-
-
Exporting & Share & Cloud Backup - Mac
AI Extend For Mac
Have you ever felt like your generated video could have been more visually appealing if a particular scene had been extended? Thankfully, with the integration of advanced AI, you can now extend a particular part of your video seamlessly in Filmora for Mac.
This guide will walk you through how to use the AI Extend feature on your Mac:
Extend Beyond Imagination with Filmora AI Extend
Filmora’s AI Extend feature revolutionizes video editing by intelligently lengthening clips by 5 to 10 seconds while preserving smooth scene transitions. This one-click tool ensures enhanced continuity and stability, setting it apart from competing AI editors. Users can effortlessly incorporate new creative content into their original videos, minimizing disruptions and maintaining the storyline.
This incredible feature guarantees a professional-grade extension experience without jump cuts. Besides extending video clips, it also allows users to lengthen the audio portion using AI, significantly boosting editing efficiency and creative flexibility.
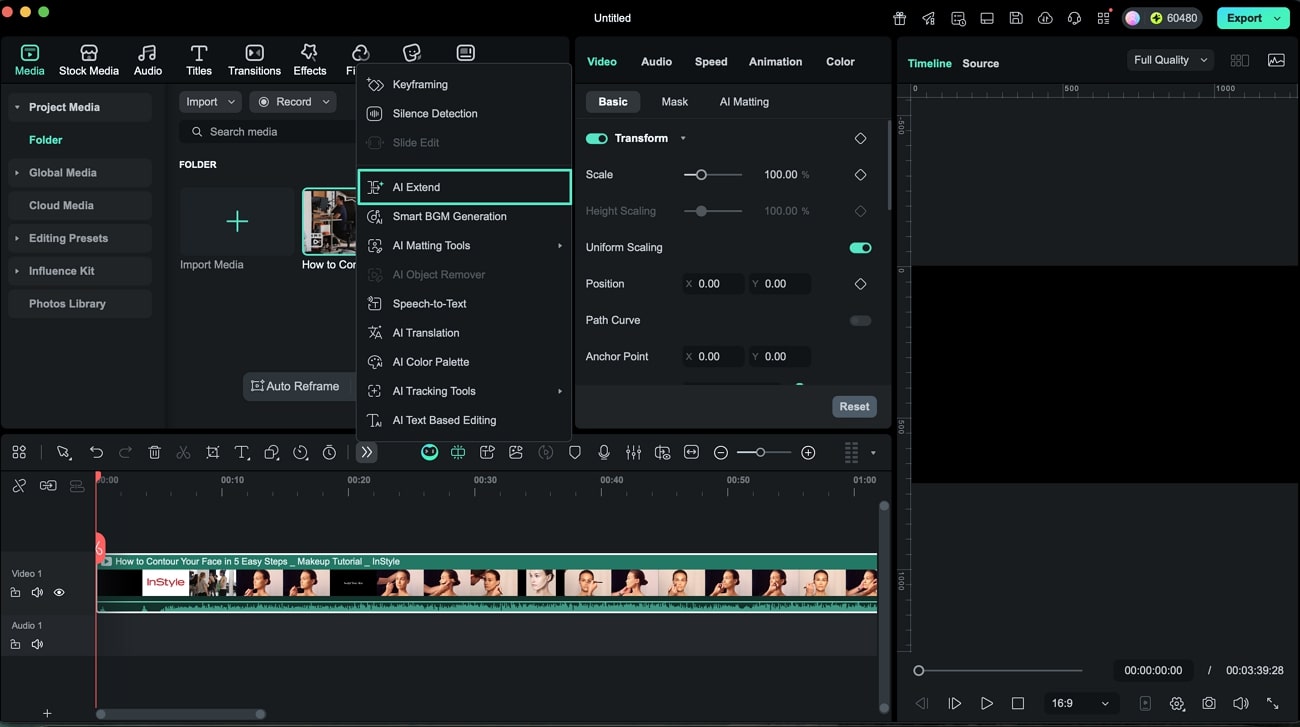
Entry Point 1: Access From Media Timeline
The feature can be accessed on Filmora on your Mac from different entry points. The primary way is to acquire it from the main timeline, which can be explored using the steps below:
Step 1. Acquire AI Extend from Timeline
Once you have launched Filmora on your Mac, create a new project and import your video to the tool’s interface. Now drag the cursor to the area on the timeline for which you want to extend after clicking on the AI Extend icon located on the timeline.
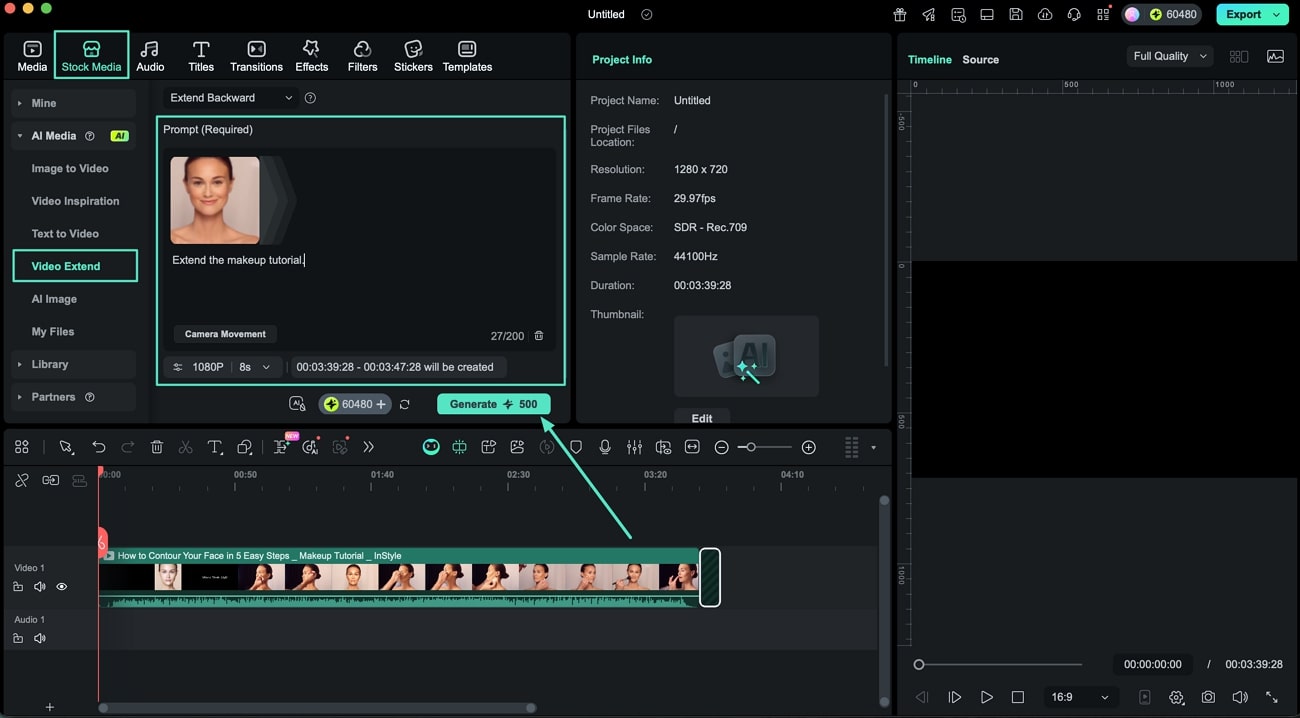
Step 2. Generate Extended Clips with Text Prompt
Input your desired text prompt once you are redirected to the Video Extend section under Stock Media. Adjust parameters like video duration (5–10 seconds) and audio duration (10–30 seconds), then click Generate to complete the extension.
Step 3. Review and Finalize Generated Clips
After extending the video, preview the results in the preview window. Apply any needed effects or filters, and once you are satisfied with the outcome, save the video by clicking the Export button.

Entry Point 2: From Stock Media
You can access this feature from another entry point on your Filmora software. Read the steps next to learn how to utilize this feature:
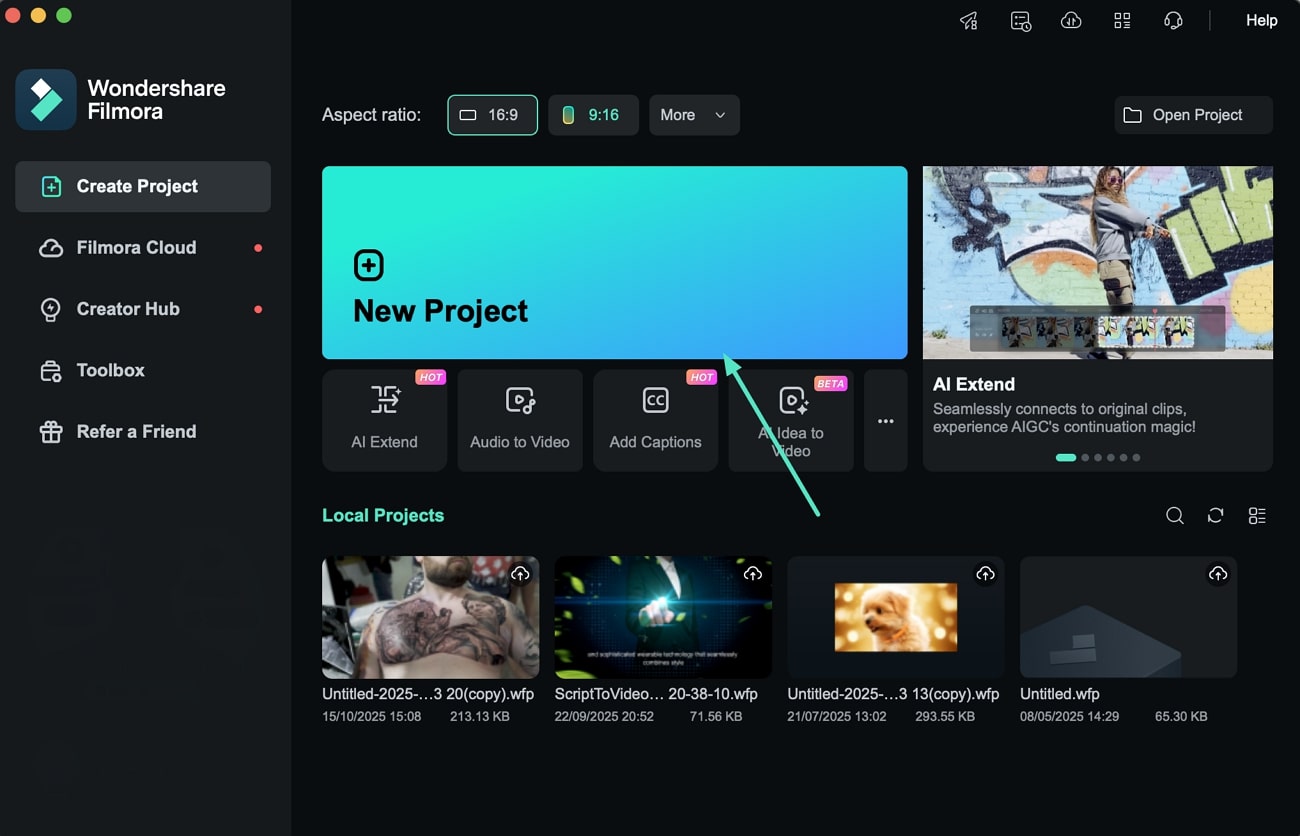
Step 1. Launch a New Project
Open Filmora on your Mac and click on the New Project tab. Then, import the video you want to extend and drag it onto the editing timeline.
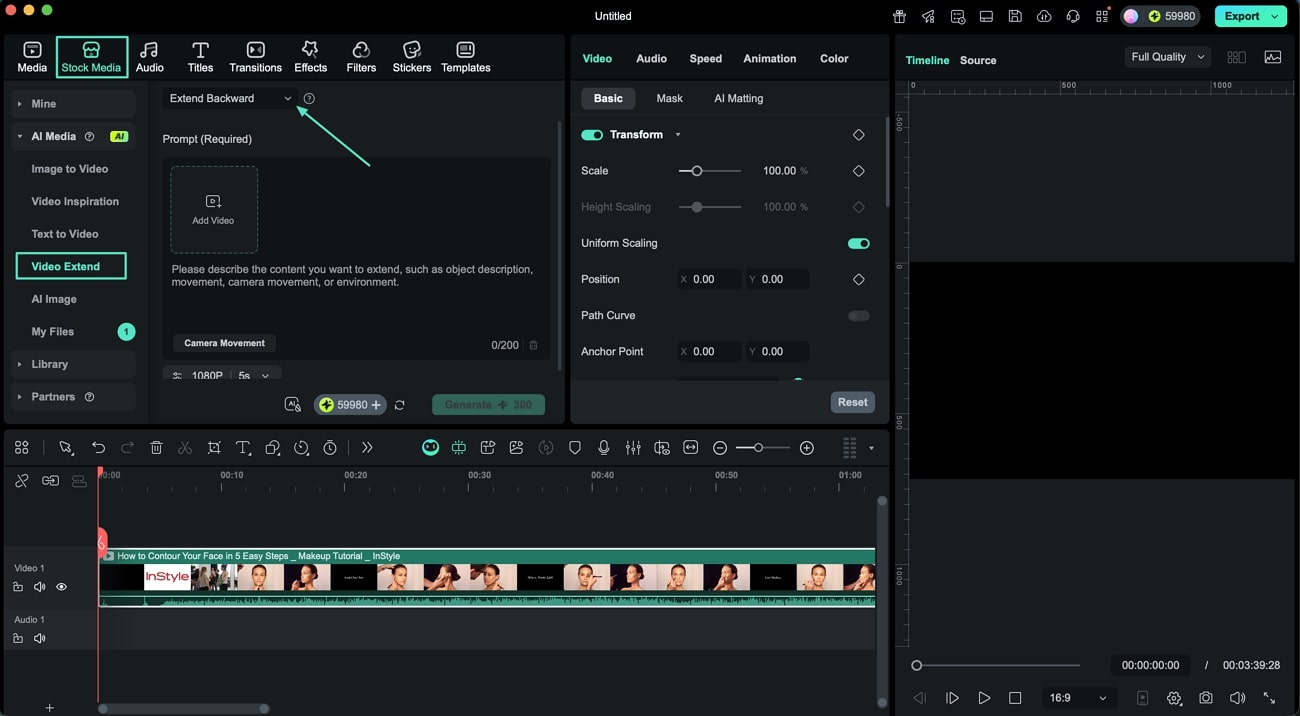
Step 2. Select the AI Extend Feature
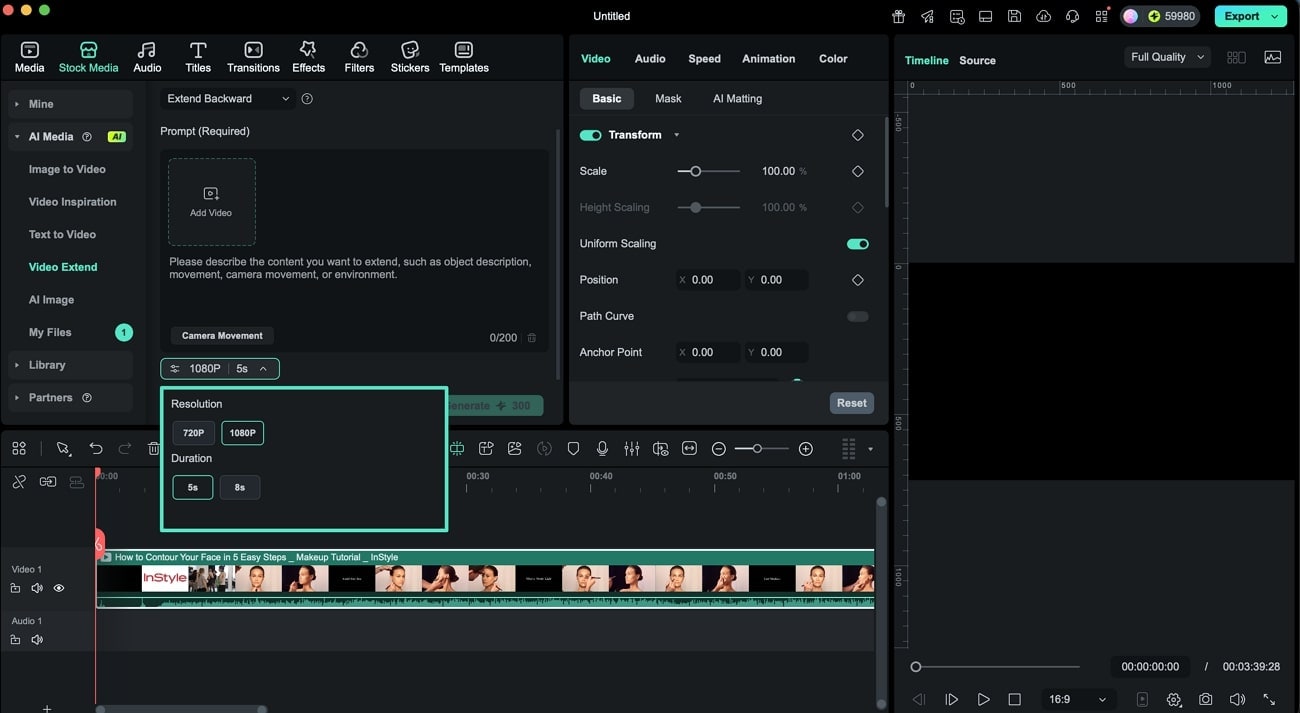
Go to the Stock Media section from the menu bar. Find the Video Extend option on the left side and click it. Choose to either Extend Forward or Extend Backward by expanding the respective dropdown menu.
Step 3. Configure Duration, Resolution, and Text Prompt
Choose the desired duration for the extended clip from the options available. Then, select the resolution quality, either 720p or 1080p. Enter your text prompt in the provided input field to guide the extension.
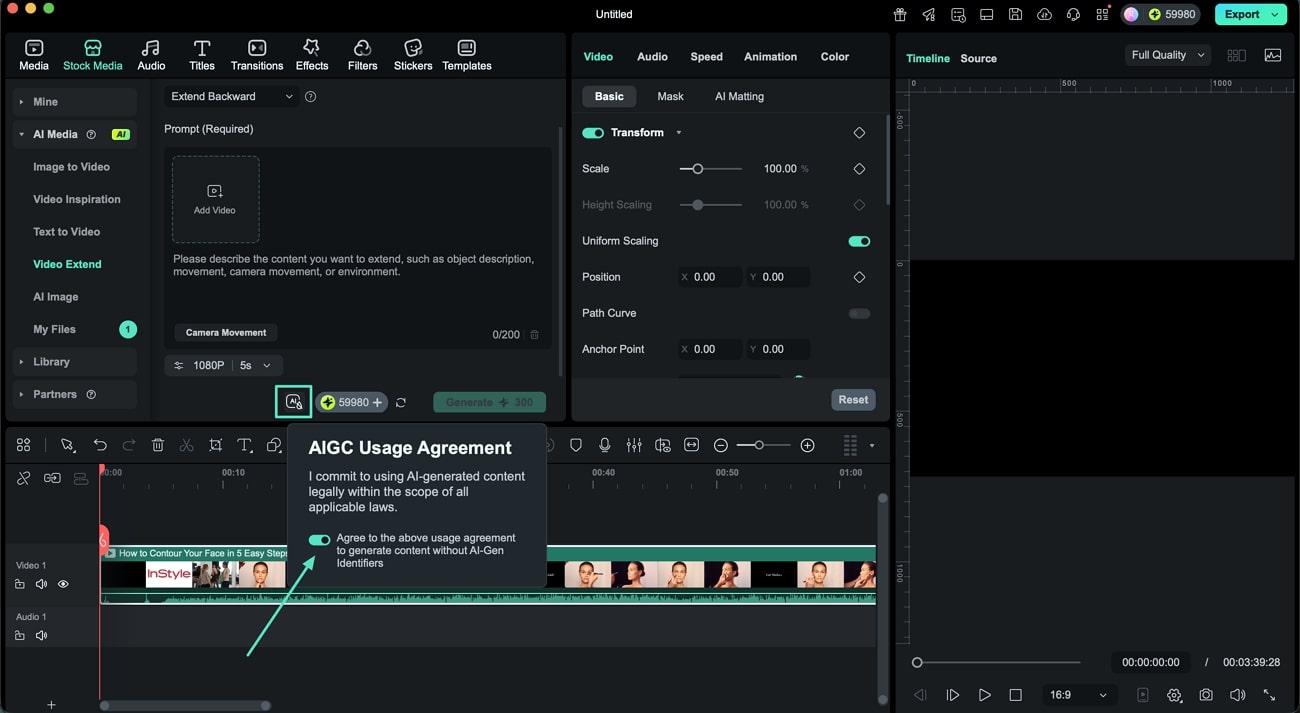
Step 4. Accept the AIGC Usage Terms
Toggle on the AI icon to agree to the legal terms for using AI-generated content. After that, press the Generate button to start the extension process.
Step 5. Edit the Generated AI Clip
Once created, the AI clip appears as a rectangle clip on the timeline, which you can reposition by dragging and adjusting its alignment. Additionally, you may add keyframes and markers to enhance its dynamics.

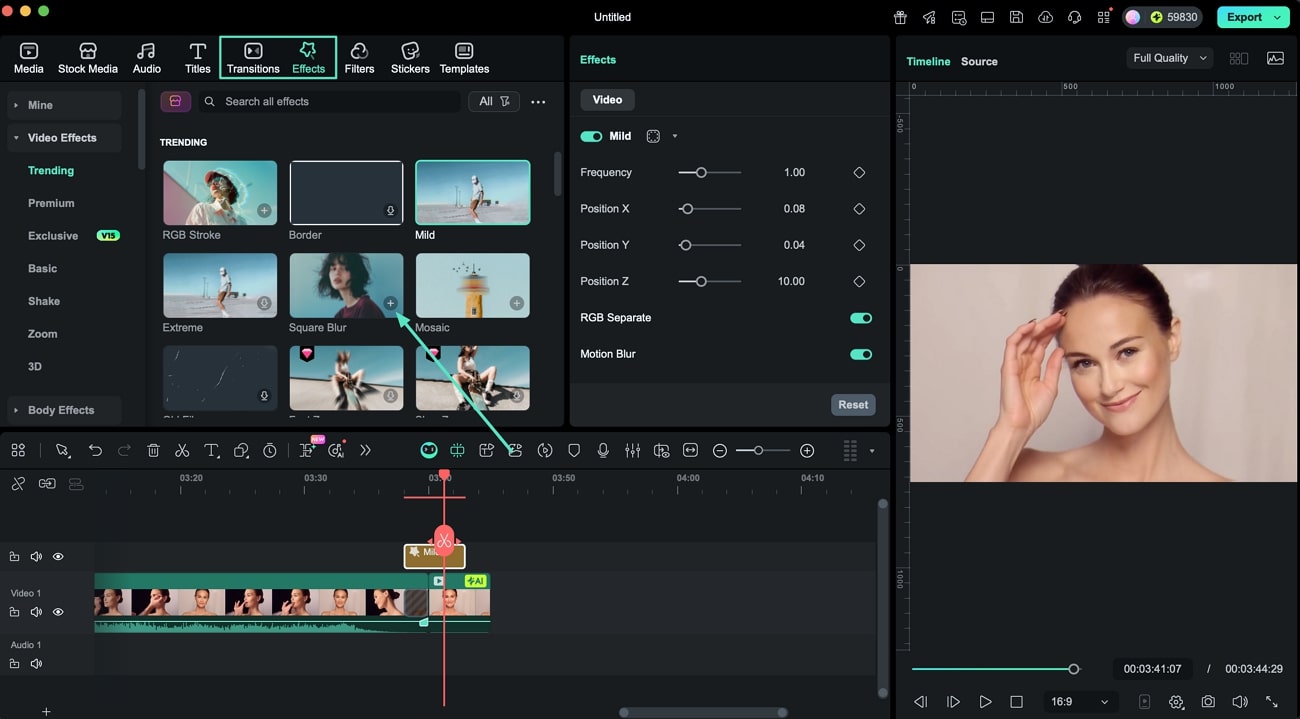
Step 6. Apply Effects and Transitions
Use the Resource Panel to add transitions and effects to your AI-generated clip. Click the + icon to include your chosen assets.
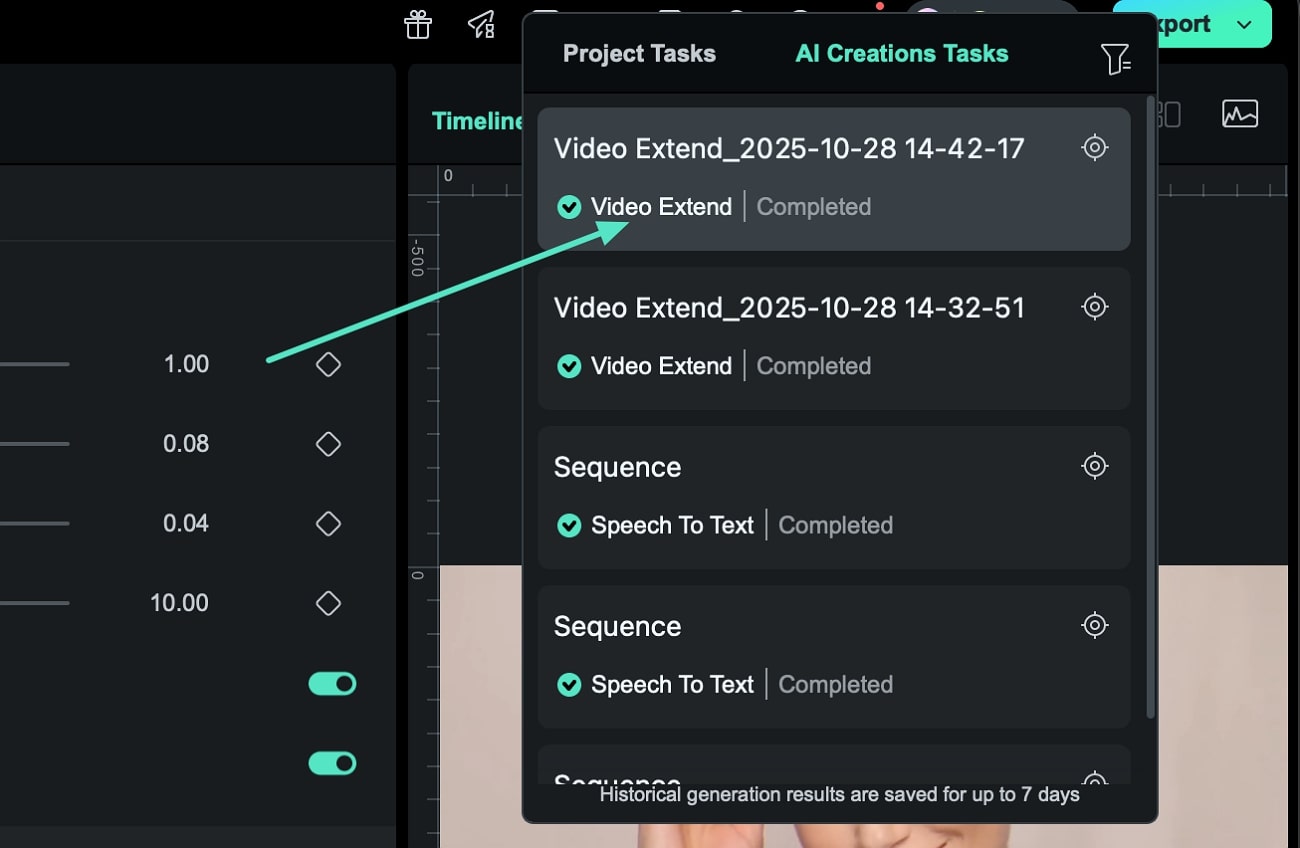
Step 7. Monitor AI Clip Generation and Identification
During generation, a progress indicator shows the AI content creation status. Once completed, the clip is added to the timeline with a clear AI-generated content label.
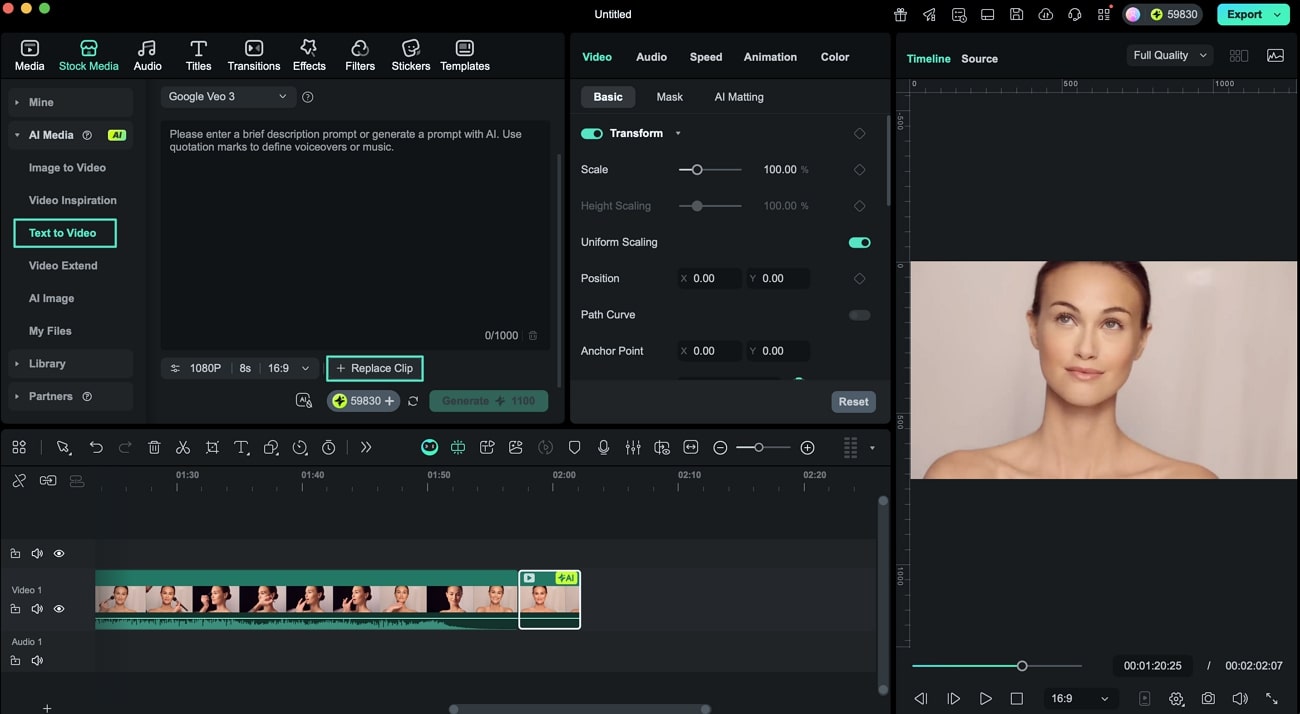
Replacing AI Clips in Filmora on Mac
The feature also lets you replace an existing clip with a new clip effortlessly using the Replace Clip feature located within the AI Media section. Follow the steps mentioned below to learn how to use this function:
Step 1. Replace an Existing Clip
In the left panel, activate the Text To Video option and select the Replace Clip option located within the interface.
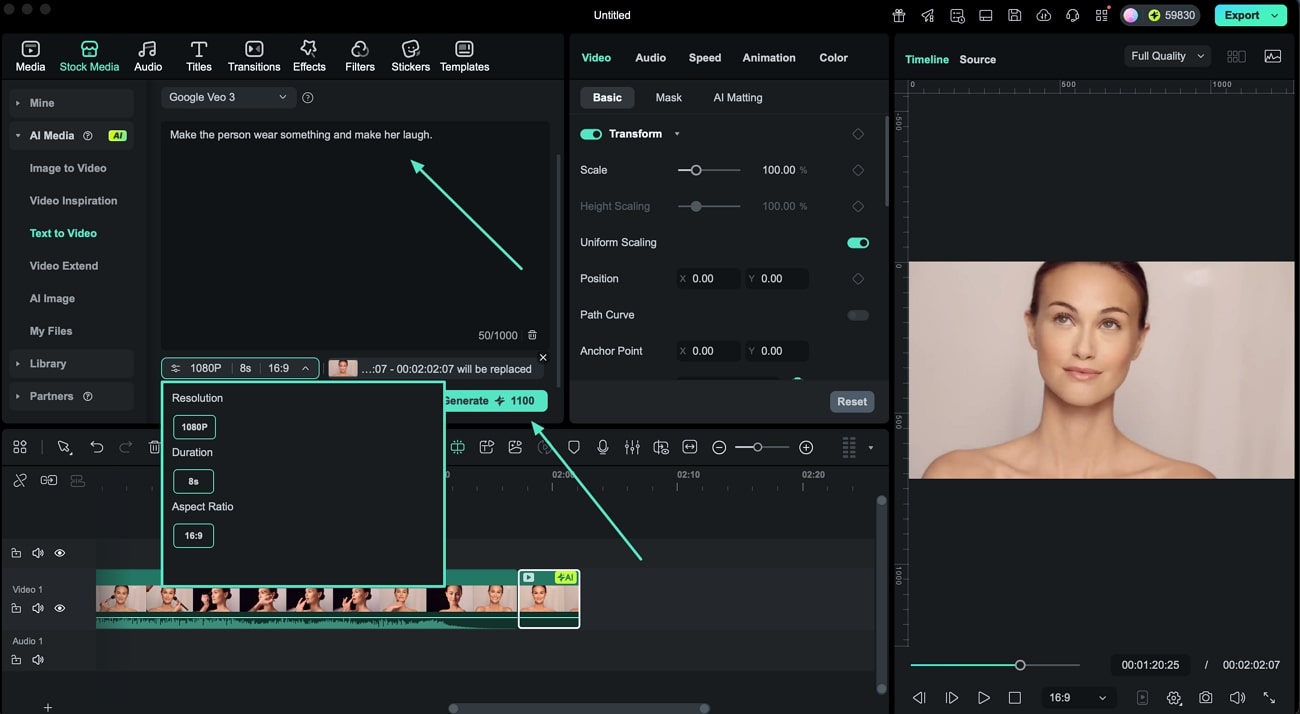
Step 2. Enter Prompt and Generate New Clip
The replacement clip is added to the folder automatically. Enter your text prompt and select output settings such as Resolution, Duration, and Aspect Ratio. Once all the settings are successfully configured, click Generate to create the new clip.
Related Posts
Featured Articles
[Top Tools] Translate Song Lyrics With High-Quality Outputs
Are you looking for ways to generate songs in multiple languages? Read this article to learn the best way to conveniently translate song lyrics.
Is VideoScribe Software Worth It? An Honest Review for Aspiring Animators
Looking for simple animation software? Check out our review of VideoScribe software for insights on its features, how to use it, and a solid alternative.
How to Change TikTok Video Background?
Have you ever used the green screen feature or thought to change the video background on TikTok? If not, you are missing a fun part of the TikTok world. Let's see how you can do it.
Recommended User Guide
Stabilize video on Mac
Learn how to stabilize your video with Filmora for Mac.
AI Smart Masking for Mac
Masking is a feature used in professional video editing, and being a professional video editor, Wondershare Filmora offers it.
Planar Tracking for Mac
You will learn how to use Planar Tracking in your videos
