For the Best Results, Use the Latest Version.
-
Preparations for Mac
-
Account (Mac)
-
Get Started & Basic Settings (Mac)
- Release notes for Mac
- Latest Versions and Features for Mac
- Get Started on Mac - Full Guide
- Download/register/uninstall on Mac
- Panel Layout on Mac
- Keyboard shortcuts on Mac
- Touchbar on Mac
- Change playback quality on Mac
- Render preview files on Mac
- Manage Timeline on Mac
- Media for use on Mac
- Logo Reveal For Mac
- Marked Favorites for Mac
-
Compatibility & Tech Specs (Mac)
-
Performance Settings (Mac)
-
-
Creating Projects - Mac
-
Creating New Projects (Mac)
-
-
Importing & Recording - Mac
-
Importing (Mac)
-
Recording (Mac)
-
-
Video Editing for Mac
-
Basic Video Editing for Mac
- Edit Live Photos on Mac
- Enable/Disable Clip for Mac
- Magnetic Timeline For Mac
- Dual Monitor Setup for Video Editing on Mac
- Select All Clips on Timeline for Mac
- Auto Ripple for Mac
- Split & cut videos on Mac
- Compositing on Mac
- Crop and zoom on Mac
- Playback Zoom Level for Mac
- Change speed on Mac
- Play video in reverse on Mac
- Mark In and Mark Out for Mac
- Markers for Mac
- Group clips on Mac
- Customized Backgrounds for Videos and Images in Mac
- Video snapshot on Mac
- Freeze frame on Mac
- Auto enhance on Mac
- Applying Drop Shadow for Mac
- Adjustment Layer for Mac
- Mark clip on Mac
- Video Editing Ruler – Mac
- Apply Transforming for Mac
-
Advanced Video Editing for Mac
- Text Animation Path for Mac
- Create Multi-Camera Clip for Mac
- Drawing Tools for Mac | Filmora Guide
- Compound Clips for Mac
- AI Video Enhancer for Mac
- Filmora Flicker Removal Guide | Mac
- Multi-Clip Editing for Mac
- Keyframe Graph Editor for Mac
- Animation keyframing on Mac
- Mask on Mac
- PIP (picture in picture) on Mac
-
AI-Powered Video Editing for Mac
- Smart Scene Cut for Mac
- Smart Short Clips for Mac
- Filmora Image to Video for Mac
- AI Idea to Video for Mac
- AI Text-to-Video for Mac
- Instant Cutter Tool on Mac
- AI Face Mosaic for Mac
- Keyframe Path Curve for Mac
- Planar Tracking for Mac
- Filmora AI Relight - Mac
- AI Extend For Mac
- AI Script-to-Video for Mac
- AI Text-Based Editing in Mac
- Create With Instant Mode on Mac
- ChatGPT Plugin - AI Copywriting on Mac
- AI Smart Cutout for Mac
- Auto reframe on Mac
- Lens correction on Mac
- AI Portrait Cutout on Mac
- Scene detection on Mac
- AI Smart Masking for Mac
- AI Mate Editing for Mac
- Motion Tracking on Mac
- Video Stabilization for Mac
- AI Object Remover For Mac
- AI Smart Search for Mac
- AI Skin Tone Protection for Mac
- Green screen on Mac
- Super Slow Motion with Optical Flow for Mac
- AI stylizer on Mac
- Video Denoise for Mac
-
-
Audio Editing for Mac
-
Basic Audio Editing for Mac
-
Advanced Audio Editing for Mac
-
AI-Powered Audio Editing for Mac
- Audio To Video for Mac
- AI Sound Effect for Mac
- Smart BGM Generation for Mac
- AI Voice Enhancer for Mac
- Audio Stretch for Mac
- AI Audio Denoise for Mac
- Auto synchronization for Mac
- AI Vocal Remover for Mac
- Auto Beat Sync on Mac
- AI Music Generator for Mac
- How to Perform AI Voice Cloning in Wondershare Filmora?
- Silence detection on Mac
-
-
Text Editing for Mac
-
Basic Text Editing for Mac
-
Advanced Text Editing for Mac
-
AI-Powered Text Editing for Mac
-
-
Video Customizations for Mac
-
Video Effects (Mac)
-
Audio Effects (Mac)
-
Transitions (Mac)
-
Stickers (Mac)
-
Filters (Mac)
-
Color Editing (Mac)
-
Animations (Mac)
-
Templates (Mac)
-
Asset Center (Mac)
-
-
Exporting & Share & Cloud Backup - Mac
Color Wheels for Mac
Users can enhance the task using color wheels when performing video editing or graphic designing in Filmora. They can employ Filmora's color wheel technique to upgrade their editing and enhance the visuals of their content. In this guide, users will have extensive knowledge of accessing the Color Wheels in this editing software:
Accessing the Color Wheels
Here is a step-by-step insight into accessing this feature from Filmora’s main interface:
Step 1: Import Media into the Media Library
Upon accessing this software on your desktop, initiate it, and from the main menu, select the "Open Project" option. Doing this will directly import your media into the "Media Library". Afterward, bring this media to the timeline.

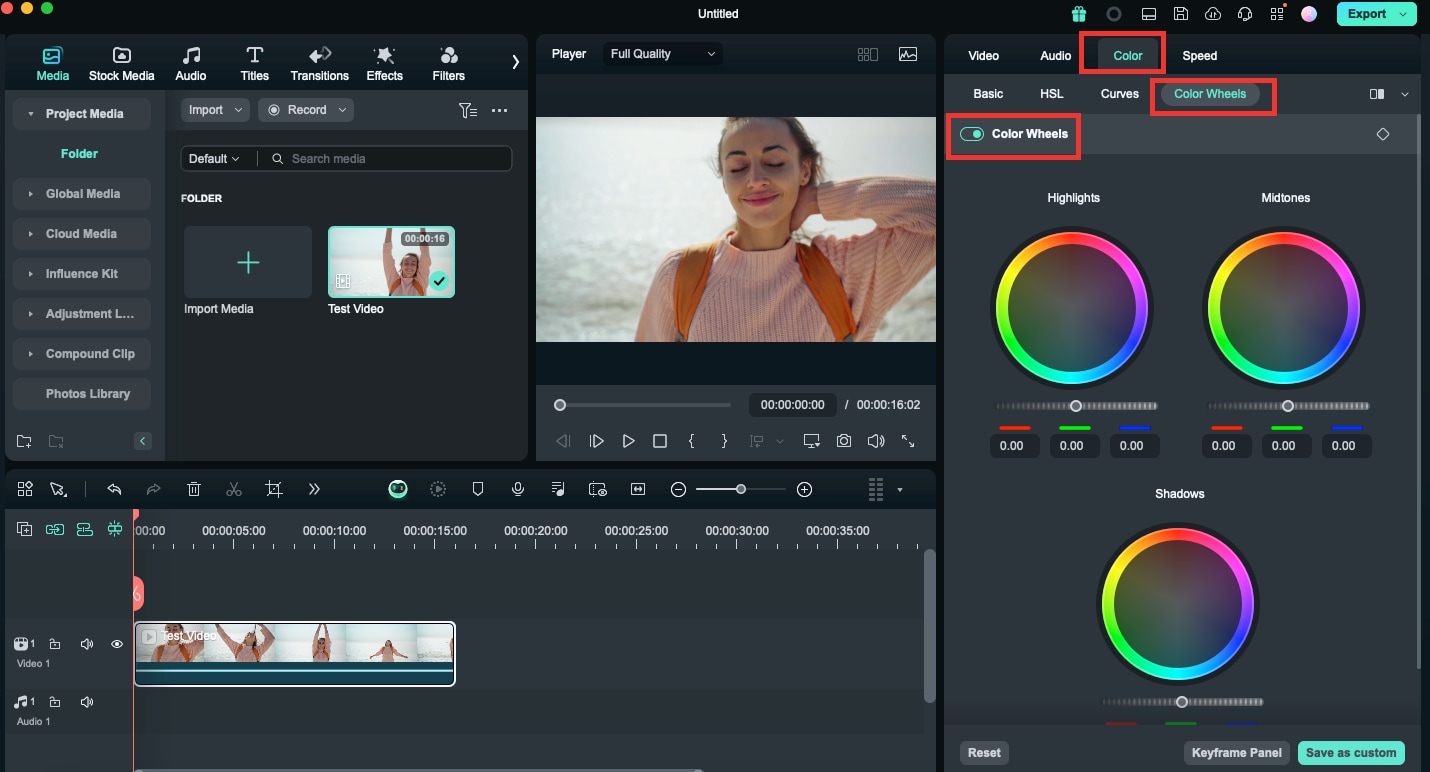
Step 2: Access with Color Wheels
After selecting the clip you just brought to the timeline, hover towards the settings panel at the right.
Left mouse click on the video on the timeline and the tabs will appear on the right side. You will find "Color Wheels under the "Color" tab, and then make sure the "Color Wheels" switch is on.
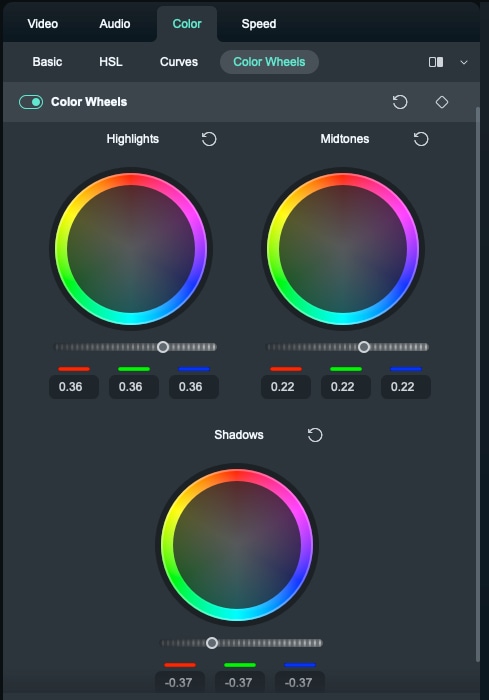
Step 3: Adjust the Color Wheels Depending on Your Preference
There are a total of three buttons for Highlights, Midtones, and Shadows, and each adjustment option has sliders that allow you to customize the parameter settings, so you can change them according to your preference, and there are also specific numbers displayed below.
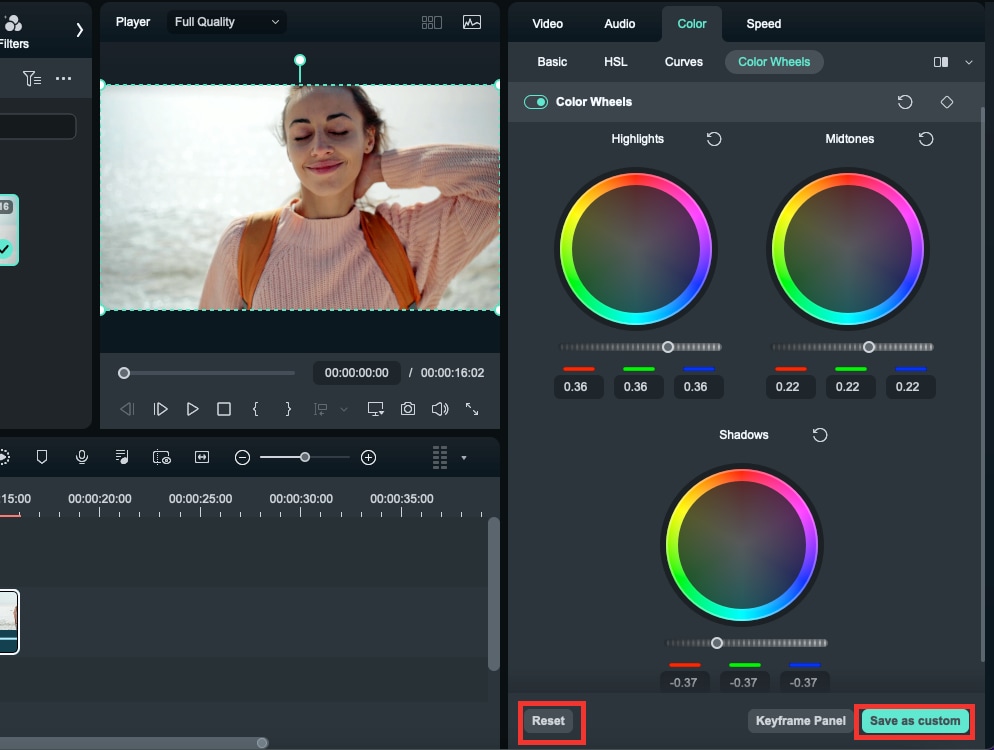
Step 4: Reset or Preserve the Settings
Upon finalizing, use the "Save as Custom" button to preserve the color wheel settings. If you want to re-adjust the settings, press the "Reset" button.
HDR Color Wheels (Available from Filmora 15.3 and Later)
Starting from Filmora 15.3, Filmora for Mac adds an HDR section in the Color panel. With HDR color wheels, you can apply more precise color grading across different luminance ranges, which helps you control color and contrast in both bright highlights and deep shadows.
Step 5: Open the HDR Color Wheels
Select the clip on the timeline, go to the right-side settings panel, and open the Color tab. Then enable HDR Color Wheel to access the HDR wheels.

Step 6: Fine-Tune Color with HDR Wheels
In the HDR color wheels panel, you can adjust multiple tonal ranges such as Black, Dark, Shadow, Light, Highlight, Specular, and Global. This makes it easier to push color into specific brightness areas while keeping the rest of the image balanced.
Related Posts
Featured Articles
How to Zoom in CapCut Desktop | Online | Mobile?
If you are using CapCut and want to use the zoom-in effect, this article is for you. Learn how to zoom in on video on CapCut desktop, mobile, and online for free.
Best Thanksgiving Invitation Templates to Use in 2026: Elevate Your Celebration
Whether you want to organize a formal dinner, family celebration, or casual get-together party, your Thanksgiving invitation templates can influence the tone of the atmosphere.
How To Make Marketing Reels in Instagram
Looking to improve your Instagram marketing? Learn how to make marketing reels with tips, tricks, and tools like Filmora to make reels that work for your business.
Recommended User Guide
AI Color Palette for Mac (Color Match)
Learn how to match the color.
Pro Video Scopes for Mac
Wondershare Filmora, being a professional video editor, offers four types of video scopes.
Color Comparison View for Mac
In the pursuit of editing, color maintenance upholds the integrity of your content, and Filmora presents its Color Comparison View for you to master color editing.
