For the Best Results, Use the Latest Version.
-
Preparations for Mac
-
Account (Mac)
-
Get Started & Basic Settings (Mac)
- Release notes for Mac
- Latest Versions and Features for Mac
- Get Started on Mac - Full Guide
- Download/register/uninstall on Mac
- Panel Layout on Mac
- Keyboard shortcuts on Mac
- Touchbar on Mac
- Change playback quality on Mac
- Render preview files on Mac
- Manage timeline on Mac
- Media for use on Mac
- Logo Reveal For Mac
- Marked Favorites for Mac
-
Compatibility & Tech Specs (Mac)
-
Performance Settings (Mac)
-
-
Creating Projects - Mac
-
Creating New Projects (Mac)
-
-
Importing & Recording - Mac
-
Importing (Mac)
-
Recording (Mac)
-
-
Video Editing for Mac
-
Basic Video Editing for Mac
- Edit Live Photos on Mac
- Enable/Disable Clip for Mac
- Magnetic Timeline For Mac
- Select All Clips on Timeline for Mac
- Auto Ripple for Mac
- Split & cut videos on Mac
- Compositing on Mac
- Crop and zoom on Mac
- Playback Zoom Level for Mac
- Change speed on Mac
- Play video in reverse on Mac
- Mark In and Mark Out for Mac
- Markers for Mac
- Group clips on Mac
- Customized Backgrounds for Videos and Images in Mac
- Video snapshot on Mac
- Freeze frame on Mac
- Auto enhance on Mac
- Applying Drop Shadow for Mac
- Adjustment Layer for Mac
- Mark clip on Mac
- Video Editing Ruler – Mac
- Apply Transforming for Mac
-
Advanced Video Editing for Mac
-
AI-Powered Video Editing for Mac
- Smart Scene Cut for Mac
- Smart Short Clips for Mac
- Image to Video for Mac
- AI Idea to Video for Mac
- AI Text-to-Video for Mac
- Instant Cutter Tool on Mac
- AI Face Mosaic for Mac
- Keyframe Path Curve for Mac
- Planar Tracking for Mac
- AI Extend For Mac
- AI Script-to-Video for Mac
- AI Text-Based Editing in Mac
- Create With Instant Mode on Mac
- ChatGPT Plugin - AI Copywriting on Mac
- AI Smart Cutout for Mac
- Auto reframe on Mac
- Lens correction on Mac
- AI Portrait Cutout on Mac
- Scene detection on Mac
- AI Smart Masking for Mac
- AI Mate Editing for Mac
- Motion Tracking on Mac
- Stabilize video on Mac
- AI Object Remover For Mac
- AI Smart Search for Mac
- AI Skin Tone Protection for Mac
- Green screen on Mac
- Super Slow Motion with Optical Flow for Mac
- AI stylizer on Mac
- Video Denoise for Mac
-
-
Audio Editing for Mac
-
Basic Audio Editing for Mac
-
Advanced Audio Editing for Mac
-
AI-Powered Audio Editing for Mac
- Audio To Video for Mac
- AI Sound Effect for Mac
- Smart BGM Generation for Mac
- AI Voice Enhancer for Mac
- Audio Stretch for Mac
- AI Audio Denoise for Mac
- Auto synchronization for Mac
- AI Vocal Remover for Mac
- Auto Beat Sync on Mac
- AI Music Generator for Mac
- How to Perform AI Voice Cloning in Wondershare Filmora?
- Silence detection on Mac
-
-
Text Editing for Mac
-
Basic Text Editing for Mac
-
Advanced Text Editing for Mac
-
AI-Powered Text Editing for Mac
-
-
Video Customizations for Mac
-
Video Effects (Mac)
-
Audio Effects (Mac)
-
Transitions (Mac)
-
Stickers (Mac)
-
Filters (Mac)
-
Color Editing (Mac)
-
Animations (Mac)
-
Templates (Mac)
-
Asset Center (Mac)
-
-
Exporting & Share & Cloud Backup - Mac
AI Idea to Video for Mac
Ever imagined a video concept but didn't know how to bring it to life? Filmora's AI Idea to Video tool on Mac helps turn your creative thoughts into short video stories with ease. You can continue generating different versions until one truly fits your vision. Curious about how it works? Follow this guide to get started!
How to Use Filmora's AI Idea to Video Feature?
To better understand how to take advantage of the AI Idea to Video feature on Mac, just follow this step-by-step walkthrough:
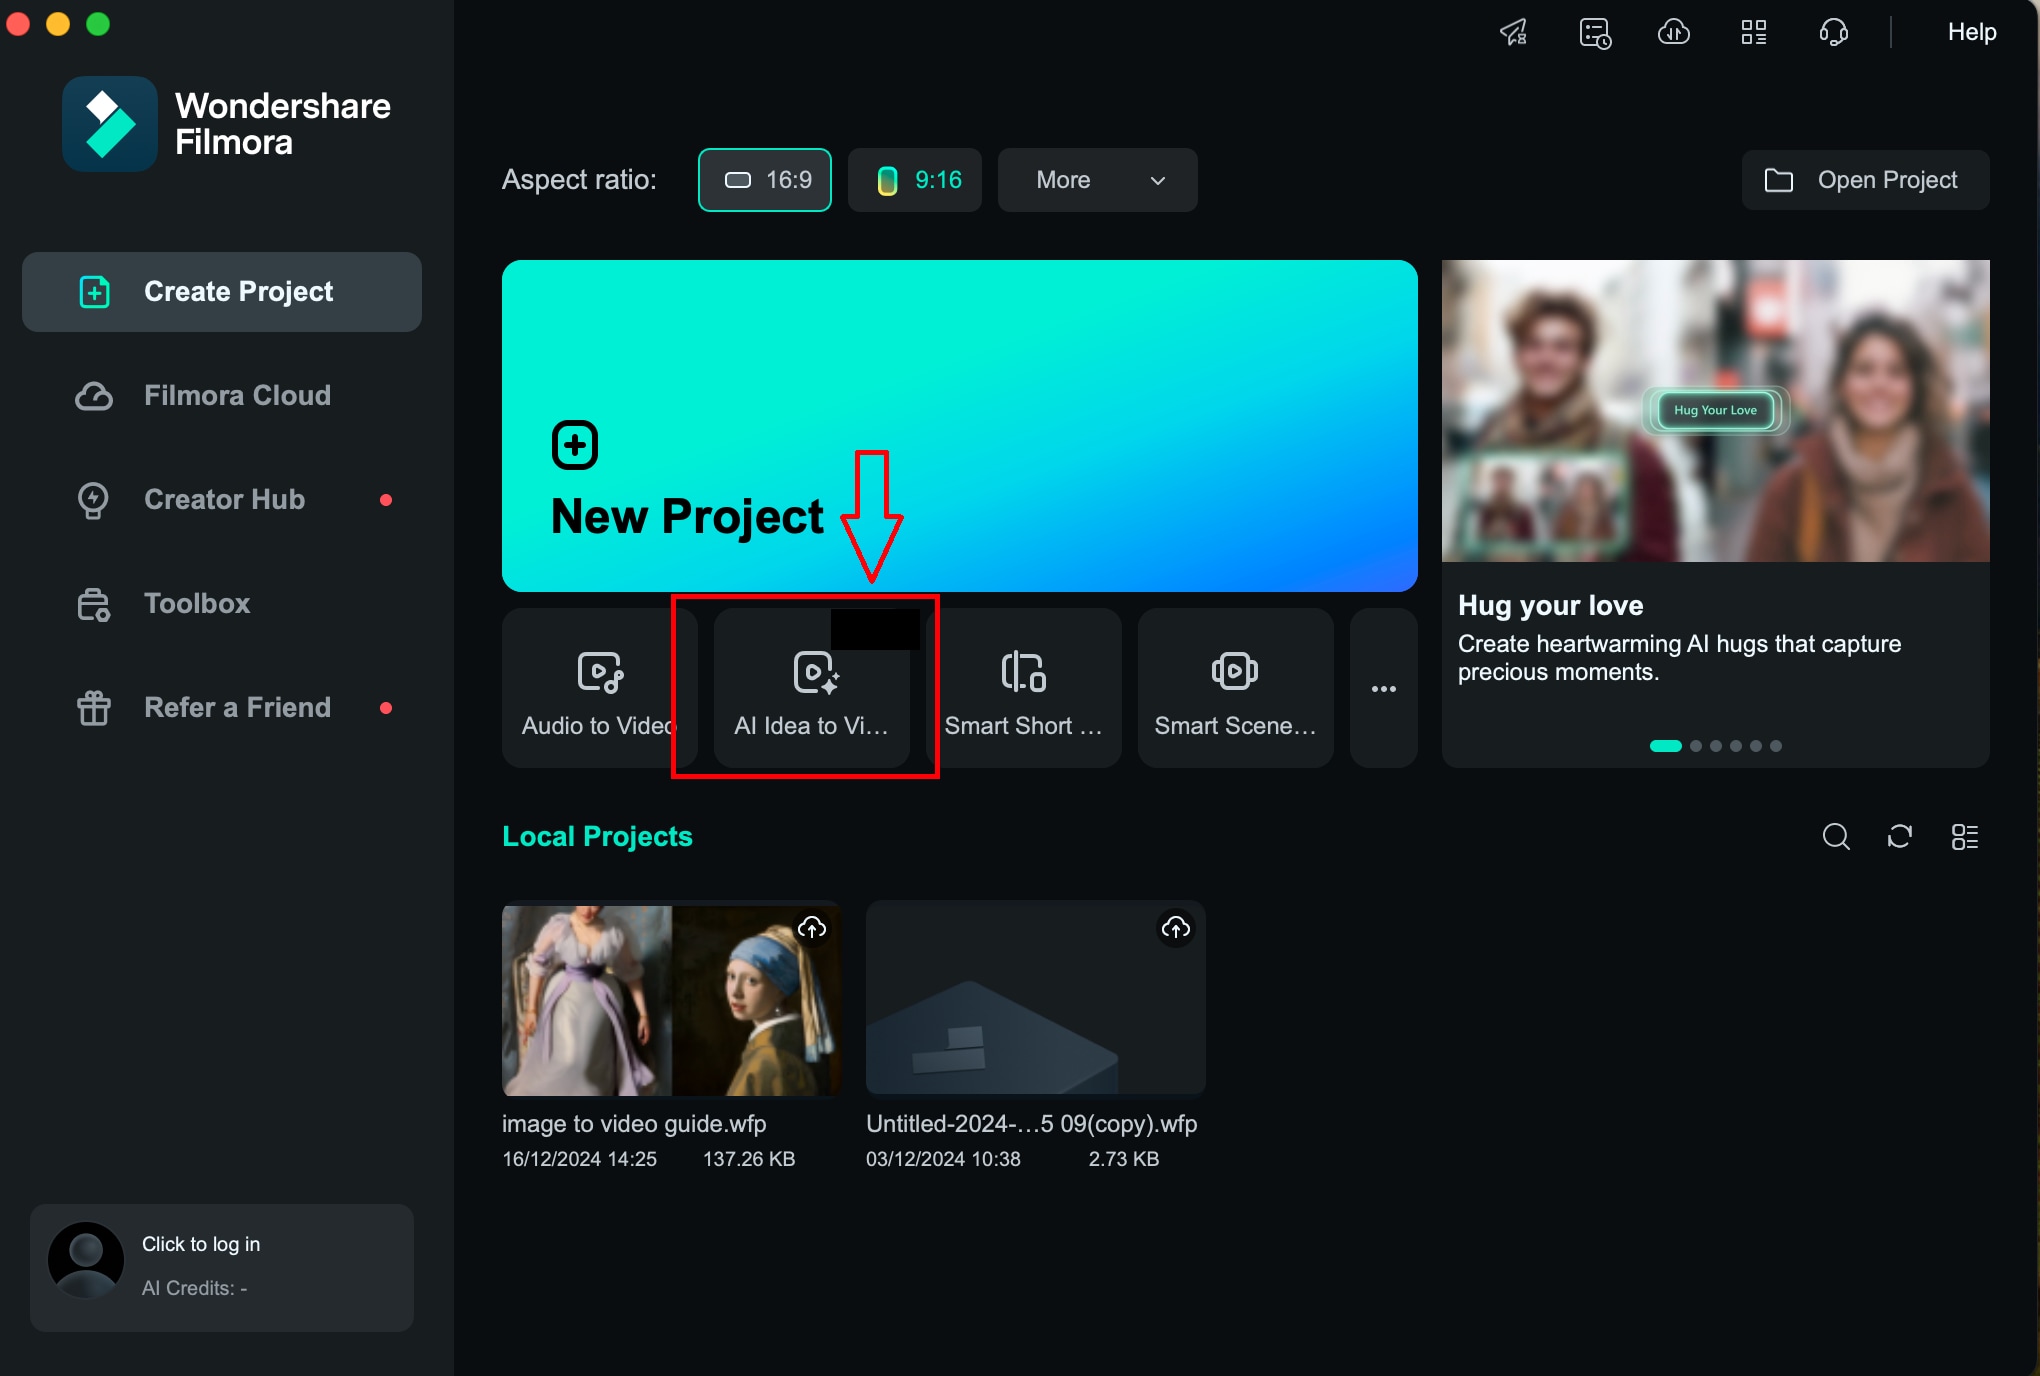
Step 1: Launch the "AI Idea to Video" Function from the Welcome Screen.
From Filmora's startup page, locate and click on the "AI Idea to Video" option to begin.
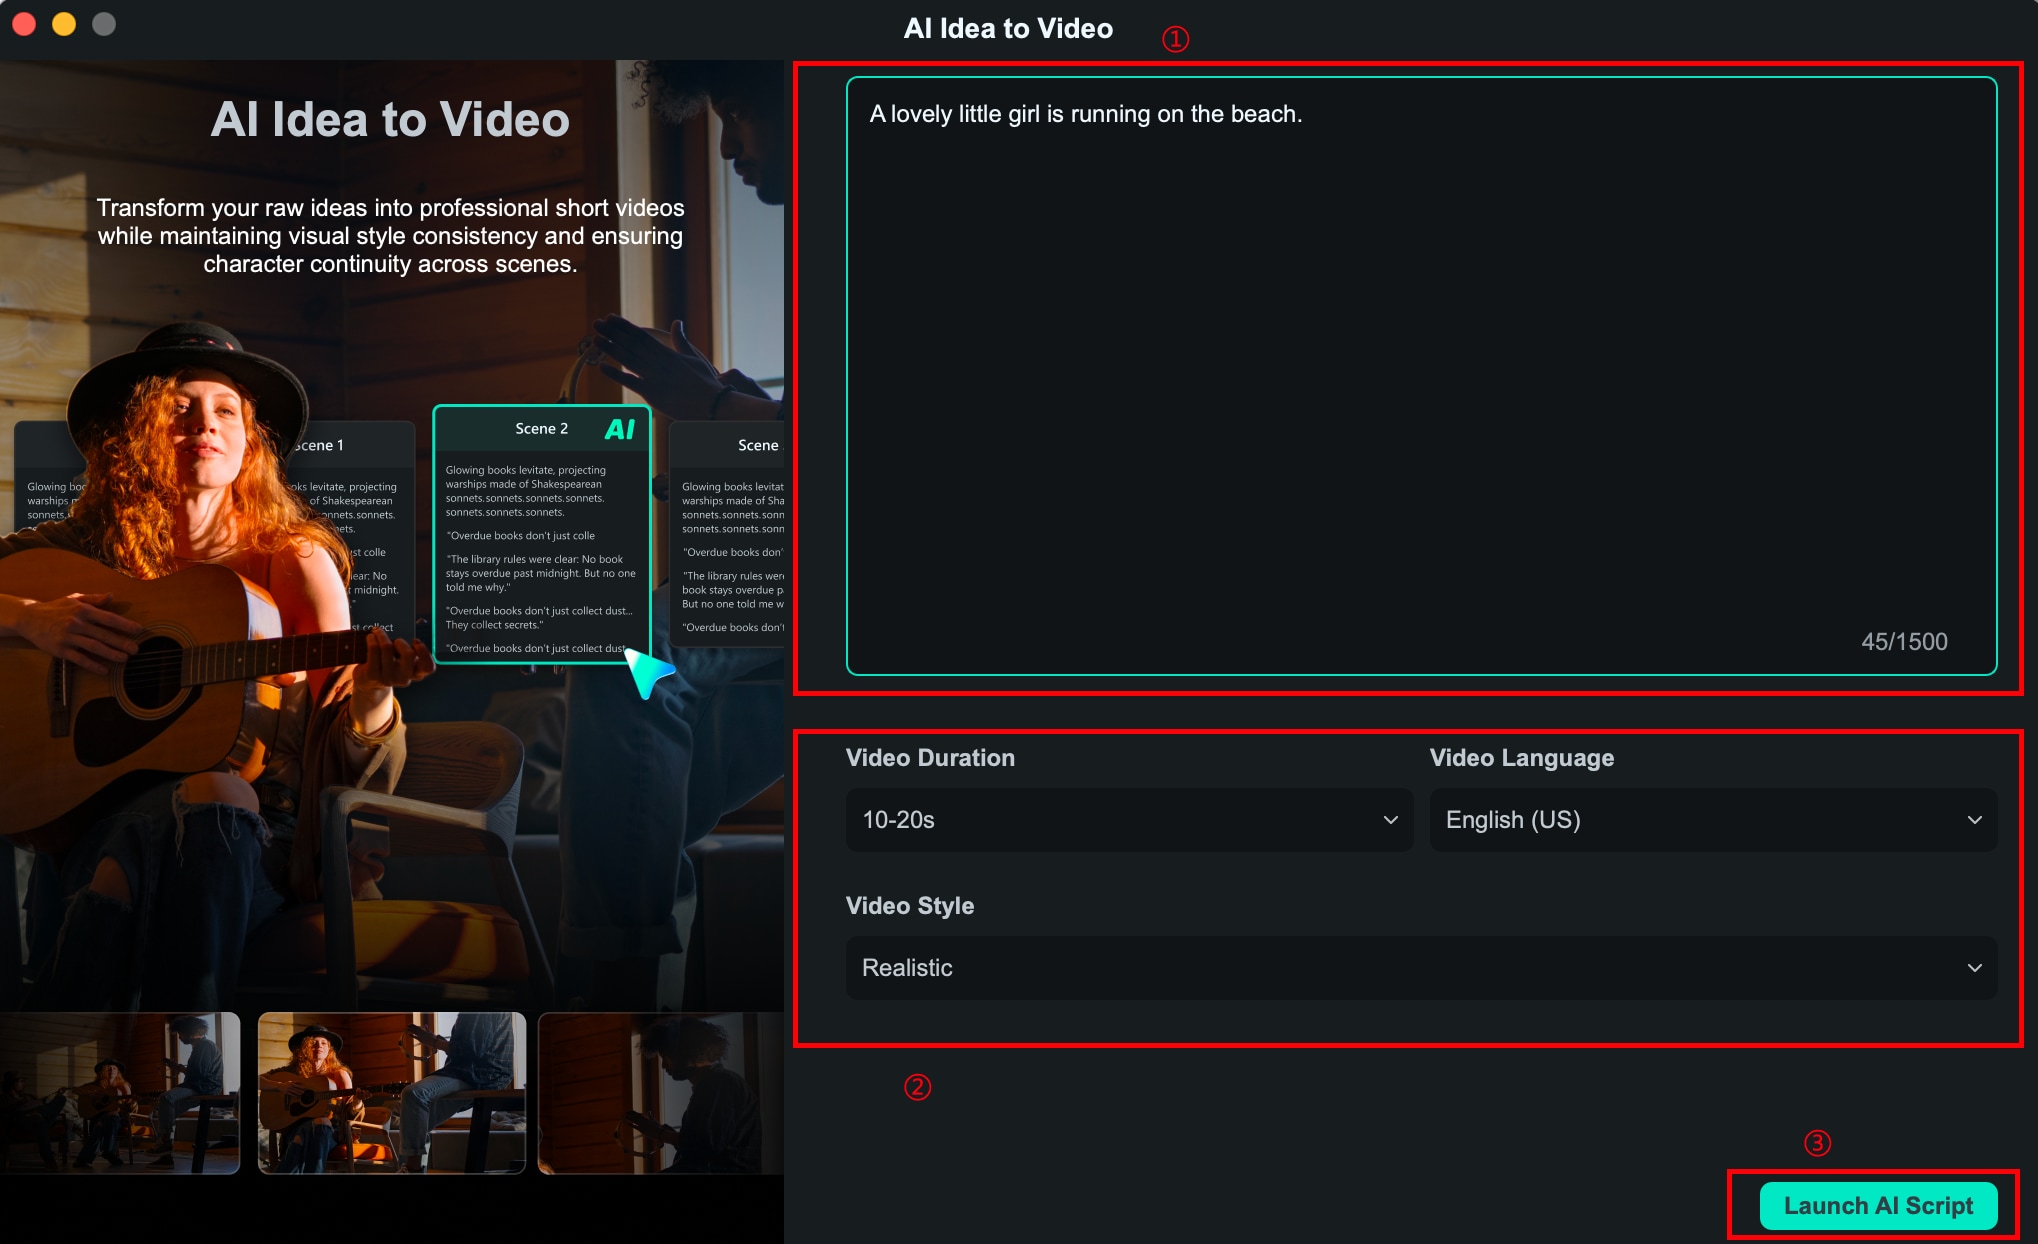
Step 2: Provide Your Story Concept and Preferences.
Inside the feature, you'll be prompted to type your video concept, adjust the preferred duration, language, and video style. Once configured, hit "Launch AI Script."
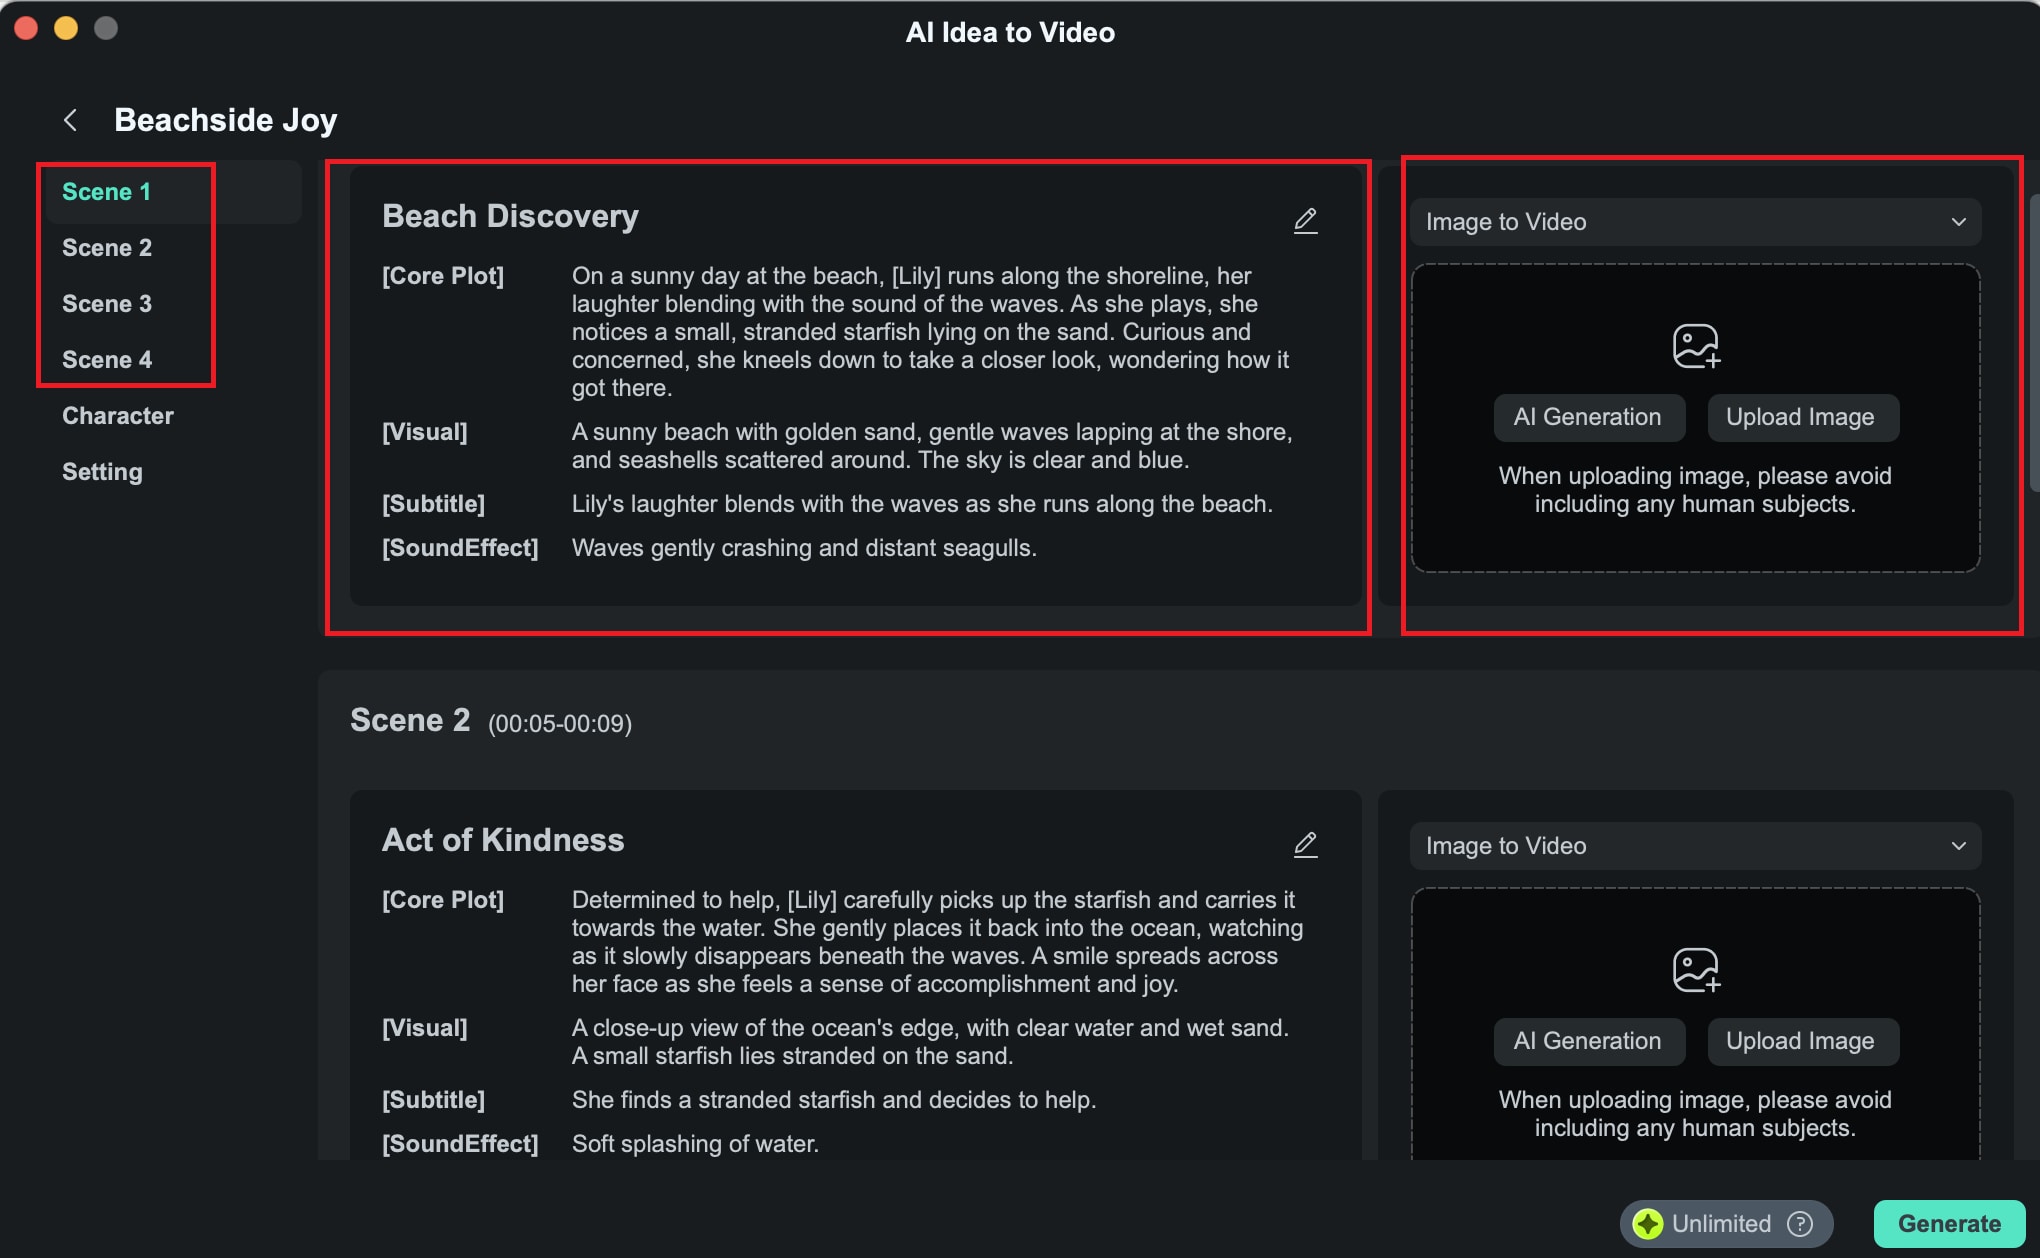
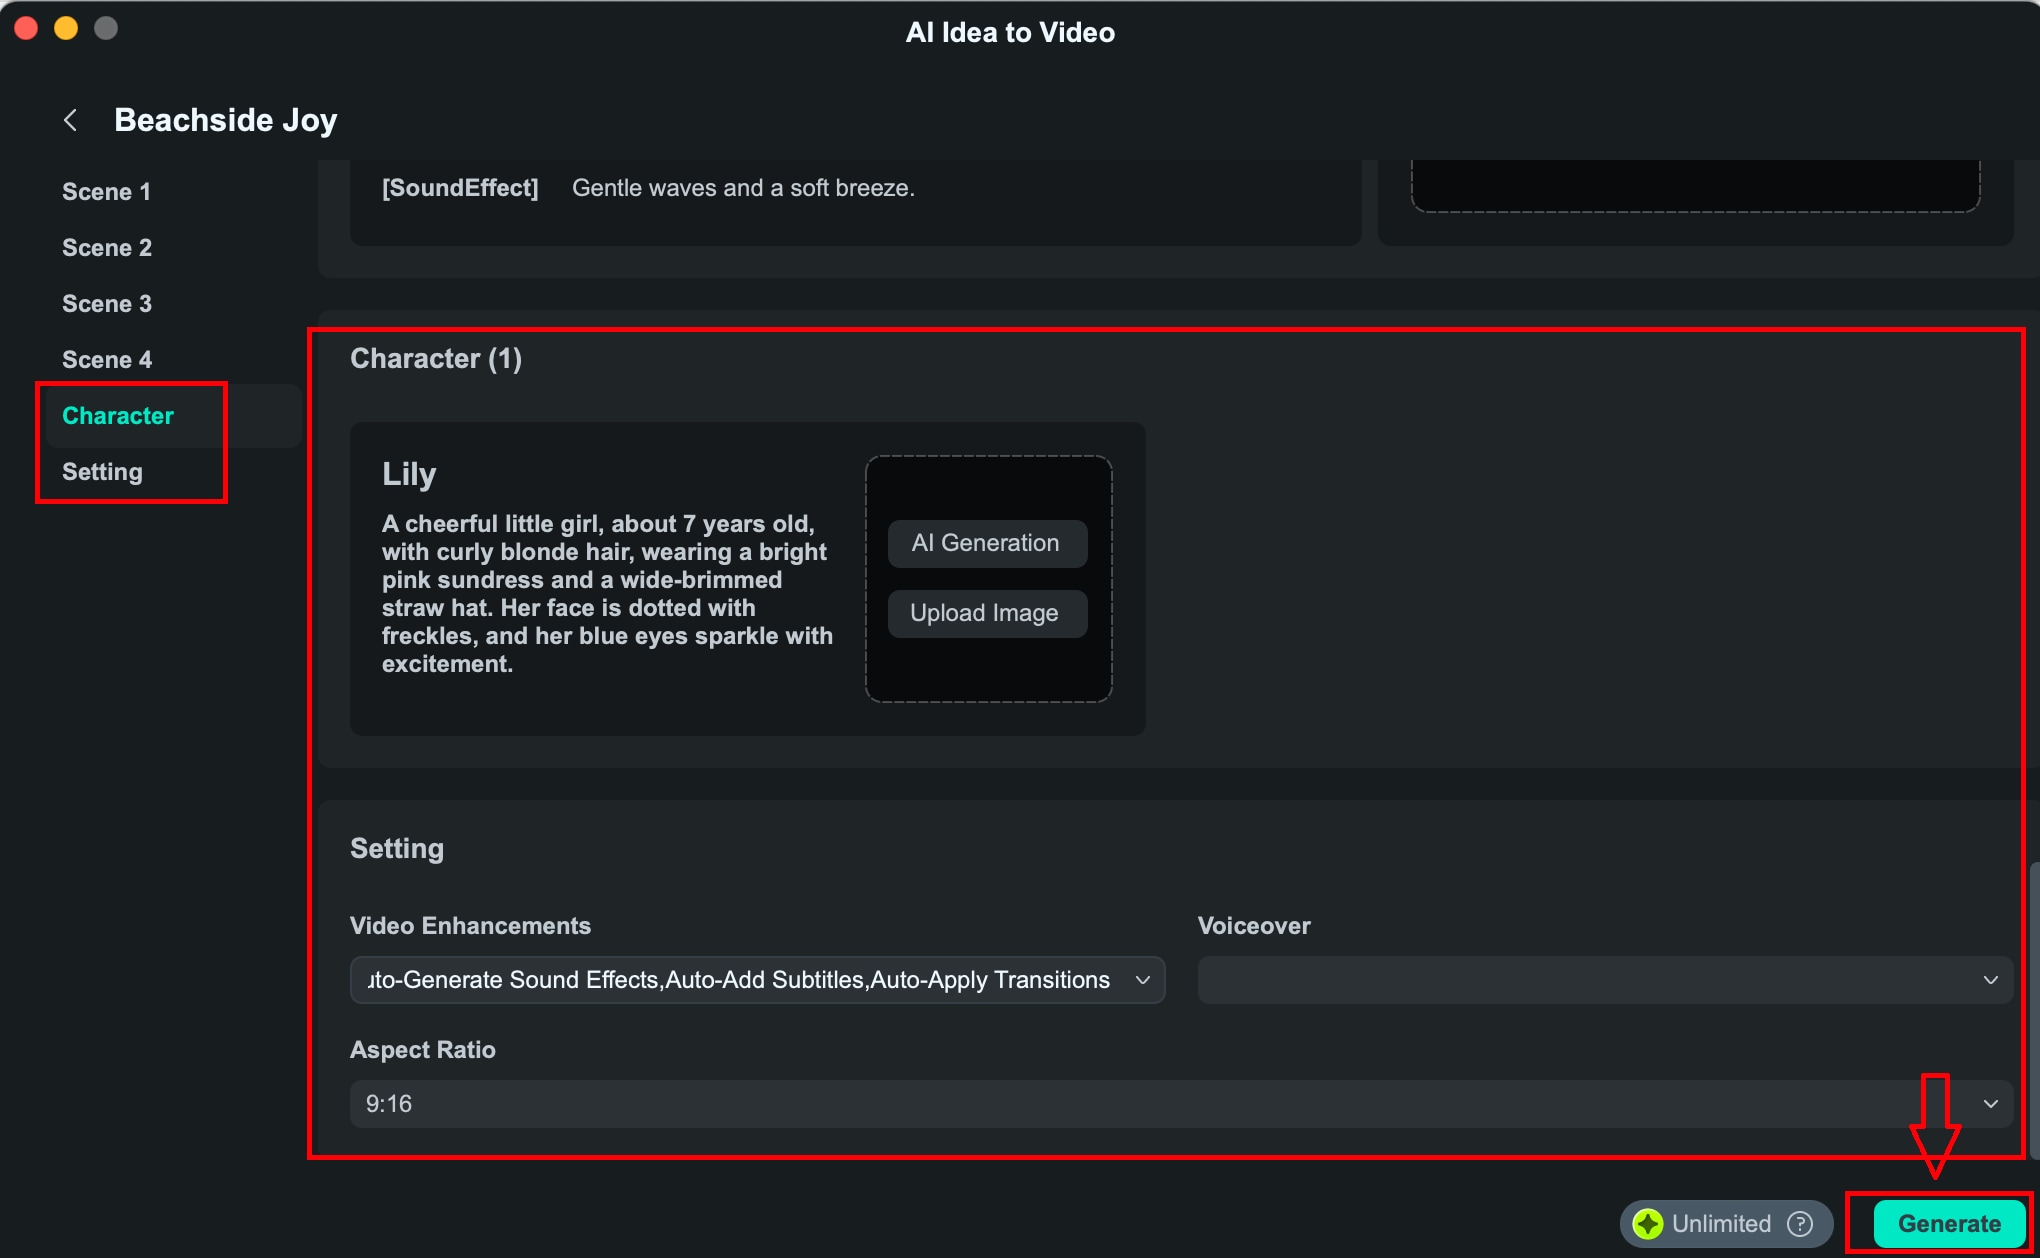
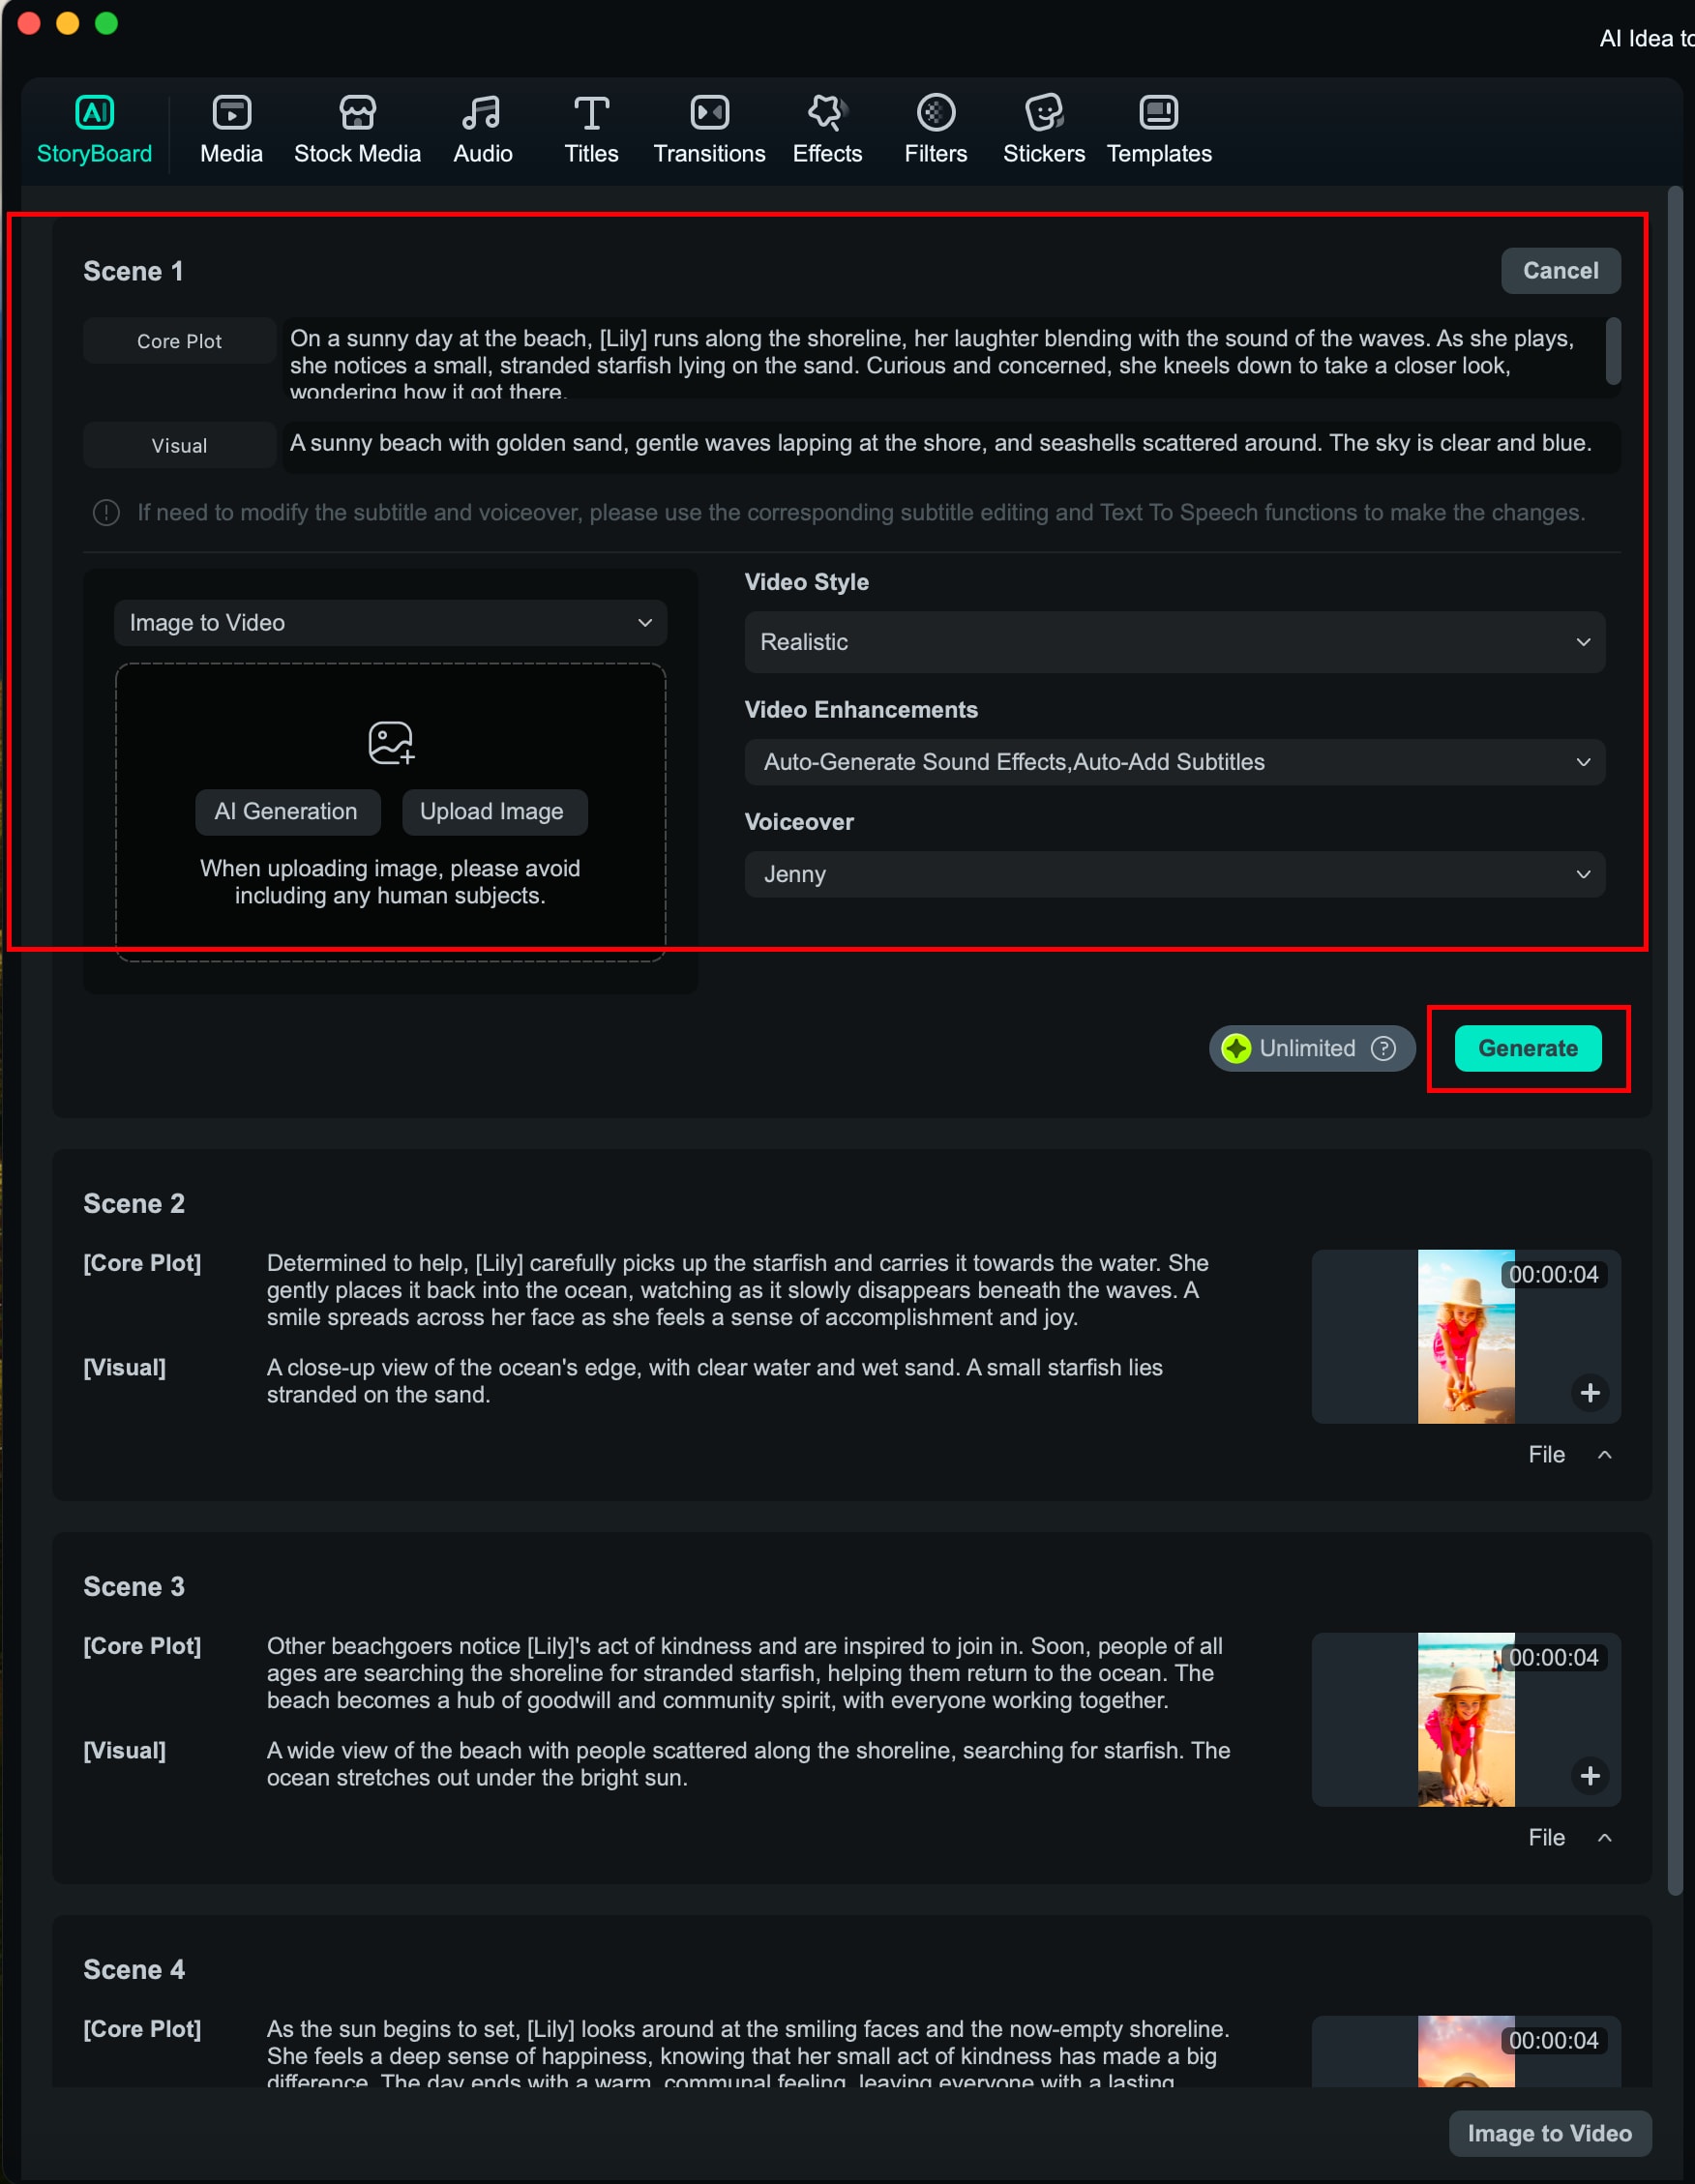
Step 3: Refine the AI-Generated Scene Breakdown.
Based on your script, Filmora will generate scene-by-scene content along with task and setting options. You can modify these details or re-generate individual parts. You may also upload images for scene-specific video creation. Once everything looks good, click "Generate."
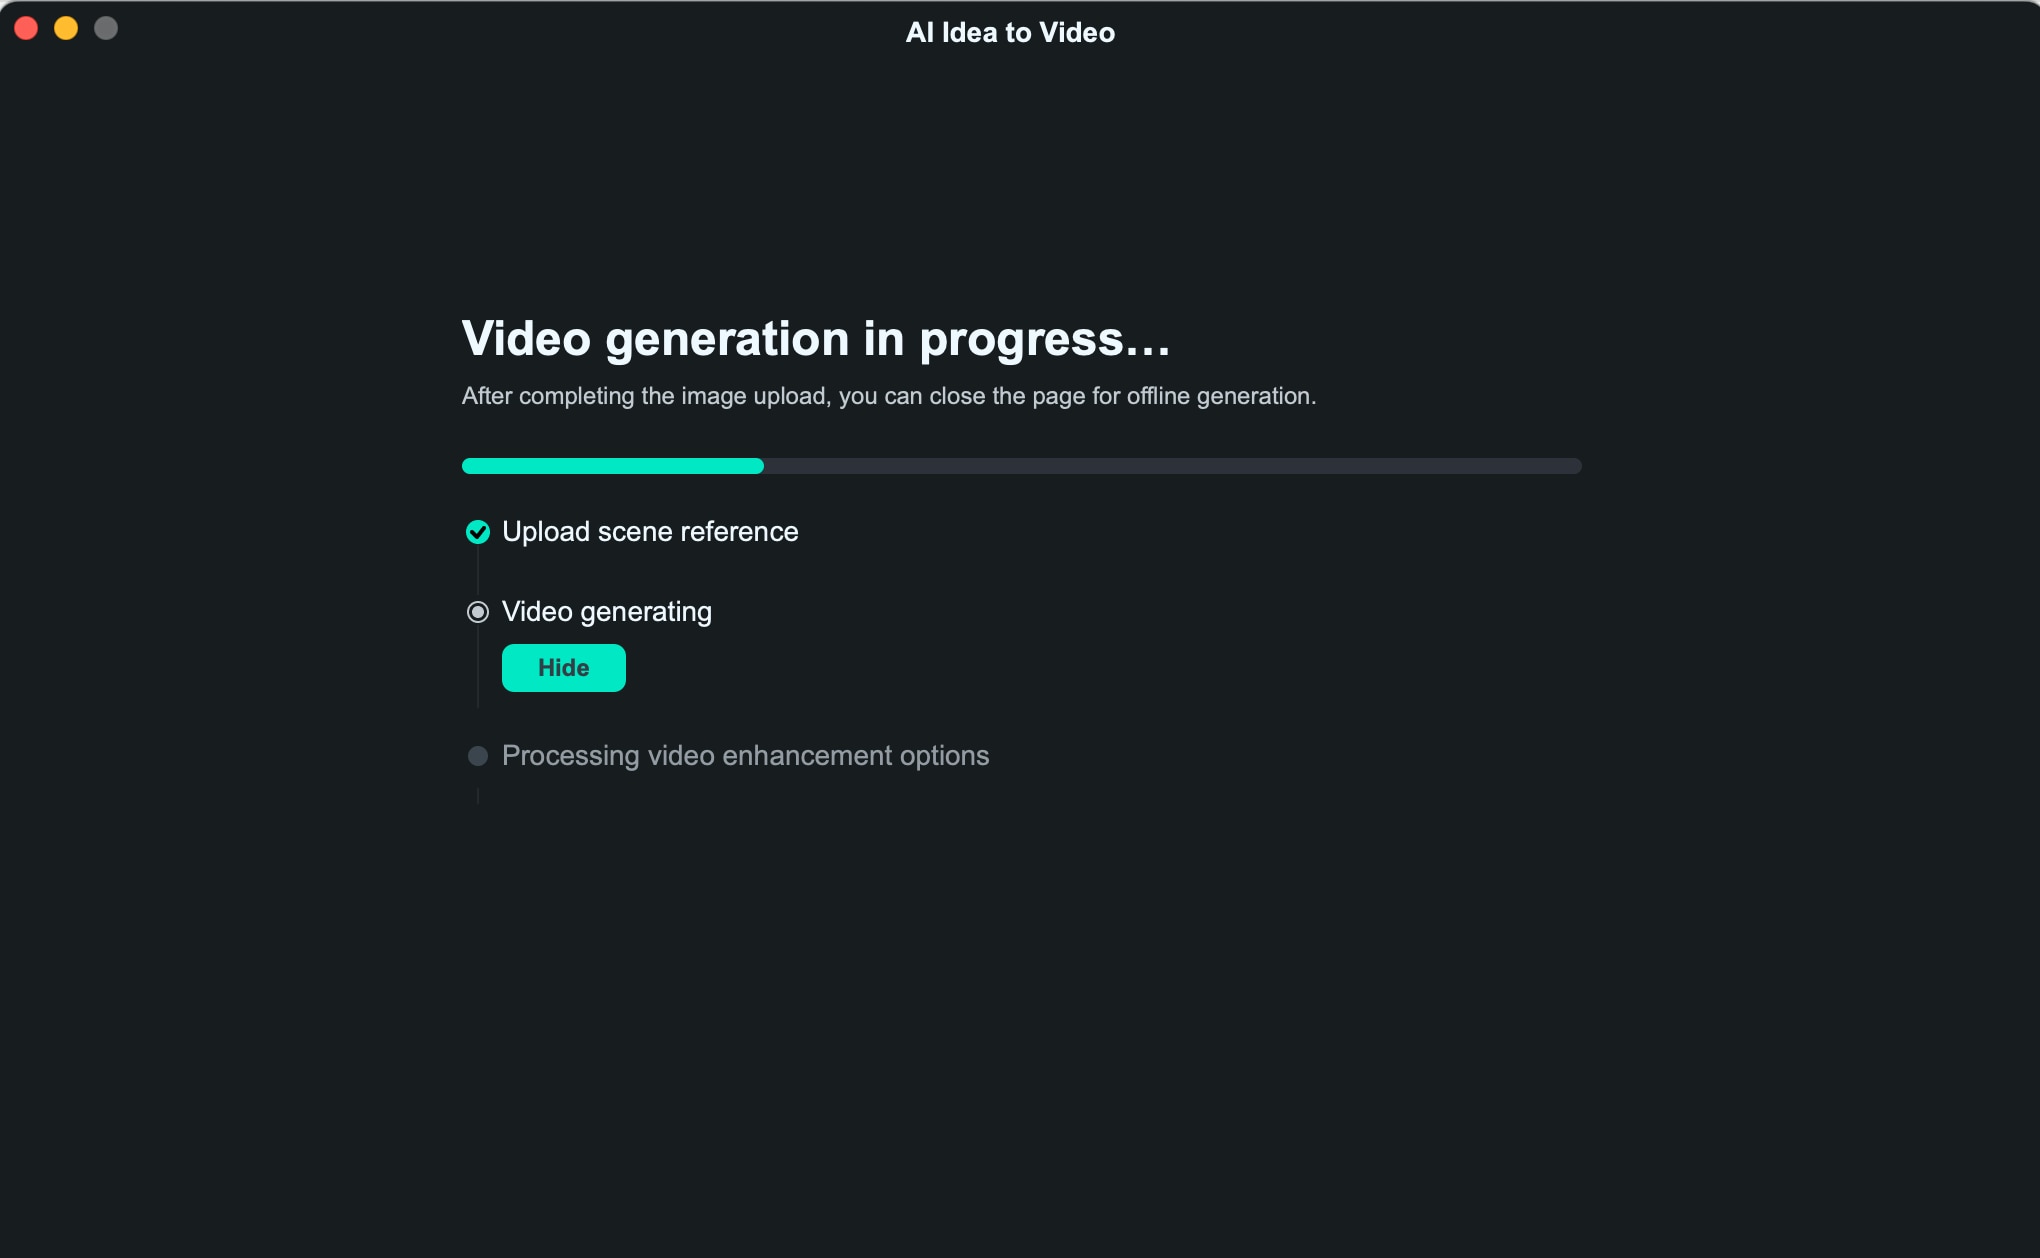
Step 4: Allow Time for Video Generation.
The video rendering process takes a few minutes. You may minimize or hide the window if preferred.
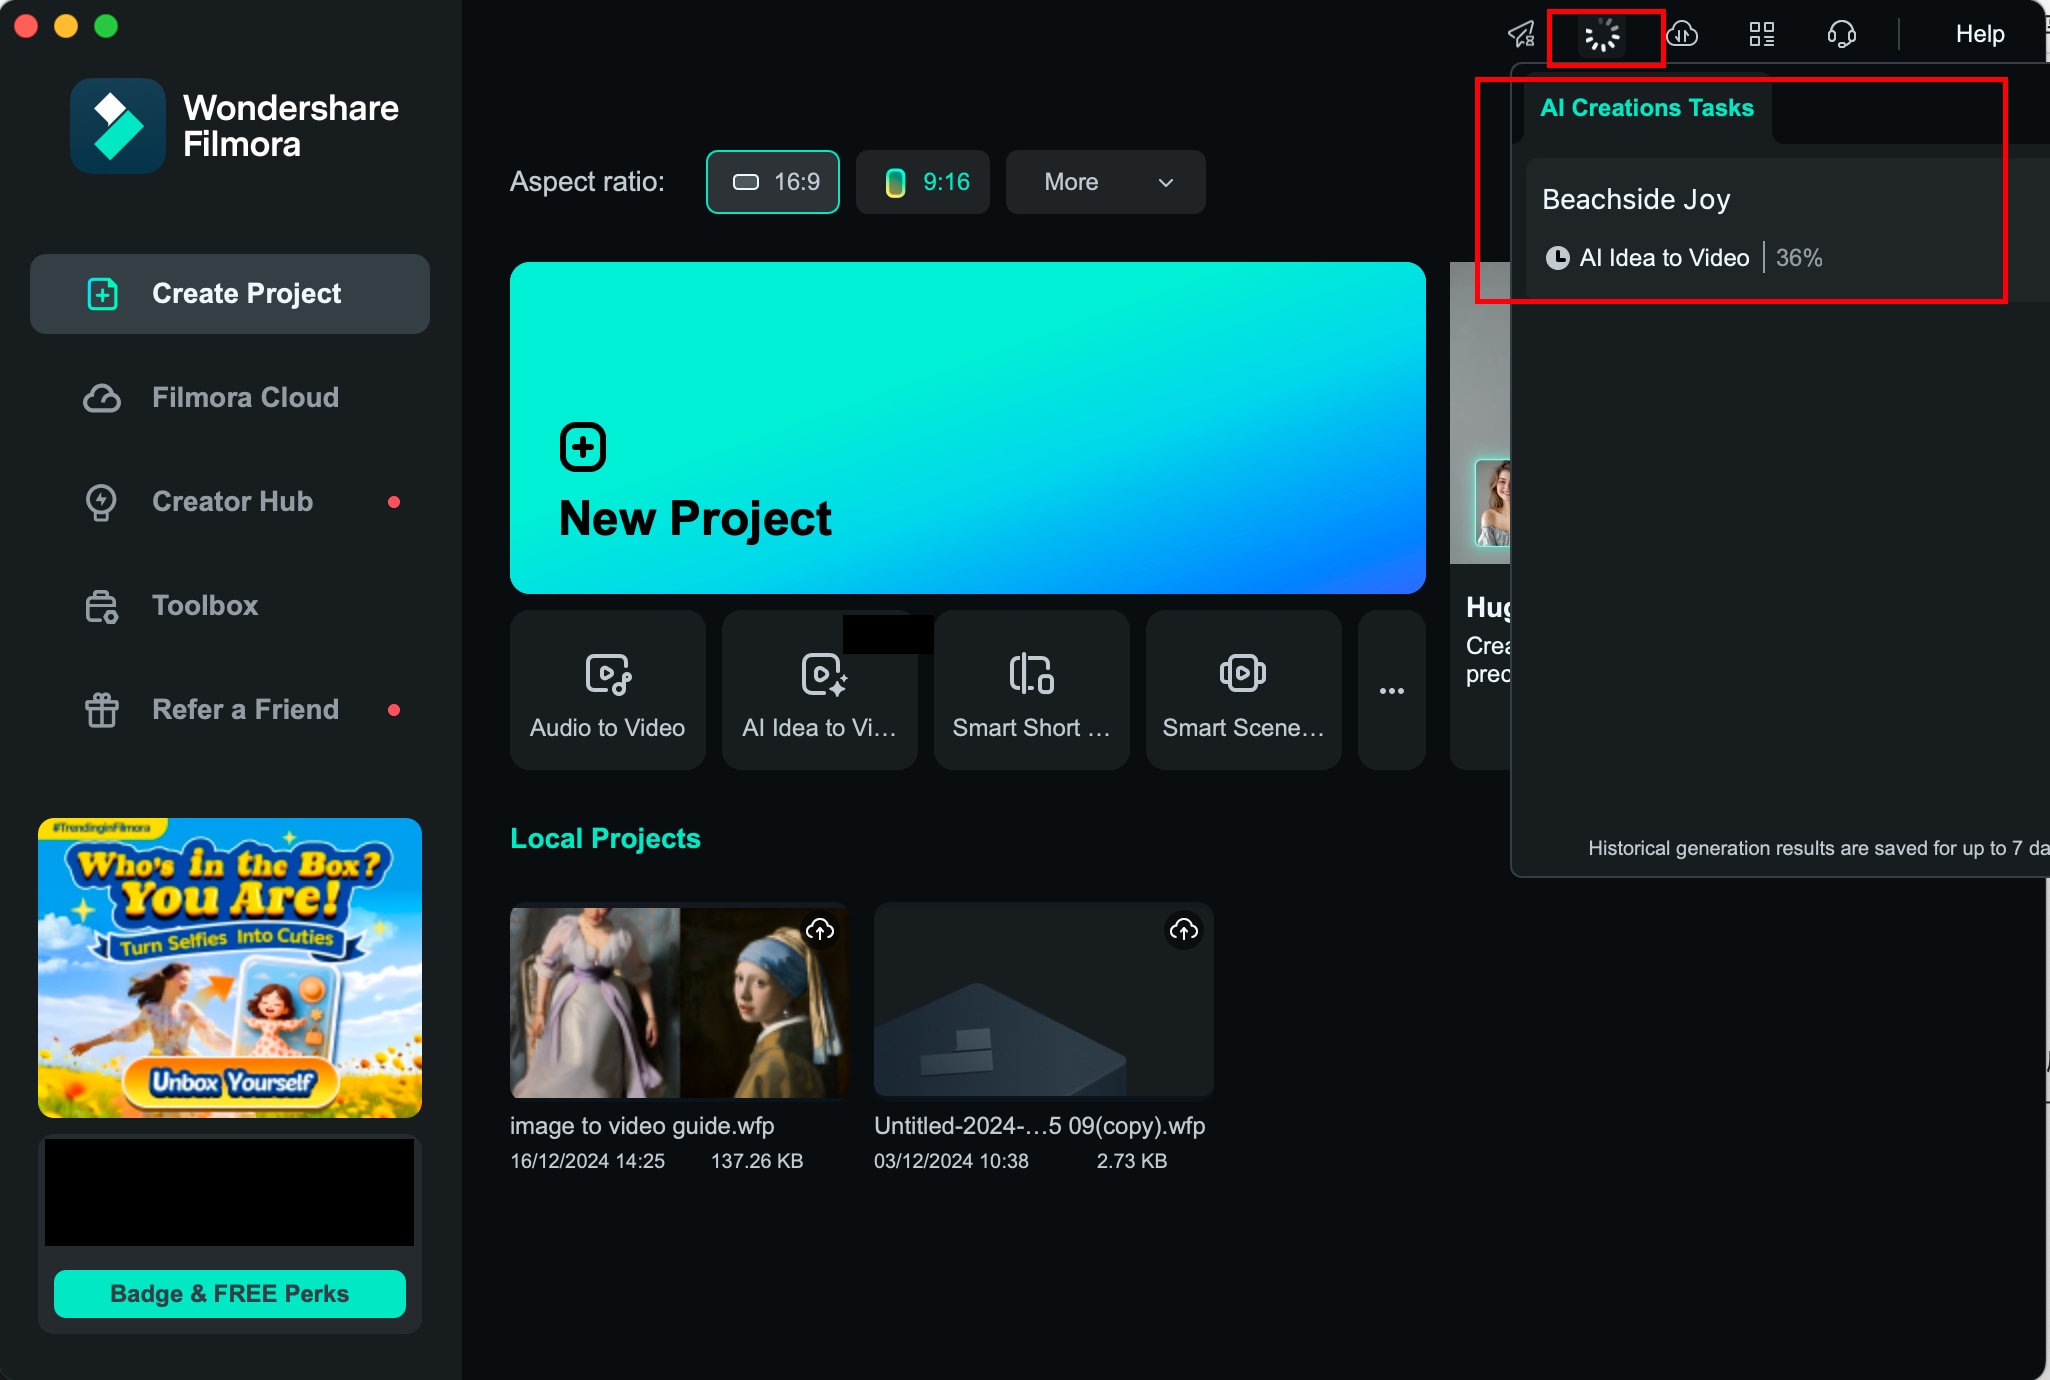
To monitor the progress, access the status either from the start interface or by clicking the project progress indicator at the top.
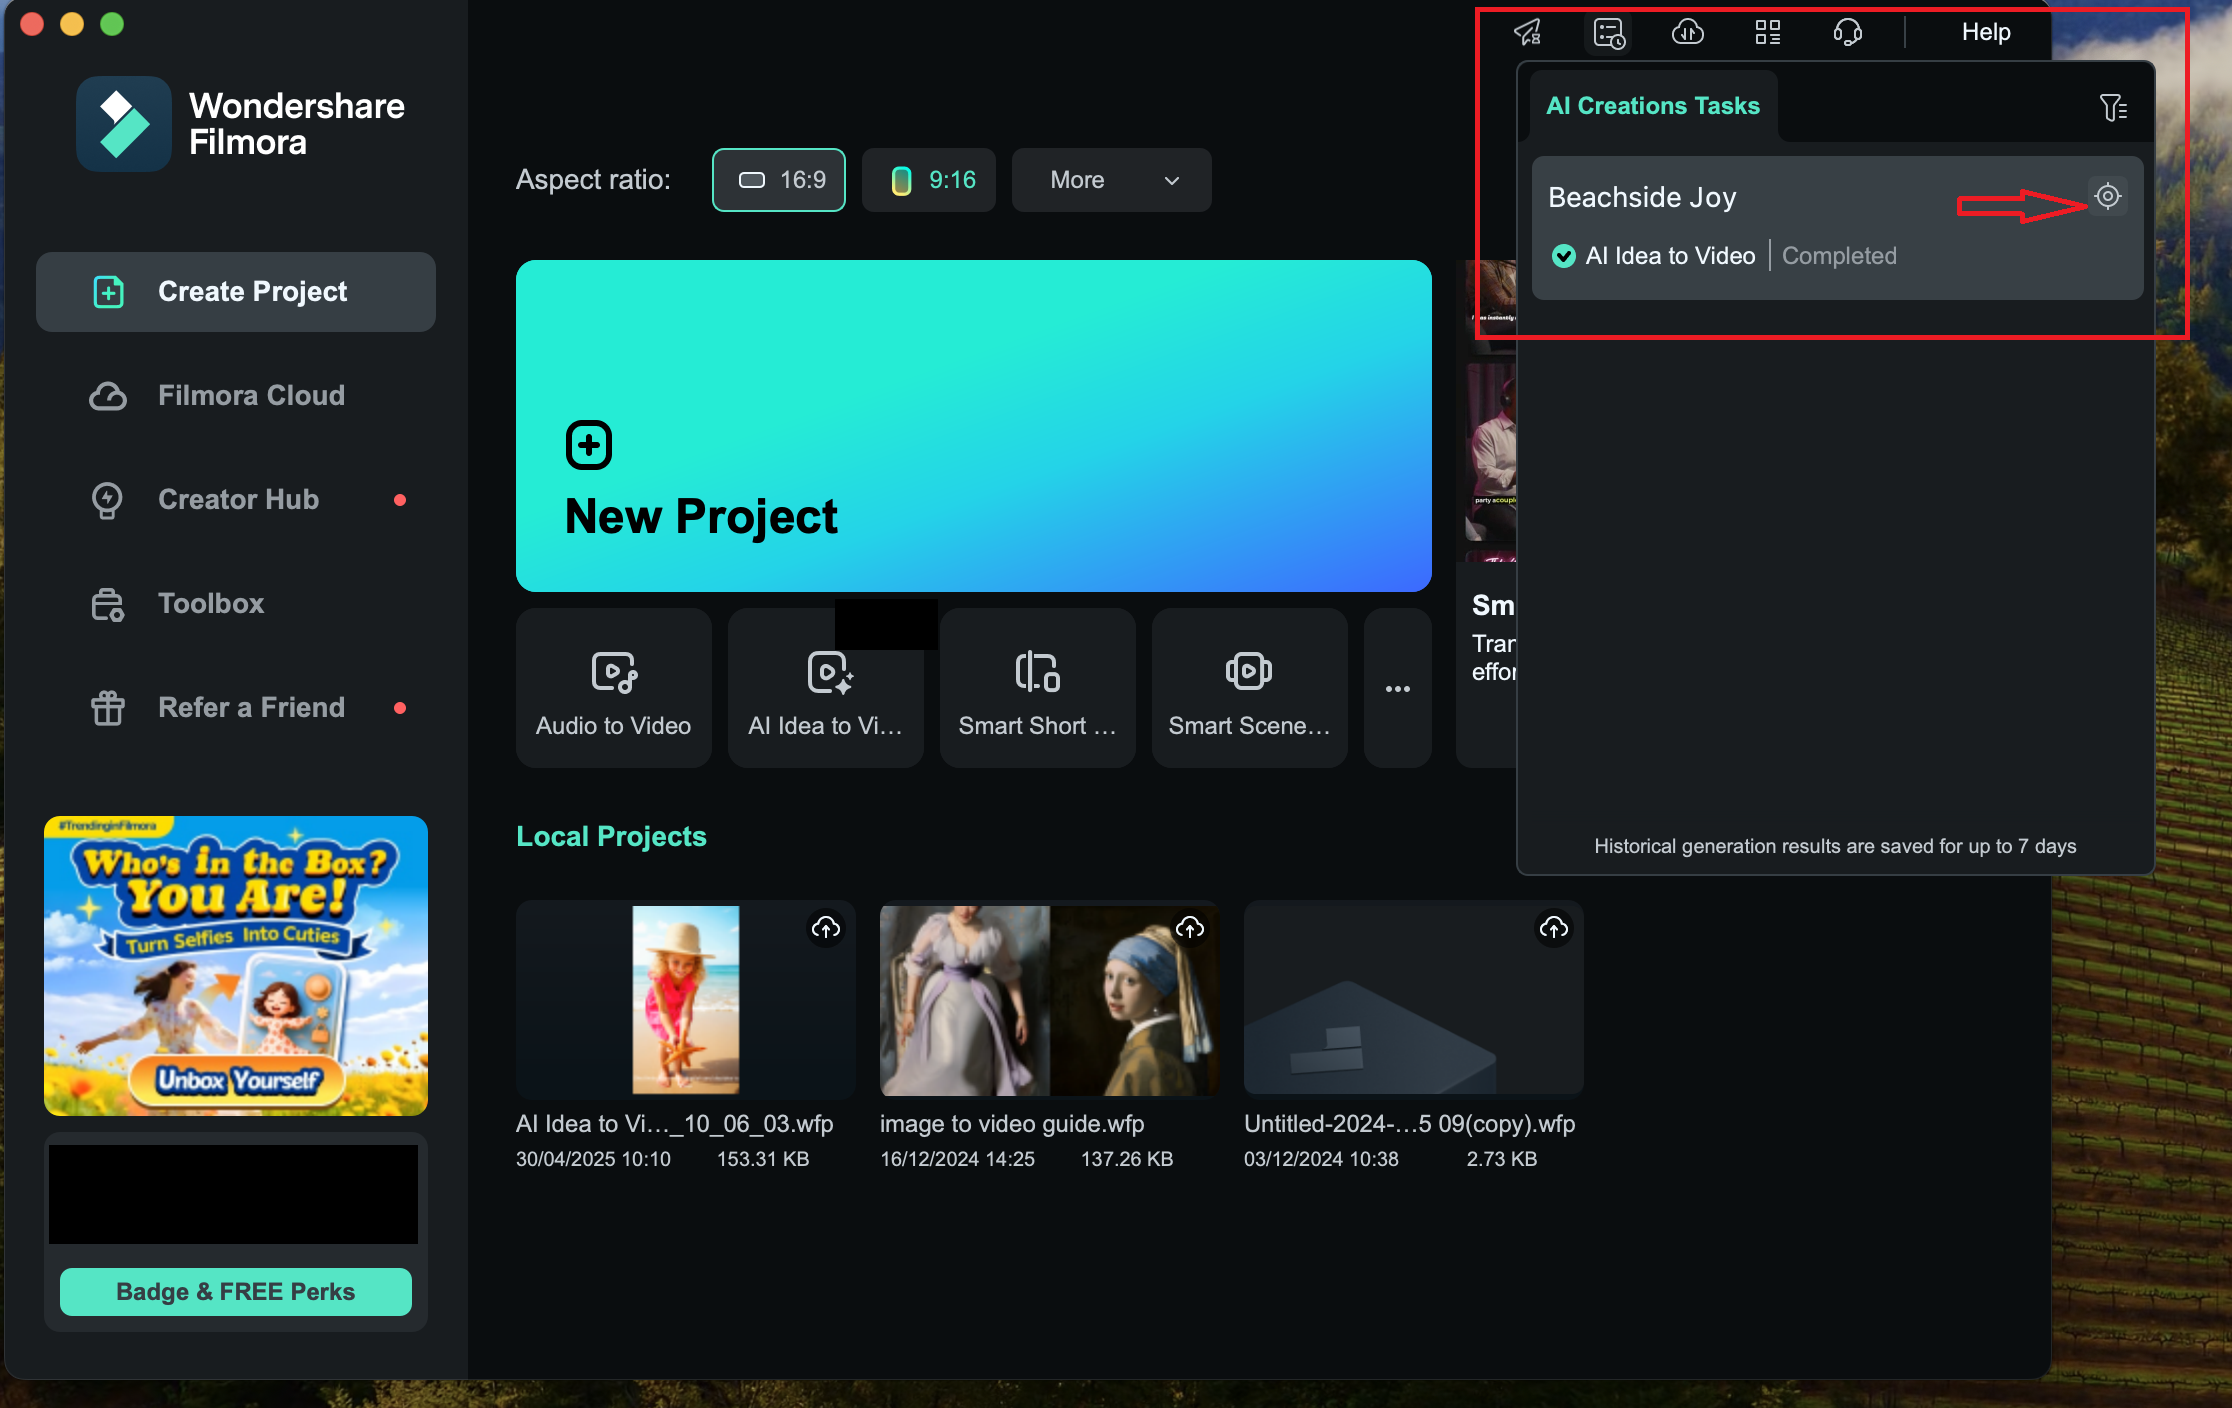
After completion, use the "Locate" option beside the task to jump straight to the video panel screen.
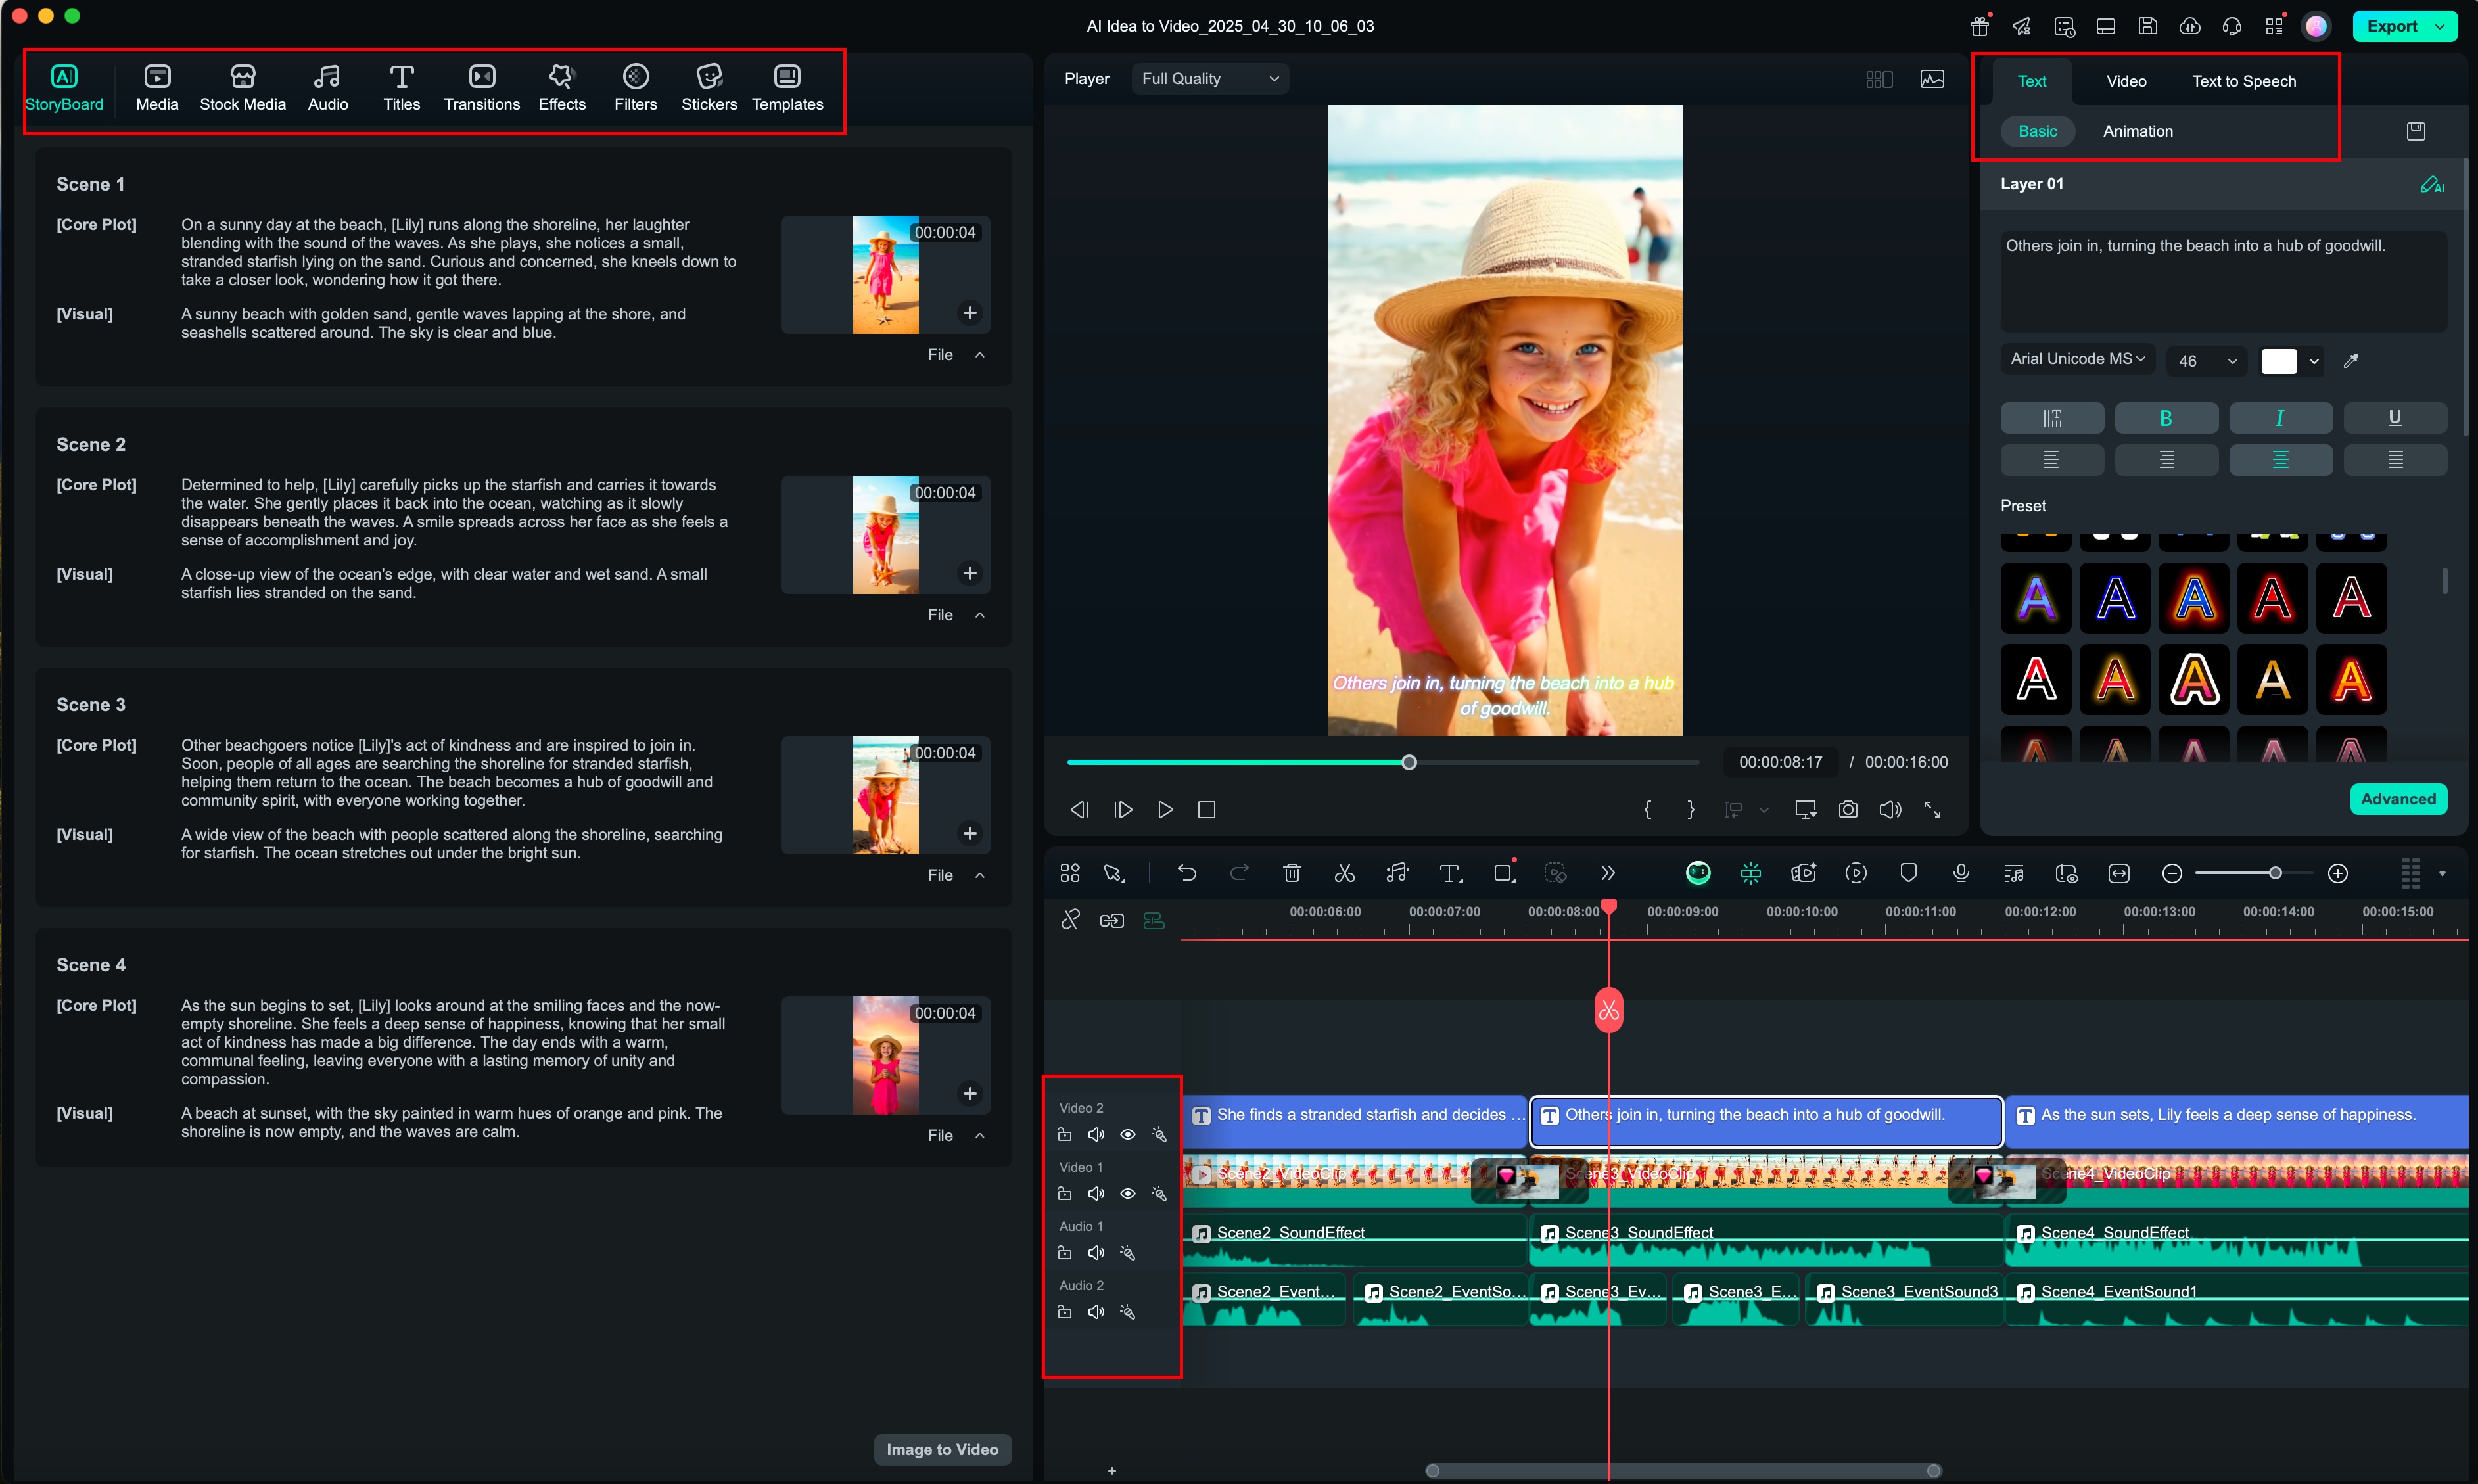
Step 5: Review and Adjust Scenes in the Storyboard.
In the Storyboard view, you'll see each scene's visual result. If subtitles or transitions were pre-configured, they will appear on the timeline. Use Filmora's editing features to further tweak fonts, background music, effects, and transitions.
Step 6: Modify or Regenerate Scenes as Needed.
If some scenes don't match your vision, feel free to revisit and adjust them. You can revise tasks, descriptions, or regenerate clips until you're satisfied with the outcome.
With Filmora's AI Idea to Video feature on Mac, your creative spark can instantly evolve into engaging visual stories. From rough concepts to polished videos, the process is smooth, flexible, and fun. Explore it yourself and let your ideas speak on screen!
Related Posts
Featured Articles
How to Write an Attractive Vlog Script: A 2025 Guide
Want to learn how to write a vlog script for any kind of content? Read this guide, where we discuss the ways that you can use to turn viewers into fans.
Top 8 Body Paint YouTube Videos You Need to See
Check out this body paint on YouTube compilation. Watch top videos, edit your own, and share full-body painting videos across platforms.
Best Ways to Change Facial Expressions with AI
Do you want to change facial expressions in a photo or video? Here are some of the best ways you can change facial expressions using an AI facial expression changer.
Recommended User Guide
Lens correction on Mac
Learn the steps on how to do lens correction with Filmora on Mac.
AI stylizer on Mac
Overview of AI Stylizer.
Video Denoise for Mac
Do you want to remove noise from videos on your Mac in Filmora? Know our step-by-step guide here.
