For the Best Results, Use the Latest Version.
-
Preparations for Mac
-
Account (Mac)
-
Get Started & Basic Settings (Mac)
- Release notes for Mac
- Latest Versions and Features for Mac
- Get Started on Mac - Full Guide
- Download/register/uninstall on Mac
- Panel Layout on Mac
- Keyboard shortcuts on Mac
- Touchbar on Mac
- Change playback quality on Mac
- Render preview files on Mac
- Manage timeline on Mac
- Media for use on Mac
- Logo Reveal For Mac
- Marked Favorites for Mac
-
Compatibility & Tech Specs (Mac)
-
Performance Settings (Mac)
-
-
Creating Projects - Mac
-
Creating New Projects (Mac)
-
-
Importing & Recording - Mac
-
Importing (Mac)
-
Recording (Mac)
-
-
Video Editing for Mac
-
Basic Video Editing for Mac
- Edit Live Photos on Mac
- Enable/Disable Clip for Mac
- Magnetic Timeline For Mac
- Select All Clips on Timeline for Mac
- Auto Ripple for Mac
- Split & cut videos on Mac
- Compositing on Mac
- Crop and zoom on Mac
- Playback Zoom Level for Mac
- Change speed on Mac
- Play video in reverse on Mac
- Mark In and Mark Out for Mac
- Markers for Mac
- Group clips on Mac
- Customized Backgrounds for Videos and Images in Mac
- Video snapshot on Mac
- Freeze frame on Mac
- Auto enhance on Mac
- Applying Drop Shadow for Mac
- Adjustment Layer for Mac
- Mark clip on Mac
- Video Editing Ruler – Mac
- Apply Transforming for Mac
-
Advanced Video Editing for Mac
-
AI-Powered Video Editing for Mac
- Smart Scene Cut for Mac
- Smart Short Clips for Mac
- Image to Video for Mac
- AI Idea to Video for Mac
- AI Text-to-Video for Mac
- Instant Cutter Tool on Mac
- AI Face Mosaic for Mac
- Keyframe Path Curve for Mac
- Planar Tracking for Mac
- AI Extend For Mac
- AI Script-to-Video for Mac
- AI Text-Based Editing in Mac
- Create With Instant Mode on Mac
- ChatGPT Plugin - AI Copywriting on Mac
- AI Smart Cutout for Mac
- Auto reframe on Mac
- Lens correction on Mac
- AI Portrait Cutout on Mac
- Scene detection on Mac
- AI Smart Masking for Mac
- AI Mate Editing for Mac
- Motion Tracking on Mac
- Stabilize video on Mac
- AI Object Remover For Mac
- AI Smart Search for Mac
- AI Skin Tone Protection for Mac
- Green screen on Mac
- Super Slow Motion with Optical Flow for Mac
- AI stylizer on Mac
- Video Denoise for Mac
-
-
Audio Editing for Mac
-
Basic Audio Editing for Mac
-
Advanced Audio Editing for Mac
-
AI-Powered Audio Editing for Mac
- Audio To Video for Mac
- AI Sound Effect for Mac
- Smart BGM Generation for Mac
- AI Voice Enhancer for Mac
- Audio Stretch for Mac
- AI Audio Denoise for Mac
- Auto synchronization for Mac
- AI Vocal Remover for Mac
- Auto Beat Sync on Mac
- AI Music Generator for Mac
- How to Perform AI Voice Cloning in Wondershare Filmora?
- Silence detection on Mac
-
-
Text Editing for Mac
-
Basic Text Editing for Mac
-
Advanced Text Editing for Mac
-
AI-Powered Text Editing for Mac
-
-
Video Customizations for Mac
-
Video Effects (Mac)
-
Audio Effects (Mac)
-
Transitions (Mac)
-
Stickers (Mac)
-
Filters (Mac)
-
Color Editing (Mac)
-
Animations (Mac)
-
Templates (Mac)
-
Asset Center (Mac)
-
-
Exporting & Share & Cloud Backup - Mac
HDR
The HDR (Highly Dynamic Range) function mainly targets semi-professionals or professionals whose devices support HDR. HDR materials shot by users or obtained from other channels can be edited, previewed, and exported in Filmora.
Key Functional Features
- HDR displays a more comprehensive range of brightness from the darkest to the brightest.
- It accommodates more brightness, shadow detail, and saturation for a more natural and realistic display without compromising tones in bright or dark areas.
- You can switch to HDR export when the current device meets the GPU acceleration conditions.
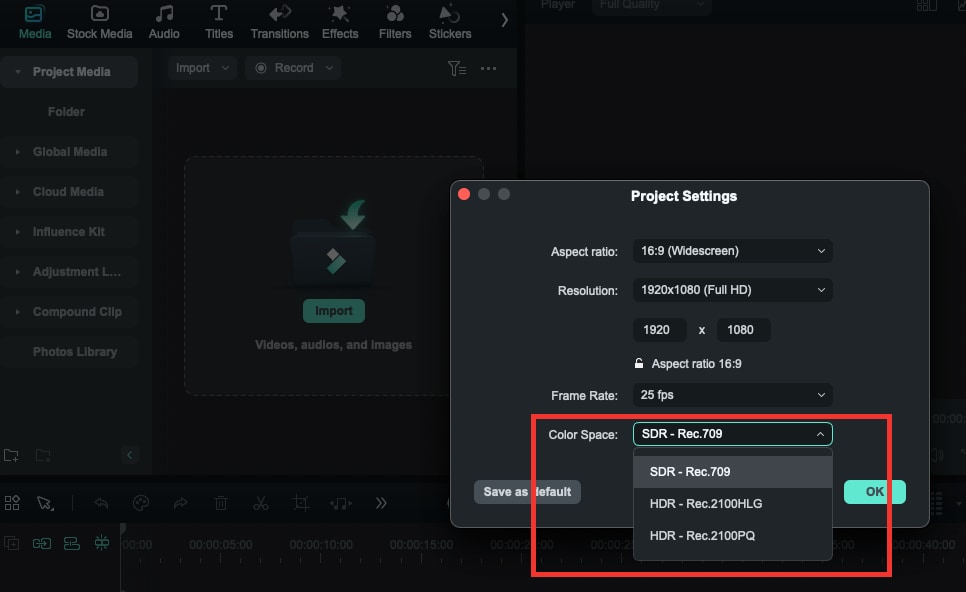
Color Space
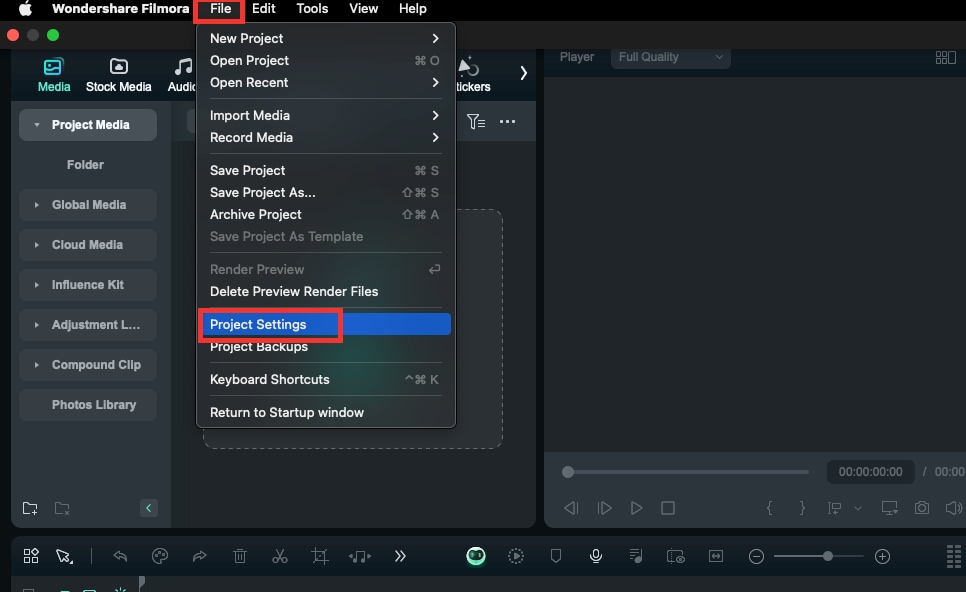
Project Settings
- Click File > Project Settings (Or click F12) to set project parameters.
- Then, click the Color Space drop-down menu option to select the HDR parameter value. The default value is SDR - Rec.709.
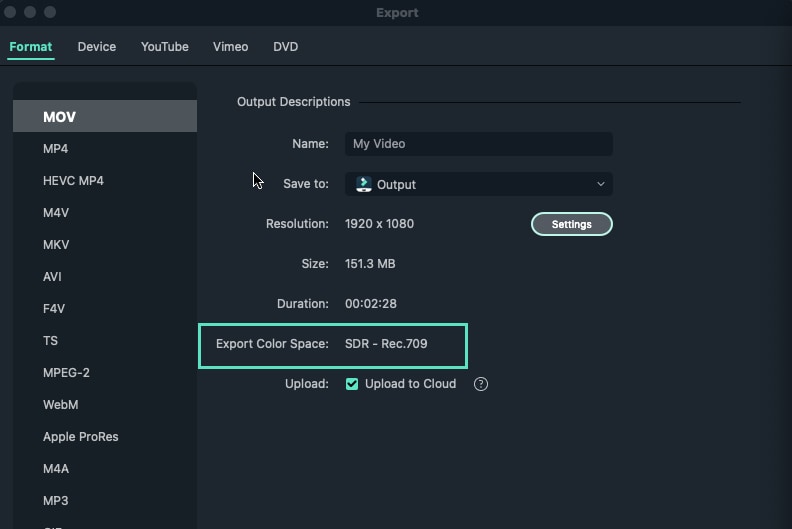
Export Color Space
- On the Export interface, click SETTINGS. When the Export Color Space is always on, the current device has enabled GPU acceleration (GPU acceleration in the preferences).
Functional Limitations and Reminders
Timeline Rendering: After rendering in HDR state, the player preview video clarity will be reduced.
GPU Support: Enable GPU acceleration for preview, rendering, and export. Filmora has a corresponding pop-up reminder on it.
Export Speed: The export speed of HDR video is about 4 times slower than that of SDR video.
Device Support: If your device does not support or does not turn on HDR, Filmora will prompt a pop-up window and remind you that the preview function of HDR is limited to the case that the device supports and HDR is on.
Related Posts
Featured Articles
Step by Step: Add Grain to Photoshop
Learn how to add grain in Photoshop using the Add Noise filter, Grain filter, and film grain overlays. Discover step-by-step methods and a more manageable alternative with Filmora for a quick, cinematic effect.
Unveiling the Premier League Highlights on YouTube
Do you want to create action-packed Premier League Highlights for YouTube? Our guide will help you engage fans by making such videos using Filmora!
How to Remove Echo from Audio: 3 Easy and Proven Ways
Are you looking to remove echo and other background noise from your audio? Here are three ways you to accurately remove echo from audio in minutes.
Recommended User Guide
Working with proxy on Mac
Once all the video clips you’d like to use in your next video are transferred from the camera to a computer and organized properly, you can start thinking about the most efficient way of piecing them together.
GPU Driver Requirements and Rendering for Mac
You will learn about GPU rendering and hardware encoding about Filmora for Mac here.
