For the Best Results, Use the Latest Version.
-
Preparations for Mac
-
Account (Mac)
-
Get Started & Basic Settings (Mac)
- Release notes for Mac
- Latest Versions and Features for Mac
- Get Started on Mac - Full Guide
- Download/register/uninstall on Mac
- Panel Layout on Mac
- Keyboard shortcuts on Mac
- Touchbar on Mac
- Change playback quality on Mac
- Render preview files on Mac
- Manage Timeline on Mac
- Media for use on Mac
- Logo Reveal For Mac
- Marked Favorites for Mac
-
Compatibility & Tech Specs (Mac)
-
Performance Settings (Mac)
-
-
Creating Projects - Mac
-
Creating New Projects (Mac)
-
-
Importing & Recording - Mac
-
Importing (Mac)
-
Recording (Mac)
-
-
Video Editing for Mac
-
Basic Video Editing for Mac
- Edit Live Photos on Mac
- Enable/Disable Clip for Mac
- Magnetic Timeline For Mac
- Dual Monitor Setup for Video Editing on Mac
- Select All Clips on Timeline for Mac
- Auto Ripple for Mac
- Split & cut videos on Mac
- Compositing on Mac
- Crop and zoom on Mac
- Playback Zoom Level for Mac
- Change speed on Mac
- Play video in reverse on Mac
- Mark In and Mark Out for Mac
- Markers for Mac
- Group clips on Mac
- Customized Backgrounds for Videos and Images in Mac
- Video snapshot on Mac
- Freeze frame on Mac
- Auto enhance on Mac
- Applying Drop Shadow for Mac
- Adjustment Layer for Mac
- Mark clip on Mac
- Video Editing Ruler – Mac
- Apply Transforming for Mac
-
Advanced Video Editing for Mac
-
AI-Powered Video Editing for Mac
- Smart Scene Cut for Mac
- Smart Short Clips for Mac
- Image to Video for Mac
- AI Idea to Video for Mac
- AI Text-to-Video for Mac
- Instant Cutter Tool on Mac
- AI Face Mosaic for Mac
- Keyframe Path Curve for Mac
- Planar Tracking for Mac
- AI Extend For Mac
- AI Script-to-Video for Mac
- AI Text-Based Editing in Mac
- Create With Instant Mode on Mac
- ChatGPT Plugin - AI Copywriting on Mac
- AI Smart Cutout for Mac
- Auto reframe on Mac
- Lens correction on Mac
- AI Portrait Cutout on Mac
- Scene detection on Mac
- AI Smart Masking for Mac
- AI Mate Editing for Mac
- Motion Tracking on Mac
- Stabilize video on Mac
- AI Object Remover For Mac
- AI Smart Search for Mac
- AI Skin Tone Protection for Mac
- Green screen on Mac
- Super Slow Motion with Optical Flow for Mac
- AI stylizer on Mac
- Video Denoise for Mac
-
-
Audio Editing for Mac
-
Basic Audio Editing for Mac
-
Advanced Audio Editing for Mac
-
AI-Powered Audio Editing for Mac
- Audio To Video for Mac
- AI Sound Effect for Mac
- Smart BGM Generation for Mac
- AI Voice Enhancer for Mac
- Audio Stretch for Mac
- AI Audio Denoise for Mac
- Auto synchronization for Mac
- AI Vocal Remover for Mac
- Auto Beat Sync on Mac
- AI Music Generator for Mac
- How to Perform AI Voice Cloning in Wondershare Filmora?
- Silence detection on Mac
-
-
Text Editing for Mac
-
Basic Text Editing for Mac
-
Advanced Text Editing for Mac
-
AI-Powered Text Editing for Mac
-
-
Video Customizations for Mac
-
Video Effects (Mac)
-
Audio Effects (Mac)
-
Transitions (Mac)
-
Stickers (Mac)
-
Filters (Mac)
-
Color Editing (Mac)
-
Animations (Mac)
-
Templates (Mac)
-
Asset Center (Mac)
-
-
Exporting & Share & Cloud Backup - Mac
Smart Short Clips for Mac
Are you looking for an effortless way to transform long videos into engaging, social media-ready clips on your Mac? Check out Filmora's Smart Short Clips feature!
This powerful tool simplifies the editing process by automatically identifying key moments in your footage, enabling you to create captivating shorts with just a few clicks. Dive into this guide to learn how to access and use this feature on your Mac!
Index
Access Smart Short Clips Feature
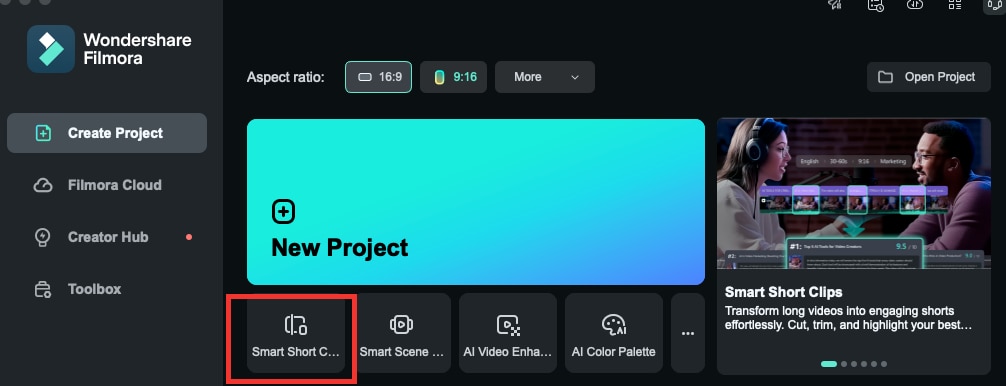
Entry 1: Access from the Home Screen
- When you open Filmora, in the list of features under New Project, you can find the entrance of Smart Short Clips.
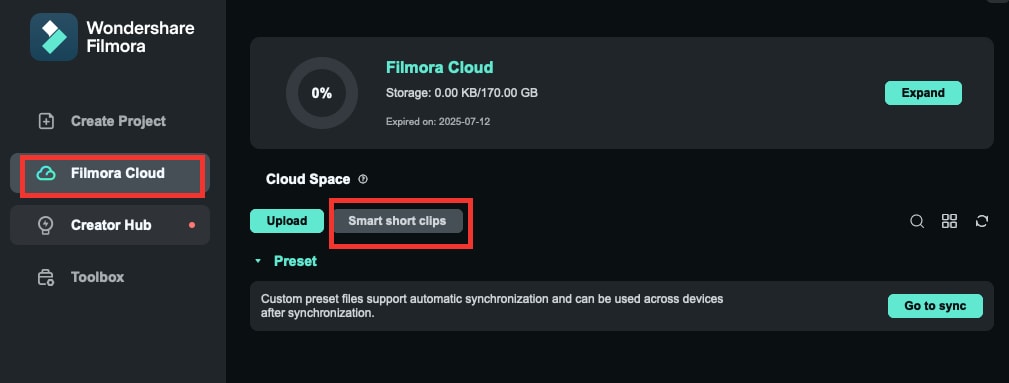
Entry 2: Access from the Filmora Cloud
- You can click on Filmora Cloud and find the entry in the Cloud Space general buttons.
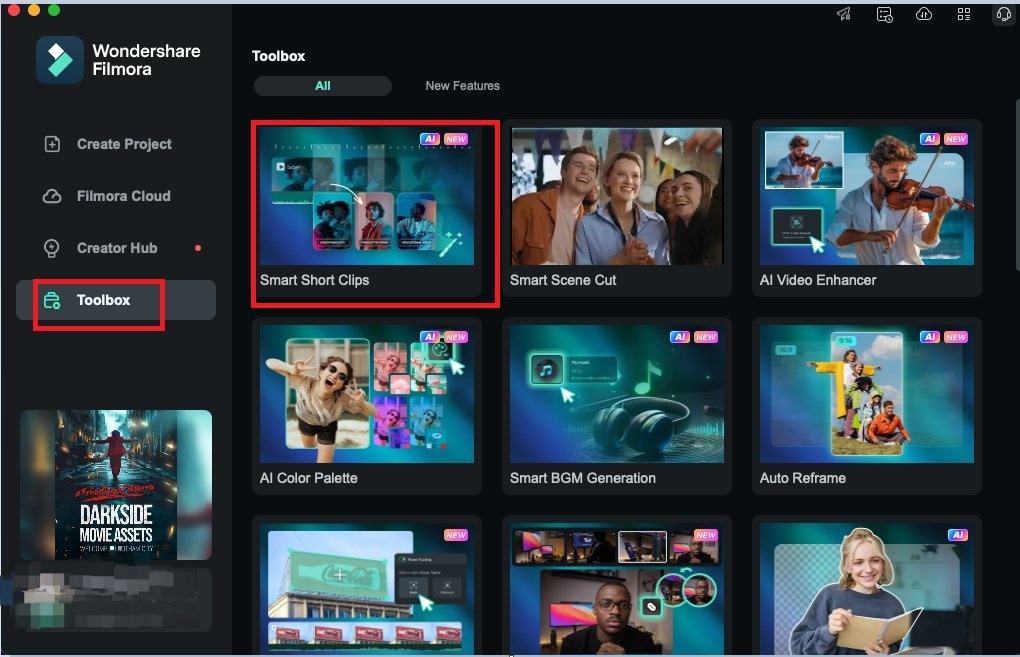
Entry 3: Access from the Toolbox
- You can click on Toolbox and find the Smart Short Clips entry in the function card, or you can check the latest new features.
Steps to Use Smart Short Clips
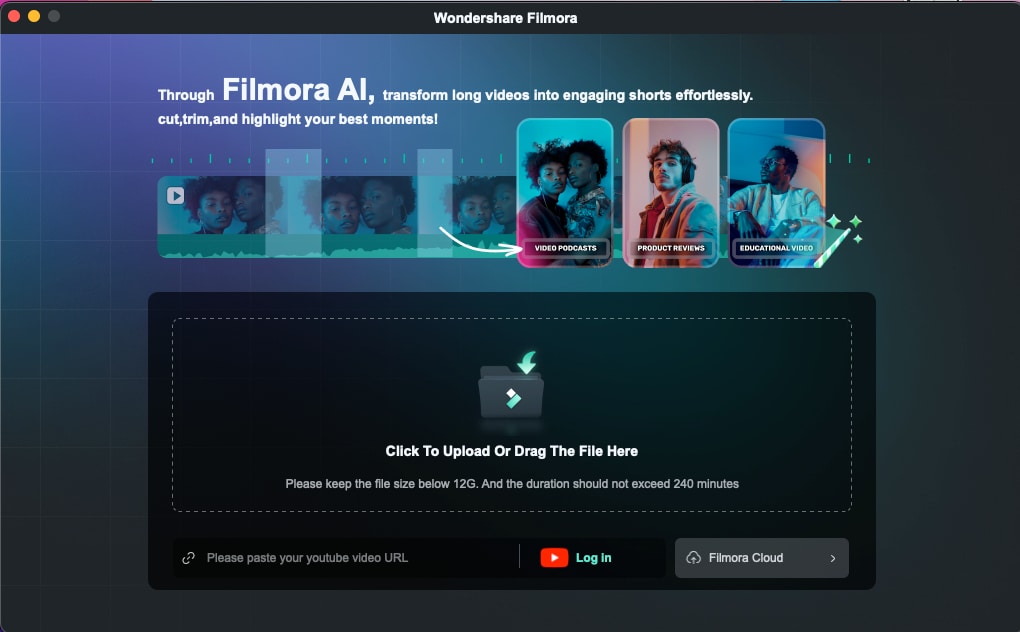
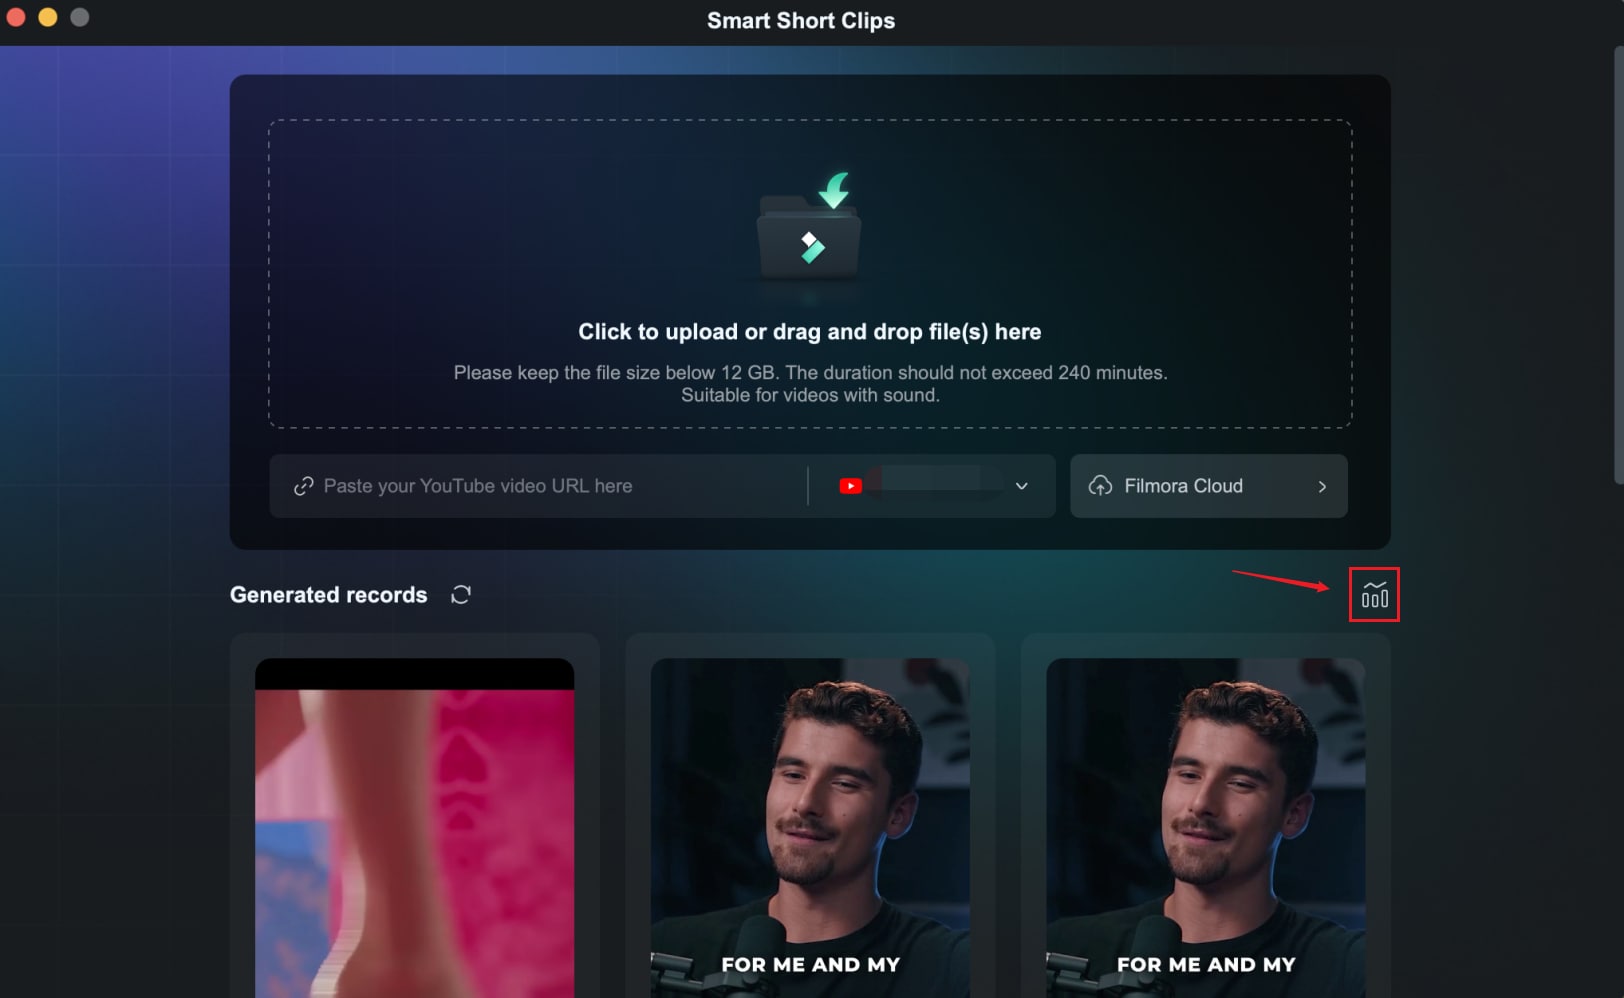
Step 1: Upload Your Videos
Simply paste a link to a YouTube video, upload a video file, or directly choose a file from Filmora Cloud into Filmora.
Note: Remember to use your own YouTube videos if you are choosing to paste a YouTube URL.
When uploading a video, you need to select the video source language manually. You can also adjust the Duration and Themes yourself if you don't want to accept the default settings.
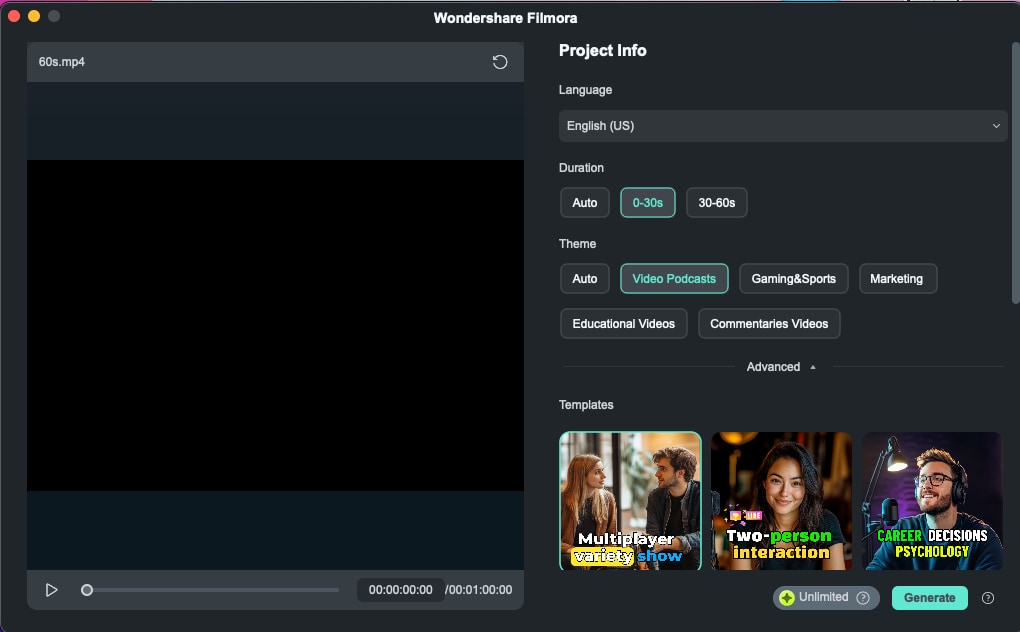
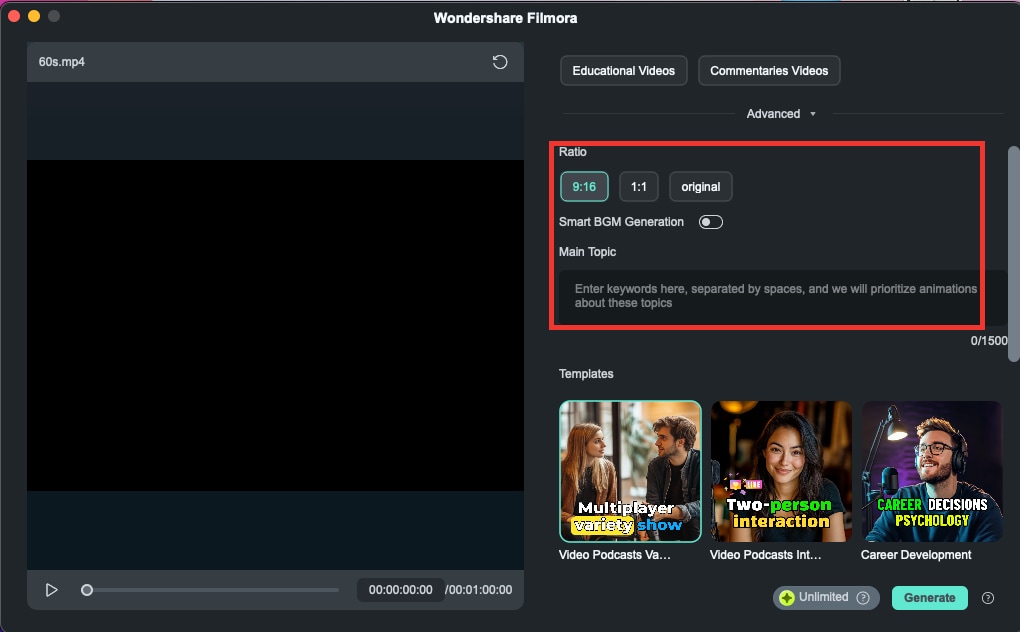
You can access the Advanced menu to choose the Aspect ratio and activate Smart BGM Generation to auto-generate music that fits your content.
Tip: You can enter a few keywords about your content in the Main Topic box to help the AI generate relevant animations.
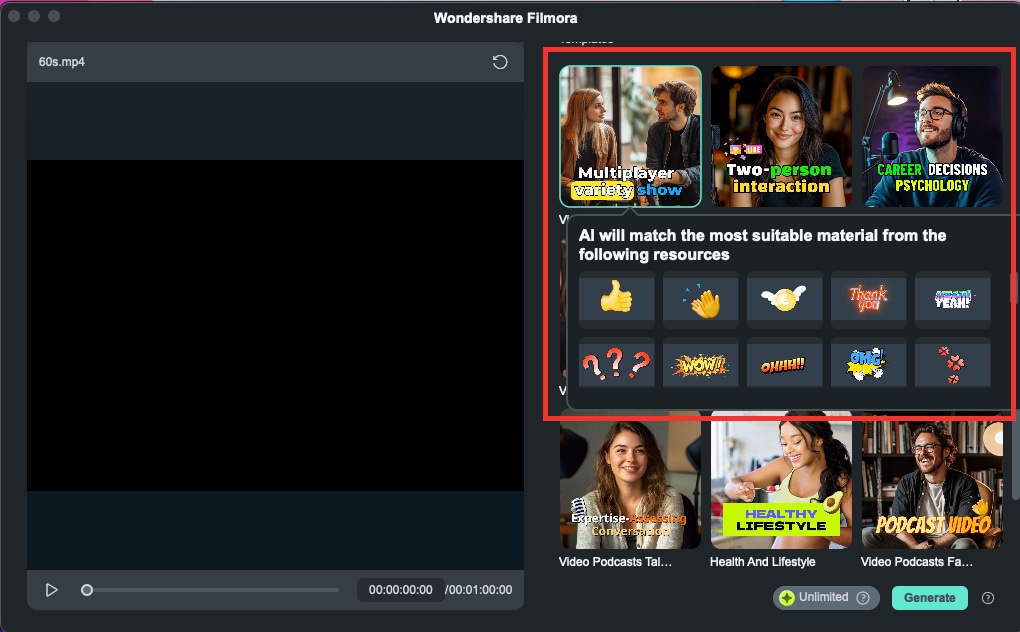
Rich templates are available under different themes. You can scroll down to find various high-quality short video templates. Select the one that catches your eye and click on Generate to continue.
You will need to wait a short time for the software to detect the video source language and upload the video.
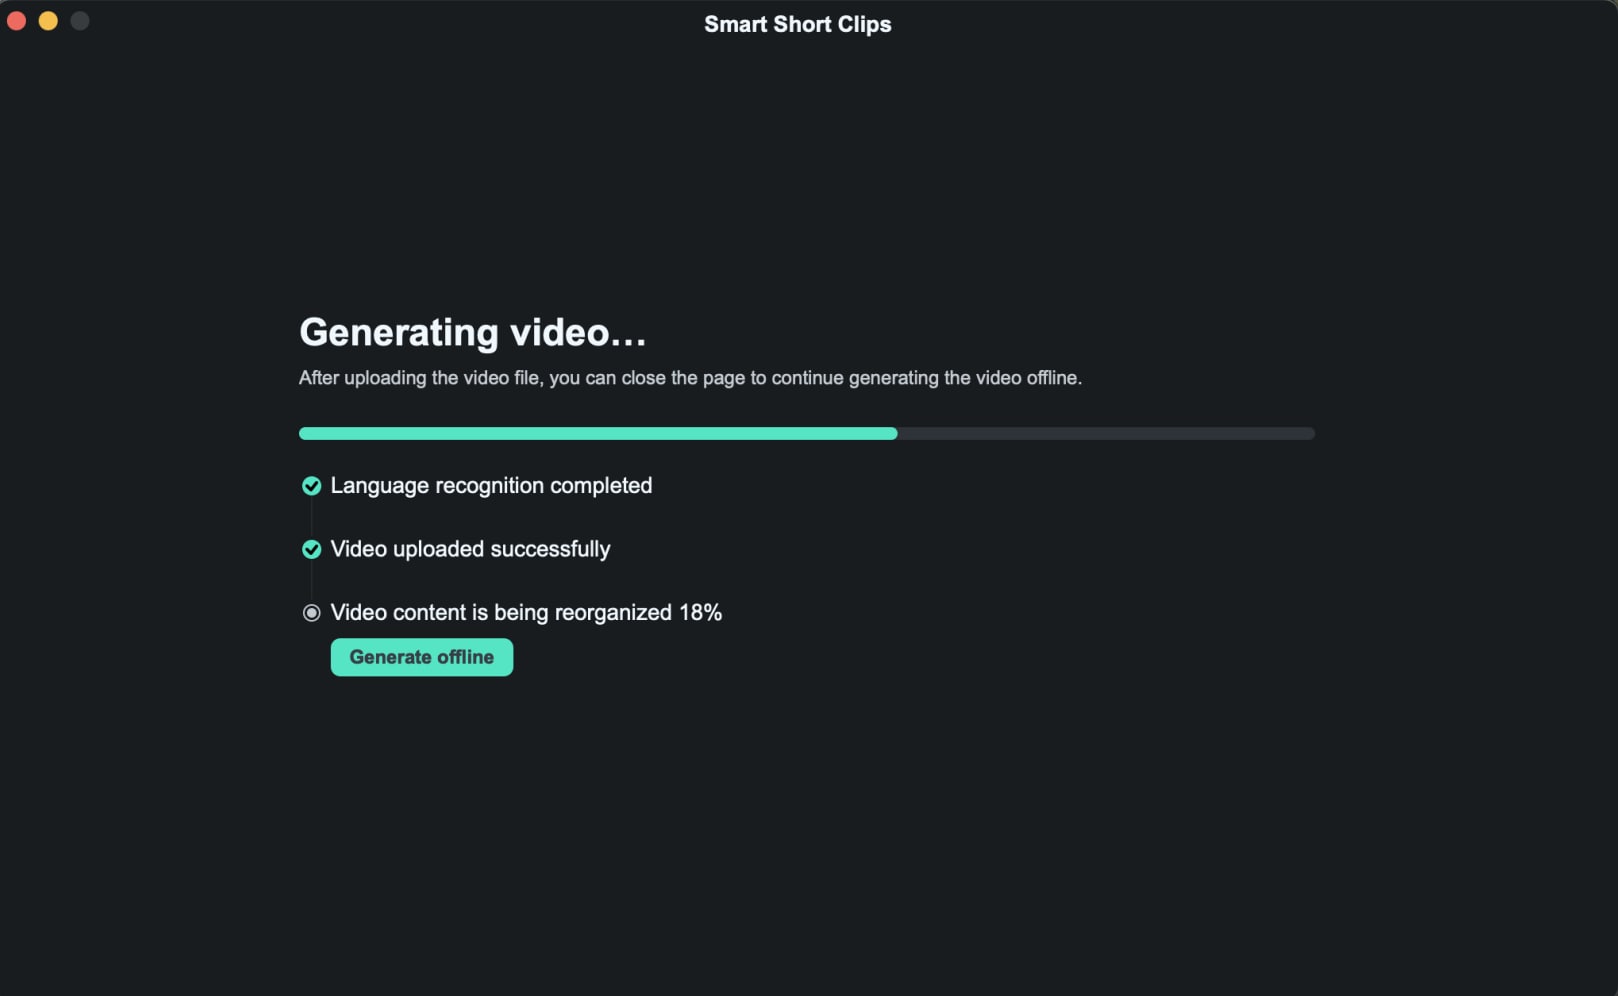
Tip: During the generation process, you can click Generate offline to edit your other videos. Moreover, an email will be delivered for notification when it is generated.
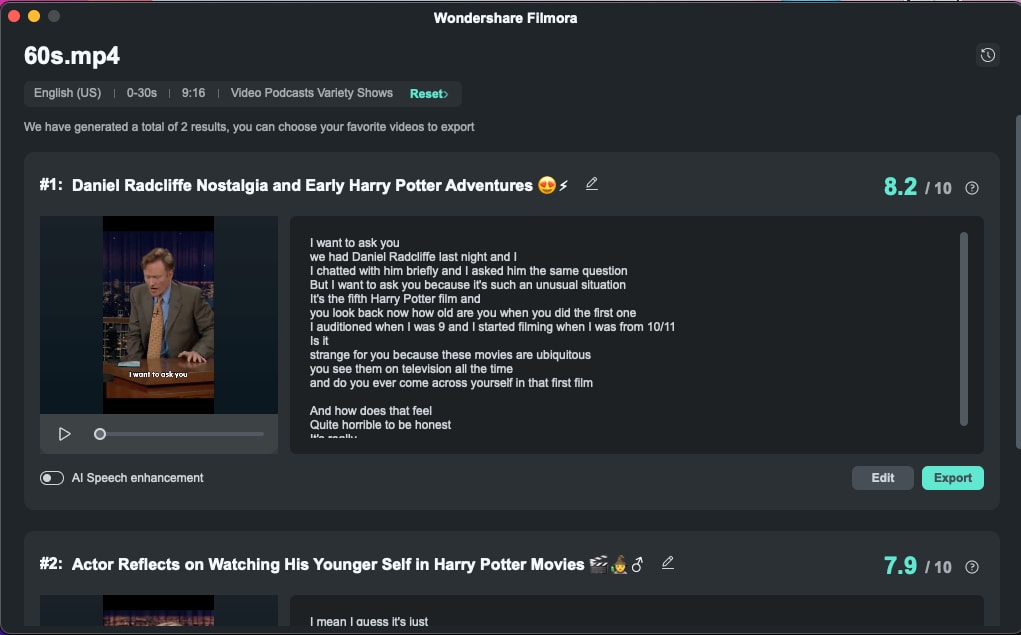
Step 2: Choose Your Shorts
Based on the uploaded video and the selected settings, the system will generate several results and will give a rating based on the platform rules.
Tips:
- You can also click Reset to regenerate it.
- You can choose AI Speech Enhancement to improve the quality of your voice recordings beyond just denoising.
Choose your favorite video clips which can be exported directly or refined.
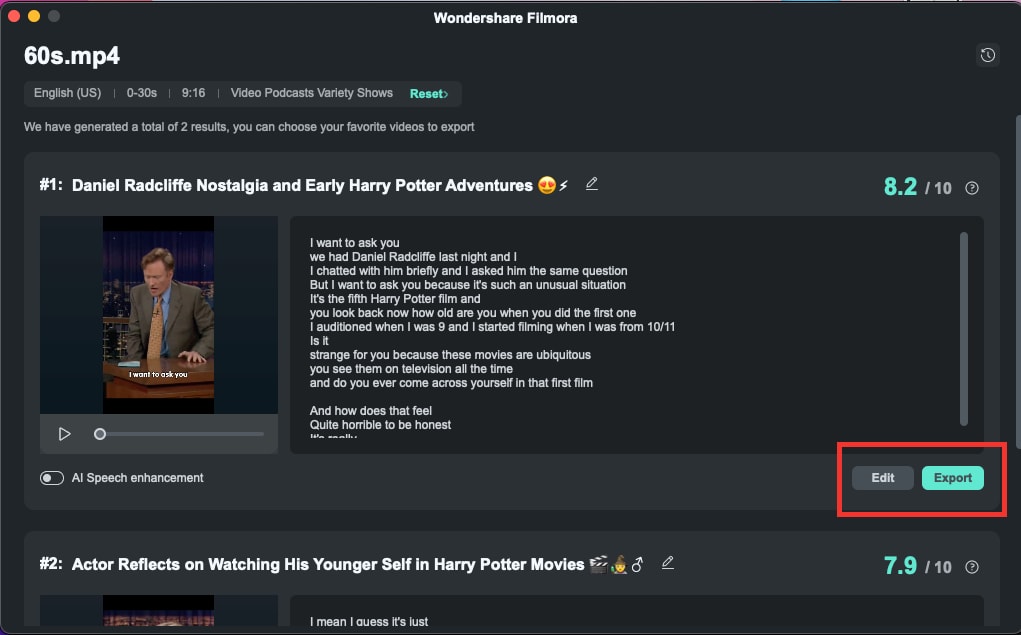
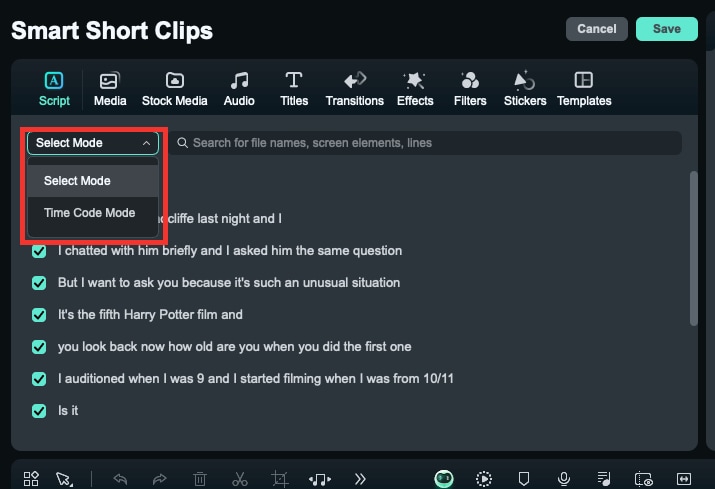
Step 3: Edit Your Video
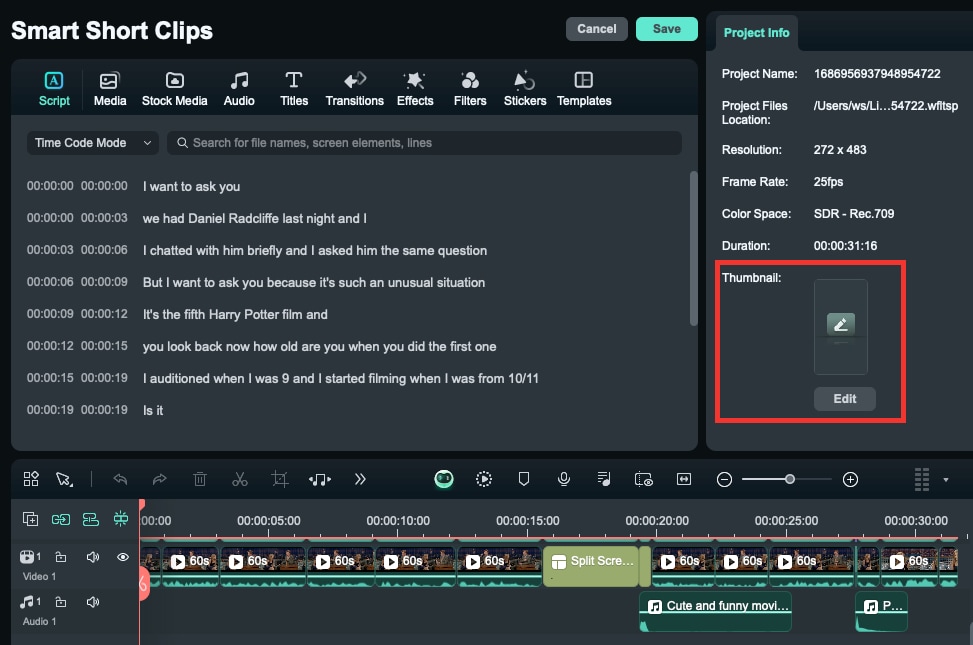
After clicking Edit you will enter the editing panel of Smart Short Clips. You can choose to use or hide specific captions in Select Mode or view the script by timecode for easier editing in Time Code Mode.
Tip: You can also generate Thumbnails and edit them by selecting the appropriate location.
You can also change the font style to better fit your video's theme by selecting the clip and navigating to the Text tab. Then click Apply to All to apply it to the whole video.
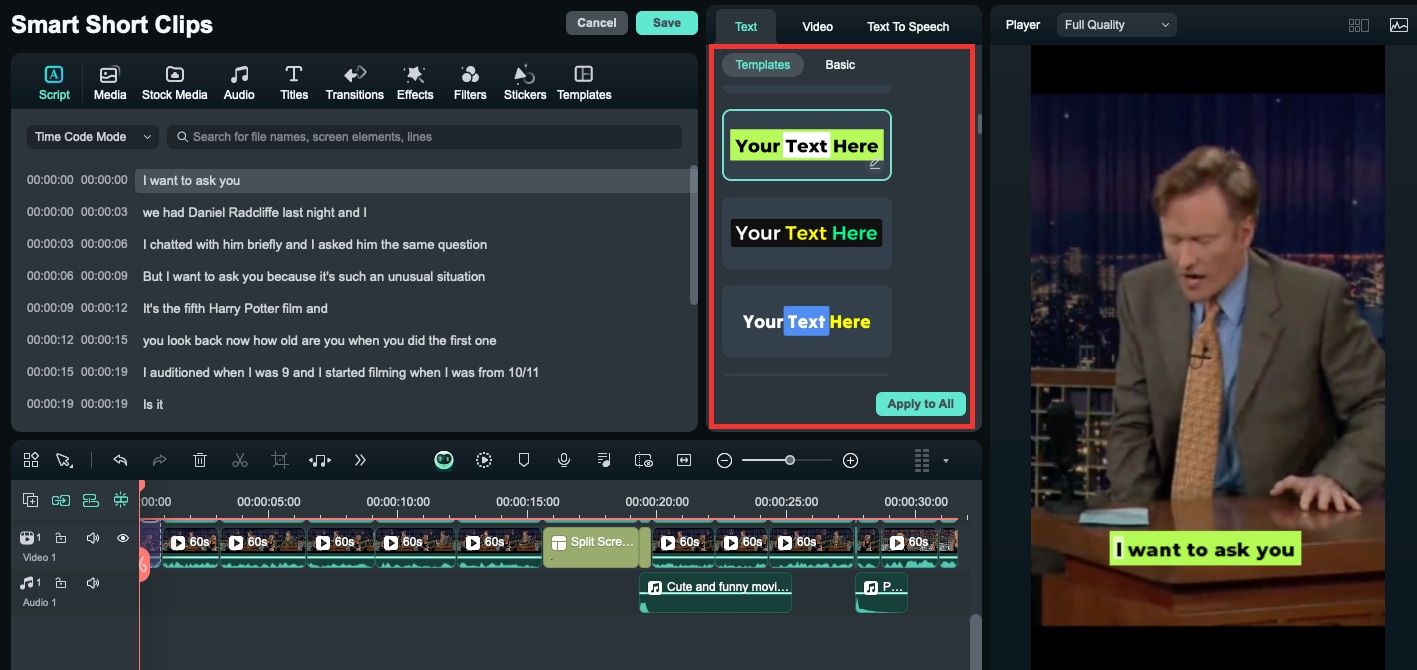
In the top toolbar, there are many other templates and resources for titles, transitions, effects, filters, and stickers that you can choose to add to your video.
To modify the text, go to the Basic option under the Text tab. You can adjust the text, merge, or emphasize certain words as needed.

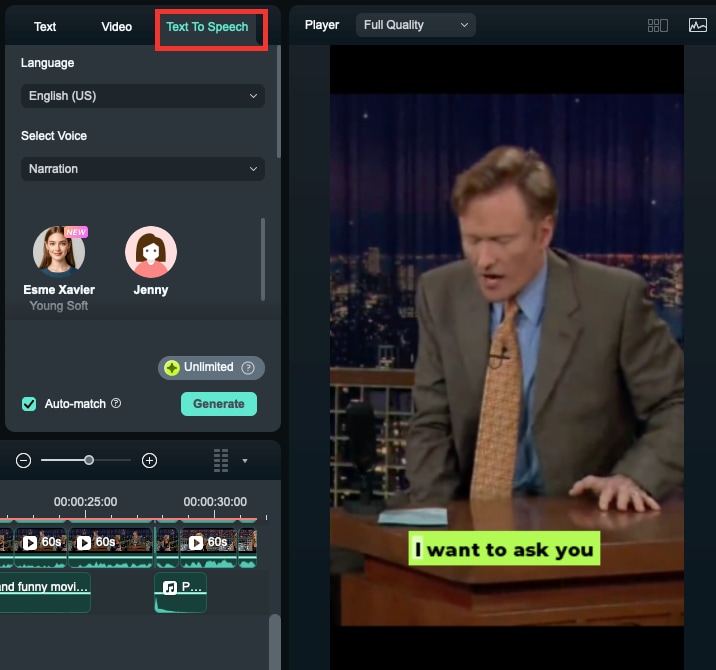
If you're not satisfied with the existing speech or want to add more dialogue to the video, you can use the Text-to-Speech feature to generate new voiceovers from the text.
You can also adjust the stickers etc. in the generated video by deleting them, zooming in or out.
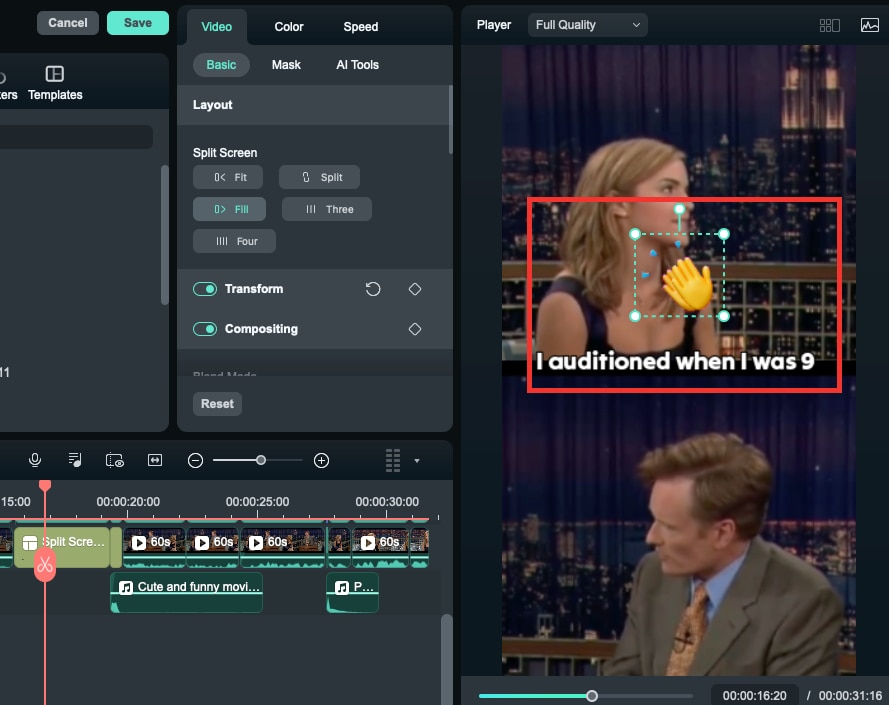
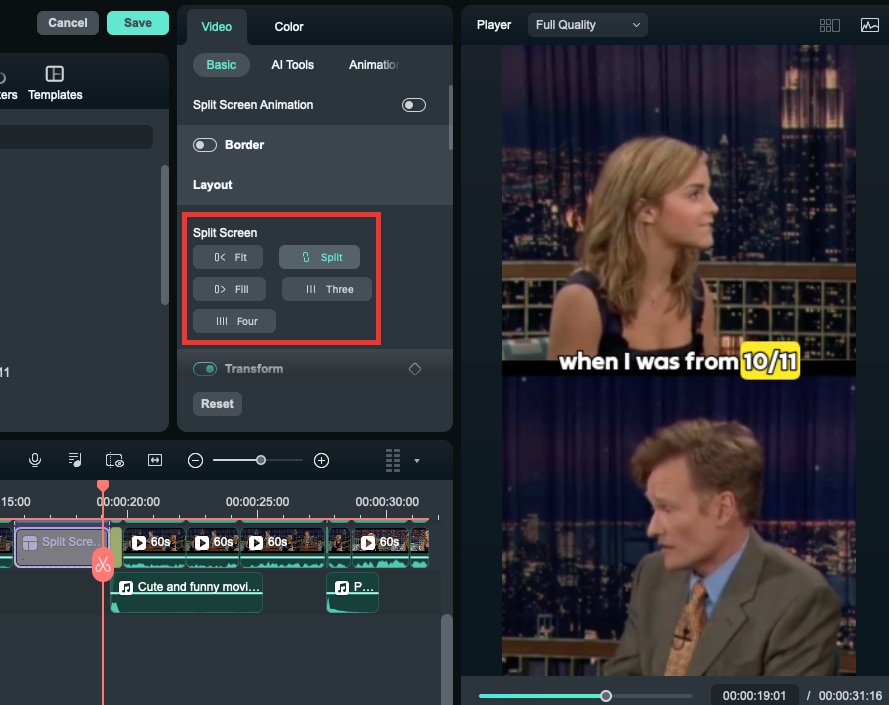
AI will intelligently recognize characters according to specific scenarios and place them in the middle with a reasonable split-screen layout.
Step 4: Export Your Shorts
Finally, open the Export window, select the social media platform (YouTube, TikTok, Instagram, Facebook, or Vimeo) for your video upload, and customize settings such as the title, description, category, resolution, and more.
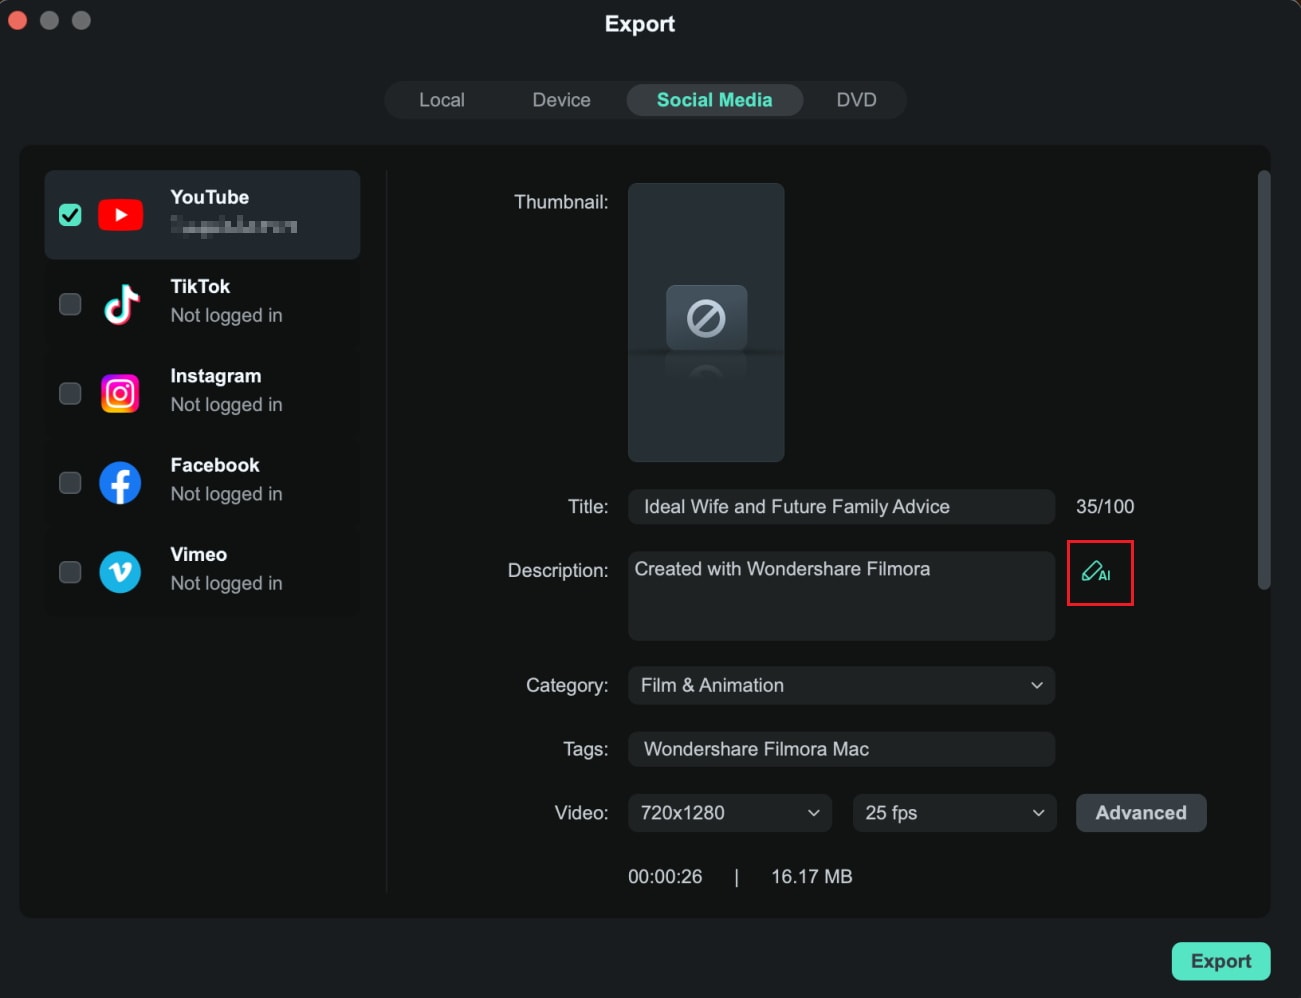
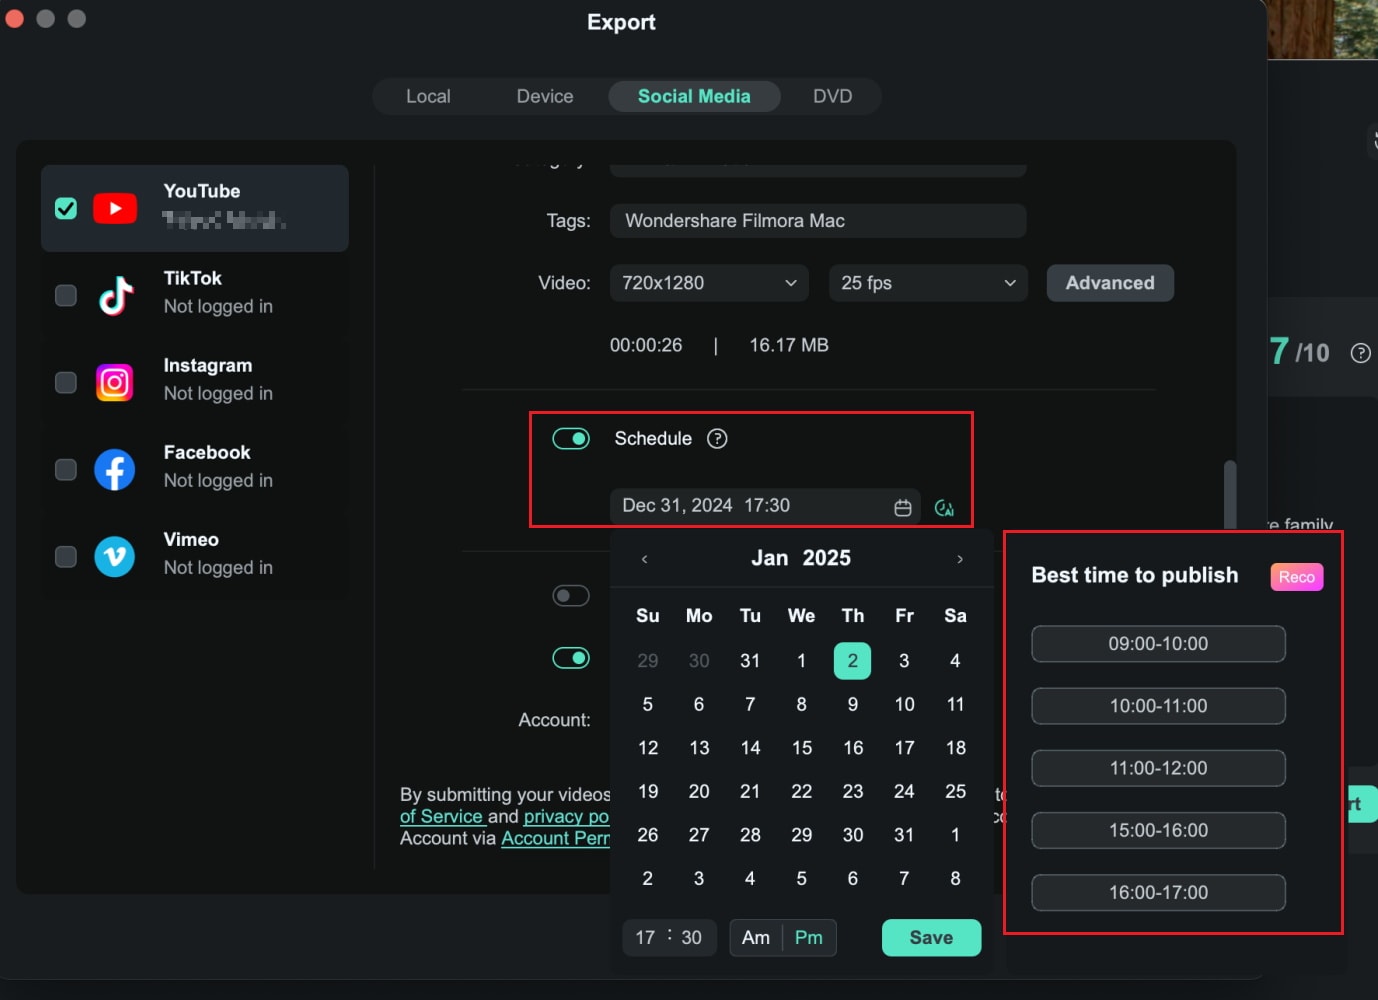
If you want to schedule your post, enable the Schedule option and set the desired date and time.
Analyze Social Media Data to Get Insights
The Analysis feature in Wondershare Filmora is an intuitive feature designed to help you gain valuable insights into your social media performance. Whether you want to track engagement on YouTube, Facebook, or Instagram, this tool provides detailed analytics, such as views, likes, and comments, all within a user-friendly interface.
Perfect for creators aiming to optimize their content strategy, the tool offers customizable timeframes, allowing you to monitor trends over the past 7 or 30 days. With the Analysis Tool, you can make data-driven decisions to enhance your reach and engagement effortlessly.
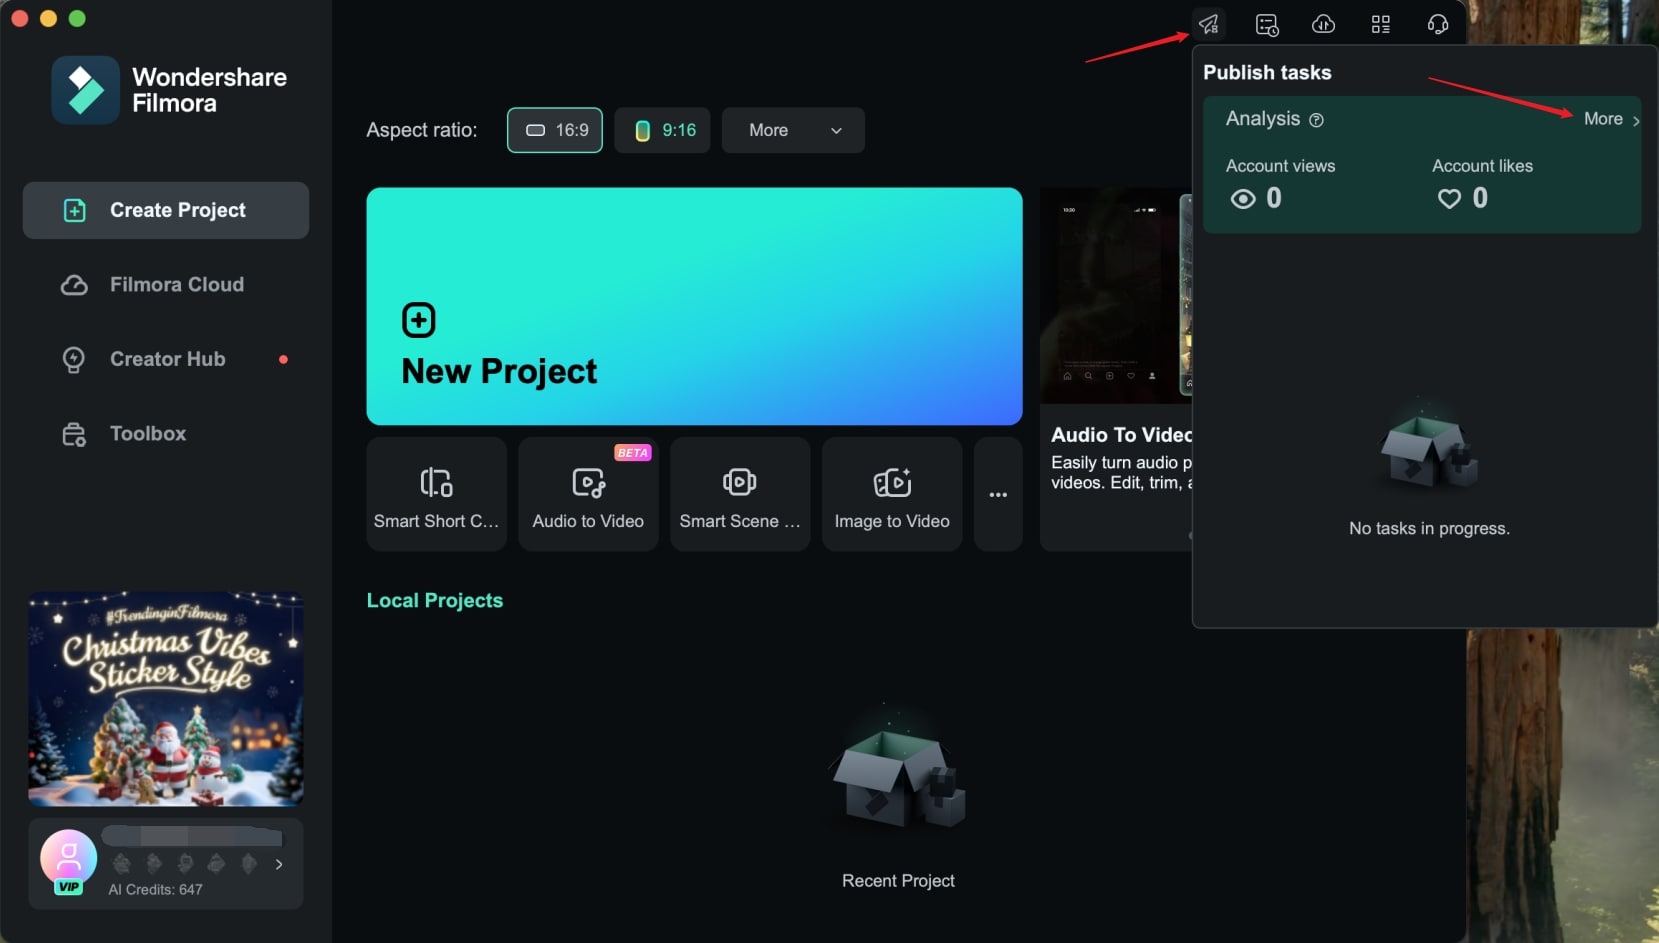
Step 1: Access Analysis tool
Access the Analysis tool by either selecting More in the Publish Tasks section on the home screen or entering the Smart Short Clips section and clicking the Analysis button.
Entry 1: Access from the Home Screen
- Locate the Publish Tasks section on the right-hand panel of the home screen. Click More to directly open the Analysis tool and view your statistics.
Entry 2: Access from Smart Short Clips
- Within the Smart Short Clips section, find the Analysis button. Click Analysis to access detailed statistics and analytics for your content.
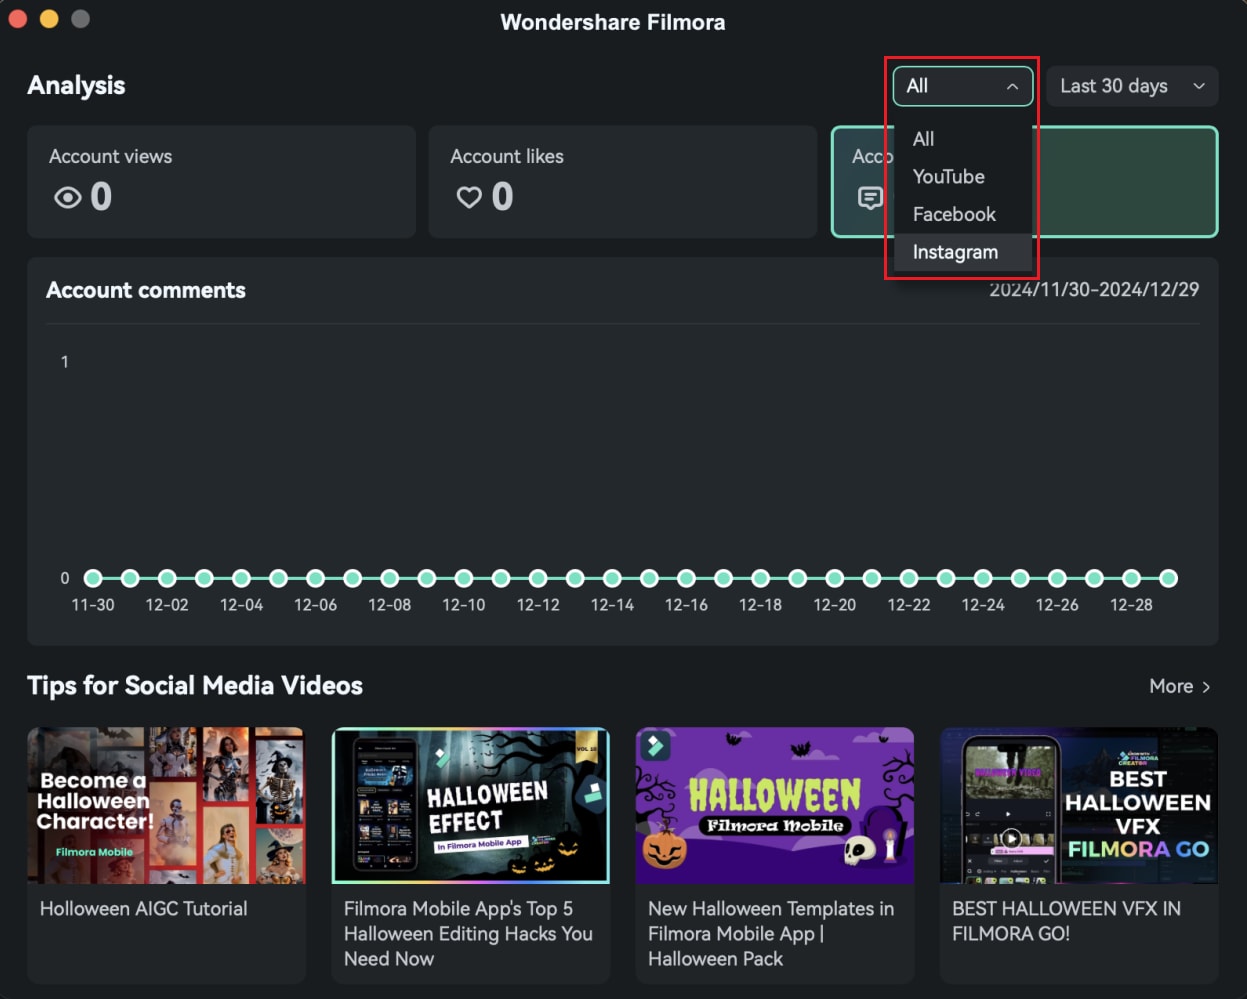
Step 2: Select your platform
Pick the platform you want to analyze (YouTube, Facebook, or Instagram) to view relevant statistics. Next, set your preferred time frame by choosing either a 7-day or 30-day data filter.
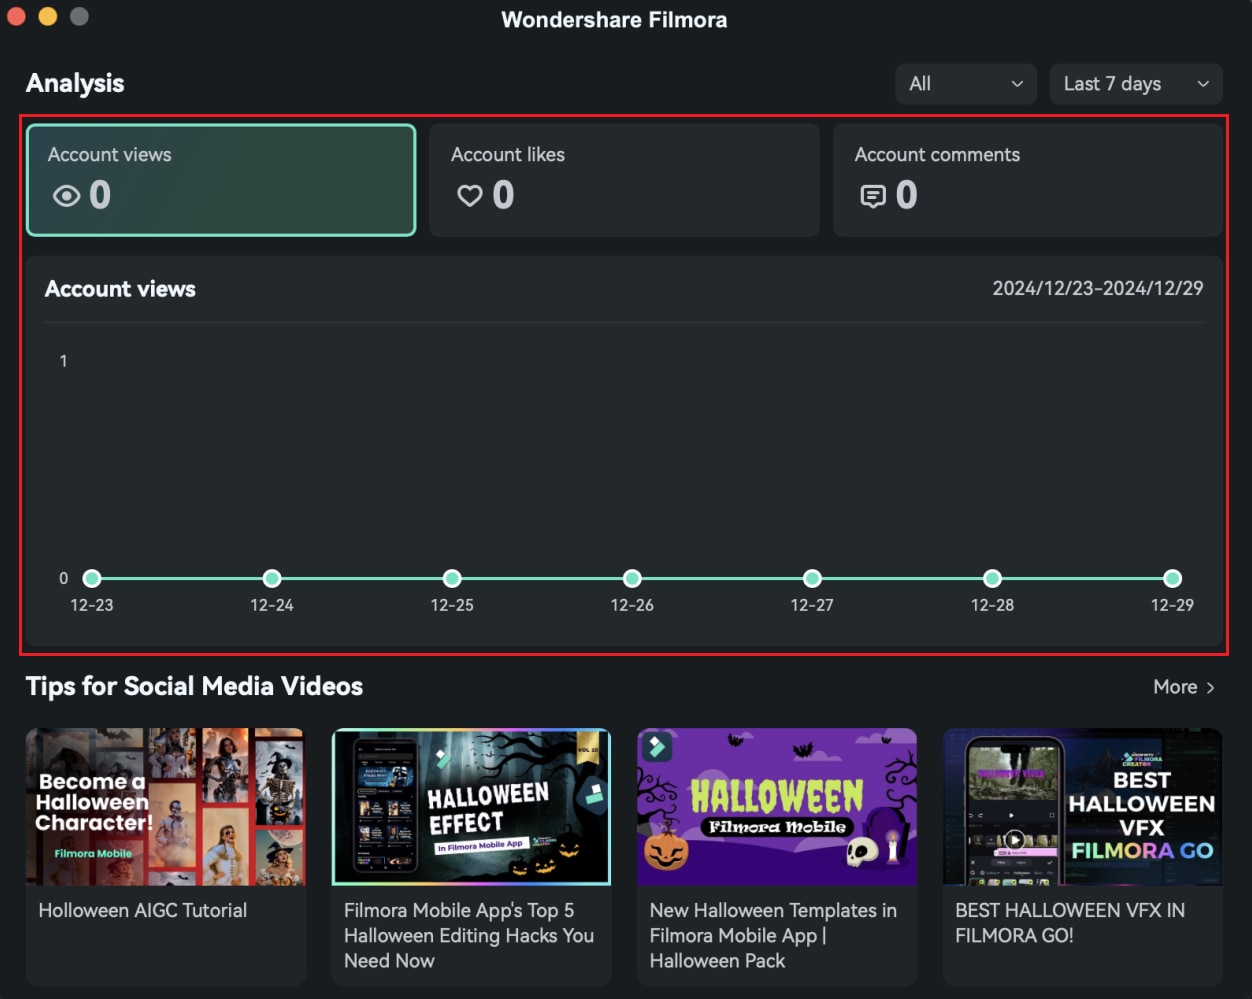
Step 3: View Analytics
The Analysis tool will present key analytics, including:
- Total Account Views
- Number of Likes
- Total Comments
Related Posts
Featured Articles
Top Solutions on How to Fade Music in iMovie
Learning new ways to add a smooth flair to the video’s audio? Read this article to learn the best solution on how to fade music in iMovie.
Best Green Screen Apps for iPhone: Top 7 Picks for Flawless Video Editing
Check out the 7 best green screen apps for iPhone. Create professional green screen videos with the best iPhone apps. Remove backgrounds, add effects, and edit seamlessly.
When Is The Best Time to Post on Instagram | Updated
What's the best time to post on IG, and how do you find the best time to extend the reach of your posts on Instagram? Check this ultimate guide here!
Recommended User Guide
Motion Tracking on Mac
Motion tracking is a useful feature of Filmora, learn how to use it in this guide.
AI Text-Based Editing in Mac
Filmora has been diligently enhancing its AI capabilities, and one of its recent introductions is AI Text-Based Editing.
AI Face Mosaic for Mac
The AI Face Mosaic feature is an advanced tool designed to recognize and protect faces in videos or images automatically. Utilizing intelligent mosaic application technology, this feature can track and cover faces in real-time, ensuring that privacy is safeguarded regardless of face movement within the frame.
