For the Best Results, Use the Latest Version.
-
Preparations for Mac
-
Account (Mac)
-
Get Started & Basic Settings (Mac)
- Release notes for Mac
- Latest Versions and Features for Mac
- Get Started on Mac - Full Guide
- Download/register/uninstall on Mac
- Panel Layout on Mac
- Keyboard shortcuts on Mac
- Touchbar on Mac
- Change playback quality on Mac
- Render preview files on Mac
- Manage timeline on Mac
- Media for use on Mac
- Logo Reveal For Mac
- Marked Favorites for Mac
-
Compatibility & Tech Specs (Mac)
-
Performance Settings (Mac)
-
-
Creating Projects - Mac
-
Creating New Projects (Mac)
-
-
Importing & Recording - Mac
-
Importing (Mac)
-
Recording (Mac)
-
-
Video Editing for Mac
-
Basic Video Editing for Mac
- Edit Live Photos on Mac
- Enable/Disable Clip for Mac
- Magnetic Timeline For Mac
- Select All Clips on Timeline for Mac
- Auto Ripple for Mac
- Split & cut videos on Mac
- Compositing on Mac
- Crop and zoom on Mac
- Playback Zoom Level for Mac
- Change speed on Mac
- Play video in reverse on Mac
- Mark In and Mark Out for Mac
- Markers for Mac
- Group clips on Mac
- Customized Backgrounds for Videos and Images in Mac
- Video snapshot on Mac
- Freeze frame on Mac
- Auto enhance on Mac
- Applying Drop Shadow for Mac
- Adjustment Layer for Mac
- Mark clip on Mac
- Video Editing Ruler – Mac
- Apply Transforming for Mac
-
Advanced Video Editing for Mac
-
AI-Powered Video Editing for Mac
- Smart Scene Cut for Mac
- Smart Short Clips for Mac
- Image to Video for Mac
- AI Idea to Video for Mac
- AI Text-to-Video for Mac
- Instant Cutter Tool on Mac
- AI Face Mosaic for Mac
- Keyframe Path Curve for Mac
- Planar Tracking for Mac
- AI Extend For Mac
- AI Script-to-Video for Mac
- AI Text-Based Editing in Mac
- Create With Instant Mode on Mac
- ChatGPT Plugin - AI Copywriting on Mac
- AI Smart Cutout for Mac
- Auto reframe on Mac
- Lens correction on Mac
- AI Portrait Cutout on Mac
- Scene detection on Mac
- AI Smart Masking for Mac
- AI Mate Editing for Mac
- Motion Tracking on Mac
- Stabilize video on Mac
- AI Object Remover For Mac
- AI Smart Search for Mac
- AI Skin Tone Protection for Mac
- Green screen on Mac
- Super Slow Motion with Optical Flow for Mac
- AI stylizer on Mac
- Video Denoise for Mac
-
-
Audio Editing for Mac
-
Basic Audio Editing for Mac
-
Advanced Audio Editing for Mac
-
AI-Powered Audio Editing for Mac
- Audio To Video for Mac
- AI Sound Effect for Mac
- Smart BGM Generation for Mac
- AI Voice Enhancer for Mac
- Audio Stretch for Mac
- AI Audio Denoise for Mac
- Auto synchronization for Mac
- AI Vocal Remover for Mac
- Auto Beat Sync on Mac
- AI Music Generator for Mac
- How to Perform AI Voice Cloning in Wondershare Filmora?
- Silence detection on Mac
-
-
Text Editing for Mac
-
Basic Text Editing for Mac
-
Advanced Text Editing for Mac
-
AI-Powered Text Editing for Mac
-
-
Video Customizations for Mac
-
Video Effects (Mac)
-
Audio Effects (Mac)
-
Transitions (Mac)
-
Stickers (Mac)
-
Filters (Mac)
-
Color Editing (Mac)
-
Animations (Mac)
-
Templates (Mac)
-
Asset Center (Mac)
-
-
Exporting & Share & Cloud Backup - Mac
Multi-Clip Editing for Mac
Multiple clip editing makes editing so easy and improves editing efficiency. With the help of this feature, users can apply the same effects to different clips simultaneously. It will be replacing the "Batch Edit" feature of Wondershare Filmora with better functionality. Where users could only perform multi-editing in text layers, it can now be applied across text and video layers likewise. To learn more about this feature and its functionality, review the section below:
Enable Multi-Clip Editing
In case you also want to save your time and effort during editing, here is a step-by-step on how you can edit multiple clips with Filmora on a MacBook
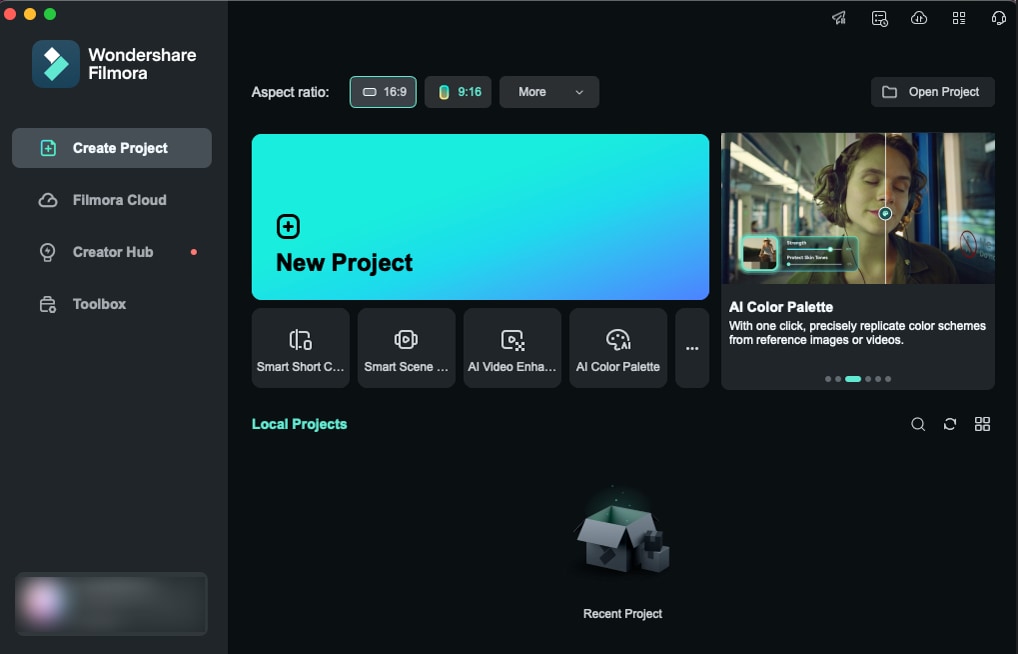
Step 1: Initiate Filmora and Access the Editing Interface
Once you have downloaded Filmora for Mac, open the software and log in to it. From the main screen, locate the "New Project" button and tap on it to access Filmora's editing interface.
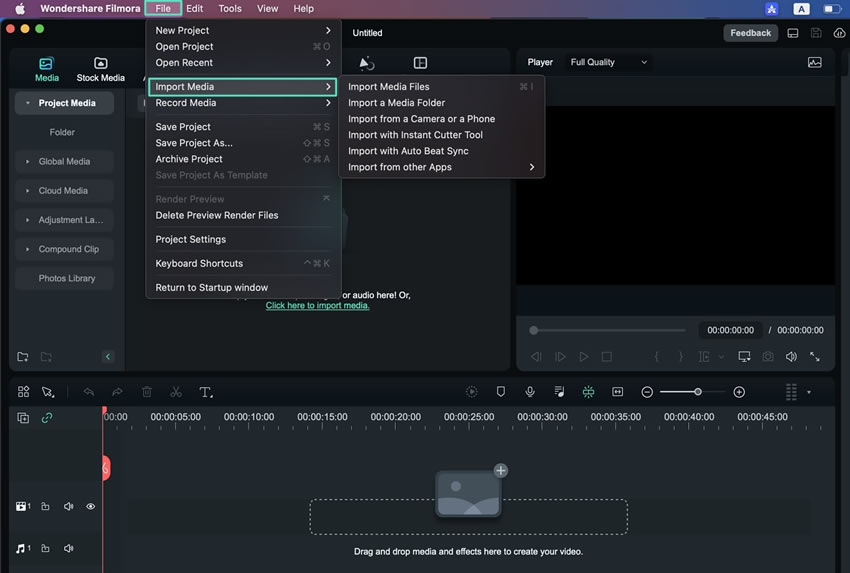
Step 2: Import Clips and Drop Them to Timeline
Navigate towards the top toolbar of the editing window and click the "File" tab. From the dropdown menu, choose "Import Media" and upload multiple clips from your device into Filmora's Media Library. With the help of your cursor, drag and drop the clips into the timeline. You can drop them on the same or distinctive tracks.
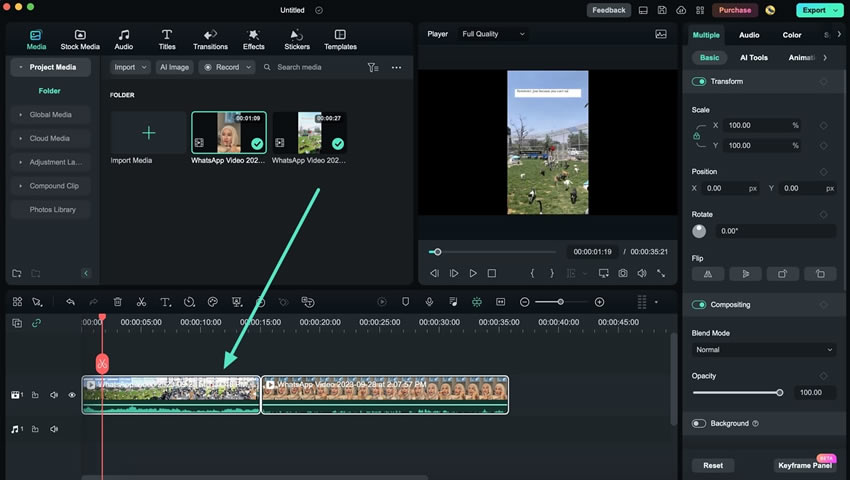
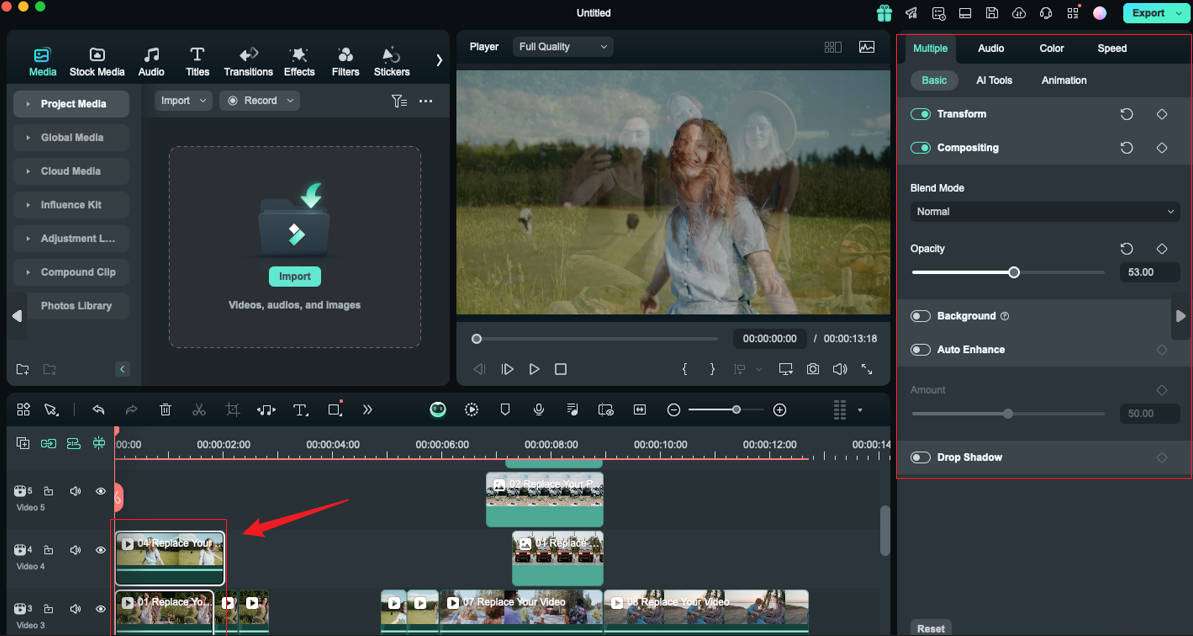
Step 3: Select Multiple Clips
Now, click the "Command" key from your keyboard, and while pressing it, click the clips in the timeline with the help of your mouse, one by one. In this way, multiple clips will be selected.
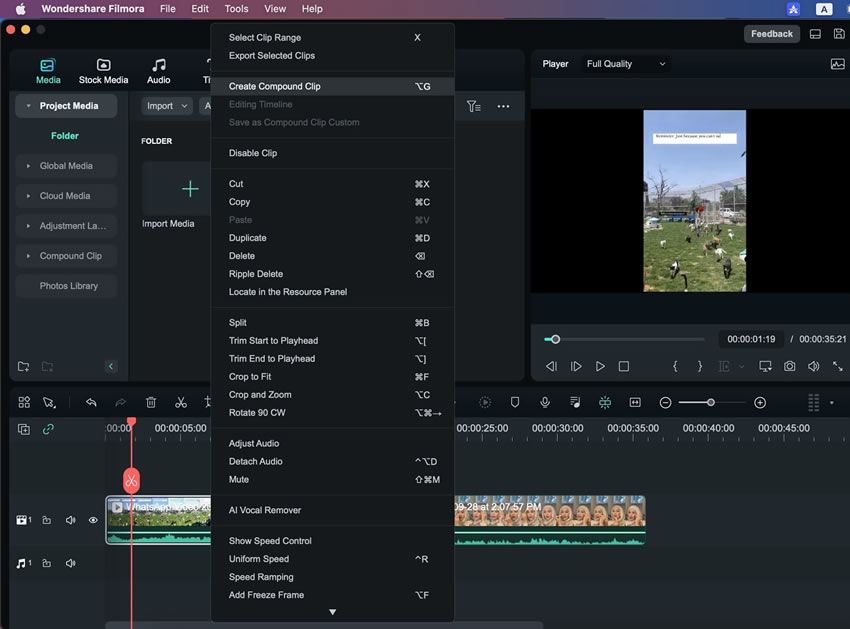
Step 4: Start Multi-Clip Editing
Following that, right-click on your clip in the timeline, and from the options available at the dropdown menu, select any to apply to both clips. Using this method, you can activate Speech-to-Text for both videos simultaneously. In addition, you can also apply "Compound Clip", "Color Match", or "Adjust Audio" settings.
Step 5: Perform Multi-Editing on Different Elements
In the case of a title layer and video clip layer, you can easily perform multi-editing in Filmora. For that, double-click on the video layer to open its settings, and proceed to hold the "Command" key on your Mac. Continue to click the title layer to navigate into the multi-layer editing settings. Change the respective parameters simultaneously and make your video editing easier.
Note:
Keep in mind that the multi-clip editing feature does not support editing of some particular parameters. As of yet, the tool does not support editing of effects and other specific tools like "AI Smart Cutout", "Masking", "Stabilization", and "Motion Tracking". It also does not support keyboard presets for centering, zooming, and clip shifting.Related Posts
Featured Articles
How to Loop a Video in After Effects (4 Easy Methods with Comparison)
Looping a video in After Effects can be simple or complex, depending on the method. This guide covers 4 AE techniques plus an easy Filmora alternative.
Top 10 TikTok Font Generator Tools to Style Your Bio in 2025
Do you need a TikTok font generator to give your video text a fancy look? Read this guide, where we discuss the top tools that let you achieve that.
Translate English To Indonesia Voice Like a Pro with Filmora
Translate English to Indonesian voice with ease using Filmora AI Translation. Enjoy seamless editing, lip-sync, and voice cloning to create accurate, professional-quality translations.
Recommended User Guide
AI Video Enhancer for Mac
Learn about how to enhance your video quality on mac
Mocha Filmora - For Mac
Here is the guide on how to use the Mocha plugin in Filmora on Mac.
