For the Best Results, Use the Latest Version.
-
Preparations for Mac
-
Account (Mac)
-
Get Started & Basic Settings (Mac)
- Release notes for Mac
- Latest Versions and Features for Mac
- Get Started on Mac - Full Guide
- Download/register/uninstall on Mac
- Panel Layout on Mac
- Keyboard shortcuts on Mac
- Touchbar on Mac
- Change playback quality on Mac
- Render preview files on Mac
- Manage timeline on Mac
- Media for use on Mac
- Logo Reveal For Mac
- Marked Favorites for Mac
-
Compatibility & Tech Specs (Mac)
-
Performance Settings (Mac)
-
-
Creating Projects - Mac
-
Creating New Projects (Mac)
-
-
Importing & Recording - Mac
-
Importing (Mac)
-
Recording (Mac)
-
-
Video Editing for Mac
-
Basic Video Editing for Mac
- Edit Live Photos on Mac
- Enable/Disable Clip for Mac
- Magnetic Timeline For Mac
- Select All Clips on Timeline for Mac
- Auto Ripple for Mac
- Split & cut videos on Mac
- Compositing on Mac
- Crop and zoom on Mac
- Playback Zoom Level for Mac
- Change speed on Mac
- Play video in reverse on Mac
- Mark In and Mark Out for Mac
- Markers for Mac
- Group clips on Mac
- Customized Backgrounds for Videos and Images in Mac
- Video snapshot on Mac
- Freeze frame on Mac
- Auto enhance on Mac
- Applying Drop Shadow for Mac
- Adjustment Layer for Mac
- Mark clip on Mac
- Video Editing Ruler – Mac
- Apply Transforming for Mac
-
Advanced Video Editing for Mac
-
AI-Powered Video Editing for Mac
- Smart Scene Cut for Mac
- Smart Short Clips for Mac
- Image to Video for Mac
- AI Idea to Video for Mac
- AI Text-to-Video for Mac
- Instant Cutter Tool on Mac
- AI Face Mosaic for Mac
- Keyframe Path Curve for Mac
- Planar Tracking for Mac
- AI Extend For Mac
- AI Script-to-Video for Mac
- AI Text-Based Editing in Mac
- Create With Instant Mode on Mac
- ChatGPT Plugin - AI Copywriting on Mac
- AI Smart Cutout for Mac
- Auto reframe on Mac
- Lens correction on Mac
- AI Portrait Cutout on Mac
- Scene detection on Mac
- AI Smart Masking for Mac
- AI Mate Editing for Mac
- Motion Tracking on Mac
- Stabilize video on Mac
- AI Object Remover For Mac
- AI Smart Search for Mac
- AI Skin Tone Protection for Mac
- Green screen on Mac
- Super Slow Motion with Optical Flow for Mac
- AI stylizer on Mac
- Video Denoise for Mac
-
-
Audio Editing for Mac
-
Basic Audio Editing for Mac
-
Advanced Audio Editing for Mac
-
AI-Powered Audio Editing for Mac
- Audio To Video for Mac
- AI Sound Effect for Mac
- Smart BGM Generation for Mac
- AI Voice Enhancer for Mac
- Audio Stretch for Mac
- AI Audio Denoise for Mac
- Auto synchronization for Mac
- AI Vocal Remover for Mac
- Auto Beat Sync on Mac
- AI Music Generator for Mac
- How to Perform AI Voice Cloning in Wondershare Filmora?
- Silence detection on Mac
-
-
Text Editing for Mac
-
Basic Text Editing for Mac
-
Advanced Text Editing for Mac
-
AI-Powered Text Editing for Mac
-
-
Video Customizations for Mac
-
Video Effects (Mac)
-
Audio Effects (Mac)
-
Transitions (Mac)
-
Stickers (Mac)
-
Filters (Mac)
-
Color Editing (Mac)
-
Animations (Mac)
-
Templates (Mac)
-
Asset Center (Mac)
-
-
Exporting & Share & Cloud Backup - Mac
Instant Cutter Tool for Mac
When you have to import long camera footage or videos, it seems to be difficult. However, with the Instant Cutter Tool on Filmora's latest version for Mac, things get easy. The tool allows you to proceed with trimming and merging the effects without re-encoding the entire video.
Trim Video Clips
Step 1: Look for the Instant Cutter Tool in Filmora Mac
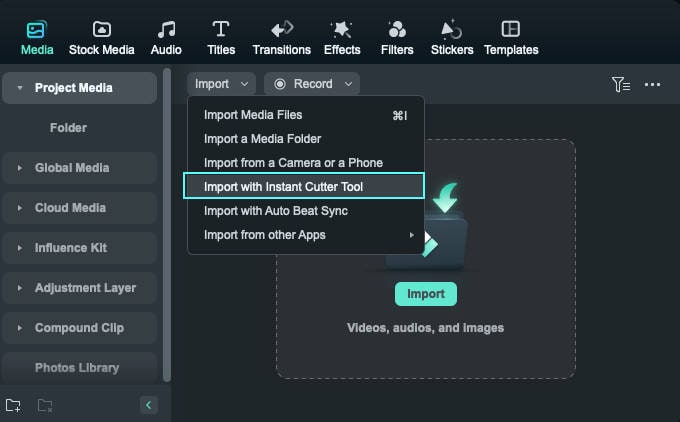
On opening Filmora for Mac, lead to the "Instant Cutter Tool" option on the home screen to lead to a new window.

On the other hand, you can press the "Media" tab from the top-left and consequently proceed to the "Import" button. Select the "Import with Instant Cutter Tool" option from the drop-down menu.
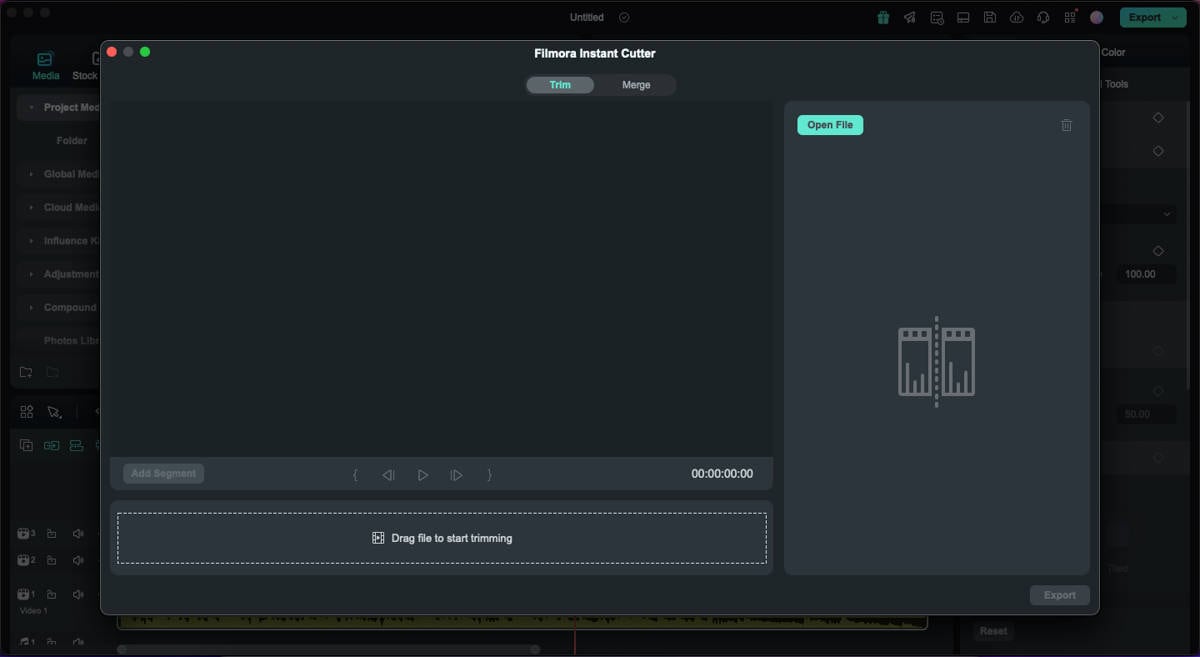
Step 2: Import Video in Trim Section
On the window that opens, continue to the "Trim" tab from the top. Press the "Open File" button from the right to import the long video file into Filmora.
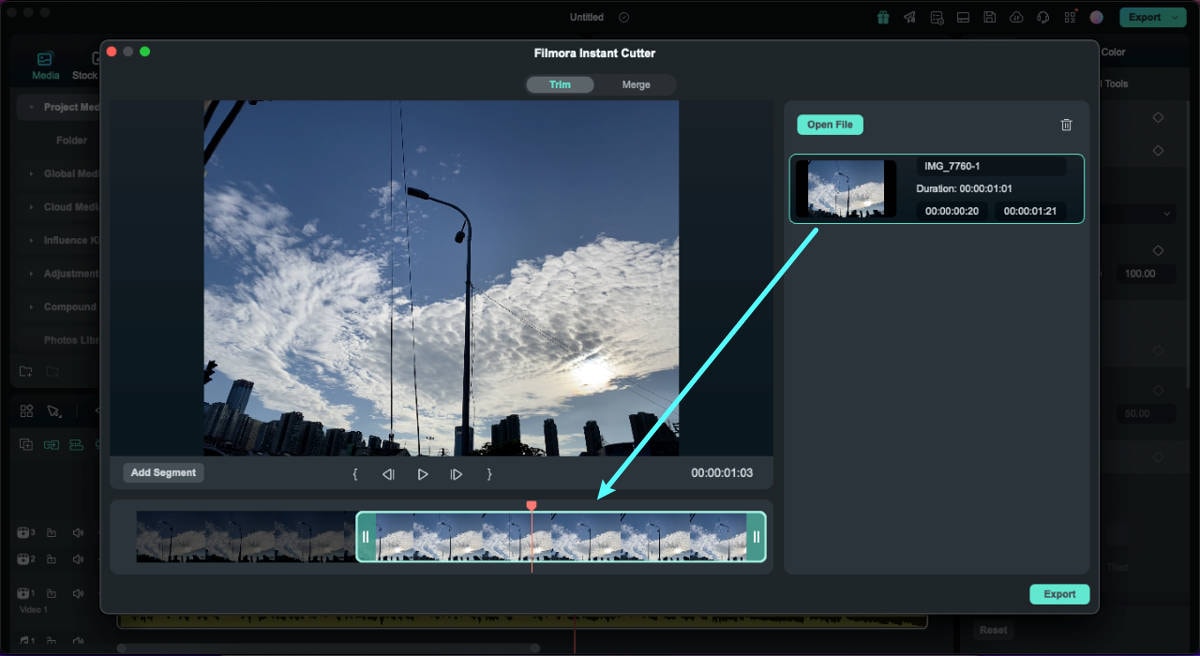
Step 3: Use Sliders to Trim Video
With the "Start" and "End" sliders on the left and right side of the timeline section, you can easily trim the video. Set the starting and ending points with the sliders and get the essential part out of the complete clip.
Step 4: Trim the Video with Mark In and Mark Out Points
You can trim the video with the Mark In and Out points within the same window. For that, bring the playhead to the appropriate position from where you want to start the video and click the "Mark In" icon. This will remove the starting part of the video that is passed through the playhead. Similarly, you can remove the ending part from the video with the "Mark Out" icon.
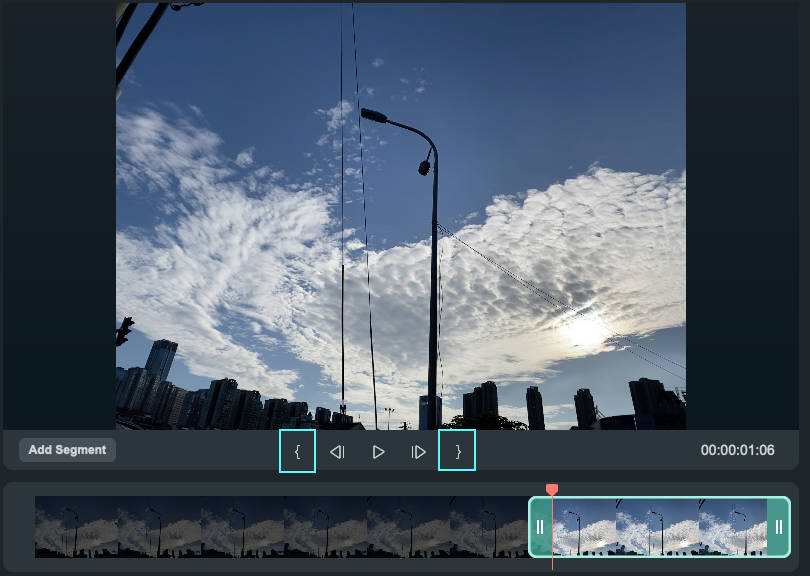
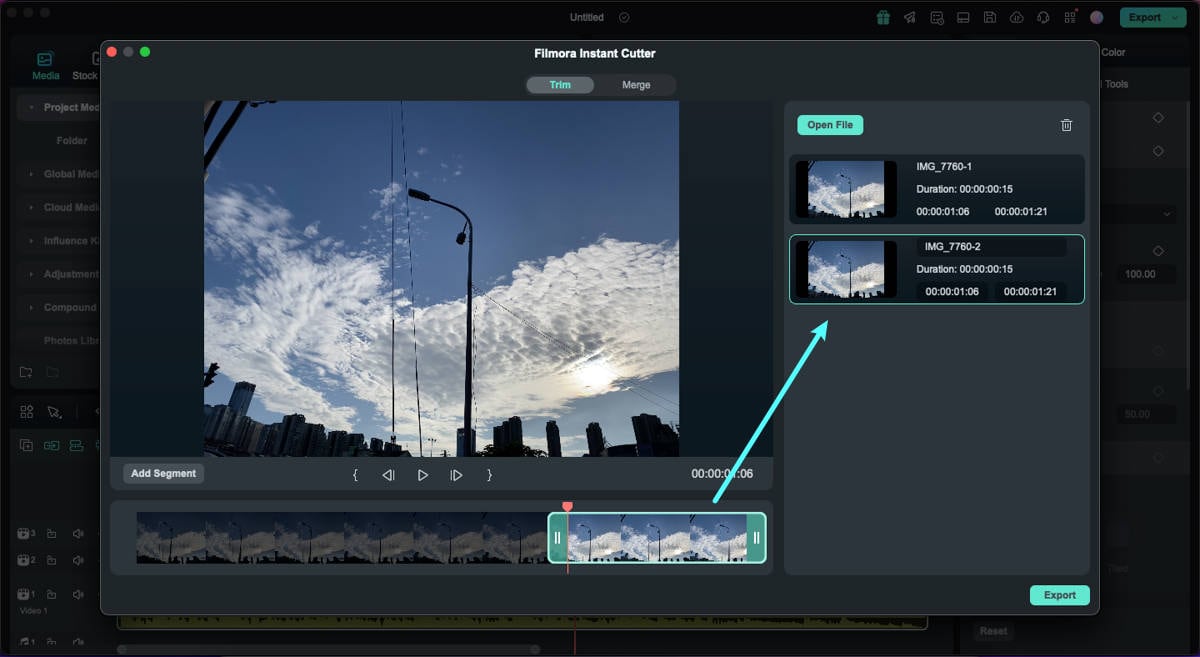
Step 5: Set the Trimmed Clip as a Segment
To save the trimmed clip as a segment of a video, use the "Add Segment" button. The trimmed clip would be added to the video section on the right side of the window.
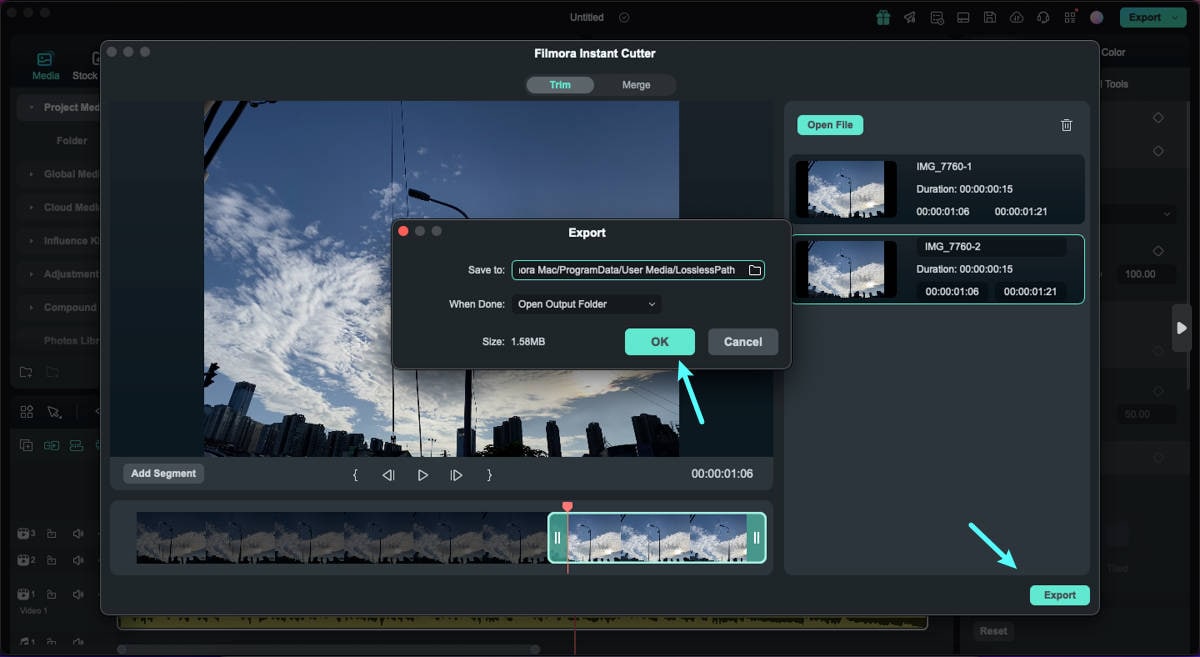
Step 6: Play and Finalize by Exporting
Continue to select the "Play" icon to play and preview the final video. You can click the "Export" button to save the finalized video to your Mac. A new pop-up window appears where you need to define the name and location of the video before pressing "OK".
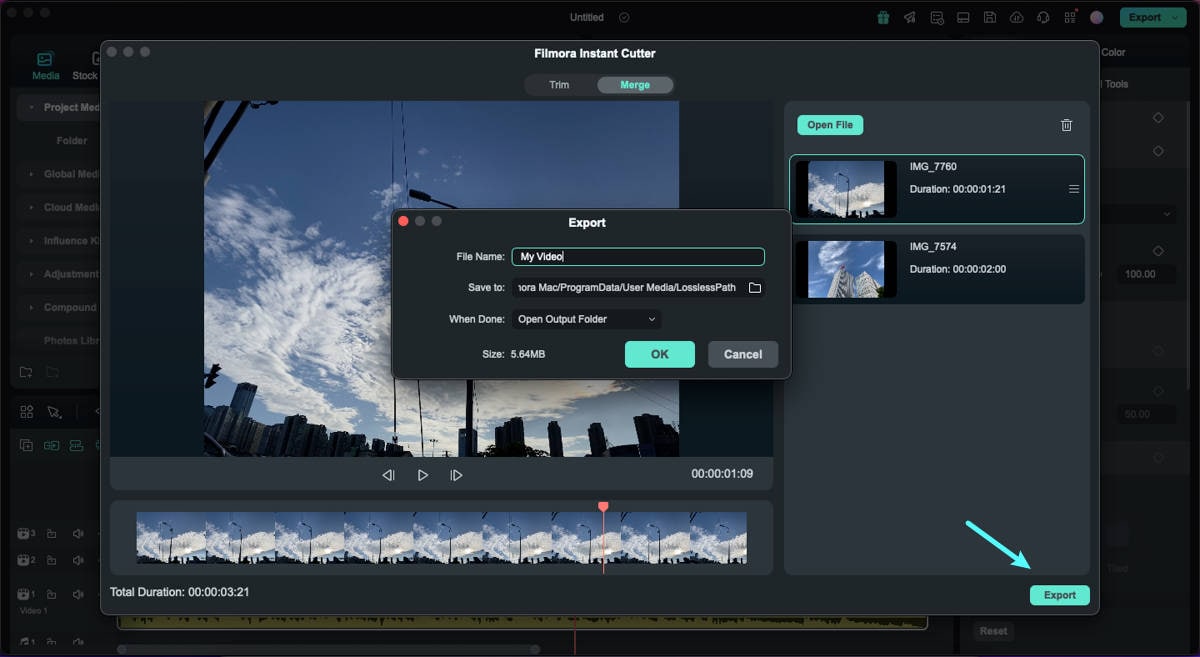
Merge Video Clips
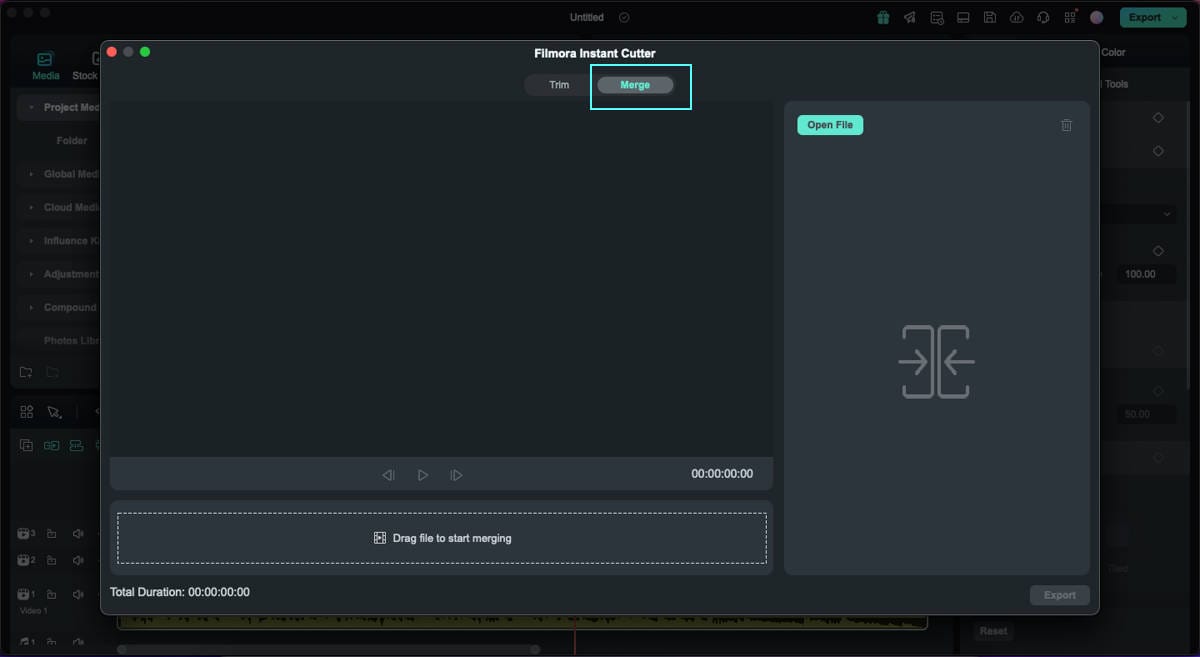
Step 1: Add Video File With Merge Category
Consequently, move to the "Merge" tab from the top and continue to add video files using the "Open File" button.
Step 2: Reorder the Clips Before Merging
As the videos are imported and displayed on the right side, re-order them using your mouse according to your requirements.
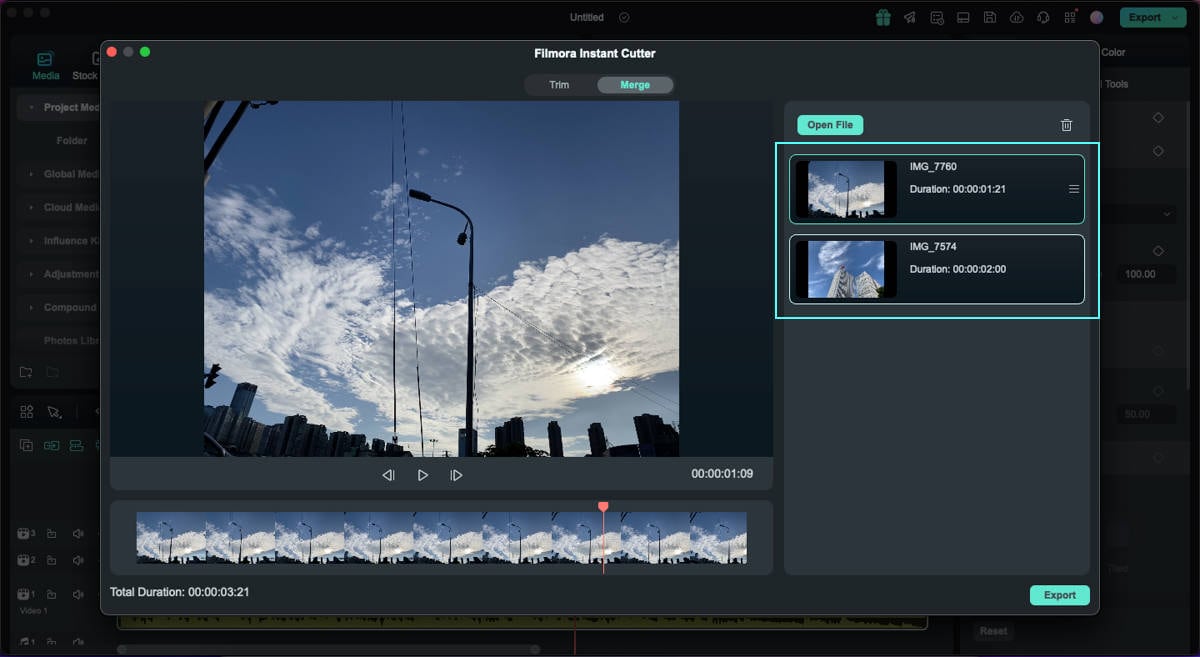
Step 3: Preview and Export Merged Video
After tapping the "Play" icon, lead to the "Export" button for saving the final merged file. Set up a name and location of the video across the pop-up and click "OK".
Related Posts
Featured Articles
Top-Rated Solutions | How to Record Switch for More Than 30 Seconds
Wondering how to record your Nintendo Switch for more than 30 seconds? Discover easy and effective methods for high-quality Switch recording.
Behind The Scenes Video: The Right Things To Follow For High Retentions
Want to know how to create a behind-the-scenes video like a pro? Read this guide, where we discuss all the necessary steps in detail.
ScreenRec Review | Features, Free Download, Pros and Cons
Explore all sides of ScreenRec in our detailed review, including its features, benefits, and shortcomings, and discover an excellent alternative.
Recommended User Guide
Lens correction on Mac
Learn the steps on how to do lens correction with Filmora on Mac.
Stabilize video on Mac
Learn how to stabilize your video with Filmora for Mac.
AI Smart Cutout for Mac
This guide shows you detailed steps for cutting out a subject from images or videos by AI Smart Cutout, only with several clicks.
