For the Best Results, Use the Latest Version.
-
Preparations for Mac
-
Account (Mac)
-
Get Started & Basic Settings (Mac)
- Release notes for Mac
- Latest Versions and Features for Mac
- Get Started on Mac - Full Guide
- Download/register/uninstall on Mac
- Panel Layout on Mac
- Keyboard shortcuts on Mac
- Touchbar on Mac
- Change playback quality on Mac
- Render preview files on Mac
- Manage timeline on Mac
- Media for use on Mac
- Logo Reveal For Mac
- Marked Favorites for Mac
-
Compatibility & Tech Specs (Mac)
-
Performance Settings (Mac)
-
-
Creating Projects - Mac
-
Creating New Projects (Mac)
-
-
Importing & Recording - Mac
-
Importing (Mac)
-
Recording (Mac)
-
-
Video Editing for Mac
-
Basic Video Editing for Mac
- Edit Live Photos on Mac
- Enable/Disable Clip for Mac
- Magnetic Timeline For Mac
- Select All Clips on Timeline for Mac
- Auto Ripple for Mac
- Split & cut videos on Mac
- Compositing on Mac
- Crop and zoom on Mac
- Playback Zoom Level for Mac
- Change speed on Mac
- Play video in reverse on Mac
- Mark In and Mark Out for Mac
- Markers for Mac
- Group clips on Mac
- Customized Backgrounds for Videos and Images in Mac
- Video snapshot on Mac
- Freeze frame on Mac
- Auto enhance on Mac
- Applying Drop Shadow for Mac
- Adjustment Layer for Mac
- Mark clip on Mac
- Video Editing Ruler – Mac
- Apply Transforming for Mac
-
Advanced Video Editing for Mac
-
AI-Powered Video Editing for Mac
- Smart Scene Cut for Mac
- Smart Short Clips for Mac
- Image to Video for Mac
- AI Idea to Video for Mac
- AI Text-to-Video for Mac
- Instant Cutter Tool on Mac
- AI Face Mosaic for Mac
- Keyframe Path Curve for Mac
- Planar Tracking for Mac
- AI Extend For Mac
- AI Script-to-Video for Mac
- AI Text-Based Editing in Mac
- Create With Instant Mode on Mac
- ChatGPT Plugin - AI Copywriting on Mac
- AI Smart Cutout for Mac
- Auto reframe on Mac
- Lens correction on Mac
- AI Portrait Cutout on Mac
- Scene detection on Mac
- AI Smart Masking for Mac
- AI Mate Editing for Mac
- Motion Tracking on Mac
- Stabilize video on Mac
- AI Object Remover For Mac
- AI Smart Search for Mac
- AI Skin Tone Protection for Mac
- Green screen on Mac
- Super Slow Motion with Optical Flow for Mac
- AI stylizer on Mac
- Video Denoise for Mac
-
-
Audio Editing for Mac
-
Basic Audio Editing for Mac
-
Advanced Audio Editing for Mac
-
AI-Powered Audio Editing for Mac
- Audio To Video for Mac
- AI Sound Effect for Mac
- Smart BGM Generation for Mac
- AI Voice Enhancer for Mac
- Audio Stretch for Mac
- AI Audio Denoise for Mac
- Auto synchronization for Mac
- AI Vocal Remover for Mac
- Auto Beat Sync on Mac
- AI Music Generator for Mac
- How to Perform AI Voice Cloning in Wondershare Filmora?
- Silence detection on Mac
-
-
Text Editing for Mac
-
Basic Text Editing for Mac
-
Advanced Text Editing for Mac
-
AI-Powered Text Editing for Mac
-
-
Video Customizations for Mac
-
Video Effects (Mac)
-
Audio Effects (Mac)
-
Transitions (Mac)
-
Stickers (Mac)
-
Filters (Mac)
-
Color Editing (Mac)
-
Animations (Mac)
-
Templates (Mac)
-
Asset Center (Mac)
-
-
Exporting & Share & Cloud Backup - Mac
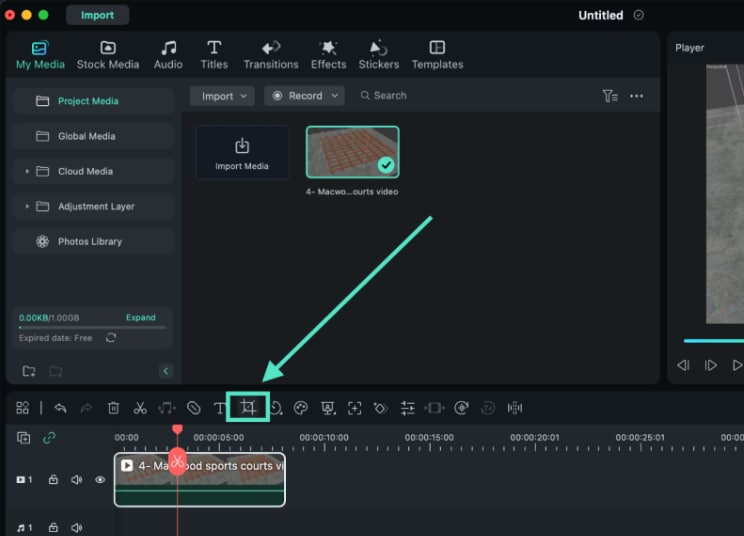
Crop and Zoom Videos
Follow the steps below to crop out and zoom into sections of your video clips on Mac with Filmora:
Select the video from the timeline, and click on the “Crop” icon.
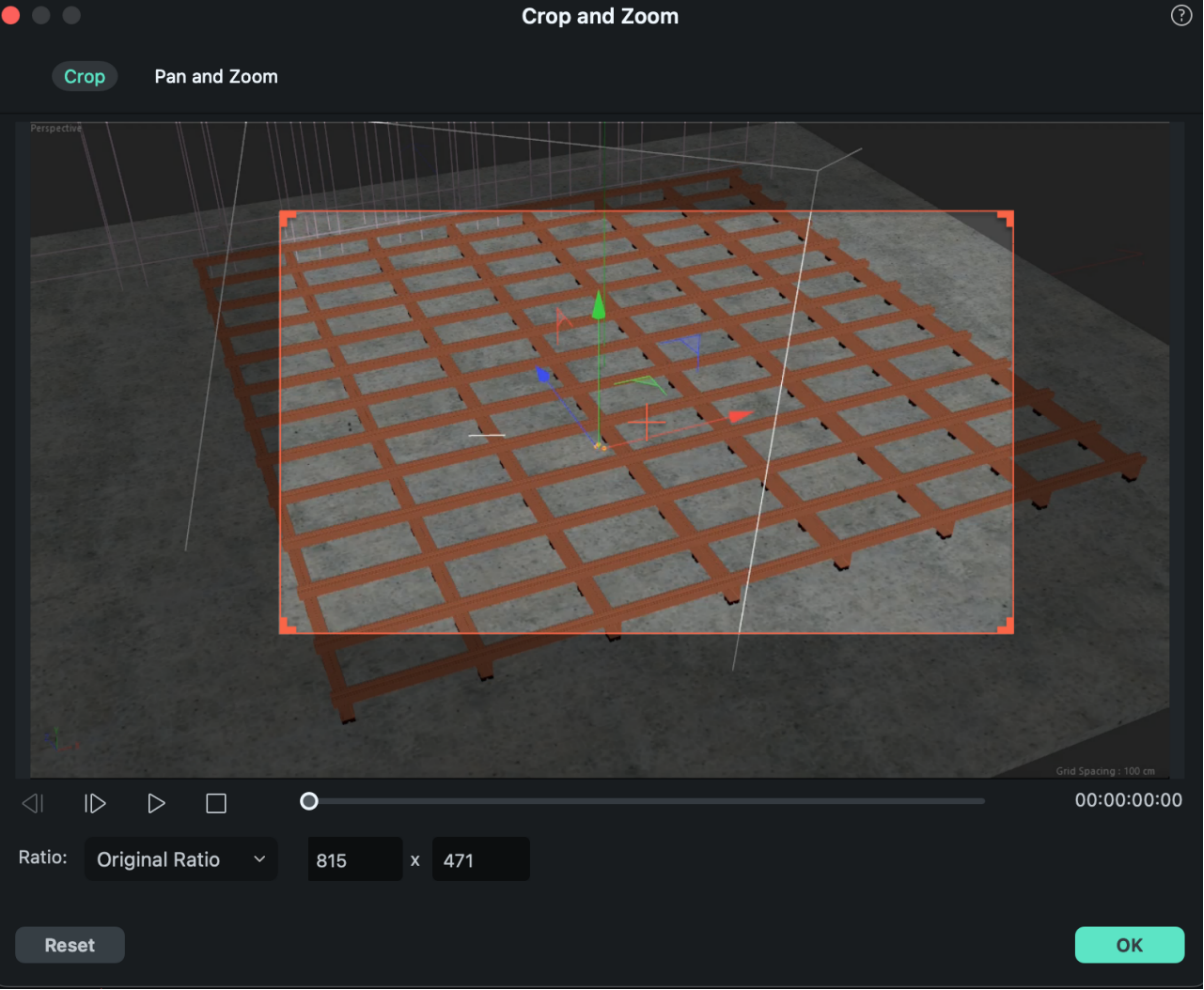
A new window will show out to let you adjust the ratio (preset dimensions: 16:9, 4:3, 1:1 or 9:16) and customize the region. Click “OK” once set.
To pan and zoom videos, switch to the “Pan and Zoom” function, and you’ll see 4 options in the right corner.
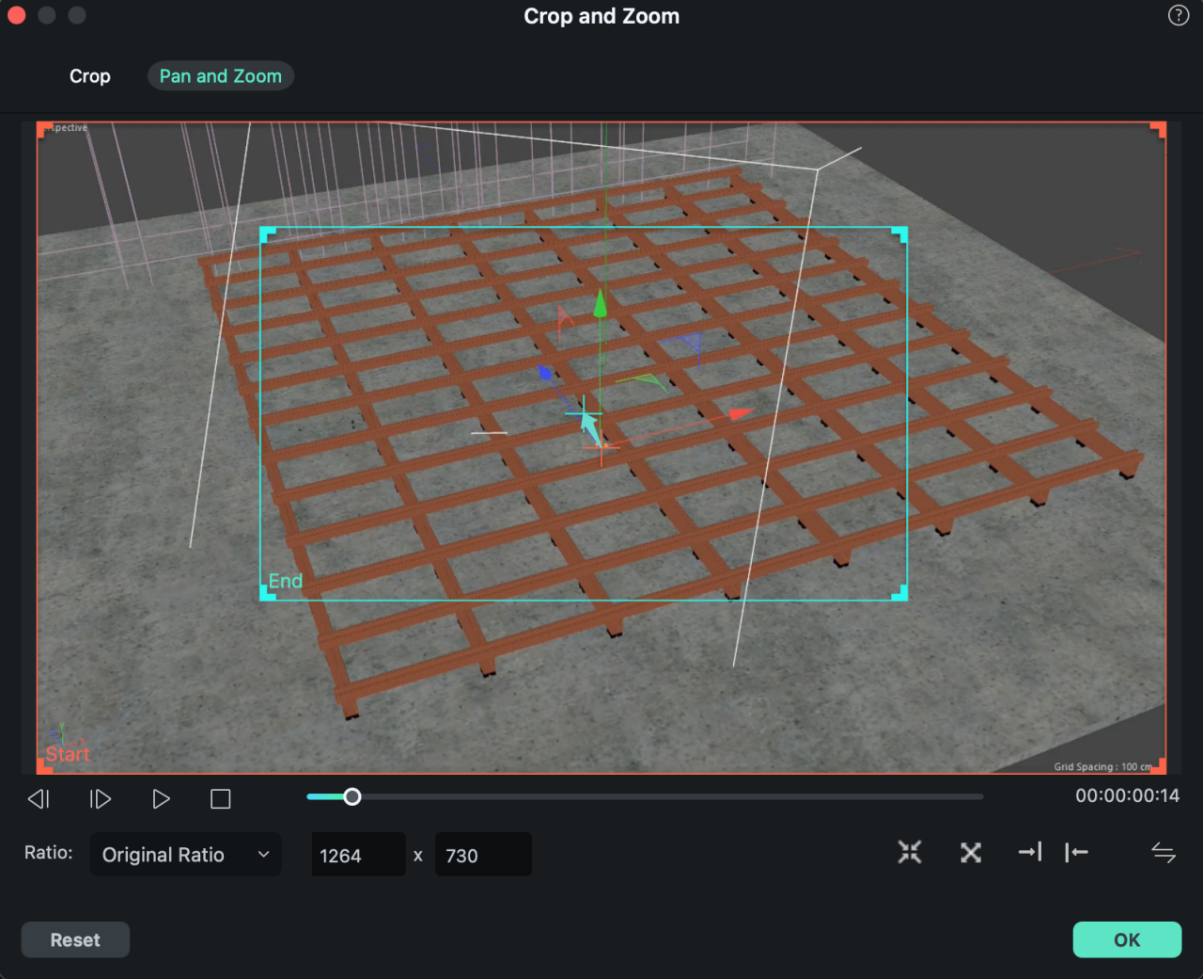
Zoom in: Using this option, you can zoom in from the larger frame to the smaller blue frame. This feature can be used to zoom in on a character’s face in the video.

Zoom out: You can also zoom out from the smaller red frame to the larger green frame to show a larger screen.
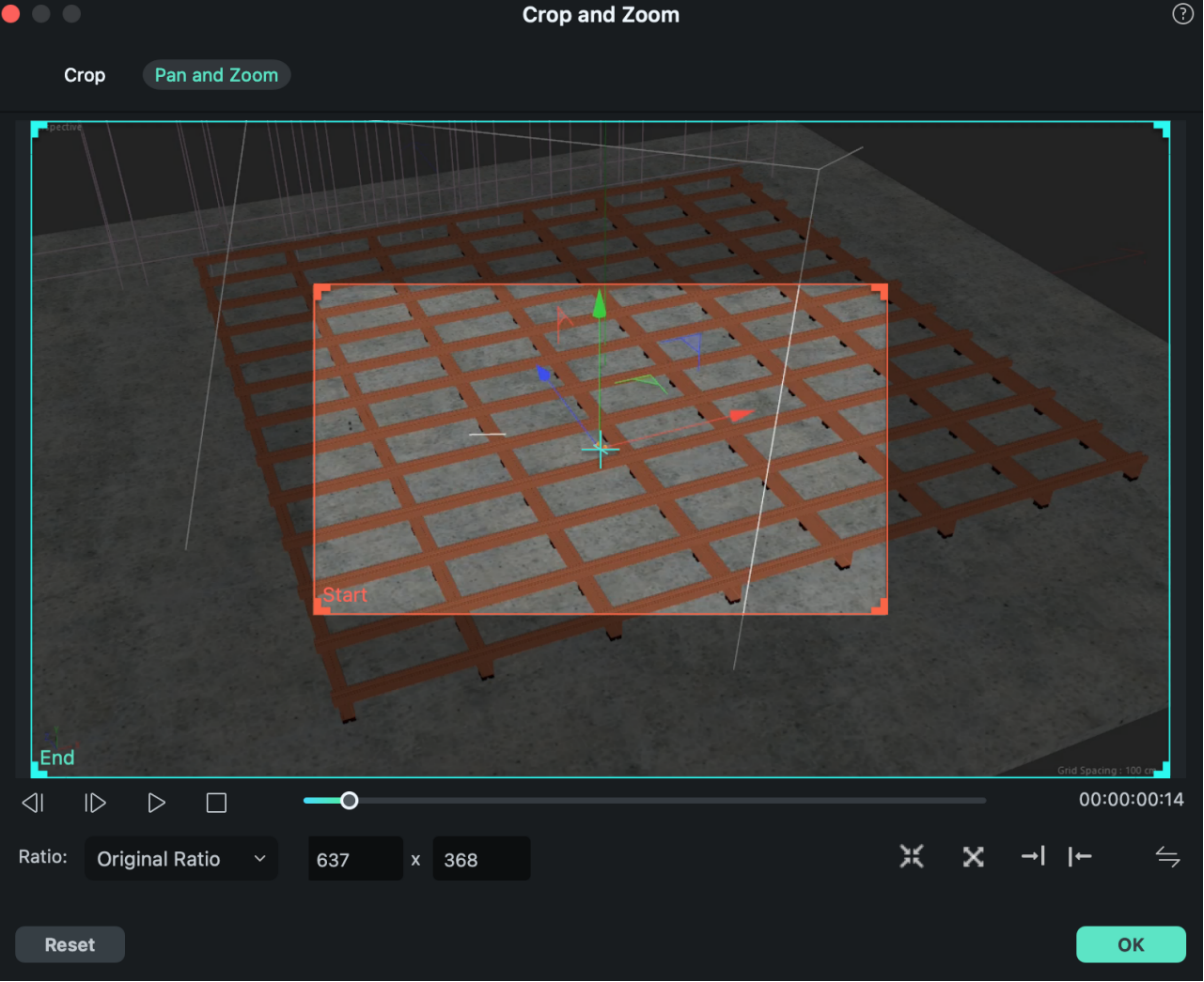
Pan right: Move horizontally from the right red frame to the left green frame. To move from the right frame to the left to showcase other characters and focus on a particular subject.
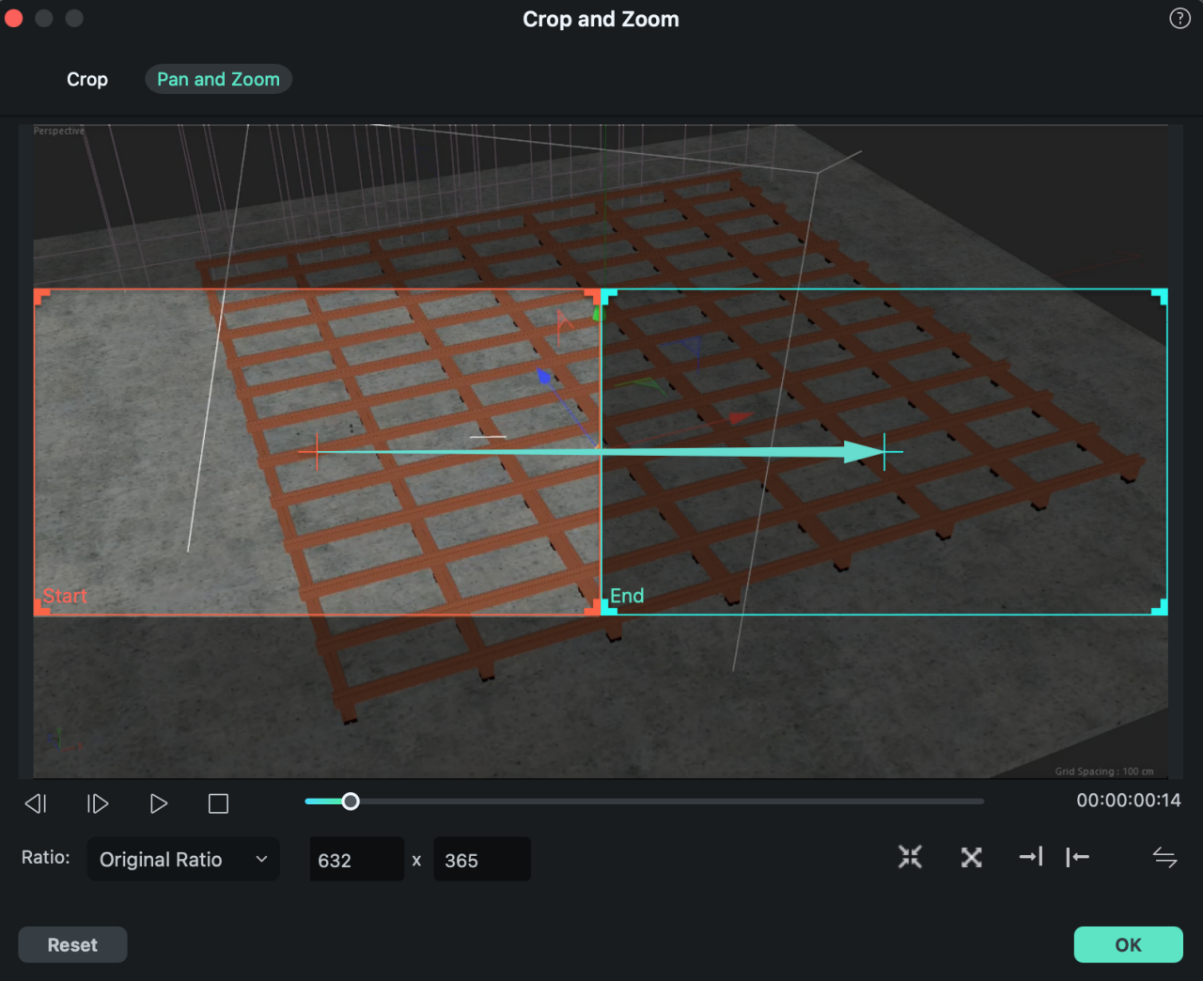
Pan left: You can move horizontally from the left red frame to the green frame on the right side. This can be done to follow a subject or move among characters.
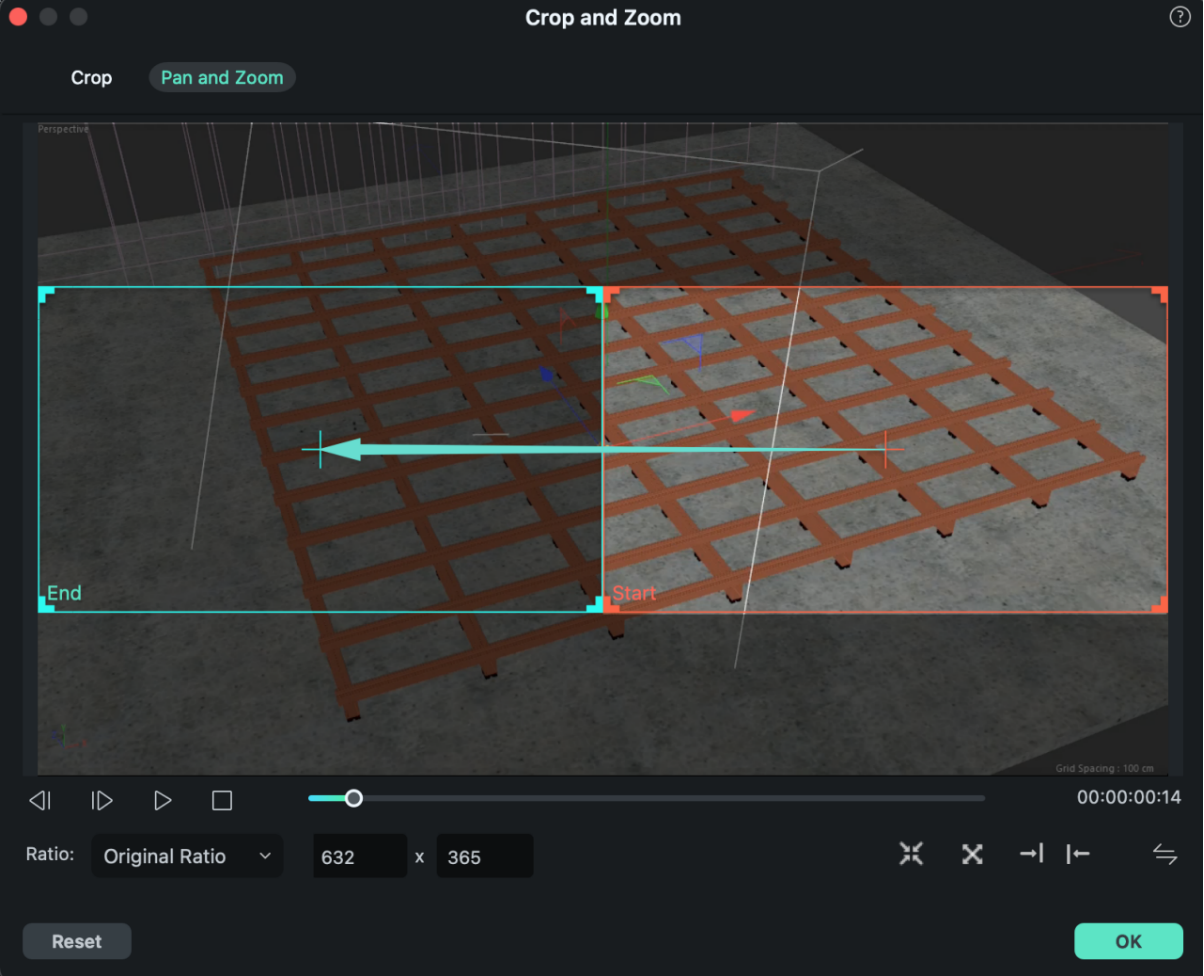
Swap the start and end areas: You can instantly swap the start and end areas by clicking the swap button.
You can click to see more details about How to Pan and Zoom in Filmora 9&10 >>
Related Posts
Featured Articles
Best 8K Video Editing Apps and Software in 2025
Looking for the best 4K or 8K video editing software in 2025? Discover 3 top-rated tools for creators, with AI features, smooth playback, and pro-level exports.
Movavi Video Suite: Download & Review
Get to know Movavi Video Editor Suite in our in-depth review. Learn how to download it, explore features, and decide if it’s the perfect video editing software for you.
The Essential Guide To TikTok Aspect Ratio
Follow this comprehensive guide to get the right TikTok Aspect Ratio to boost engagement and visual experience for your TikTok audience.
Recommended User Guide
Play video in reverse on Mac
It it necessary to play video in reverse in certain circumstances. Here we are going to tell you how to use Filmora to play video in reverse.
Auto Ripple for Mac
Filmora offers the Auto Ripple feature that automates removing video gaps and eliminates manual effort.
Magnetic Timeline For Mac
Achieve seamless video editing with Wondershare Filmora's Magnetic Timeline on Mac
