For the Best Results, Use the Latest Version.
Filmora User Guide for Mac
-
Preparations for Mac
-
Account (Mac)
-
Get Started & Basic Settings (Mac)
- Release notes for Mac
- Latest Versions and Features for Mac
- Get Started on Mac - Full Guide
- Download/register/uninstall on Mac
- Panel Layout on Mac
- Keyboard shortcuts on Mac
- Touchbar on Mac
- Change playback quality on Mac
- Render preview files on Mac
- Manage Timeline on Mac
- Media for use on Mac
- Logo Reveal For Mac
- Marked Favorites for Mac
-
Compatibility & Tech Specs (Mac)
-
Performance Settings (Mac)
-
-
Creating Projects - Mac
-
Creating New Projects (Mac)
-
-
Importing & Recording - Mac
-
Importing (Mac)
-
Recording (Mac)
-
-
Video Editing for Mac
-
Basic Video Editing for Mac
- Edit Live Photos on Mac
- Enable/Disable Clip for Mac
- Magnetic Timeline For Mac
- Dual Monitor Setup for Video Editing on Mac
- Select All Clips on Timeline for Mac
- Auto Ripple for Mac
- Split & Cut Videos on Mac
- Compositing on Mac
- Crop and zoom on Mac
- Playback Zoom Level for Mac
- Change Speed on Mac
- Play Video in Reverse on Filmora for Mac
- Mark In and Mark Out for Mac
- Markers for Mac
- Group Clips in Filmora for Mac
- Customized Backgrounds for Videos and Images in Mac
- Video snapshot on Mac
- Freeze Frame on Mac
- Auto enhance on Mac
- Applying Drop Shadow for Mac
- Adjustment Layer for Mac
- Mark Clips in Filmora for Mac
- Video Editing Ruler – Mac
- Apply Transforming for Mac
-
Advanced Video Editing for Mac
- Text Animation Path for Mac
- Create Multi-Camera Clip for Mac
- Filmora Motion Blur | Mac
- Drawing Tools for Mac | Filmora Guide
- Compound Clips for Mac
- AI Video Enhancer for Mac
- Video Chapters in Filmora for Mac
- Filmora Flicker Removal Guide | Mac
- Multi-Clip Editing for Mac
- Keyframe Graph Editor for Mac
- Add Animation Keyframing in Filmora for Mac
- Mask on Mac
- PIP (Picture in Picture) in Filmora on Mac
-
AI-Powered Video Editing for Mac
- Smart Scene Cut for Mac
- Smart Short Clips for Mac
- Filmora AI Eye Contact - Mac
- Filmora Image to Video for Mac
- AI Idea to Video for Mac
- AI Text-to-Video for Mac
- Instant Cutter Tool on Mac
- AI Face Mosaic for Mac
- Filmora Image to Prompt for Mac
- Keyframe Path Curve for Mac
- Filmora AI Image Enhancer Guide – macOS
- Planar Tracking for Mac
- Filmora AI Relight - Mac
- AI Extend For Mac
- AI Script-to-Video for Mac
- AI Text-Based Editing in Mac
- Create With Instant Mode on Mac
- ChatGPT Plugin - AI Copywriting on Mac
- AI Smart Cutout in Filmora for Mac
- Auto reframe on Mac
- Lens Correction in Filmora for Mac
- AI Portrait Cutout on Mac
- Scene detection on Mac
- AI Smart Masking for Mac
- AI Mate Editing for Mac
- Motion Tracking on Mac
- Video Stabilization for Mac
- AI Video/Photo Object Remover for Mac
- AI Smart Search for Mac
- AI Skin Tone Protection for Mac
- Green screen on Mac
- Super Slow Motion with Optical Flow for Mac
- AI Stylizer for Mac
- Video Denoise for Mac
-
-
Audio Editing for Mac
-
Basic Audio Editing for Mac
-
Advanced Audio Editing for Mac
-
AI-Powered Audio Editing for Mac
- Audio To Video for Mac
- AI Sound Effect for Mac
- Smart BGM Generation on Mac
- AI Voice Enhancer for Mac
- Audio Stretch for Mac
- AI Audio Denoise for Mac
- Auto Synchronization on Mac
- AI Vocal Remover for Mac
- AI Auto Beat Sync for Mac
- AI Music Generator for Mac
- AI Voice Cloning on Mac
- Silence Detection on Mac
-
-
Text Editing for Mac
-
Basic Text Editing for Mac
-
Advanced Text Editing for Mac
-
AI-Powered Text Editing for Mac
-
-
Video Customizations for Mac
-
Video Effects (Mac)
-
Audio Effects (Mac)
-
Transitions (Mac)
-
Stickers (Mac)
-
Filters (Mac)
-
Color Editing (Mac)
-
Animations (Mac)
-
Templates (Mac)
-
Asset Center (Mac)
-
-
Exporting & Share & Cloud Backup - Mac
Filmora Tutorial Videos
Filmora 13 & 14 User Guide in PDF
Filmora 12 User Guide in PDF
Filmora 11 User Guide in PDF
Filmora 9 & 10 User Guide
AI Video/Photo Object Remover for Mac
Filmora’s AI Object Remover for Mac helps users easily remove unwanted items from videos or images while keeping the background natural and smooth. Using smart AI detection, it can identify objects, text, or visual distractions and fill the removed area seamlessly. Whether you are fixing background clutter or cleaning up reused clips, this feature delivers polished, professional-looking results.
In Filmora V15, advanced tools such as Smart Brush, Magic Box, and Eraser offer better precision and flexibility. These AI-powered options allow faster selections, cleaner edits, and improved control, making the object removal process suitable for both beginners and advanced Mac users.
Removing Objects From Videos
Step 1. Start a New Project
Launch Filmora on your Mac and select the New Project option to begin editing.
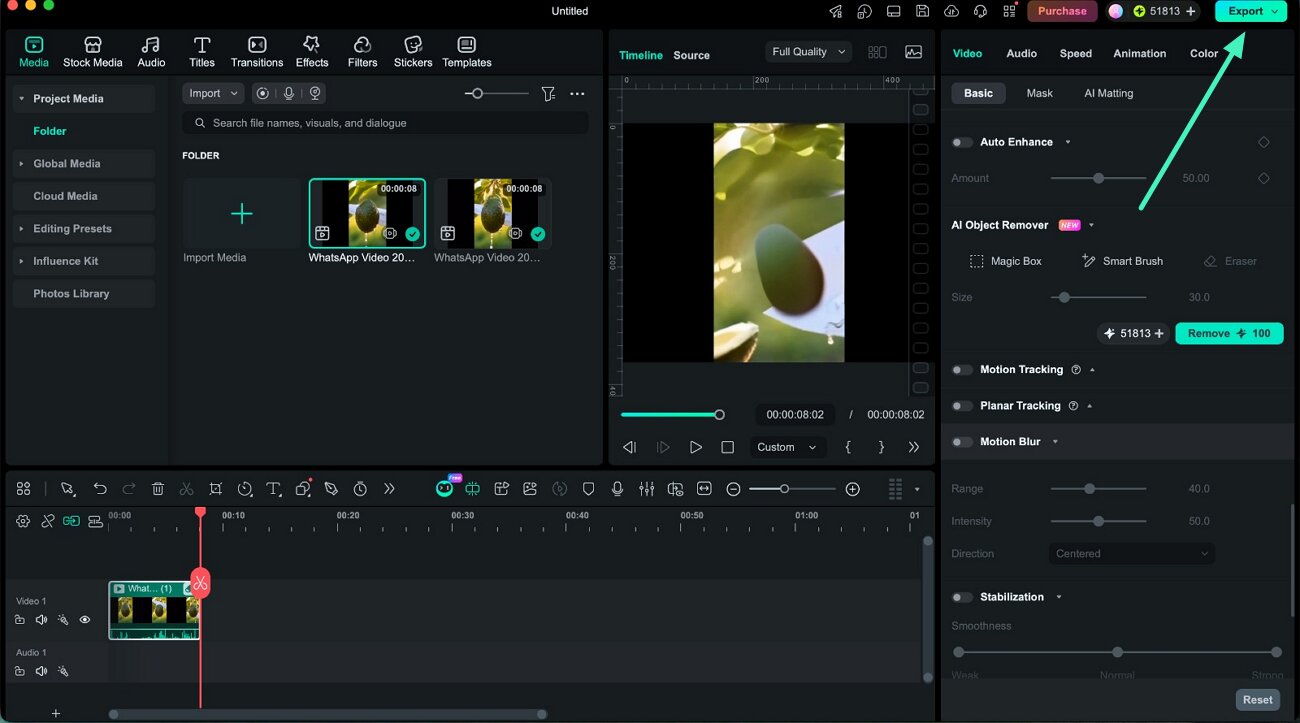
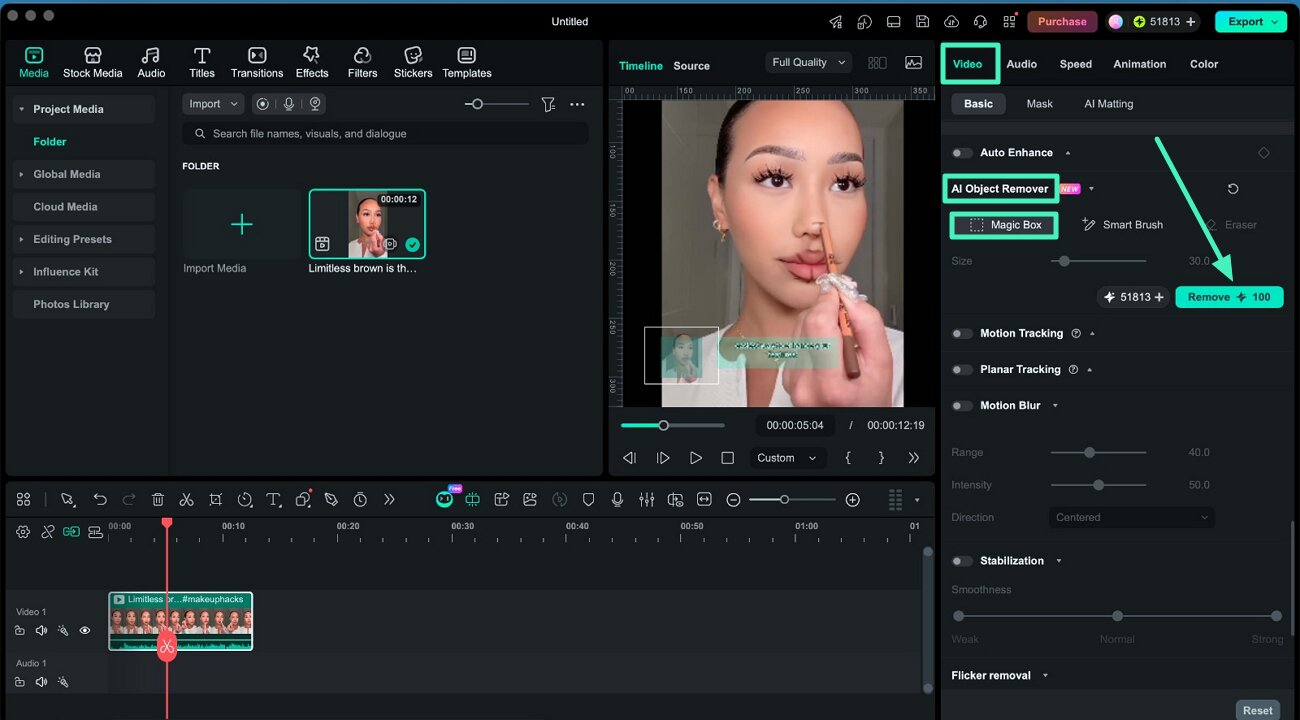
Step 2. Import Video and Access AI Object Remover
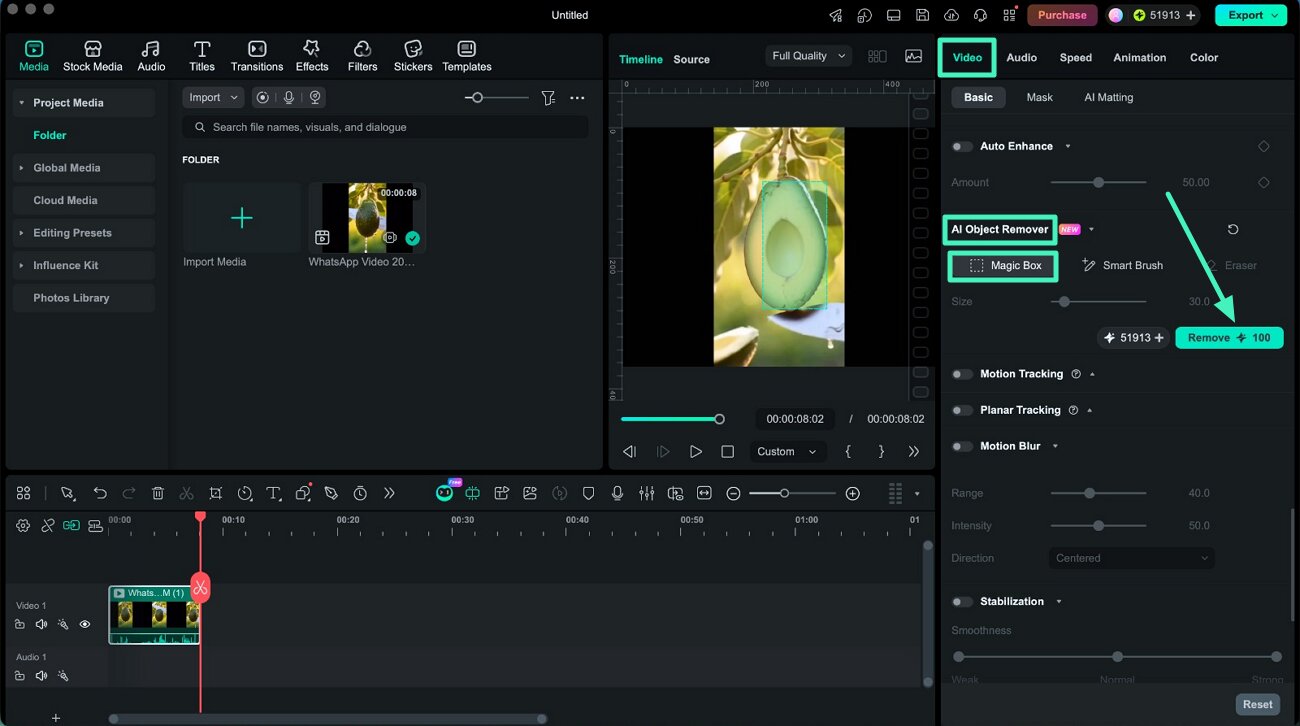
Remove Using Magic Box
Import your video into the timeline, then open the Video Properties panel on the right side. Scroll to find the AI Object Remover feature and choose Magic Box. Draw a box around the object you want to remove in the preview window, then click Remove to apply the effect.
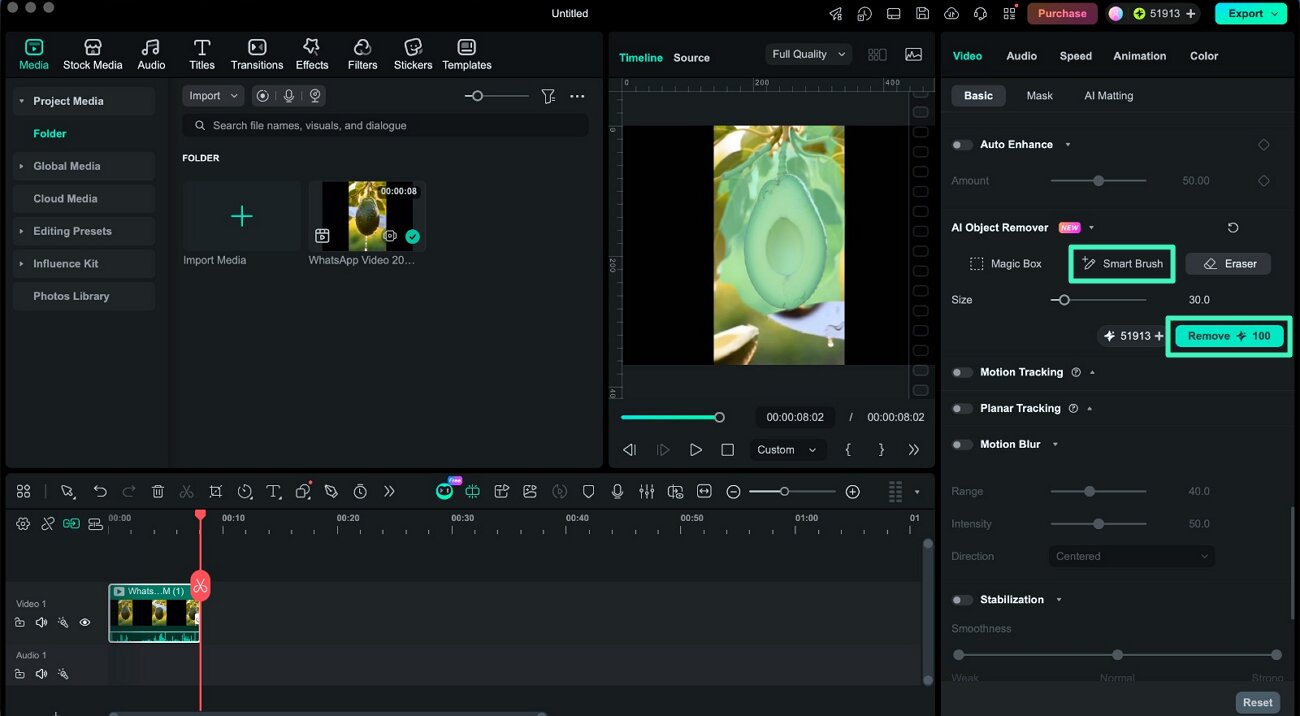
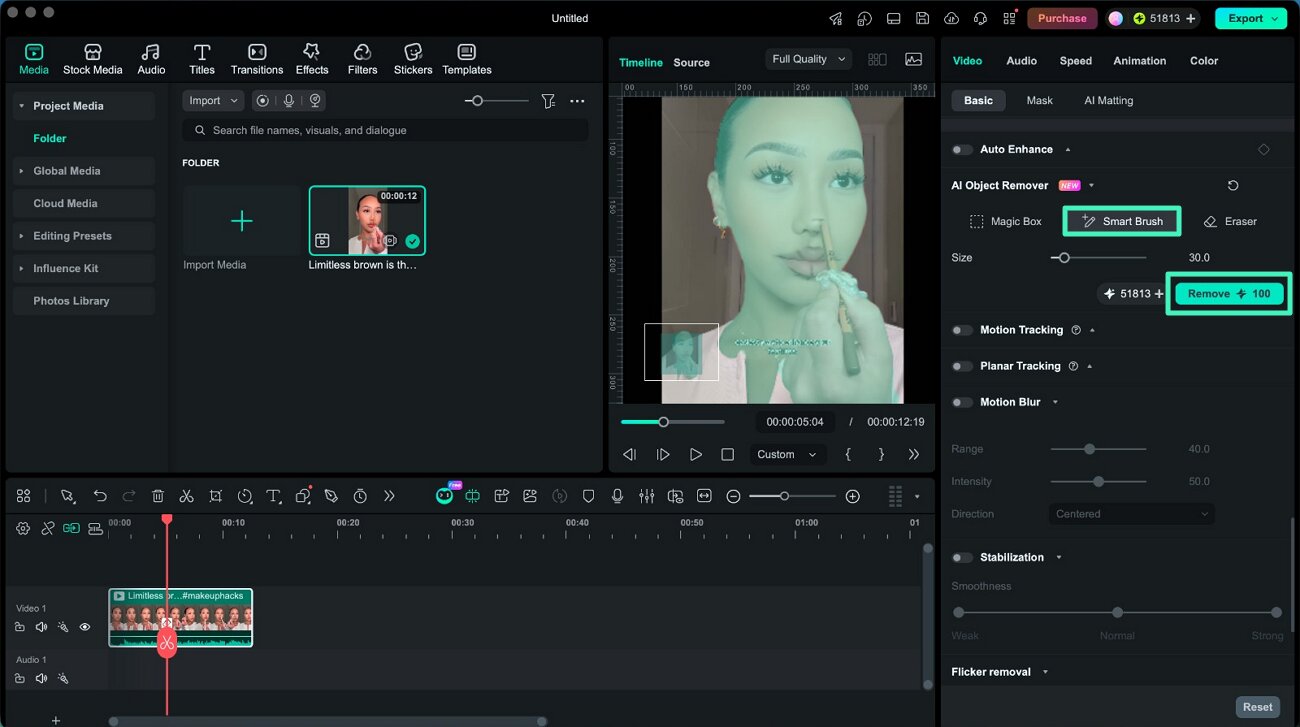
Remove Object Using Smart Brush
For a more detailed selection, choose the Smart Brush tool and paint over the object directly in the preview window. Once selected, click Remove to let AI process the removal.
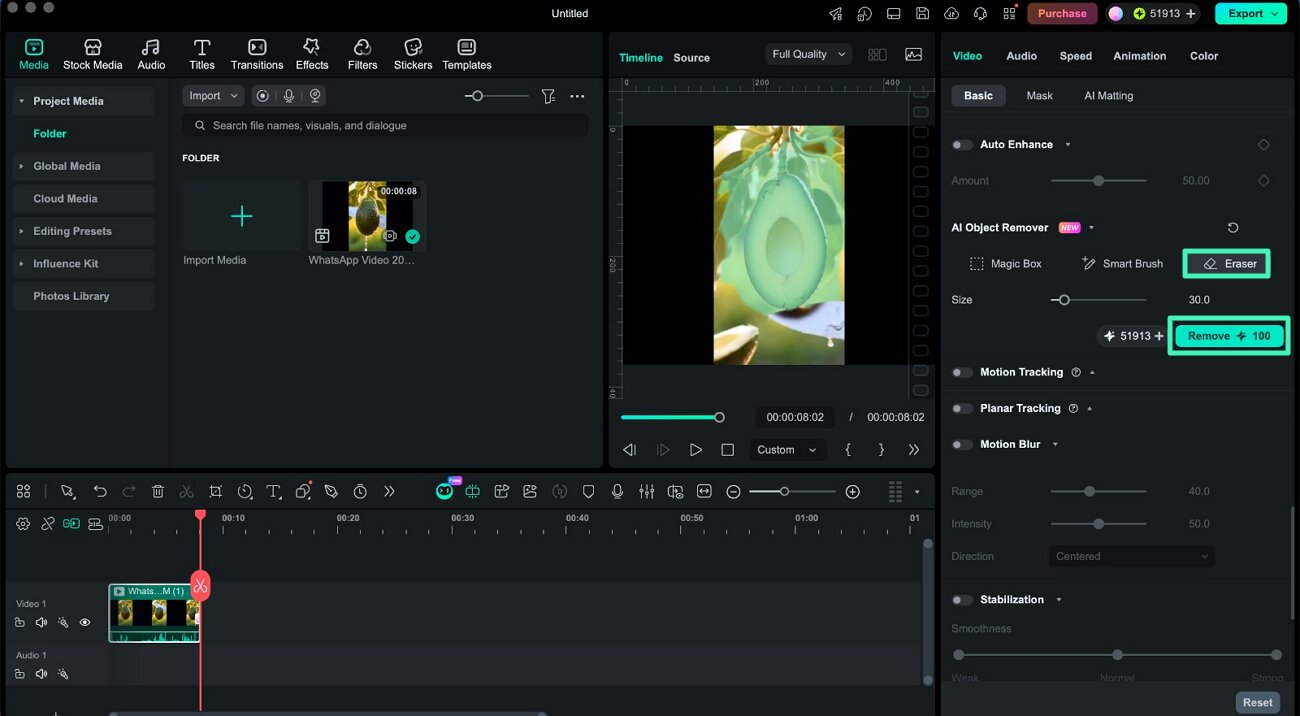
Use Eraser to Undo Selection
If the selection needs correction, switch to the Eraser tool and drag over the highlighted area to remove unwanted selections.
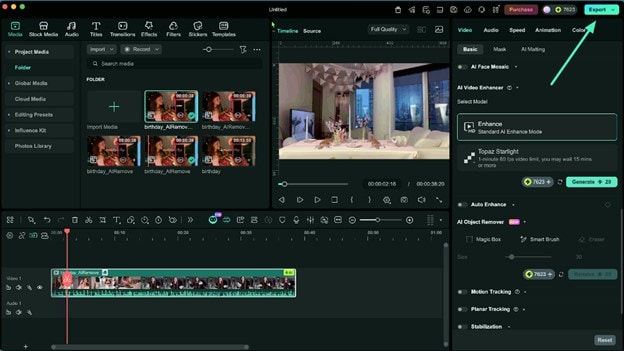
Step 3. Export the Final Video
After the object is removed successfully, click the Export button in the top-right corner to save the edited video on your Mac.
Removing Subtitles From Videos
Step 1. Import Video and Enable Object Remover
Using Magic Box
After importing the video, open the Properties panel and select AI Object Remover. Choose Magic Box, then draw a selection around the subtitle area in the preview window. Click Remove to successfully begin the text removal process.
Using Smart Brush
Select the Smart Brush tool and brush over the subtitle text to highlight it. Once selected, press Remove to complete the process.
Use Eraser to Undo Selection
If needed, use the Eraser tool to adjust or clear incorrect selections by dragging over the area.

Step 2. Preview and Save the Video
Preview the results to ensure the subtitles are fully removed, then click Export in the top-right corner to save the final output.
Related Posts
Featured Articles
Learn more popular articles from Wondershare.
Make the Viral AI Car Crash Video That Looks Realistic
This guide shows how to create realistic AI car crash videos and photos using prompts and images. Refine the results and shape the final scene, all inside Filmora.
Stable Diffusion Pixel Art: How to Generate Stunning Retro Images with Prompts
Stable Diffusion makes it simple to create pixel art from text prompts. Generate retro 8-bit characters, items, and backgrounds with crisp details using pixel art stable diffusion prompts.
Top 5 Discord GIF Makers You Need for Creative Chat Reactions
Spice up your Discord chats with custom GIFs! Our guide features the best GIF makers for Discord, helping you create eye-catching and memorable reactions.
Recommended User Guide
Learn how to use more features.
ChatGPT Plugin - AI Copywriting on Mac
Auto-generate your video scripts, captions, descriptions, and more with ChatGPT in Filmora for Mac
AI Smart Search for Mac
Do you have a lot of videos to navigate to find the exact video clip? Try Wondershare Filmora's AI smart search to find the video clips quickly!
