Looking to make your videos more vibrant? Adding a neon effect After Effects can transform plain text into an eye-catching visual. This technique is perfect for highlighting important information or adding a cool, retro vibe.
In this article, we'll walk you through how to create standout neon text effects step by step. You’ll discover how to set up your project and apply effects to make your text glow beautifully.
Whether you’re creating a title sequence or enhancing your video content, these neon effects will grab your audience's attention and make your videos pop. Get ready to light up your projects with some neon look!
In this article
-
- Step 1: Setting Up Your Composition
- Step 2: Adding Text Layer
- Step 3: Applying Fill and Stroke
- Step 4: Adding Soft Glow
- Step 5: Enhancing with Glow Effect
- Step 6: Animating Your Text
- Step 7: Refining with Additional Effects
- Step 8: Exporting Your Composition
- Pros and Cons of Using Neon Text Effect in After Effects
Part 1. The Default Glow Effects In After Effects
After Effects includes basic glow effects right from the start. These are handy for quickly creating a glowing look. Let's explore the various glow options After Effects offers.
-
Layer Style – Outer Glow
In After Effects, the outer glow is easily found in the Layer Tab > Layer Style > Outer Glow.
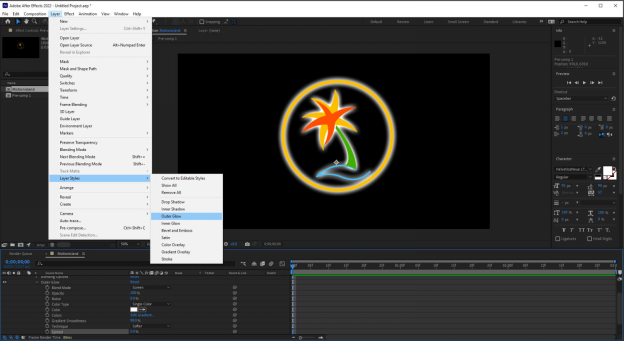
You can use the outer glow on layers, composition, and footage.
-
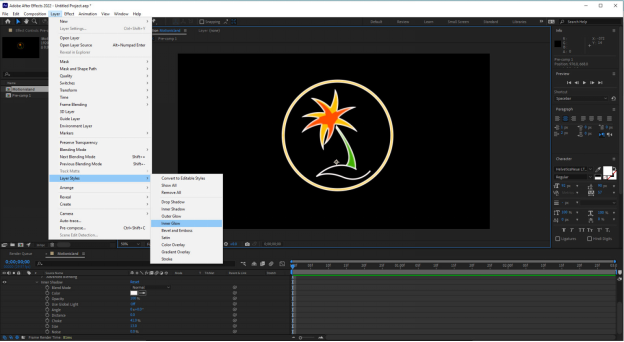
Layer Style – Inner Glow
In After Effects, you can effortlessly find the inner glow in Layer Tab > Layer Style >Inner Glow.
Keep in mind that you need both an outer glow and an inner glow to create more realistic glow effects.
-
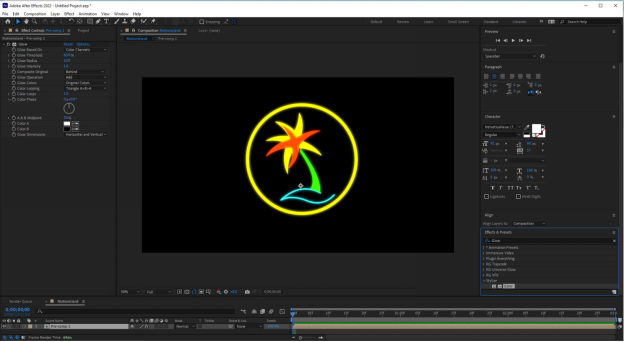
Stylize – Glow
The standard glow effect is a popular choice when you don't have other plugins. You can find it in the Effects & Presets panel or go to Effect > Stylize > Glow in the top bar.
-
Image Creative – Dimension – Glow+Shadow
You can use the Dimension Glow + Shadow effect for multiple glows behind a layer. Find it in the Effects & Presets panel under Image-Creative. The effect uses three drop shadows to create a glow.
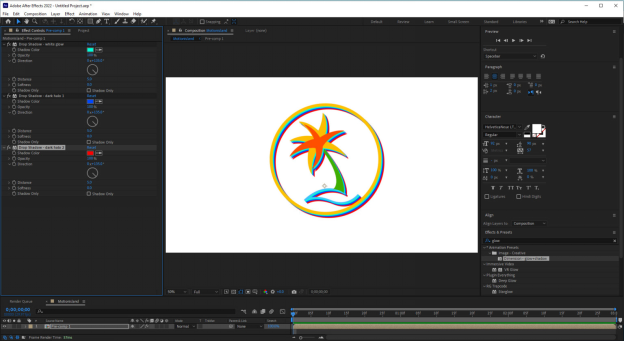
Now that you know about the default glow effects in After Effects. Next., let's learn how to make glowing text in After Effects.
Part 2. Step-by-Step Guide To Creating Neon Text Effect in After Effects
Creating neon text in After Effects adds a vibrant, electrifying touch to your videos and graphics. It grabs attention and brings a stylish edge to your projects. Below, we will show you step-by-step how to make realistic, eye-catching neon text in After Effects.
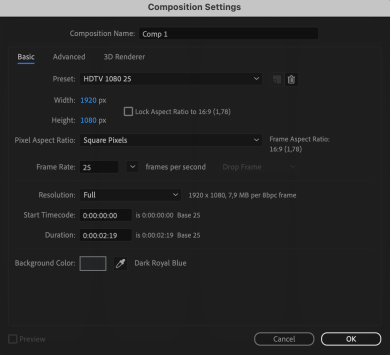
Step 1: Set Up Your Composition
First, create a new composition in After Effects with your desired dimensions and duration.
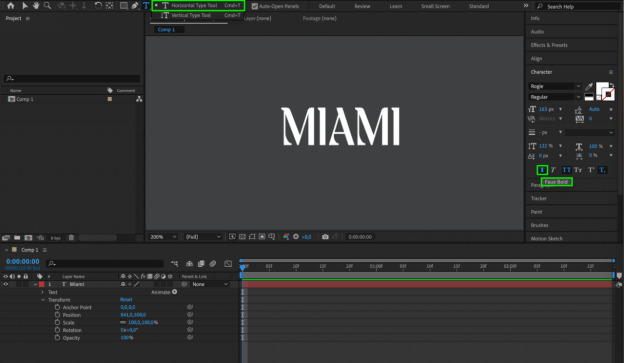
Step 2: Add Text Layer
Now, add a new text layer to the composition and type in your desired text. Choose a bold font that will amplify the impact of the neon effect. Then, adjust the size and position of the text to your liking.
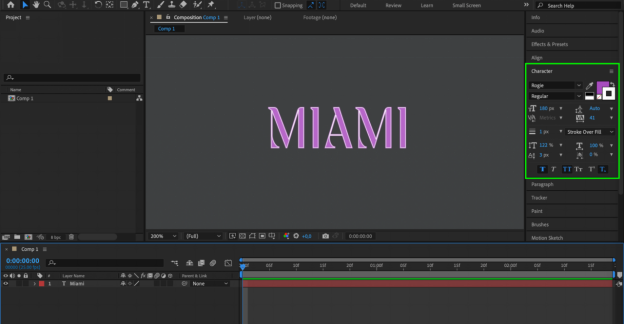
Step 3: Apply Fill and Stroke
To create the neon effect, choose the fill option in the Character panel and select a bright color for your text. Plus, apply a stroke to your text layer to mimic the outline of neon signs. You can experiment with different stroke colors and thicknesses until you achieve your desired effect.
Step 4: Add Soft Glow
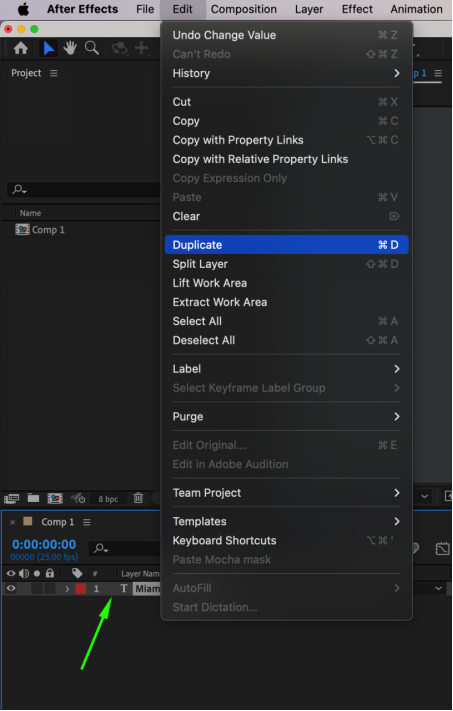
To make the text truly stand out, duplicate the text layer.
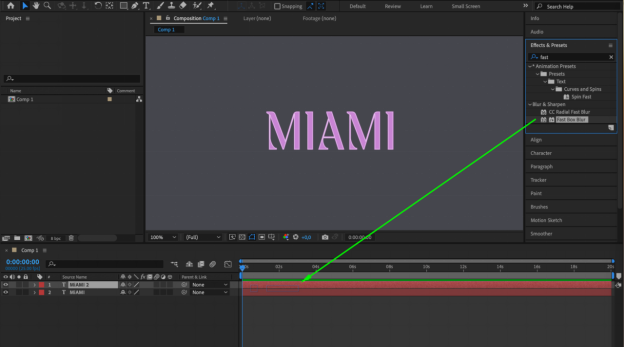
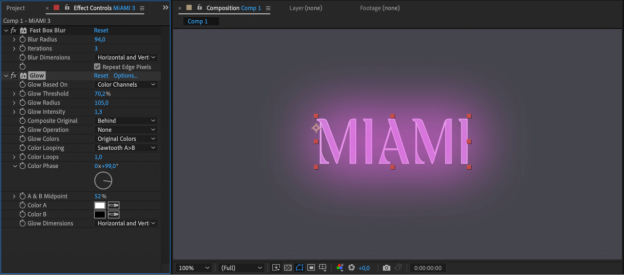
Apply the Fast Box Blur effect to the duplicated layer.
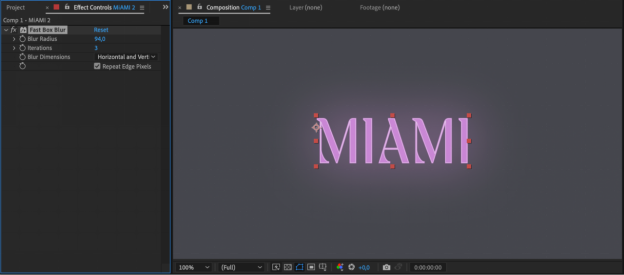
Then, adjust the settings to create a soft glow around the text.
Step 5: Enhance with Glow Effect
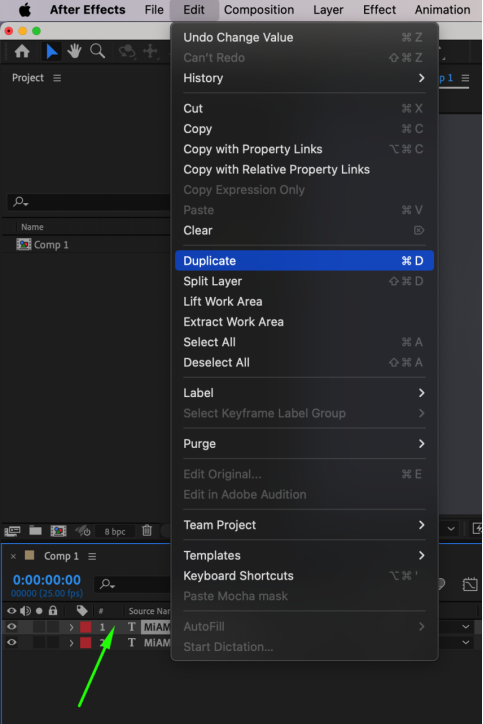
Now, duplicate the duplicated layer again to enhance the neon effect even further.
Apply the glow effect to this duplicated layer.
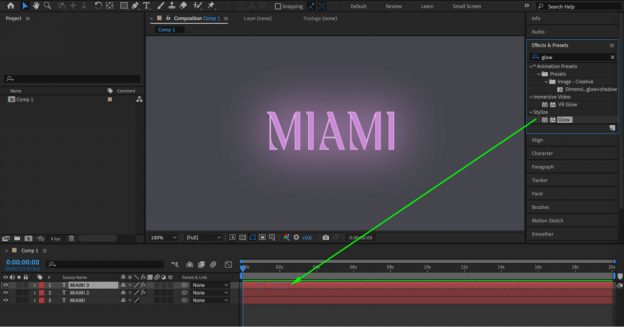
Customize the glow settings, such as intensity, radius, and color, to make the text glow in a way that captures attention.
Step 6: Animate Your Text
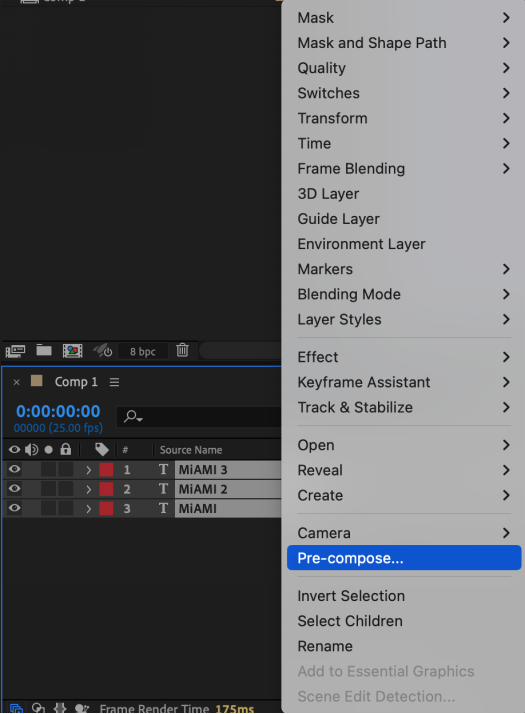
To animate your neon text, add keyframes for position, scale, rotation, and opacity. Use the Text Animator for exciting presets. Also, pre-compose layers for easier management.
Step 7: Refine with Additional Effects
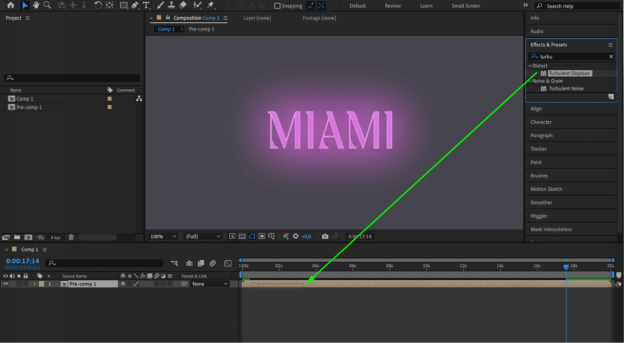
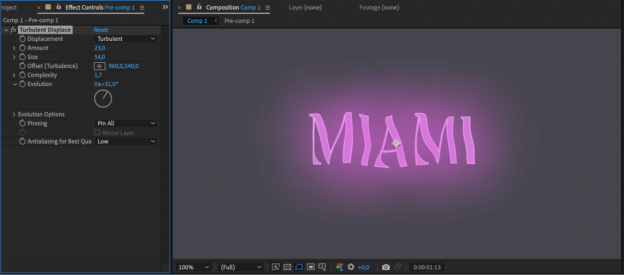
To enhance the neon effect, apply Turbulent Displace or CC Glass to give your text texture and dimension.
Experiment with blending modes, adjust brightness and contrast, and add extra elements to improve the overall look.
Step 8: Export Your Composition
When you're happy with your neon text animation, export your composition. Select the file format and settings you need.
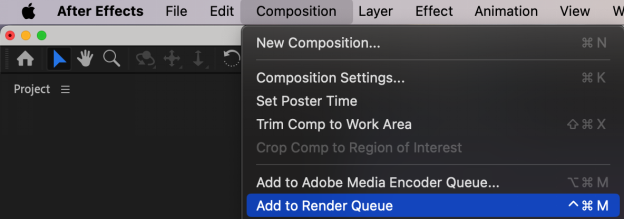
Consider rendering with an alpha channel to overlay your neon text easily on other footage.

That’s all about creating neon effect in After Effects. Now, shed some light on the pros and cons of using neon text effects in After Effects.
Pros and Cons of Using Neon Text Effect in After Effects
Below are the pros and cons of using neon effect in Afer effects.
If you find it a bit difficult to apply neon text effect in After Effects, don’t worry! We have enlisted the best alternative to After Effects in the following section.
Part 3 Explore Alternatives: Filmora's Neon Effect Feature
Looking to add a vibrant touch to your videos? Wondershare Filmora's Neon Effect feature can help. It's perfect for music videos or any project needing a splash of color.
This tool allows you to insert glowing visuals, like neon signs or text effortlessly. Enhancing key moments or adding a futuristic feel makes your content pop.
With various colors and styles, Filmora's Neon Effect meets the needs of creators who want standout videos without complex processes. It's an excellent choice for adding a professional look to your edits.
Key Features of The Filmora for Neon Effect
Some of the key features of Filmora in creating neon text effects are:
- 3D Neon Effect: You can add shadows and various effects to create an impressive 3D neon text effect.
- Outline and Shadow Options: You can add shadows and outlines to your neon text to make it more visually appealing.
- Ready-Made Templates: Filmora offers various ready-made neon text effect templates. It saves a lot of time.
- Adjust Glow Intensity: You can customize the glow intensity to achieve the desired glow intensity level.
- Neon Colors: Filmora offers various neon colors to create the vibe. You can also use the color picker to get the required color.
Elevate your videos with Filmora's Neon Effect, adding a vibrant glow to your footage.

Step-by-Step Guide on Neon Text Effects in Filmora
Follow the steps below to create neon text effects in Filmora.
Step 1. Firstly, launch Filmora, go to Titles, and place a simple text in the timeline.
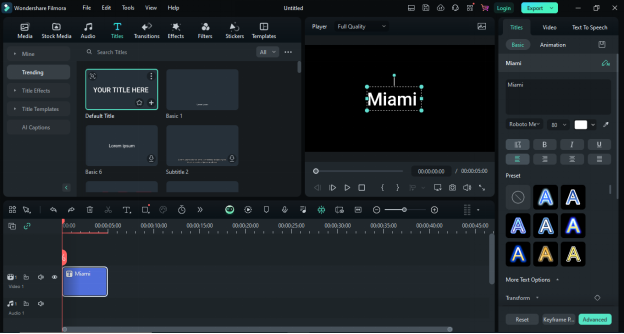
Step 2. Double-click the text, select 'Advanced,' and pick your preferred font. You can also download neon-style fonts and templates online. Use them in Filmora to create neon texts.
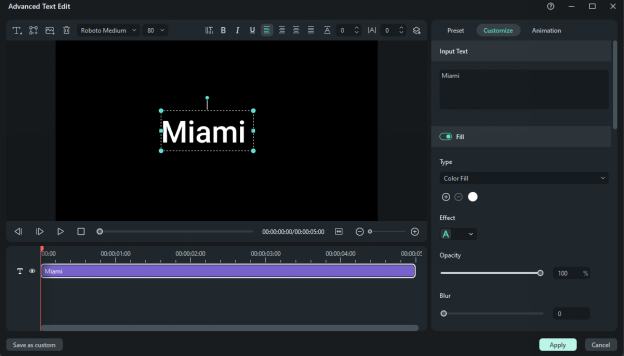
Step 3. Enter your text in the box and select the text size. Then, move the text to where you want it.
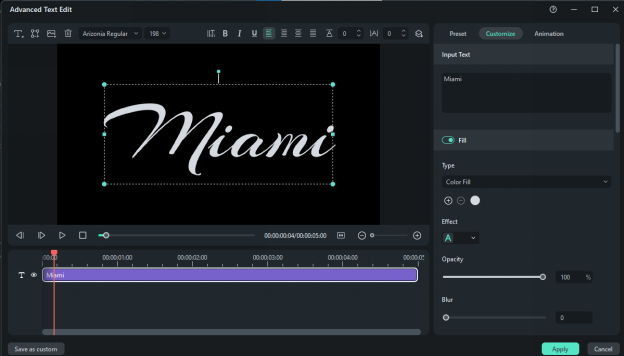
Step 4. In the Customize section on the right, choose Text Fill, set the color to white, and pick a 3D font style.
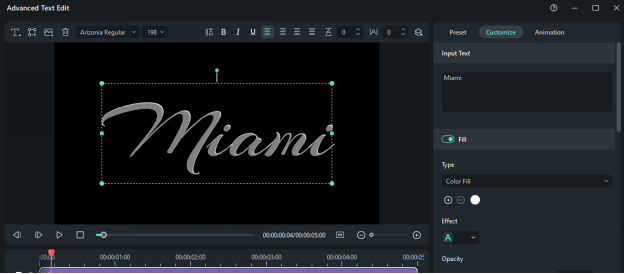
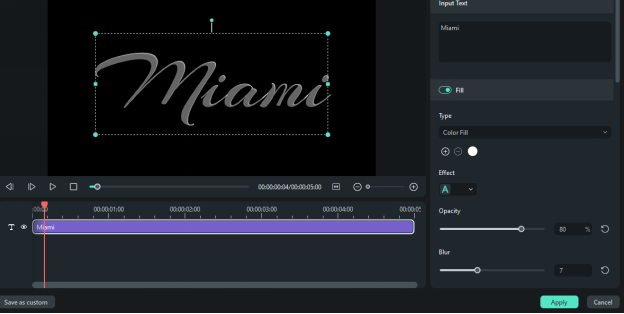
Step 5. Set the following values for 3D text:
- Opacity: 80%
- Blur: 7
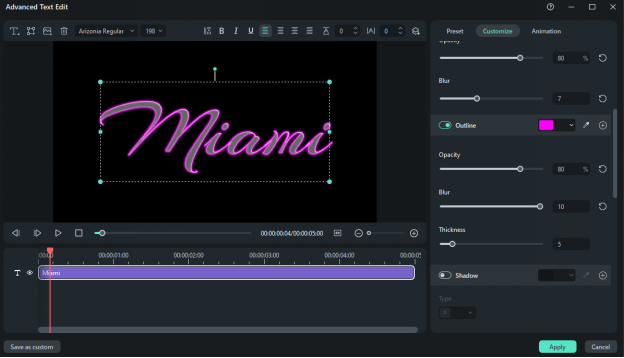
Step 6. Now, activate the Text Border, choose the color of the neon light, and adjust the following values:
- Opacity: 80
- Blur: 10
- Size: 5
Step 7. Turn on Text Shadow and choose Bottom Shadow. Select the same neon color used earlier and adjust the settings.
- Opacity: 90
- Blur: 10
- Size: 7
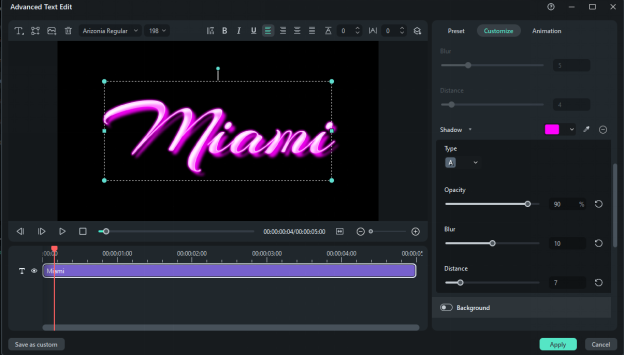
Step 8. Click OK to save your changes. Then, copy the text layer, lock it, and paste it above the second video layer.
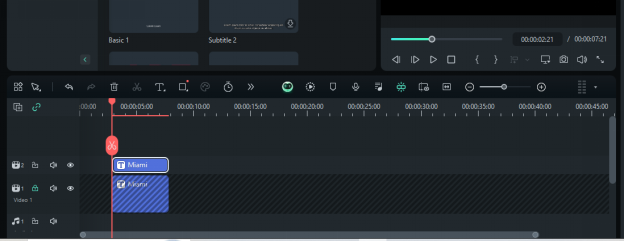
Step 9. On the first layer, move forward four frames, split, and move forward another four frames. Repeat this 3 to 4 times to create the light effect animation. Do the same for the second layer and leave empty spaces between the two layers.
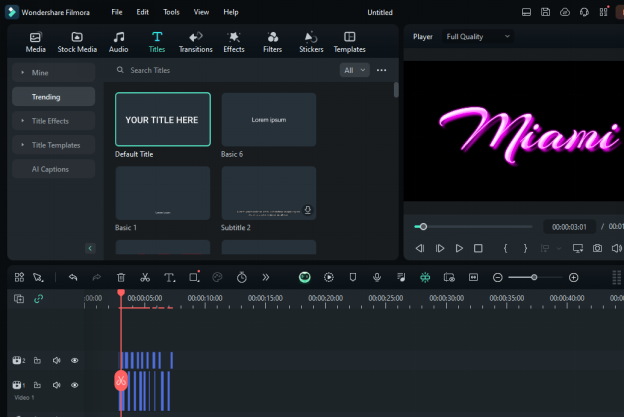
Step 10. Select the first box in the first layer and turn off all options in advanced settings. In the second layer, set the opacity of each box to 60%, except the last one. Do this for all three boxes. Your animation is now set!
After Effects or Filmora? Which Tool is Best for Creating Neon Text Effect
Feature |
After Effects | Wondershare Filmora |
| Complexity | High, suitable for professionals | Low, user-friendly for beginners |
| Flexibility | Highly flexible, can create custom animations | Limited flexibility, but sufficient for basic and intermediate effects |
| Preset Availability | Extensive library of effects and plugins | Limited presets but includes ready-to-use neon effects |
| Rendering Speed | Generally slower due to complex effects | Faster rendering for simpler effects |
| Cost | Subscription-based, more expensive | More affordable with one-time purchase or subscription options |
| Learning Curve | Steep, requires time to master | Gentle, easy to learn and use |
| Community and Support Integration with Other Tools |
Large professional community and extensive tutorials | Growing community with accessible support and tutorials |
| Integration with Other Tools | Seamless integration with Adobe Creative Cloud | Integrates with other Filmora tools and some third-party applications |
Summary
After Effects is great for experts. It has many options but is costly and hard to learn. Filmora is easier and cheaper, making it good for beginners. It works fast and fits a tight budget.
After Effects is best for detailed work, while Filmora is best for simple tasks. Both have good support and work well with other apps. After Effects is better for those who use other Adobe products.
This comparison will help you pick the tool that best suits your needs. Next keep up the pace and jump to the next part.
Part 4. Free After Effects Template Resources
Adding templates to your After Effects project can make your videos look more professional. These templates are ready-to-use AE files that let you easily edit text, colors, and design elements.
Using templates from the web can really boost the look of your videos.
Here are some places online to find a variety of After Effects templates.
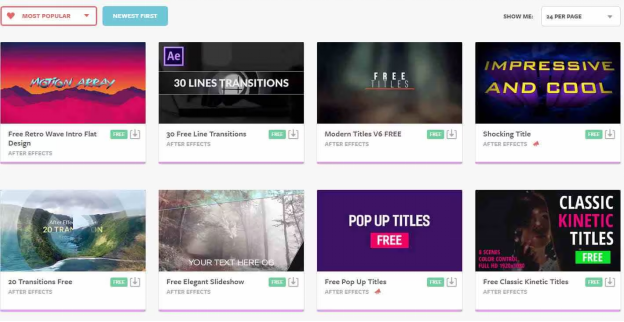
1. Motion Array
Motion Array is a site with thousands of AE templates. Signing up is free, but not all templates are available to Free Account users. You can also create fractals automatically with their fractal generators.
2. Premium Beat
Premium Beat mainly offers royalty-free music and sound effects. However, their blog is also a great place to learn about top AE templates. The articles include links to download templates so users can get more details before downloading.
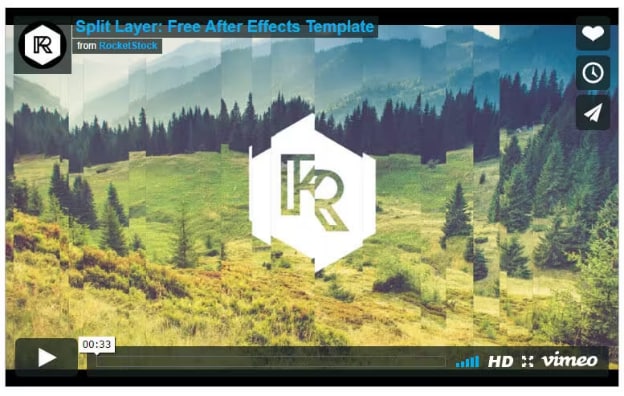
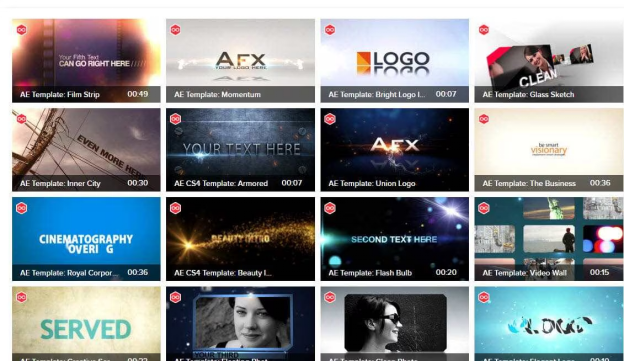
3. VideoBlocks
VideoBlocks is a top site for finding new AE templates. It also has a wide range of stock footage and backgrounds for your projects.
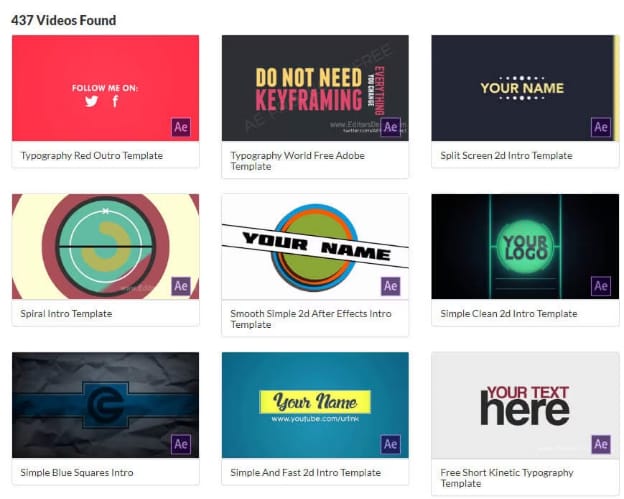
4. Editorsdepot
Editorsdepot offers over 500 AE templates for free. This lets visitors choose the template that fits their needs best. Downloading templates from this site costs nothing.
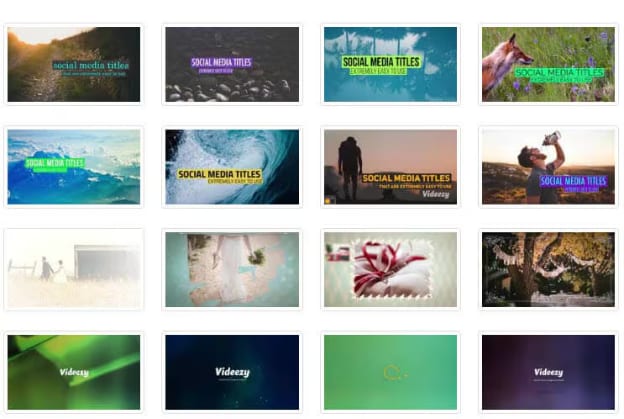
5. Videezy
Videezy has hundreds of AE templates to make your intros look professionally designed. To use all the website's features, you need to create an account.
We have discussed some resources for free After Effects templates. Next, let's discuss the best plug-in for creating glow effects in After Effects.
Part 5. The Best Plug-In To Create Glow Effects In After Effect
After Effects has basic glow effects, but they lack options and take time to look good. Using a plug-in can speed up this process and create more realistic glows.
Here’s a list of the best plugins:
1. Universe Glow | Redgiant
Universe Glow by Redgiant offers key features to create customized glows on images and footage. It allows users to soften bright areas, isolate specific colors and channels, and apply glow to particular colors.
The plugin also supports color aberration for a more natural glow effect. Users can control the saturation, tint, and quality of the color aberrations. Universe Glow includes customizable presets ready for use and adjustment.
The plugin provides seven glow options: Chromatic Glow, Edge Glow, Glimmer, Glo Fi, Glow, Point Zoom, and Quantum. Each option comes with a variety of presets.
You can get more details about Universe Glow from this video.
2. Optical Glow | Redgiant
Optical Glow is a fast, photo-realistic glow effect plugin used in professional visual effects and motion graphics. It produces high-quality glow effects and is available exclusively in the VFX Suite at Maxon.
Watch this video on Optical Glow that showcases the power of this plugin.
3. Deep Glow | AEscript
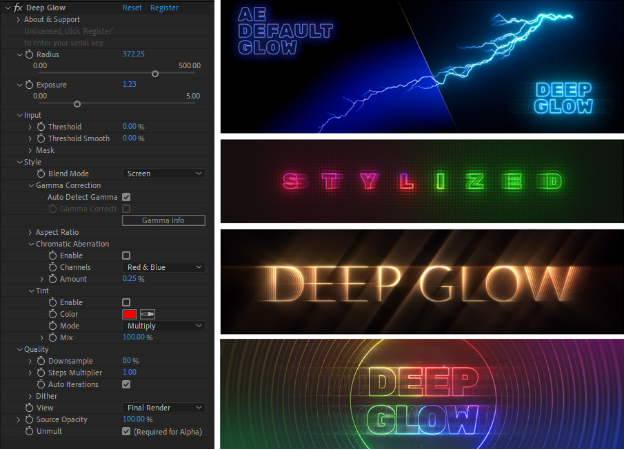
Deep Glow is a powerful plugin that offers many features for creating glowing animations. It includes intuitive controls for refining glow effects.
Key features of Deep Glow include aspect ratio adjustments, chromatic aberration, blur quality controls, tint options, and blending modes to enhance glow colors. It also has dithering controls to minimize color banding. Check out the effects control image below for more details.
To have a better understanding of this plug-in, you can watch this video.
4.SABER | Video Copilot
Saber is a top free plugin for creating stunning glow effects. It offers 50 presets that let you instantly create various glows like fire, electric, neon, pulse, and energy. Saber also provides many customization options, including flicker and glow distortion.
Watch this video on how to manage these glow effects.
5. Starglow | Redgiant Trapcode
Starglow helps create glowing stars on any layer, image, or video by using layer brightness to determine star placement.
For more details, watch this video tutorial.
Conclusion
Neon effect After Effects can take your video editing to the next level. It adds vibrant and glowing visuals that capture attention. After Effects offers many tools for creating these effects. On the other hand, Wondershare Filmora provides a simpler, beginner-friendly option.
Both platforms allow you to create stunning neon text, but each serves different needs. Try out both to see which one works best for your projects.
Filmora is excellent if you want quick results without too much complexity. The neon effect is perfect for making your videos more dynamic and engaging.


