For the Best Results, Use the Latest Version.
-
Preparations for Mac
-
Account (Mac)
-
Get Started & Basic Settings (Mac)
- Release notes for Mac
- Latest Versions and Features for Mac
- Get Started on Mac - Full Guide
- Download/register/uninstall on Mac
- Panel Layout on Mac
- Keyboard shortcuts on Mac
- Touchbar on Mac
- Change playback quality on Mac
- Render preview files on Mac
- Manage timeline on Mac
- Media for use on Mac
- Logo Reveal For Mac
- Marked Favorites for Mac
-
Compatibility & Tech Specs (Mac)
-
Performance Settings (Mac)
-
-
Creating Projects - Mac
-
Creating New Projects (Mac)
-
-
Importing & Recording - Mac
-
Importing (Mac)
-
Recording (Mac)
-
-
Video Editing for Mac
-
Basic Video Editing for Mac
- Edit Live Photos on Mac
- Enable/Disable Clip for Mac
- Magnetic Timeline For Mac
- Select All Clips on Timeline for Mac
- Auto Ripple for Mac
- Split & cut videos on Mac
- Compositing on Mac
- Crop and zoom on Mac
- Playback Zoom Level for Mac
- Change speed on Mac
- Play video in reverse on Mac
- Mark In and Mark Out for Mac
- Markers for Mac
- Group clips on Mac
- Customized Backgrounds for Videos and Images in Mac
- Video snapshot on Mac
- Freeze frame on Mac
- Auto enhance on Mac
- Applying Drop Shadow for Mac
- Adjustment Layer for Mac
- Mark clip on Mac
- Video Editing Ruler – Mac
- Apply Transforming for Mac
-
Advanced Video Editing for Mac
-
AI-Powered Video Editing for Mac
- Smart Scene Cut for Mac
- Smart Short Clips for Mac
- Image to Video for Mac
- AI Idea to Video for Mac
- AI Text-to-Video for Mac
- Instant Cutter Tool on Mac
- AI Face Mosaic for Mac
- Keyframe Path Curve for Mac
- Planar Tracking for Mac
- AI Extend For Mac
- AI Script-to-Video for Mac
- AI Text-Based Editing in Mac
- Create With Instant Mode on Mac
- ChatGPT Plugin - AI Copywriting on Mac
- AI Smart Cutout for Mac
- Auto reframe on Mac
- Lens correction on Mac
- AI Portrait Cutout on Mac
- Scene detection on Mac
- AI Smart Masking for Mac
- AI Mate Editing for Mac
- Motion Tracking on Mac
- Stabilize video on Mac
- AI Object Remover For Mac
- AI Smart Search for Mac
- AI Skin Tone Protection for Mac
- Green screen on Mac
- Super Slow Motion with Optical Flow for Mac
- AI stylizer on Mac
- Video Denoise for Mac
-
-
Audio Editing for Mac
-
Basic Audio Editing for Mac
-
Advanced Audio Editing for Mac
-
AI-Powered Audio Editing for Mac
- Audio To Video for Mac
- AI Sound Effect for Mac
- Smart BGM Generation for Mac
- AI Voice Enhancer for Mac
- Audio Stretch for Mac
- AI Audio Denoise for Mac
- Auto synchronization for Mac
- AI Vocal Remover for Mac
- Auto Beat Sync on Mac
- AI Music Generator for Mac
- How to Perform AI Voice Cloning in Wondershare Filmora?
- Silence detection on Mac
-
-
Text Editing for Mac
-
Basic Text Editing for Mac
-
Advanced Text Editing for Mac
-
AI-Powered Text Editing for Mac
-
-
Video Customizations for Mac
-
Video Effects (Mac)
-
Audio Effects (Mac)
-
Transitions (Mac)
-
Stickers (Mac)
-
Filters (Mac)
-
Color Editing (Mac)
-
Animations (Mac)
-
Templates (Mac)
-
Asset Center (Mac)
-
-
Exporting & Share & Cloud Backup - Mac
Silence Detection
Silence Detection
Silence Detection will scan and remove silent pauses from your videos automatically. Here’s how to use Filmora’s Silence Detection feature:
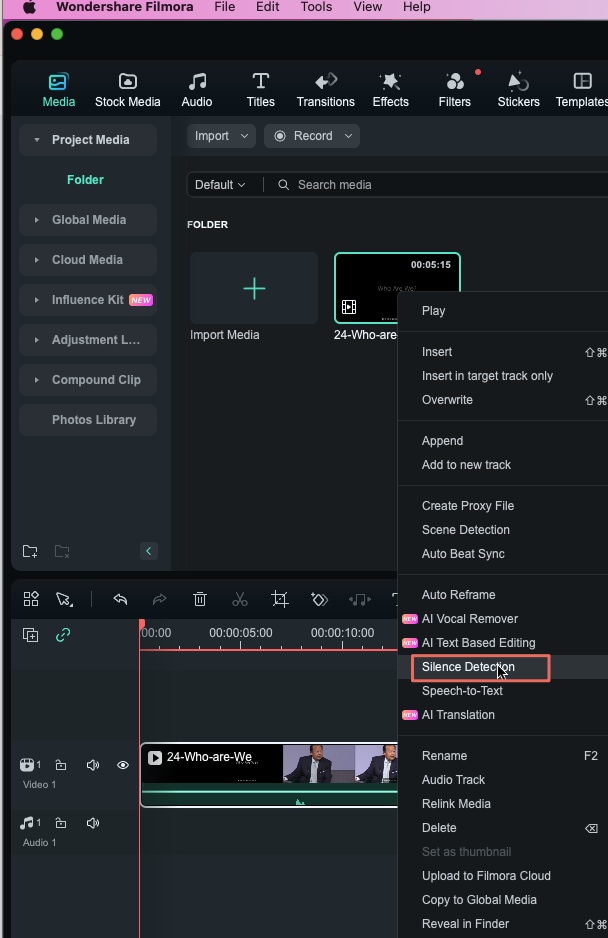
After importing your video to Filmora, right-click on the video and choose the “Silence Detection” option.
Tips: Silence Detection also allows for batch processing of multiple video clips. Simply select all the videos you want to detect.
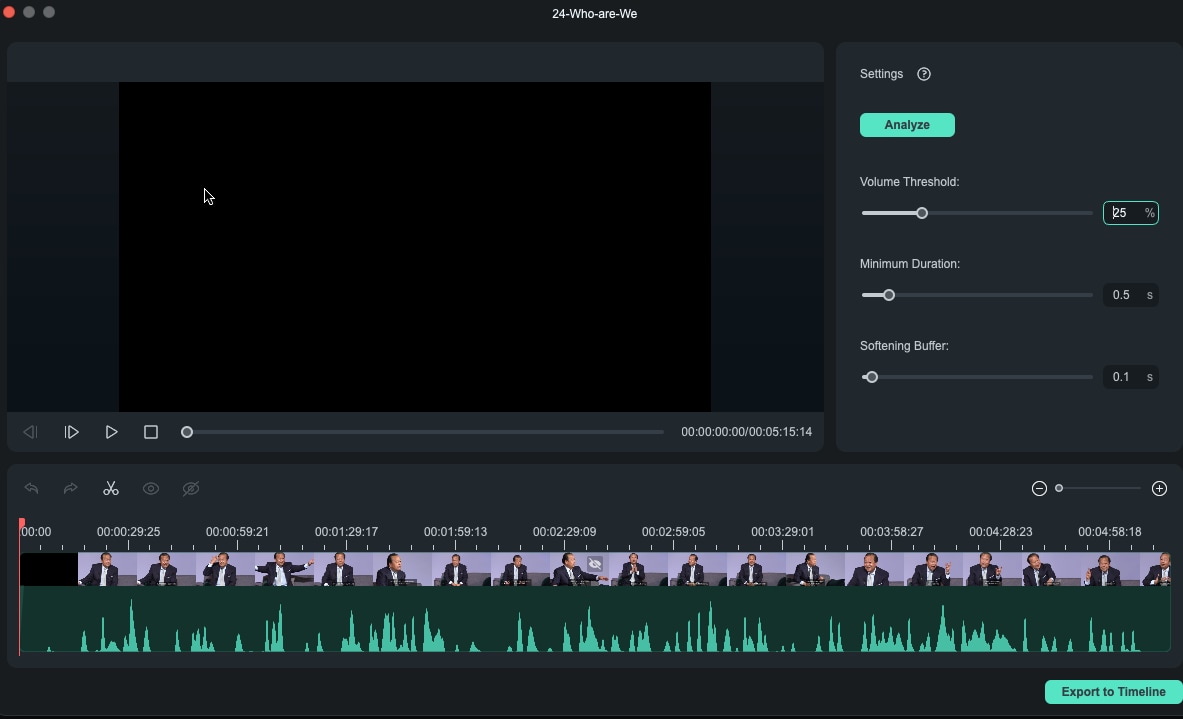
Now the Settings panel will appear, you can adjust the Threshold, Minimum Duration and Increase Buffer.
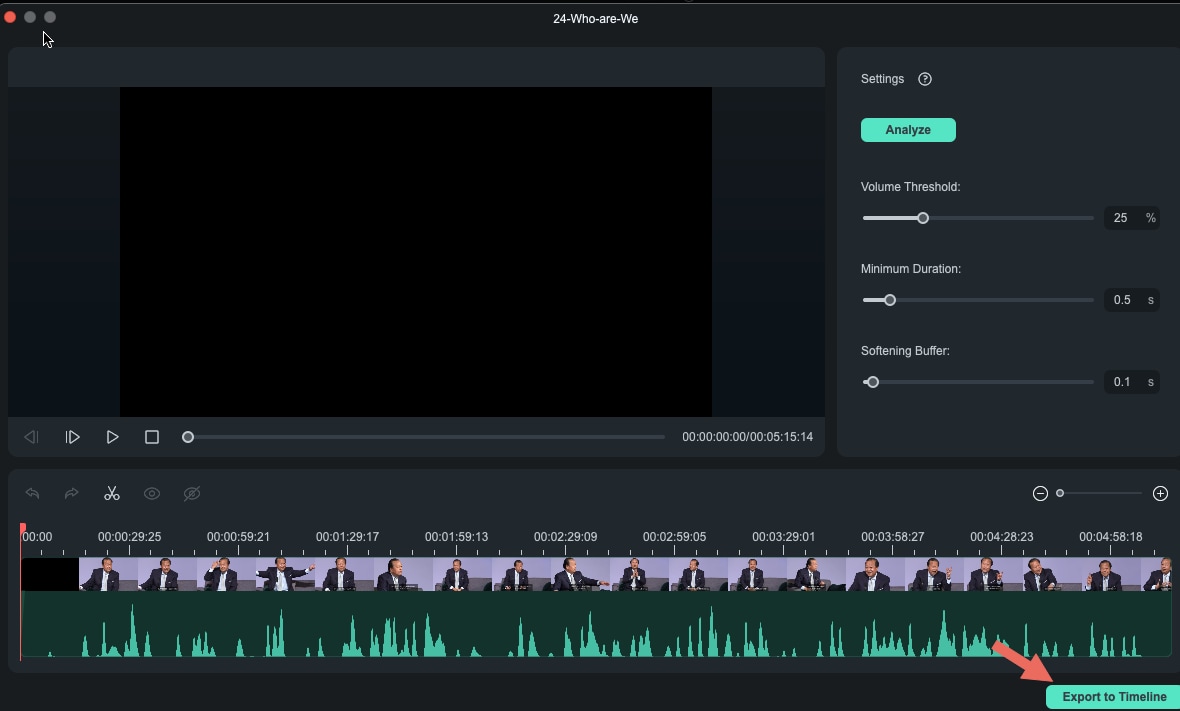
The process will start, you can click “Export to Timeline” once the process ends. Now you will be able to preview the video.
Denoise Audio
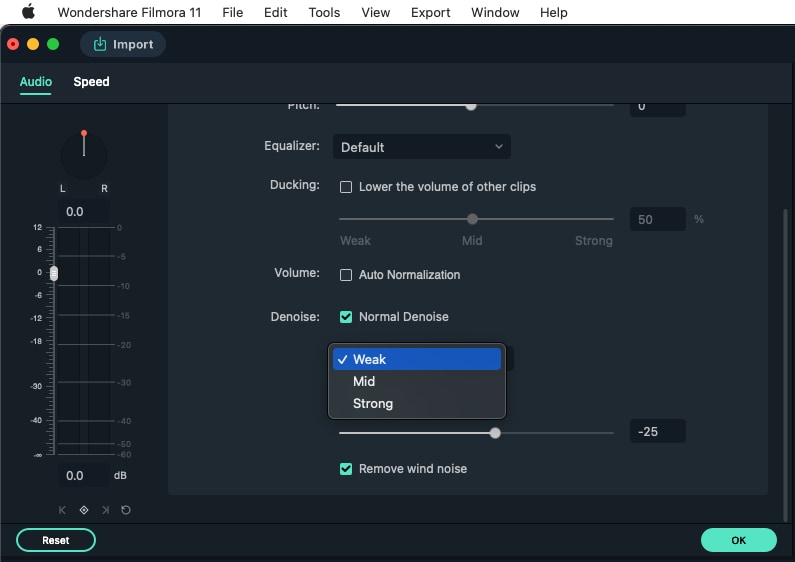
If you want to denoise the hum and other background audio from your video in Filmora, just follow the steps below:
Detach audio from video and double click audio from the timeline, you’ll see a pop-out audio settings window.
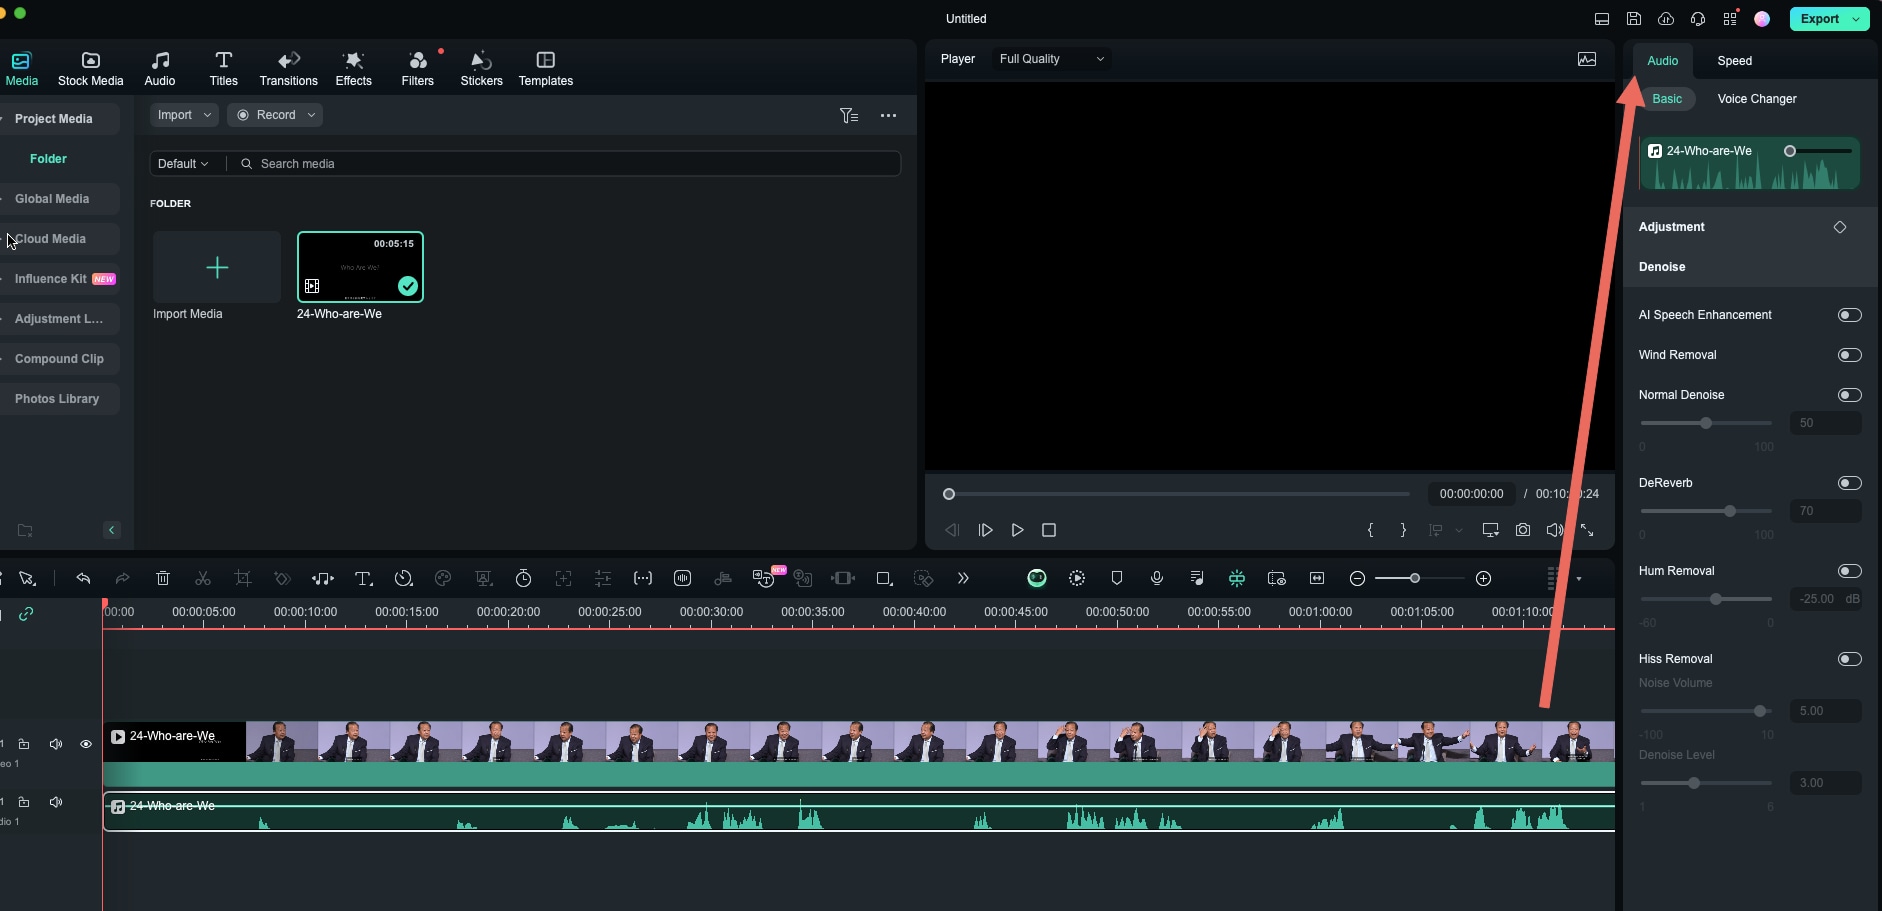
There will be 3 options: Normal Denoise, Remove hub and Remove wind noise. Adjust these options to your desired settings and apply it.
Related Posts
Featured Articles
How to Edit Audio in Premiere Pro: Techniques & Tools for Cleaner Sound
Edit audio in Premiere Pro with step-by-step guidance on trimming, volume, effects, noise reduction, mixing, and export for clear, professional sound that enhances every video project.
How To Convert FFmpeg Image Sequence to Video
If you’re looking to learn how to convert ffmpeg image sequence to video, this post is for you. Read on to find more details.
How to Do Text to Speech in Windows?
How do I use text-to-speech on Windows? Check our step-by-step guide to converting text to speech on Windows with the narrator's voice, an online voice generator, and the best text-to-speech software for pc.
Recommended User Guide
Audio Stretch for Mac
Among many diverse functions Filmora offers is its Audio Stretch feature.
How to Perform AI Voice Cloning in Wondershare Filmora?
When making a video using text for generating speech, you might desire using your voice. Discover the new AI voice cloning feature on Filmora Mac.
Audio To Video for Mac
Audio to Video is a technology that automatically generates video content based on an uploaded audio file. The process typically involves artificial intelligence (AI) analyzing the audio's speech, tone, and context to create visuals that align with and enhance the message of the audio. This can include adding relevant imagery, animations, captions, or even syncing video clips to match the pace and tone of the audio.
