For the Best Results, Use the Latest Version.
-
Preparations for Mac
-
Account (Mac)
-
Get Started & Basic Settings (Mac)
- Release notes for Mac
- Latest Versions and Features for Mac
- Get Started on Mac - Full Guide
- Download/register/uninstall on Mac
- Panel Layout on Mac
- Keyboard shortcuts on Mac
- Touchbar on Mac
- Change playback quality on Mac
- Render preview files on Mac
- Manage timeline on Mac
- Media for use on Mac
- Logo Reveal For Mac
- Marked Favorites for Mac
-
Compatibility & Tech Specs (Mac)
-
Performance Settings (Mac)
-
-
Creating Projects - Mac
-
Creating New Projects (Mac)
-
-
Importing & Recording - Mac
-
Importing (Mac)
-
Recording (Mac)
-
-
Video Editing for Mac
-
Basic Video Editing for Mac
- Edit Live Photos on Mac
- Enable/Disable Clip for Mac
- Magnetic Timeline For Mac
- Select All Clips on Timeline for Mac
- Auto Ripple for Mac
- Split & cut videos on Mac
- Compositing on Mac
- Crop and zoom on Mac
- Playback Zoom Level for Mac
- Change speed on Mac
- Play video in reverse on Mac
- Mark In and Mark Out for Mac
- Markers for Mac
- Group clips on Mac
- Customized Backgrounds for Videos and Images in Mac
- Video snapshot on Mac
- Freeze frame on Mac
- Auto enhance on Mac
- Applying Drop Shadow for Mac
- Adjustment Layer for Mac
- Mark clip on Mac
- Video Editing Ruler – Mac
- Apply Transforming for Mac
-
Advanced Video Editing for Mac
-
AI-Powered Video Editing for Mac
- Smart Scene Cut for Mac
- Smart Short Clips for Mac
- Image to Video for Mac
- AI Idea to Video for Mac
- AI Text-to-Video for Mac
- Instant Cutter Tool on Mac
- AI Face Mosaic for Mac
- Keyframe Path Curve for Mac
- Planar Tracking for Mac
- AI Extend For Mac
- AI Script-to-Video for Mac
- AI Text-Based Editing in Mac
- Create With Instant Mode on Mac
- ChatGPT Plugin - AI Copywriting on Mac
- AI Smart Cutout for Mac
- Auto reframe on Mac
- Lens correction on Mac
- AI Portrait Cutout on Mac
- Scene detection on Mac
- AI Smart Masking for Mac
- AI Mate Editing for Mac
- Motion Tracking on Mac
- Stabilize video on Mac
- AI Object Remover For Mac
- AI Smart Search for Mac
- AI Skin Tone Protection for Mac
- Green screen on Mac
- Super Slow Motion with Optical Flow for Mac
- AI stylizer on Mac
- Video Denoise for Mac
-
-
Audio Editing for Mac
-
Basic Audio Editing for Mac
-
Advanced Audio Editing for Mac
-
AI-Powered Audio Editing for Mac
- Audio To Video for Mac
- AI Sound Effect for Mac
- Smart BGM Generation for Mac
- AI Voice Enhancer for Mac
- Audio Stretch for Mac
- AI Audio Denoise for Mac
- Auto synchronization for Mac
- AI Vocal Remover for Mac
- Auto Beat Sync on Mac
- AI Music Generator for Mac
- How to Perform AI Voice Cloning in Wondershare Filmora?
- Silence detection on Mac
-
-
Text Editing for Mac
-
Basic Text Editing for Mac
-
Advanced Text Editing for Mac
-
AI-Powered Text Editing for Mac
-
-
Video Customizations for Mac
-
Video Effects (Mac)
-
Audio Effects (Mac)
-
Transitions (Mac)
-
Stickers (Mac)
-
Filters (Mac)
-
Color Editing (Mac)
-
Animations (Mac)
-
Templates (Mac)
-
Asset Center (Mac)
-
-
Exporting & Share & Cloud Backup - Mac
Render Preview Files
This lesson of our Filmora tutorial is dedicated to the Render Button that will ensure the smooth playback of video files and visual effects, you add to the timeline.
Rendering Previews from Filmora’s Timeline
The playback of high-resolution video files can lag sometimes if the computer used for editing those files doesn’t have enough processing power. Lagging can occur regardless of the video editing software you are using, but Filmora offers a quick way to fix this issue.
The rendering process can be described as a process during which a computer processes information from a particular data source and creates a preview image that is displayed in the software’s preview window.
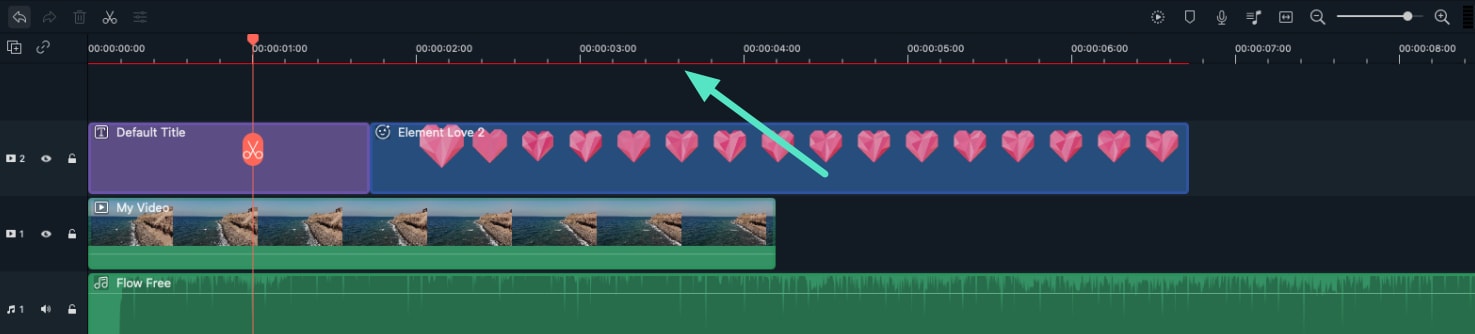
After you add new media files to the Filmora’s timeline, a red line will appear over the portion of the timeline these media files occupy indicating that the footage hasn’t been rendered yet.
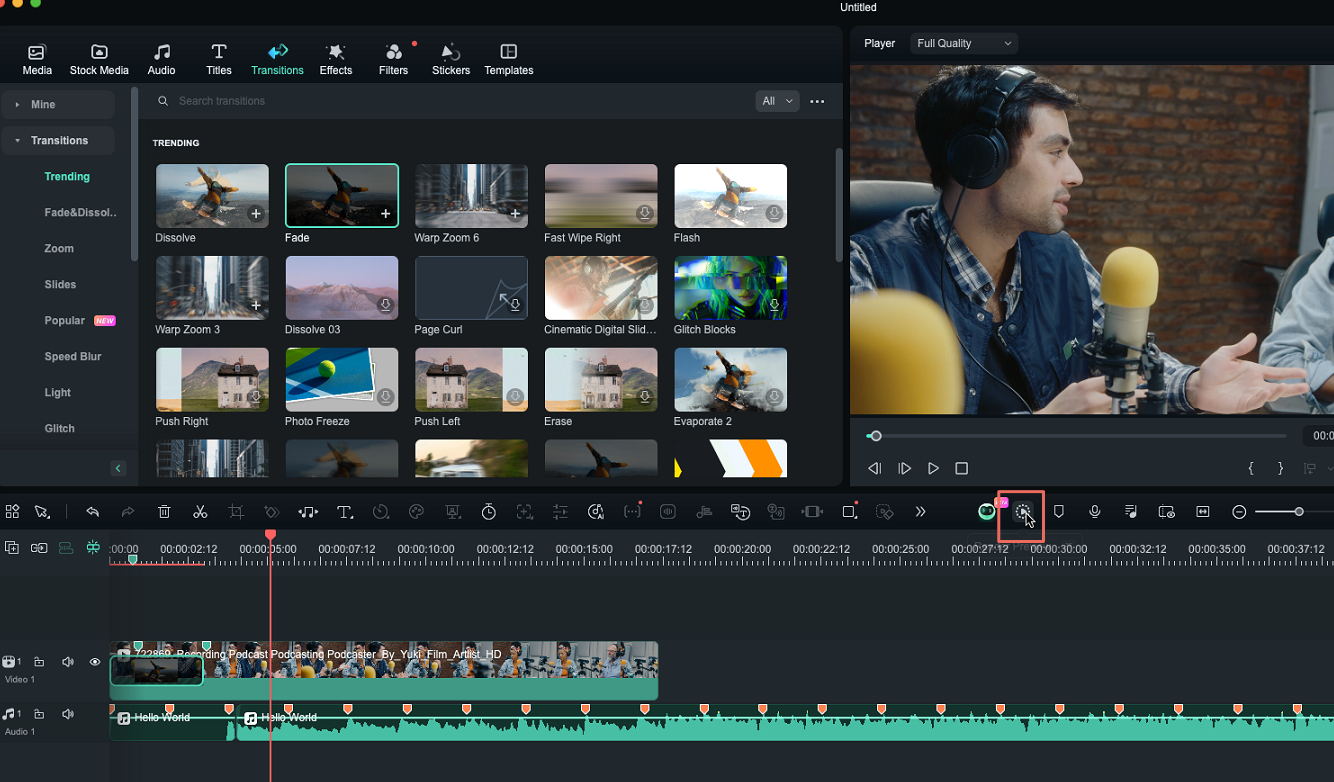
Your computer will generate rendered versions of the files you placed on the timeline after you click on the Render Preview button that is located in the upper right corner of the Filmora’s timeline.
The Render Progress bar will pop up on the screen, informing you about how much time remains until the rendering process is completed.
Keep in mind that rendering process can take a while if you are working with a lot of different high-resolution files.
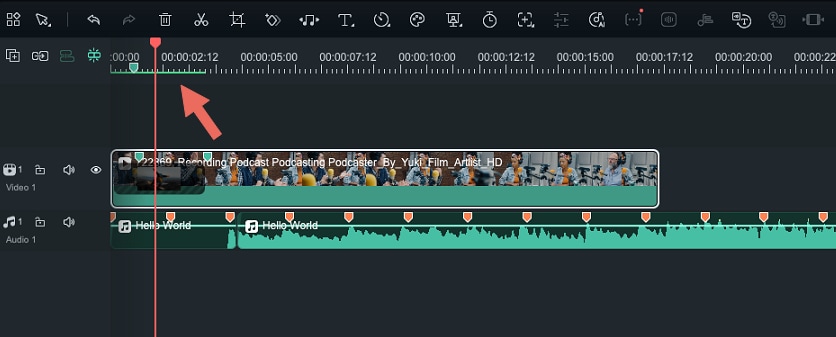
The rendering process will eliminate the lagging effect that commonly occurs when multiple visual effects are applied to the footage. Once the rendering process is completed, the red line displayed over the media files will turn green.
Under its default settings, Filmora doesn’t automatically render all files you add to the timeline, so all video clips or visual effects you placed on the timeline after the rendering process is completed have to be rendered separately. The red line is going to be displayed over all unrendered media files on the timeline.
Besides clicking on the Render Preview button, you can also hit Enter button on your keyboard to start a new rendering session. Rendering all media files added to timeline will make the workflow smoother and faster.
Adjusting the Render Preview Settings
You can set different render preview settings for each new project separately. Simply click on the Preferences option in the File menu and once the Preferences window pops up on the screen head over to the Performance menu.
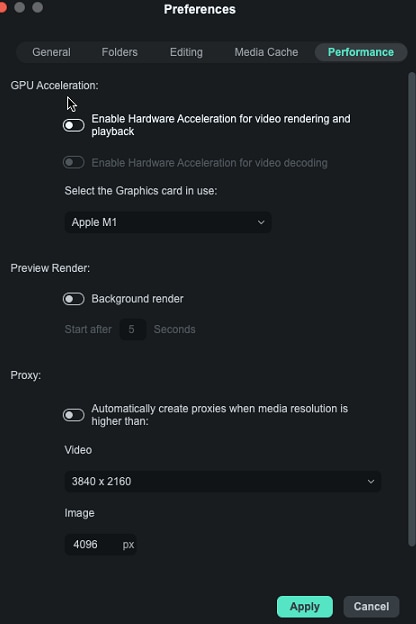
Under the Preview Render menu, you can enable the Background render option which will perform the rendering automatically after you add a new media file to the timeline. You can set up how long it takes for the automatic background rendering start by setting the amount of time. However, enabling Background Render can slow down the Filmora video editor if your computer doesn’t have a lot of processing power.
So, if you are editing a video on a computer with limited processing capabilities, you should leave the background render box unchecked. Filmora lets you set the destination folder for all preview renders you generate while working on a certain project.
Related Posts
Featured Articles
How to Create a Shooting Star Effect Easily (No After Effects Needed)
The shooting star effect adds a visual value to your nighttime videos. This article explores 2 tools for making the perfect dynamic effect in your films.
5 Top Hand-Drawn Animation Video Makers to Lift Your Content
In search of ways to create compelling whiteboard videos for your marketing campaign? Read this article to explore the top hand-drawn animation makers of all time.
PDF Text-to-Speech Readers – Everything You Need to Know
Looking for the best PDF text-to-speech reader? Check out the ultimate PDF TTS guide to discover your ideal solution.
Recommended User Guide
Download/register/uninstall on Mac
Learn how to download/register/uninstall for Filmora for Mac
Touchbar on Mac
Learn how can touch bar help you edit a video.
Latest Versions and Features for Mac
Find out the new features of Filmora Version 15 for Mac.
