For the Best Results, Use the Latest Version.
-
Preparations for Mac
-
Account (Mac)
-
Get Started & Basic Settings (Mac)
- Release notes for Mac
- Latest Versions and Features for Mac
- Get Started on Mac - Full Guide
- Download/register/uninstall on Mac
- Panel Layout on Mac
- Keyboard shortcuts on Mac
- Touchbar on Mac
- Change playback quality on Mac
- Render preview files on Mac
- Manage timeline on Mac
- Media for use on Mac
- Logo Reveal For Mac
- Marked Favorites for Mac
-
Compatibility & Tech Specs (Mac)
-
Performance Settings (Mac)
-
-
Creating Projects - Mac
-
Creating New Projects (Mac)
-
-
Importing & Recording - Mac
-
Importing (Mac)
-
Recording (Mac)
-
-
Video Editing for Mac
-
Basic Video Editing for Mac
- Edit Live Photos on Mac
- Enable/Disable Clip for Mac
- Magnetic Timeline For Mac
- Select All Clips on Timeline for Mac
- Auto Ripple for Mac
- Split & cut videos on Mac
- Compositing on Mac
- Crop and zoom on Mac
- Playback Zoom Level for Mac
- Change speed on Mac
- Play video in reverse on Mac
- Mark In and Mark Out for Mac
- Markers for Mac
- Group clips on Mac
- Customized Backgrounds for Videos and Images in Mac
- Video snapshot on Mac
- Freeze frame on Mac
- Auto enhance on Mac
- Applying Drop Shadow for Mac
- Adjustment Layer for Mac
- Mark clip on Mac
- Video Editing Ruler – Mac
- Apply Transforming for Mac
-
Advanced Video Editing for Mac
-
AI-Powered Video Editing for Mac
- Smart Scene Cut for Mac
- Smart Short Clips for Mac
- Image to Video for Mac
- AI Idea to Video for Mac
- AI Text-to-Video for Mac
- Instant Cutter Tool on Mac
- AI Face Mosaic for Mac
- Keyframe Path Curve for Mac
- Planar Tracking for Mac
- AI Extend For Mac
- AI Script-to-Video for Mac
- AI Text-Based Editing in Mac
- Create With Instant Mode on Mac
- ChatGPT Plugin - AI Copywriting on Mac
- AI Smart Cutout for Mac
- Auto reframe on Mac
- Lens correction on Mac
- AI Portrait Cutout on Mac
- Scene detection on Mac
- AI Smart Masking for Mac
- AI Mate Editing for Mac
- Motion Tracking on Mac
- Stabilize video on Mac
- AI Object Remover For Mac
- AI Smart Search for Mac
- AI Skin Tone Protection for Mac
- Green screen on Mac
- Super Slow Motion with Optical Flow for Mac
- AI stylizer on Mac
- Video Denoise for Mac
-
-
Audio Editing for Mac
-
Basic Audio Editing for Mac
-
Advanced Audio Editing for Mac
-
AI-Powered Audio Editing for Mac
- Audio To Video for Mac
- AI Sound Effect for Mac
- Smart BGM Generation for Mac
- AI Voice Enhancer for Mac
- Audio Stretch for Mac
- AI Audio Denoise for Mac
- Auto synchronization for Mac
- AI Vocal Remover for Mac
- Auto Beat Sync on Mac
- AI Music Generator for Mac
- How to Perform AI Voice Cloning in Wondershare Filmora?
- Silence detection on Mac
-
-
Text Editing for Mac
-
Basic Text Editing for Mac
-
Advanced Text Editing for Mac
-
AI-Powered Text Editing for Mac
-
-
Video Customizations for Mac
-
Video Effects (Mac)
-
Audio Effects (Mac)
-
Transitions (Mac)
-
Stickers (Mac)
-
Filters (Mac)
-
Color Editing (Mac)
-
Animations (Mac)
-
Templates (Mac)
-
Asset Center (Mac)
-
-
Exporting & Share & Cloud Backup - Mac
Mask
If you want to create some effects to present the video in a creative way, add mask is a way to go. Here we are going to show how to add different types of masks to a video in Filmora on macOS.
Masks are mostly used to prevent the viewers from any distraction and draw their attention to a particular action or person.
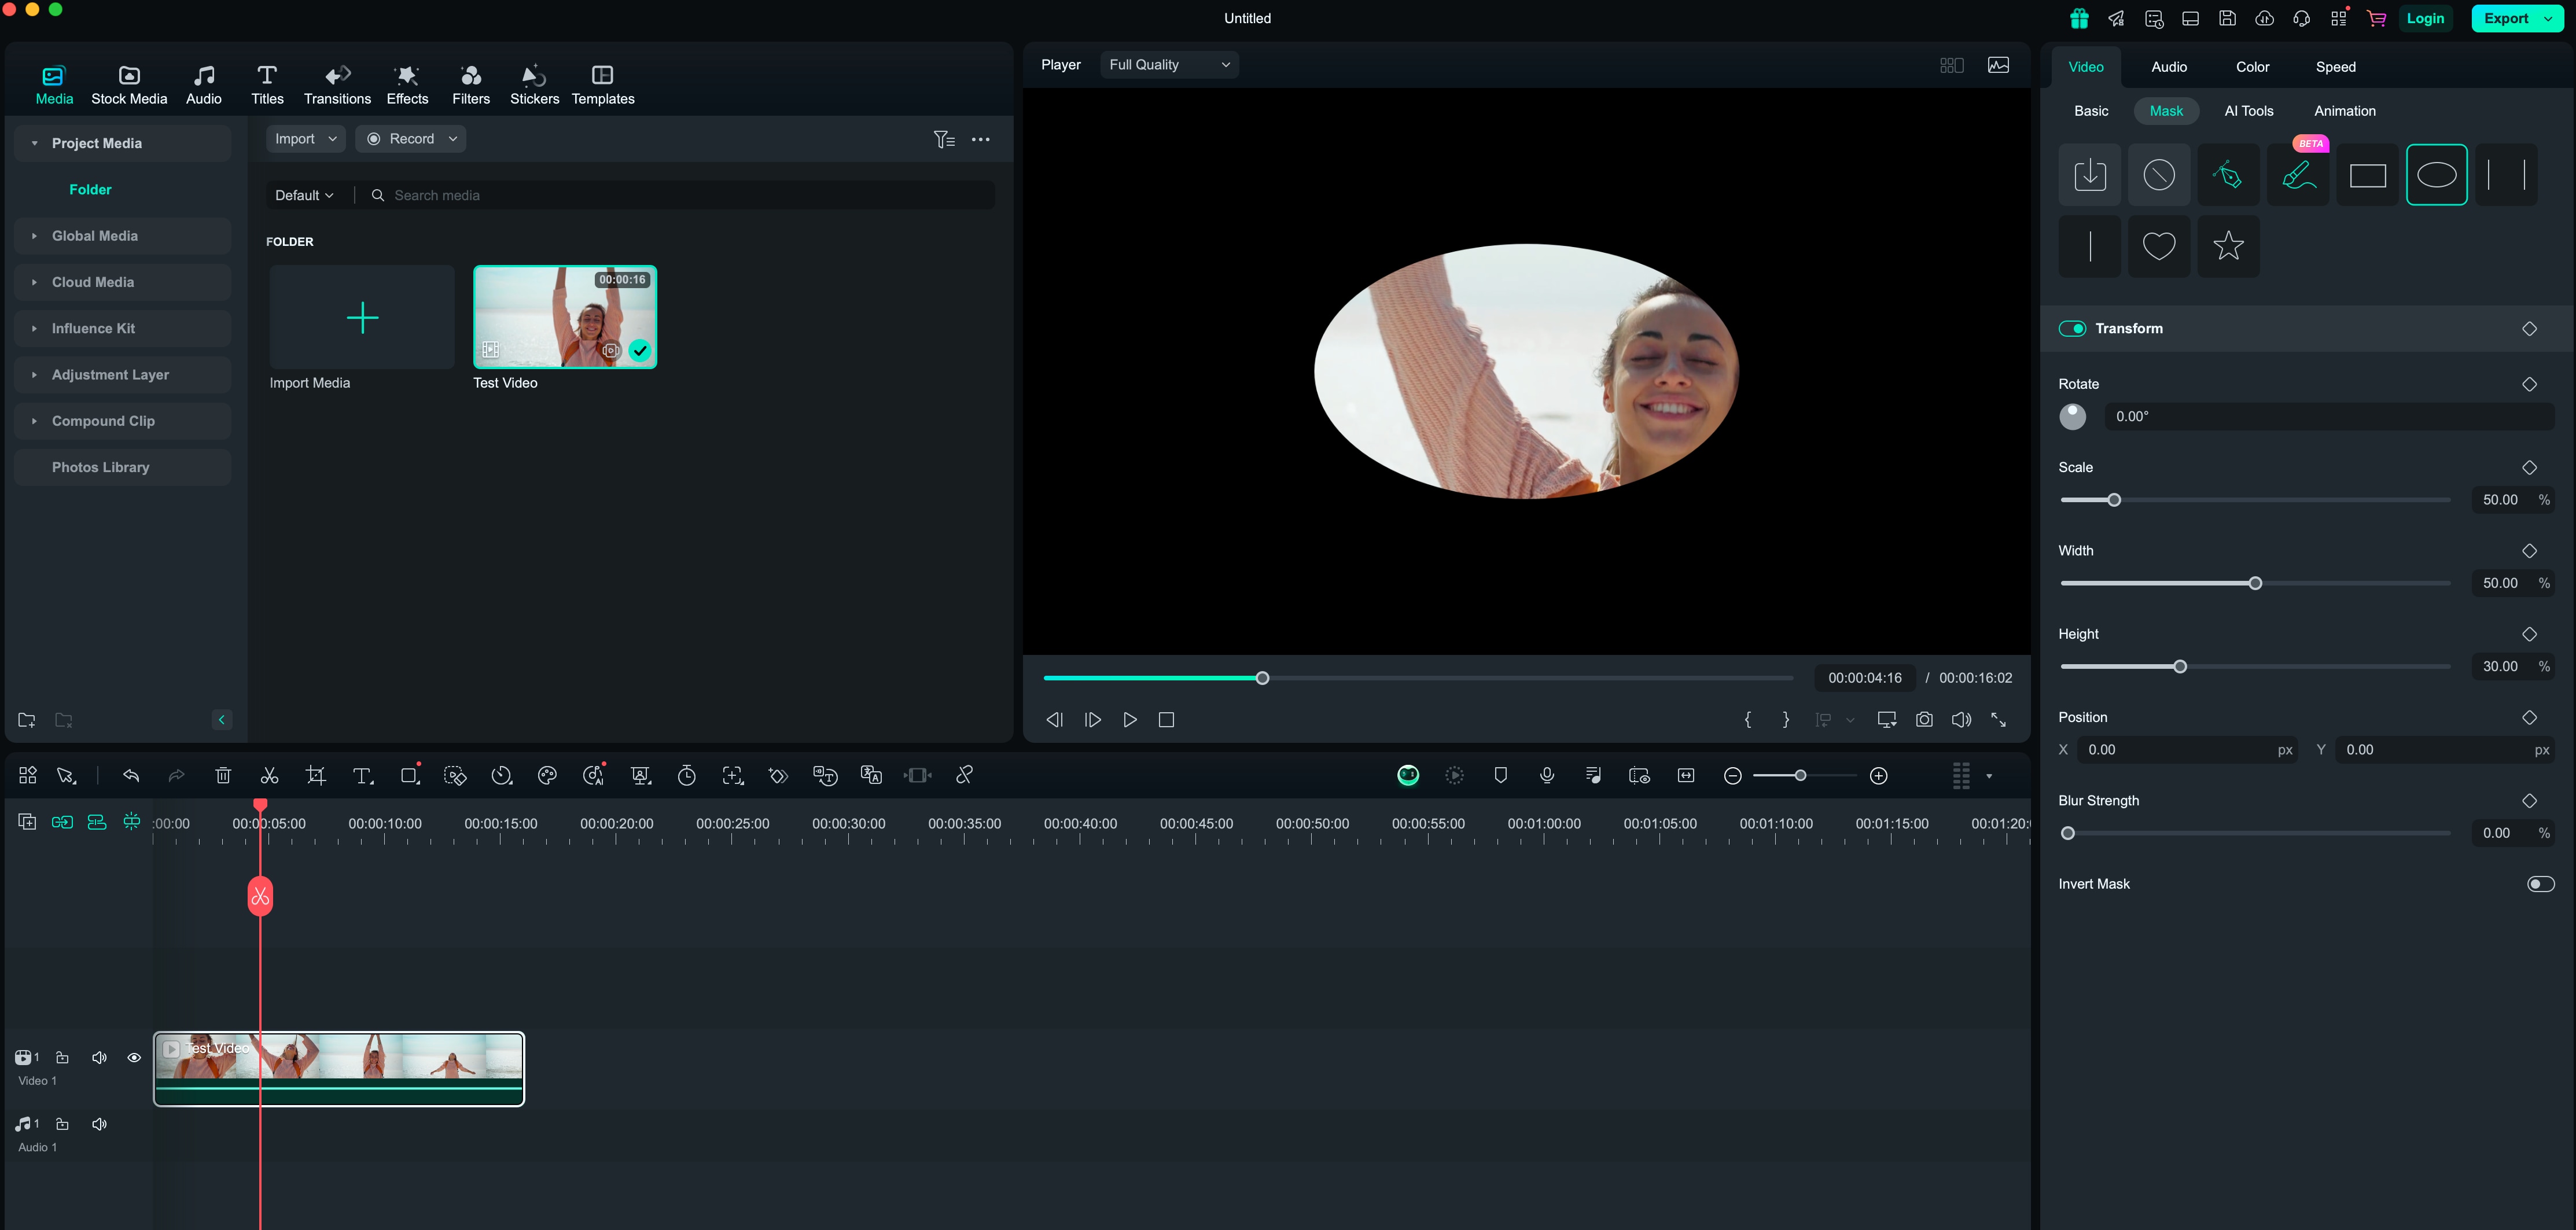
Go to the Masks tab
Double click the video clip in the timeline to enter the Video panel. In the Mask tab, you can find some mask shapes, such as rectangle, circle, double line, single line, love and star. You can also draw a mask as you wish.
Apply a Mask
You can apply an existing video mask or load your own video mask by clicking Import. When you select a shape from the Masks, only the area it covers will be visible in the Preview window. Everything else will be hidden.
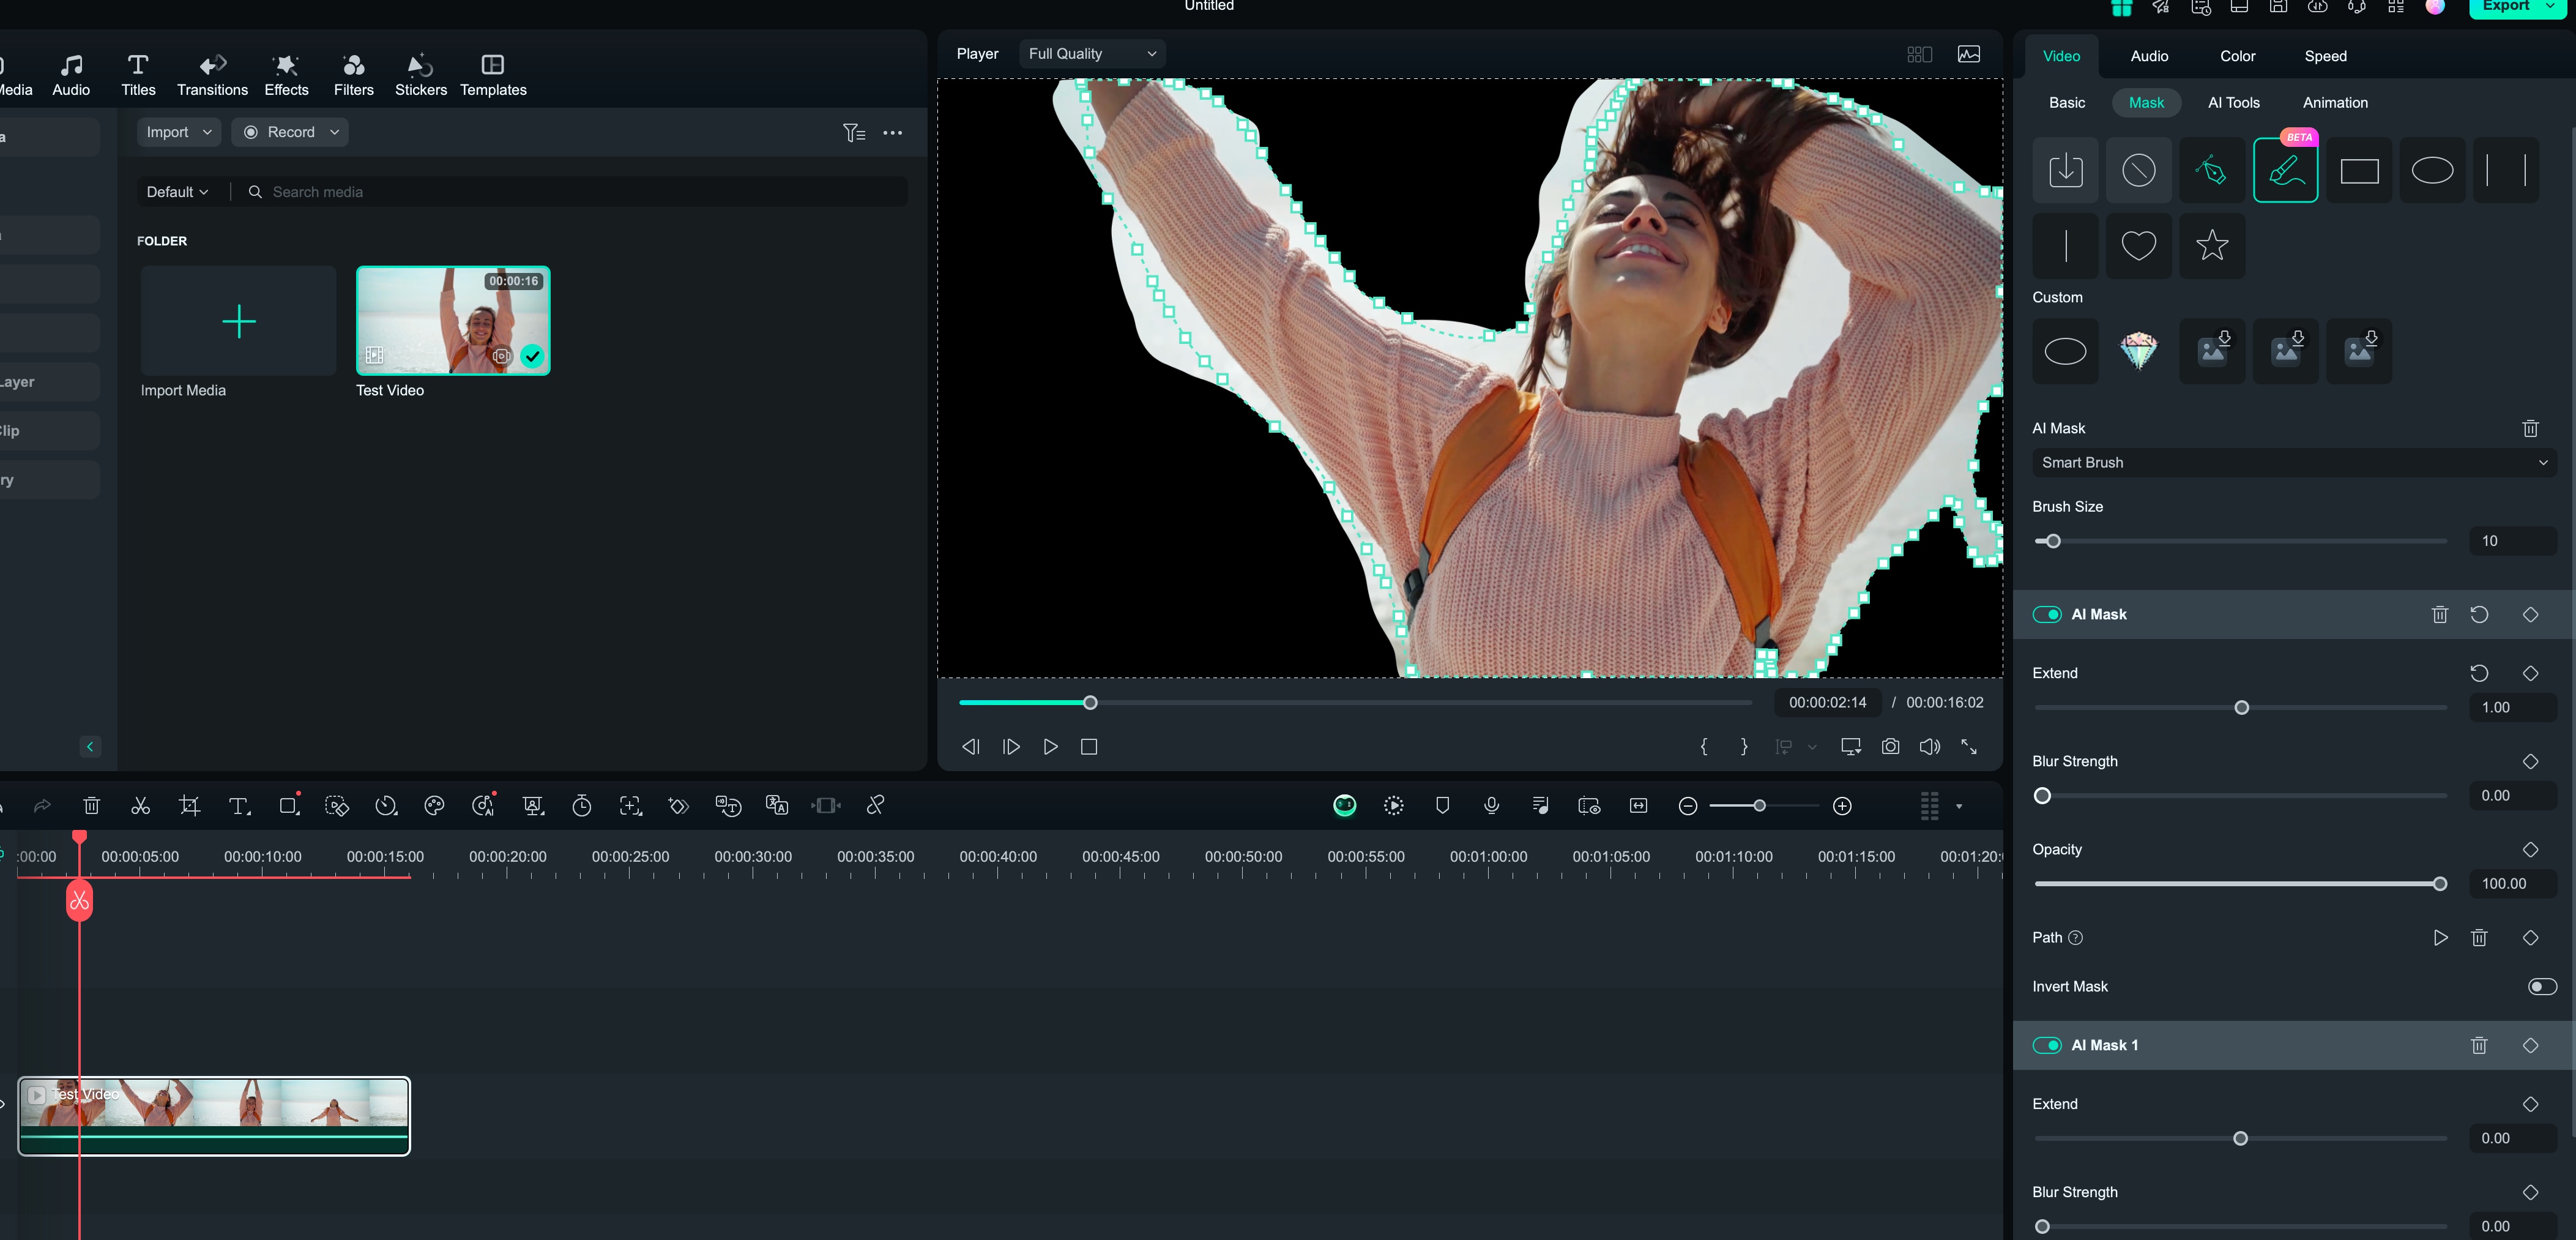
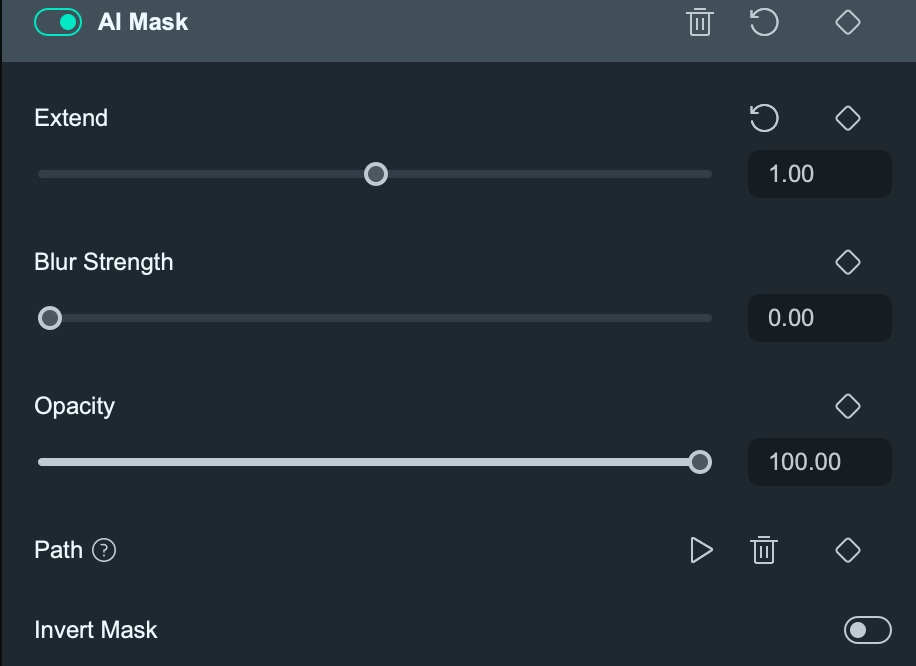
Apply AI Mask
To use Filmora's AI Mask, select your video, choose Mask, and then click on AI Mask to let the AI automatically detect subjects for easy, precise editing.
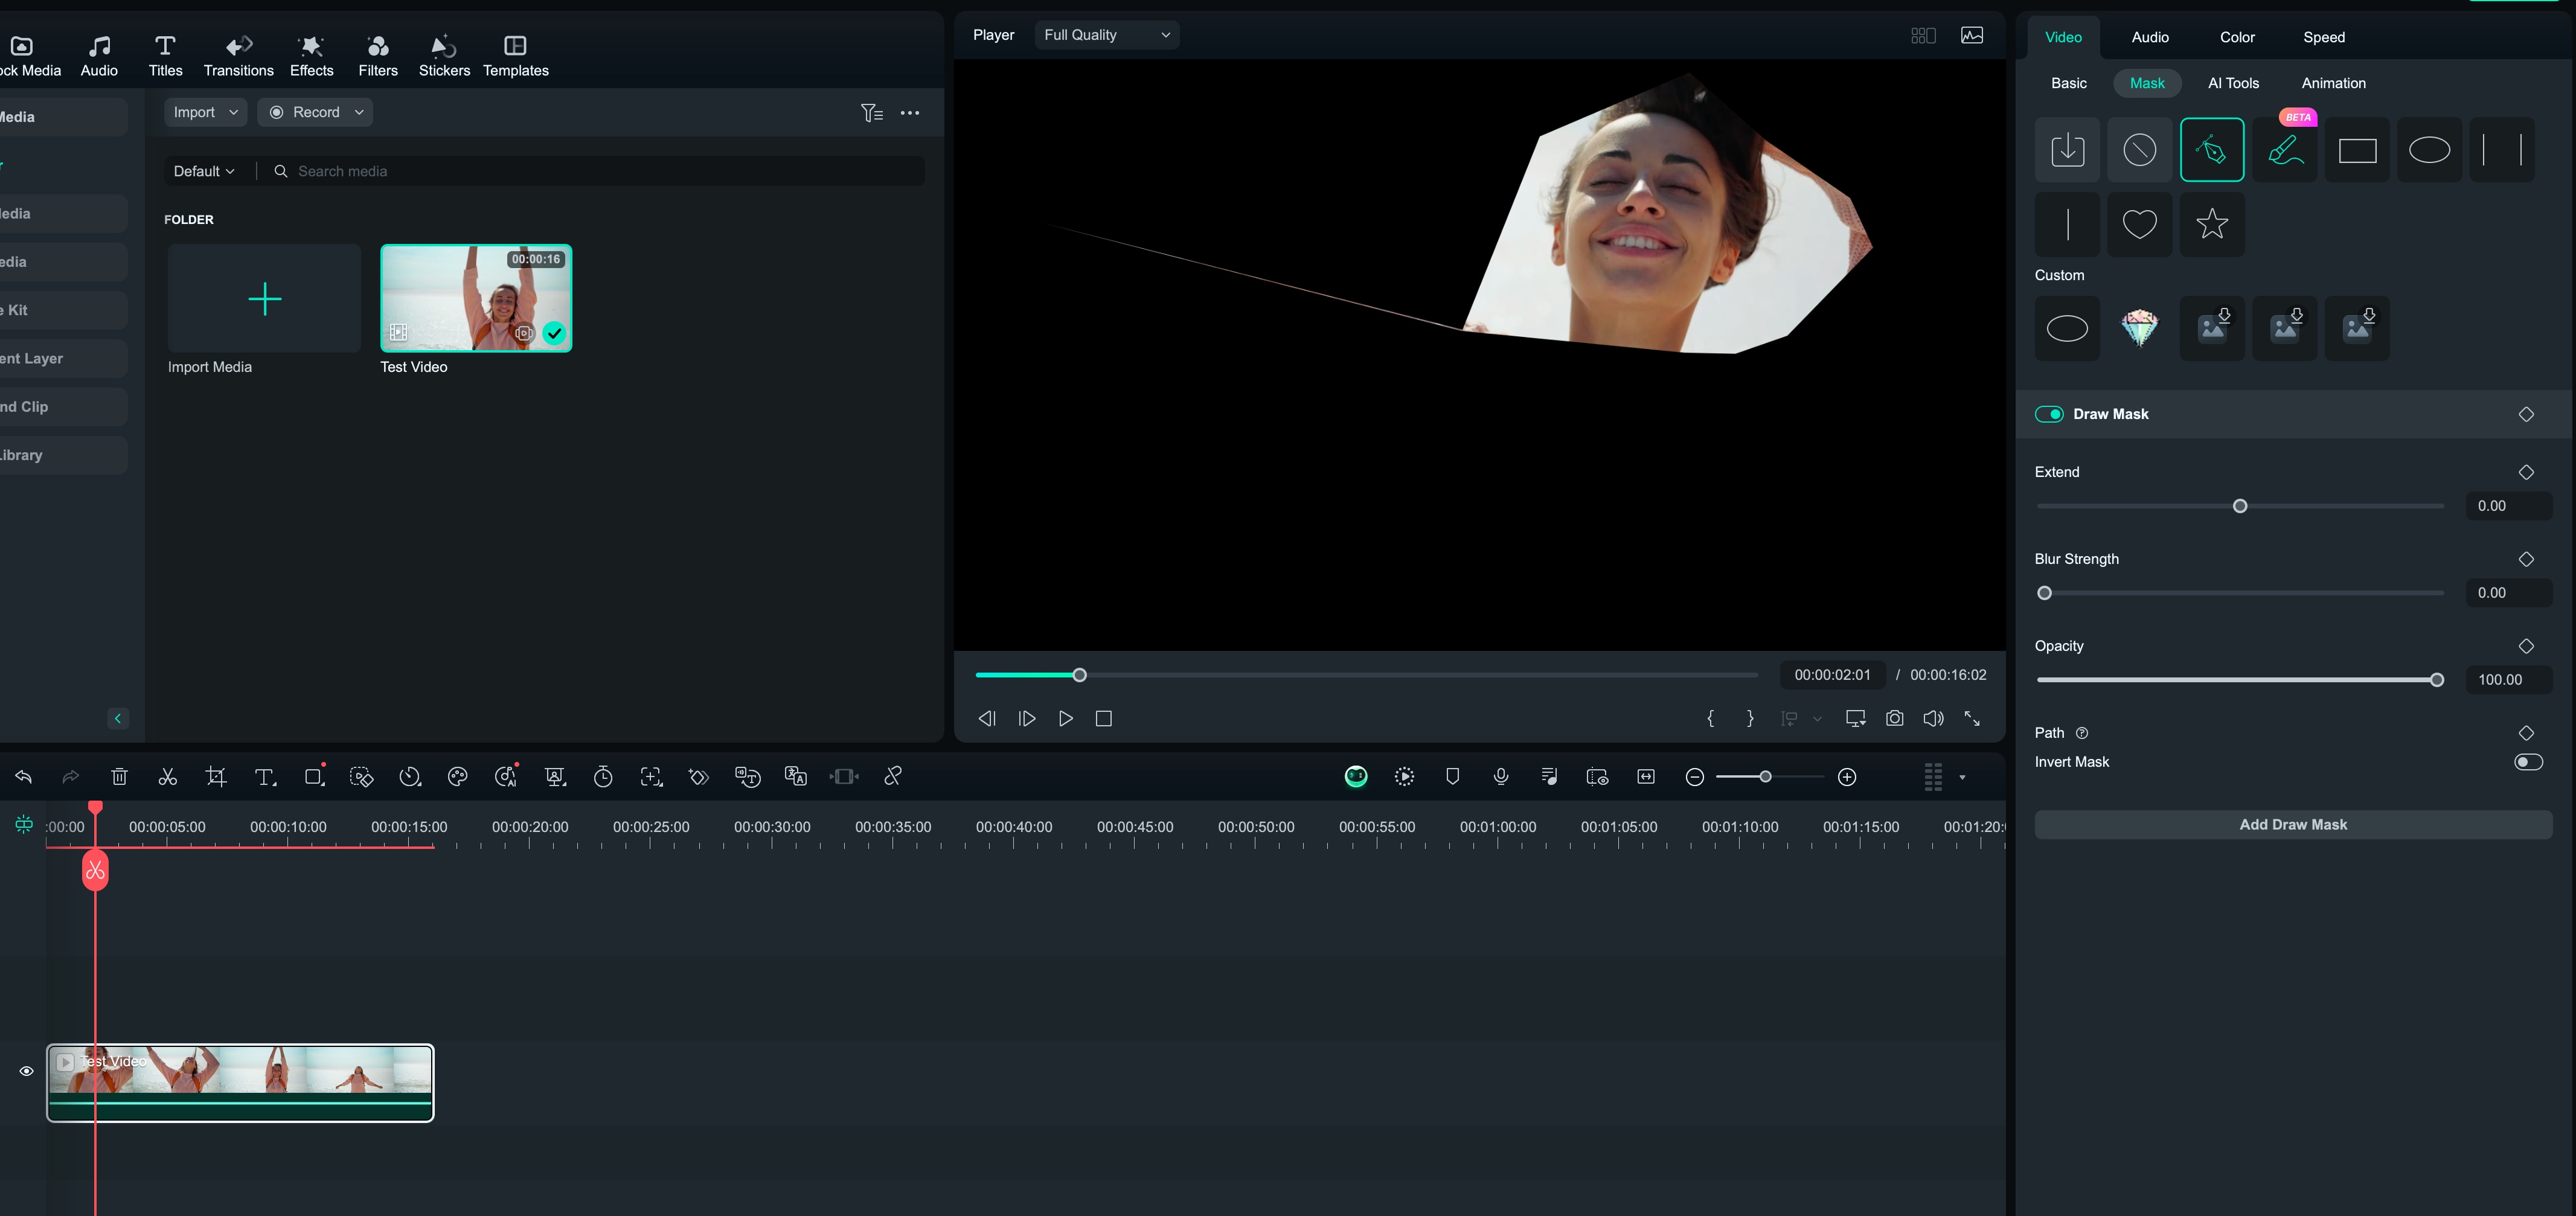
Draw a mask
Using the Draw Mask feature, you can create complicated masks in any shape by dragging control points and modifying B-Splines. By adjusting the Bessel curve for drawn masks while holding the Option, you can easily produce smooth curves. The draw mask can also be saved as a preset so that you can apply it with just one click.
Adjust the Mask
To edit the mask, you can also drag the sliders in the Mask tab. Rotate, scale, position, width, and height are all adjustable. You can even invert the mask so that the hidden portion becomes visible.
Related Posts
Featured Articles
How to Start Car Vlogging: Setup, Safety, and Video Recording Tips
Car vlogging feels like bringing your viewers along for the ride. If you’ve ever wanted to start, this guide covers the basics, from how to set up, stay safe, record, and edit your videos.
How to Transcribe MP4 to Text Precisely and Instantly with AI
Experience the efficiency of Filmora's Speech-to-Text feature, an advanced mp4-to-text transcription tool that delivers quick and accurate results for all your transcription needs. We covered everything you need to transcribe your MP4 file into text.
How To Convert EXR, Tiff, PNG, or JPG Image Sequences to MP4 Videos
Are you looking for ways to convert an EXR, Tiff, PNG, or JPG sequence to MP4 easily? This guide discusses several different methods to do so.
Recommended User Guide
Compound Clips for Mac
With the latest version of Filmora, users can explore the newly added features, including the Compound Clip functionality.
Keyframe Graph Editor for Mac
Keyframes holds a significant value when it comes to editing in Filmora. Users can make different animations with their help and they help in creating smooth transitions.
Multi-Clip Editing for Mac
Multiple clip editing makes editing so easy, and Filmora also offers this.
