For the Best Results, Use the Latest Version.
Filmora User Guide for Mac
-
Preparations for Mac
-
Account (Mac)
-
Get Started & Basic Settings (Mac)
- Release notes for Mac
- Latest Versions and Features for Mac
- Get Started on Mac - Full Guide
- Download/register/uninstall on Mac
- Panel Layout on Mac
- Keyboard shortcuts on Mac
- Touchbar on Mac
- Change playback quality on Mac
- Render preview files on Mac
- Manage Timeline on Mac
- Media for use on Mac
- Logo Reveal For Mac
- Marked Favorites for Mac
-
Compatibility & Tech Specs (Mac)
-
Performance Settings (Mac)
-
-
Creating Projects - Mac
-
Creating New Projects (Mac)
-
-
Importing & Recording - Mac
-
Importing (Mac)
-
Recording (Mac)
-
-
Video Editing for Mac
-
Basic Video Editing for Mac
- Edit Live Photos on Mac
- Enable/Disable Clip for Mac
- Magnetic Timeline For Mac
- Dual Monitor Setup for Video Editing on Mac
- Select All Clips on Timeline for Mac
- Auto Ripple for Mac
- Split & Cut Videos on Mac
- Compositing on Mac
- Crop and zoom on Mac
- Playback Zoom Level for Mac
- Change Speed on Mac
- Play Video in Reverse on Filmora for Mac
- Mark In and Mark Out for Mac
- Markers for Mac
- Group Clips in Filmora for Mac
- Customized Backgrounds for Videos and Images in Mac
- Video snapshot on Mac
- Freeze Frame on Mac
- Auto enhance on Mac
- Applying Drop Shadow for Mac
- Adjustment Layer for Mac
- Mark Clips in Filmora for Mac
- Video Editing Ruler – Mac
- Apply Transforming for Mac
-
Advanced Video Editing for Mac
- Text Animation Path for Mac
- Create Multi-Camera Clip for Mac
- Filmora Motion Blur | Mac
- Drawing Tools for Mac | Filmora Guide
- Compound Clips for Mac
- AI Video Enhancer for Mac
- Video Chapters in Filmora for Mac
- Filmora Flicker Removal Guide | Mac
- Multi-Clip Editing for Mac
- Keyframe Graph Editor for Mac
- Add Animation Keyframing in Filmora for Mac
- Mask on Mac
- PIP (Picture in Picture) in Filmora on Mac
-
AI-Powered Video Editing for Mac
- Smart Scene Cut for Mac
- Smart Short Clips for Mac
- Filmora AI Eye Contact - Mac
- Filmora Image to Video for Mac
- AI Idea to Video for Mac
- AI Text-to-Video for Mac
- Instant Cutter Tool on Mac
- AI Face Mosaic for Mac
- Filmora Image to Prompt for Mac
- Keyframe Path Curve for Mac
- Filmora AI Image Enhancer Guide – macOS
- Planar Tracking for Mac
- Filmora AI Relight - Mac
- AI Extend For Mac
- AI Script-to-Video for Mac
- AI Text-Based Editing in Mac
- Create With Instant Mode on Mac
- ChatGPT Plugin - AI Copywriting on Mac
- AI Smart Cutout in Filmora for Mac
- Auto reframe on Mac
- Lens Correction in Filmora for Mac
- AI Portrait Cutout on Mac
- Scene detection on Mac
- AI Smart Masking for Mac
- AI Mate Editing for Mac
- Motion Tracking on Mac
- Video Stabilization for Mac
- AI Video/Photo Object Remover for Mac
- AI Smart Search for Mac
- AI Skin Tone Protection for Mac
- Green screen on Mac
- Super Slow Motion with Optical Flow for Mac
- AI Stylizer for Mac
- Video Denoise for Mac
-
-
Audio Editing for Mac
-
Basic Audio Editing for Mac
-
Advanced Audio Editing for Mac
-
AI-Powered Audio Editing for Mac
- Audio To Video for Mac
- AI Sound Effect for Mac
- Smart BGM Generation on Mac
- AI Voice Enhancer for Mac
- Audio Stretch for Mac
- AI Audio Denoise for Mac
- Auto Synchronization on Mac
- AI Vocal Remover for Mac
- AI Auto Beat Sync for Mac
- AI Music Generator for Mac
- AI Voice Cloning on Mac
- Silence Detection on Mac
-
-
Text Editing for Mac
-
Basic Text Editing for Mac
-
Advanced Text Editing for Mac
-
AI-Powered Text Editing for Mac
-
-
Video Customizations for Mac
-
Video Effects (Mac)
-
Audio Effects (Mac)
-
Transitions (Mac)
-
Stickers (Mac)
-
Filters (Mac)
-
Color Editing (Mac)
-
Animations (Mac)
-
Templates (Mac)
-
Asset Center (Mac)
-
-
Exporting & Share & Cloud Backup - Mac
Filmora Tutorial Videos
Filmora 13 & 14 User Guide in PDF
Filmora 12 User Guide in PDF
Filmora 11 User Guide in PDF
Filmora 9 & 10 User Guide
Filmora AI Video Enhancer for Mac
Rather than relying on manual fine-tuning, Filmora's AI Video Enhancer uses advanced AI models to analyze each frame and automatically improve sharpness, texture, and visual clarity. This makes it an effective solution for enhancing older footage, refining smartphone recordings, or improving videos shot in less-than-ideal environments. As a result, soft or low-resolution clips appear cleaner, more detailed, and visually polished.
By offering professional-grade enhancement directly within the Mac editing workflow, Filmora ensures both speed and reliability. The newly added Topaz model, accessible through the Select Model option, delivers high-quality improvements while preserving the original frame rate, duration, and motion. This streamlined process allows creators to achieve consistent results without disrupting the natural flow of the video.
Key Features of AI Video Enhancer
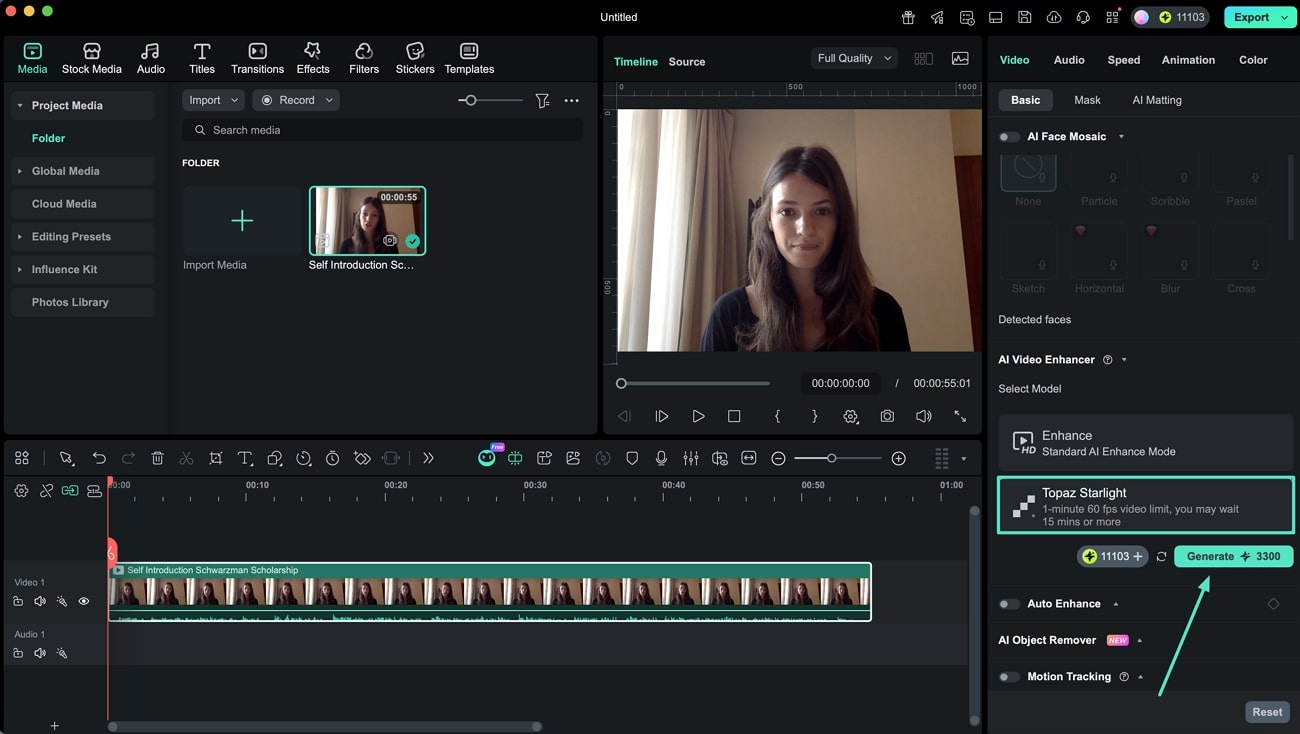
- Powered by Topaz Starlight Model: Filmora utilizes the advanced Topaz Starlight AI model to enhance clarity, minimize noise, and improve overall visual quality with high-level accuracy.
- Consistent Output Settings: Enhanced videos retain the same frame rate and duration as the source clip, ensuring smooth playback and seamless placement within existing projects.
- Smart Resolution Handling: Footage up to 1080p is enhanced and exported at 1080p, while higher-resolution videos preserve their original resolution, supporting outputs up to 4K without forced upscaling.
Step-by-Step Guide to Using AI Video Enhancer on Mac
Now that you understand the capabilities of this feature, follow the steps below to use it in Filmora on your Mac:
Index
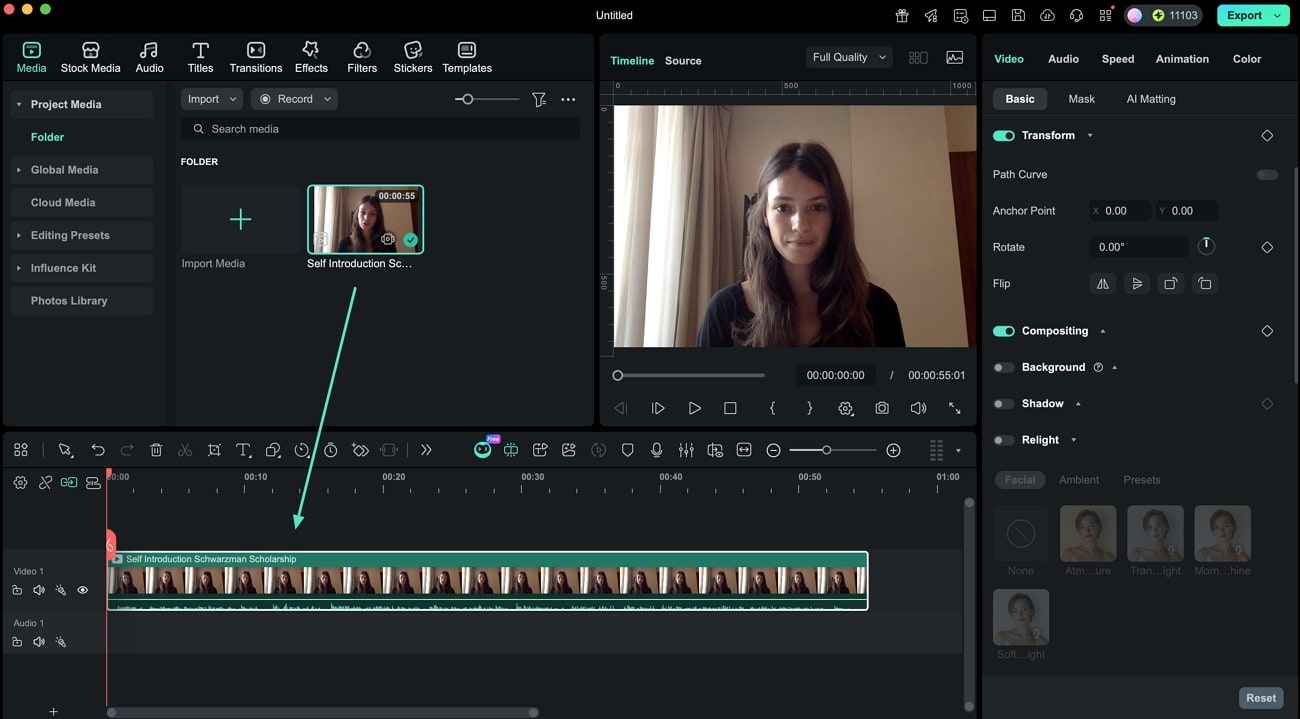
Step 1. Import and Add Media Files to the Timeline
Launch Filmora for Mac, import your media files, and add them to the timeline.
Step 2. Access AI Video Enhancer Standard Mode
Within the editing workspace, open the Video settings panel on the right side. Under the Basic section, scroll to find AI Video Enhancer, select the standard model, and click Generate to start the enhancement process.

Step 3. Select the Topaz Starlight Model
For higher-quality results, choose the Topaz Starlight model located beneath the standard option, then click Generate to apply advanced enhancement.
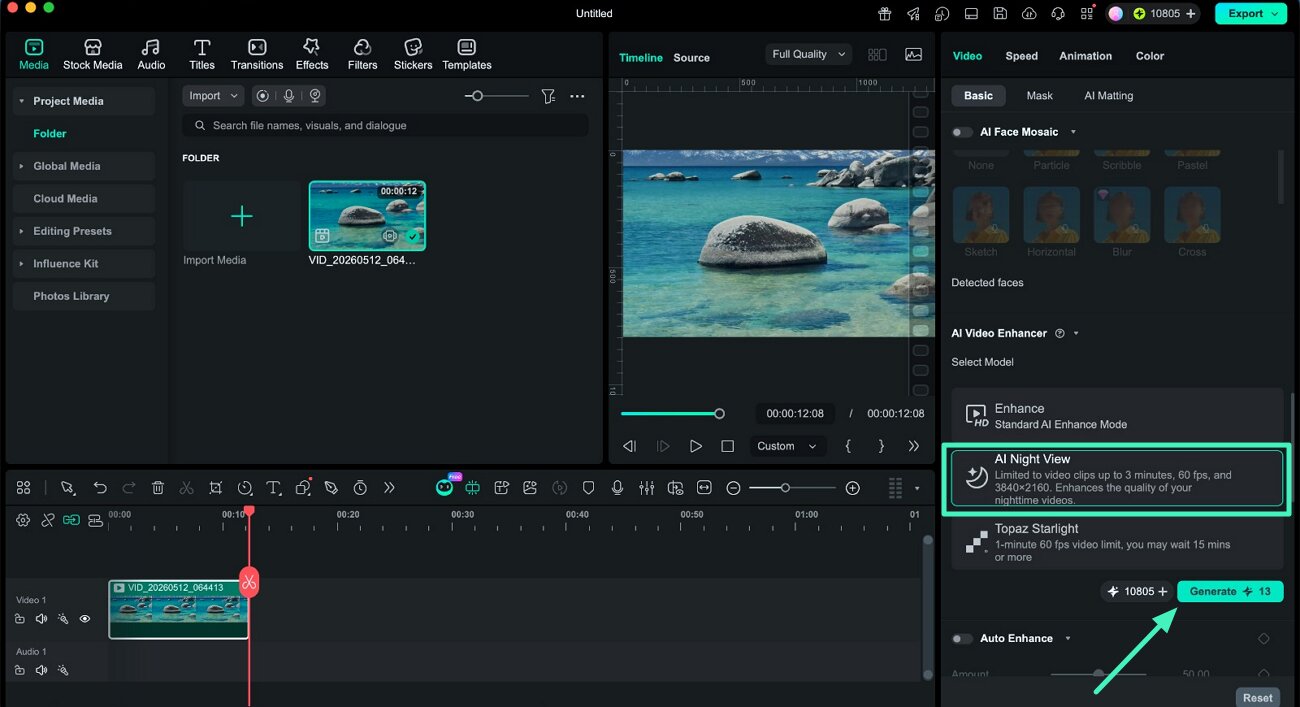
Step 4. Enable AI Night ViewNEW
To enhance the visual quality pof dark video or videos that are shot at night, click the "AI Night View" option. Hit the "Generate" button to enhance the nighttime video quality.
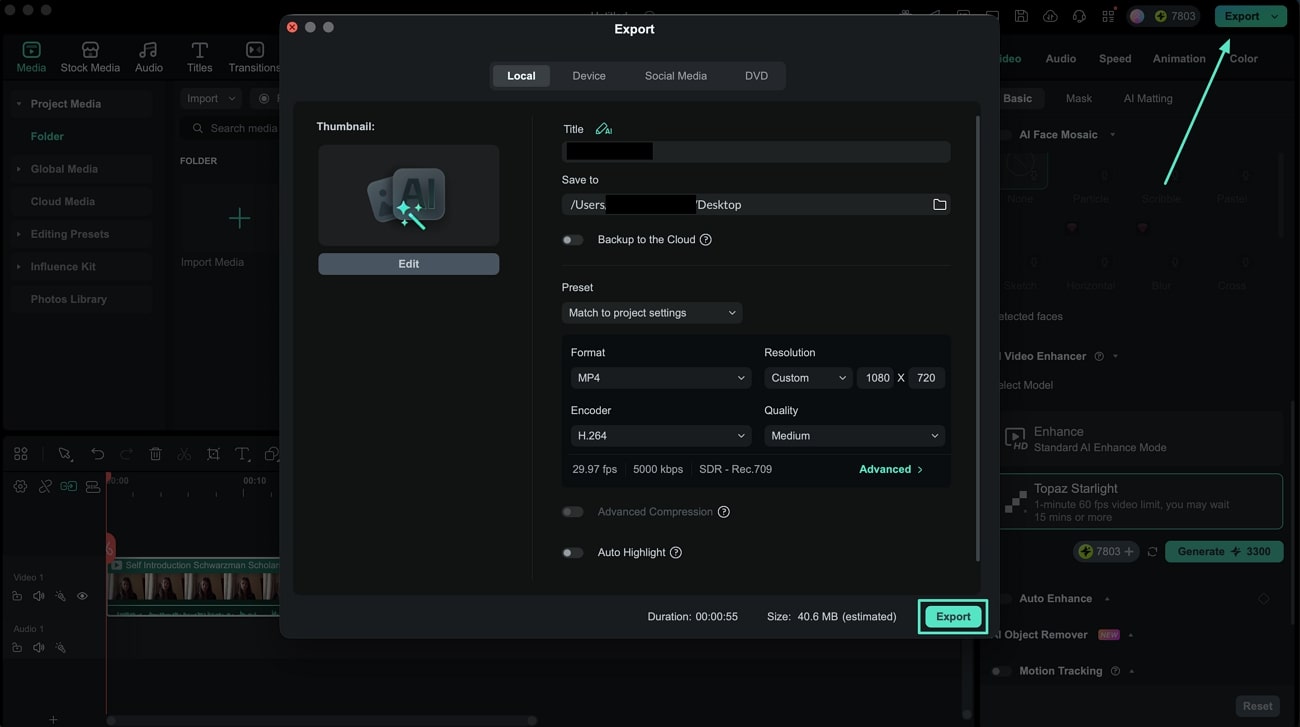
Step 5. Preview and Export the Video
After the enhancement is complete, review the final output and click Export in the top-right corner to save the video to your Mac.
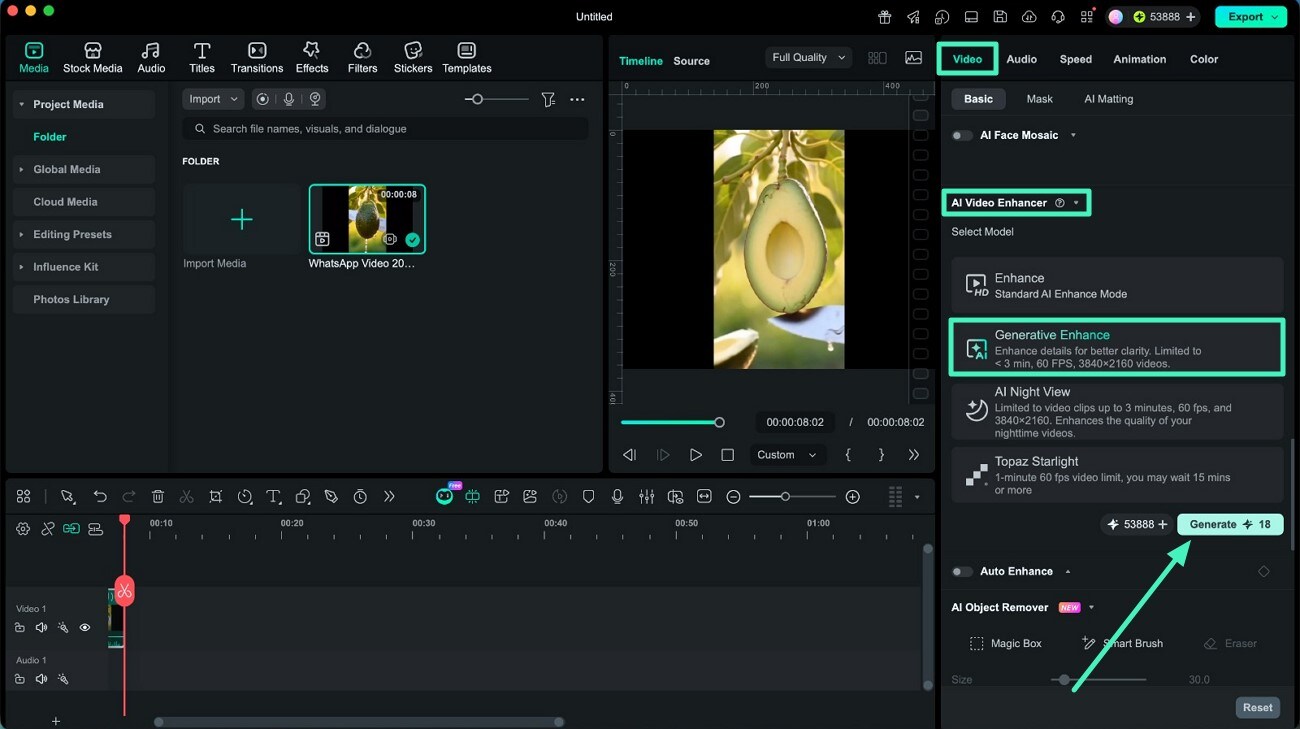
Improving the quality of low-resolution or blurry videos no longer requires third-party enhancement software. Generative Enhance in Filmora for Mac leverages an advanced generative AI model to restore fine details, sharpen soft footage, and produce more realistic textures while preserving a natural look. It is particularly useful for enhancing old recordings.
The feature supports videos up to 3 minutes long, with a maximum frame rate of 60 FPS and a maximum resolution of 3840 × 2160 (4K UHD), allowing you to enhance video quality directly within your editing workflow.
Step 1. Import Your Video and Enable Generative Enhance
Open your project in Filmora for Mac and import the video you want to enhance. Select the clip on the timeline, then open the Video tab from the inspector panel on the right. Scroll to AI Video Enhancer, choose Generative Enhance, and click Generate to begin processing.
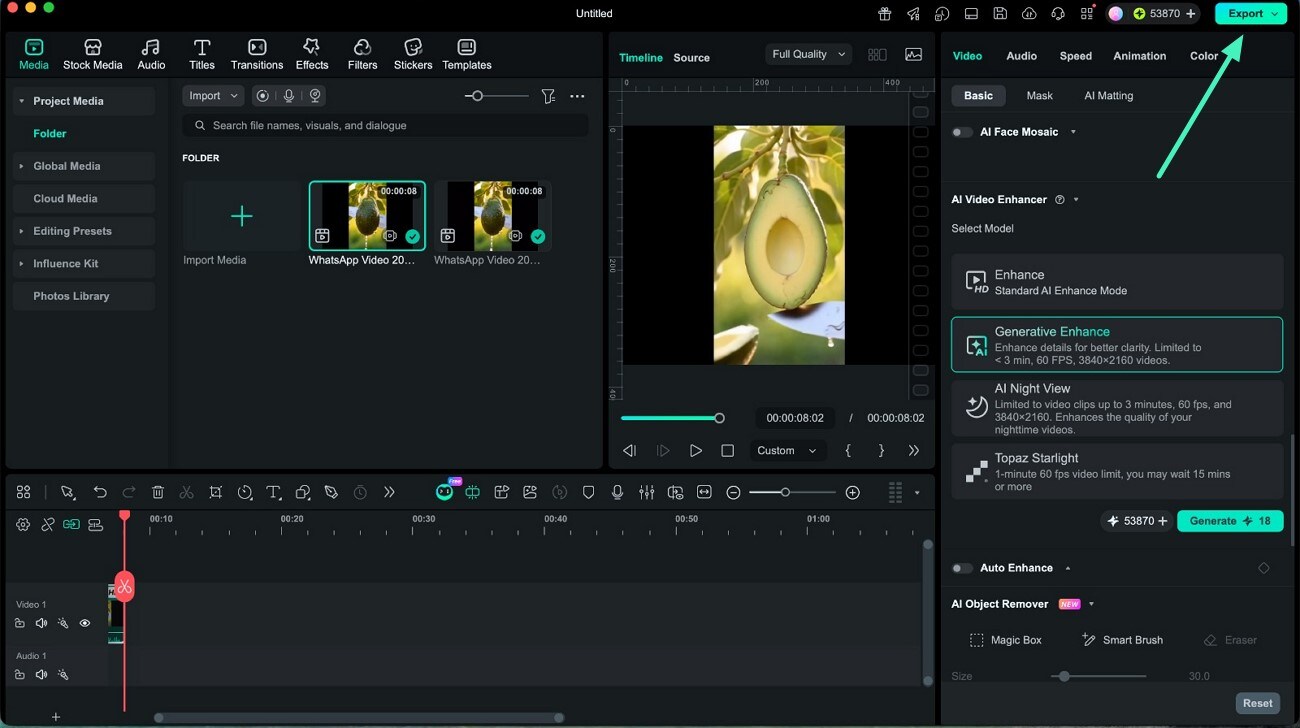
Step 2. Review the Enhanced Video and Export
After the AI finishes processing, compare the enhanced clip in the preview window. If you're satisfied with the improved sharpness and detail, click Export to save the enhanced video to your Mac.
Related Posts
Featured Articles
Learn more popular articles from Wondershare.
How To Make Subtitles/Captions Like MrBeast
Due to his success, MrBeast fans also aspire to be like him. This article looks into creating video subtitles in the MrBeast font to make content like his.
Latest | 7 Best Free Screen Recorders With No Watermark
Is there any screen recorder without a watermark? Check our top picks!
How to Crop Screen Recordings? [PC | Mac | Mobile]
Are you looking for ways to crop the unwanted parts of a screen recording and keep only the required parts? here is an article that will teach you how to crop screen recordings on your Windows, Mac, and mobile.
Recommended User Guide
Learn how to use more features.
Mask on Mac
If you want to blur any part of a video, use mask. This guide will show to how to add mask to video with Filmora.
Text Animation Path for Mac
Filmora has introduced an exciting new feature—Text Path Animation. It enables creators to animate text along a customizable path, making it easier to emphasize key phrases, titles, or special effects in videos. Here's everything you need to know to make the most of this feature and enhance your video content.
Filmora Motion Blur | Mac
Here is the guide on how to use the Motion Blur in Filmora on Mac.
