
 100% Security Verified | No Subscription Required | No Malware


PowerPoint is an excellent tool for creating presentations, and it has been at the helm of this industry for decades. However, if you want your presentation to stand out, you need something extra.
Let’s assume that you have a PowerPoint presentation and want to repurpose it for YouTube. With Wondershare Filmora, you can do this easily. This is the best video editing tool with image and audio editing capabilities. You can use it to record your presentation and add audio, or you can make a new one from scratch.
Let’s jump in and see how.
For a more detailed guidance, please jump to the next part.
In this article
Task 1: Record Your Screen while the Presentation is Playing
The first step is to start recording the screen. We will give you step-by-step instructions on how to do it. In any case, you need to download Filmora and install it on your computer. Then you need to run the program and open a new project. This is all very intuitive, and you don’t need our help.
 secure download

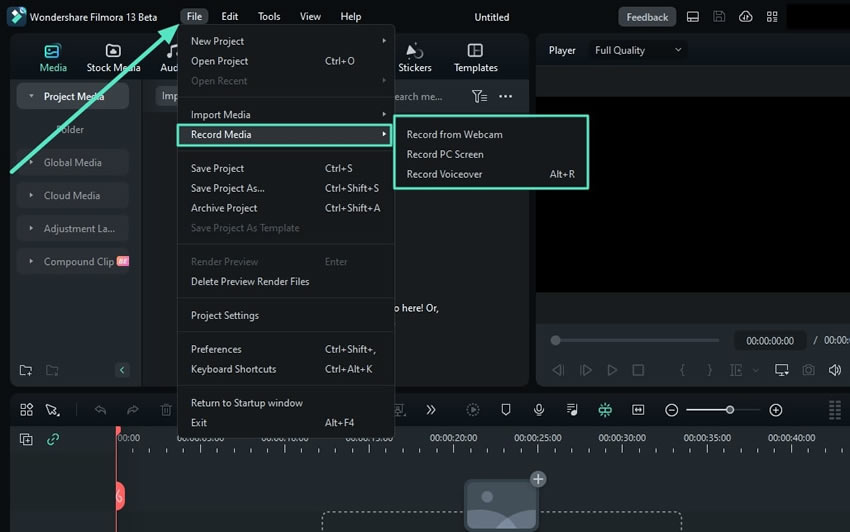
Step 1: When you open a new project, click on File > Record Media > Record PC Screen.
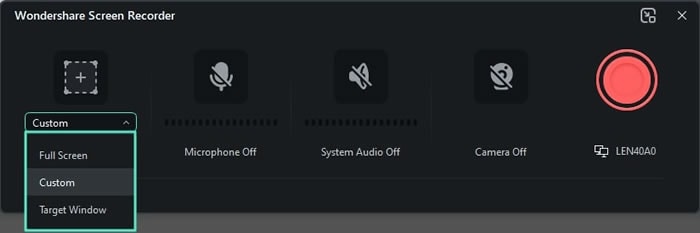
Step 2: Select the part of the screen you want to record. Since you are recording a PowerPoint, we suggest that you play your presentation in full screen and record it like that. Therefore, you should select Full Screen from the dropdown menu.
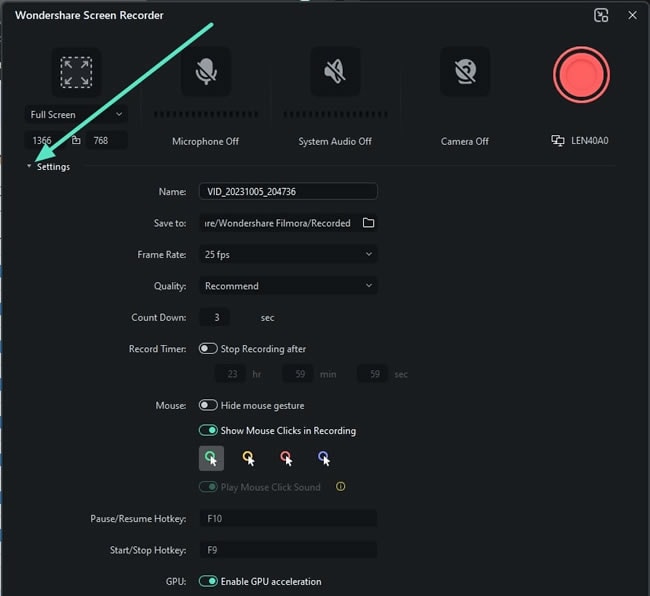
Step 3: You can also adjust the advanced settings. We will leave this up to you. Scroll through the options and select the ones you like.
Step 4: Click the big red button to start recording.
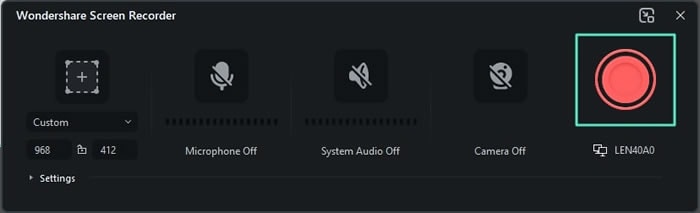
When the recording is activated, you can open your PowerPoint presentation, set it to full-screen, and wait for it to finish. When you are done, click the big red button again to stop the recording.
Presto, your entire presentation is recorded and it is ready for further editing.
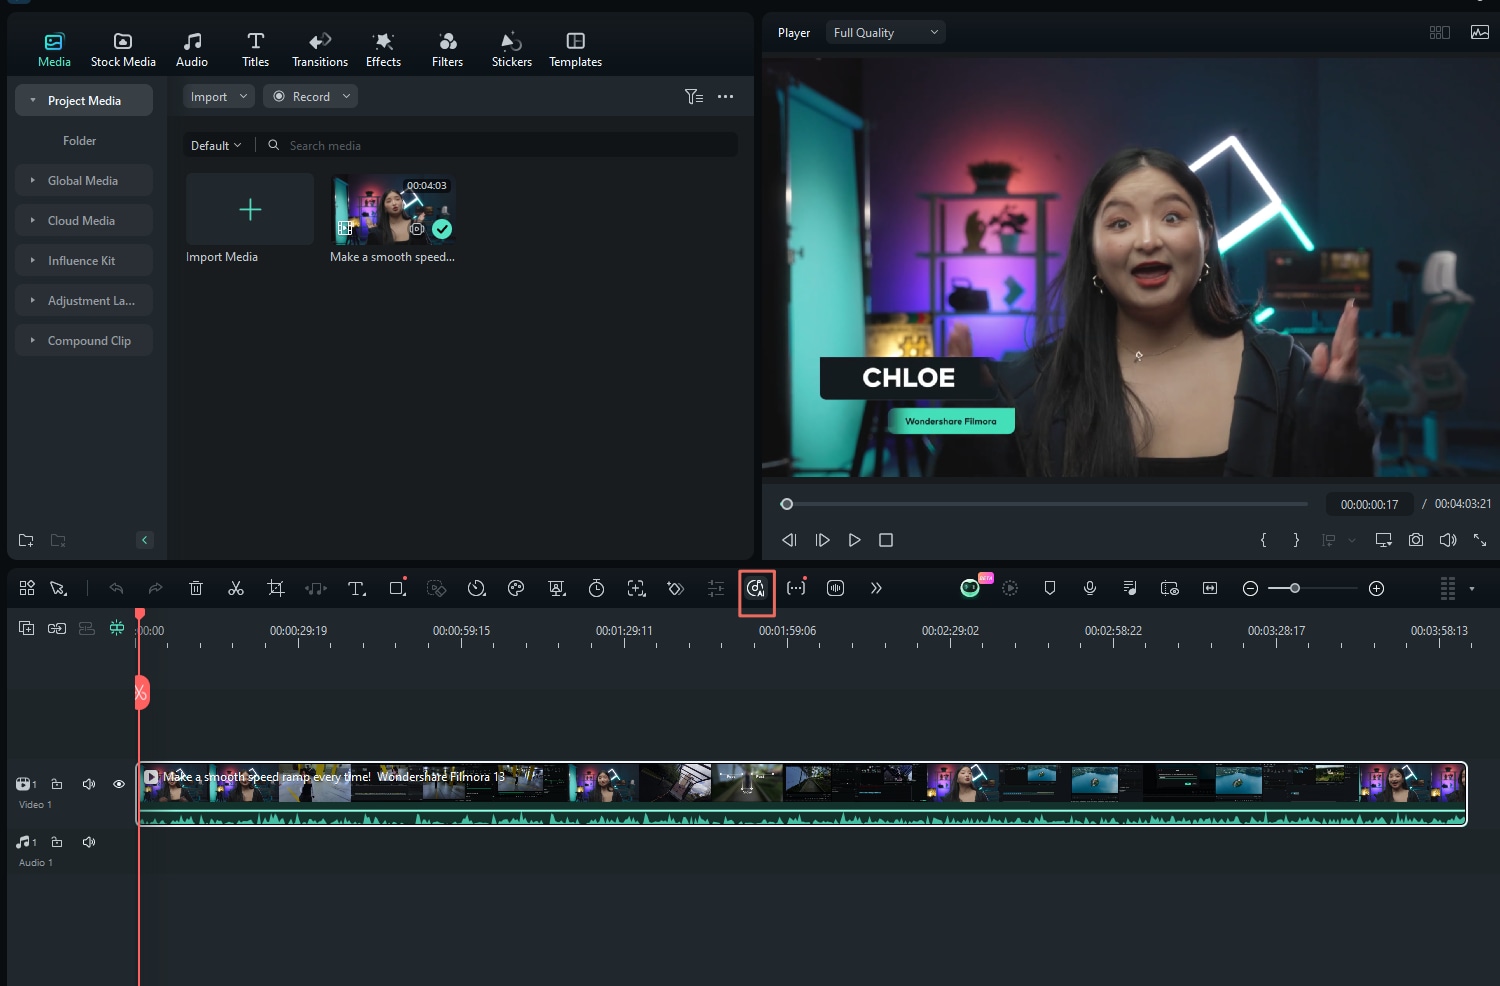
Task 2: Trim the Recording to Perfection
Surely, the beginning and the end of the video are not perfect. The recorded video certainly does not start when the presentation begins, nor does it end when the presentation ends. That’s why Filmora has the Trim function. Here’s how to use it.
Simply select the video in the timeline. Hover with your mouse over the beginning and end of the video until the Trim tool appears. Then, click and drag to trim the video to perfection.
This will help you set the correct beginning and end of your presentation.
Powerful AI video editor for all creators

Add audio to the presentation
There are two options here, and this is mainly related to whether you want the presentation to have commentary.
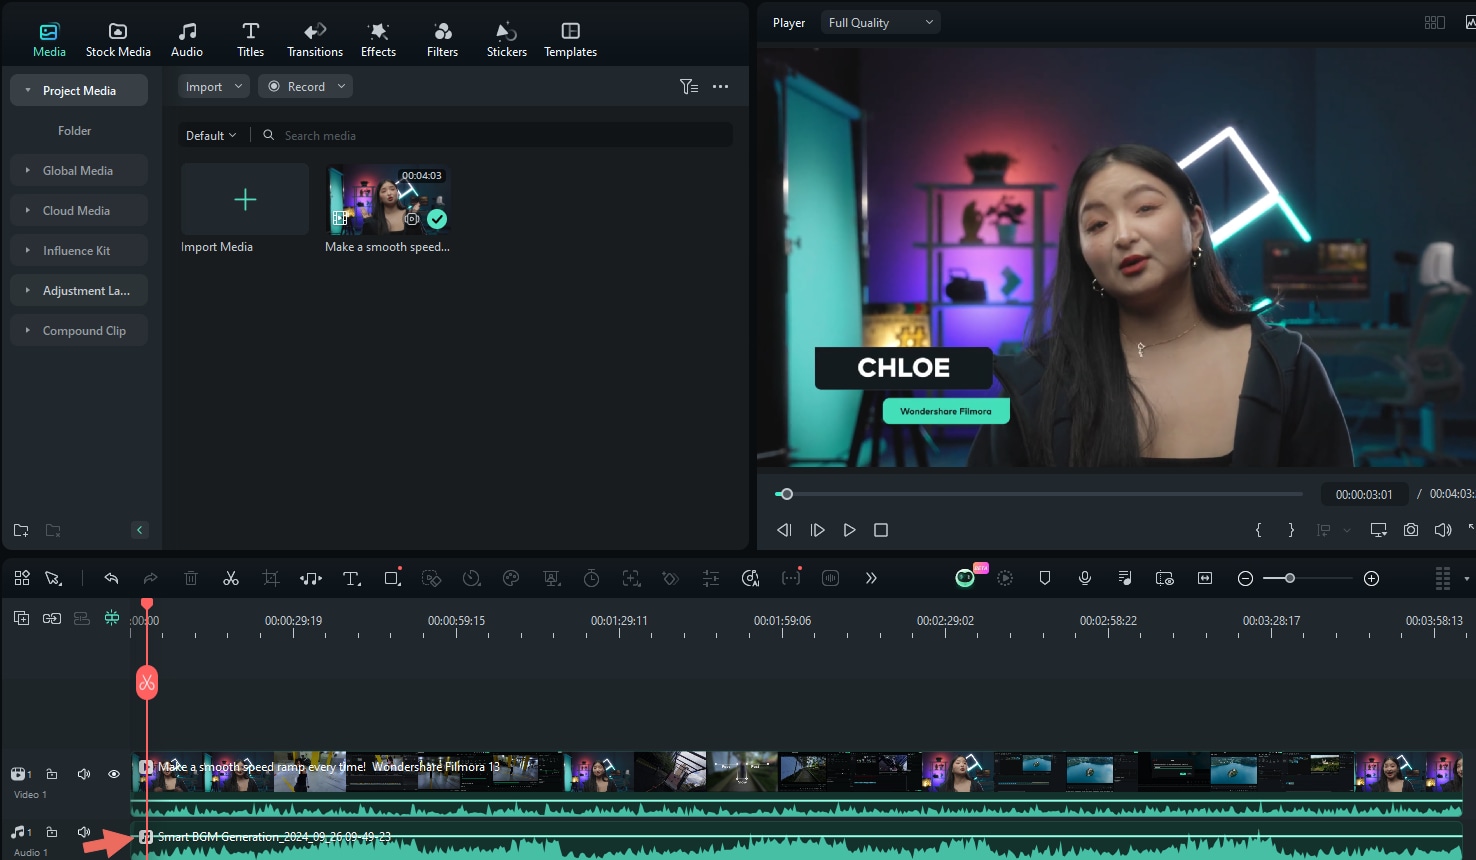
If you want it to be a silent presentation, then you can use Filmora to generate background music. Here’s how to do it.
Step 1: Click on the video in the timeline and find the Smart BGM Generator button.
Step 2: Filmora will take some time to generate the audio, but when it does, the new audio file will appear below the original video file in the timeline.
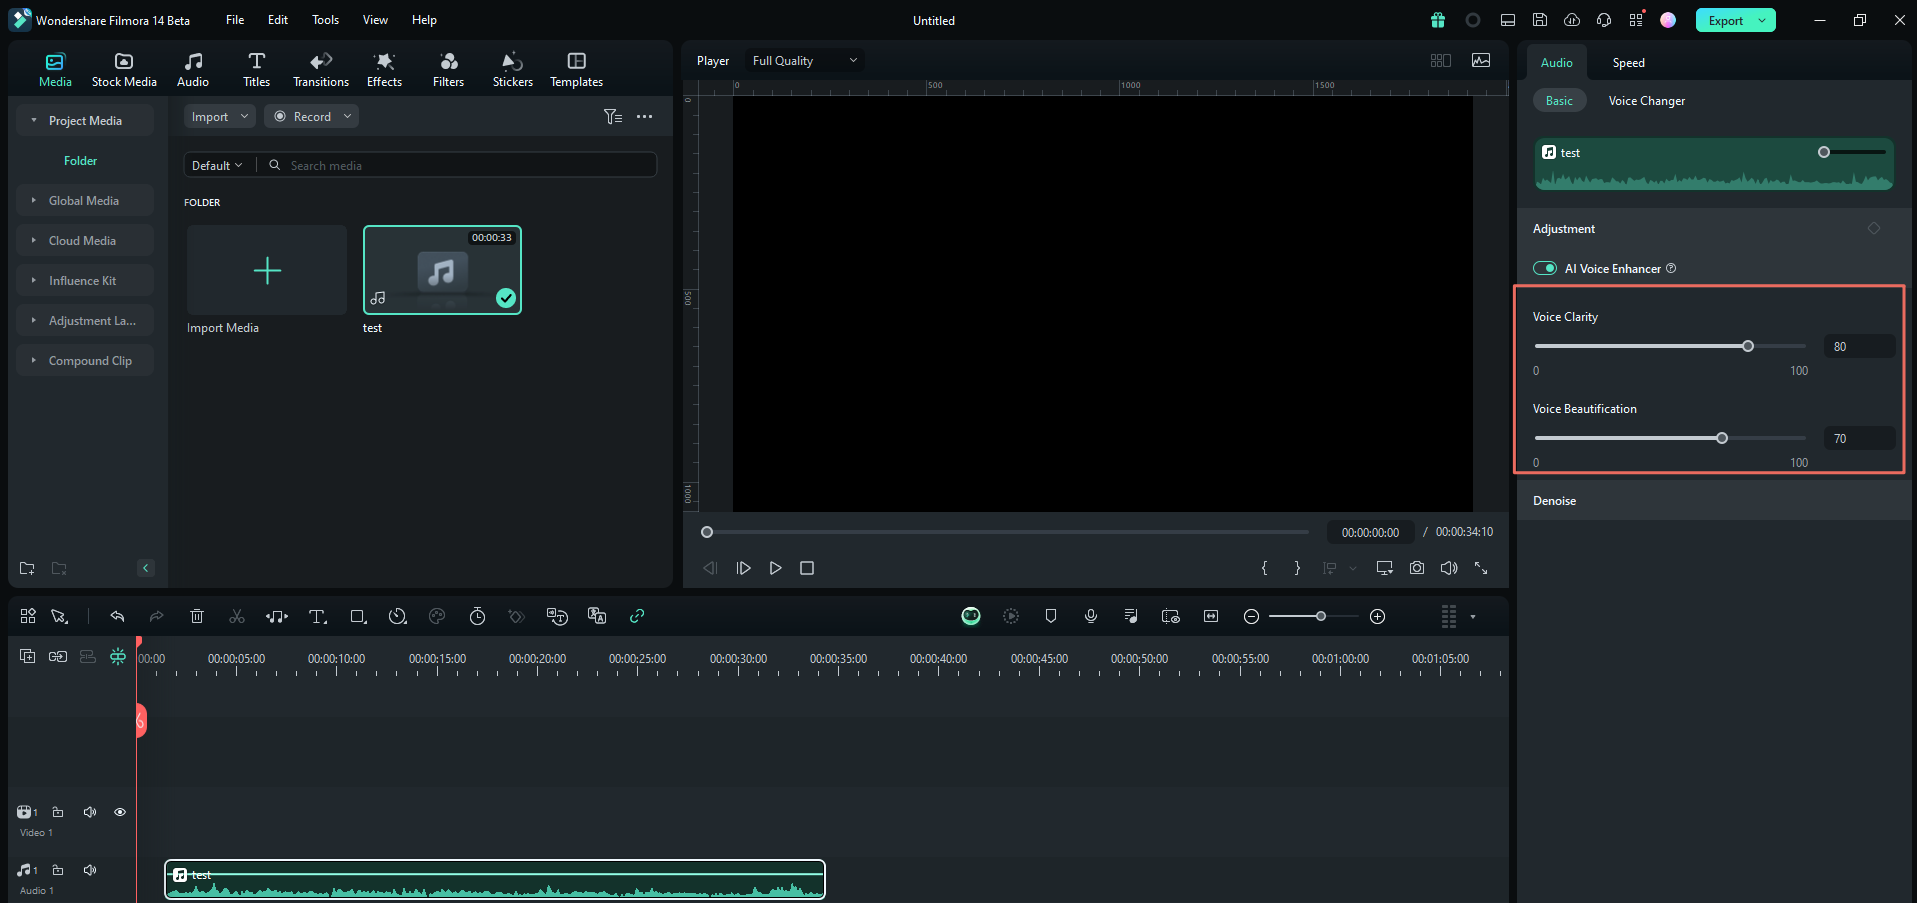
If you do have a voice recording over the presentation, but you are not satisfied with the quality of sound, you can use Filmora’s AI Voice Enhancer to make your voice sound better.
Step 1: To do this, simply select the audio file in the timeline and, on the right-hand side, click on Audio and then Basic. You will see the option to activate the AI Voice Enhancer.
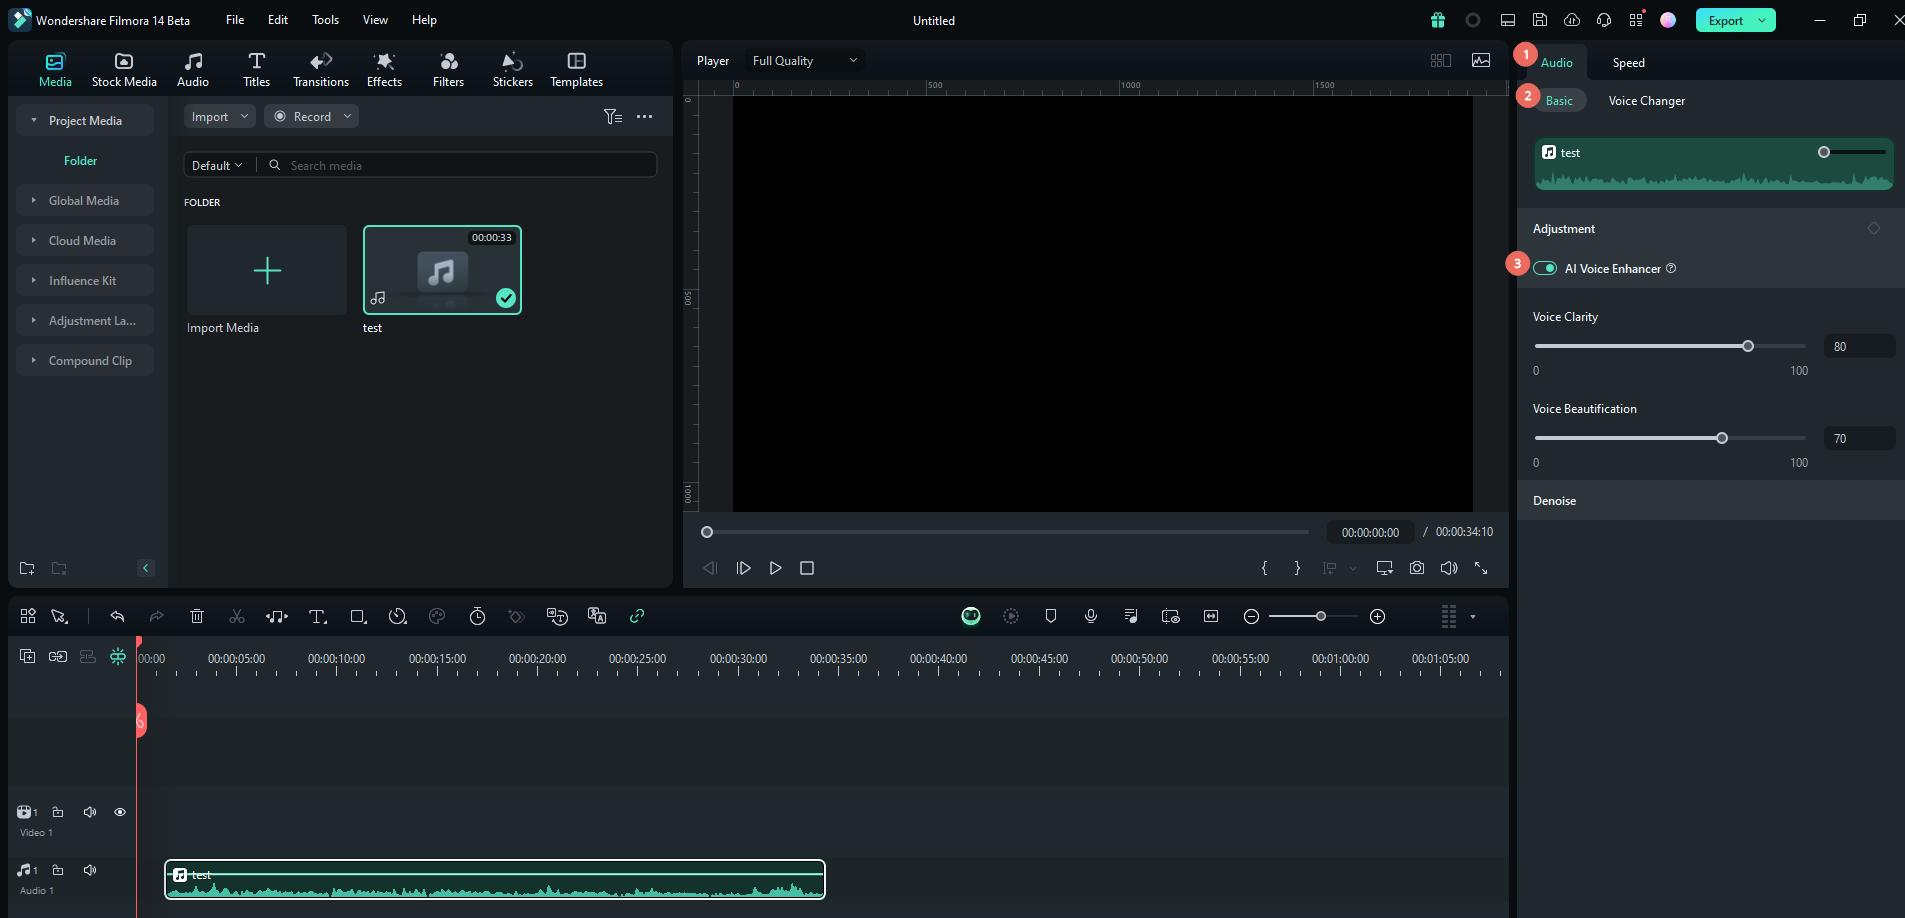
Step 2: Adjust the parameters to your liking.
As you can see, Filmora offers several helpful features that will help you record a PowerPoint presentation and transform it into a cool video that you can upload to your channel. But what if we told you that you don’t need PowerPoint to make a presentation? You can do everything in Filmora.
Here’s how.
Make the Entire PowerPoint Presentation in Filmora from Scratch
Filmora is a very versatile tool and you can use it for a variety of purposes. Let’s see how to make a presentation in Filmora.
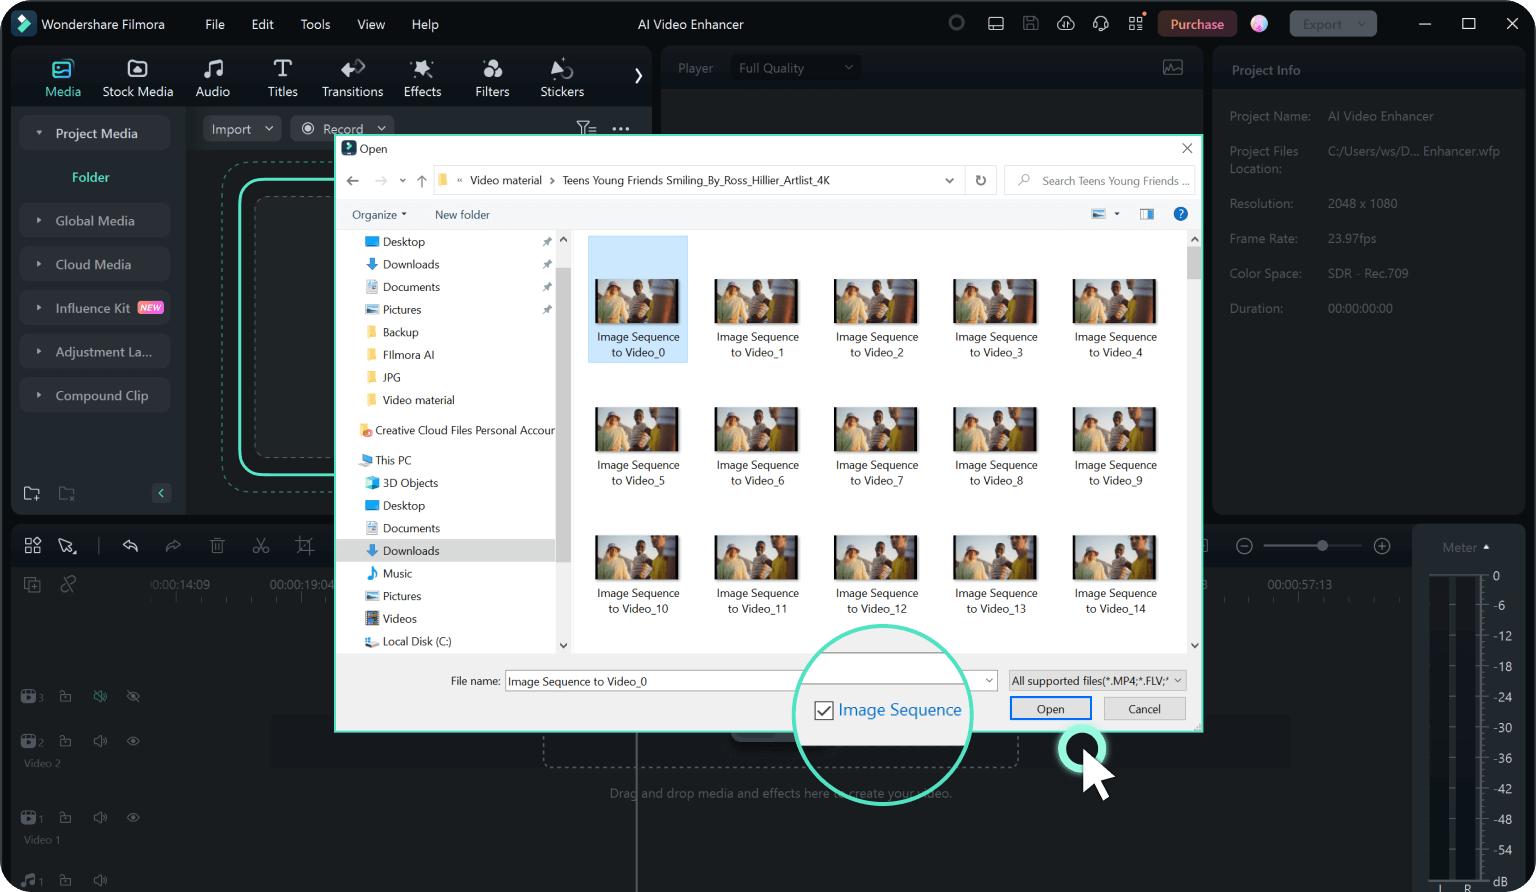
The first thing you need to do is add an image sequence. When you are uploading media, just make sure that the Image Sequence box is ticked.
You can use the Trim function (explained above) to set the duration of each image in the timeline.
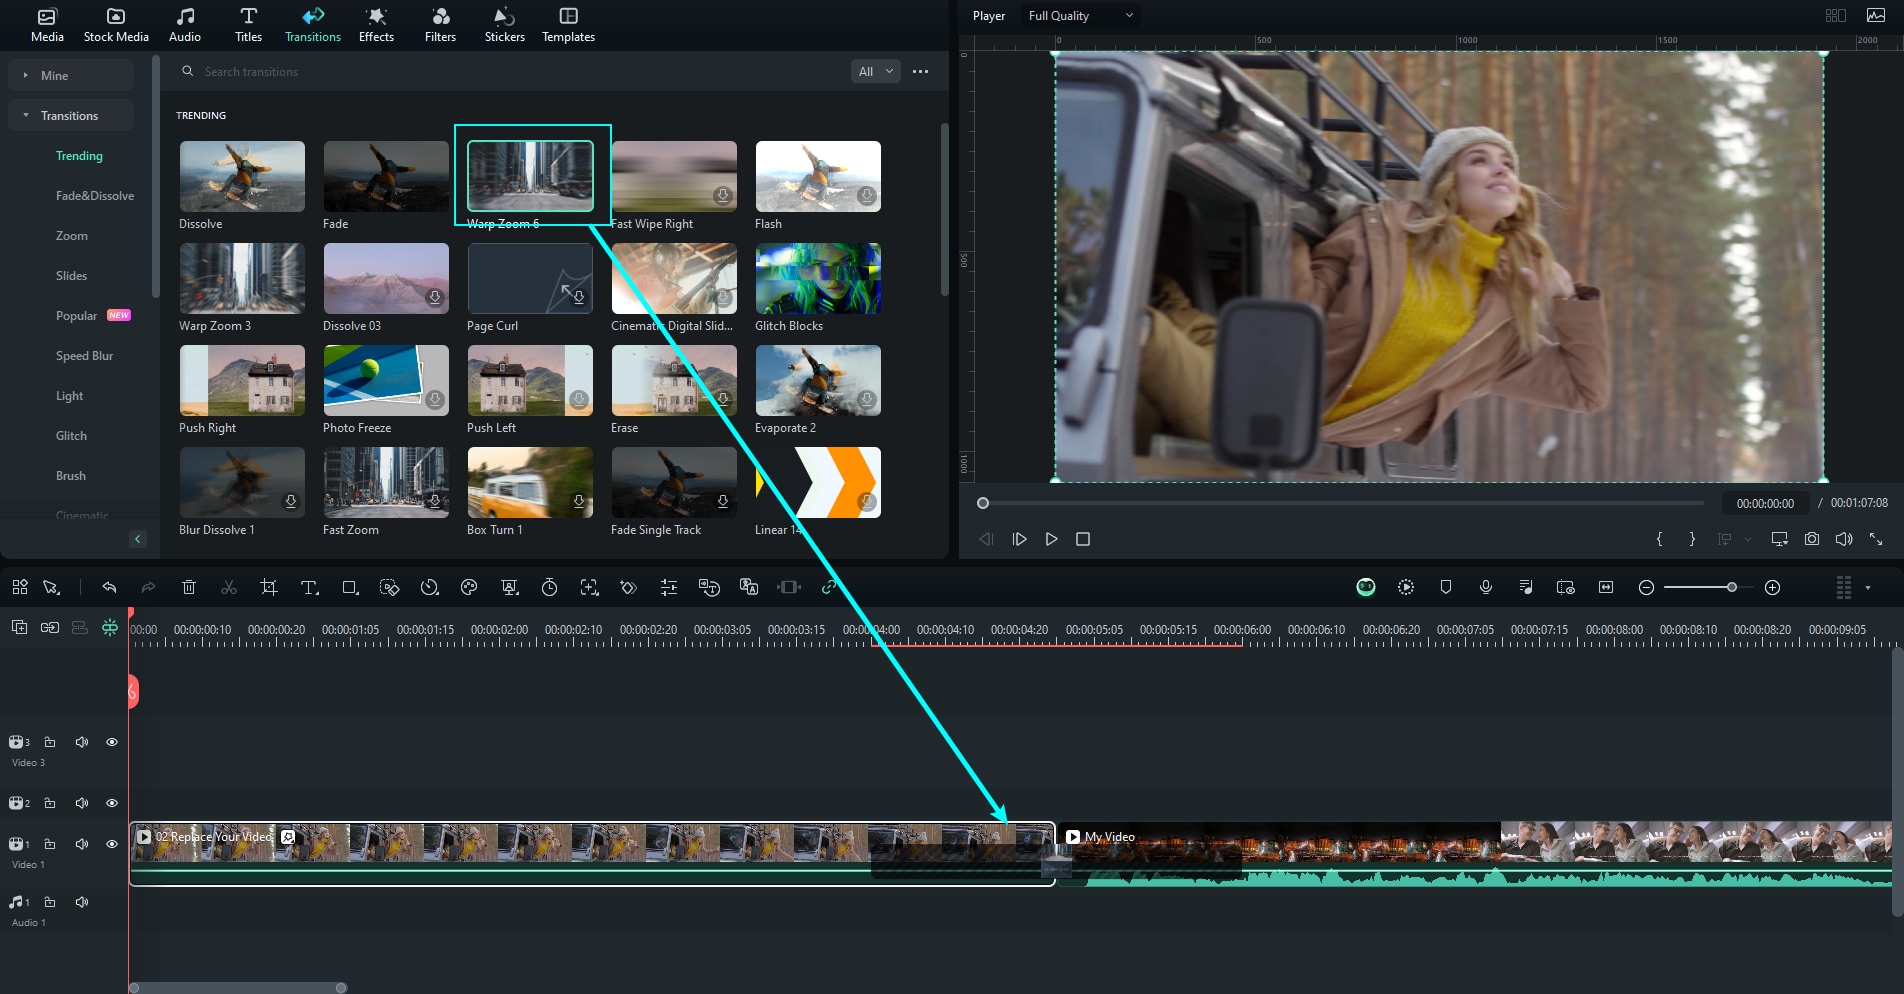
Filmora has a better transition effects library than PowerPoint
To add transitions between images and make the entire presentation more engaging, simply click on Transitions in the top-left corner, find the transition effect that you like, and drag it to the timeline between the images. Simple.
You can even add effects in Filmora
Filmora has an extensive library of effects as well, and you can use those to make your presentation stand out even more.
The process is the same as with transitions. Just find the Effects tab, select the effect you like, and drag it to the timeline.

With all this, you can really transform your PowerPoint presentation into something really special.
Conclusion
As you can see, Filmora is a very versatile tool. Although it is designed to be a video editing tool with excellent image and audio editing capabilities, it also has other features for other types of projects. If you are creative and want to improve your presentation-making capabilities, but also learn to edit videos to perfection, Filmora is an excellent choice.
