For the Best Results, Use the Latest Version.
-
Preparations for Mac
-
Account (Mac)
-
Get Started & Basic Settings (Mac)
- Release notes for Mac
- Latest Versions and Features for Mac
- Get Started on Mac - Full Guide
- Download/register/uninstall on Mac
- Panel Layout on Mac
- Keyboard shortcuts on Mac
- Touchbar on Mac
- Change playback quality on Mac
- Render preview files on Mac
- Manage Timeline on Mac
- Media for use on Mac
- Logo Reveal For Mac
- Marked Favorites for Mac
-
Compatibility & Tech Specs (Mac)
-
Performance Settings (Mac)
-
-
Creating Projects - Mac
-
Creating New Projects (Mac)
-
-
Importing & Recording - Mac
-
Importing (Mac)
-
Recording (Mac)
-
-
Video Editing for Mac
-
Basic Video Editing for Mac
- Edit Live Photos on Mac
- Enable/Disable Clip for Mac
- Magnetic Timeline For Mac
- Dual Monitor Setup for Video Editing on Mac
- Select All Clips on Timeline for Mac
- Auto Ripple for Mac
- Split & cut videos on Mac
- Compositing on Mac
- Crop and zoom on Mac
- Playback Zoom Level for Mac
- Change speed on Mac
- Play video in reverse on Mac
- Mark In and Mark Out for Mac
- Markers for Mac
- Group clips on Mac
- Customized Backgrounds for Videos and Images in Mac
- Video snapshot on Mac
- Freeze frame on Mac
- Auto enhance on Mac
- Applying Drop Shadow for Mac
- Adjustment Layer for Mac
- Mark clip on Mac
- Video Editing Ruler – Mac
- Apply Transforming for Mac
-
Advanced Video Editing for Mac
-
AI-Powered Video Editing for Mac
- Smart Scene Cut for Mac
- Smart Short Clips for Mac
- Filmora Image to Video for Mac
- AI Idea to Video for Mac
- AI Text-to-Video for Mac
- Instant Cutter Tool on Mac
- AI Face Mosaic for Mac
- Keyframe Path Curve for Mac
- Planar Tracking for Mac
- AI Extend For Mac
- AI Script-to-Video for Mac
- AI Text-Based Editing in Mac
- Create With Instant Mode on Mac
- ChatGPT Plugin - AI Copywriting on Mac
- AI Smart Cutout for Mac
- Auto reframe on Mac
- Lens correction on Mac
- AI Portrait Cutout on Mac
- Scene detection on Mac
- AI Smart Masking for Mac
- AI Mate Editing for Mac
- Motion Tracking on Mac
- Video Stabilization for Mac
- AI Object Remover For Mac
- AI Smart Search for Mac
- AI Skin Tone Protection for Mac
- Green screen on Mac
- Super Slow Motion with Optical Flow for Mac
- AI stylizer on Mac
- Video Denoise for Mac
-
-
Audio Editing for Mac
-
Basic Audio Editing for Mac
-
Advanced Audio Editing for Mac
-
AI-Powered Audio Editing for Mac
- Audio To Video for Mac
- AI Sound Effect for Mac
- Smart BGM Generation for Mac
- AI Voice Enhancer for Mac
- Audio Stretch for Mac
- AI Audio Denoise for Mac
- Auto synchronization for Mac
- AI Vocal Remover for Mac
- Auto Beat Sync on Mac
- AI Music Generator for Mac
- How to Perform AI Voice Cloning in Wondershare Filmora?
- Silence detection on Mac
-
-
Text Editing for Mac
-
Basic Text Editing for Mac
-
Advanced Text Editing for Mac
-
AI-Powered Text Editing for Mac
-
-
Video Customizations for Mac
-
Video Effects (Mac)
-
Audio Effects (Mac)
-
Transitions (Mac)
-
Stickers (Mac)
-
Filters (Mac)
-
Color Editing (Mac)
-
Animations (Mac)
-
Templates (Mac)
-
Asset Center (Mac)
-
-
Exporting & Share & Cloud Backup - Mac
Filmora AI Mate for Mac
Filmora’s AI Mate on Mac introduces a whole new way to edit, one that feels intuitive, responsive, and creatively energizing. Instead of navigating through panels and menus, you simply communicate your goals, and the assistant interprets your intent with impressive accuracy. It observes what’s happening in your project, understands the assets you’re working with, and adjusts its suggestions to match your editing flow in real time.
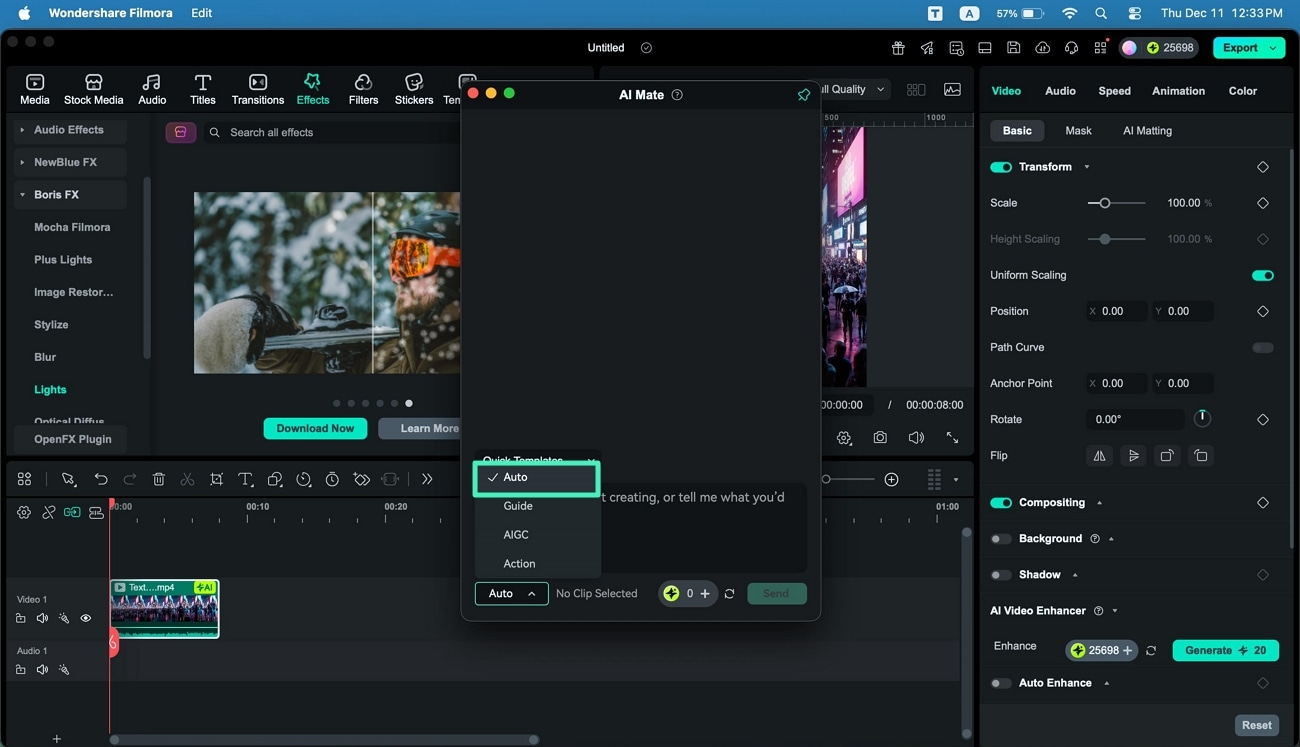
The assistant dynamically shifts between Action, Guide, and AIGC modes depending on whether you need quick adjustments, step-by-step direction, or AI-generated content. Even vague instructions, like asking to soften a clip or enhance a scene, are translated into precise actions. With smart error correction, intention recognition, and rapid prompts, AI Mate turns Filmora for Mac into a more adaptive editing workspace. Now, let’s break down how each mode works:
Mode 1. Action Mode
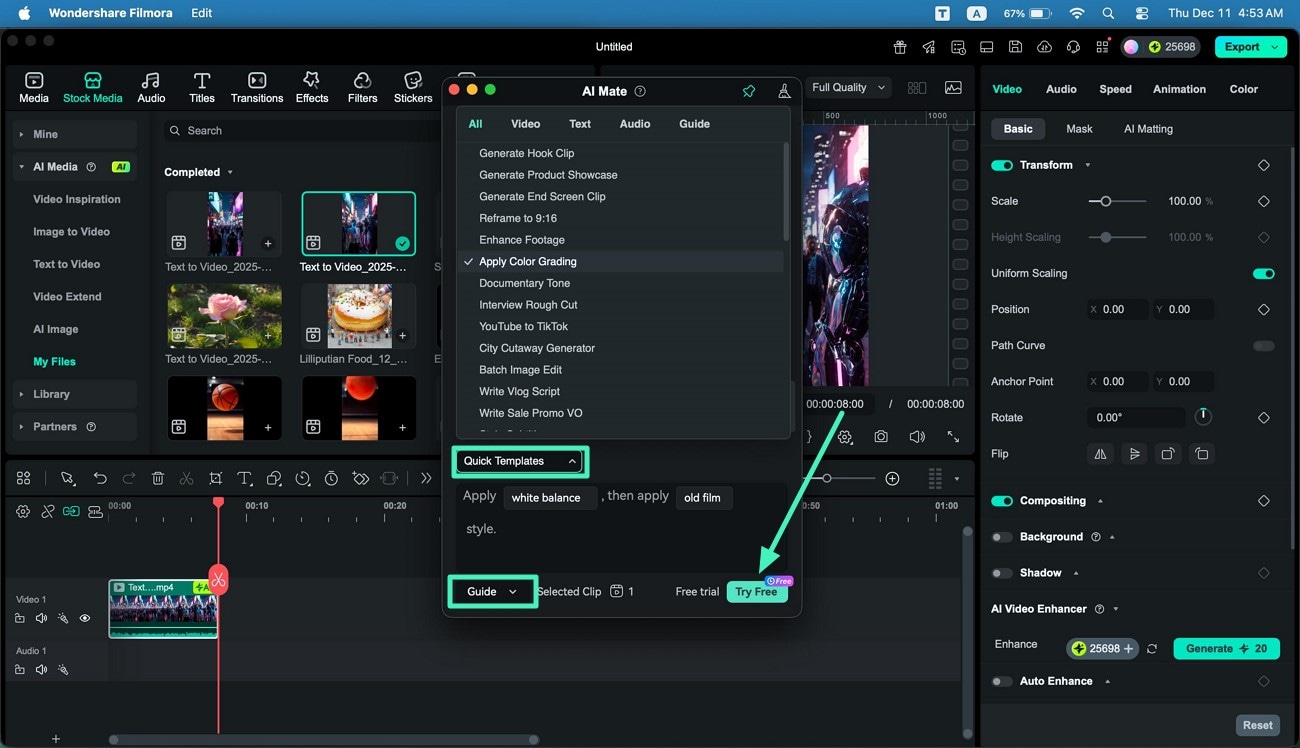
Action Mode in Filmora’s AI Mate lets you execute editing commands instantly while fine-tuning parameters with precision. It processes your instructions to toggle features, adjust values, or apply effects directly to clips or the full timeline. From temperature setting, noise reduction, video stabilization, and auto-framing to AI tools like Smart Script, it handles a variety of modification features. You can also refine audio, color, text, and timeline structure.
Steps to Use Action Mode on Mac
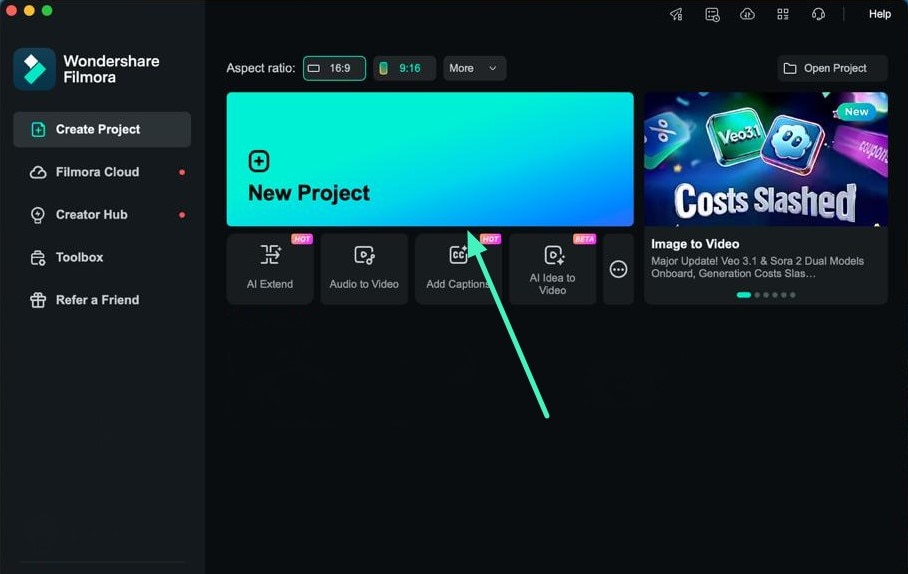
Step 1. Launch Filmora and Create a Project
Open Filmora on your Mac, start a New Project, and import the media you want to work on.
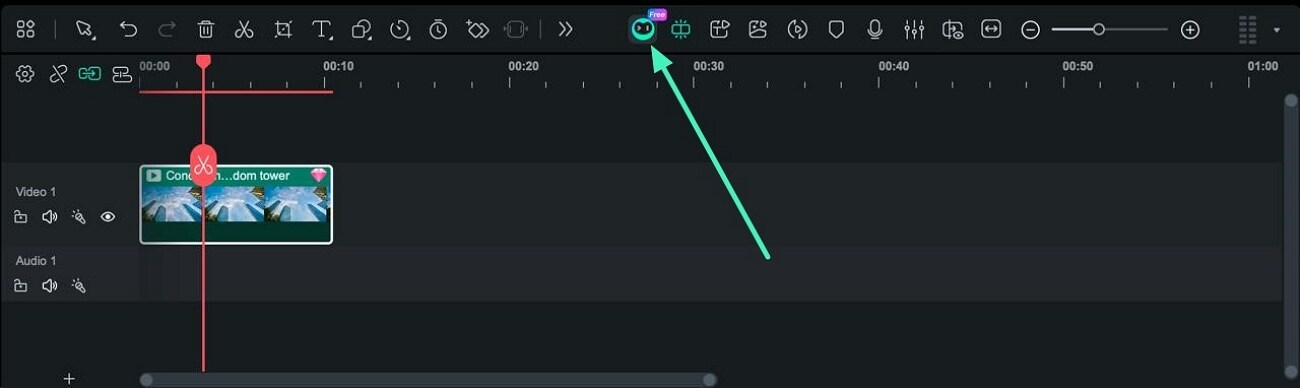
Step 2. Access the AI Mate Feature
In the main editing interface, locate the AI Mate icon above the timeline and click it.
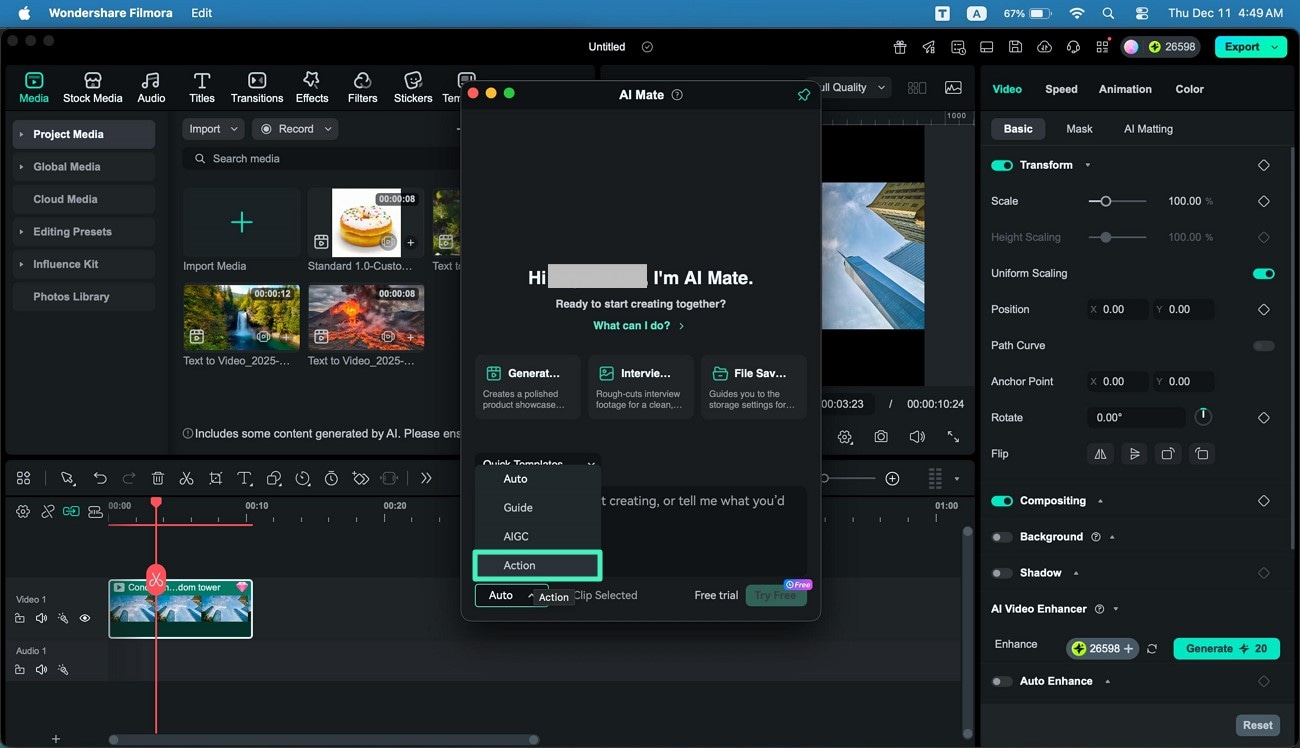
Step 3. Select Action Mode
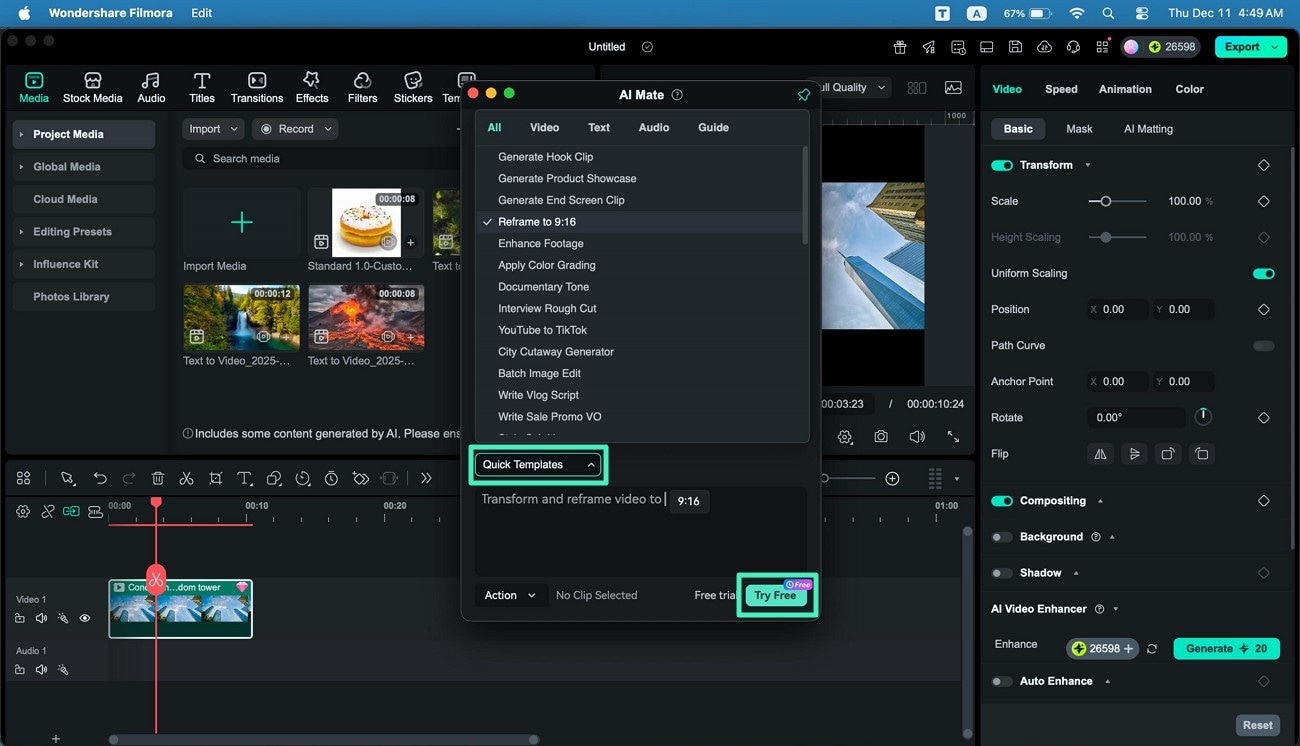
Inside the AI Mate window, open the dropdown menu in the lower-left corner and choose Action.
Step 4. Enter Prompt and Execute
Type your instruction or choose a Quick Template, then press Send to apply the command.
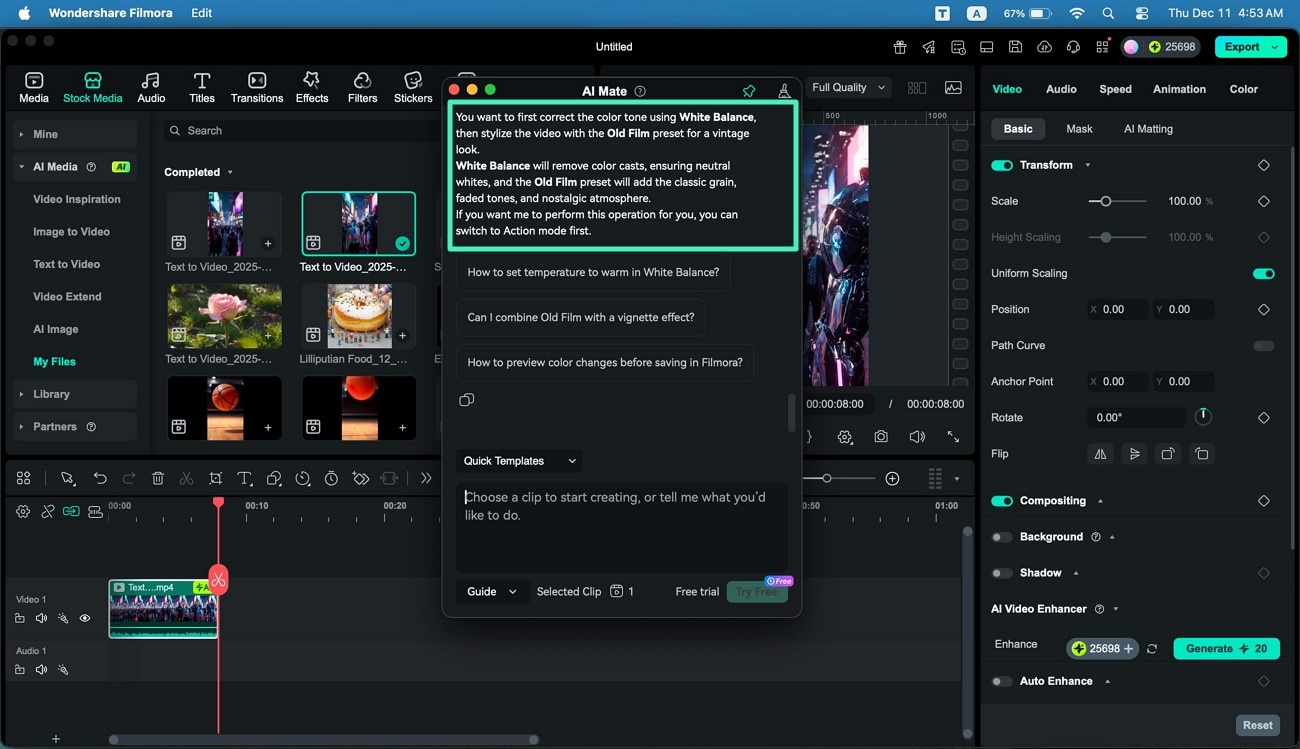
Step 5. Observe the Results
AI Mate will either perform the action, like opening the desired tool panel instantly, or guide you through the steps. Press Start Guide to follow the on-screen instructions for your desired tasks.
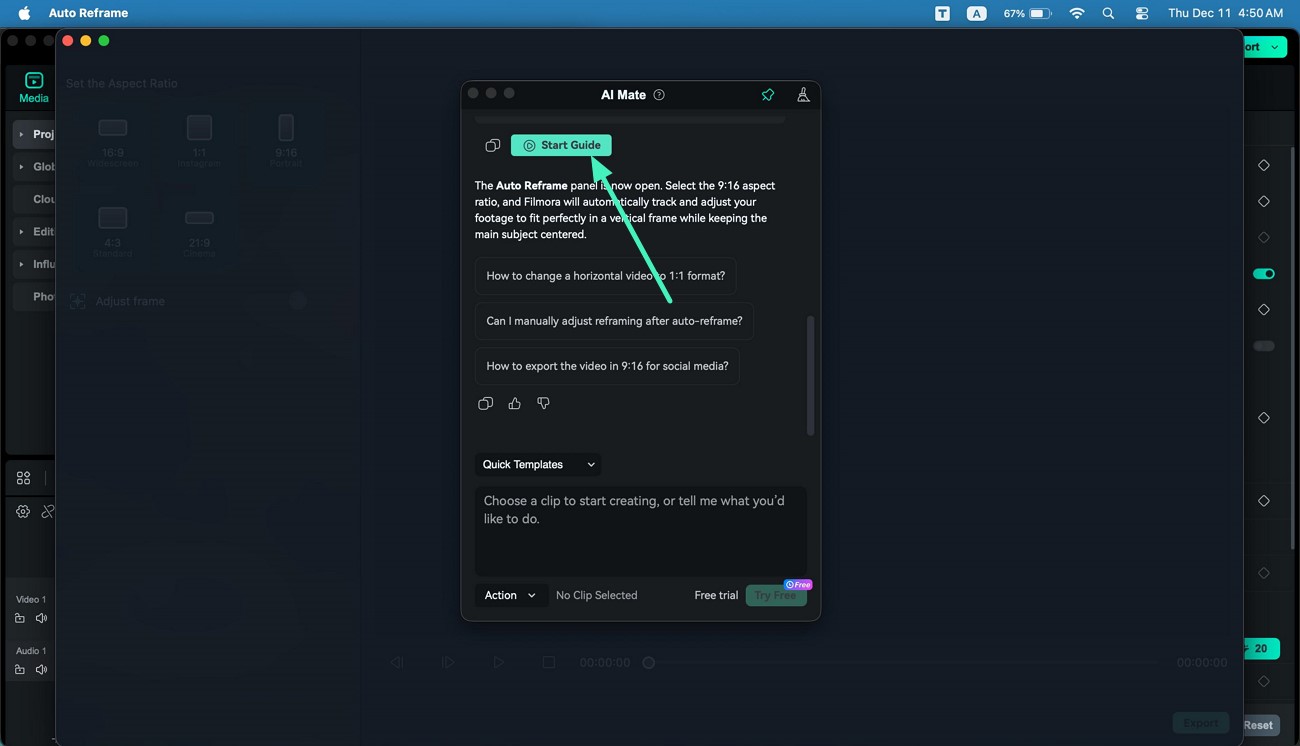
Mode 2. Guide Mode
Guide Mode in Filmora’s AI Mate acts as your built-in instructor, answering “How do I…” or “Where is…” questions with clear navigation support. It can display Guide Cards or move you directly to the correct feature, whether it’s text addition, background processing, screen recording, or AI tools like TTS, translation, and voice changer.
Steps to Use Guide Mode on Mac
Step 1. Access the Guide Mode
Open the AI Mate window and pick Guide Mode from the dropdown menu located on the bottom left. Choose a Quick Template or manually enter your question/command, then click Send.
Step 2. Copy the Generated Results
AI Mate will display a guide explaining the steps for your required task. You can copy the instructions or follow them directly.
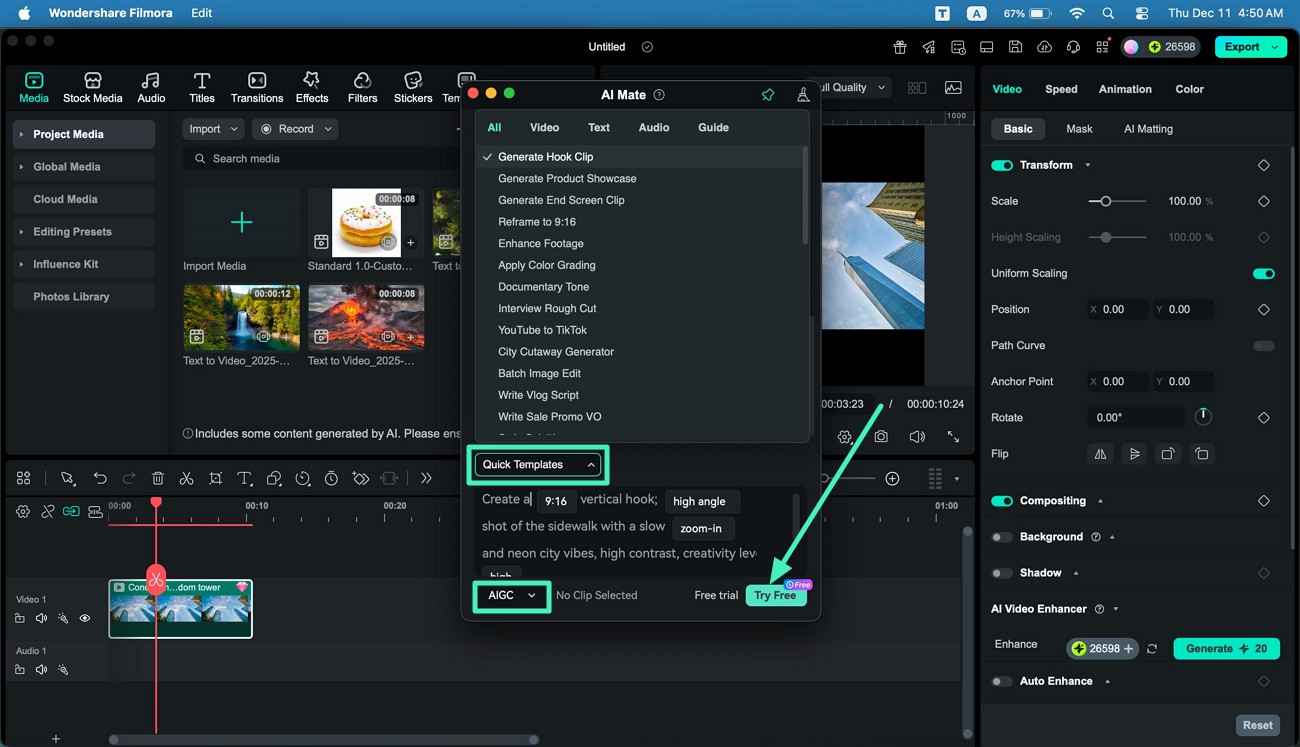
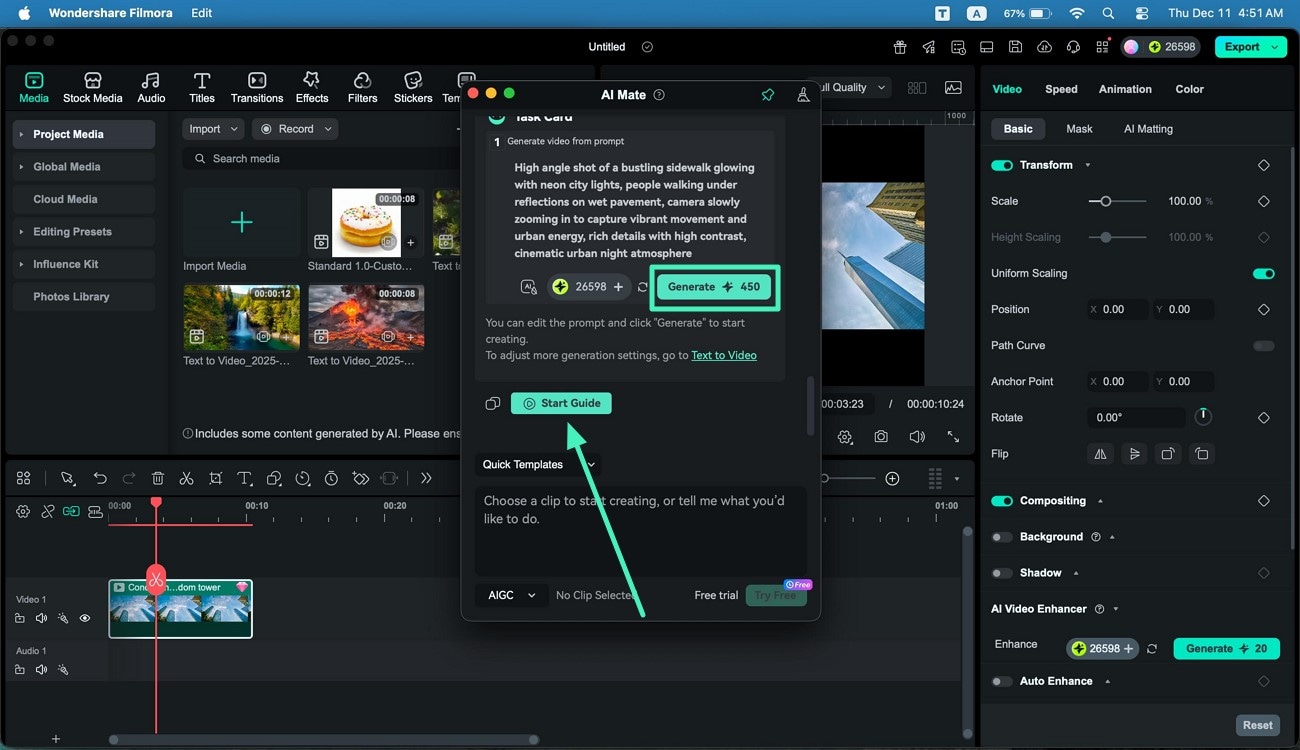
Mode 3. AIGC Mode
AIGC Mode in Filmora’s AI Mate specializes in Text-to-Video generation, allowing you to create videos directly from your prompts with customizable settings. Additionally, it provides quick access to other AI tools like AI Image and Text-to-Music to streamline your creative workflow. You can craft text-to-video outputs using 0–500 characters, choose creativity levels like Strict, Balanced, or Creative, and set aspect ratios such as 9:16, 1:1, or 16:9. By default, it generates 5-second standard-resolution clips. It can also directly activate tools like AI Copywriting, Script Master, Text-to-Music, and Image-to-Video for seamless content generation.
Steps to Use AIGC Mode on Mac
Step 1. Select AIGC and Input Command
Choose AIGC Mode from the dropdown menu located on the bottom left of the AI Mate interface. Enter your text prompt or pick a Quick Template, then hit Send.
Step 2. Follow the Instructions in the Results
Preview the AI-generated suggestions and click Generate to begin. You may also choose Start Guide for manual navigation to get the task done.
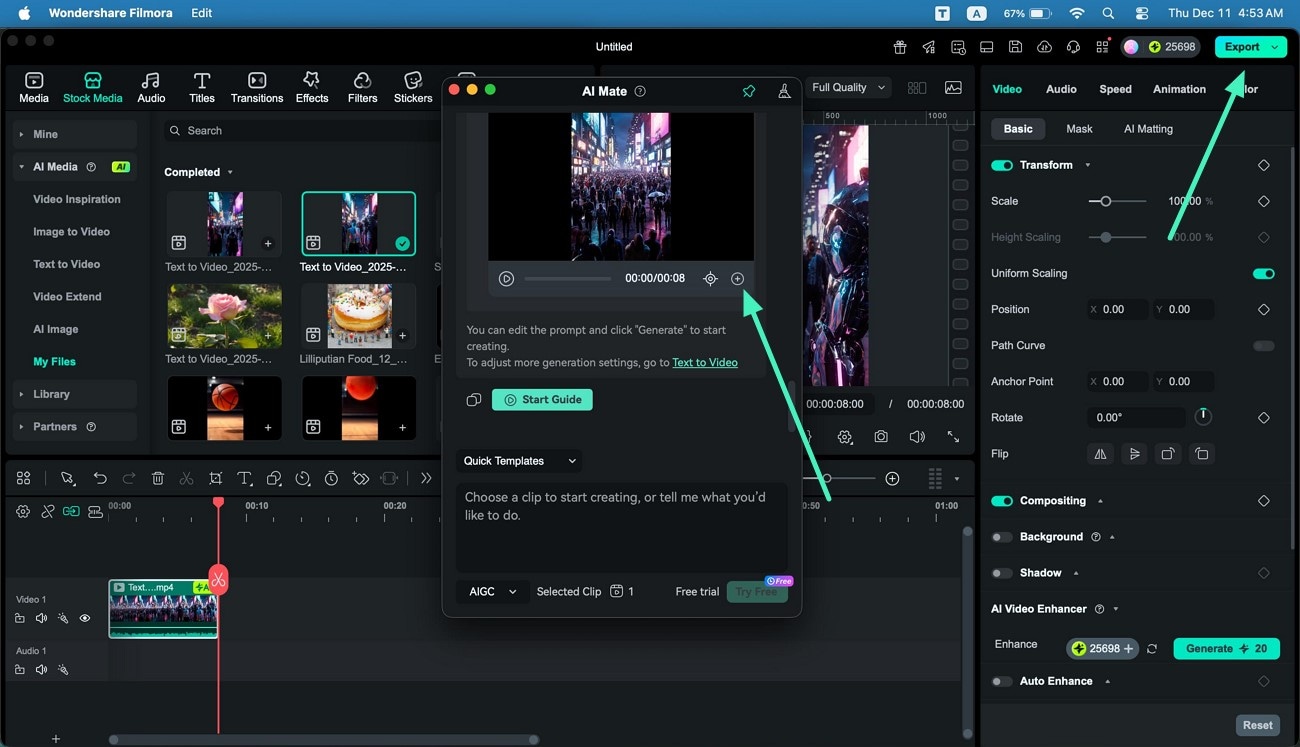
Step 3. Review the Generated Results and Export
After creation, review the output in the preview window by pressing the + icon and press Export in the top-right corner to save the file.
Note: When in Auto Mode, the system detects the user’s language and automatically applies the most suitable mode to process and complete the task.
Related Posts
Featured Articles
Create an Animated Logo Like a Pro: A Complete Beginner's Guide
Check out the best tools to make animated logo videos. Learn step-by-step how to animate your brand logo, where to use it, and tips to make it look professional.
How to Zoom in CapCut Desktop | Online | Mobile?
If you are using CapCut and want to use the zoom-in effect, this article is for you. Learn how to zoom in on video on CapCut desktop, mobile, and online for free.
How to Run Snapchat Ads: A Complete Guide for Businesses
Want to run Snapchat Ads? This complete guide covers everything from creating ads with AI tools to track performance to grow your campaign.
Recommended User Guide
Planar Tracking for Mac
You will learn how to use Planar Tracking in your videos
Smart Scene Cut for Mac
This guide explains how to use Planar Tracking in your videos on Mac.
AI Script-to-Video for Mac
Here is the guide on how to use the AI Script to Video feature on the Mac.
