100% Security Verified | No Subscription Required | No Malware


 ChatGPT
 Perplexity
 Gemini
 Claude
 Grok
Grok
If you have recorded a video in an environment with low light, you might not get the most out of the scene. Most of these videos lack visibility with shadowed faces and muted landscapes, which makes the video less engaging. To fix this, you need to master how to adjust brightness and contrast in premiere pro. This video editor provides various ways to adjust the radiance as per the requirements.
Read this article till the end if you are looking for how to brighten video in premiere pro effectively. In this article, we will discuss various ways that might help you enhance the overall visuals of your dull videos.
In this article

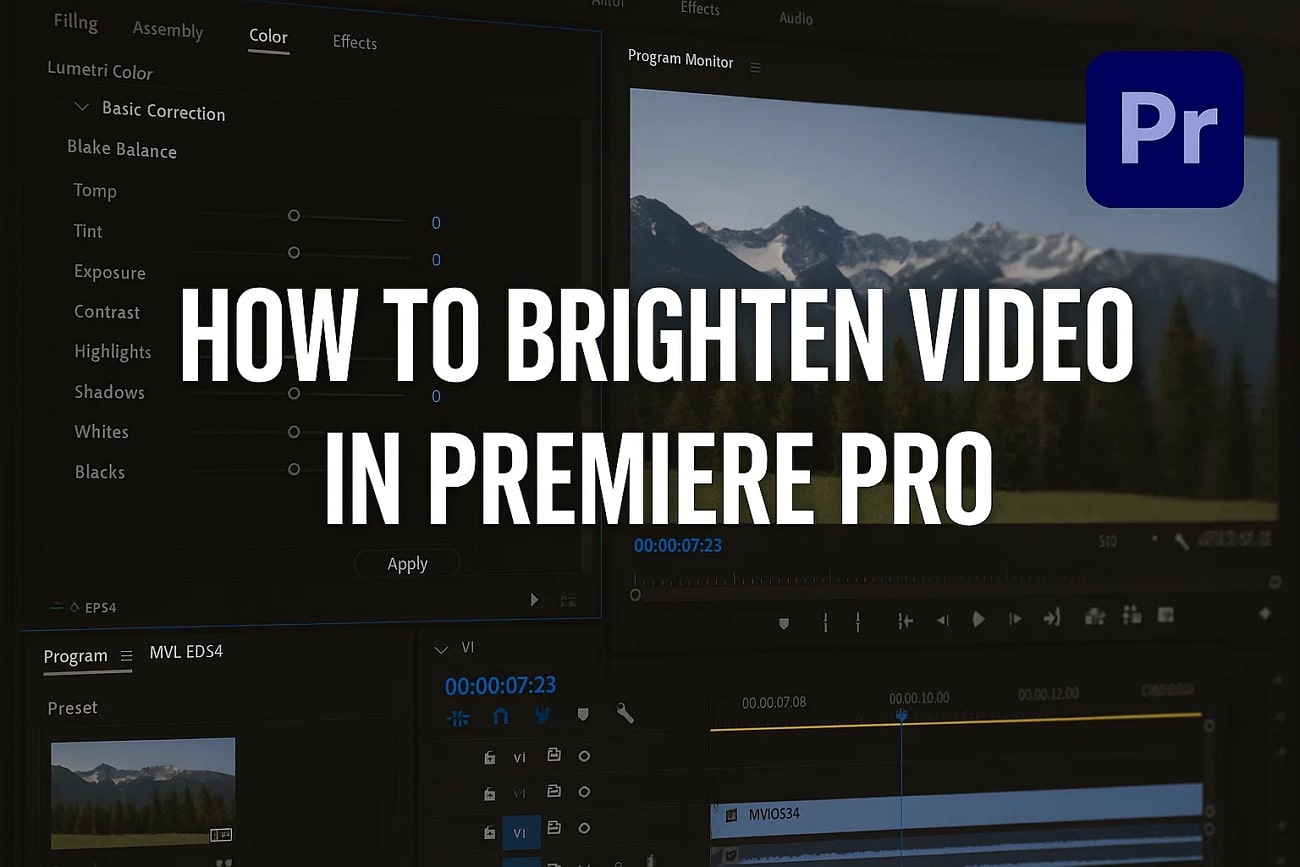
Part 1. How to Adjust the Brightness in Videos in Adobe Premiere Pro?
Adobe Premiere Pro is a professional-grade video editor , and for those just starting out, exploring a few Premiere Pro tutorials is a great way to learn its various adjustment options. You can apply the brightness and adjust its intensity according to your preferences. Along with the brightness, you also get the ability to adjust the contrast to make the visuals look professional-grade.
Moreover, you can apply the brightness effect to a specific area of the video. This helps increase the overall exposure and luminance across a video to brighten up the underexposed scenes. To learn how to adjust brightness in Premiere Pro, read the steps mentioned below:
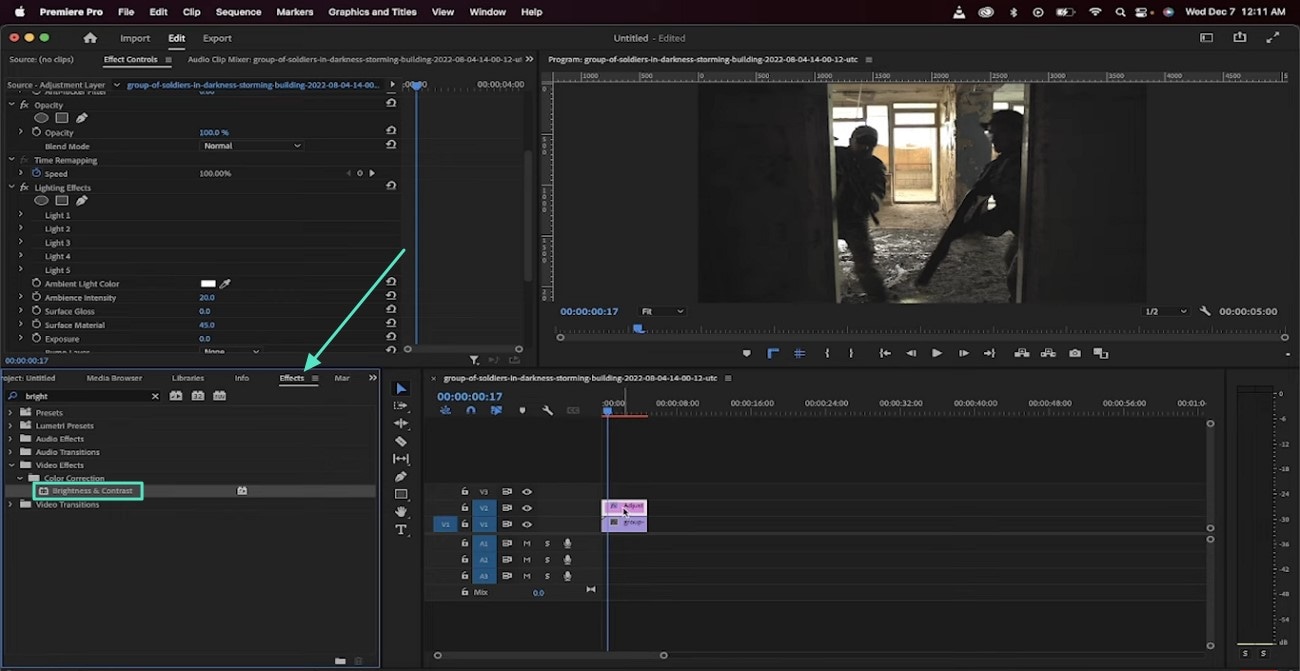
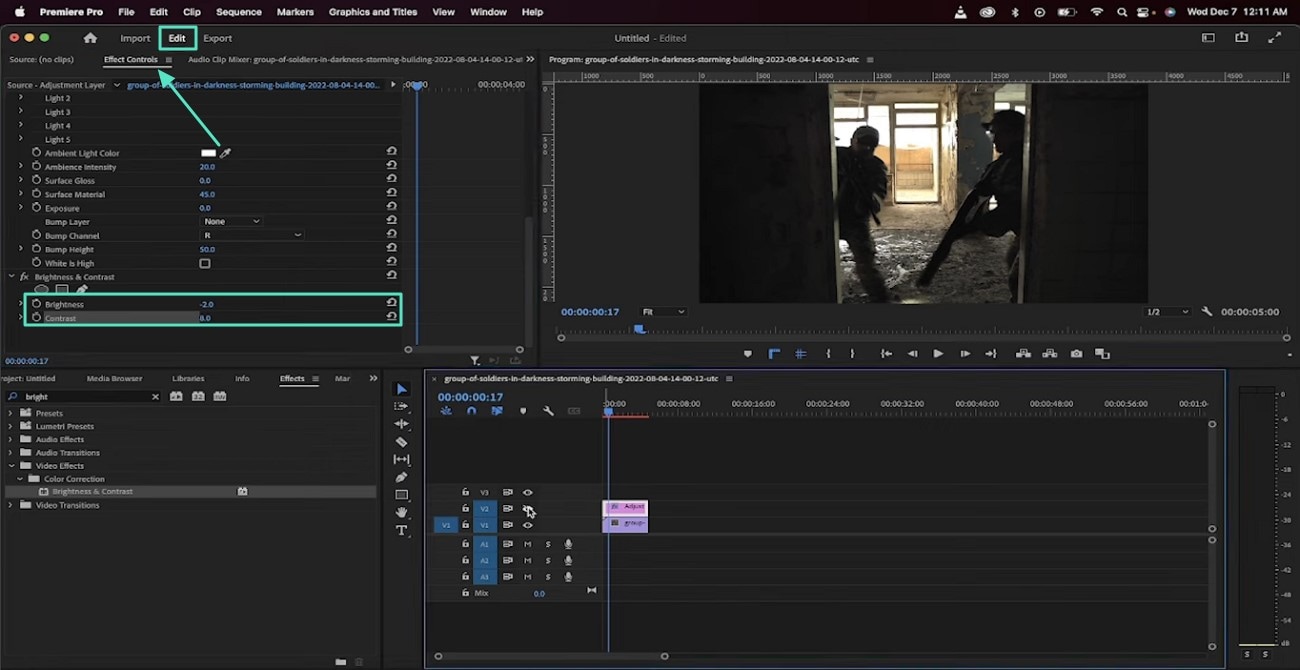
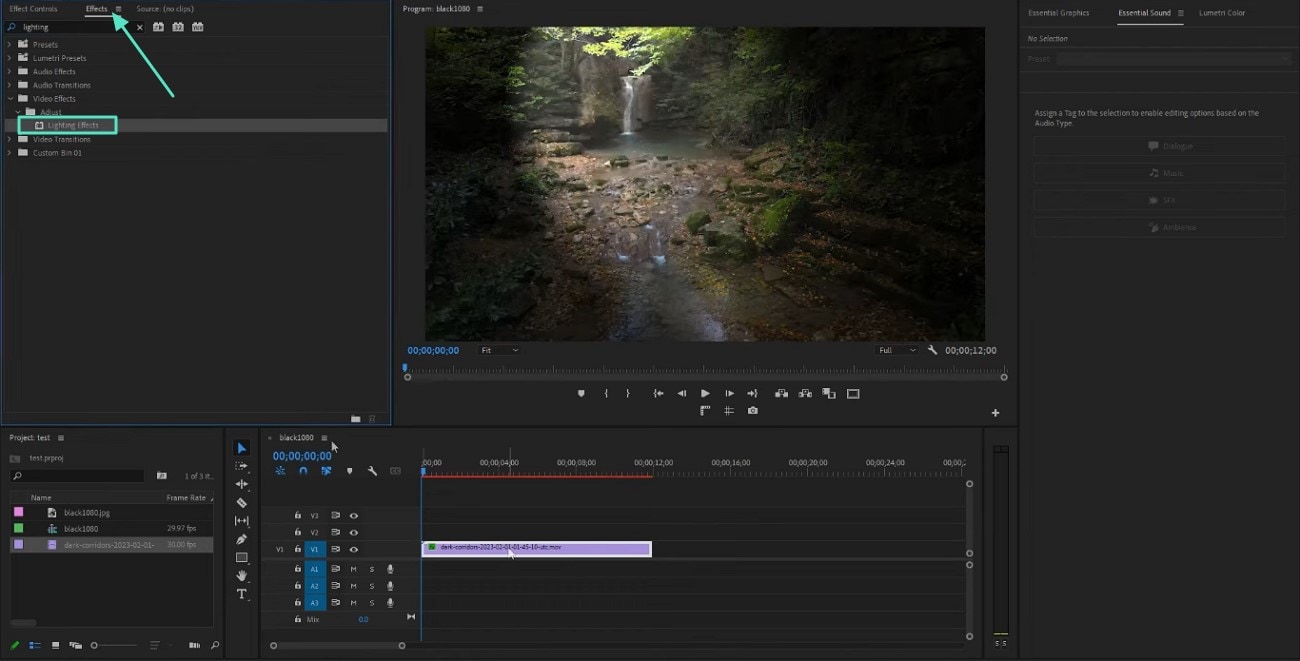
Part 2. How To Lighten Up a Dark Video In Adobe Premiere Pro?
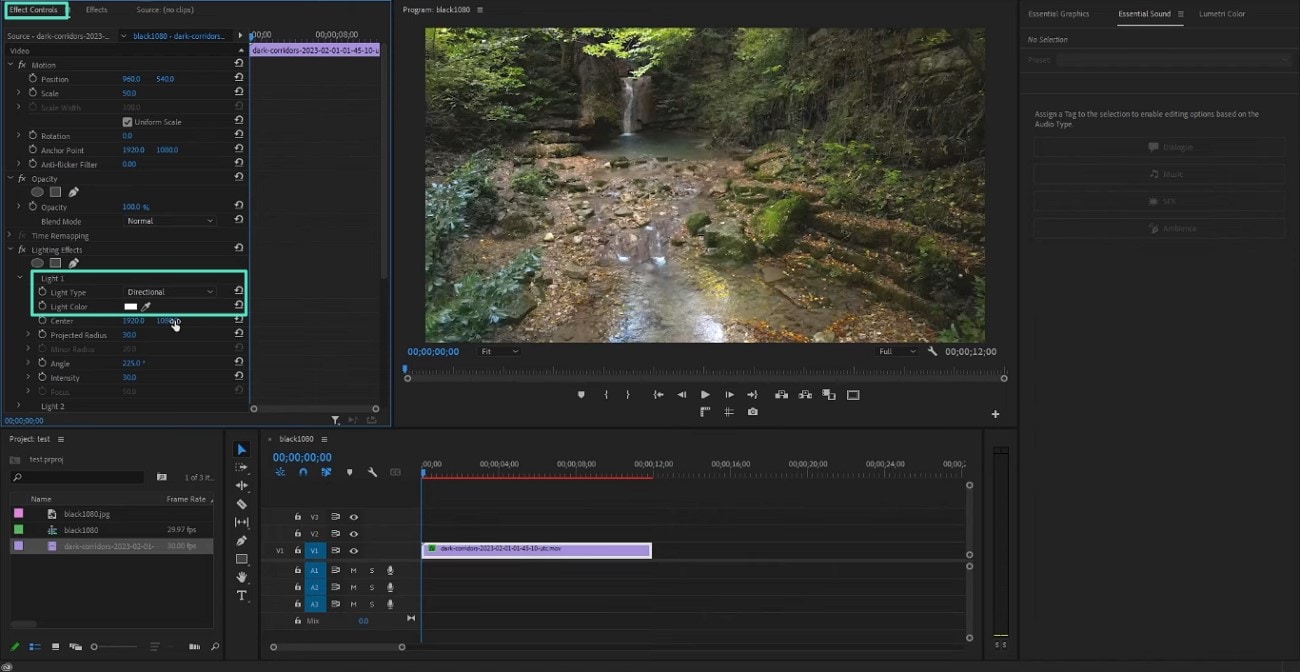
If you are caught up in a dark or moody clip, you can use the Lightning feature of Premiere Pro that enhances the overall look and feel of the footage. This process helps improve visibility by revealing hidden details in shadows.
You can adjust its intensity according to your preferences and select the part of the video on which you want to apply it. Moreover, choose the light type, color, and other aspects like projected radius according to your preferences. Given below is the step-by-step guide on how to brighten a video in Premiere Pro by adjusting the lighting:
Part 3. Enhance Your Video Using Premiere Pro
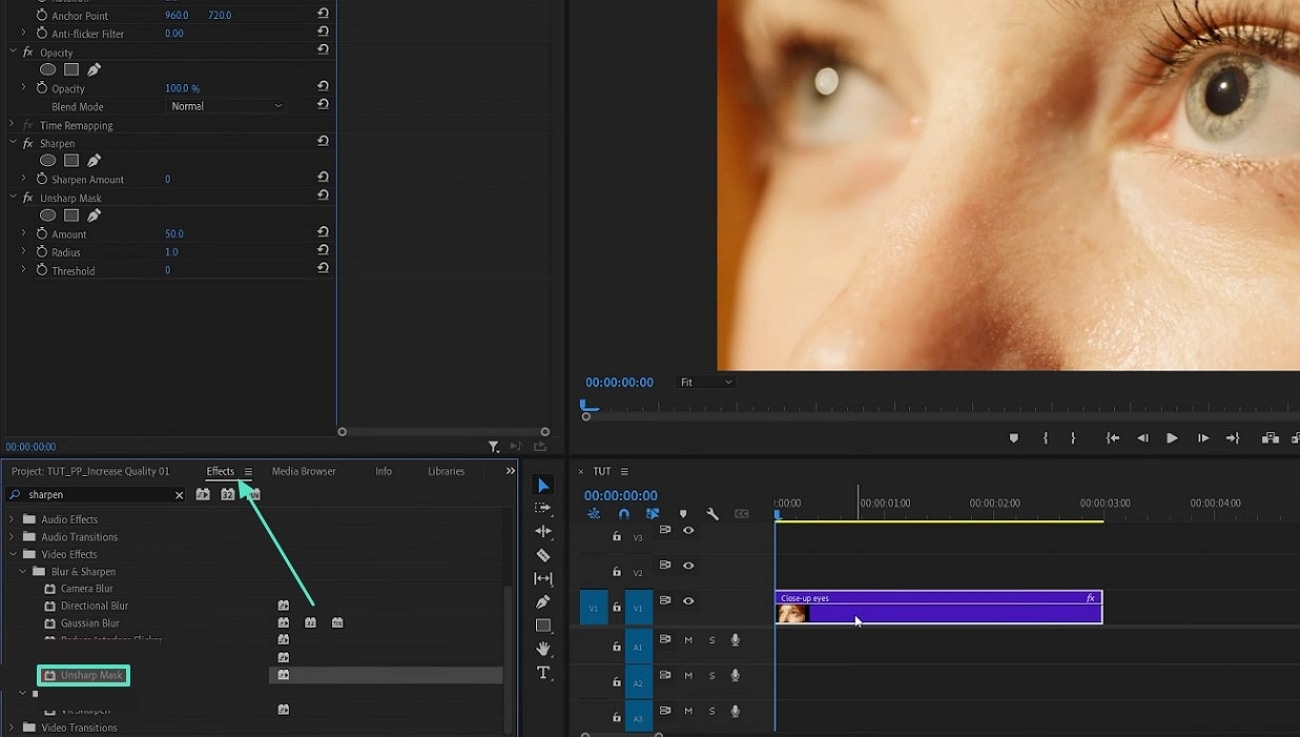
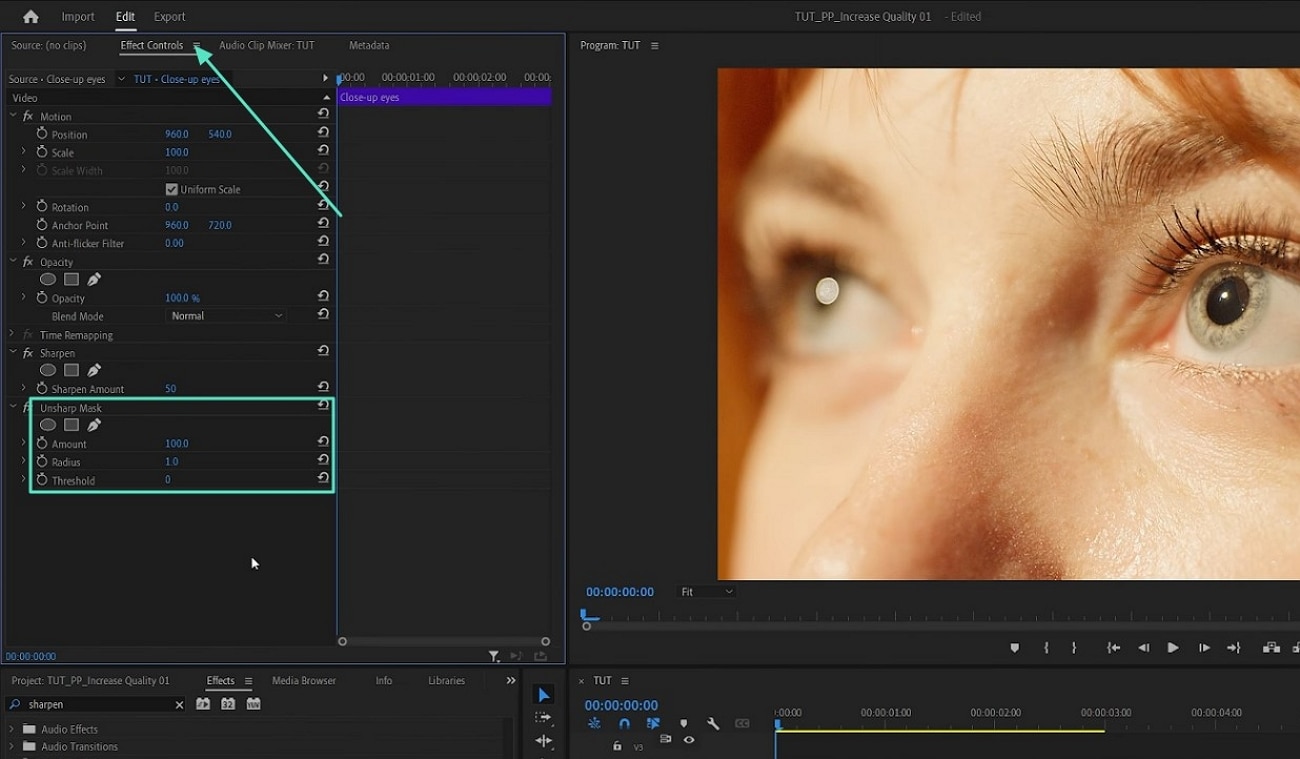
This video editor provides the utility of enhancing the visuals with Unsharp Mask to add clarity to soft footage that lacks crispness. The effect works by increasing the contrast within the frame and making the subjects appear crisper without heavy artifacts.
You can apply this effect to a certain area in the video that seems unclear or make the entire video sharp. Read the steps mentioned below to learn how to make a video brighter in Premiere Pro by adding an Unsharp Mask:
Part 4. Illuminate Your Videos with Ease: Exploring Filmora's Brightness Tools
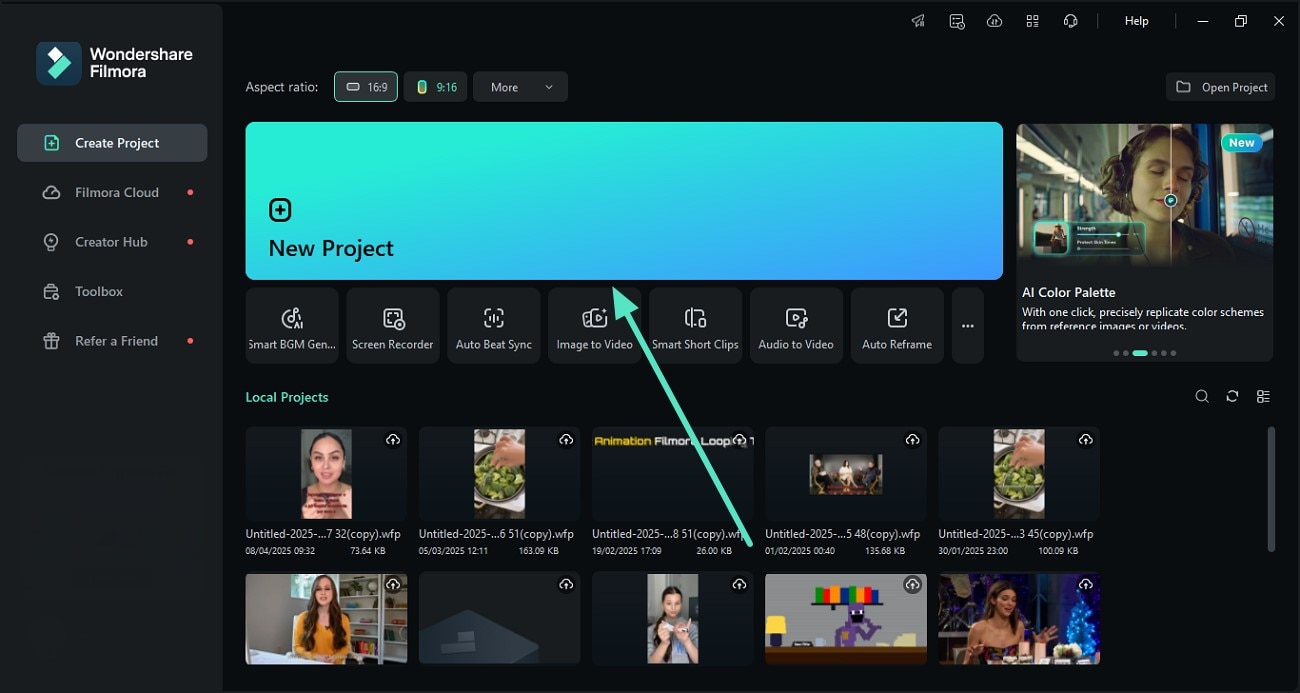
If you are looking for a more efficient resource that provides enhanced results with an easy interface, you can use Wondershare Filmora. This all-in-one multimedia tool provides various basic and advanced video enhancement features that result in professional-looking visuals. You get various ways to brighten up your video from your desktop as well as your smartphone.
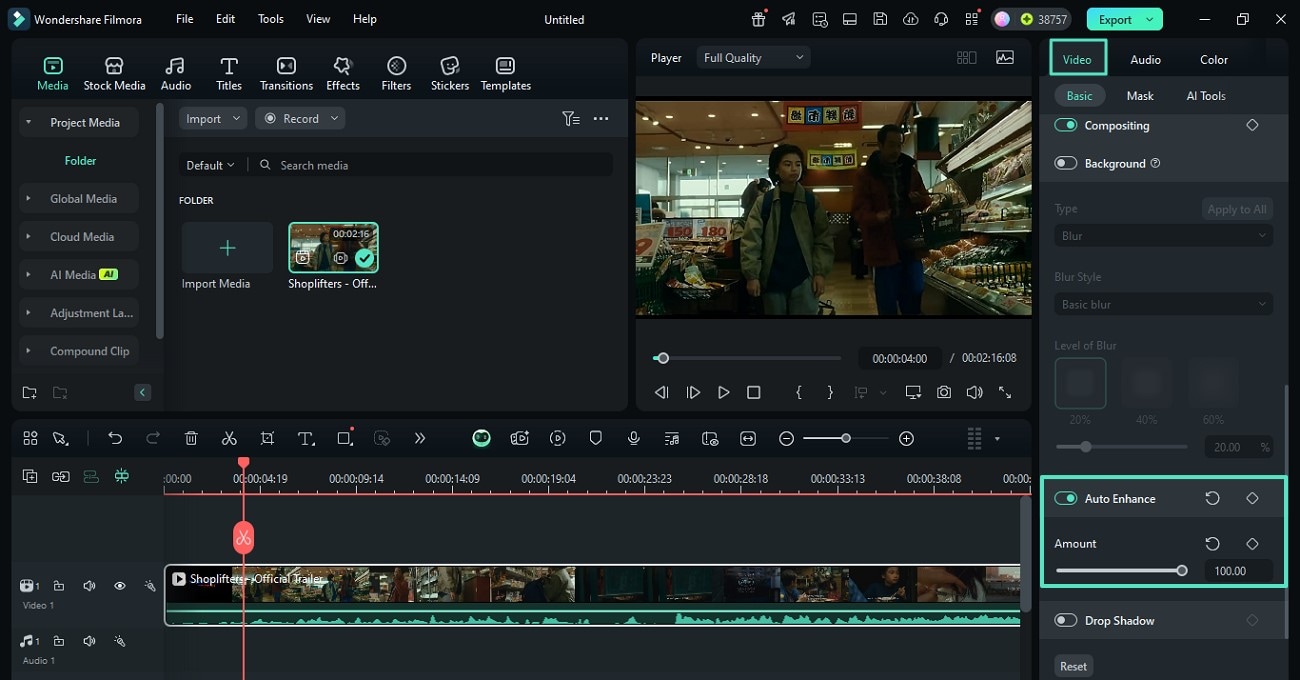
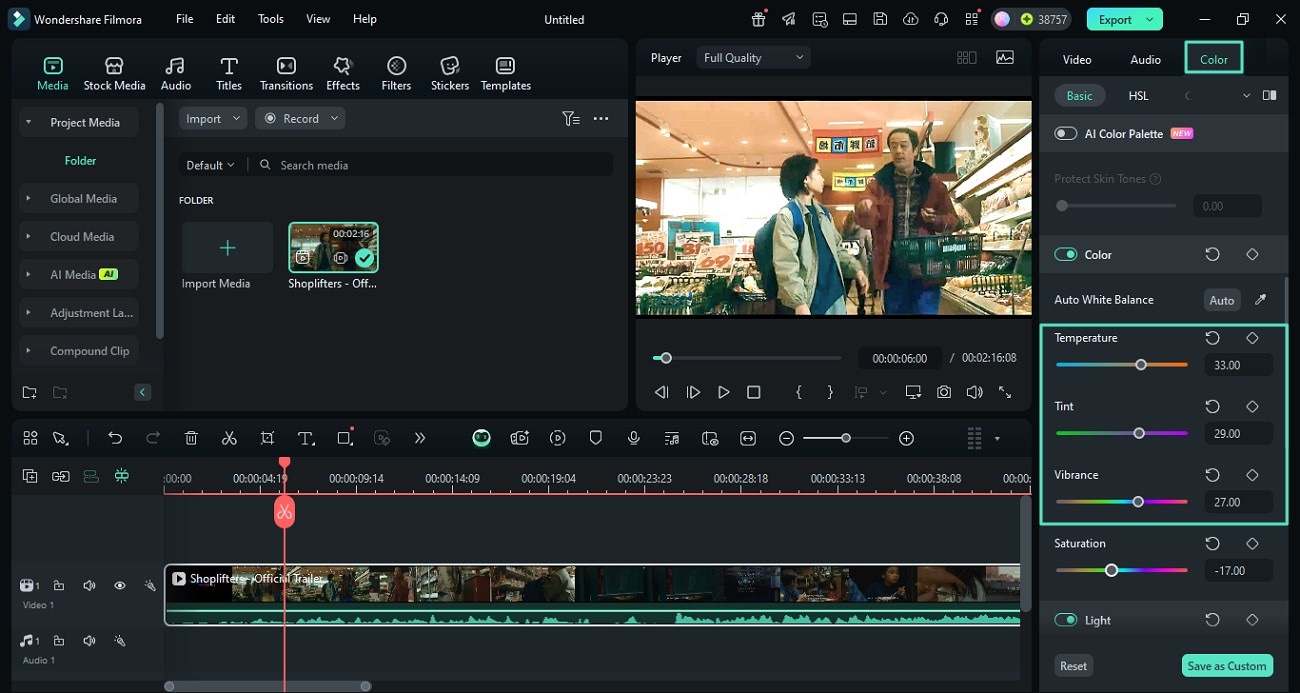
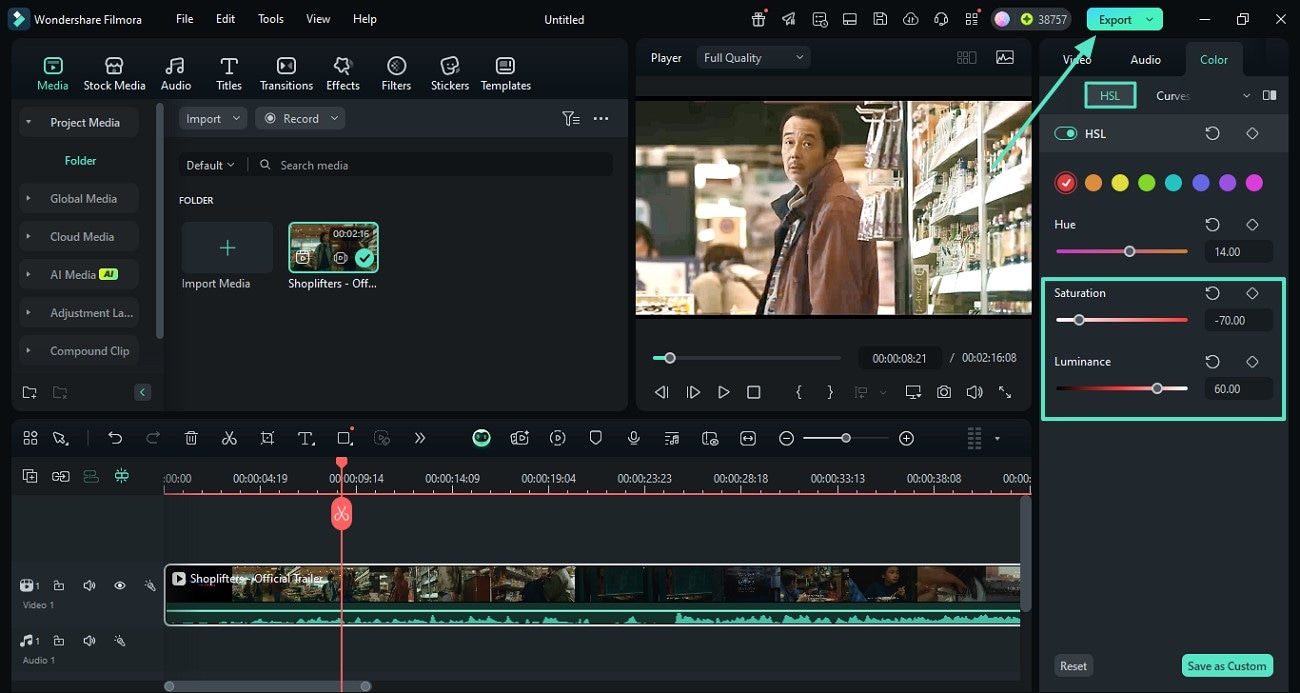
The platform offers multiple color gradings and lighting options to make the visuals crisp and clear in dull or low-light videos. Moreover, you get the ability to adjust the intensity of the element according to your preferences. You can apply the Auto-Enhance feature offered by the tool to apply visual enhancements automatically.
Comprehensive Steps to Brighten Up a Video With Filmora Desktop
As discussed, Filmora, as Adobe Premiere alternative, provides various options that are better than Premiere Pro's brightness option to make your video look clear. Provided below are the steps to enhance and brighten the footage using the Filmora desktop:

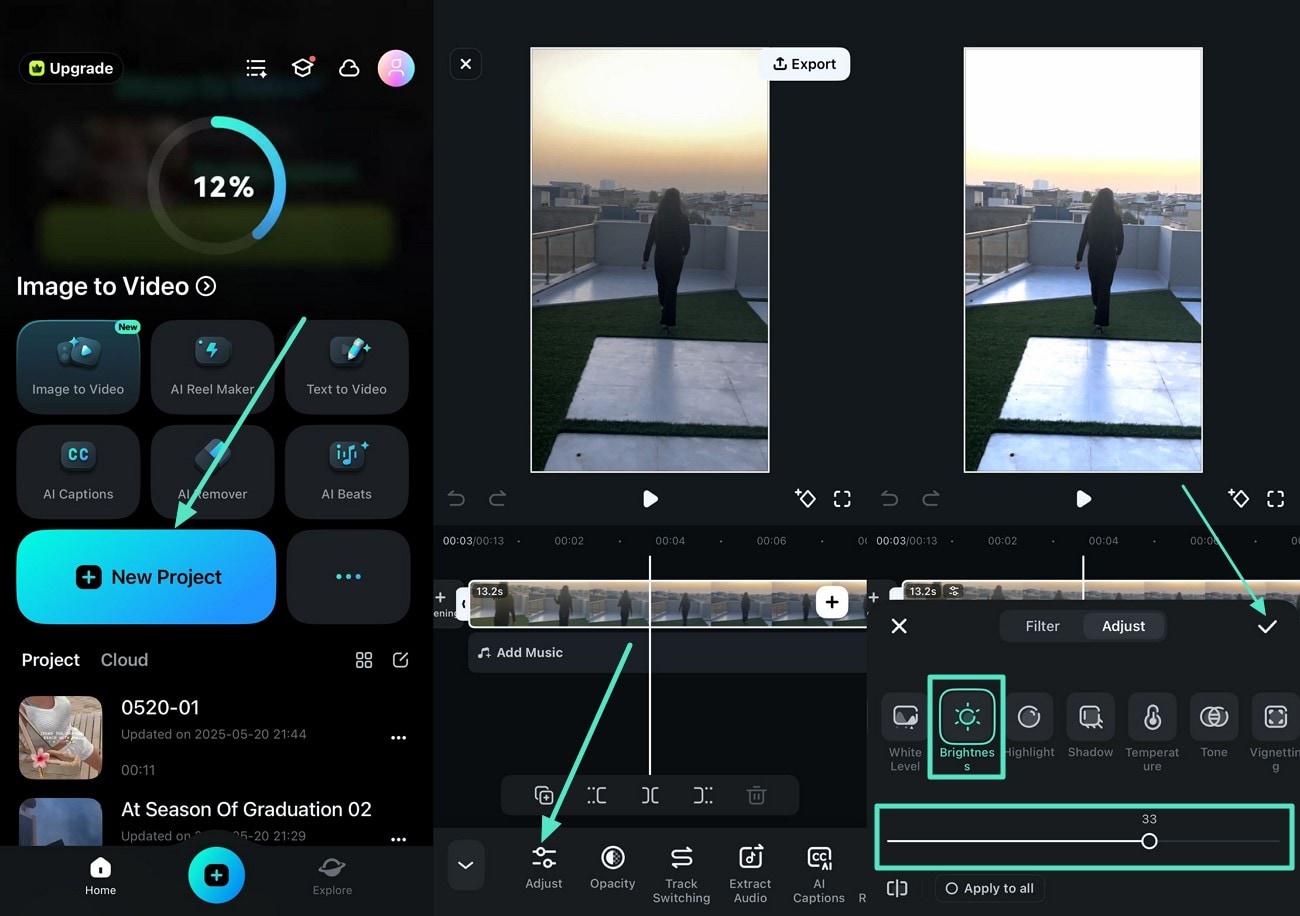
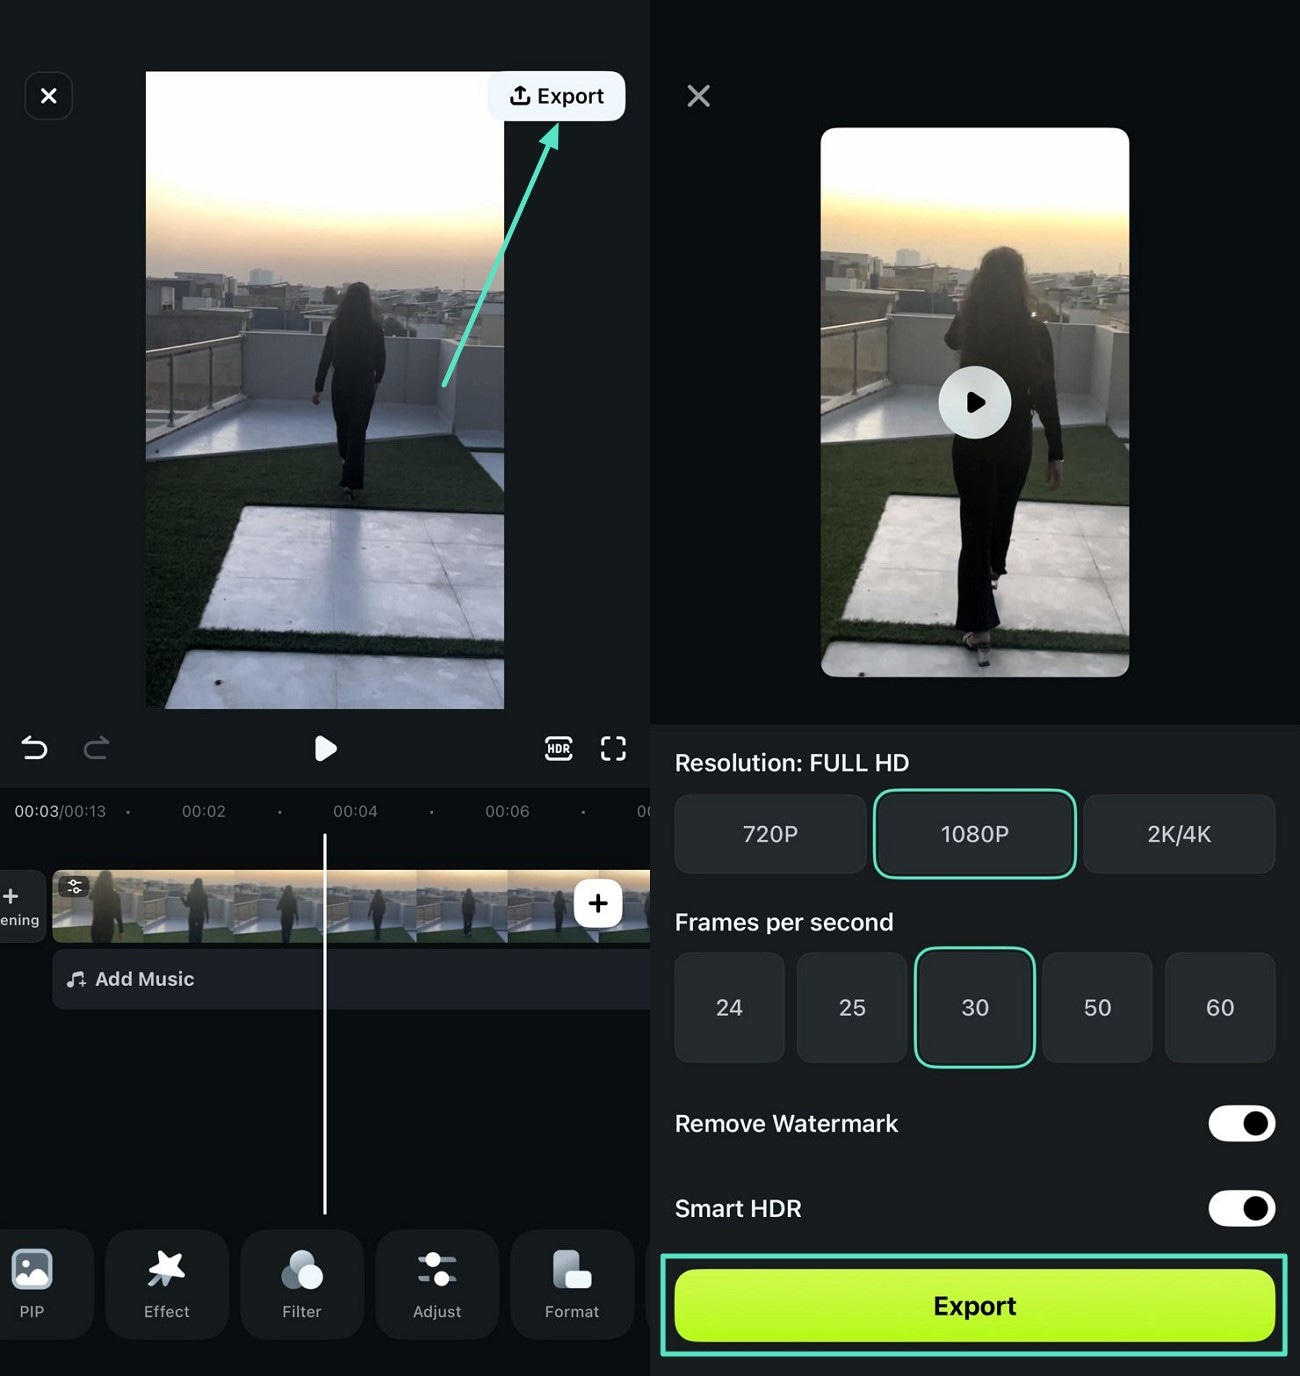
Guide to Brigten Up Videos with The Filmora App
Having learned the Premiere Pro brightness adjustment with Filmora desktop, let us have a look at the step-by-step guide to brightening a video with the Filmora App [iOS/Android]:
Conclusion
To sum it up, this article discussed how to adjust brightness in Premiere Pro using different techniques. The article also discussed how you can adjust the brightness and lighten up dull videos automatically with Wondershare Filmora. This AI-powered tool allows users to adjust the vibrance and other elements from their desktop as well as their smartphone.