For the Best Results, Use the Latest Version.
Filmora User Guide for Mac
-
Preparations for Mac
-
Account (Mac)
-
Get Started & Basic Settings (Mac)
- Release notes for Mac
- Latest Versions and Features for Mac
- Get Started on Mac - Full Guide
- Download/register/uninstall on Mac
- Panel Layout on Mac
- Keyboard shortcuts on Mac
- Touchbar on Mac
- Change playback quality on Mac
- Render preview files on Mac
- Manage Timeline on Mac
- Media for use on Mac
- Logo Reveal For Mac
- Marked Favorites for Mac
-
Compatibility & Tech Specs (Mac)
-
Performance Settings (Mac)
-
-
Creating Projects - Mac
-
Creating New Projects (Mac)
-
-
Importing & Recording - Mac
-
Importing (Mac)
-
Recording (Mac)
-
-
Video Editing for Mac
-
Basic Video Editing for Mac
- Edit Live Photos on Mac
- Enable/Disable Clip for Mac
- Magnetic Timeline For Mac
- Dual Monitor Setup for Video Editing on Mac
- Select All Clips on Timeline for Mac
- Auto Ripple for Mac
- Split & Cut Videos on Mac
- Compositing on Mac
- Crop and zoom on Mac
- Playback Zoom Level for Mac
- Change Speed on Mac
- Play Video in Reverse on Filmora for Mac
- Mark In and Mark Out for Mac
- Markers for Mac
- Group Clips in Filmora for Mac
- Customized Backgrounds for Videos and Images in Mac
- Video snapshot on Mac
- Freeze Frame on Mac
- Auto enhance on Mac
- Applying Drop Shadow for Mac
- Adjustment Layer for Mac
- Mark Clips in Filmora for Mac
- Video Editing Ruler – Mac
- Apply Transforming for Mac
-
Advanced Video Editing for Mac
- Text Animation Path for Mac
- Create Multi-Camera Clip for Mac
- Filmora Motion Blur | Mac
- Drawing Tools for Mac | Filmora Guide
- Compound Clips for Mac
- AI Video Enhancer for Mac
- Video Chapters in Filmora for Mac
- Filmora Flicker Removal Guide | Mac
- Multi-Clip Editing for Mac
- Keyframe Graph Editor for Mac
- Add Animation Keyframing in Filmora for Mac
- Mask on Mac
- PIP (Picture in Picture) in Filmora on Mac
-
AI-Powered Video Editing for Mac
- Smart Scene Cut for Mac
- Smart Short Clips for Mac
- Filmora AI Eye Contact - Mac
- Filmora Image to Video for Mac
- AI Idea to Video for Mac
- AI Text-to-Video for Mac
- Instant Cutter Tool on Mac
- AI Face Mosaic for Mac
- Filmora Image to Prompt for Mac
- Keyframe Path Curve for Mac
- Filmora AI Image Enhancer Guide – macOS
- Planar Tracking for Mac
- Filmora AI Relight - Mac
- AI Extend For Mac
- AI Script-to-Video for Mac
- AI Text-Based Editing in Mac
- Create With Instant Mode on Mac
- ChatGPT Plugin - AI Copywriting on Mac
- AI Smart Cutout in Filmora for Mac
- Auto reframe on Mac
- Lens Correction in Filmora for Mac
- AI Portrait Cutout on Mac
- Scene detection on Mac
- AI Smart Masking for Mac
- AI Mate Editing for Mac
- Motion Tracking on Mac
- Video Stabilization for Mac
- AI Video/Photo Object Remover for Mac
- AI Smart Search for Mac
- AI Skin Tone Protection for Mac
- Green screen on Mac
- Super Slow Motion with Optical Flow for Mac
- AI Stylizer for Mac
- Video Denoise for Mac
-
-
Audio Editing for Mac
-
Basic Audio Editing for Mac
-
Advanced Audio Editing for Mac
-
AI-Powered Audio Editing for Mac
- Audio To Video for Mac
- AI Sound Effect for Mac
- Smart BGM Generation on Mac
- AI Voice Enhancer for Mac
- Audio Stretch for Mac
- AI Audio Denoise for Mac
- Auto Synchronization on Mac
- AI Vocal Remover for Mac
- AI Auto Beat Sync for Mac
- AI Music Generator for Mac
- AI Voice Cloning on Mac
- Silence Detection on Mac
-
-
Text Editing for Mac
-
Basic Text Editing for Mac
-
Advanced Text Editing for Mac
-
AI-Powered Text Editing for Mac
-
-
Video Customizations for Mac
-
Video Effects (Mac)
-
Audio Effects (Mac)
-
Transitions (Mac)
-
Stickers (Mac)
-
Filters (Mac)
-
Color Editing (Mac)
-
Animations (Mac)
-
Templates (Mac)
-
Asset Center (Mac)
-
-
Exporting & Share & Cloud Backup - Mac
Filmora Tutorial Videos
Filmora 13 & 14 User Guide in PDF
Filmora 12 User Guide in PDF
Filmora 11 User Guide in PDF
Filmora 9 & 10 User Guide
AI Text-to-Video for Mac
With the new updates, Mac users can now convert their text prompts into videos using the latest VEO 3.1 and Sora 2 models. This feature enables users to transform the mandate and text into visually appealing content. The integration of the Google VEO 3.1 and Sora 2 technologies adds a compelling and relevant background score to the generated video.
You can specify your requirements for the music in the text box and mention the quality as well. The utility offers 3 different modes to cater to a diverse type of users and their needs. Users also get the ability to select the resolution and duration, along with the aspect ratio, for each of the videos generated through text. To learn how to use the Text to Video feature on Filmora Mac, read the steps mentioned next:
Mode 1. Normal Mode 2.0
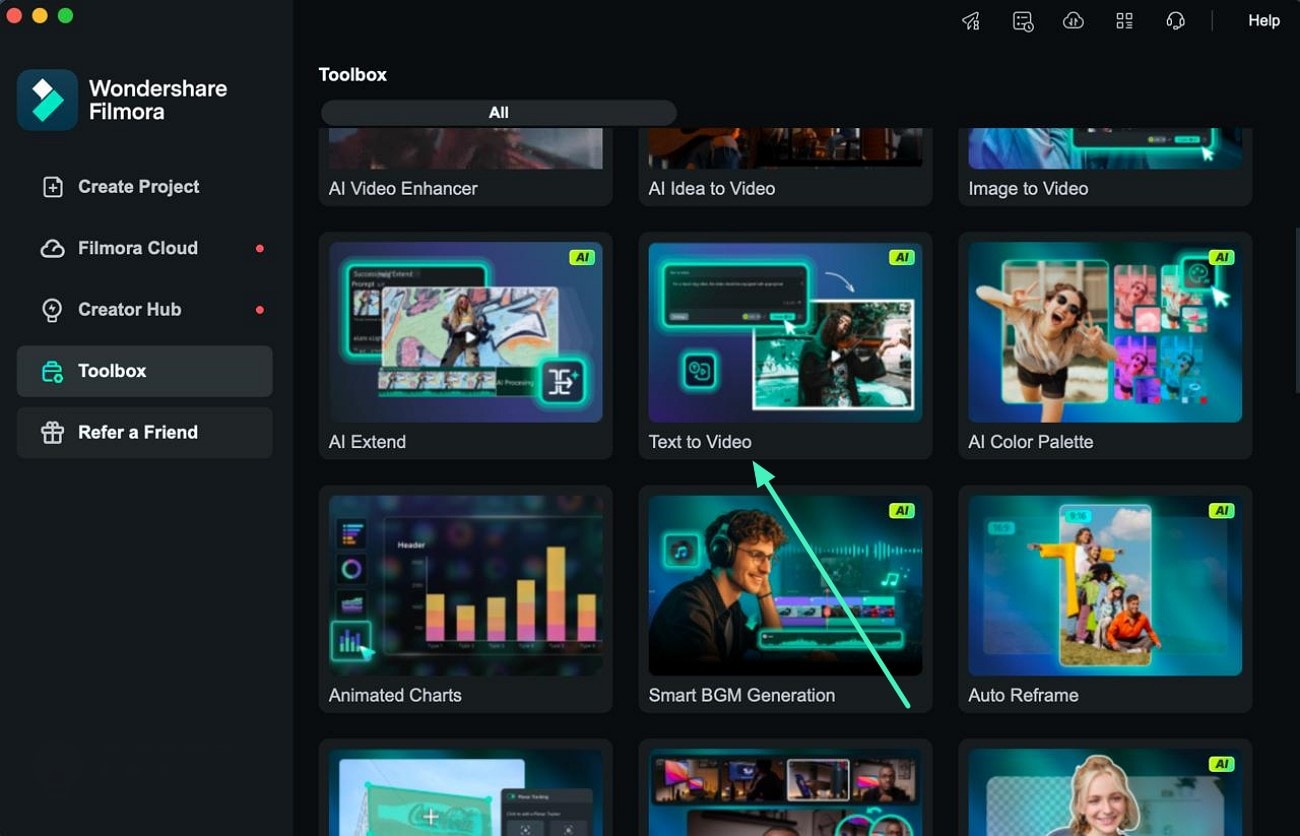
Step 1. Look for the AI Text to Video Feature
Begin the process by accessing the tool on your Mac device and pressing the Text to Video feature located within the homepage.
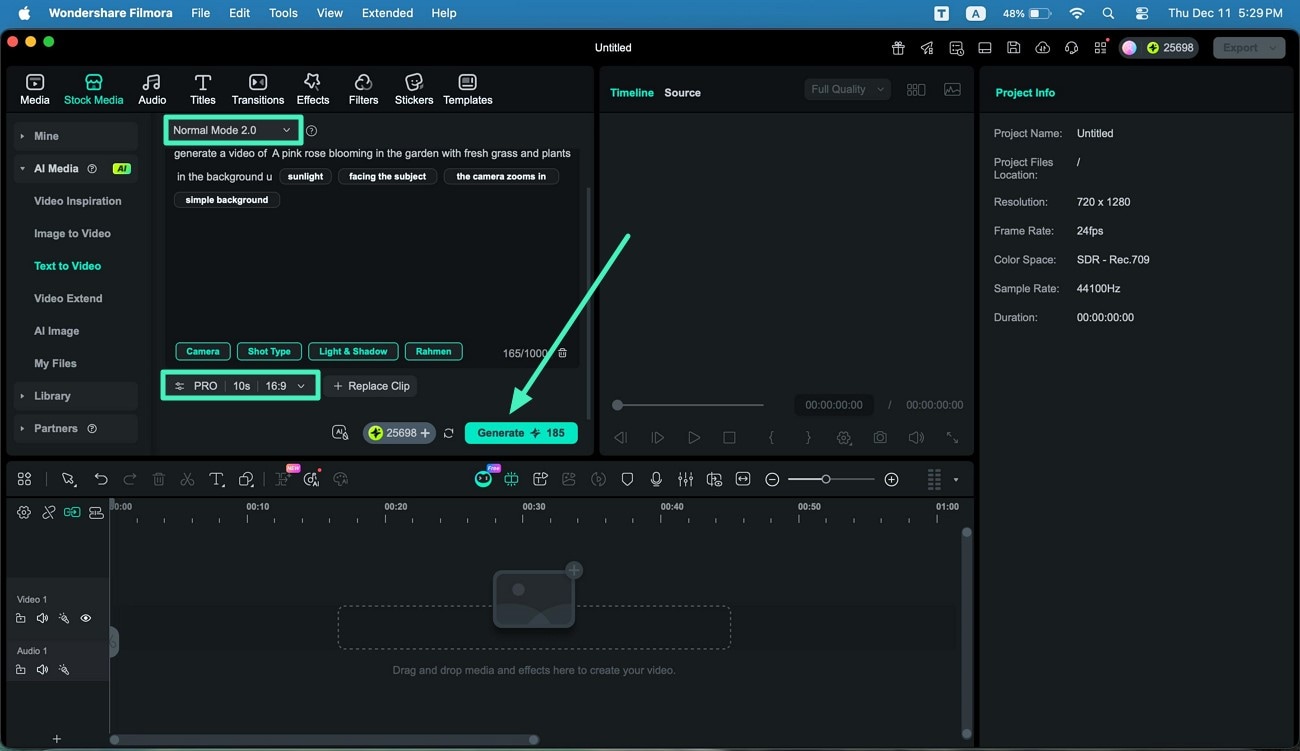
Step 2. Select Normal Mode and Input Prompt
In the following interface, access the Text to Video section and select the Normal Mode 2.0 by expanding the drop-down menu. Next, input your text prompt in the text field located within the interface. Now, configure the settings such as Resolution, Duration and Aspect Ratio by choosing your desired options. Execute the video generation process by pressing the Generate button located within the interface.
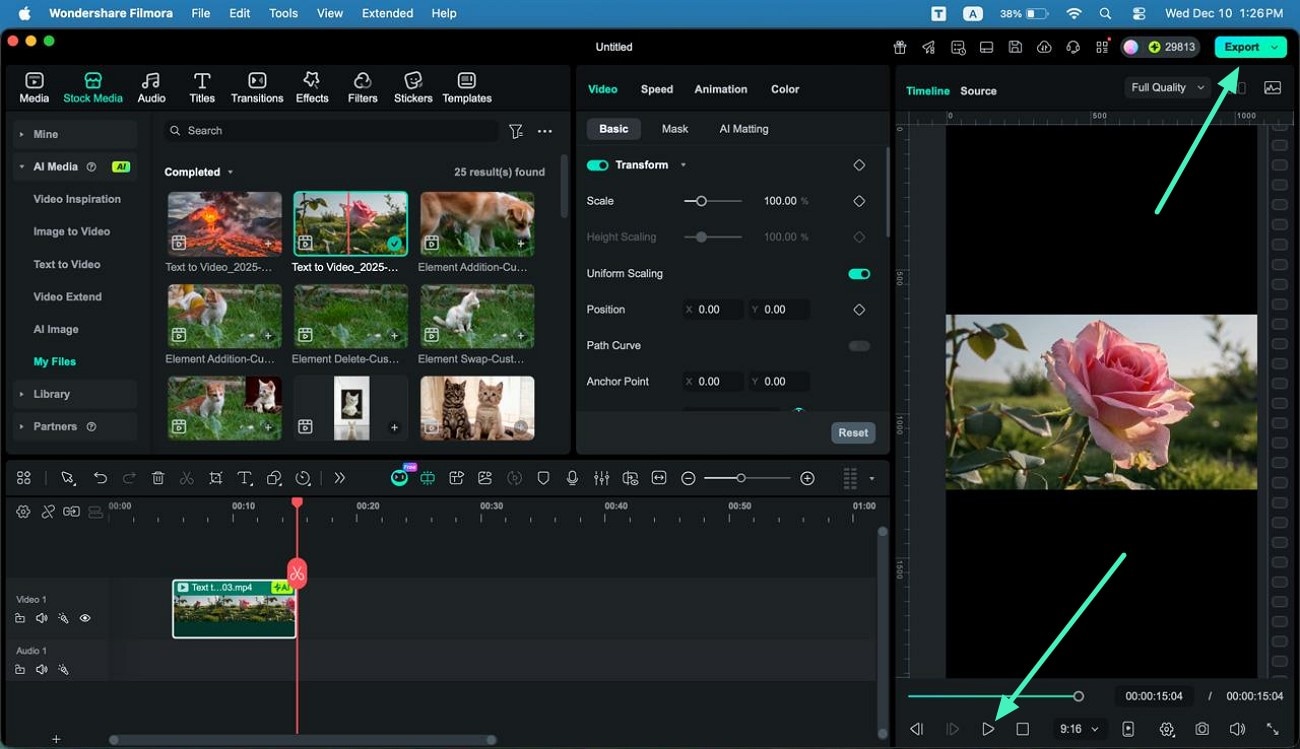
Step 3. Review the Video and Export
Once the video is generated from your provided text, review it within the preview window by tapping on the Play icon. Finally, hit the Export button located at the top right corner of the interface to successfully save the generated video to your Mac.
📌Note:
To ensure transparency and compliance when using Filmora's AI features, please be aware of the following:
- The software interface will clearly identify all content created by AI.
- For traceability, exported or downloaded AI-generated assets may include a visible or invisible watermark.
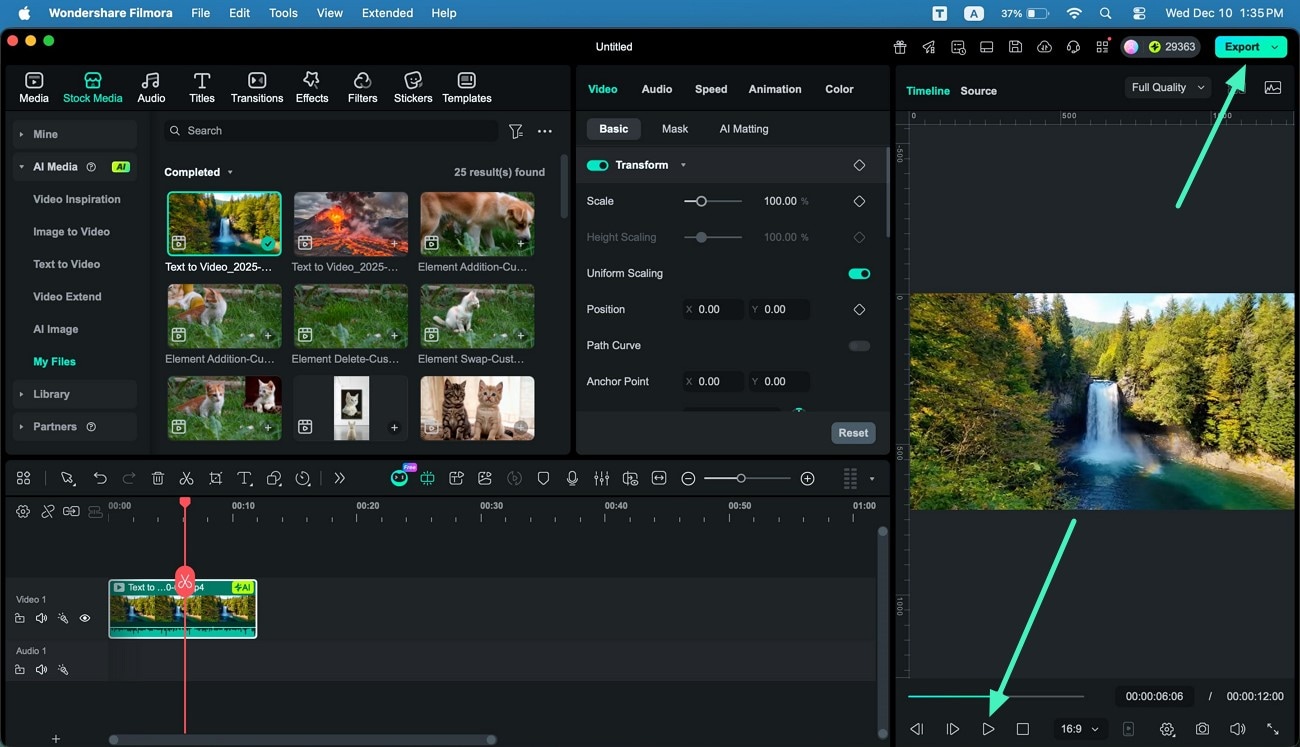
Mode 2. Google Veo 3.1
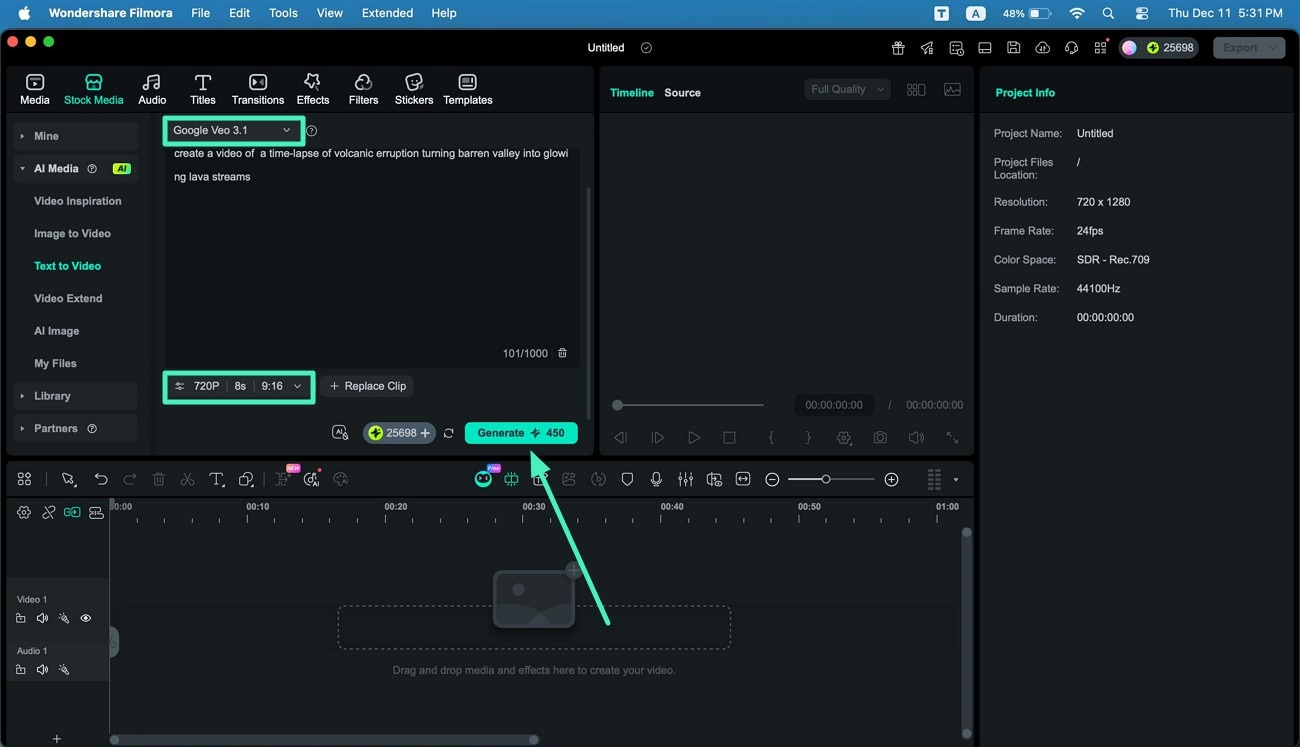
Step 1. Enable Veo-3 Mode and Give Prompt
After enabling the Google Veo 3.1 mode by expanding the drop-down menu at the top, input the text requirement within the text field.
Now select the Resolution, Aspect Ratio and Duration from the bottom and press the Generate button to execute the process instantly.
Step 2. Review the VEO 3.1 Results and Export
Once the video is successfully generated, tap on the Play button to review the results. Once you are satisfied with the visuals, click the Export button to successfully save the video.
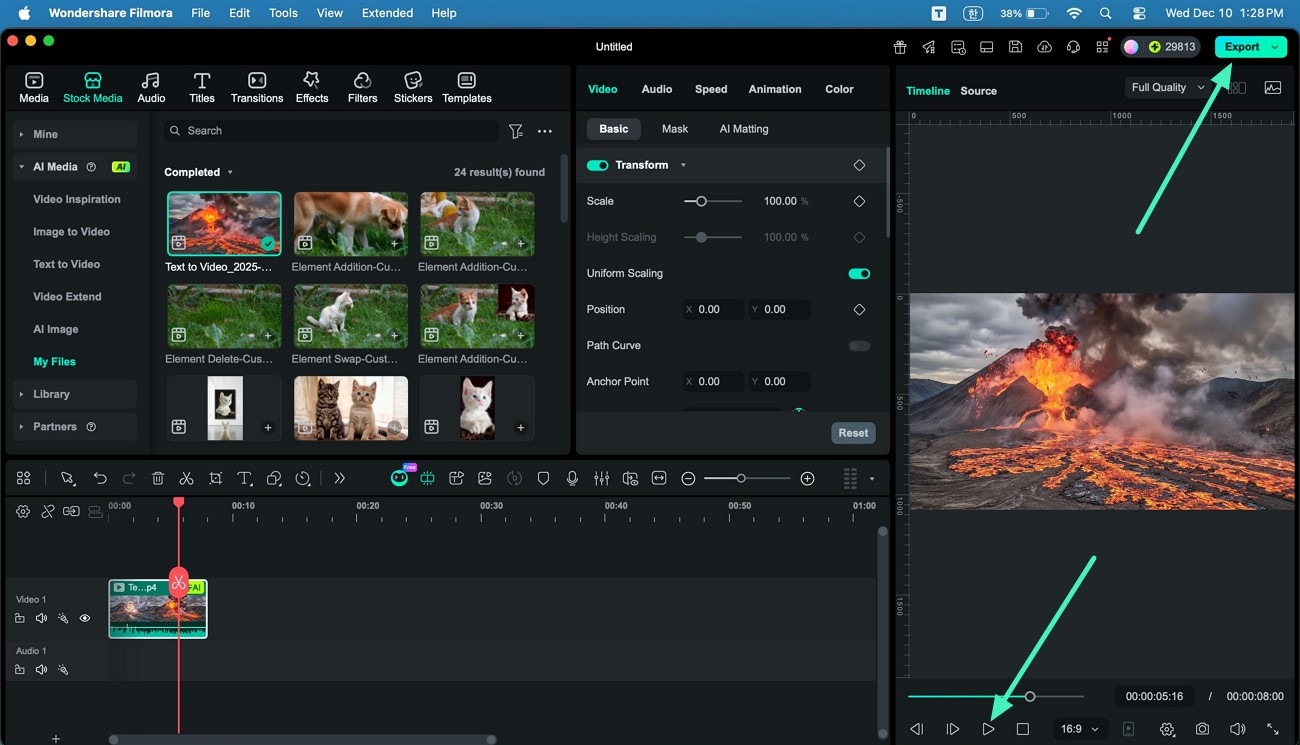
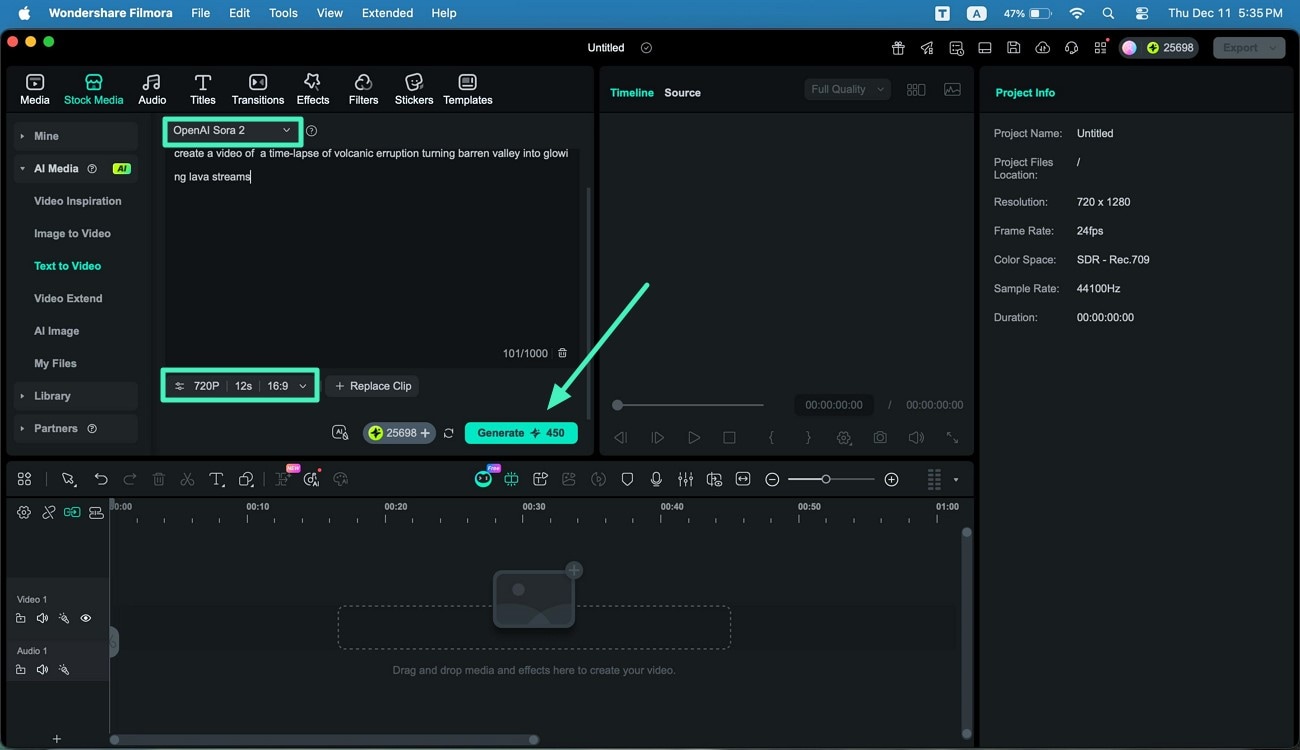
Mode 3. OpenAI Sora 2
Step 1. Enter Your Preferred Prompt
After choosing the Text to Video feature, access the mode list and pick OpenAI Sora 2. Type your video idea into the prompt box and fine-tune the settings such as Duration, Aspect Ratio and Resolution. Once everything is set, press Generate to start the creation process.
Step 2. Review the Output and Store the Video
After Filmora completes the video creation, hit the Play icon to watch the newly produced clip. Once the preview matches what you want, select the Export button to download and save your finished video.
Related Posts
Featured Articles
Learn more popular articles from Wondershare.
How to Make a Radio Ad: Tips, Tools, and Examples
Want to make a radio commercial but think you need a studio? With Wondershare Filmora, you can create professional ads easily with one simple tool
Most Popular Filmora Intro Templates Perfect for Any Video
Are you searching for ways to create opening videos but do not want to start from scratch? Read this article to learn the top Filmora intro templates for free download.
How to Make a Pitch Video That Impresses with Real Examples
Try a pitch video maker that helps you make professional videos that clearly showcase your business. Explore the best pitch video examples and start creating one that impresses your audience.
Recommended User Guide
Learn how to use more features.
Filmora Image to Video for Mac
This guide explains how to use Image to Video feature on Mac.
AI Idea to Video for Mac
Here is the guide on how to master the AI Idea to Video feature using Filmora on the Mac.
