

 ChatGPT
 Perplexity
 Gemini
 Claude
 Grok
Grok
With the rise in online video consumption on mobile devices, platforms like Facebook, Instagram, and Snapchat have embraced vertical videos.
To convert horizontal video to vertical, various editing software like Premiere Pro can be used. As Facebook reports, 79% of users find vertical videos more engaging, prompting filmmakers to adapt. This article explains how to convert horizontal video to vertical using Premiere Pro and Filmora.
In this article

Part 1: Why Vertical Video Matters?
1. Mobile-first today
When the world is virtually living off the mobile, how can videos not be there in an appealing format? For using the internet, the most used device nowadays is a mobile device. Having videos in vertical format is more convenient as you can also enjoy them in PIP (Picture In Picture) mode while carrying on with other work on your smartphone. The default aspect ratios of mobile devices are vertical, as they are primarily designed to take and make calls. So, having vertical videos is more convenient than horizontal ones over social media sites. Though there is the option to watch videos vertically over smartphones, 94% of people watch videos vertically.

2. Vertical video is popular on social media
As you spend a huge amount of time on social media using your mobile device rather than a desktop or computer, it is obvious that you would be consuming videos in vertical alignment only. The usual way you hold your Smartphone is vertically, as is the video format because it's more intuitive that way.
Not only that, with time social networks realized the need and eliminated the black bars that used to be around vertical videos. This mobile-friendly video format has now been optimized across social media platforms for a better experience.
3. Vertical video is powerful in data
Videos are driving data to a great extent and hence the user views on them is changing gradually, opening more ways for converting horizontal video to vertical and meet the market needs. Here are some impressive data vouching for vertical video usage –
- Millennials no longer stay glued to their TV sets, but rather consume videos on mobile devices twice as much as that of TV.
- 94% of the time people use their mobiles vertically according to a MOVR Mobile Overview report.
- On Snapchat, around 7 billion-plus video clips are being watched by users, and the maximum time they are shot vertically.
- Referring to Mary Meeker's Internet Trends report, vertical viewing of videos has increased multi-fold as compared to old times.
- On Snapchat, vertical video Ads are watched 9 times more than horizontal video Ads.
Part 2: How to make a vertical video on Premiere Pro
After understanding the need for Premiere Pro vertical videos and their significance, now is the time to learn how to convert Premiere Pro vertical video from horizontal one.
Here, we have discussed the two methods for incorporating the auto-reframe effect into the clip and the entire sequence.
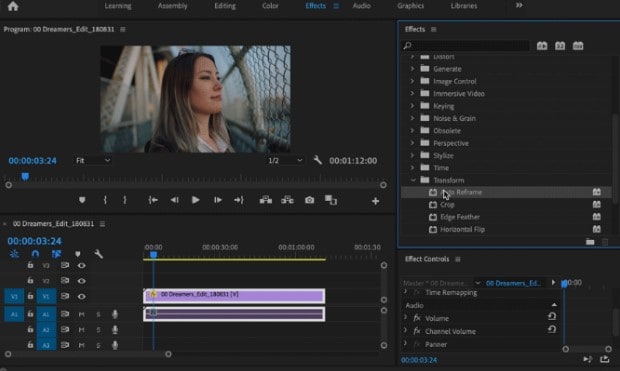
Method 1. How to Add the Auto Reframe Effect to a Clip
Step 1: Upload the video into Premiere Pro. Now go to video effect >> Transform >> Auto reframe feature, and drag it into the video.
Step 2: To fine-tune the auto-reframe effect, select the motion tracking option from the effect controls.
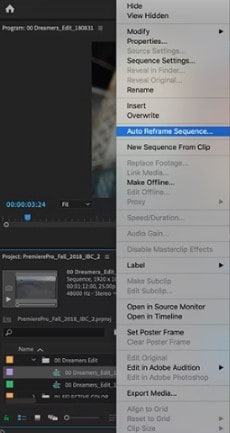
Method 2. Auto Reframe an Entire Sequence
Now if you want to add auto reframe in the entire sequence, then follow the below steps:
Step 1: Go to the Sequence >> Auto Reframe Sequence.
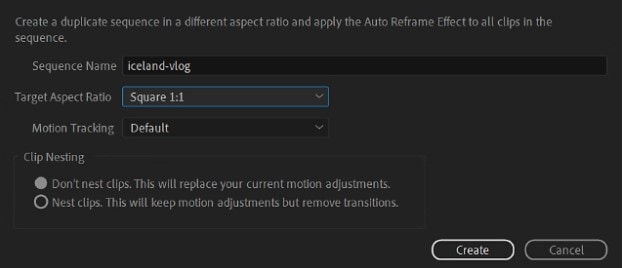
Step 2: A new dialogue box will appear. Choose the target aspect ratio accordingly. Similarly, you can fine-tune effects on auto-reframe videos by selecting the desired effects.
Part 3: Filmora: Best Alternative to Premiere Pro
Wondershare Filmora is an easy-to-use yet powerful video editor suitable for all creators, allowing you to effortlessly convert horizontal videos into vertical ones.
Notably, Filmora not only has the Auto Reframe feature but also includes an advanced compression function, and it offers a method for manually adjusting video dimensions. Wondershare Filmora is a clear winner! Its advanced video compressor makes it incredibly easy to reduce file size without any loss of quality while ensuring that your videos meet the size requirements for social media uploads.
Plus, it's incredibly fast, with compression speeds up to 47x faster! And the best part? If you're reducing file sizes for YouTube uploads, you can use the recommended bitrate for the best possible quality.
And if that's not enough, Filmora also has an Auto Reframe feature, along with other ways to help reduce file size. You can adjust the video resolution, tweak the bitrate and frame rate, or cut the video length. Plus, it comes with advanced features to enhance your videos before sharing them on social media.
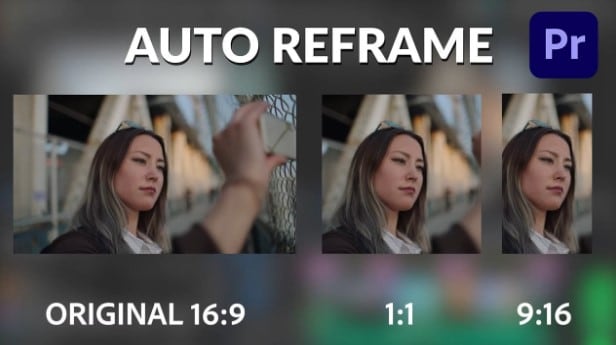
- Auto reframe video in 16:9, 1:1, 9:16, 4:3 or 21:9.
- Offers cool video effects and filters to make your video become professional.
- Cross-platform supported - (Windows, Mac, iOS, Android).
- Resize Your Videos Without Quality Loss.


So, what are you waiting for? Give Filmora a try to reduce the size of your video files! Just follow this simple guide to get started:
Method 1: Using Advanced Video Compressor
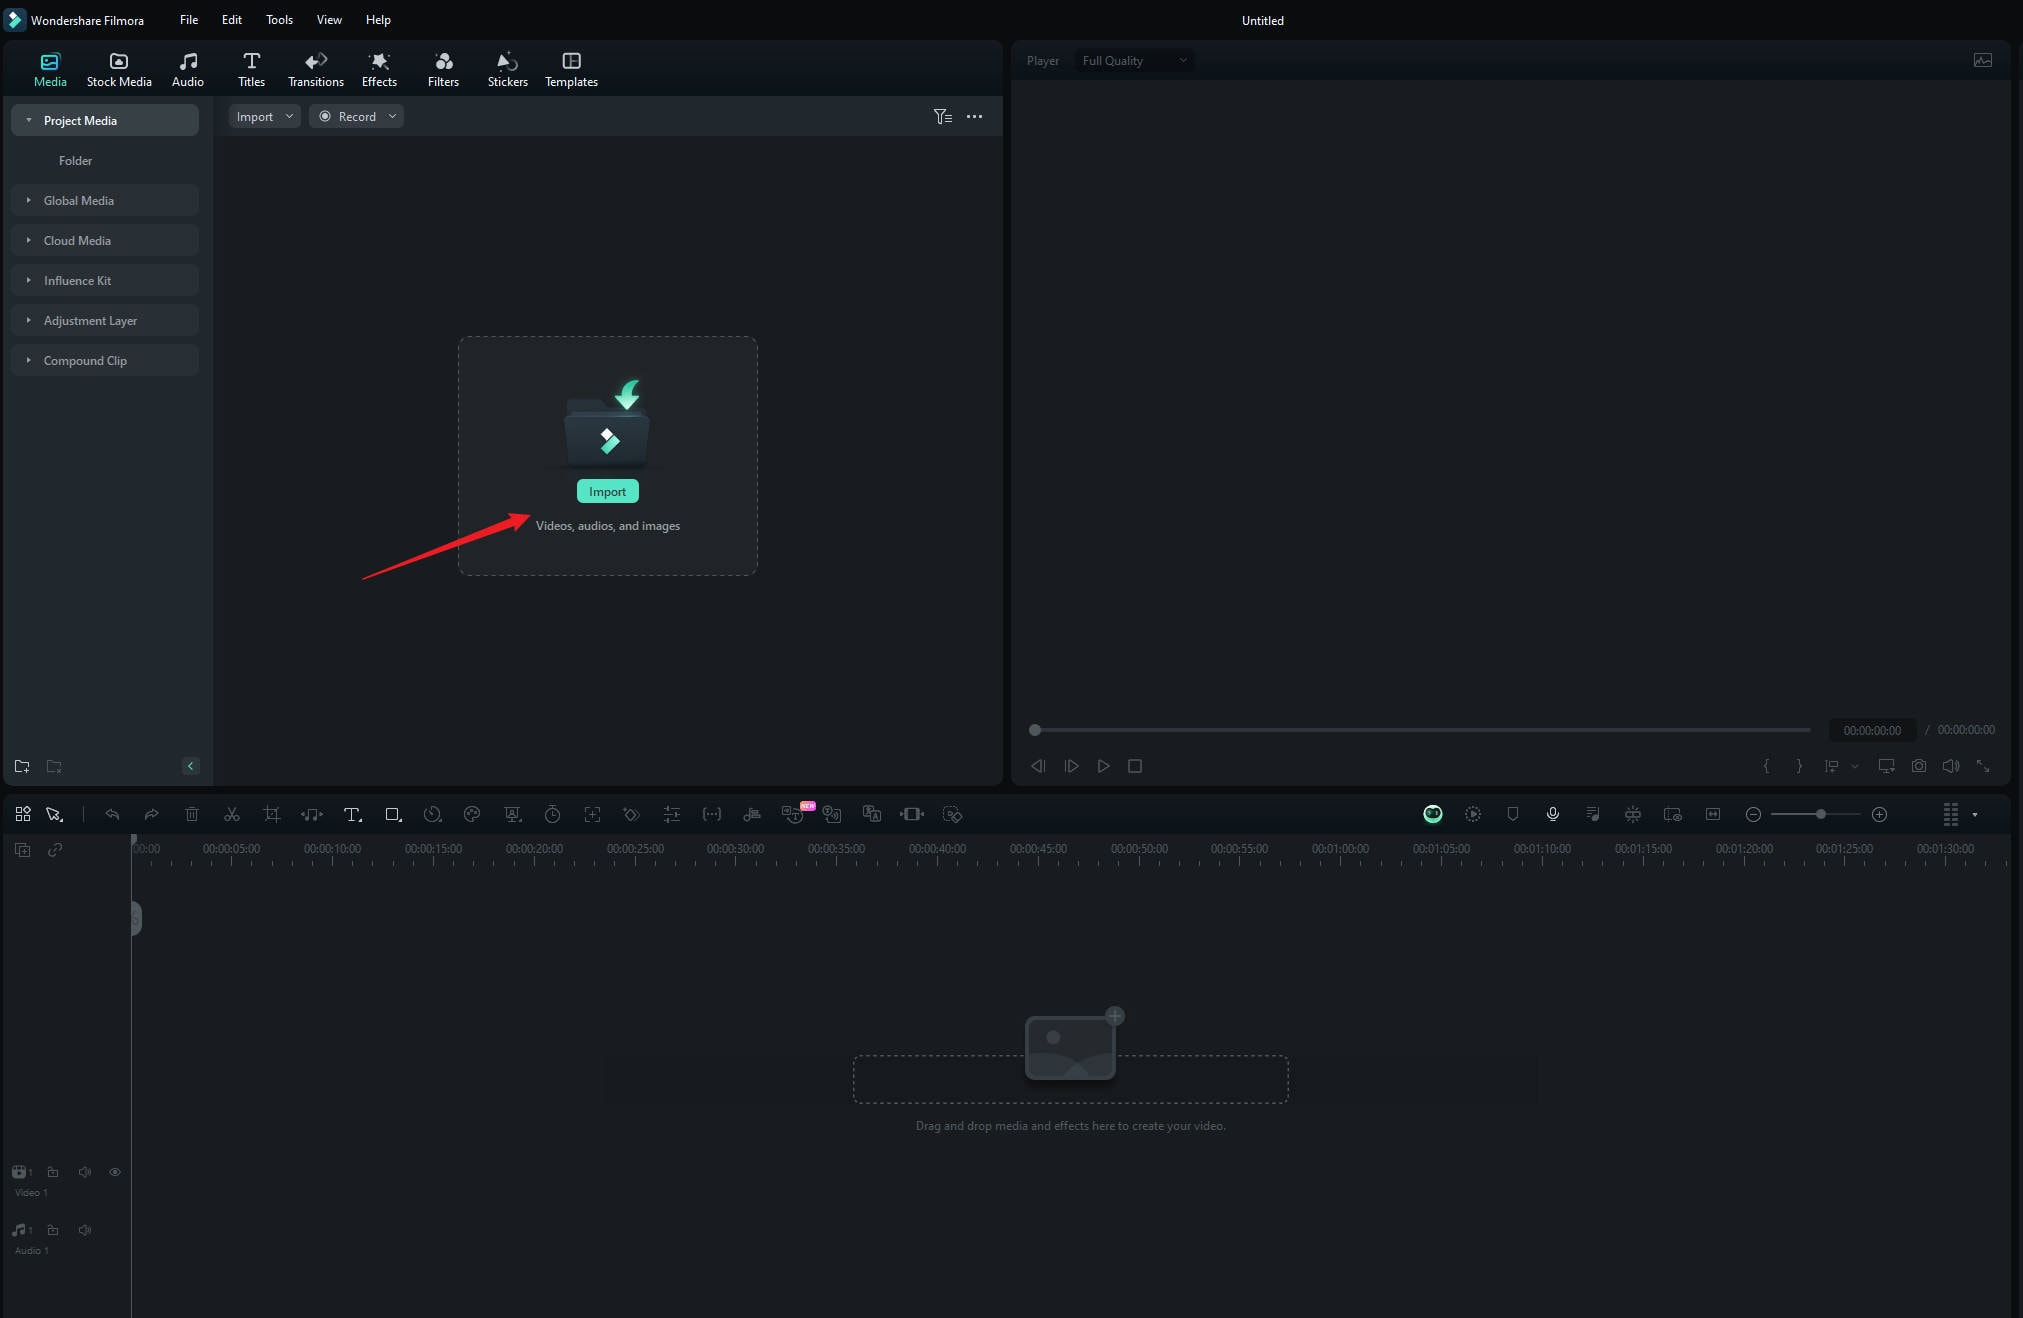
Step1Launch Filmora and upload your video
If you haven't downloaded Wondershare Filmora yet, you can grab the latest version here. After installing, just double-click the icon to open it. Once Filmora is open, start a new project and import your video from Google Drive or Dropbox, or simply drag and drop your videos into Filmora.
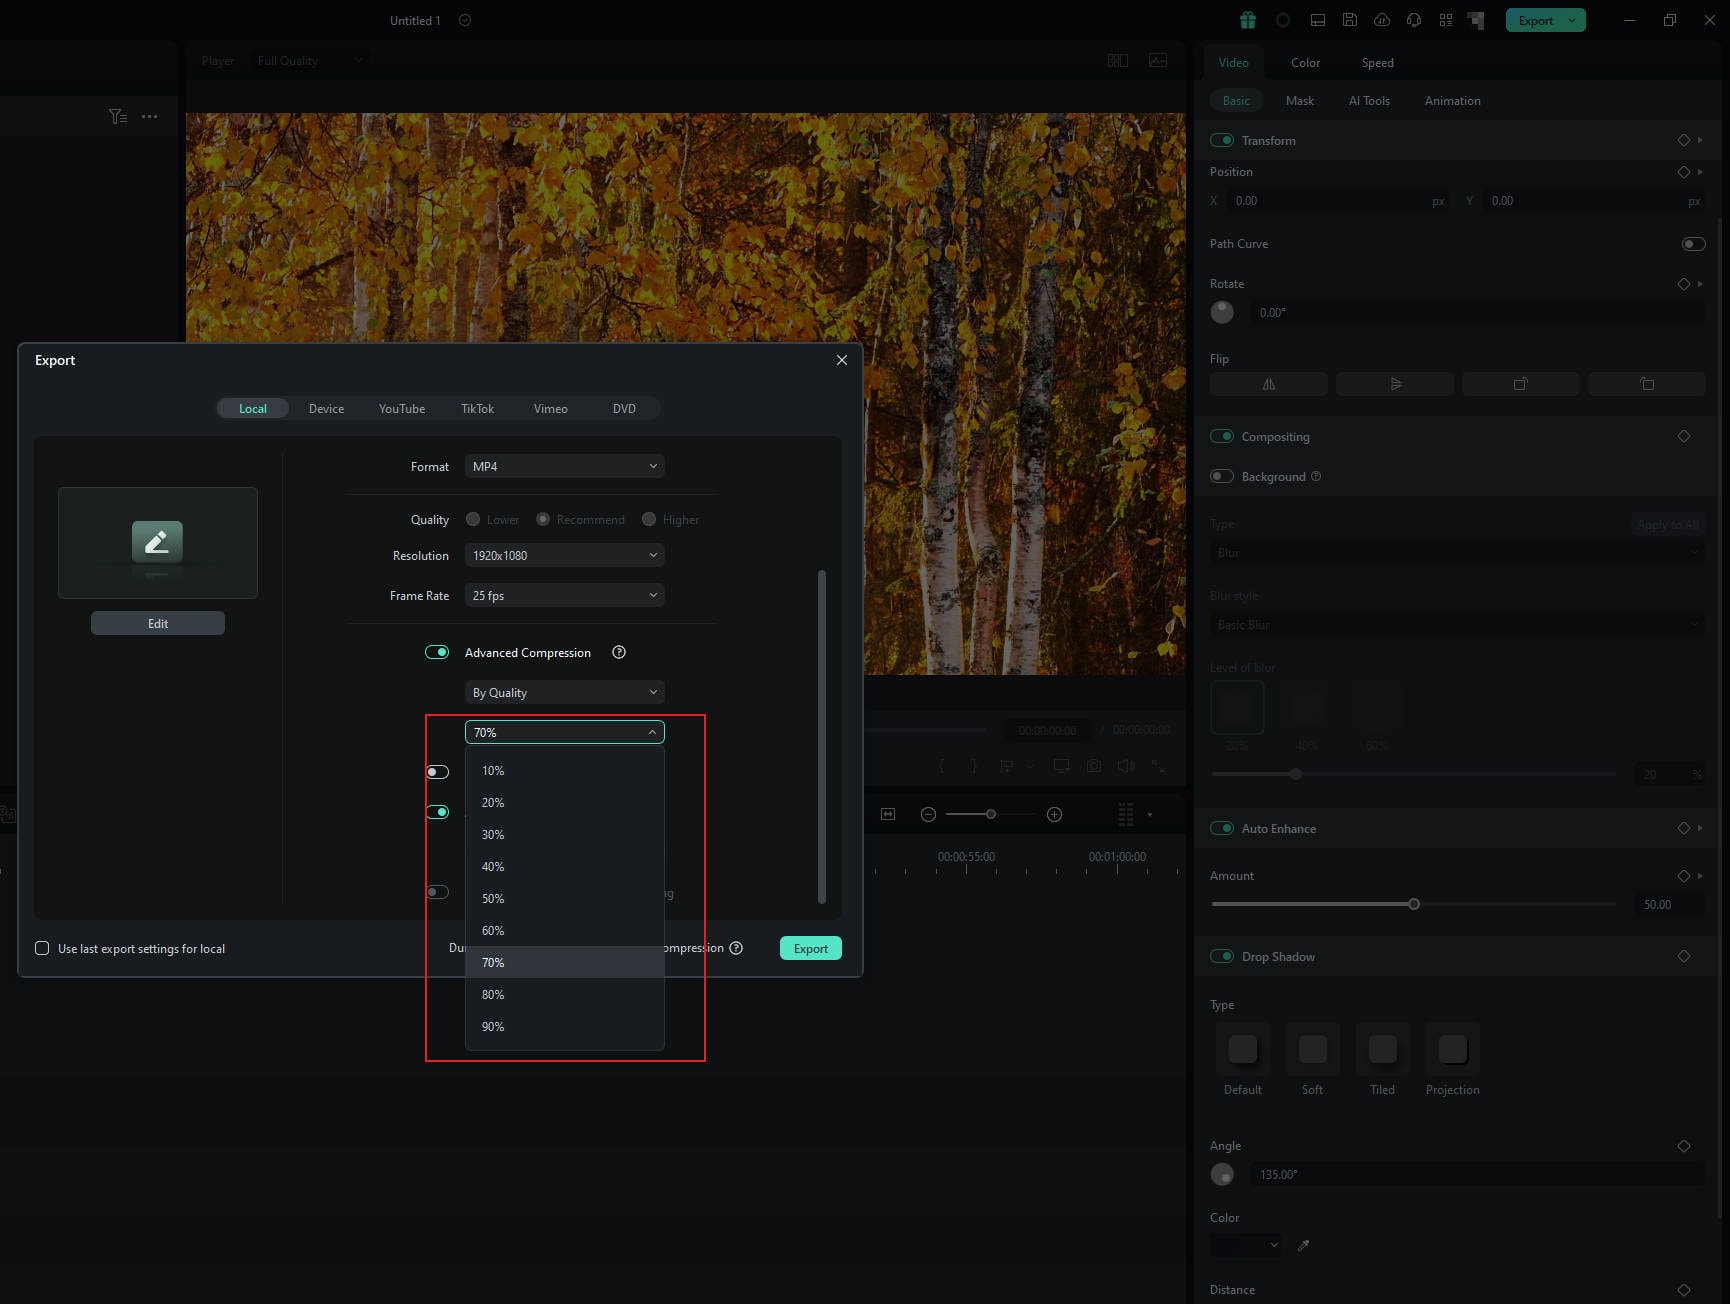
Step2Compress your video
Click "Export" at the top right, then choose your video compression mode: "By Quality" or "YouTube Upload".

If you choose "By Quality", you can adjust the file size by selecting a quality level, from 10% to 90%. Meanwhile, if you choose "YouTube Upload", the video will automatically be compressed to the recommended bitrate for YouTube, which helps prevent blurriness when uploading.
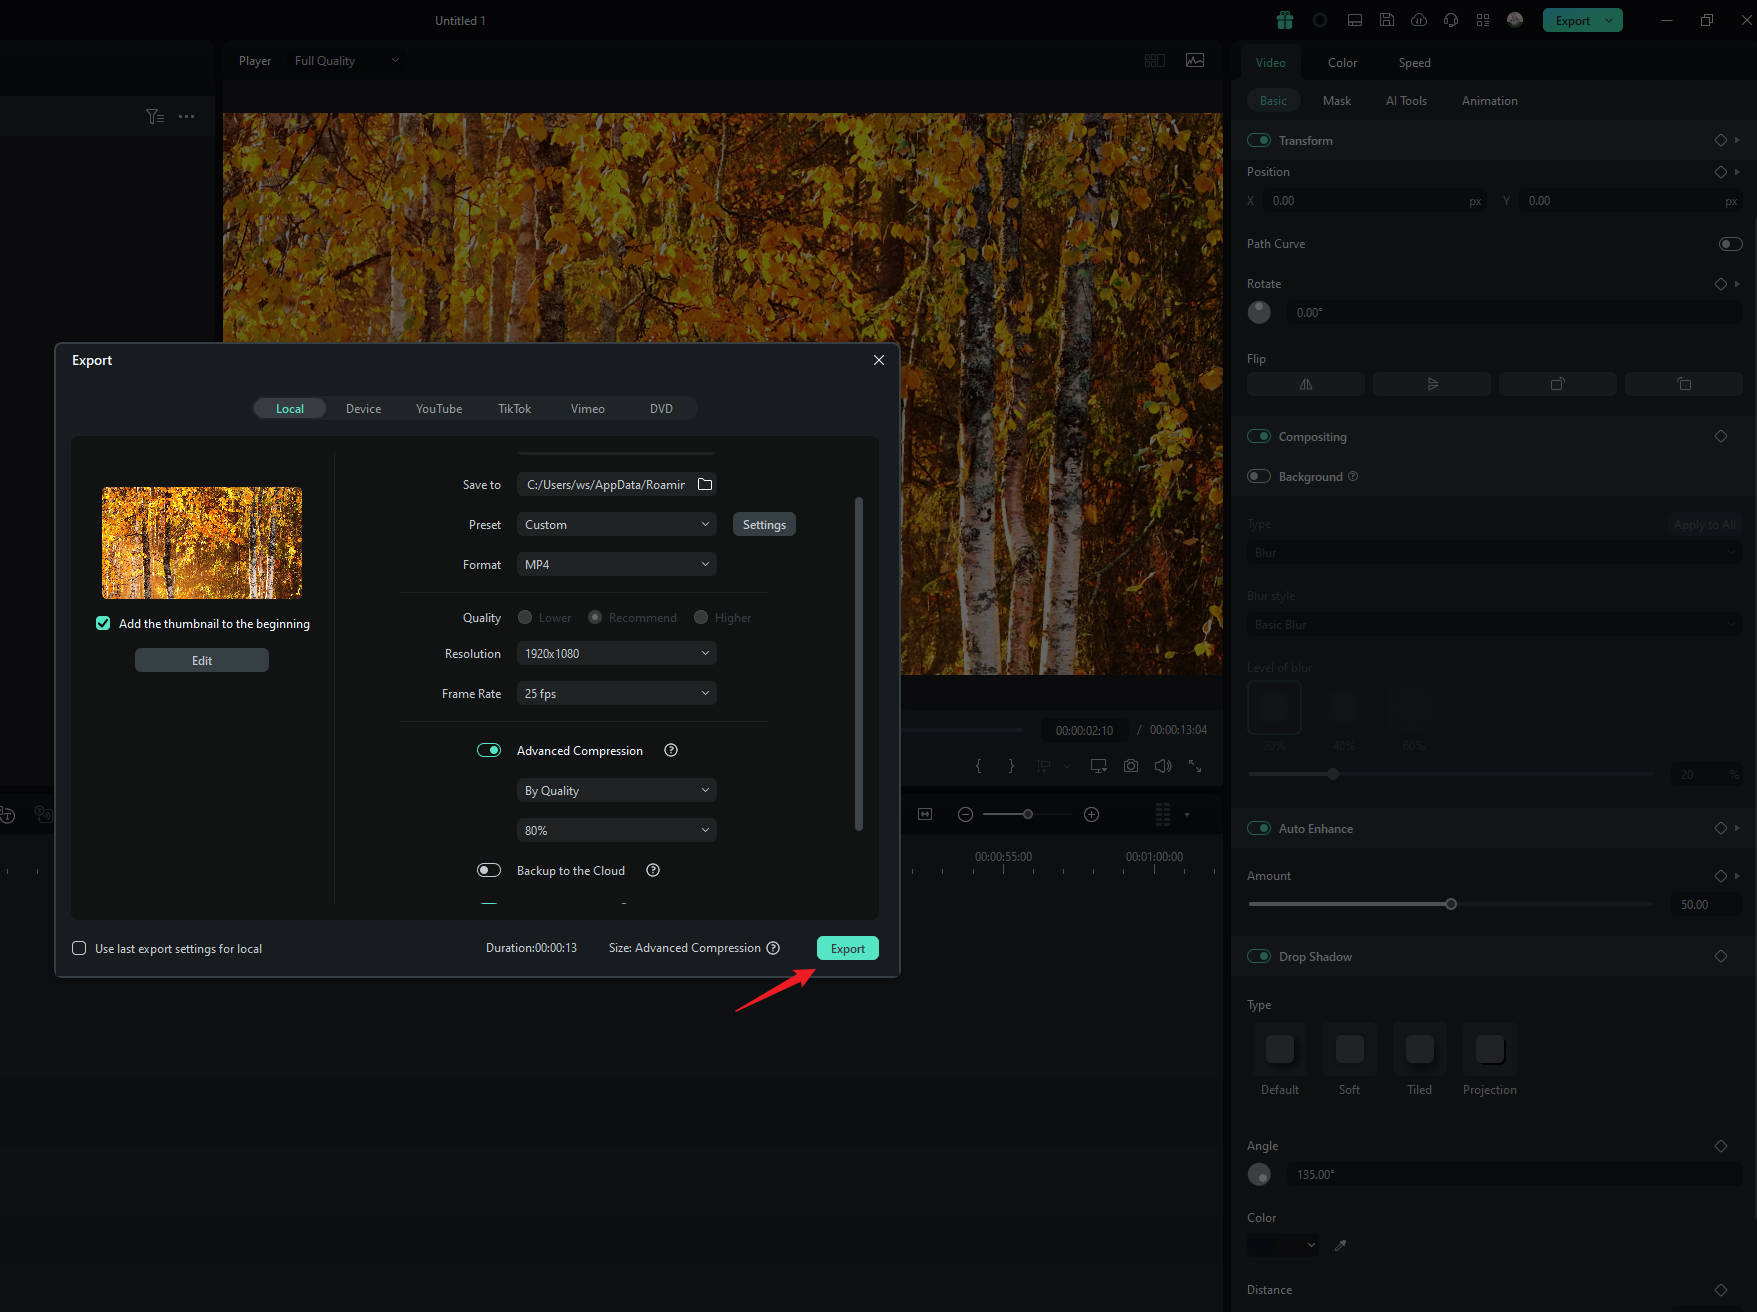
Step3Export your video
Choose the option that works best for you, and the tool will automatically compress your video. Once it's done, just click "Export" to save your video with the smaller file size.
Method 2: Using Auto Reframe Feature
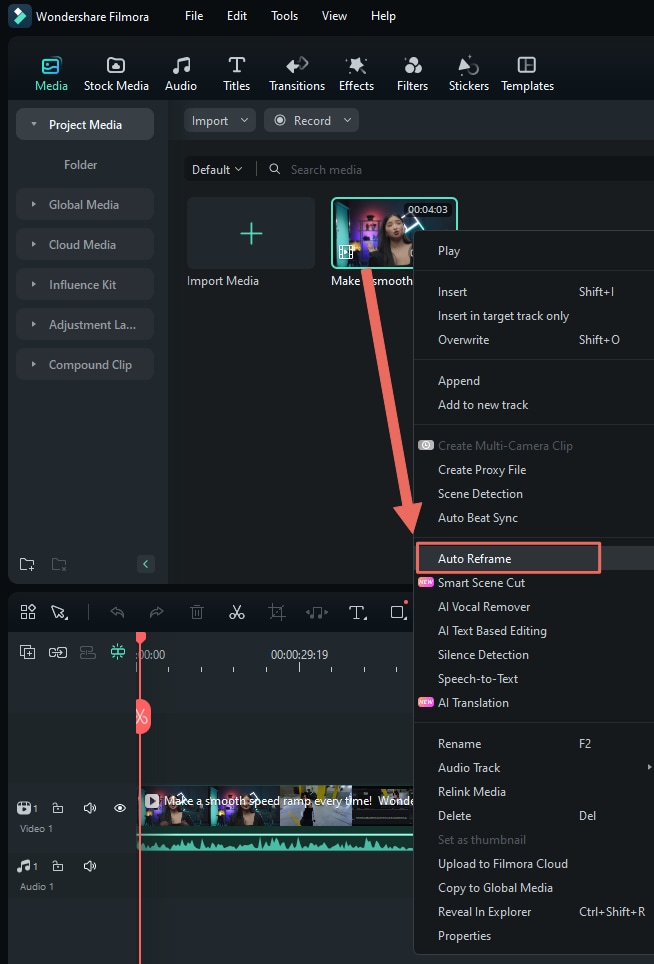
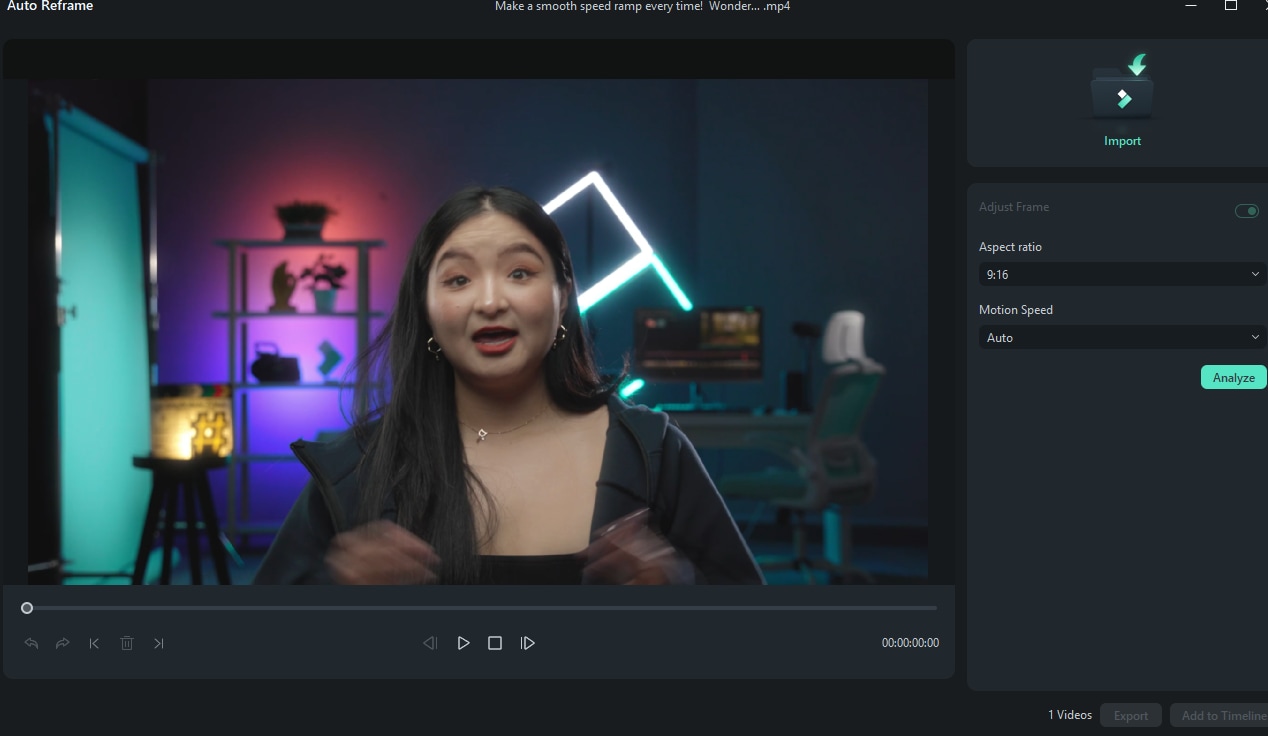
Step1Upload your video and access the Auto Reframe feature
After uploading your video to Filmora, go to Tools > Auto Reframe, or simply right-click the video in the media library and select Auto Reframe.
Step2Adjust aspect ratio
In the pop up window, you'll see several aspect ratio options like square (1:1), vertical (9:16), standard (4:3), widescreen (16:9), and cinema (21:9). Choose the one that will help reduce your video size. For example, if your video was originally widescreen (16:9), switching to a square (1:1) or vertical (9:16) aspect ratio can reduce the file size.
Once you've made your selection, click "Analysis" to let Filmora adjust the video accordingly.
Step3Review the preview and make any additional adjustments
Once you've set everything up and reframed your video, take a moment to preview it. If you need to make changes, just pause the video and drag the frame where you want it. Do this as needed. When you're satisfied with how it looks, click "Export" or "Add to Timeline" to save your changes.
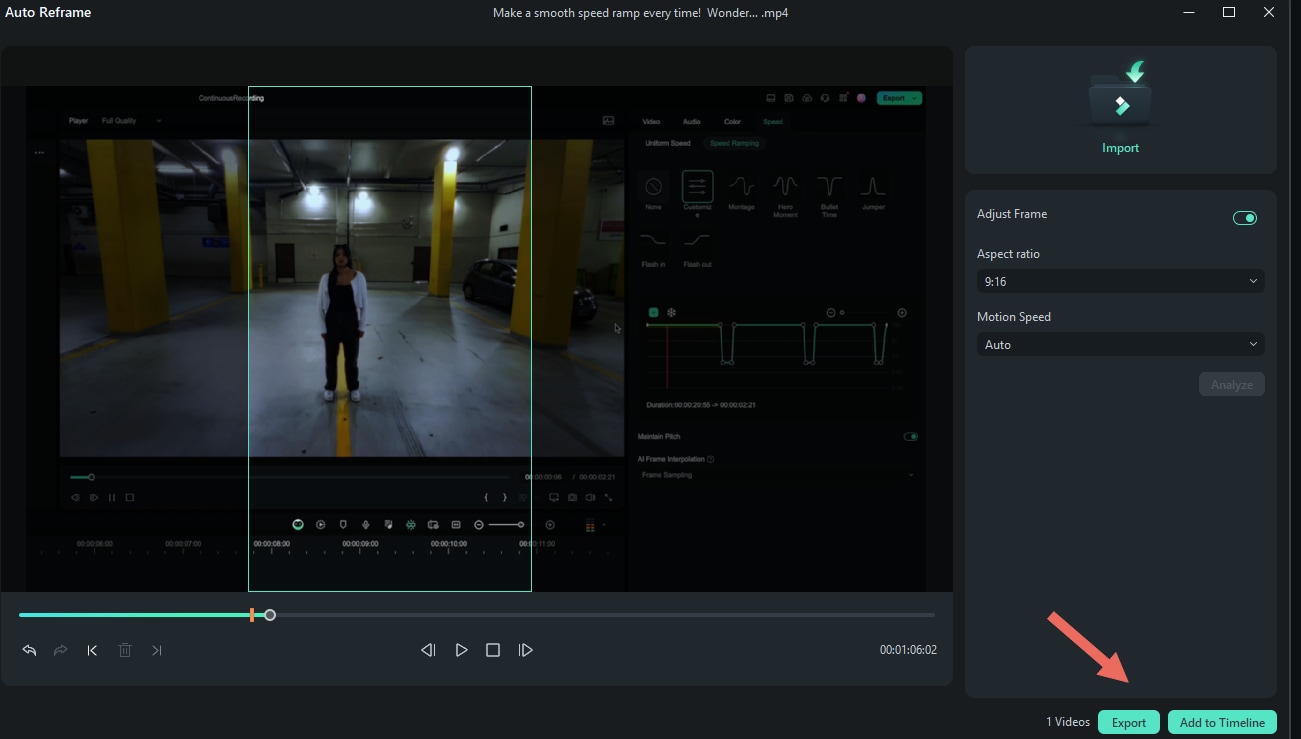
Step4Change the dimensions when exporting
The above mentions changing the dimensions of a single video or multiple videos in the media library, but you can also directly export videos from the timeline, select "Auto Reframe," and modify the dimensions.

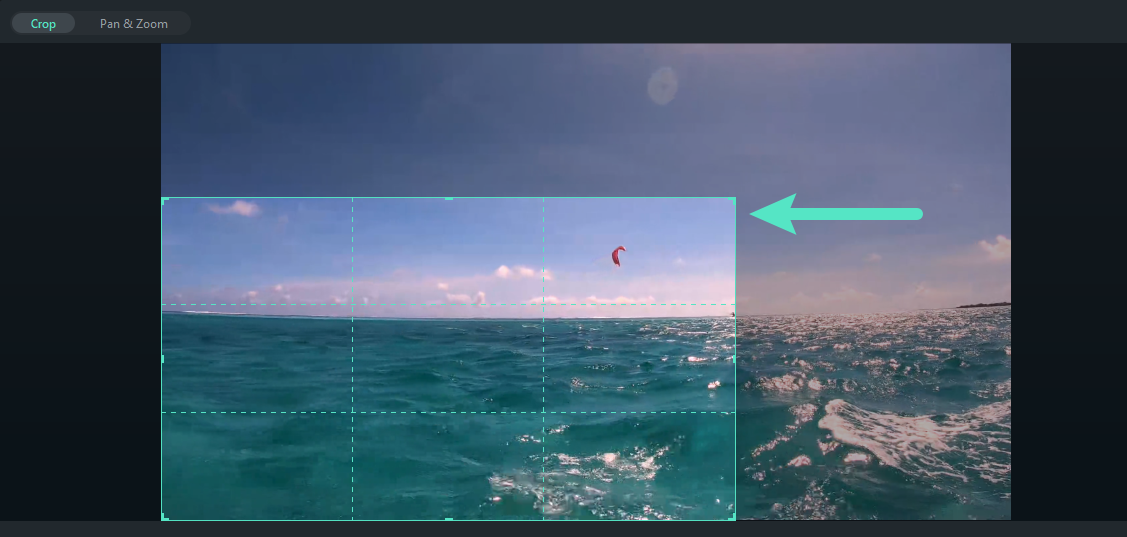
Method 3: Use The Crop Tool
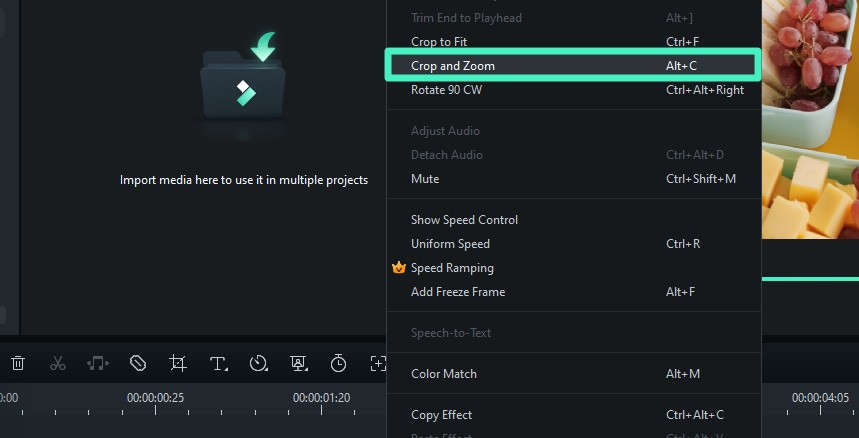
Step1Find the Crop tool
You can also reduce the size of your video by using the Crop tool to adjust the video dimensions. Just right-click on the video in the timeline and select the "Crop and Zoom" option.
Step2Select aspect ratio
In the Crop and Zoom panel, you can adjust the crop area by choosing from the available ratio presets.
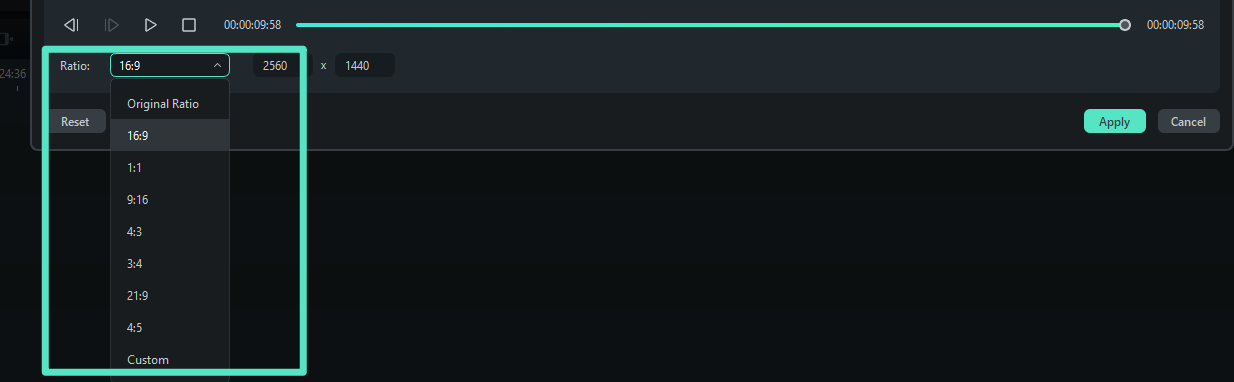
Step3Crop the video
To adjust the size and position, drag the crop box to choose the part of the video you want to keep. This will help resize your video and make the file smaller. When you're happy with it, click "Apply" to save your changes.
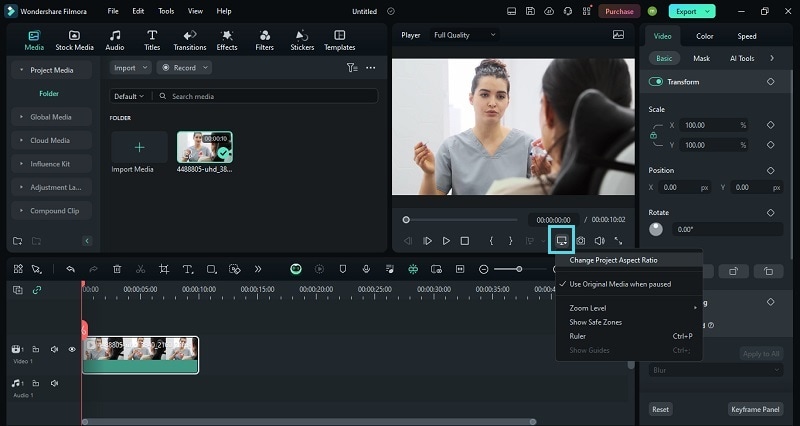
Method 4: Change Project Aspect Ratio
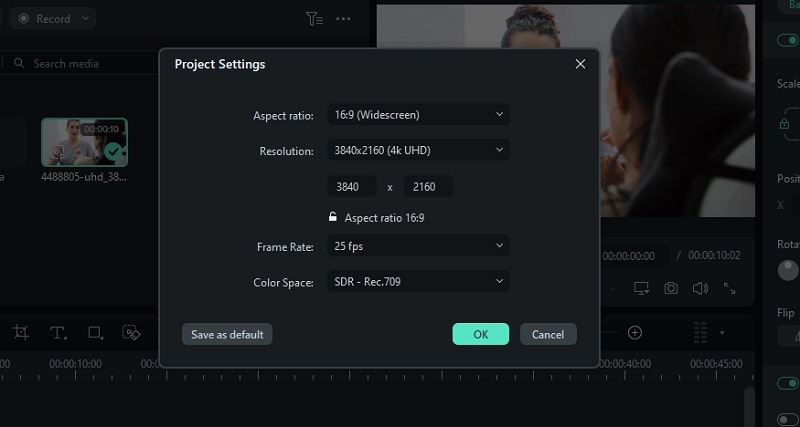
If you want a more straightforward approach, you can change the project aspect ratio. After importing your video to Filmora, click the Settings button and select "Change Project Aspect Ratio."
Then, you'll get to change the aspect ratio as well as the resolution and frame rate.
Conclusion
By reading this article, you should be able to easily master the methods of compressing videos in Premiere Pro and Filmora. Although Premiere Pro is a more professional video editing software on the market, Filmora offers a variety of video compression tools that make your editing more creative and the interface more intuitive, making it easier for beginners to get started. Let's practice together!
