


 ChatGPT
 Perplexity
 Gemini
 Claude
 Grok
Grok
Ever scrolled through an epic sports reel or a heartwarming wedding recap and wondered, “How do I make a highlight video like that?” You might want to create a highlight video for capturing game-winning goals, showcasing unforgettable moments from an event, or creating quick clips for social media.
A highlight video is the perfect way to tell your story in a compact format. The best highlight videos are short, impactful, and focused on the best moments—no fluff, just the highlights that grab attention and keep viewers hooked.

And to create a highlight video, you don't need to be a pro editor. If you're ready to bring your best moments to life, let's dive in!
In this article
Part 1. How to Create a Highlight Video Automatically with Filmora
Creating a highlight video doesn't have to be time-consuming or complicated. With Wondershare Filmora, every editing task is easy and quick. Its AI-powered tools can help you effortlessly identify, segment, and edit key moments from long videos. Tools like Smart Scene Cut, Smart Short Clips, and Scene Detection can streamline the process, saving you hours of manual work.
Here's how to make a highlight video with each feature to bring your best moments to life.
Method 1: Using Smart Scene Cut
Smart Scene Cut intelligently identifies and segments the key highlights, objects, or scenes in your footage. It is particularly helpful during the rough-cut stage, letting you extract the most impactful moments for quick editing and timeline placement.
How to Make a Highlight Video with Smart Scene Cut
Step1Launch Filmora and Enter Smart Scene Cut Interface
Open Filmora and locate the Smart Scene Cut window on the startup page.
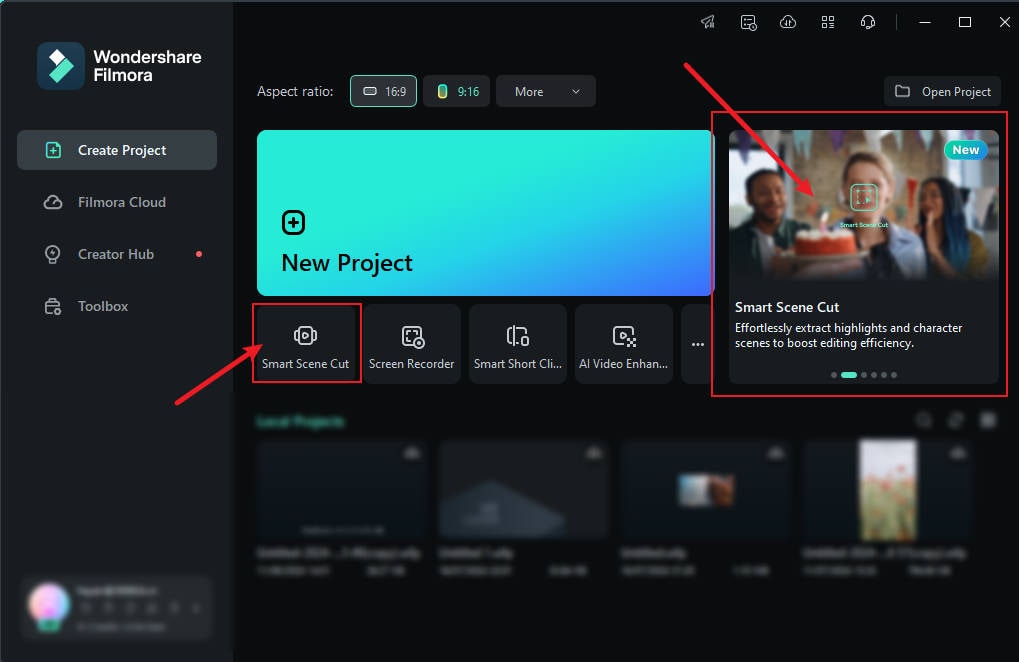
Or, you can also find the Smart Scene Cut feature in the video thumbnail after importing a video in a new project.
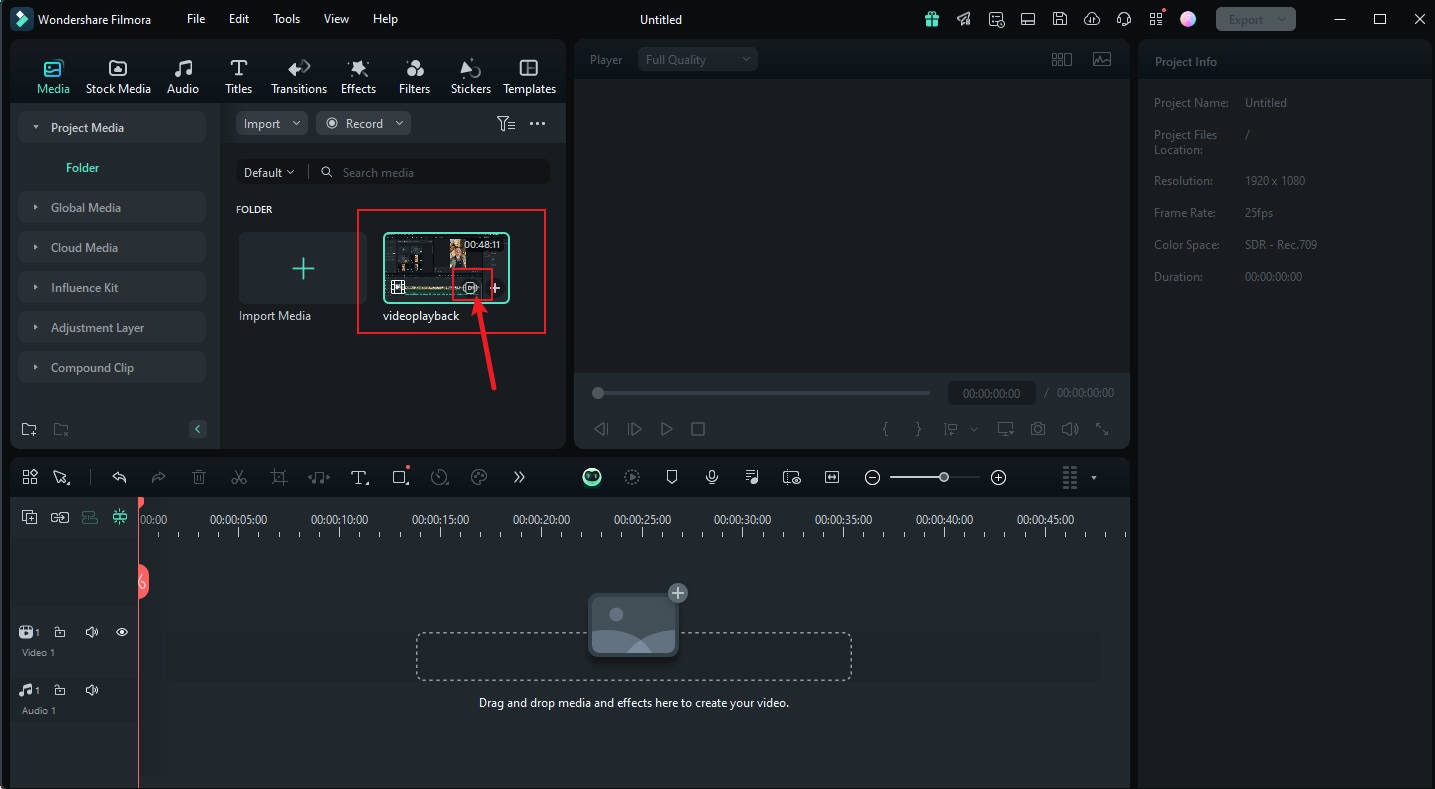
Next, click Create in the pop-up window. Filmora will process your video and upload it for segmentation.

Step2View and Edit Results
Once processed, navigate to the Media folder to find the segmented results. Filmora categorizes clips into:
- Highlight Scene: AI-detected standout moments.
- Character Scene: Focused on scenes with people.
- Custom Object: Allows you to select and track specific objects.
Watch this video for more details:
Method 2: Using Smart Short Clips
Smart Short Clips automatically generates bite-sized, social media-ready videos by analyzing and identifying key moments in your footage. It's ideal for creating engaging highlights tailored for platforms like TikTok, Instagram Reels, and YouTube Shorts.
How to Create a Highlight Video with Smart Short Clips
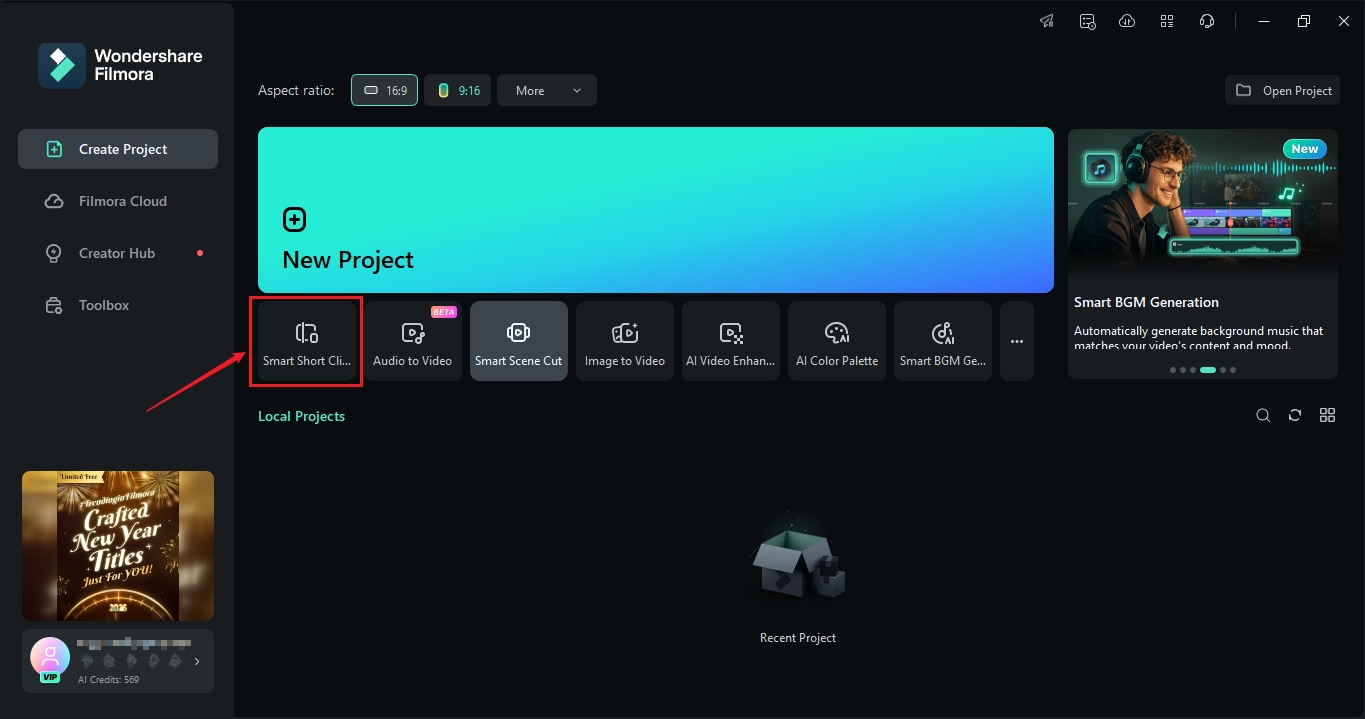
Step1Access Smart Short Clips
There are several ways to access the Smart Short Clips feature. First, from the Filmora launch screen, select Smart Short Clips under New Project.
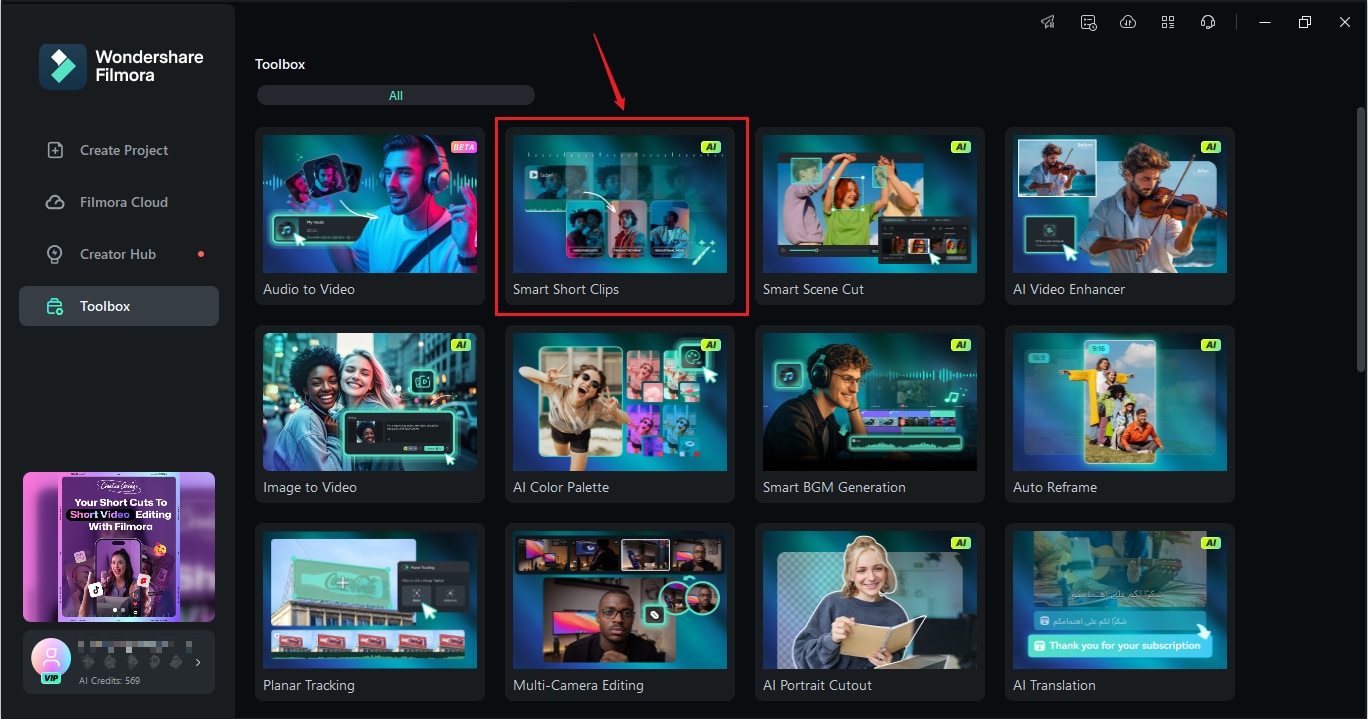
Alternatively, you can also access the Smart Short Clips feature via Toolbox by selecting the feature card.
Step2Upload Your Video
Paste a YouTube link, upload a local file, or select one from Filmora Cloud. Choose the source language and set the desired clip duration. Use the Advanced Menu to adjust aspect ratios, activate Smart BGM Generation, and add keywords to guide AI animations.
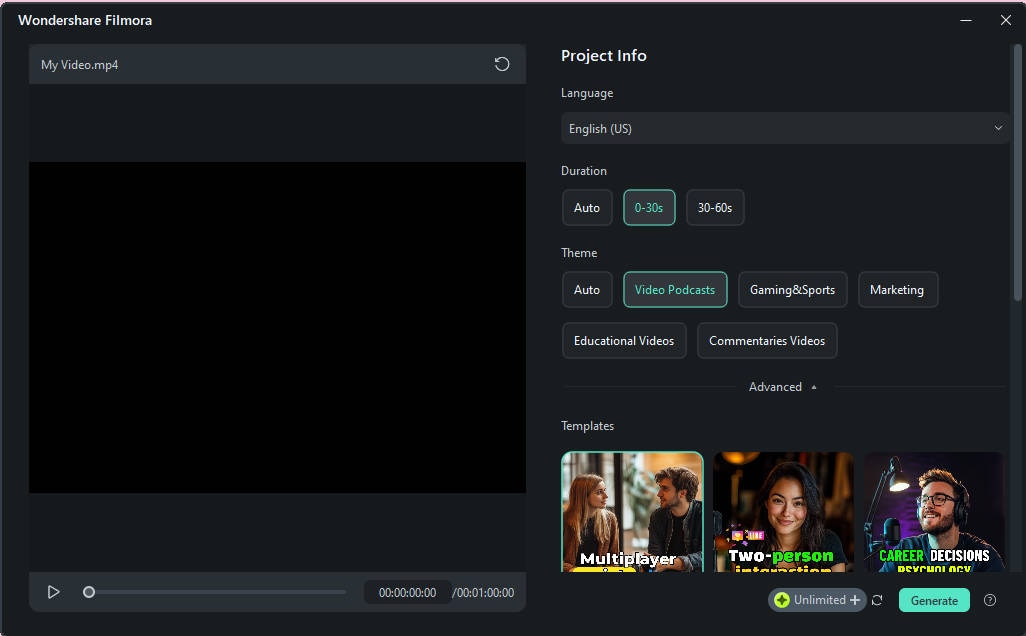
Select a video theme or template and click Generate. Filmora will analyze your video and produce multiple short clips.
Step3Review and Select
Review the AI-generated shorts. You can edit the Smart Short Clips editor by:
- Modifying captions and fonts.
- Adding transitions, effects, or text-to-speech voiceovers.
- Refining with stickers and animations.
Watch this video for more details:
Method 3: Using Scene Detection
Scene Detection automatically identifies transitions between shots, splitting long videos into smaller segments. It's perfect for quickly isolating scenes without manually scrubbing through the footage.
How to Make a Highlight Video with Scene Detection:
Watch this video for more details:
Part 2. More Features to Enhance Your Highlight Video
Once you've captured the best moments using Filmora's AI tools, it's time to elevate your event highlight video with advanced features. These tools can transform a simple video into a visually stunning, emotionally engaging masterpiece.
Here's how to use them to make your highlight video stand out:
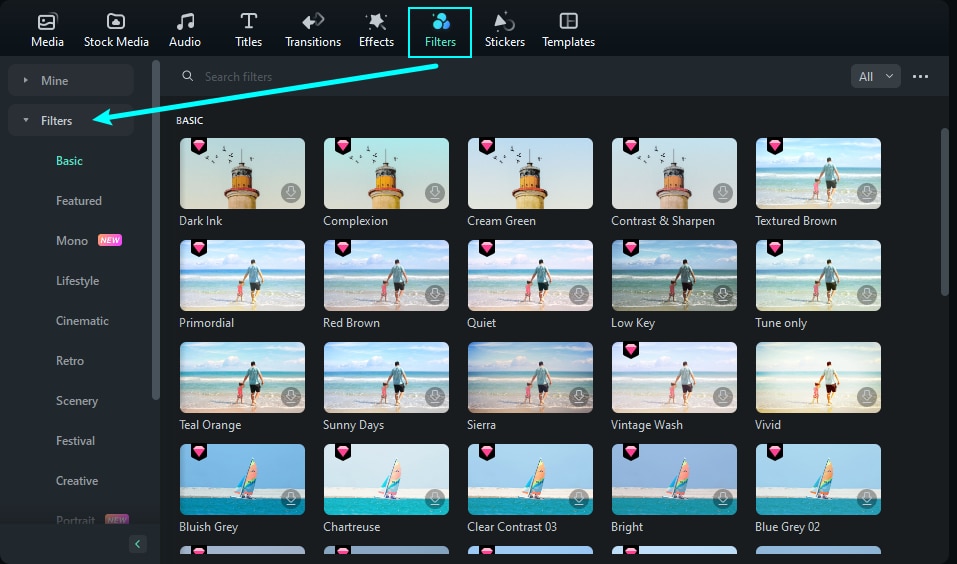
1. Transitions, Filters, and Effects
Smooth transitions and creative effects can turn raw footage into a cinematic experience. Filmora offers:
- Transitions: Seamlessly connect scenes with fades, wipes, zooms, and more.
- Filters: Adjust colors and tones to create a cohesive visual style—perfect for setting the mood.
- Effects: Add overlays like light leaks or glitch effects for a modern, polished look.
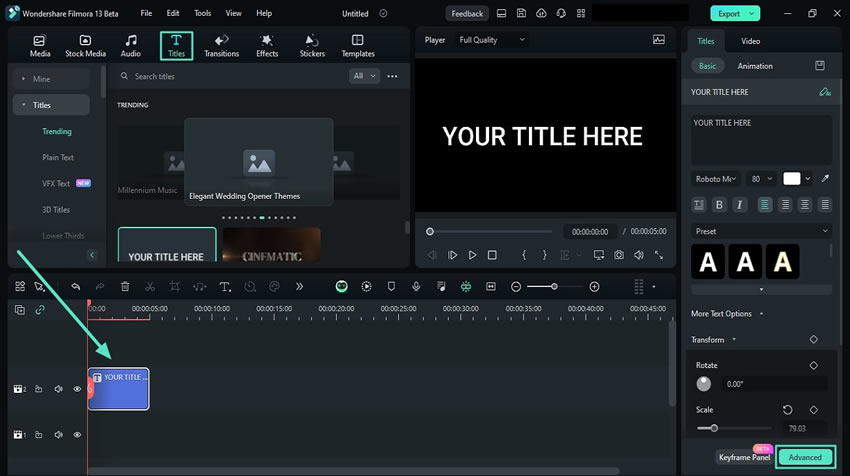
2. Text Overlays and Branding to Personalize Your Video
Adding captions, titles, or logos can make your video more engaging and tailored to your audience. Filmora provides:
- Customizable Text Overlays: Choose from over 1,000 templates to add stylish captions or intros.
- Logos and Watermarks: Establish your brand identity by incorporating your logo into the video.
- Title Effects: Use animated 3D titles for a dynamic touch.
3. Music and Sound Effects: Add Emotional Resonance
Sound is important for creating an emotional connection. Filmora's built-in library includes:
- Royalty-Free Music: Choose from curated tracks to match the mood of your video.
- AI-Generated Music and Sound Effects: Let AI create unique music that enhances your story.
- Audio Tools: Adjust volume, sync music to transitions, and remove background noise.

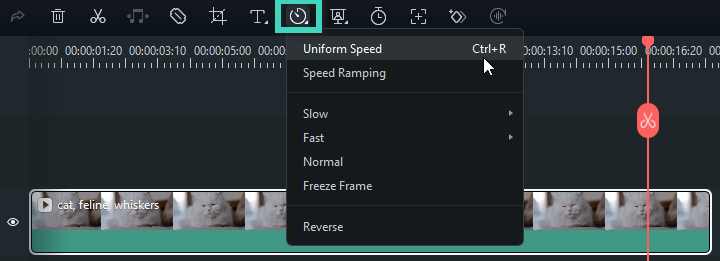
4. Speed Adjustments: Create Dramatic Moments
Manipulating video speed can add depth and drama to your highlight reel:
- Slow Motion: Emphasize pivotal moments, like a goal scored or a joyful smile.
- Fast Forward: Condense time-consuming scenes, such as event preparations or travel footage.
5. AI Tools: Elevate Quality with Advanced Technology
Filmora's AI tools make it easy to refine your video's visual and audio quality:
- AI Portrait: Automatically remove backgrounds to focus on the subject, perfect for creating clean, professional shots.
- AI Audio Denoise: Eliminate unwanted noise for crisp, clear sound, even in noisy environments.
- AI Speech-to-Text: Quickly generate subtitles or translations for accessibility and global reach.
Bring It All Together
By combining these advanced features, you can create a highlight video that's polished, professional, and emotionally impactful. Experiment with transitions, music, and AI tools to find the perfect blend of style and substance—and watch your highlights truly shine!
Part 3. Other Tools to Consider for Making Highlight Videos
While Filmora stands out as a powerful tool that is easy to navigate for creating highlight videos, there are other video editors available, such as:
- Adobe Premiere Rush (iOS and Android)
- Veed.io (Online)
- FlexClip (Online)
To help you decide which tool best suits your needs, here's a quick comparison:
| Feature | Filmora | Premiere Rush | Veed.io | FlexClip |
| Ease of Use | Very intuitive; and beginner-friendly. | Simple but limited features. | Easy, web-based editor. | Template-based, very easy. |
| AI Features | Available with advanced tools. | Only basic tools. | Available with some options. | Available, but for basic automated tools. |
| Transitions & Effects | Extensive library of filters, effects, and transitions. | Basic transitions. | Decent effects library. | Simple effects only. |
| Music & Sound | Royalty-free music and AI sound effects. | Limited music options. | Royalty-free stock library. | Few music tracks are available. |
| Pricing | Start from $9.33 monthly. | $9.99 monthly. | Start from $9 monthly. | Start from $11.99 monthly. |
| Best For | All users—beginners to pros. | Quick edits on mobile/desktop. | Online editing for quick projects. | Fast template-based edits. |
While tools like Premiere Rush, Veed.io, and FlexClip are suitable for simple projects, Filmora offers:
- AI-Powered Editing: Features like Smart Scene Cut and Smart Short Clips save time and effort.
- Professional Results: Access thousands of transitions, effects, and royalty-free music.
- Customization & Control: Advanced tools for both beginners and pros.
- Affordable Pricing: Flexible plans with excellent value for money.
Conclusion
Creating a highlight video doesn't have to be complicated. If you wonder how to make a highlight video, Filmora is the perfect solution. With Filmora, you can effortlessly turn long footage into short, engaging clips that capture your best moments.
Tools like Smart Scene Cut, Smart Short Clips, and Scene Detection make it easy to identify and edit highlights, whether you're showcasing sports, weddings, or social media content. Start creating professional-quality highlight videos today and bring your unforgettable moments to life with just a few clicks!
