

 ChatGPT
 Perplexity
 Gemini
 Claude
 Grok
Grok
From hiding unwanted elements to making custom animations and transitions, masks are a fundamental part of an Adobe After Effects workflow. They provide the editing precision necessary to cut out or combine different elements, allowing users to create complex compositions in a few steps.
That's why today's guide will explore masking processes further and dive into the After Effects mask-to-shape workflow.
Stick around. We'll look into masking applications, explain After Effects' masking shapes, and teach you how to create masks from shapes in After Effects. Finally, we'll provide an alternative solution for those who dislike the complexity of Adobe's products.
In this article
The Applications of Masking
The versatility of masking as a video editing process can be seen in multiple areas. Here are a few examples of its applications:
- Controlling Objects – Masks help editors cut out objects from their backgrounds, allowing them to place them in other scenarios and combine them to create complex scenes.
- Creating Dynamic Text – Creative and dynamic text elements that appear or disappear in exciting ways can make a big difference in animations and other videos, and masks can help here.
- Making Custom Transitions – Mastering an After Effects mask-to-shape workflow lets users animate masks and create interesting shapes, leading to thrilling video effects, compelling animations, and fantastic transitions that captivate the audience.
What Are the Different Masking Shapes in After Effects?
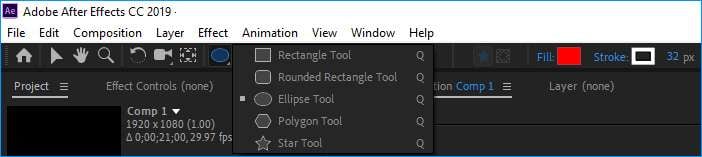
Adobe After Effects' popularity in masking workflows stems from the various masking shapes the software offers. These shapes include the following:
- Rectangle Tool;
- Rounded Rectangle Tool;
- Ellipse Tool;
- Polygon Tool;
- Star Tool.
Thanks to their names, these shaping tools are incredibly self-explanatory. Users can create elaborate masks for various purposes with these five After Effects Shape menu tools or a combination of these shapes. They can also cycle through them by pressing the Q key on their keyboards.
How to Mask From Shape in After Effects?
Although Adobe After Effects isn't exactly known as a beginner-friendly tool, the editing application has a relatively straightforward method for creating masks from shapes. Here's what you'll need to do:
- Open the Adobe After Effects app and import your media into the editing tool.
- Drag the media to the Timeline. Then, create a shape layer in the Timeline and click on it to select it.
- Go to the app's Shape tool menu and choose one of the five abovementioned tools (rectangle, polygon, star, etc.).

- Ensure the Tool Creates Mask option at the top is selected.

- Drag the cursor over your image or video; the app will create masks instead of shapes.
The annoying thing about creating After Effects masks from shape is that the program automatically switches back to the Tool Creates Shape option each time you click outside the Composition window or draw something. That's why you must constantly select the layer and enable the Tool Creates Mask option whenever you want to make a mask.
Pros and Cons of Using After Effects for Masking From Shape
While an After Effects mask to shape workflow can be advantageous for controlling the visibility of specific parts of your layers, the process also has more than a few drawbacks you should be aware of. With that said, let's explore these pros and cons together:
Considering these strengths and weaknesses, you can decide whether creating After Effects masks from shapes suits your needs. If it does, great. If it doesn't, you can always look into alternative solutions.
An Alternative to Consider: Wondershare Filmora
Despite being a prevalent editing tool, Adobe After Effects pays little attention to beginners and is often characterized as a professional tool. As such, its user interface can be challenging for beginners to navigate, so users look for alternative solutions.
Unlike Adobe After Effects, you can easily find the masking tools in Wondershare Filmora. In addition to that, it offers many different masks to choose from, like stars, hearts, circles, rectangular, or linear masks, and you can also upload any mask shapes according to your needs. What's more, with the power of AI, you can create the mask by the brush, or select the characters and subjects easily by switching the options.
How to Create and Edit Masks in Wondershare Filmora?
The result of beginner-first editing software is immense accessibility and a masking workflow that's effortless to master. It can be done in a few simple steps.
Here's what that workflow looks like:
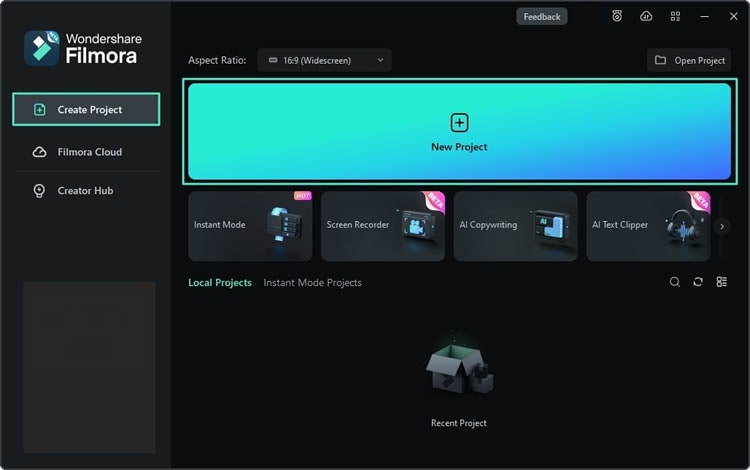
- Launch Wondershare Filmora and tap New Project.
- Click Import to add your media files.

- Drag and drop the imported media into the Timeline and click it to select it.

- Navigate to the right sidebar and select Video > Mask. Then, choose a masking shape, such as a heart, and place it onto your media in the Player panel. The Import option is also available for those who want to add existing masks.

- Alternatively, manually draw a complex mask shape using the Draw Mask option. You can then adjust the Expand, Blur Strength, and Opacity, add a Path, activate the Invert Mask option, or add multiple masks and keyframes.

- Once done adding and editing mask shapes, click Export in the top right corner.
Unlike Adobe After Effects, Filmora also has an AI-enhanced masking tool, AI Smart Mask, which drastically enhances your editing workflow and lets you create custom masks that make your projects truly unique. Here's how you can use it:
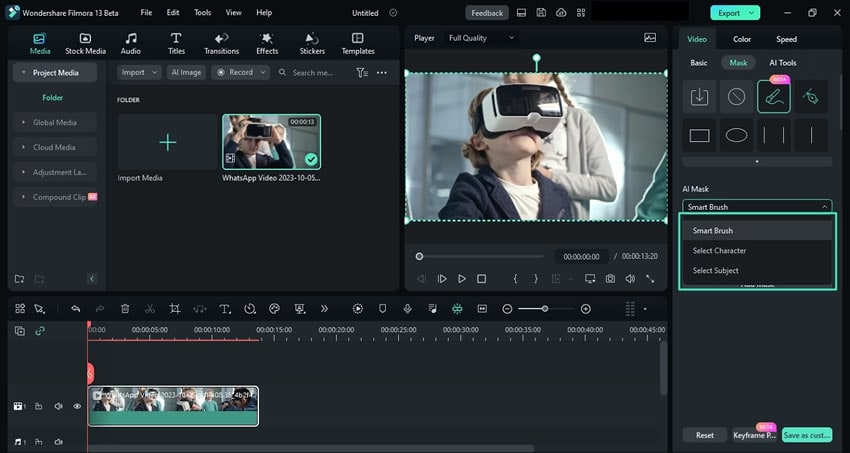
- Once you have selected an image or video in the Timeline, go to Video > Mask in the sidebar on the right and select the AI Mask option.
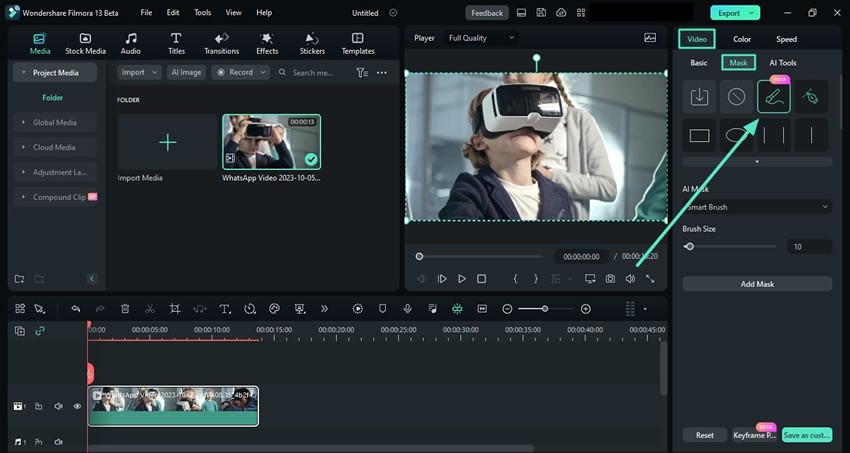
- Choose the Select Character or Select Subject options, or pick a Smart Brush and adjust its size.
- You can customize the same Expand, Blur Strength, Opacity, and Path settings or use the Invert Mask tool, just like the Draw Mask option.
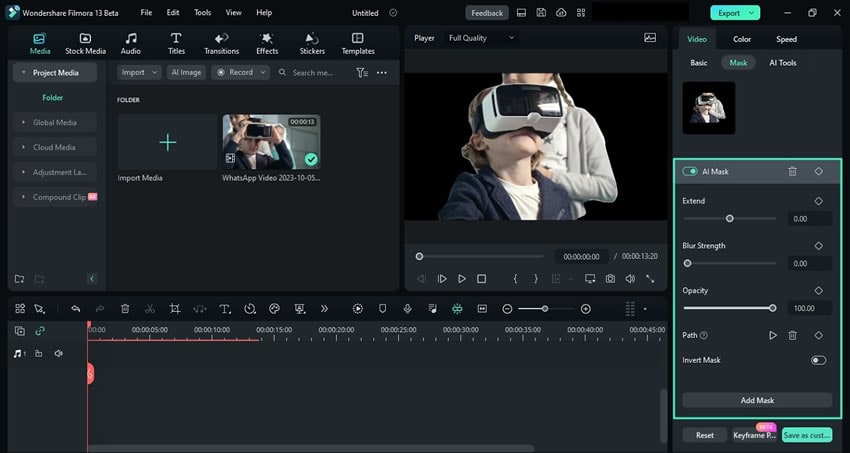
- Tap the Add Mask button. You can also open the Keyframe Panel or use the Save as Custom option in the bottom right corner to save your masking settings for different media.
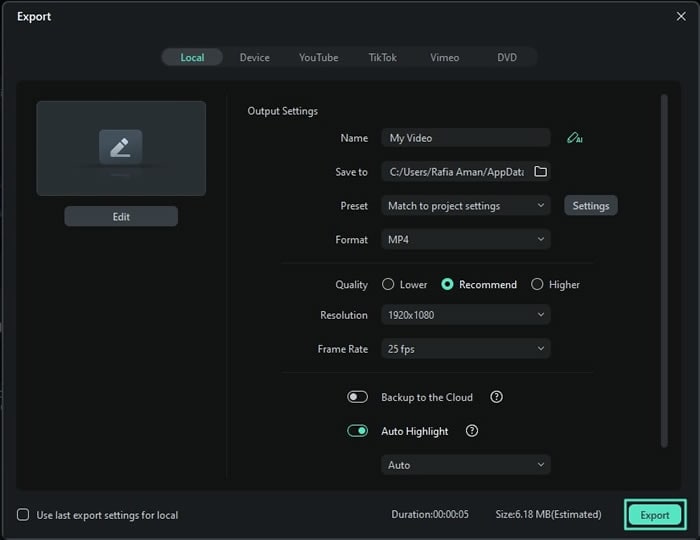
- When ready, press the Export button at the top right, adjust the output settings, and tap Export again to save your projects to the device.
As you can see, both traditional masking shapes and the AI-enhanced Smart Mask tool are easier to use than Adobe's, they not only help you save time but also produce good-quality results, which makes Filmora a fantastic alternative to creating masks from shapes in After Effects.
Conclusion
Creating masks from shapes in After Effects can be an incredibly precious editing technique that lets users manipulate different elements, create complex After Effects compositions, or make custom animations that draw the audience's attention to the video. While Wondershare Filmora, not only offers traditional masking shapes but also AI masking tools that can improve your video editing efficiency!
Let's download Wondershare Filmora today and see the magic of AI masking!
