For the Best Results, Use the Latest Version.
-
Preparations for Mac
-
Account (Mac)
-
Get Started & Basic Settings (Mac)
- Release notes for Mac
- Latest Versions and Features for Mac
- Get Started on Mac - Full Guide
- Download/register/uninstall on Mac
- Panel Layout on Mac
- Keyboard shortcuts on Mac
- Touchbar on Mac
- Change playback quality on Mac
- Render preview files on Mac
- Manage timeline on Mac
- Media for use on Mac
- Logo Reveal For Mac
- Marked Favorites for Mac
-
Compatibility & Tech Specs (Mac)
-
Performance Settings (Mac)
-
-
Creating Projects - Mac
-
Creating New Projects (Mac)
-
-
Importing & Recording - Mac
-
Importing (Mac)
-
Recording (Mac)
-
-
Video Editing for Mac
-
Basic Video Editing for Mac
- Edit Live Photos on Mac
- Enable/Disable Clip for Mac
- Magnetic Timeline For Mac
- Select All Clips on Timeline for Mac
- Auto Ripple for Mac
- Split & cut videos on Mac
- Compositing on Mac
- Crop and zoom on Mac
- Playback Zoom Level for Mac
- Change speed on Mac
- Play video in reverse on Mac
- Mark In and Mark Out for Mac
- Markers for Mac
- Group clips on Mac
- Customized Backgrounds for Videos and Images in Mac
- Video snapshot on Mac
- Freeze frame on Mac
- Auto enhance on Mac
- Applying Drop Shadow for Mac
- Adjustment Layer for Mac
- Mark clip on Mac
- Video Editing Ruler – Mac
- Apply Transforming for Mac
-
Advanced Video Editing for Mac
-
AI-Powered Video Editing for Mac
- Smart Scene Cut for Mac
- Smart Short Clips for Mac
- Image to Video for Mac
- AI Idea to Video for Mac
- AI Text-to-Video for Mac
- Instant Cutter Tool on Mac
- AI Face Mosaic for Mac
- Keyframe Path Curve for Mac
- Planar Tracking for Mac
- AI Extend For Mac
- AI Script-to-Video for Mac
- AI Text-Based Editing in Mac
- Create With Instant Mode on Mac
- ChatGPT Plugin - AI Copywriting on Mac
- AI Smart Cutout for Mac
- Auto reframe on Mac
- Lens correction on Mac
- AI Portrait Cutout on Mac
- Scene detection on Mac
- AI Smart Masking for Mac
- AI Mate Editing for Mac
- Motion Tracking on Mac
- Stabilize video on Mac
- AI Object Remover For Mac
- AI Smart Search for Mac
- AI Skin Tone Protection for Mac
- Green screen on Mac
- Super Slow Motion with Optical Flow for Mac
- AI stylizer on Mac
- Video Denoise for Mac
-
-
Audio Editing for Mac
-
Basic Audio Editing for Mac
-
Advanced Audio Editing for Mac
-
AI-Powered Audio Editing for Mac
- Audio To Video for Mac
- AI Sound Effect for Mac
- Smart BGM Generation for Mac
- AI Voice Enhancer for Mac
- Audio Stretch for Mac
- AI Audio Denoise for Mac
- Auto synchronization for Mac
- AI Vocal Remover for Mac
- Auto Beat Sync on Mac
- AI Music Generator for Mac
- How to Perform AI Voice Cloning in Wondershare Filmora?
- Silence detection on Mac
-
-
Text Editing for Mac
-
Basic Text Editing for Mac
-
Advanced Text Editing for Mac
-
AI-Powered Text Editing for Mac
-
-
Video Customizations for Mac
-
Video Effects (Mac)
-
Audio Effects (Mac)
-
Transitions (Mac)
-
Stickers (Mac)
-
Filters (Mac)
-
Color Editing (Mac)
-
Animations (Mac)
-
Templates (Mac)
-
Asset Center (Mac)
-
-
Exporting & Share & Cloud Backup - Mac
Import Subprojects on Mac
Filmora's Import Subprojects feature significantly enhances workflow efficiency by allowing users to import multiple project files as subprojects into a master project. This enables creators to reuse media, timelines, and templates seamlessly across projects.
Index
Introducing Filmora Subprojects Management: Effortlessly Manage Multiple Projects
This efficient utility optimizes project management by organizing workflows clearly, preventing slowdowns from overly large single files. This fosters enhanced team collaboration by simplifying asset sharing and preventing version conflicts. Users also benefit from unified style management to maintain consistent branding across video series. The Import Subprojects feature ensures smooth operations through compatibility checks and error handling.
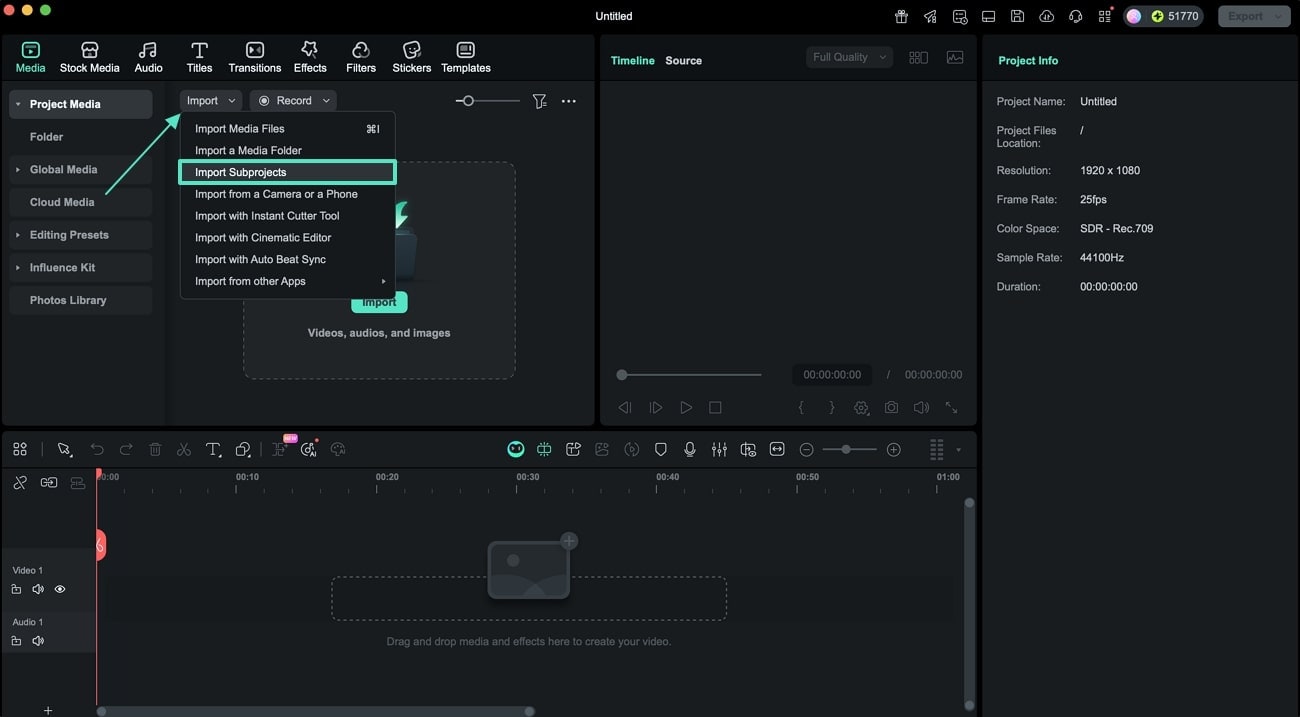
Step 1. Start by Accessing the Import Media Folder
After launching Filmora and creating a new project on your Mac, enter the editing interface. Here head to the Media section and expand the Import dropdown menu. From here, click on the Import Subprojects option from the list.
Step 2. Wait for the Project to Import
Once you select the project from your Mac's storage, wait for the tool to completely load it within its interface. Users can import .wfp or .wfpbundle files through this option. During the import process, a progress indicator will be displayed, and users can track its progress.

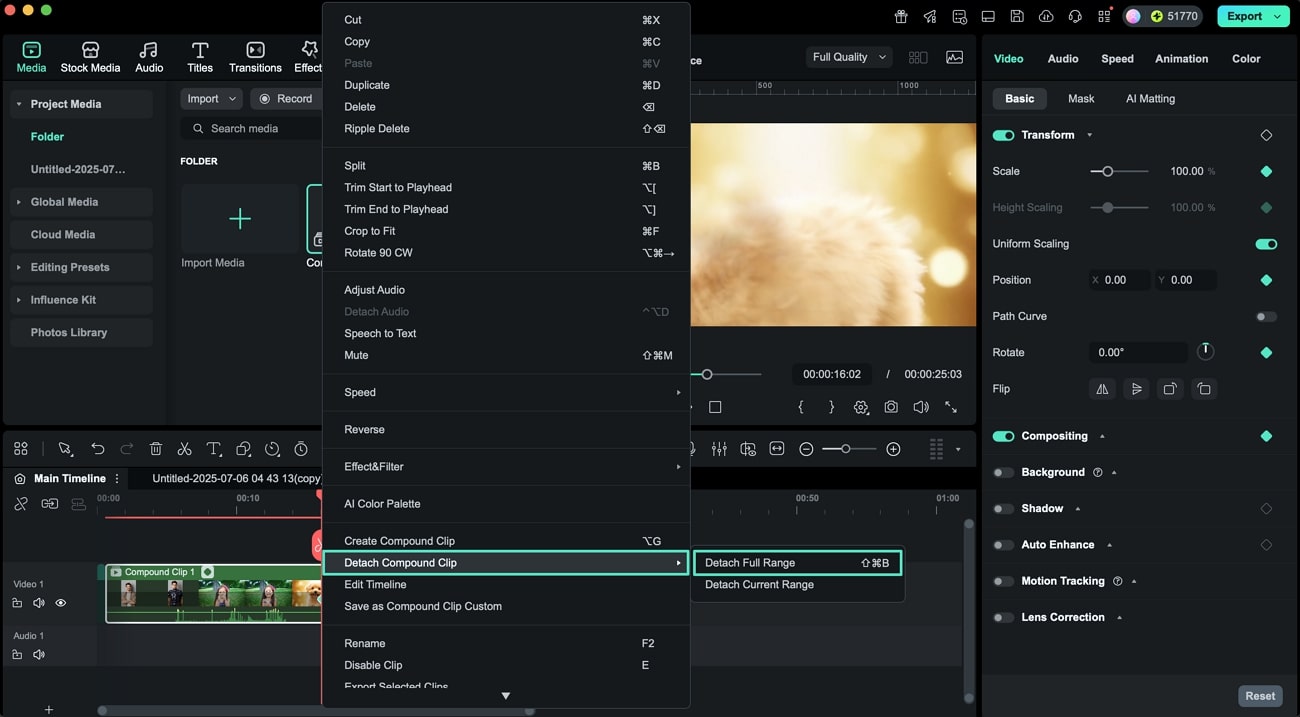
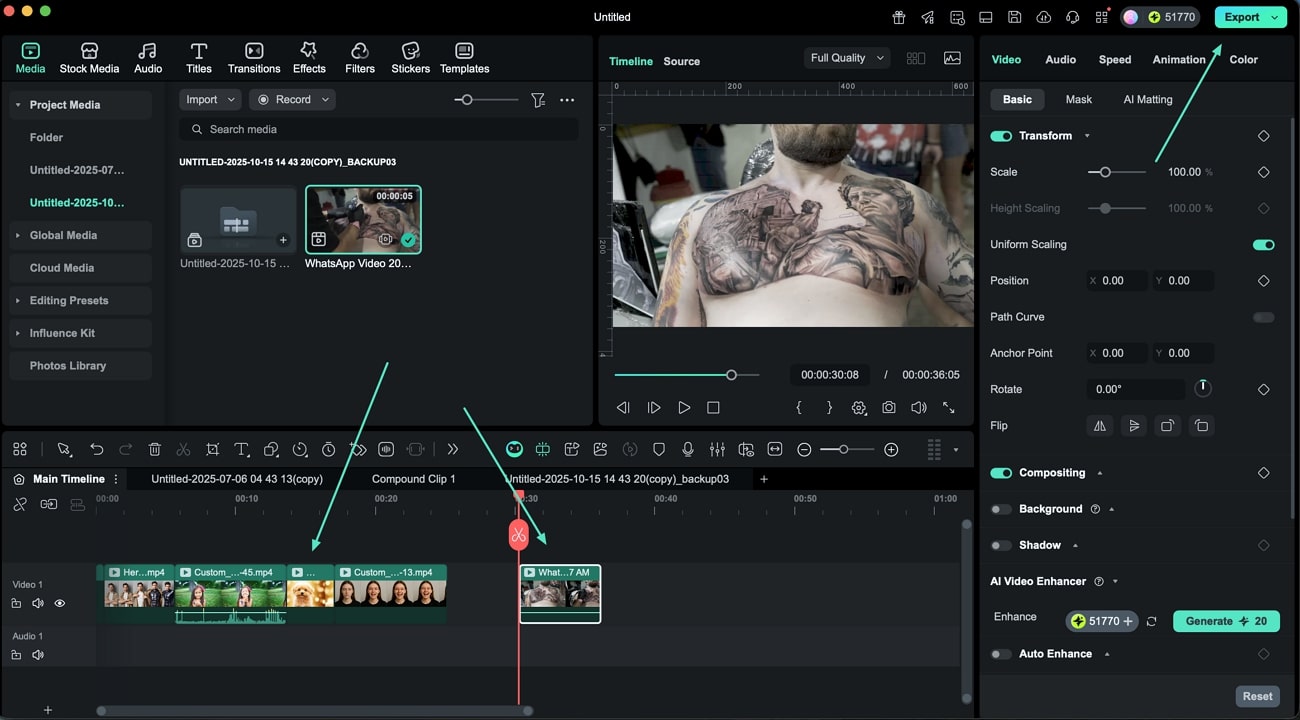
Step 3. Detach Compound Clip
A new folder is created in the Media Library, displaying the imported project's media assets and Compound Clips. You can drag and drop imported Compound Clips onto the current master project's timeline. Right-click on the clip and click the Detach Compound Clip option from the list.
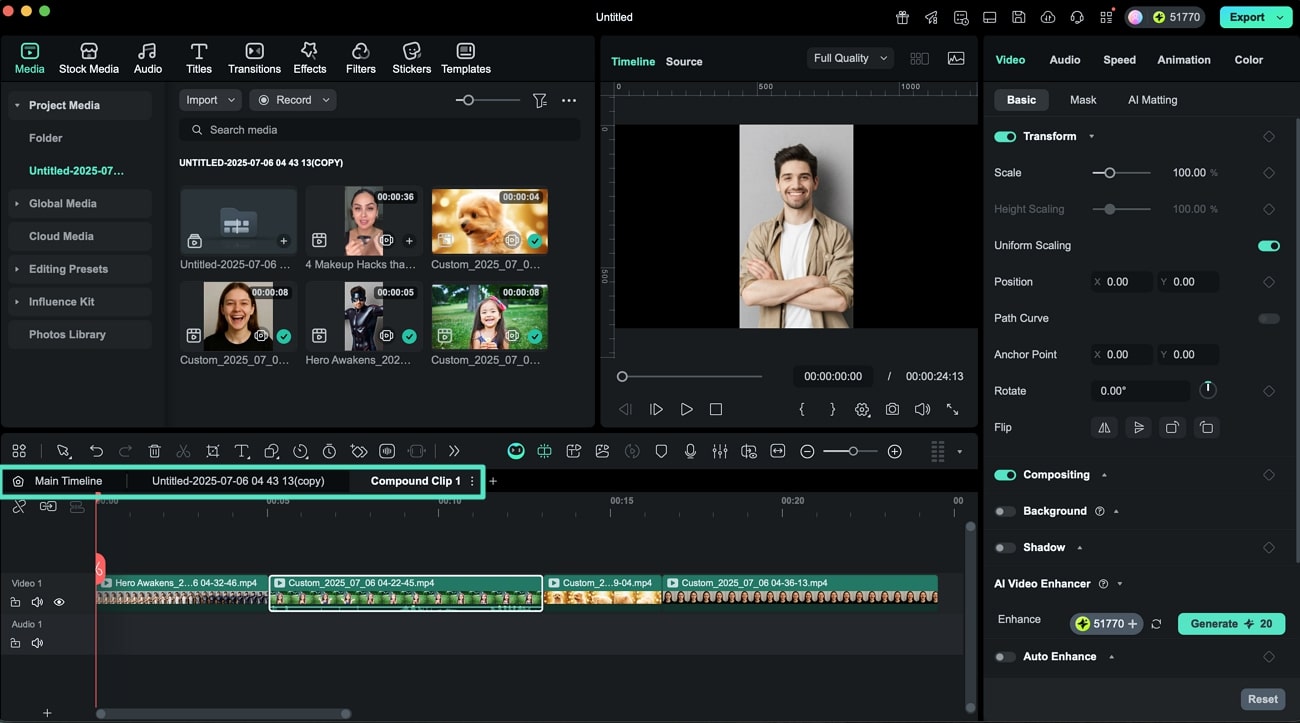
Step 4. Edit a Specific Composite Clip
Double-click on a composite clip to enter the internal editing view and once the editing is done, you can return to the master timeline by selecting the right option by switching the timeline.
Step 5. Import Another Project File
After editing is complete, head to Media section again and expand the Import option. Now, locate the Import Subprojects option and click on it to import another project.
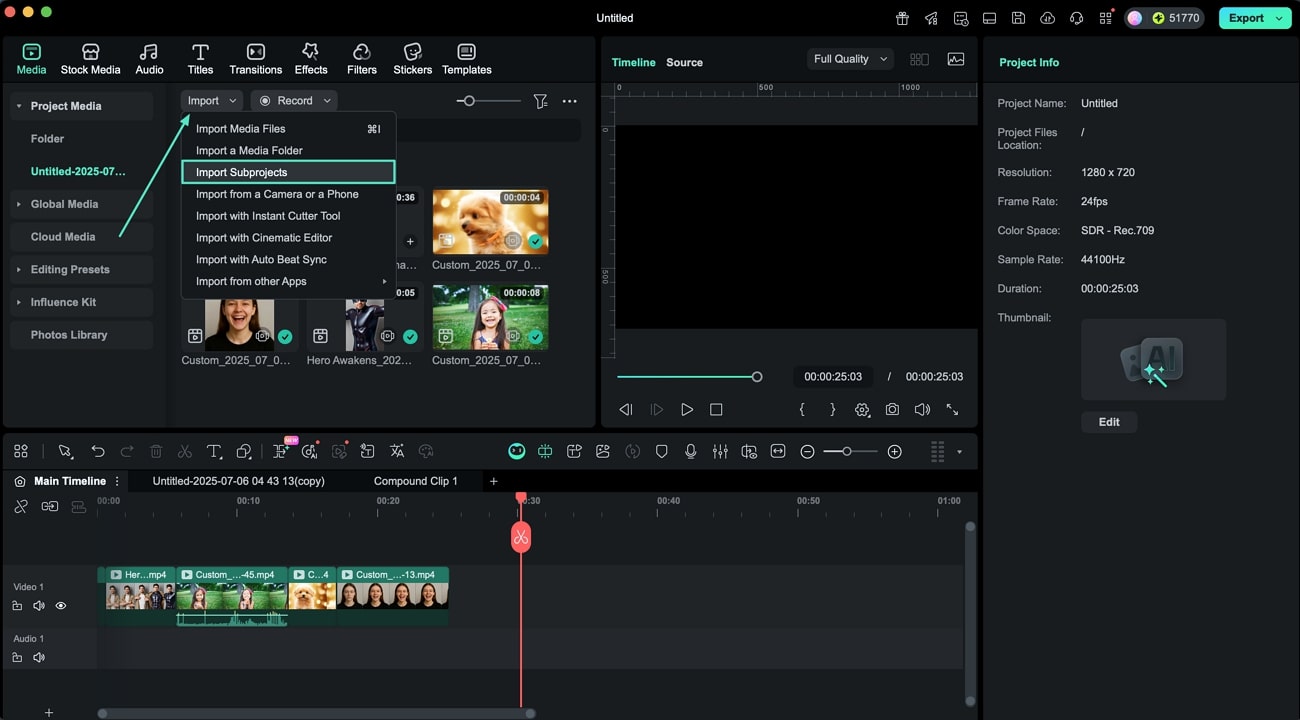
Step 6. Perform Multi-Project Editing on Timeline
Once the second project is imported, you can make changes to the visuals and apply assets simultaneously as Filmora supports multi-project editing on the same timeline. Once editing is finalized, head to the top-right corner of the interface and click the Export button to save the results.
Note:
Filmora's project and asset handling system ensures efficient management by automatically checking for missing media files during import, prompting users to relink assets if necessary. Its consistent saving mechanisms and compatibility checks further guarantee a smooth workflow, minimizing errors and ensuring a seamless editing experience.Related Posts
Featured Articles
What is the Razor Tool and How to Use the Premiere Pro Razor Tool?
Struggling with messy timelines when cutting clips in Premiere Pro? The Razor Tool (shortcut C) lets you cut video/audio precisely. Learn step-by-step use, key shortcuts (Ctrl+K/Cmd+K), fix gaps/pops, and try Filmora for easier cutting.
10 Best Short Haircuts for Men – Virtual Try-On with AI
See what you would look like with different short hairstyles for young guys. Try on different men's short haircuts and stick around for a surprise near the end.
Complete Guide: How to Use Green Screen on Twitch
Tired of your boring Twitch background? Learn how to set up a Twitch green screen for captivating backgrounds and take your Twitch streams to the next level.
Recommended User Guide
Import on Mac
Learn how to import media files to your Filmora for Mac.
Import Media from Third-Party Drives on Mac
Filmora makes it possible to import media from third party drives, including Google Drive, One Drive and Dropbox.
