For the Best Results, Use the Latest Version.
-
Preparations
-
Account
-
Get Started & Basic Settings
-
Compatibility & Tech Specs
-
Performance Settings
-
-
Creating Projects
-
Creating New Projects
-
-
Importing & Recording
-
Video Editing for Windows
-
Basic Video Editing
- Enable/Disable Clip in Windows
- Magnetic Timeline for Windows
- Dual Monitor Setup for Video Editing on Windows
- Select All Clips on Timeline for Windows
- Manage Timeline and Tracks on Windows
- Auto Ripple for Windows
- Split & trim video
- Crop & Pan & Zoom Video
- Compositing
- Change Video Speed on Windows
- Playing videos in reverse
- Mark In and Mark Out for Windows
- Markers for Windows
- Group editing
- Customizable Backgrounds for Videos and Images in Windows
- Video snapshot
- Using freeze frame
- Logo Reveal For Windows
- Apply auto enhance
- Applying drop shadow
- Adjustment layer for Windows
- Transforming
- Video Editing Ruler – Windows
-
Advanced Video Editing
- Drawing Tools for Windows | Filmora Guide
- Create Multi-Camera Clip
- Compound Clip for Windows
- Multi-Clip Editing for Windows
- Filmora Motion Blur | Windows
- Filmora Flicker Removal Guide | Windows
- Apply mask to video
- Creating a PIP effect
- Keyframe Graph Editor for Windows
- Add animation keyframing for Windows
- Keyframe Path Curve for Windows
-
AI-Powered Video Editing
- Smart Scene Cut for Windows
- Smart Short Clips for Windows
- AI Face Mosaic for Windows
- Filmora AI Eye Contact- Windows
- AI Video Enhancer for Windows
- AI Text-to-Video for Windows
- Planar Tracking for Windows
- AI Idea to Video for Windows
- Filmora Image to Video for Windows
- Filmora Image to Prompt for Windows
- Instant Cutter Tool for Windows
- AI Extend
- Filmora AI Relight - Windows
- Filmora AI Image Enhancer Guide - Windows
- AI Script to Video Guide for Windows
- AI Text-Based Editing for Windows
- AI Mate Editing for Windows
- Create with instant mode
- ChatGPT Plugin - AI Copywriting
- AI Smart Cutout
- Lens correction on Windows
- Auto reframe video
- AI Portrait Cutout
- Scene detection feature
- AI Smart Masking for Windows
- Make motion tracking
- Video Stabilization for Windows
- AI Video/Photo Object Remover for Windows
- AI Smart Search for Windows
- AI Skin Tone Protection for Windows
- AI Image for Windows
- Chroma key (green screen)
- Super Slow Motion with Optical Flow for Windows
- Video Denoise for Windows
-
-
Audio Editing for Windows
-
Basic Audio Editing
-
Advanced Audio Editing
-
AI-Powered Audio Editing
-
-
Text Editing for Windows
-
Basic Text Editing
-
Advanced Text Editing
-
AI-Powered Text Editing
-
-
Video Customizations
-
Video Effects
-
Audio Effects
-
Transitions
-
Stickers
-
Filters
-
Color Editing
-
Animations
-
Templates
-
Asset Center
-
-
Exporting & Share & Cloud Backup
AI Extend
The AI Extend feature of Filmora intelligently extends clips by 5-8 seconds, maintaining smooth transitions and consistent scenes to preserve story flow. Users get multiple opportunities to cast out all creative interruptions by supplementing unique content into the original video. Offering better stability and continuity among its competitors, this one-click extension has changed the concept of AI editing.
Upon reading this guide, you will learn how to use AI Extend to seamlessly lengthen your video clips:
Introducing Filmora AI Extend: Expand Beyond Imagination
Filmora’s new AI Extend feature offers professional-grade video extension, delivering smooth continuity and stable performance. It integrates deeply with the timeline workflow, letting users edit AI-generated clips just as easily as normal ones. The feature lets users add effects and transitions freely without importing or exporting hassles.
Covering the entire creative process from AI asset generation to final editing and splicing, AI Extend seamlessly merges extended clips with originals, preserving story integrity and preventing jump cuts. Its intuitive interface enables one-click extension and clearly shows extension direction. The tool boosts efficiency by allowing quick addition of 5-10 seconds. Besides video extension, users also get the ability to extend the audio using AI.
Entry 1: From Media Timeline
To access the AI Extend feature, the first option is from the media timeline. Alternatively, you can access the AI Extend feature from the product startup page, too. To know how it is used properly, look into the following steps:
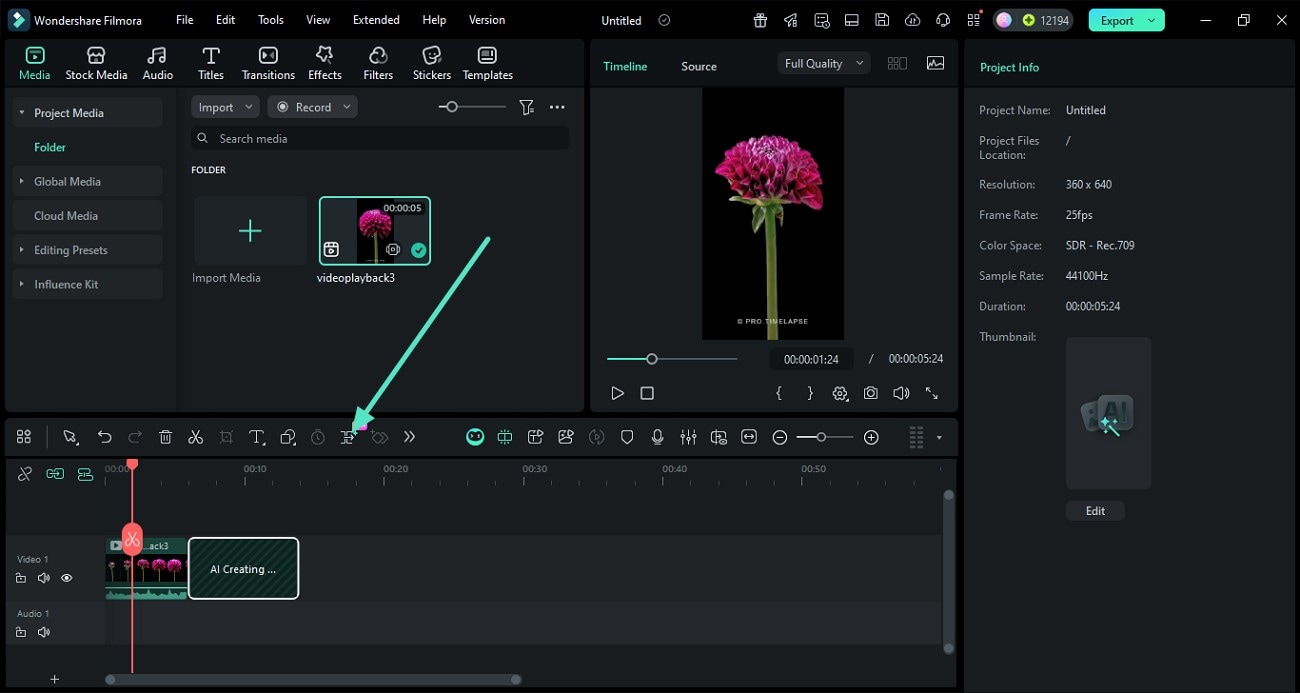
Step 1. Access AI Extend From Timeline
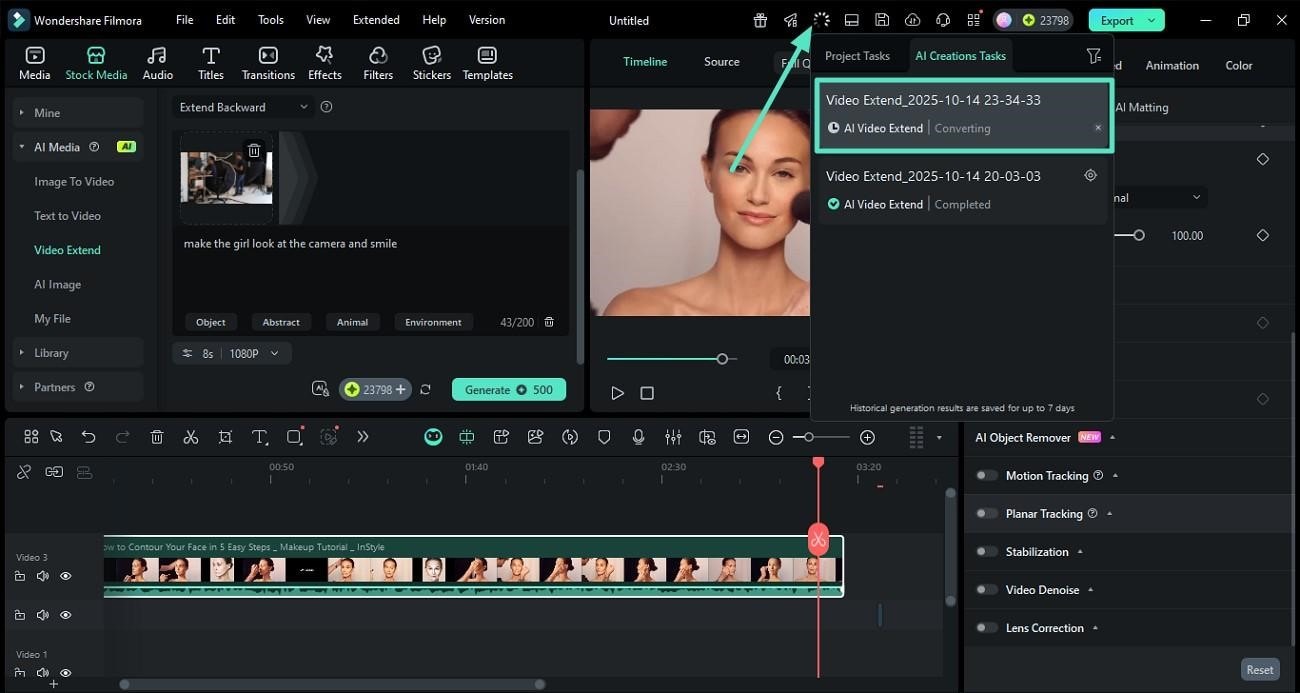
After importing the video to the timeline, head to the media timeline options and click on the AI Extend icon. Select the area on the timeline by dragging from where you want to extend, either forward or backward.
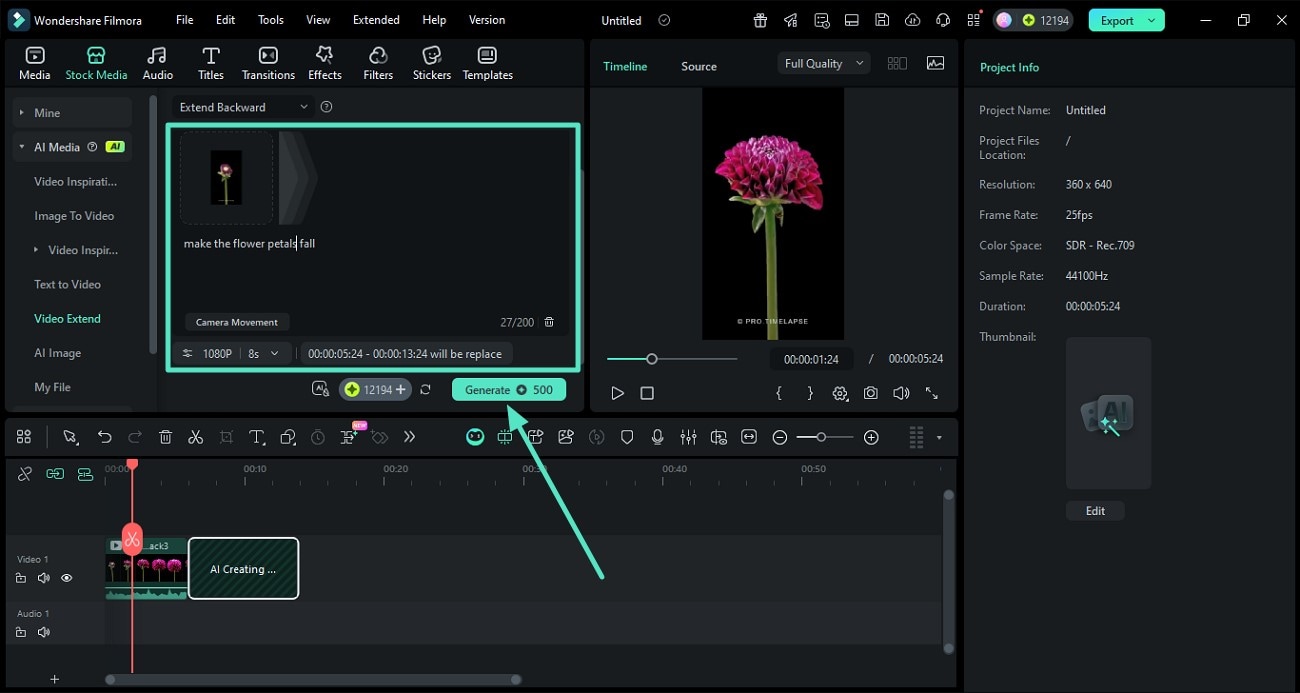
Step 2. Insert Text Prompt and Generate
This will automatically lead you into the Video Extend section within Stock Media. Add in your prompt, configure settings such as duration (5-8 seconds for video and 10-30 seconds for audio), and press the Generate button to successfully execute the process.
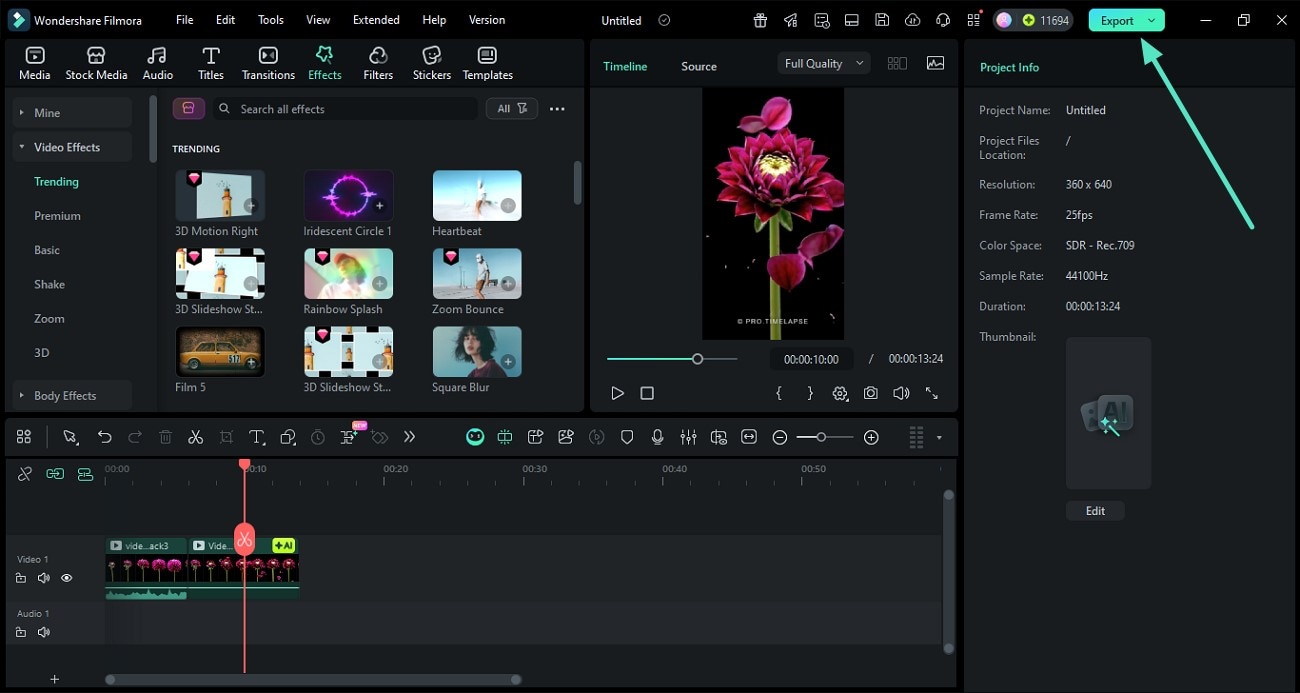
Step 3. Review the Generated Results
Once the video is extended, preview it within the preview window and apply effects and filters if required. When you are satisfied with the results, save the video using the Export button.
Entry 2: From Stock Media Section
AI Extend also comes with another entry point, where users can access this feature from the Stock Media section, which holds a variety of AI Media tools within Filmora.
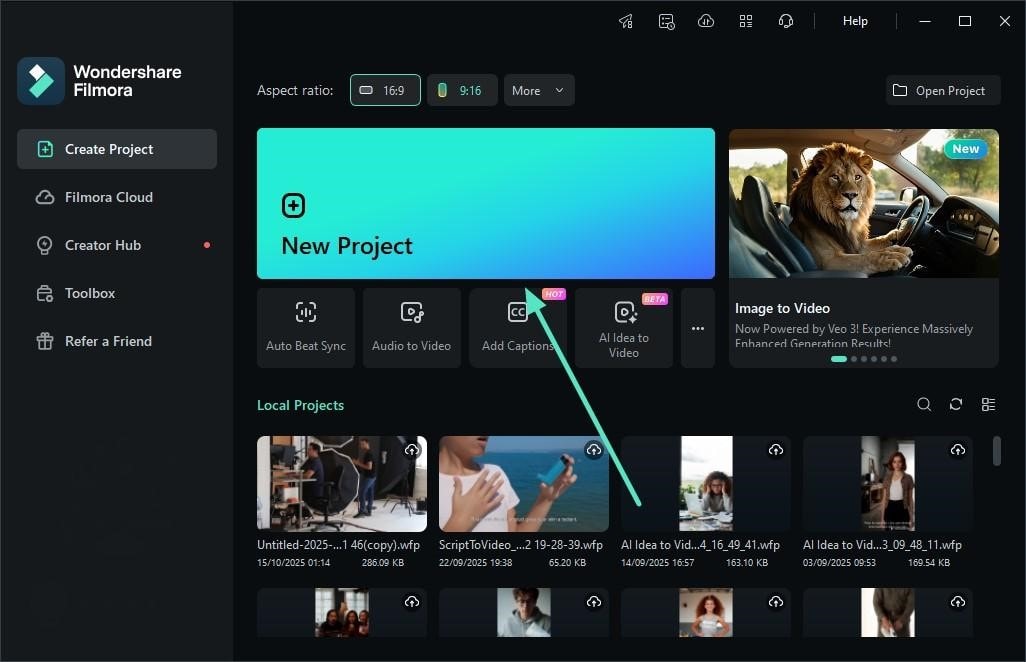
Step 1. Start By Accessing the New Project
To begin, launch Filmora on your desktop and press the New Project tab. Next, add the video for which you want to add the extension and drag it to the editing timeline.
Step 2. Choose AI Extend Function From the Resource Panel
In the following interface, access the Stock Media section from the menu bar. Locate the Video Extend section on the left and click on it. Within the section, choose whether you want to Extend Forward or Extend Backward by expanding the respective drop-down menu.
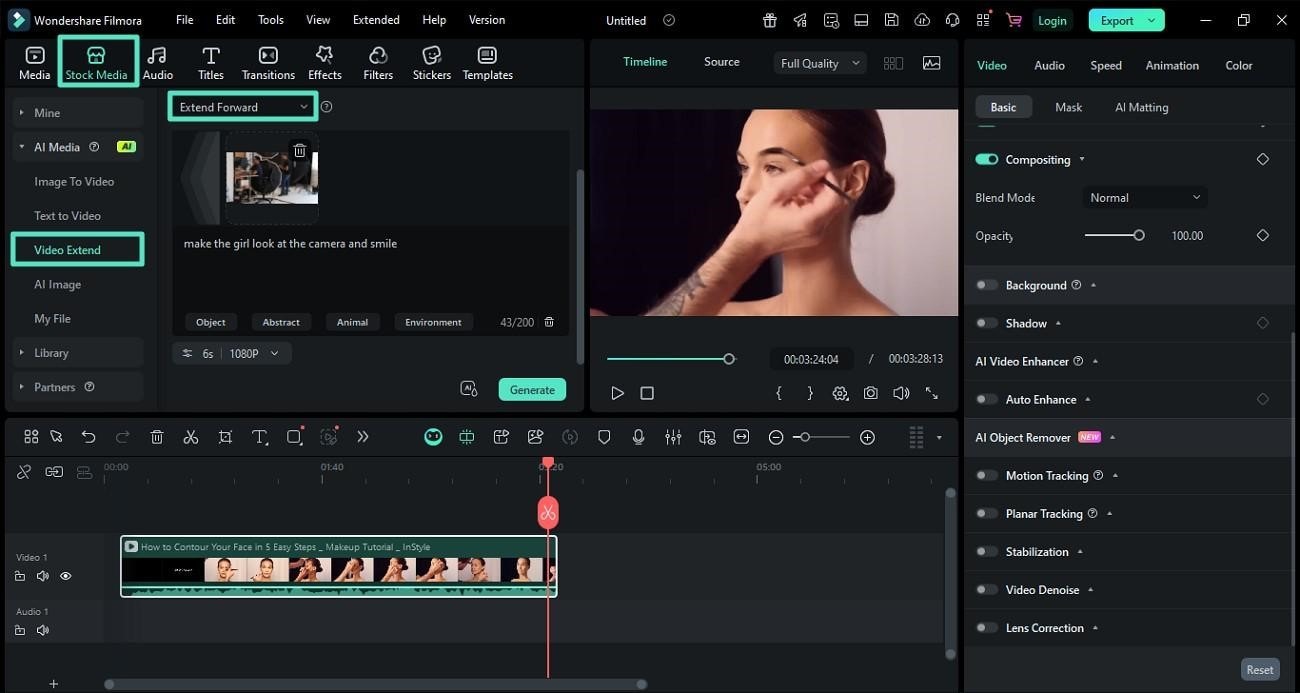
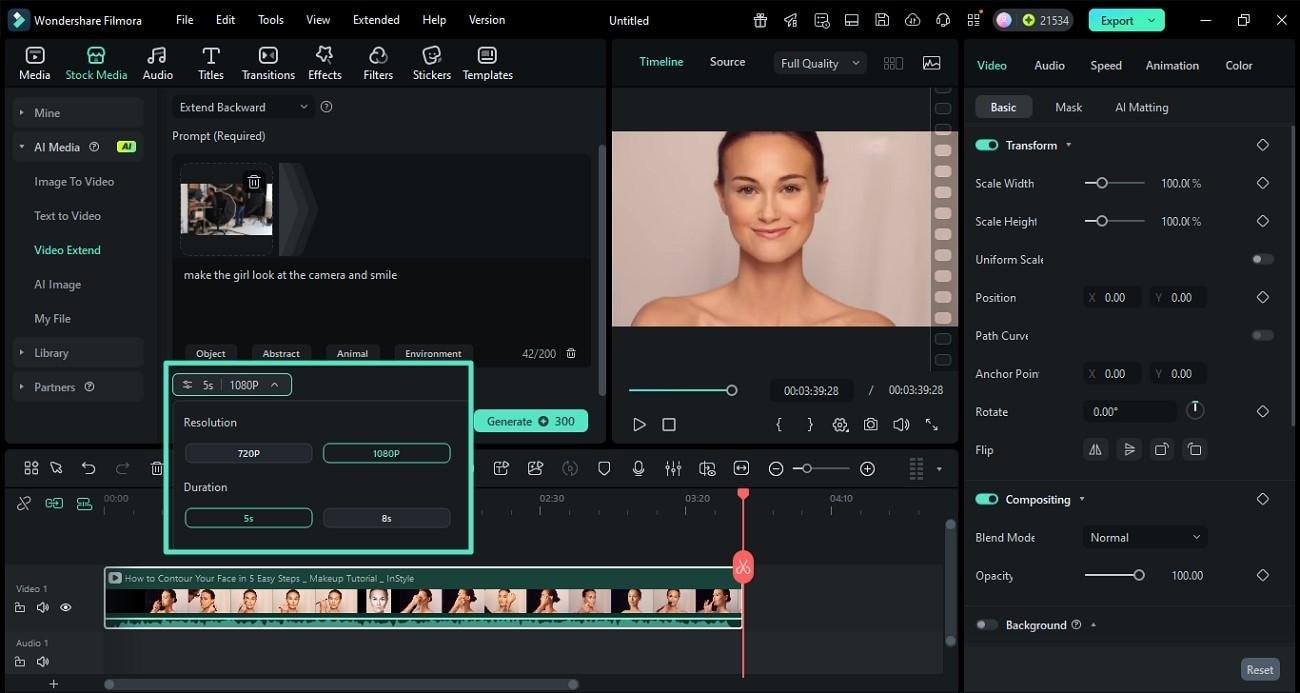
Step 3. Select the Duration and Resolution and Extend Through Prompt
Filmora also provides you with the utility of selecting the duration of the extended clip to be generated. Click on the Duration of your choice from the options provided. Next, select the Resolution Quality for the clip by choosing from 720p or 1080p. Now, input your text requirement in the form of a prompt within the designated field.
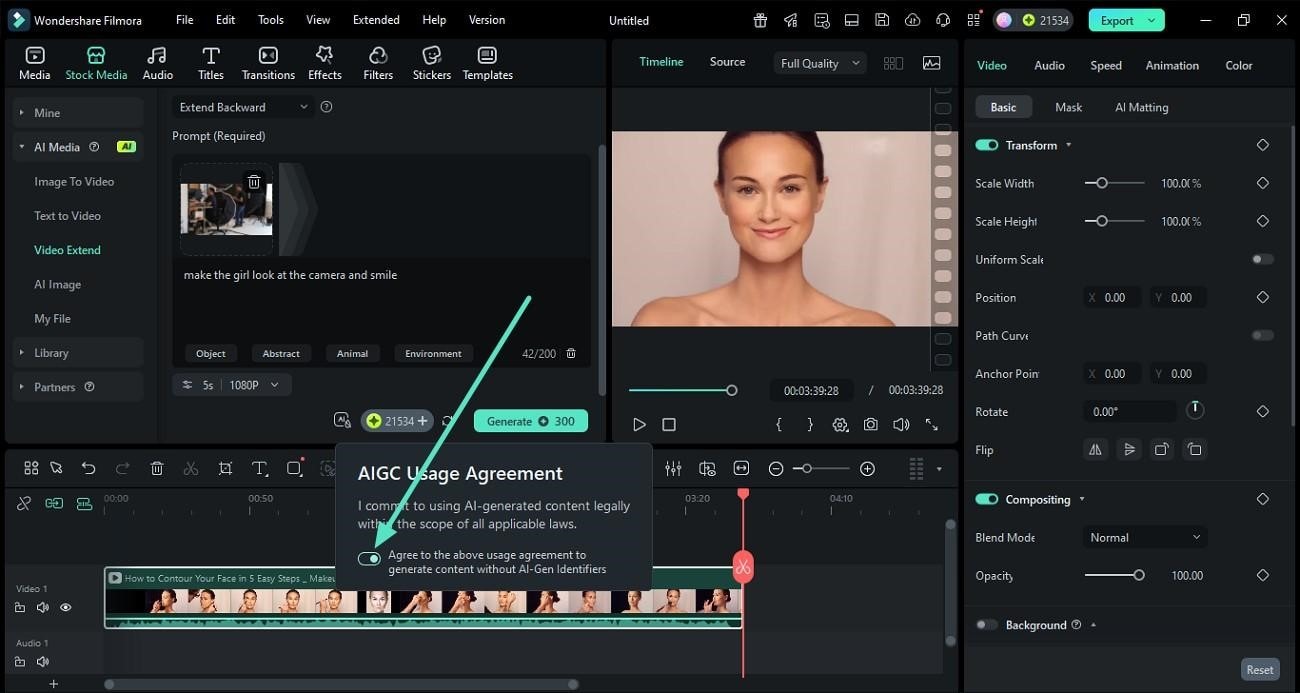
Step 4. Accept the AIGC Usage Agreement
Click on the small AI icon located within the interface and turn its toggle on to commit to using AI-generated content legally. Finally, hit the Generate button to let the tool begin the extension process.
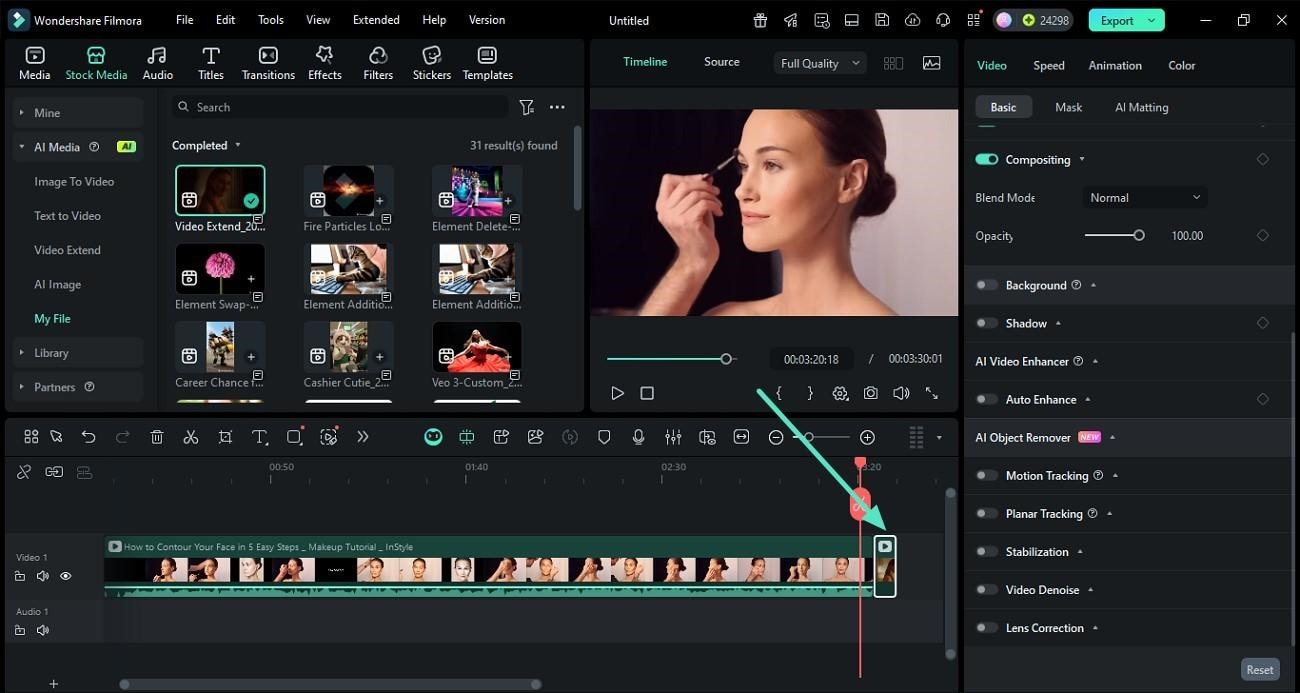
Step 5. Edit the AI Clip
Once the clip is generated, it will appear within the timeline as a Rectangle Clip. You can drag the position of the clip and change its alignment by simply dragging and moving it through the timeline. Moreover, you can also add keyframes and markers within it to give it a more dynamic flair.
Step 6. Add Effects and Transitions From the Resource Panel
Filmora allows you to add different transitions and effects to the generated AI Clip by accessing these assets from the Resource Panel. You can add your desired asset by simply clicking on the + icon.

Step 7. AI Clip Identification and Interaction
When generating AI clips with Filmora’s AI Extend, a Generating state appears with the progress as a placeholder while content is being created. Once complete, the clip automatically populates the timeline with a clear AI-generated content identifier.
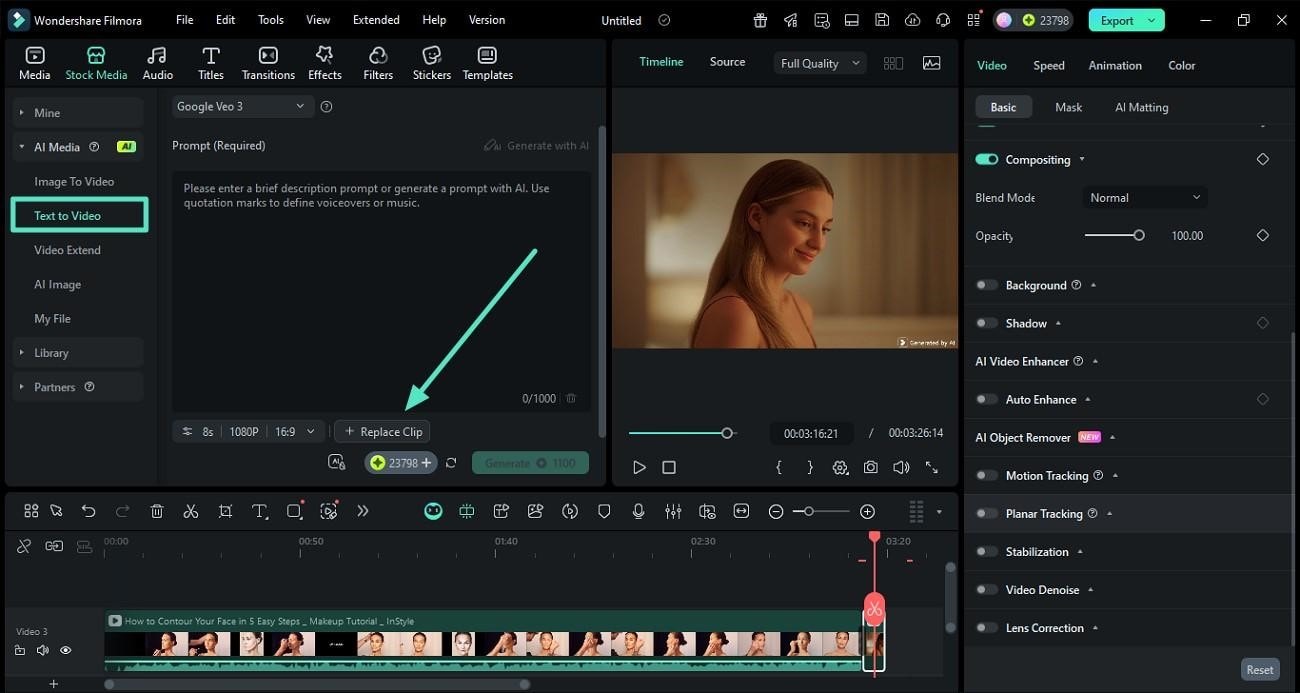
Replacing The Clip With Filmora
There is always an option to make changes to your generated clips with the Replace Clip option within the AI Media section. Let’s look into how it can be easily done with Filmora:
Step 1. Replace the Generated Clip
To replace a generated clip, head to the panel on the left and enable the Text To Video option. Now, locate the Replace Clip option and choose it.
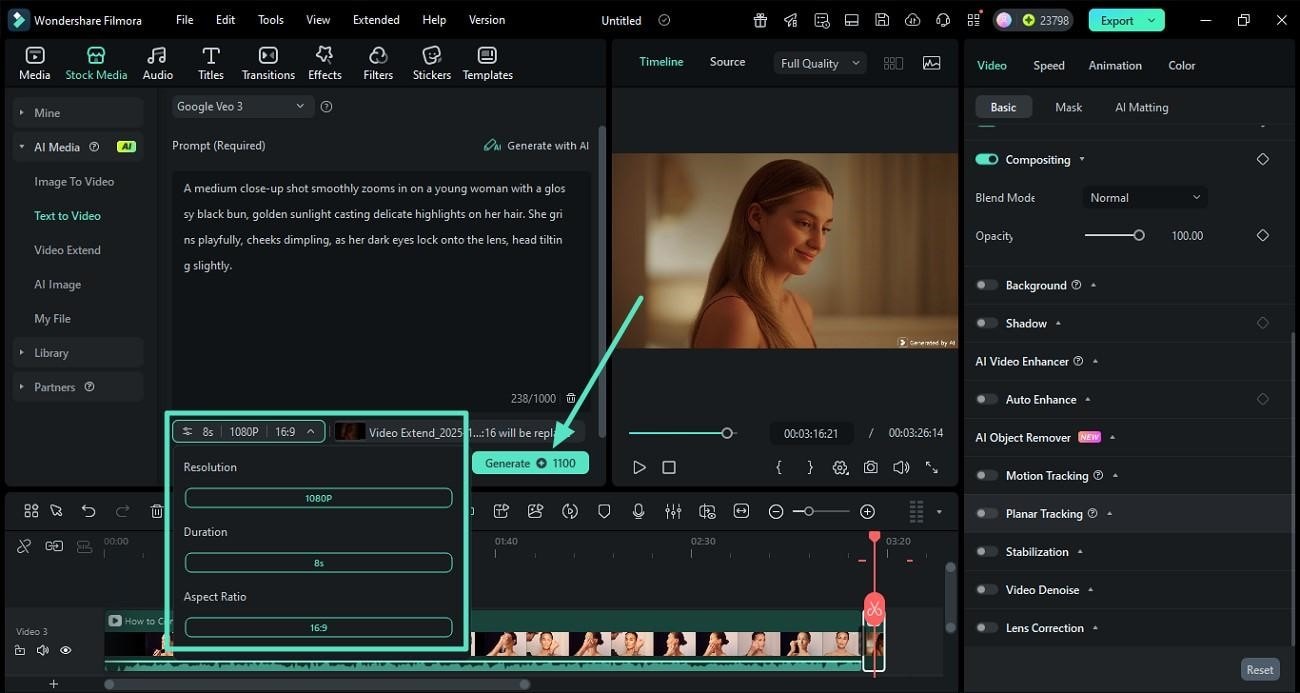
Step 2. Add Text Prompt and Generate
The clip will be added automatically to the designated folder. Now, add your text requirement in the form of a prompt within the field and select output settings such as Resolution, Duration, and Aspect Ratio. Finally, hit the Generate button to start the clip generation process.
Note:
Besides AI video extend, Filmora also offers Audio Extend, which is essentially the original Audio Stretch feature. This tool allows you to lengthen audio clips while maintaining sound quality, making it perfect for syncing audio with video.
Related Posts
Featured Articles
How to Add a Watermark to a Video?
Add a logo or text watermark to any video in minutes. Learn AI and manual methods, creative ideas, and pro tips for perfect placement, opacity, and style.
How to Make Live Wallpaper on iPhone: The Best Options Available
Learn how to set live wallpapers on iPhones with this simple guide. Understand the effectiveness of using the built-in or the AI apps techniques.
Top 10 Best Video Players for PC (2026 Expert Picks)
Enhance video consumption with the best video player for PC. This guide explains the top 10 video players to help you choose the best one.
Recommended User Guide
AI Mate Editing for Windows
AI assistants play an essential role during editing, and with Filmora's new AI Mate Editing feature, users can ask for valuable insights about their videos.
Filmora Image to Prompt for Windows
Here is the guide on how to use the Image to Prompt in Filmora on Windows.
Filmora AI Eye Contact- Windows
Here is the guide on how to use the AI eye contact feature in Filmora for Windows.
