Drawing Tools for Windows
When creating a tutorial or news videos, the Drawing Tools feature in Wondershare Filmora allows users to highlight important details and create banners directly on the video clips. It enhances the engagement and storytelling visuals of the video. This feature provides several shapes, including arrow, rectangle, and oval, to help you add a personal touch to the content.
Index
How to Utilize Drawing Tools of Wondershare Filmora?
To get a better understanding of how to utilize the two methods of adding elements to your videos, follow the simple guide below:
Way 1. Utilize Filmora's Drawing Tools for Making Banners
Upon having an overview of drawing tools, let's learn how you can use them to create engaging banners for your video:
Step 1. Create a New Project
Download and install the recent version of Filmora on your PC to start the task. After launching this tool, click the "New Project" button to enter the main workspace.
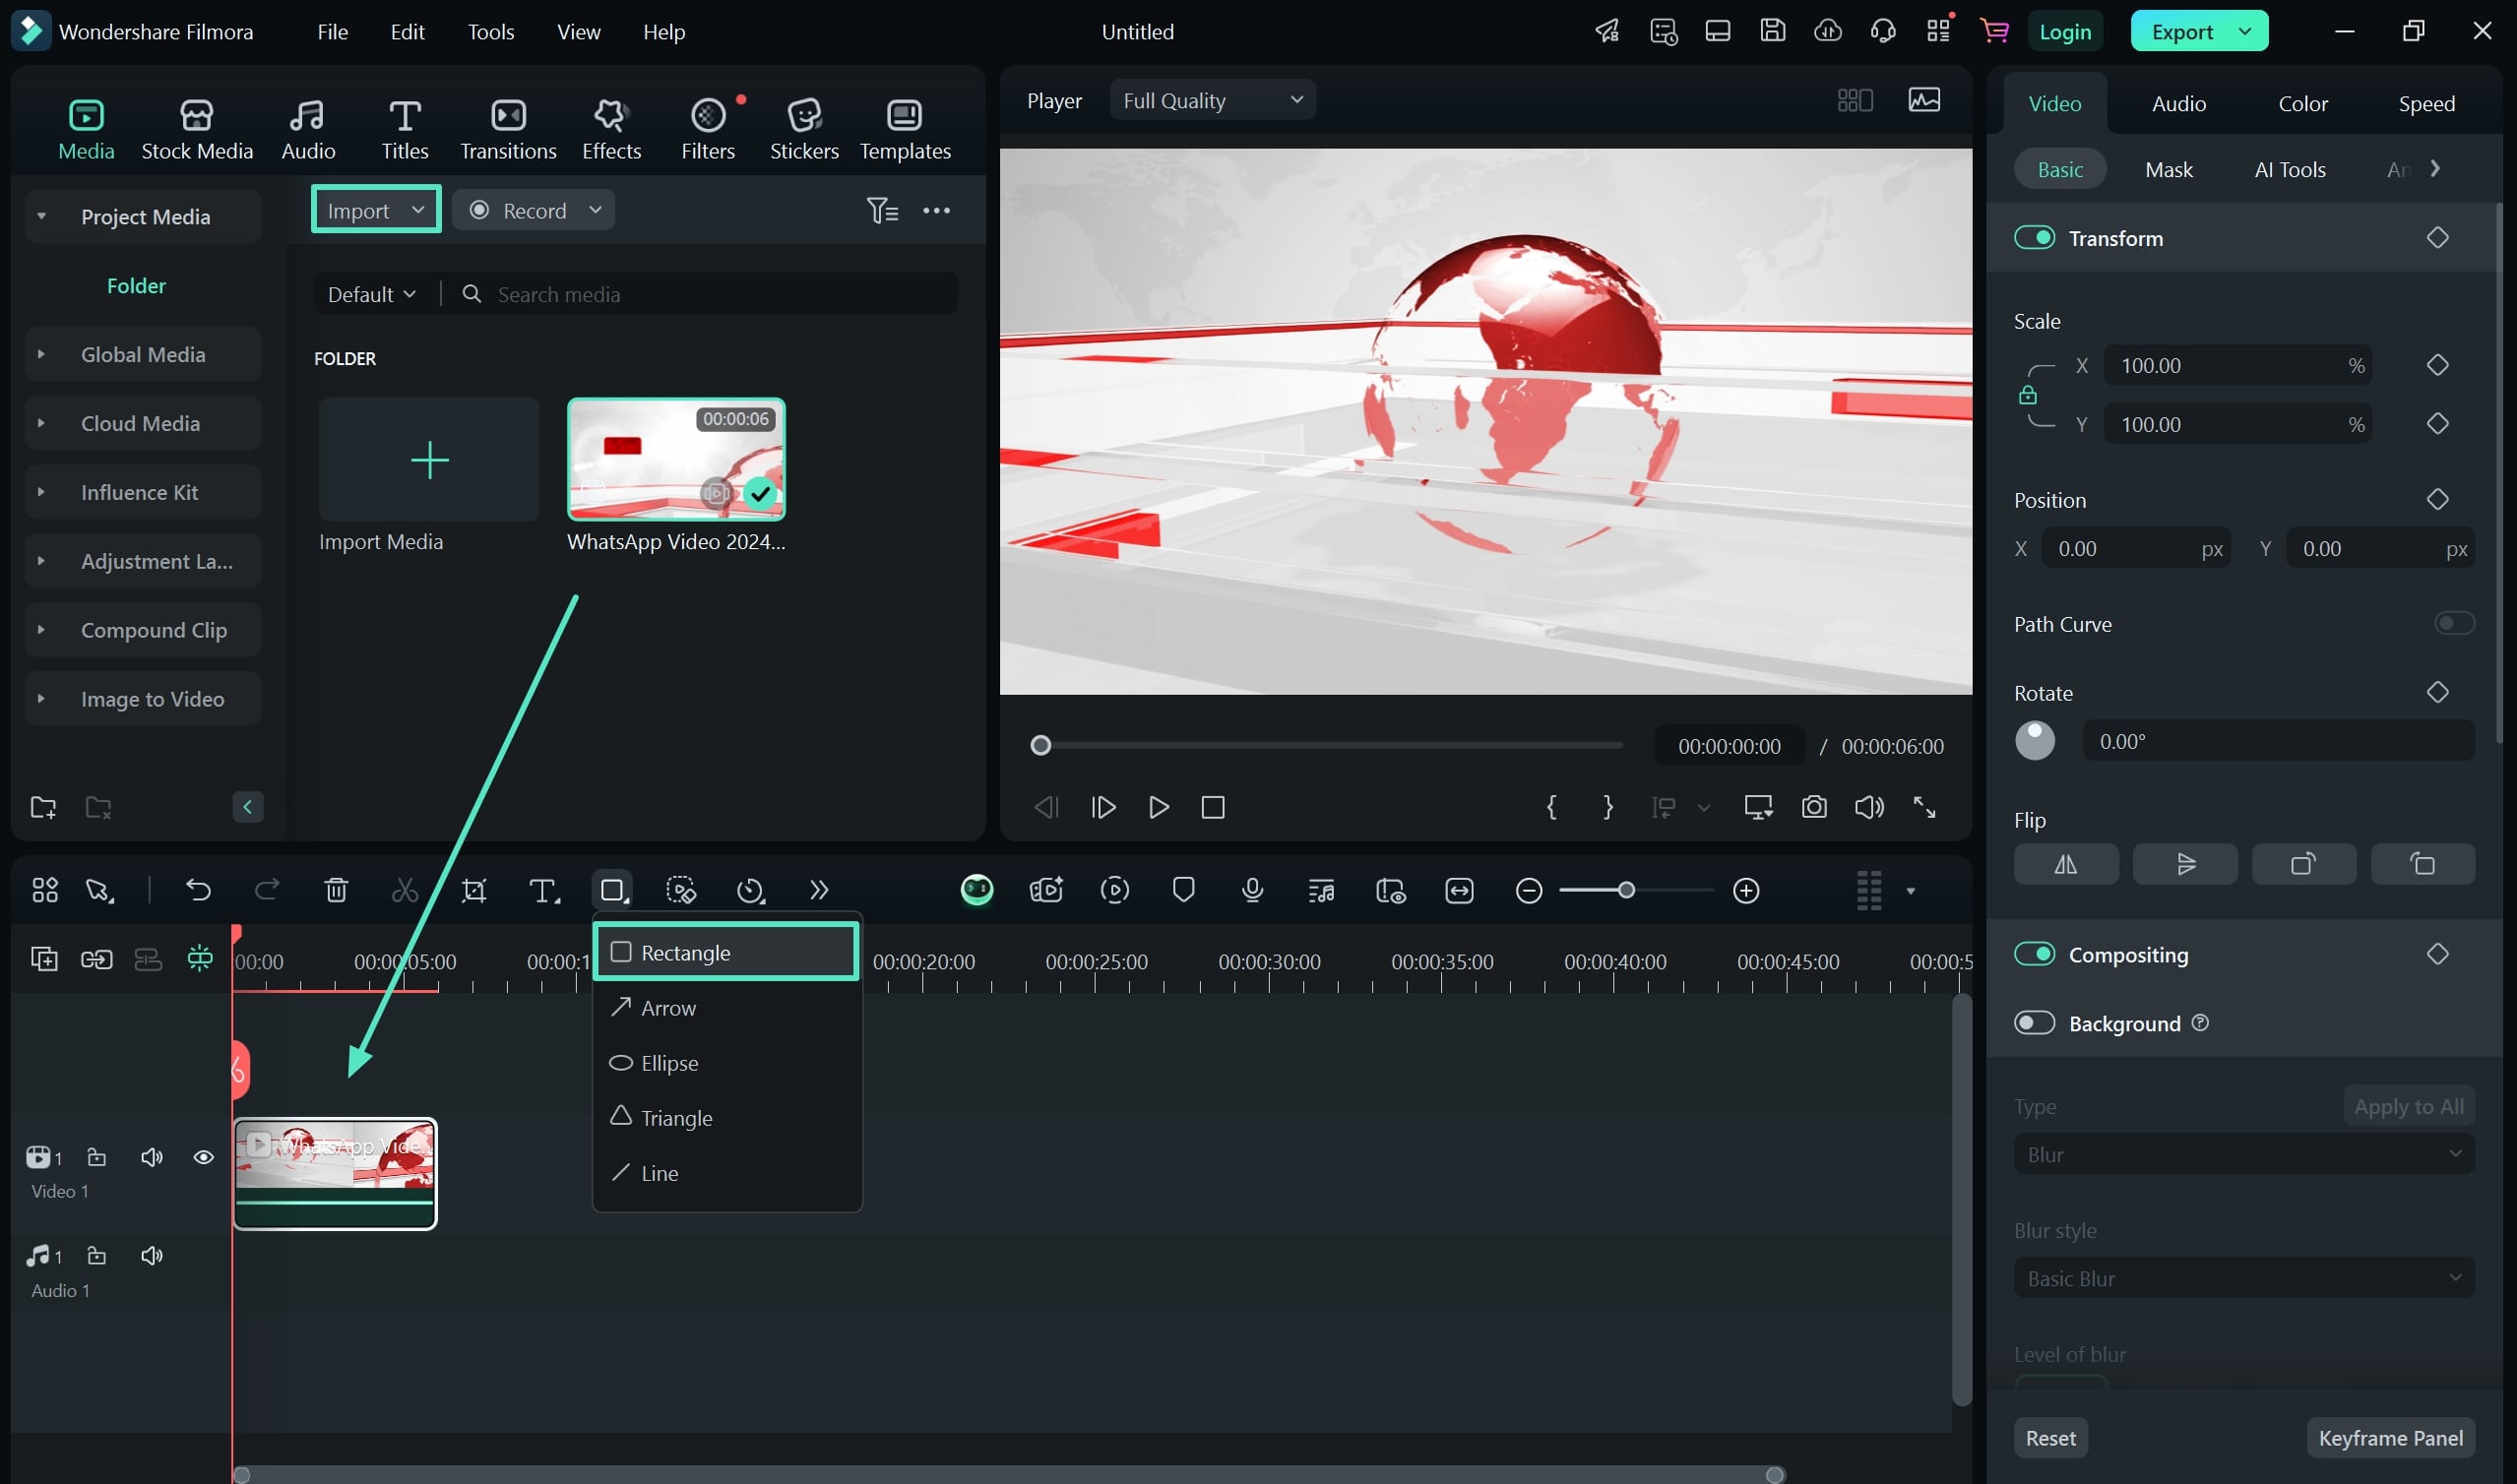
Step 2. Add the Video and Access Drawing Tools
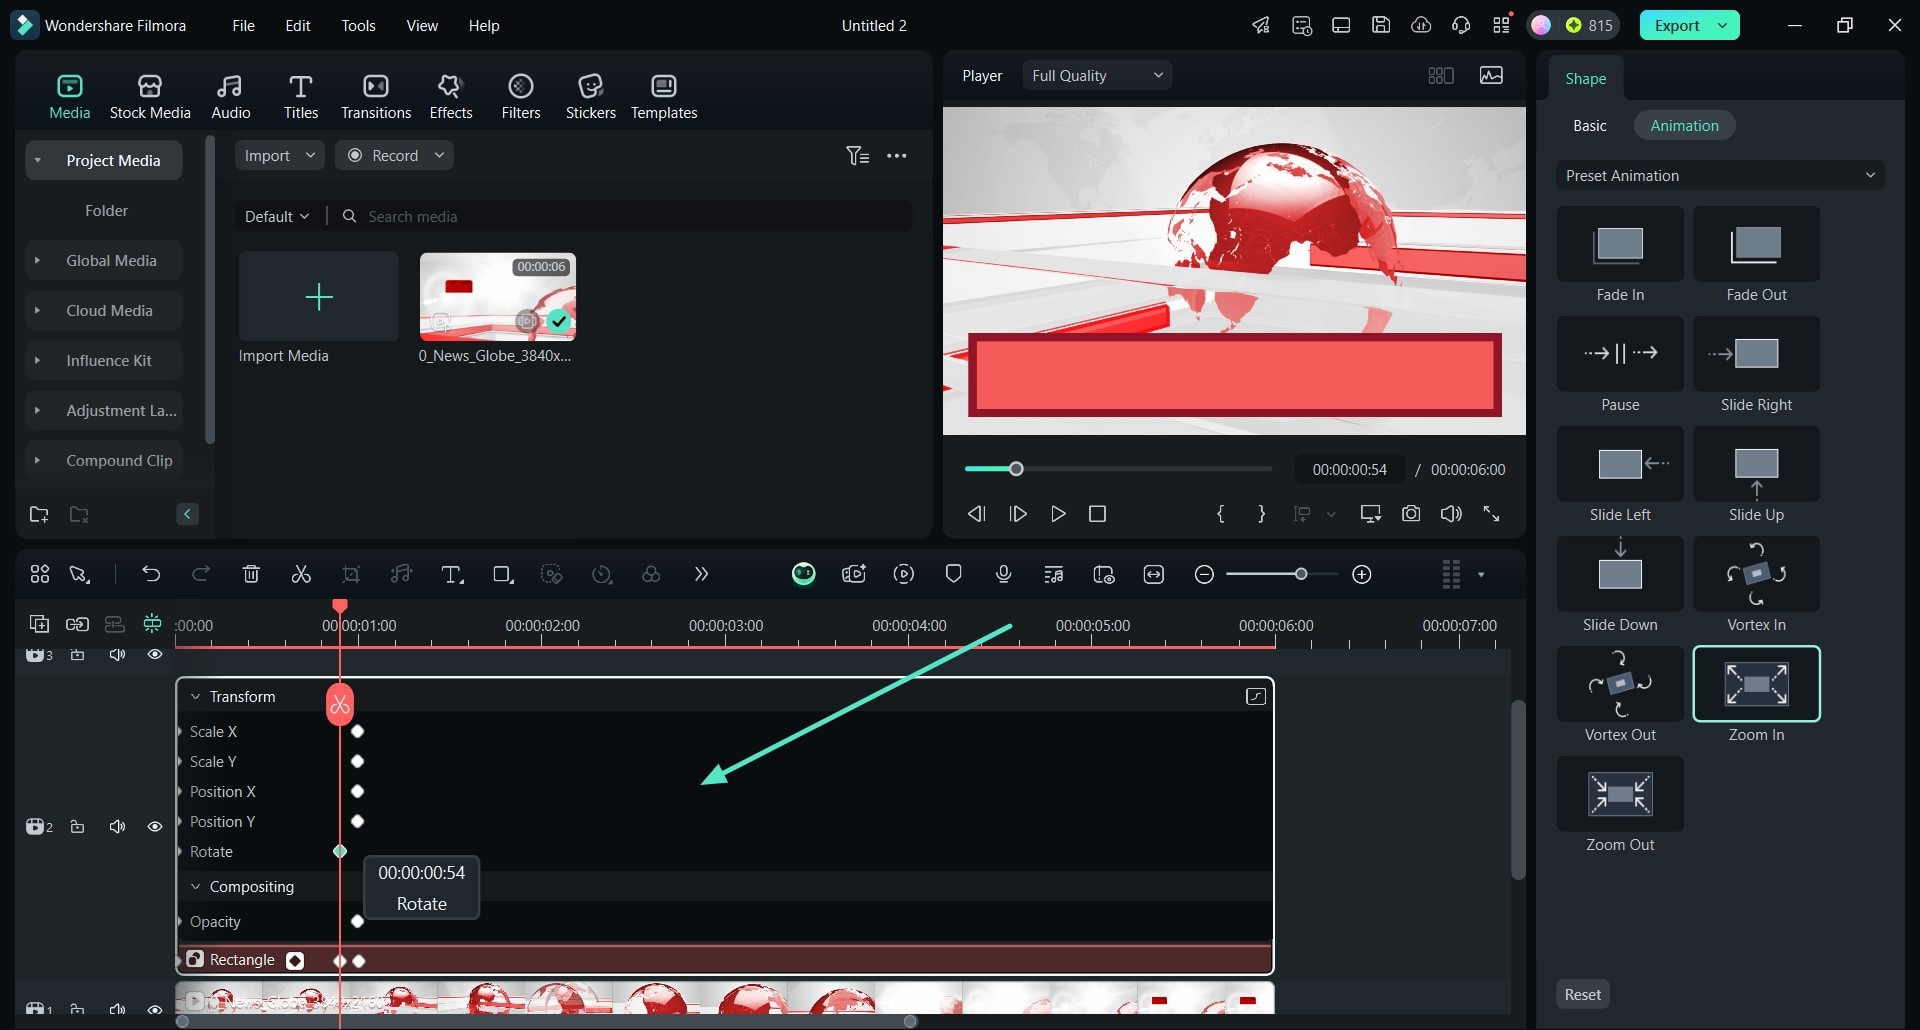
Once you enter the main workspace, tap on the "Import" button to add the video in which you want to insert a banner. Drag and drop the video into the timeline for editing after importing. Access the "Drawing Tools" menu from the top of the timeline and choose the "Rectangle" option from the available shapes.
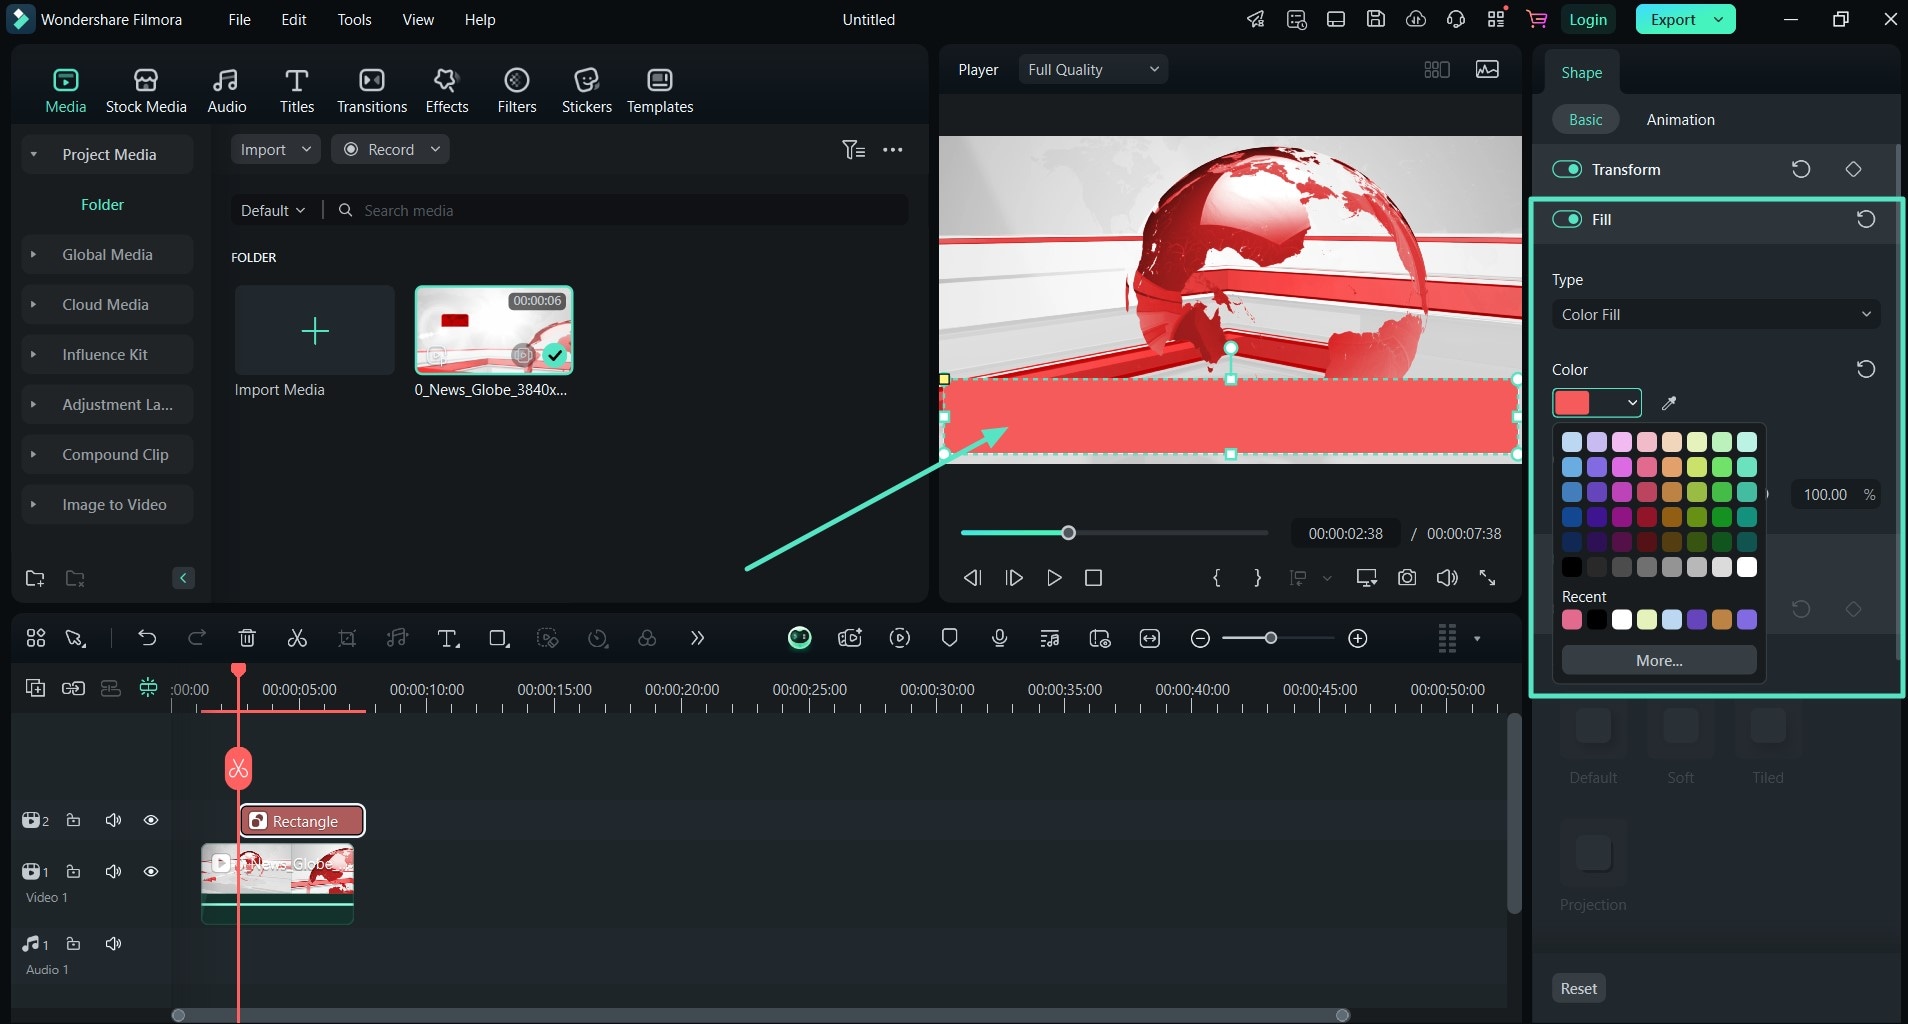
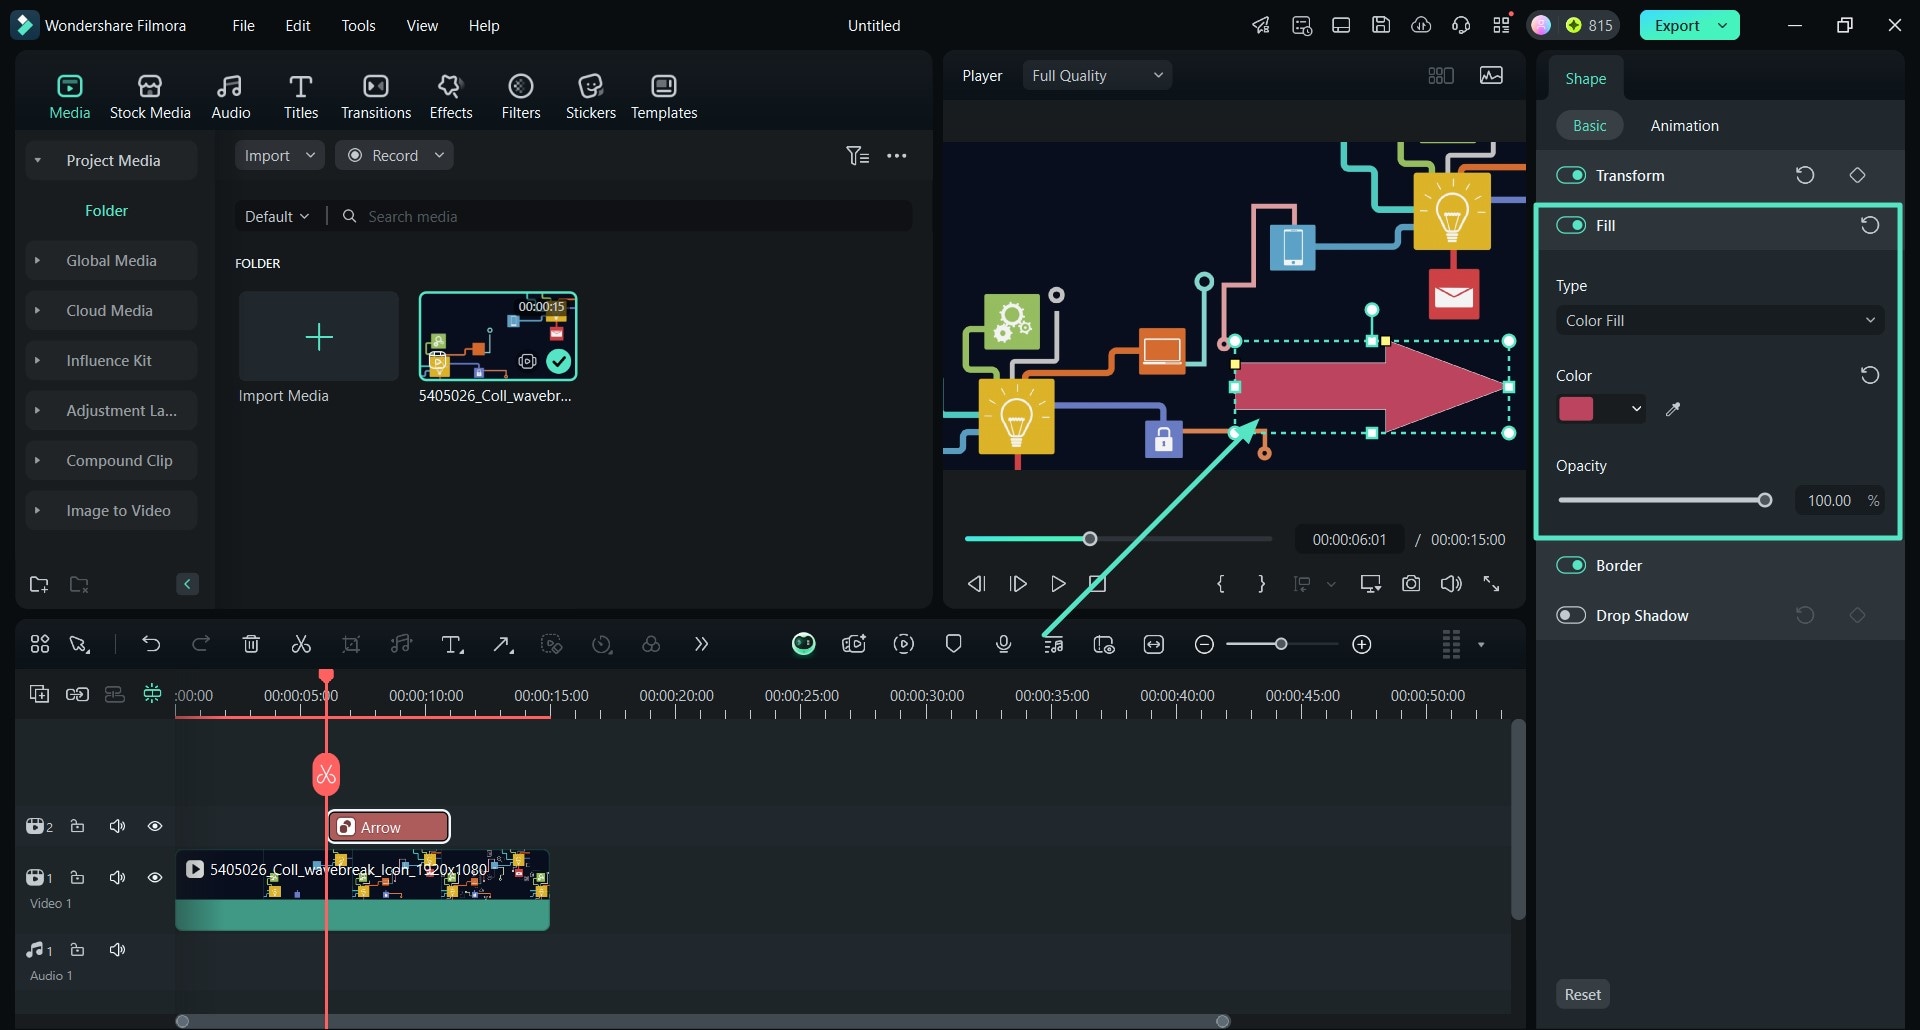
Step 3. Customize Your Banner Design
Once you draw this shape on your video, position it properly by dragging it to your desired location. Next, head to the right-side panel to enable the "Fill" option and choose a color for your banner that complements your video.
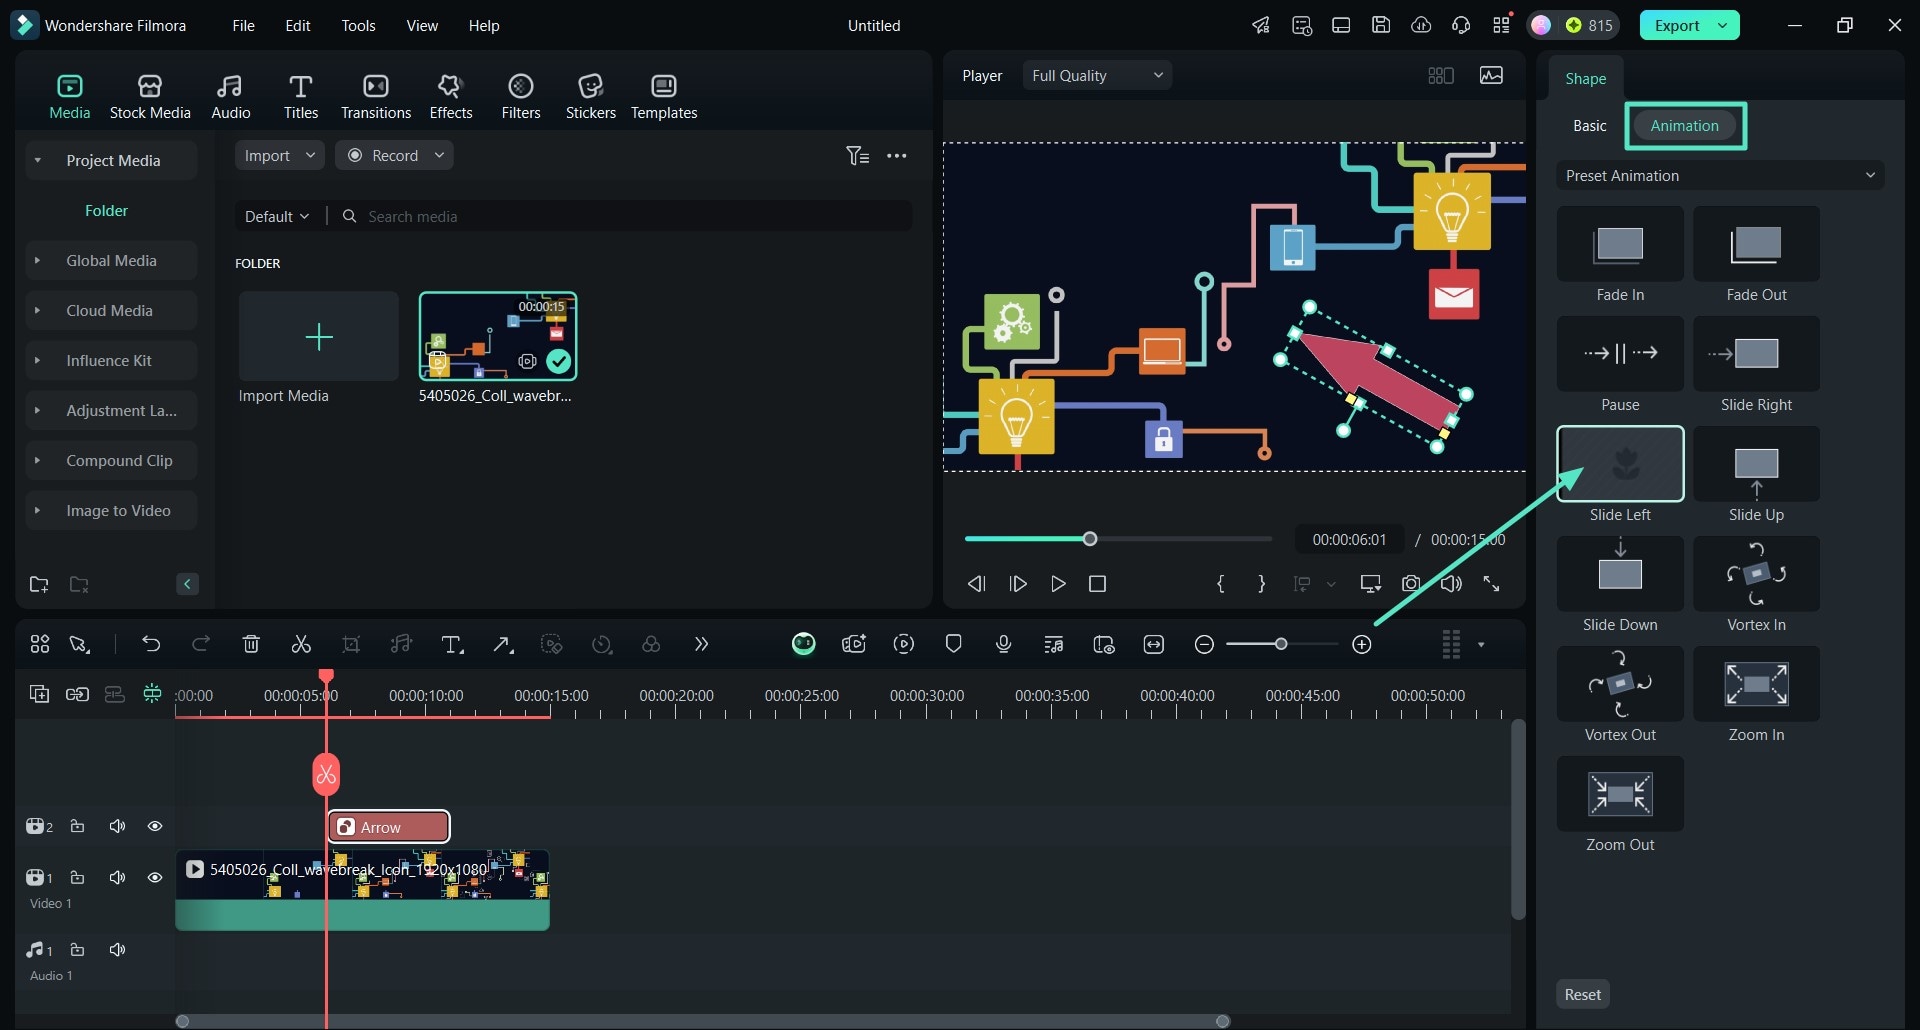
Step 4. Apply Animations to the Banner
Now, shift to the "Animation" section and pick which style best matches your requirements. To apply the animation, you need to double click on the chosen option.

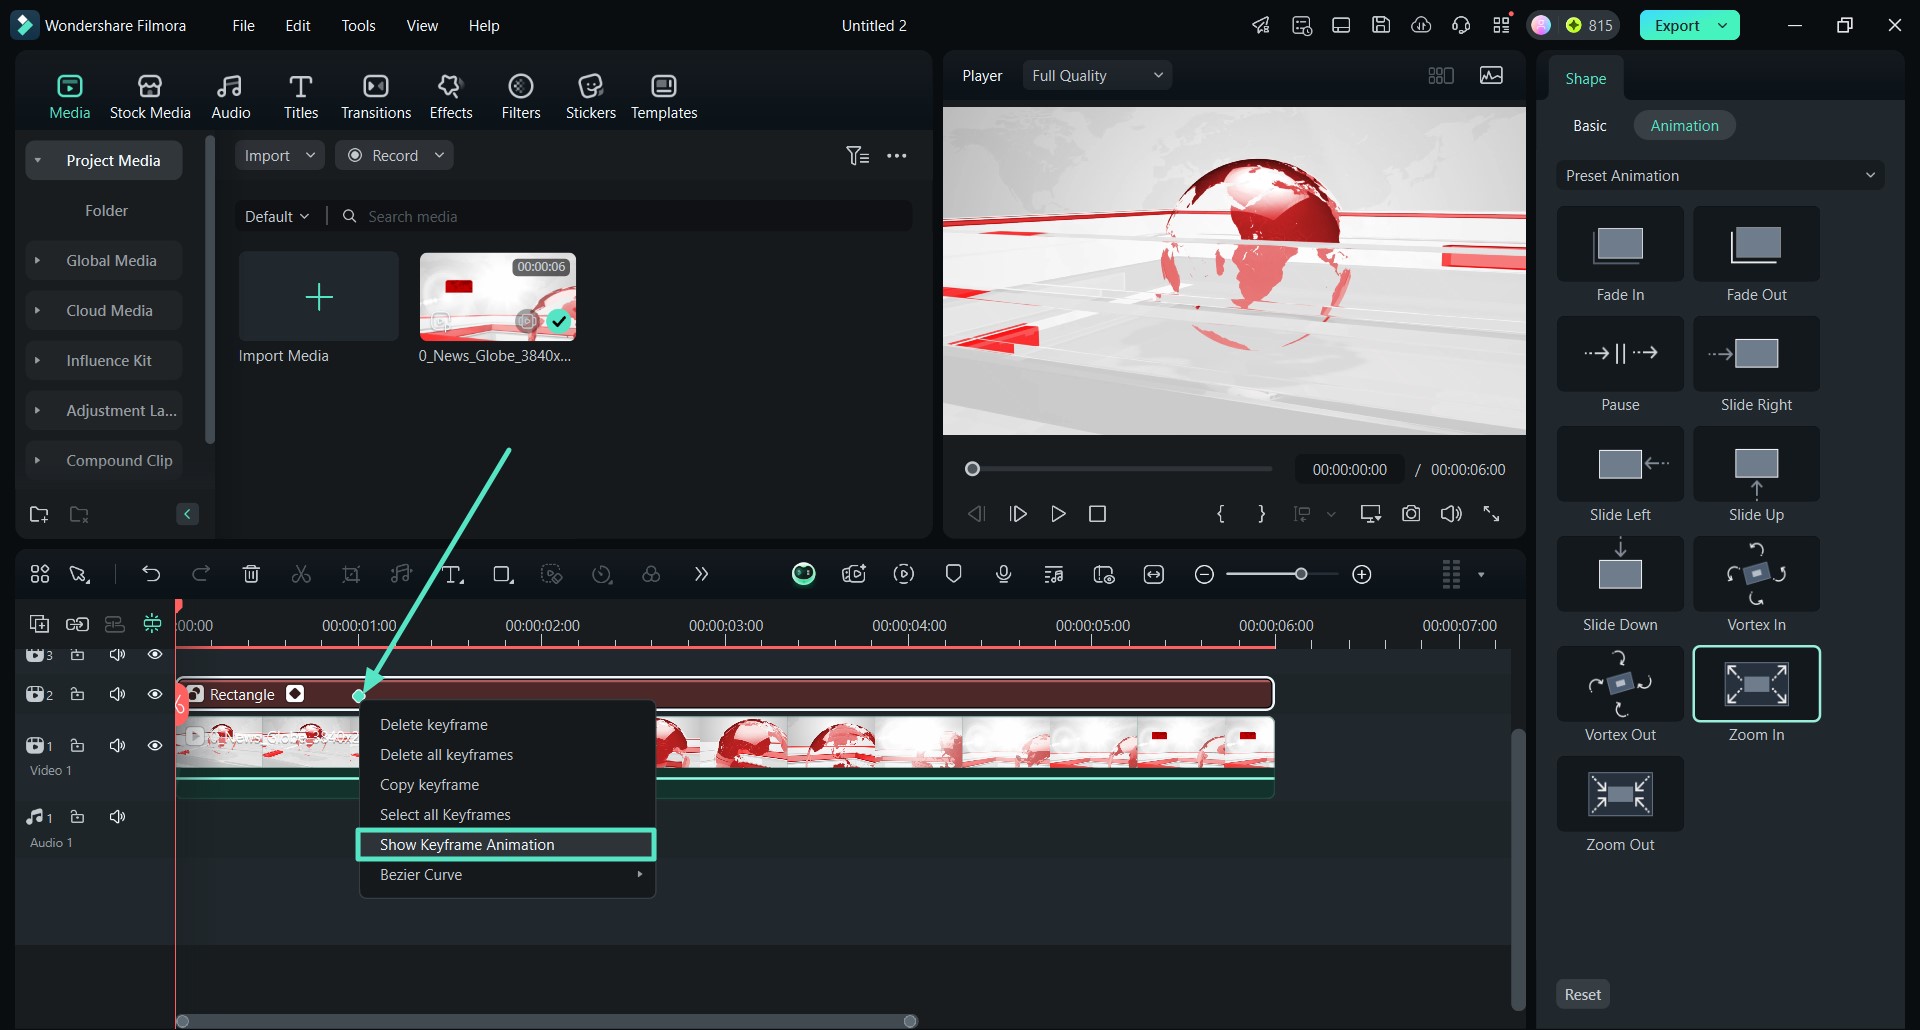
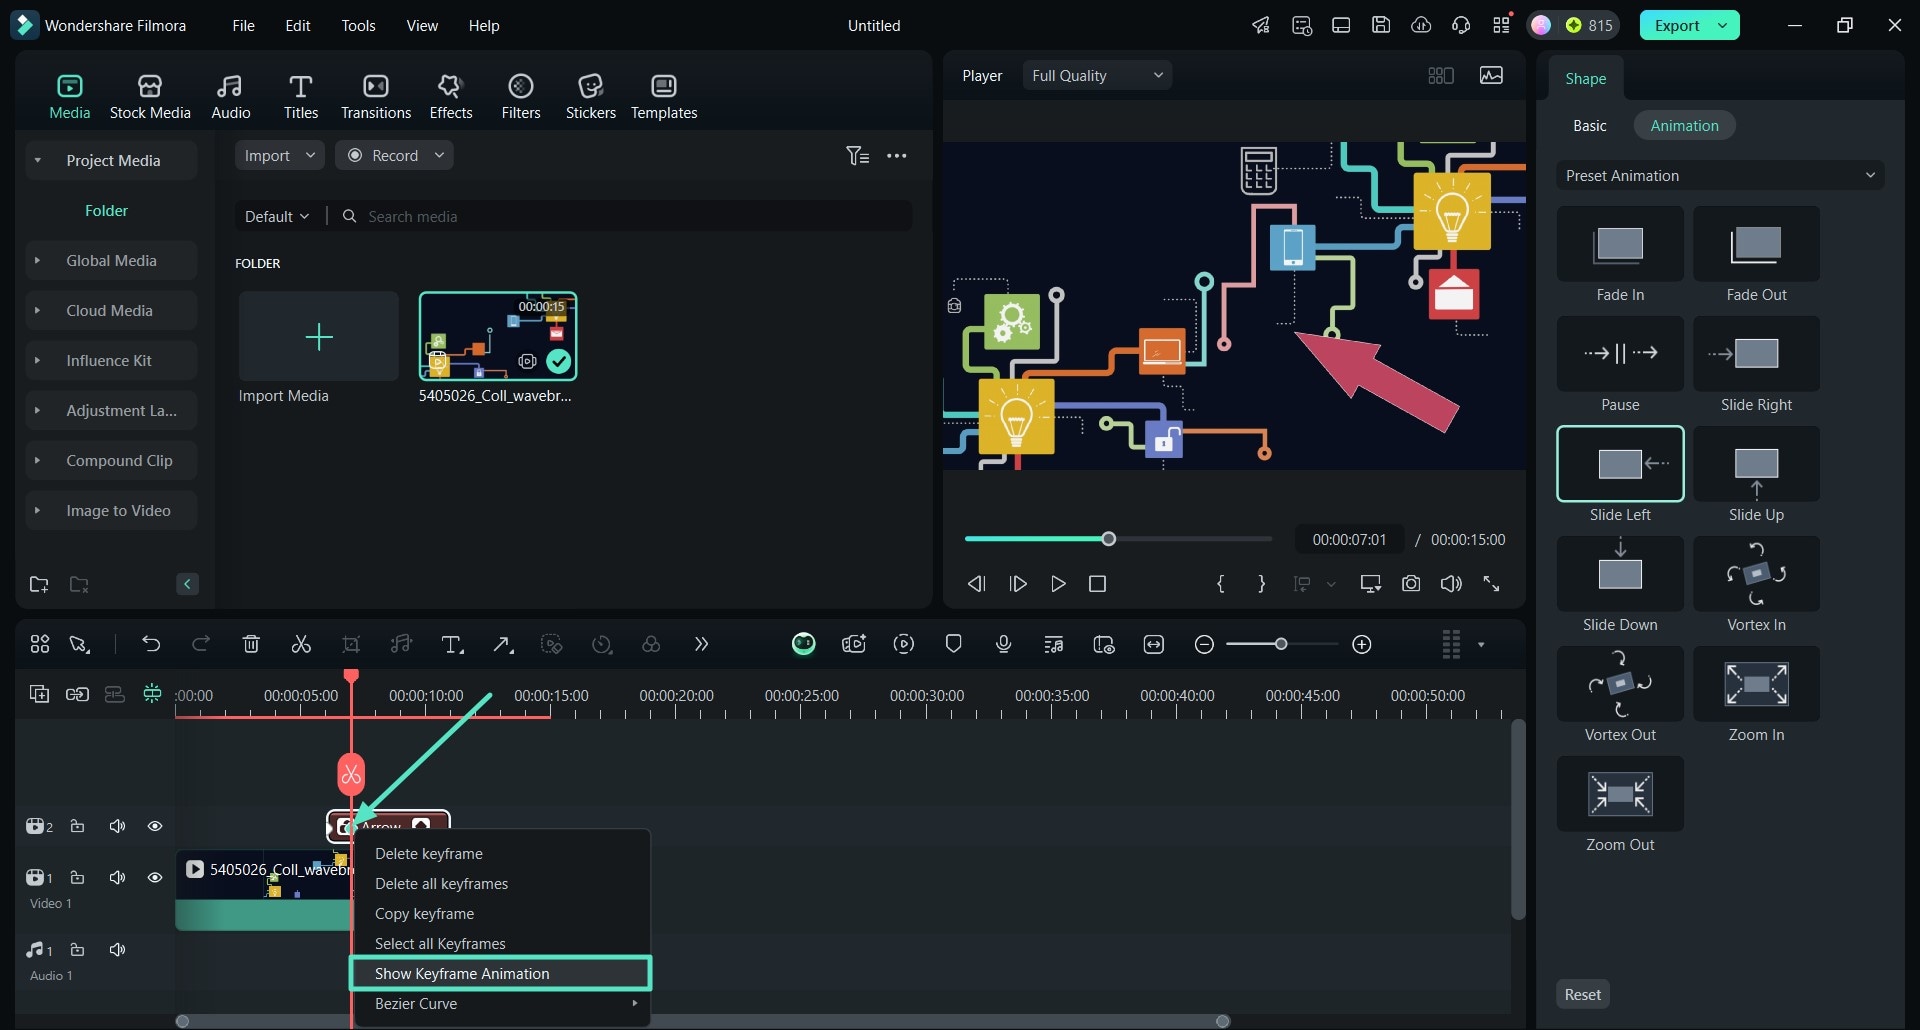
Step 5. Locate Keyframe Animations
Once the animation is applied, move to the timeline section and "Right-Click" on the diamond shape on the added animation. From the pop-up menu, pick the "Show Keyframe Animation" option.
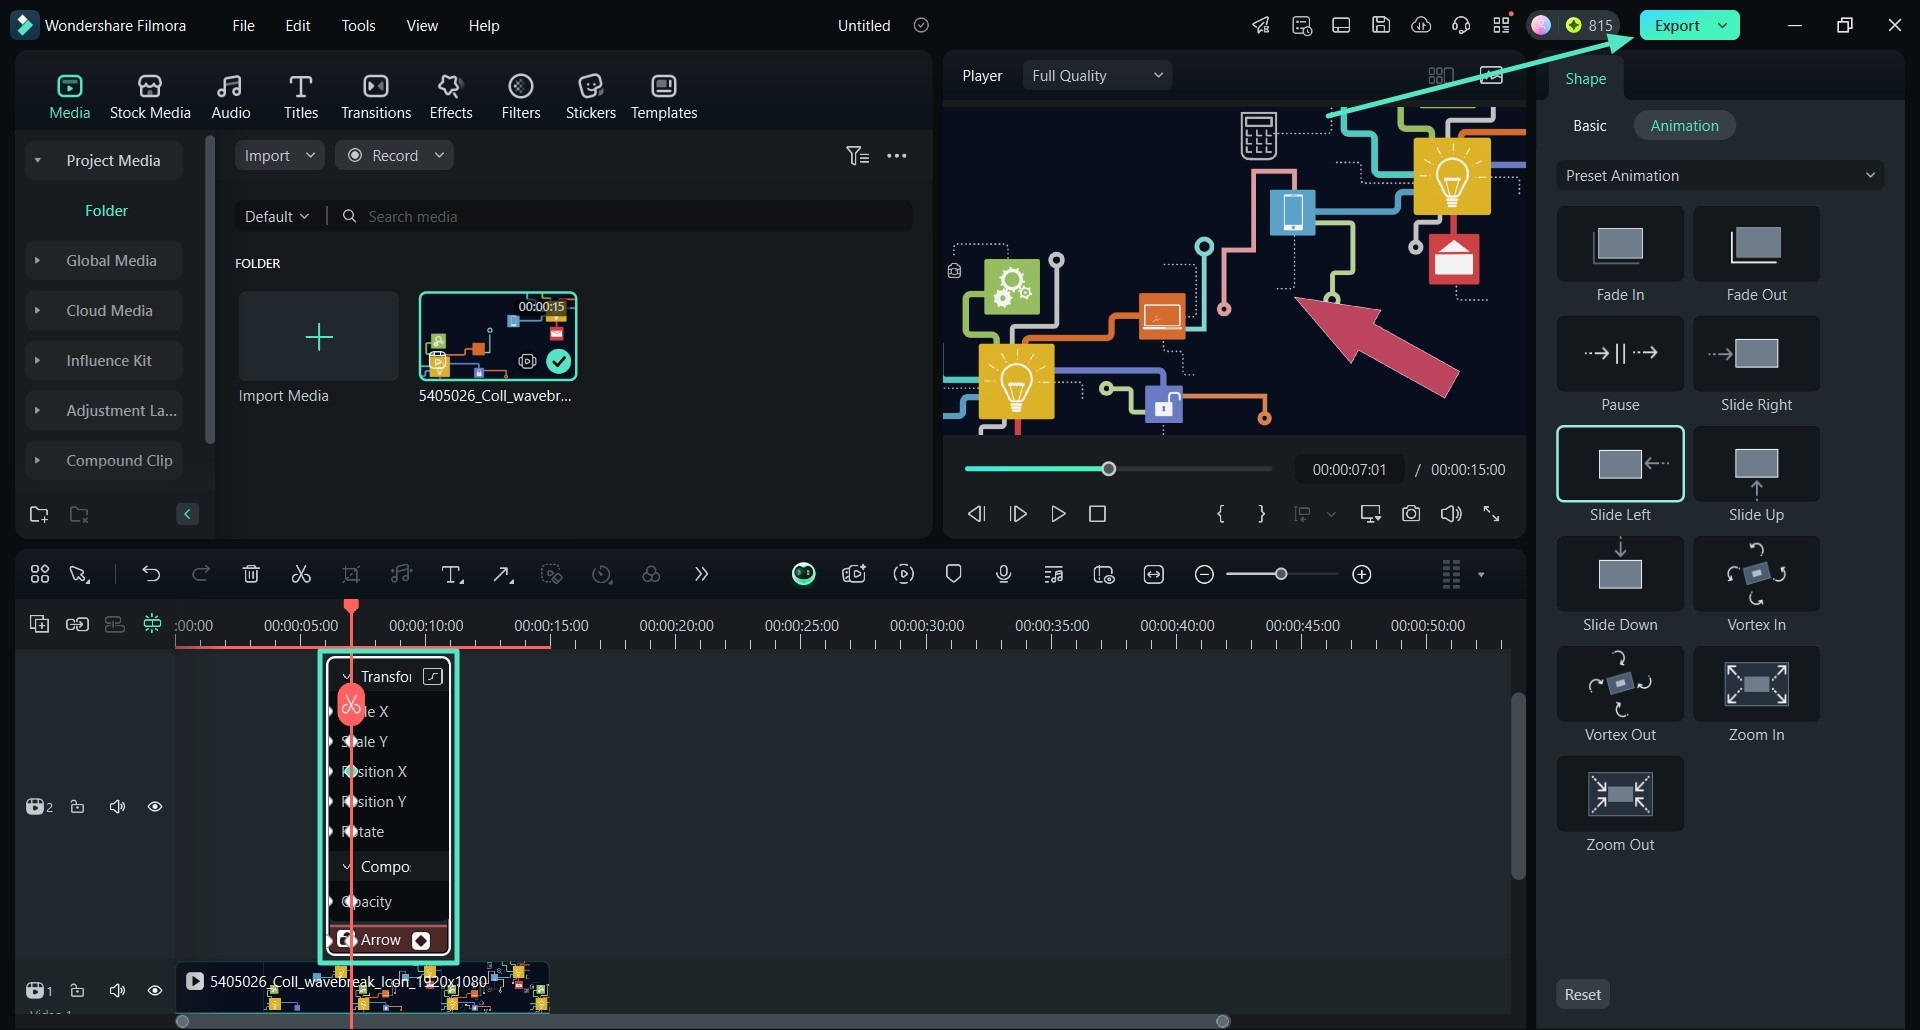
Step 6. Adjust the Keyframe Animations for the Banner
Upon getting the extended keyframe animation settings, start to adjust them as per your video. You can drag the diamonds across to set the animation accordingly.
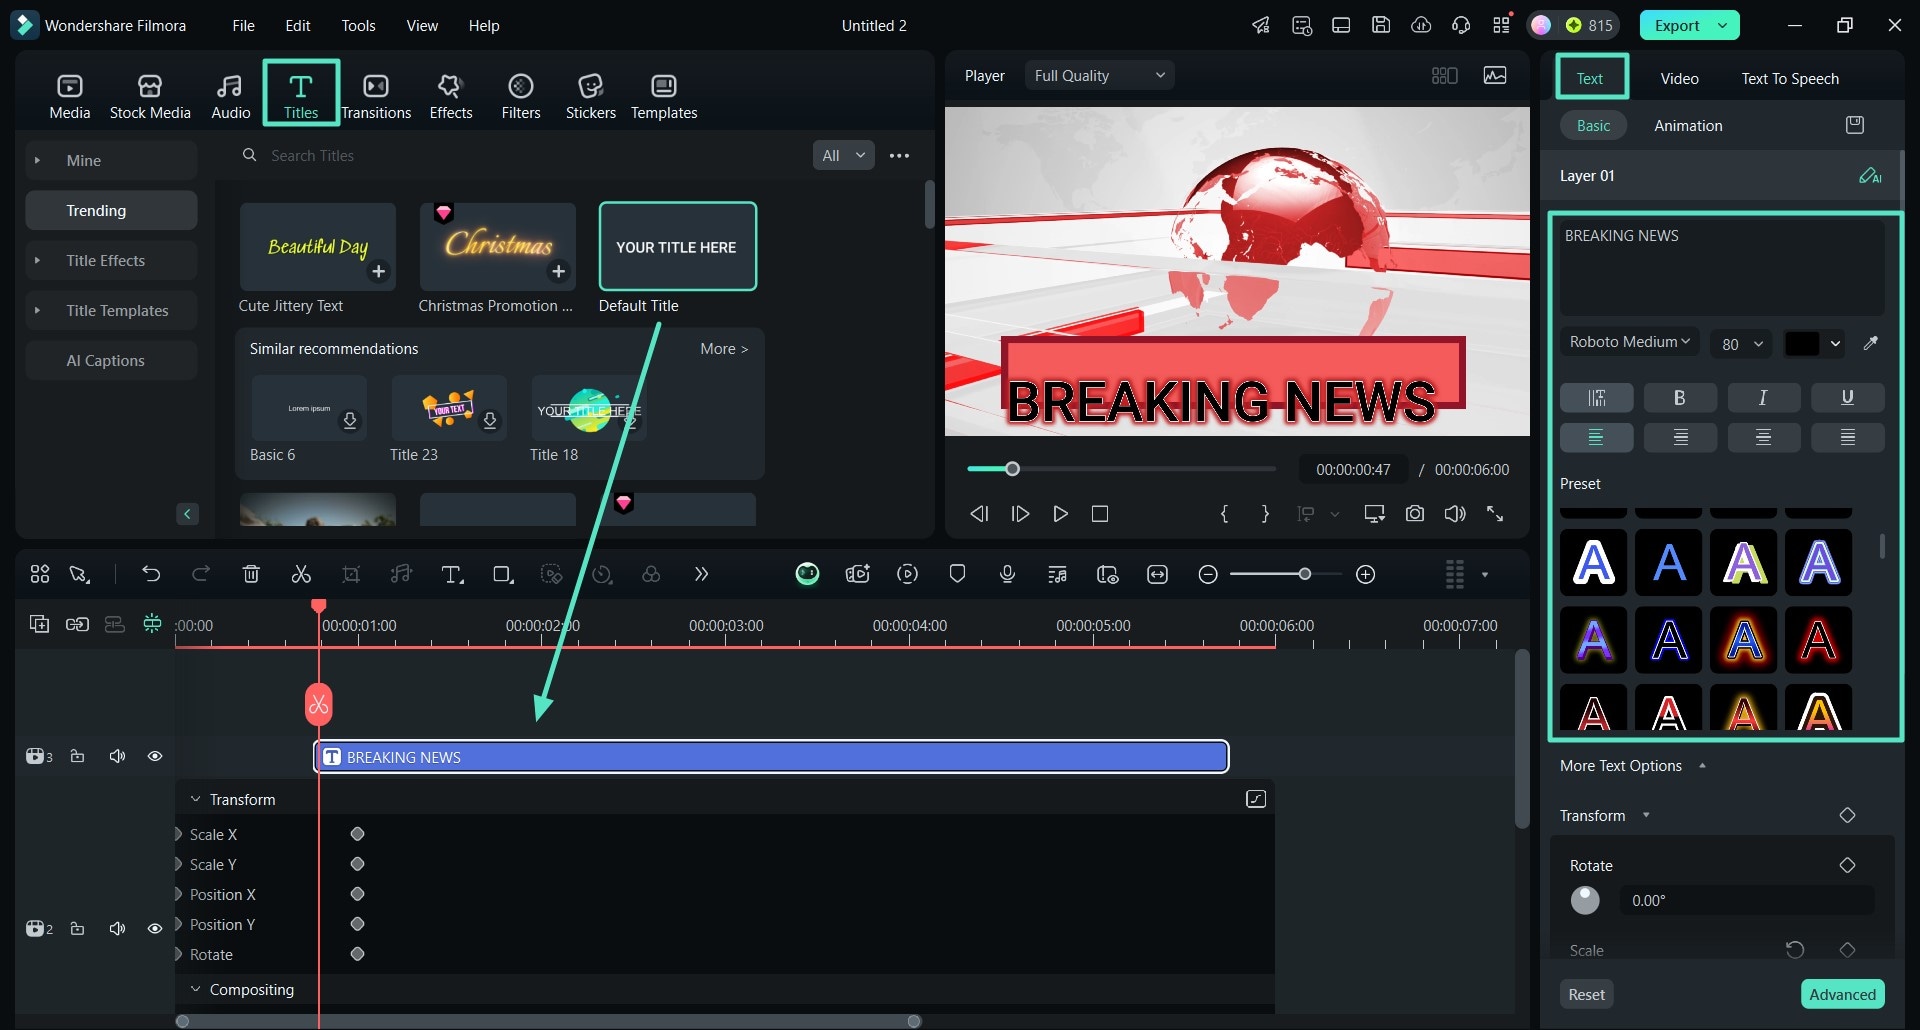
Step 7. Add Titles to Your Banner
Afterward, navigate to the "Titles" section in the top toolbar, and select the title that best matches your requirement. Drag and drop the chosen title on top of the video in the timeline. Adjust title's position once it appears within the preview window by dragging it over the banner. To customize the appearance of the title, go to the "Video" tab, choose an effect style under preset, and add a "Text" to the video banner.
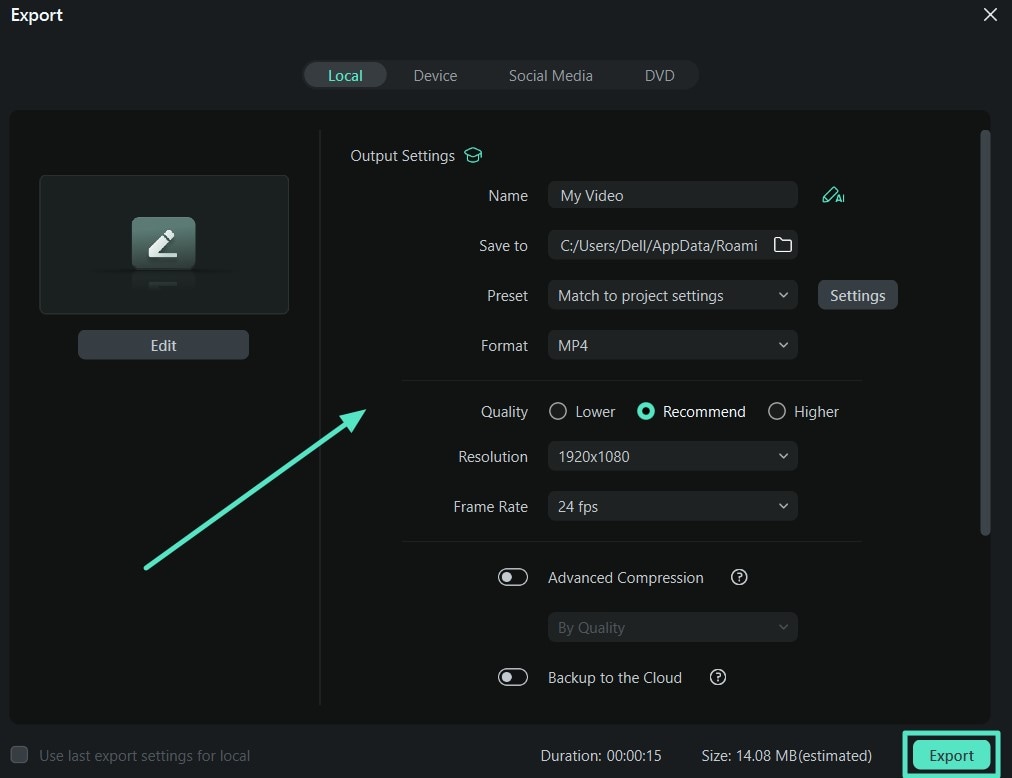
Step 8. Export the Video Banner to Your PC
When satisfied with the look of the banner, tap on the "Export" tab at the top-right of the interface. In the "Export" window, you can choose the output folder, resolution, and format for the video. Click the "Export" button to save the video to your computer.
Way 2. Insert Dynamic Arrows Using Filmora's Drawing Tool
Apart from different shapes that can be added into your video for annotation, here is another way you can annotate your videos for a better viewing experience:
Step 1. Add Your Video and Drag it to the Timeline
Initiate the process by clicking the "Import Media" button to add your video to the interface and drag the video to the timeline.

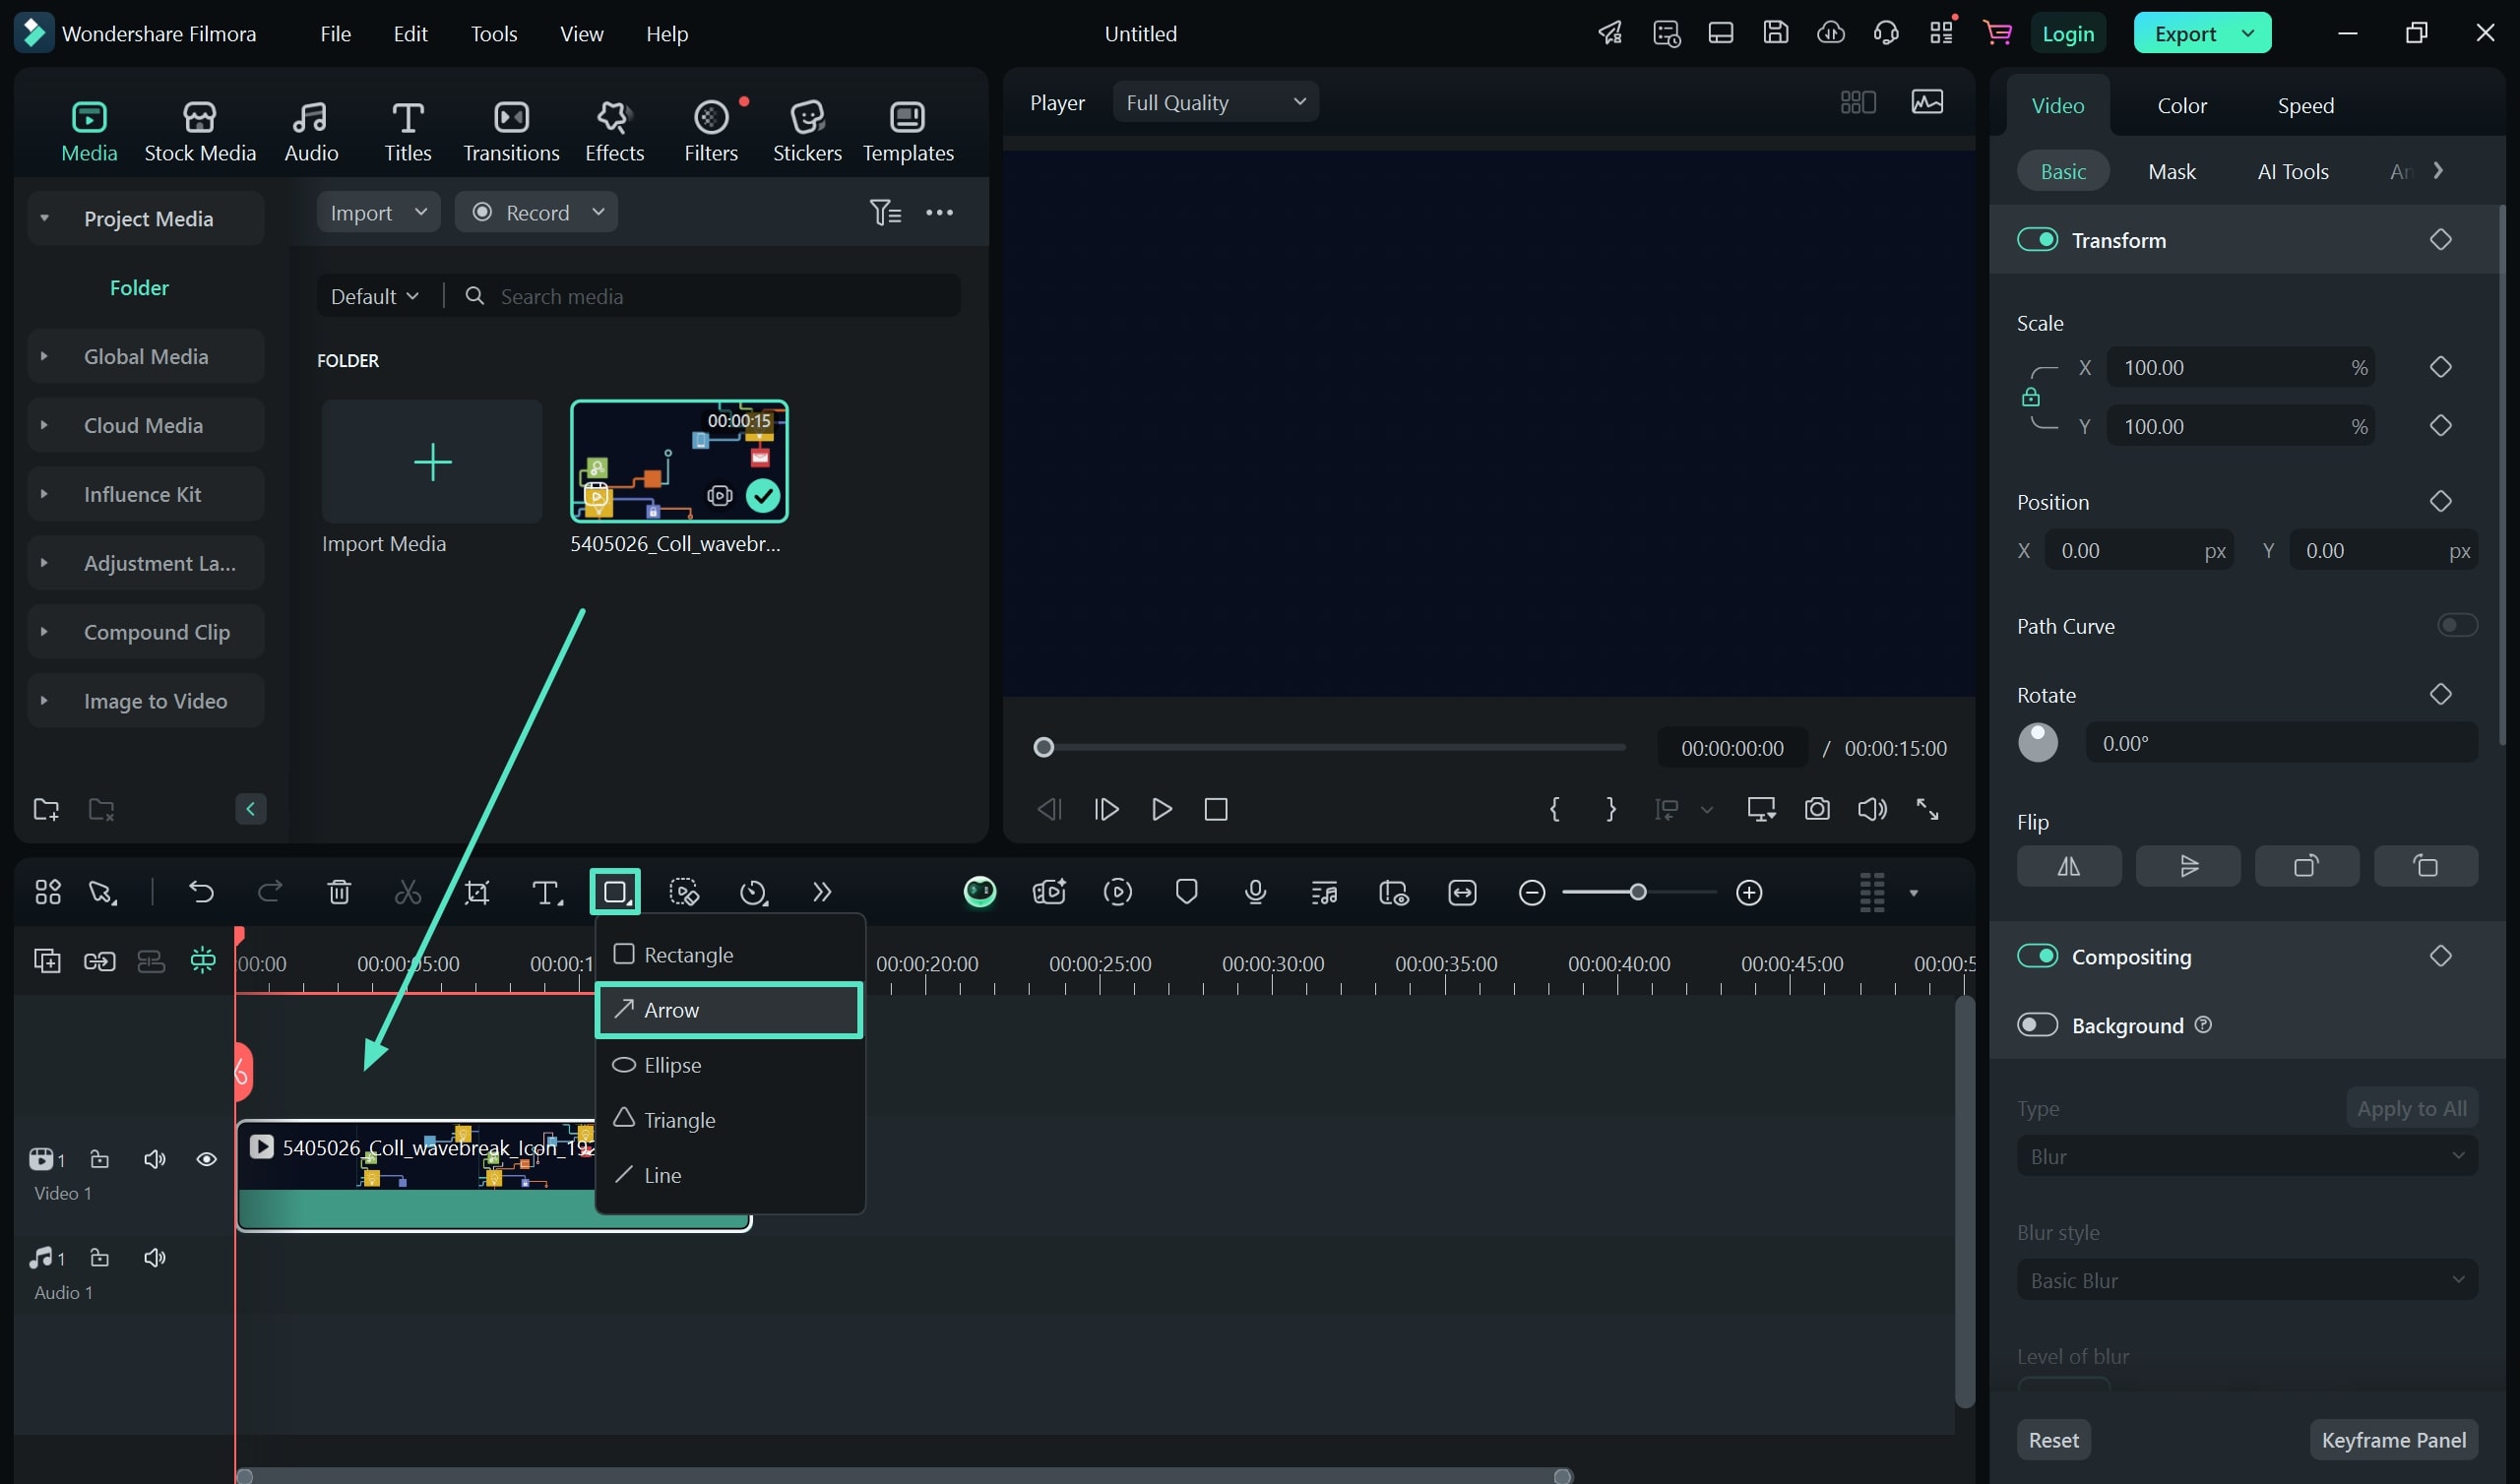
Step 2. Select the Arrow From the Drawing Tools
Next, on the editing interface, click on the "Drawing Tools" icon and select the "Arrow" option. Then, draw this arrow across the video where you want to place the arrow.
Step 3. Adjust the Arrow on the Video and Fill it
Moving on, to match the video elements, tap on the "Fill" toggle button to turn it on and add colors to it. Then, adjust the arrow on the video to place it in an organized manner.
Step 4. Shift to the Animations to Apply it
Upon adjusting the arrow, click on the "Animations" section and pick which style best fits the video. To apply the animations to the drawing tool by clicking twice on it.
Step 5. Right-click on the Arrow and Pick the Show Keyframe Animation
After adjusting the animated arrow, right-click on the element from the timeline. This gives you a drop-down menu, where you can pick the "Show Keyframe Animation" option.
Step 6. Adjust the Keyframe Animation and Export the Video
Next, from the keyframe animations panel on the timeline, you can adjust it according to your liking. Lastly, hit the "Export" button on the top right corner of the screen to download the video to your files.
Way 3. Add Lines With Easy Format Customization
While Filmora offers a complete set of shapes to draw interactive elements in your video, you can also add up lines with contextual formatting to make videos inclusive. Provided next are some simplified steps to add lines to your video content across Filmora:
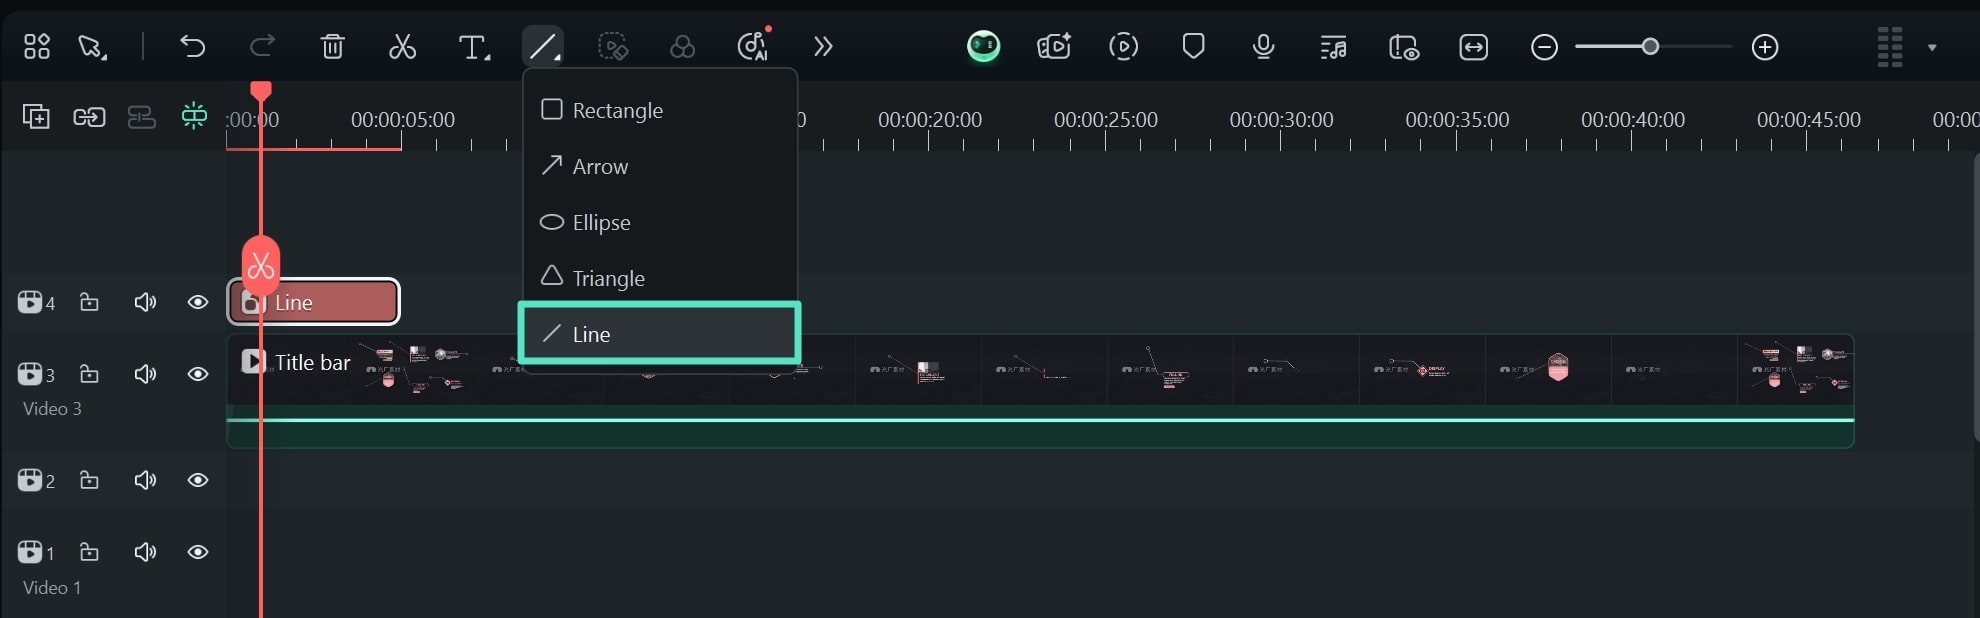
Step 1. Add Line Shape in Video Timeline
After importing your video into Filmora's timeline, continue to the "Shapes" option in the timeline menu bar and choose "Line" from the list.
Step 2. Customize Line Shape Settings in Filmora
As you draw it on the preview window, the settings involving the shape appears on the right. While you can add up animations as discussed in the previous sections, the "Line" shape provides a special set of format customizations. Within the "Basic" section, expand the "Line" settings menu and discover different options which allows you to enhance the outlook of this shape. You can define how to start the line or select the end style, while selecting an overall style and size for it with the available options.

Way 4. Pen Tool for Customizable DrawingNEW
Filmora Pen Tool lets you draw precisely on your media with minimal effort and beautiful strokes. You can customize these strokes by modifying control points and curves, making it easy to craft precise shapes or smooth lines. It also allows you to animate and adjust different attributes of the applied pen strokes according to your preferences. Learn how to use this pen tool in detail in the steps mentioned next:
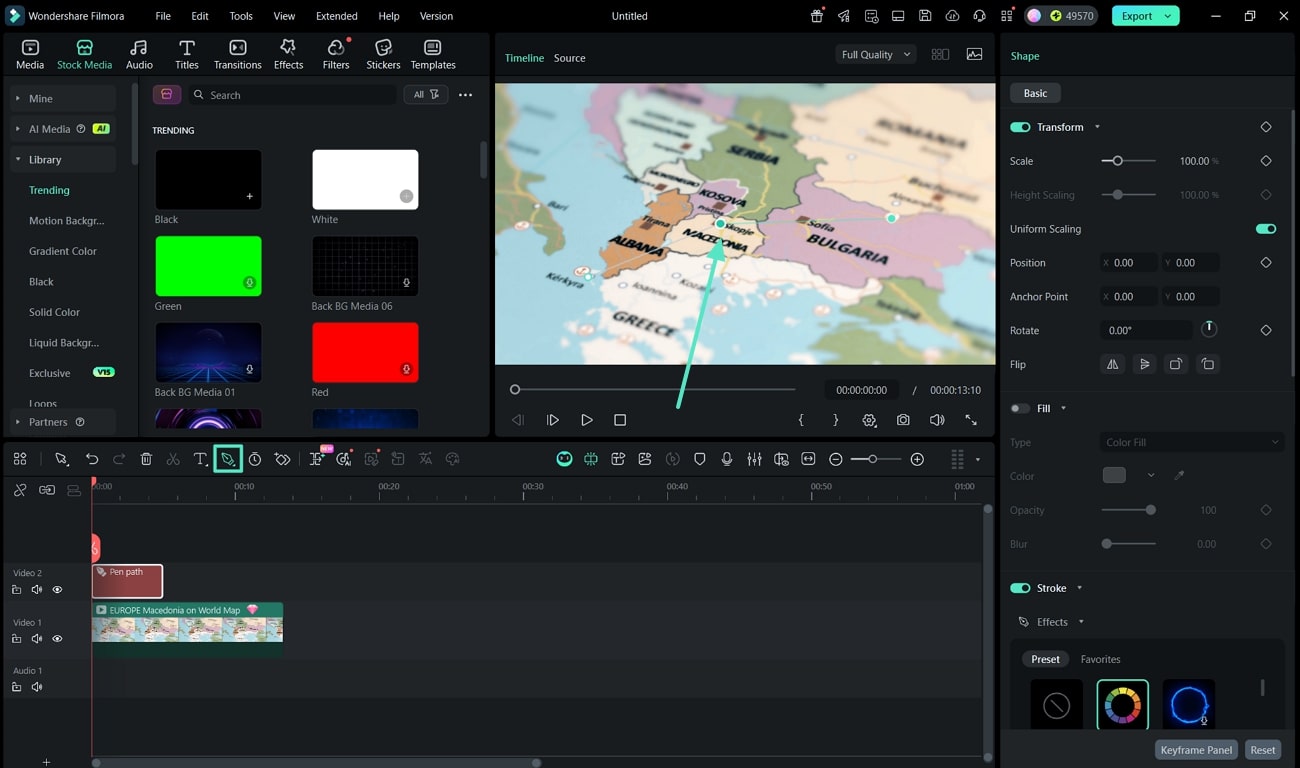
Step 1. Start By Accessing the Pen Tool and Drawing On the Media
Head to the top of the timeline and select the "Pen" icon to enable the Pen tool. Now, draw the shape within the preview window by adding different curve points.
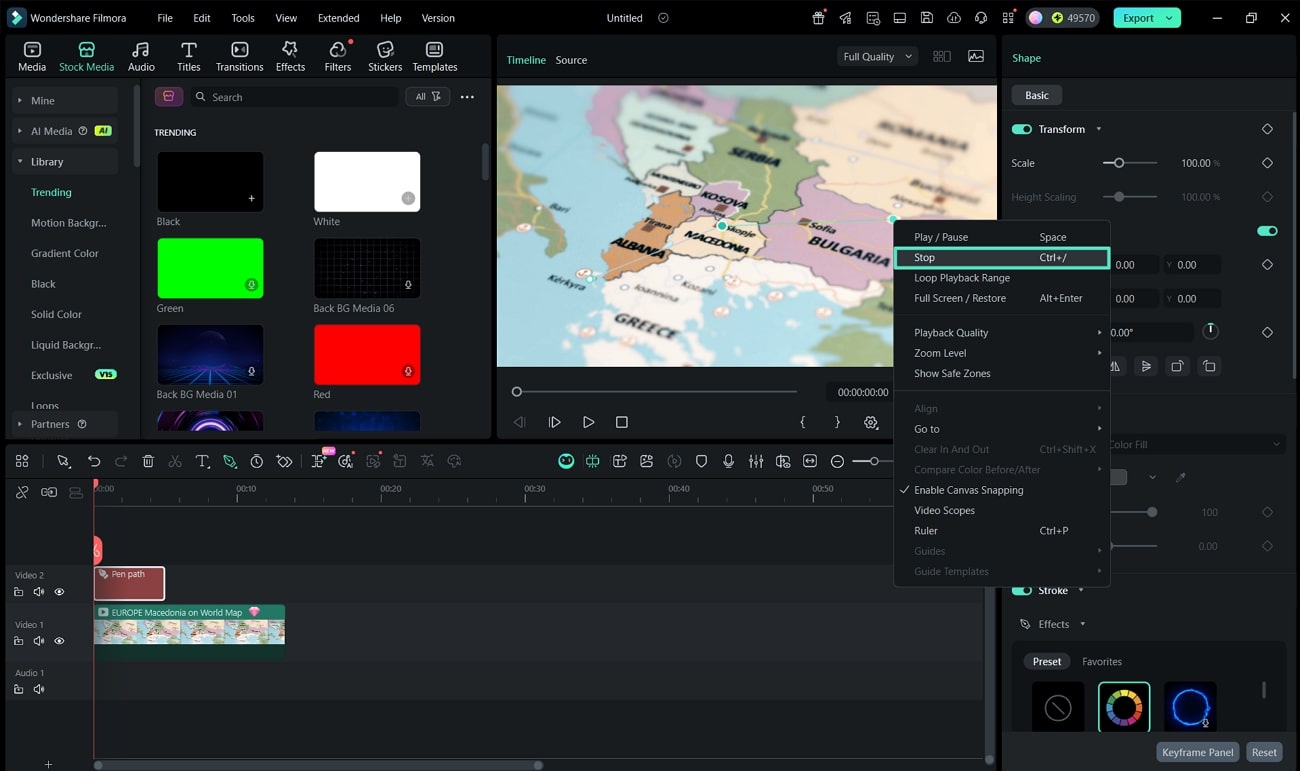
Step 2. Complete the Selection
Once the shape is drawn using the pen tool, right-click to enable a list of options. Next, choose the "Stop" button to complete the selection.
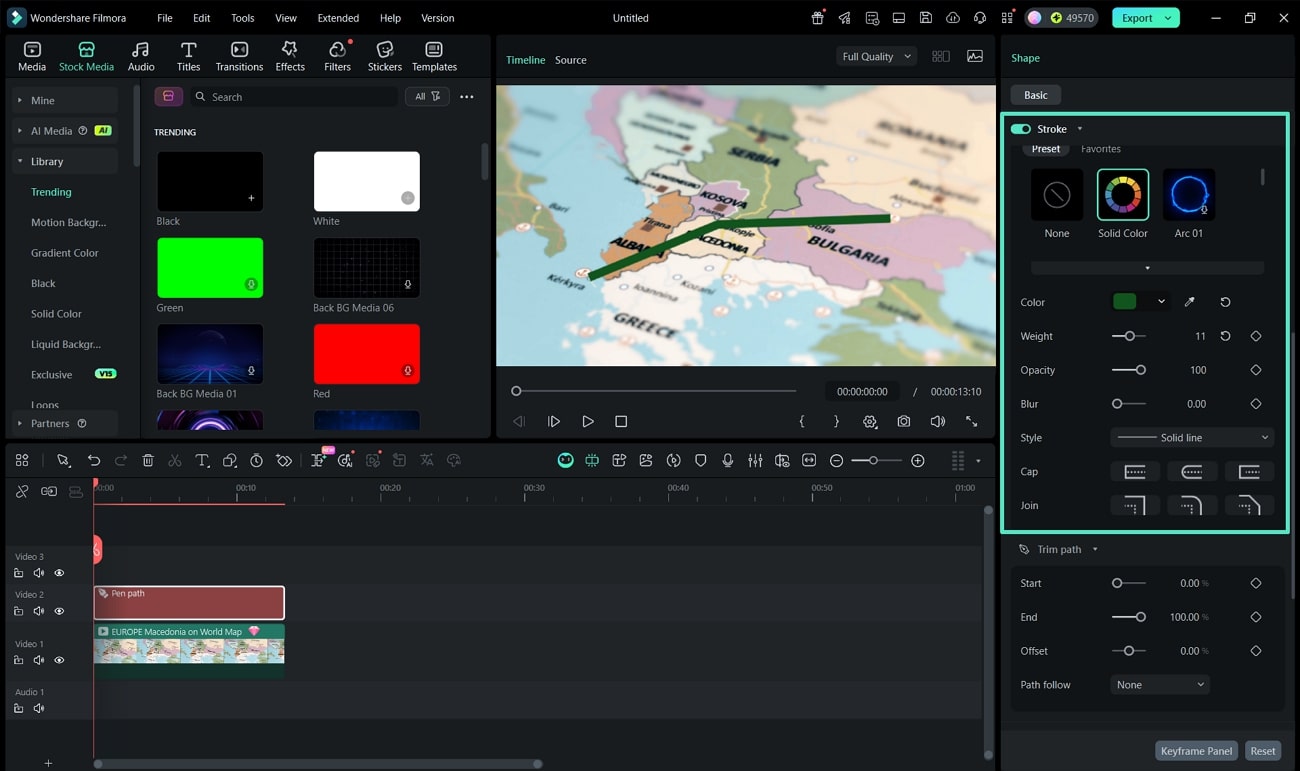
Step 3. Customize The Stroke
Enable the "Stroke" settings and define a particular style from the available presets. Select the color along with other settings like "Weight" and "Opacity" to mark the path specific.
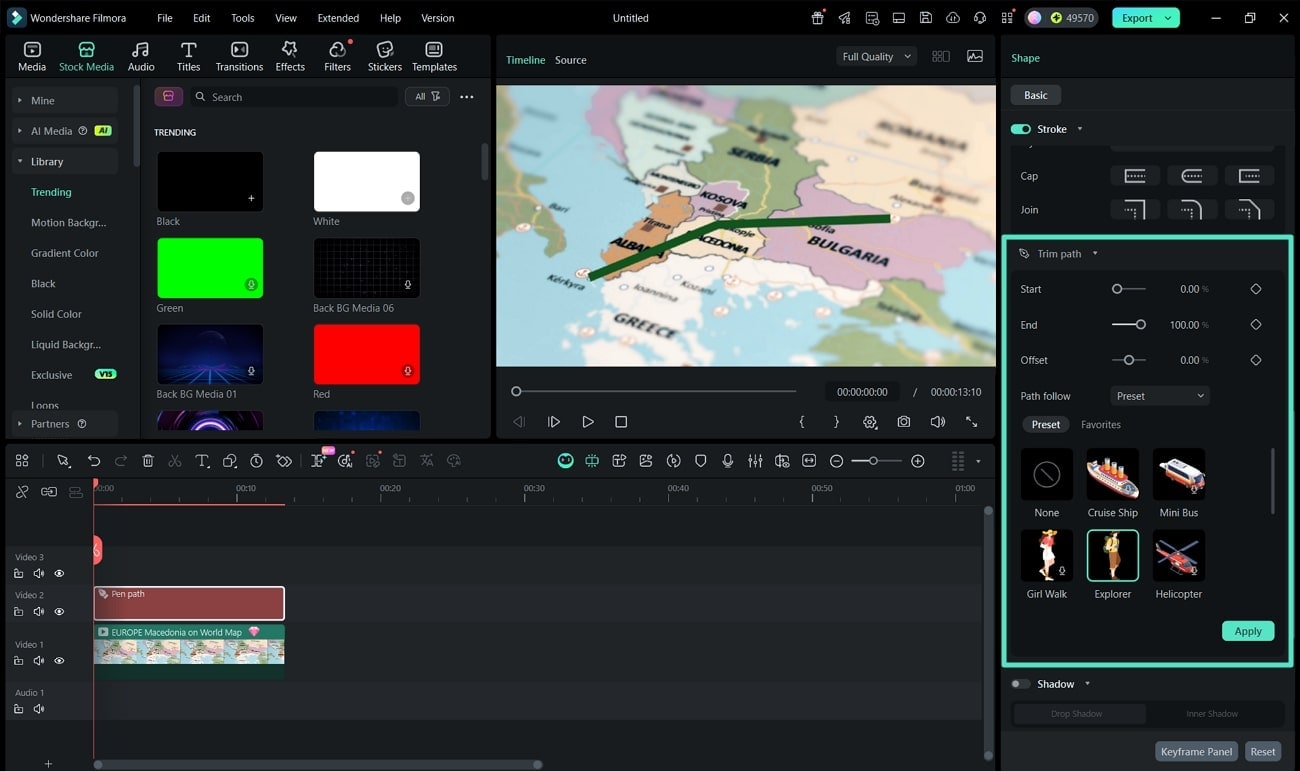
Step 4. Include Trim Path Preset
Lead into the "Trim Path" section and change the "Path follow" option to "Preset." Continue to select an appropriate option and click "Apply" to include it within the defined path.
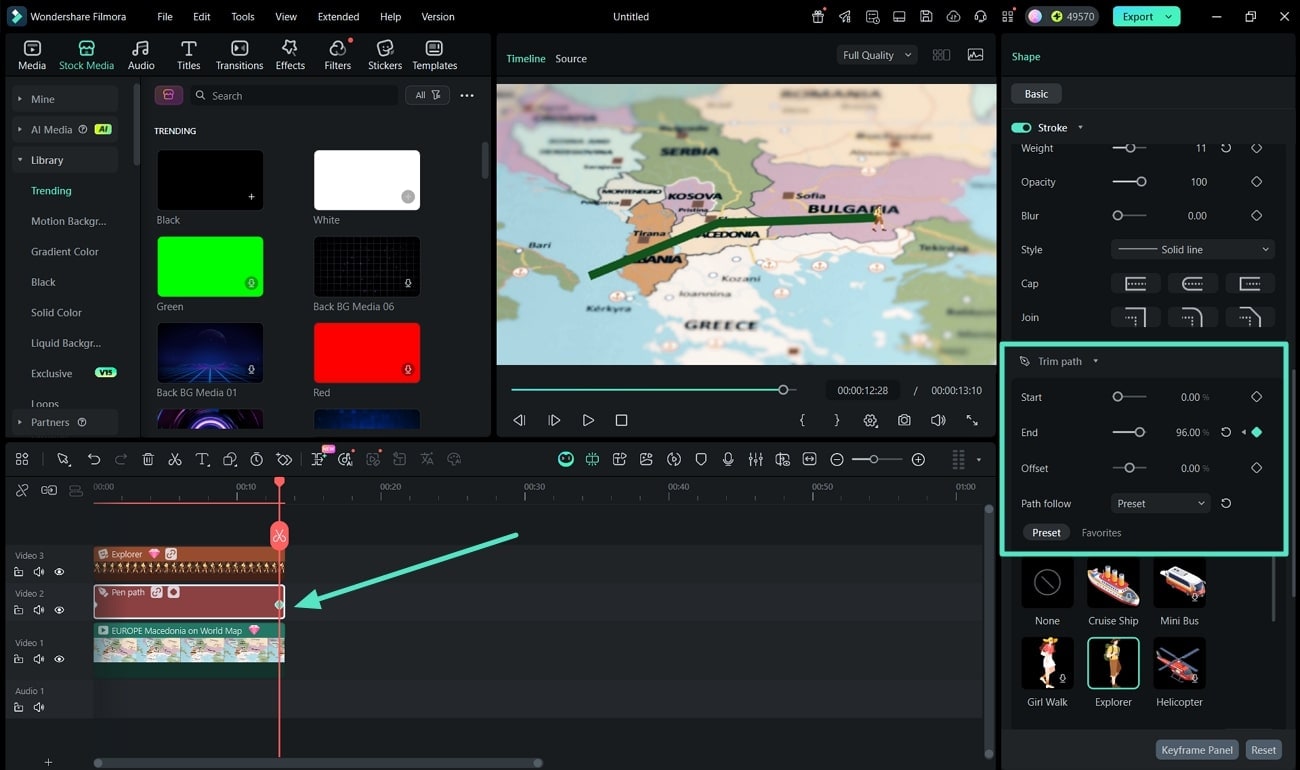
Step 5. Use Keyframes For Path Animation
To animate the path flow, you need to use the "Keyframe" option provided within the "Trim Path" section. Navigate to the start of the clip and enable the "End" keyframe at 0%. Play the clip further and set the "End" keyframe at 98-100% to complete the path.
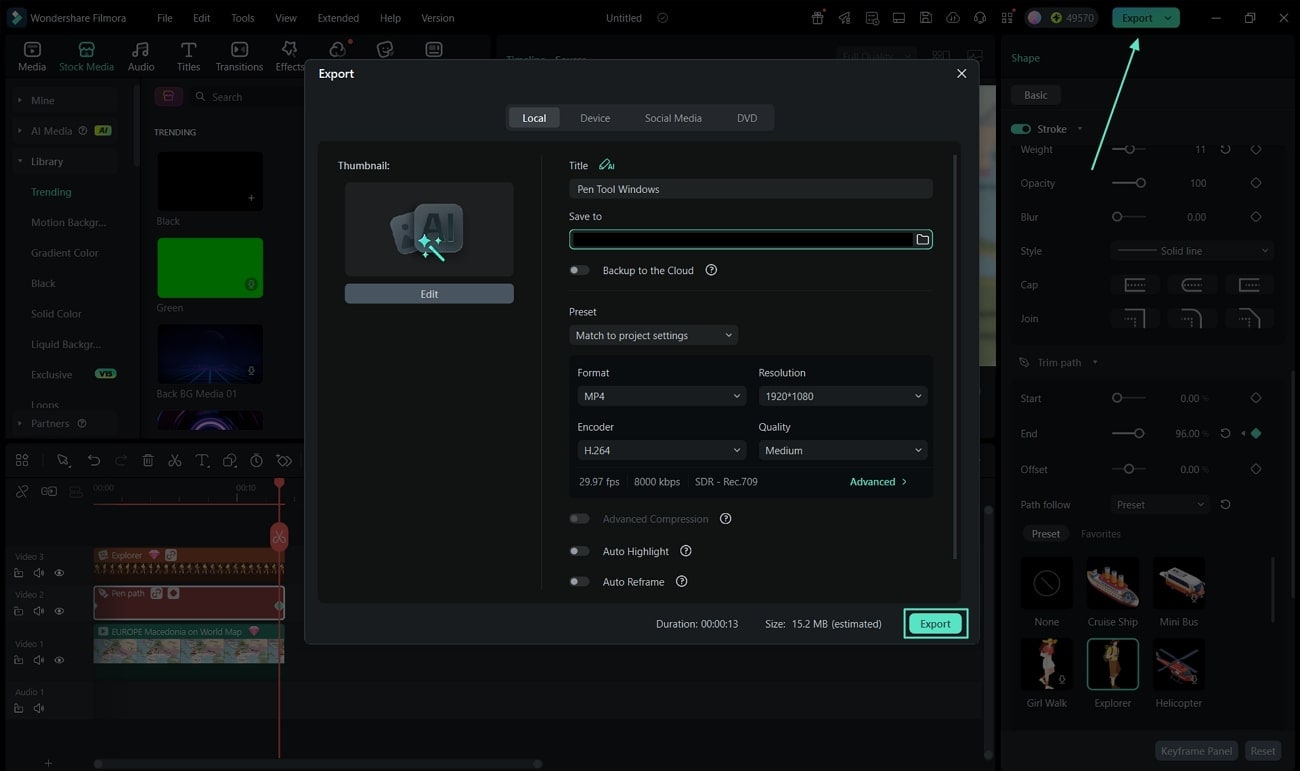
Step 6. Export Final Video in Filmora
Using the "Export" button, lead into the next window and define the export settings for the video. Once you've set the resolution settings, click "Export" to conclude using the pen tool.
Watch the example demo below.

If you want to learn more about the Pen Tool in Filmora, please check out this step-by-step tutorial to master these techniques.
