
 100% Security Verified | No Subscription Required | No Malware

You might notice that the background music might start or stop abruptly while editing a video or a documentary on iMovie. This makes the transitions between scenes feel jarring and unpleasant to the ears. You can add fades at the start and end of each music track to create a smooth viewing and audio experience. If you are unaware of how to fade music in iMovie, read this article to the end.

In this article
Part 1. Understanding Types of Audio Fades: Fade In vs. Fade Out
Fades are essential enhancement tools in sound and video editing that help create smooth transitions between scenes. There are two types of fades that you can apply to make the overall experience more engaging:
Fade-In: A Fade-In usually increases the volume gradually from silent to a high level. This is typically used at the beginning of the track or a scene to introduce the audio subtly. Using this technique, you create a soft entry by easing the audience into the scene and preventing sudden jolts.
Fade-Out: It works the other way and gradually decreases the volume of audio from high to silence. The effect is usually applied at the end of the soundtrack or scene, signifying the conclusion. Most editors use this technique to create an emotional effect to allow the moment in a video to resonate with the audience.
Part 2. How to Fade Music and Audio in iMovie on Mac
You get two different methods to add the fading effects to the video audio using this video editor. You can apply manual adjustments to the audio, and auto fades by simply turning them on. Let us explore both methods to create smooth transitions in your video's audio using iMovie:
Method 1. Adjusting Manually
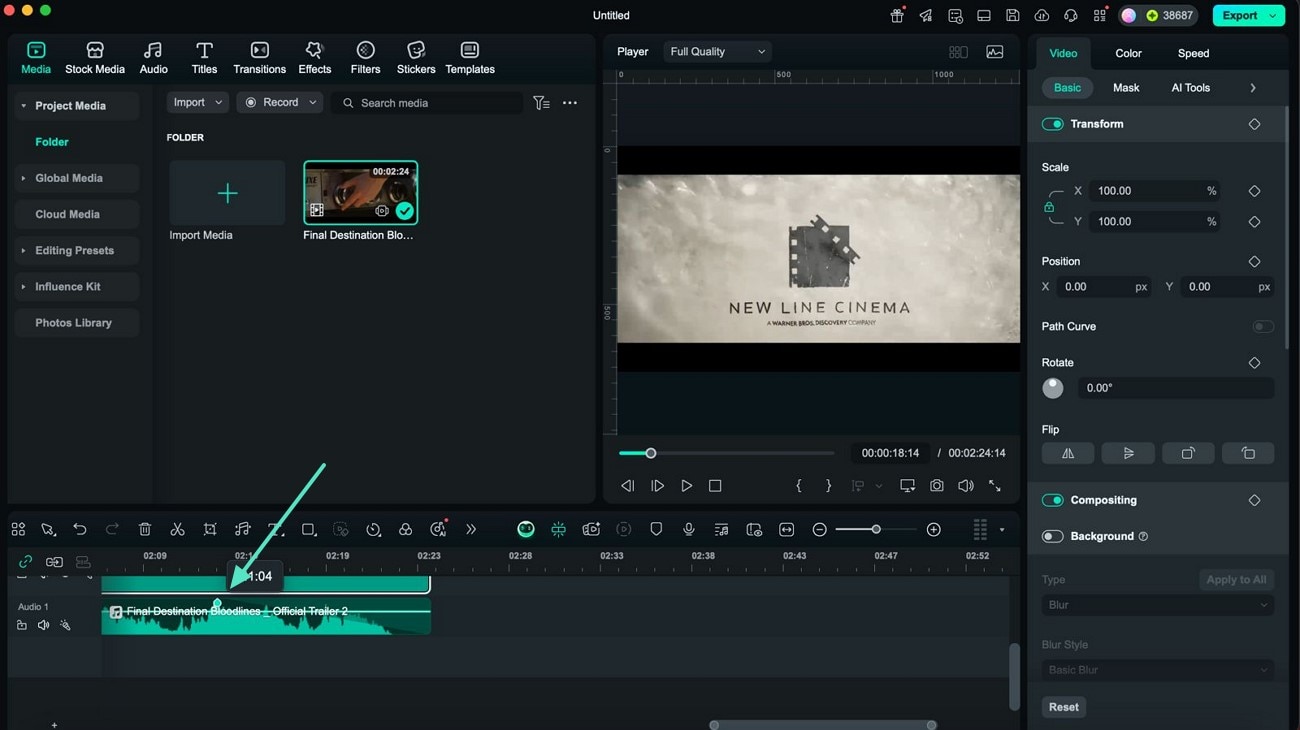
In this method, you can drag and adjust the fade pointers in the audio panel according to your preferences. This method offers full control over how and where the audio dims in the video. It is useful when you are working with background music that needs to blend seamlessly with the voice-overs or scene changes. Read the steps mentioned below to learn how to add fade music in iMovie manually:
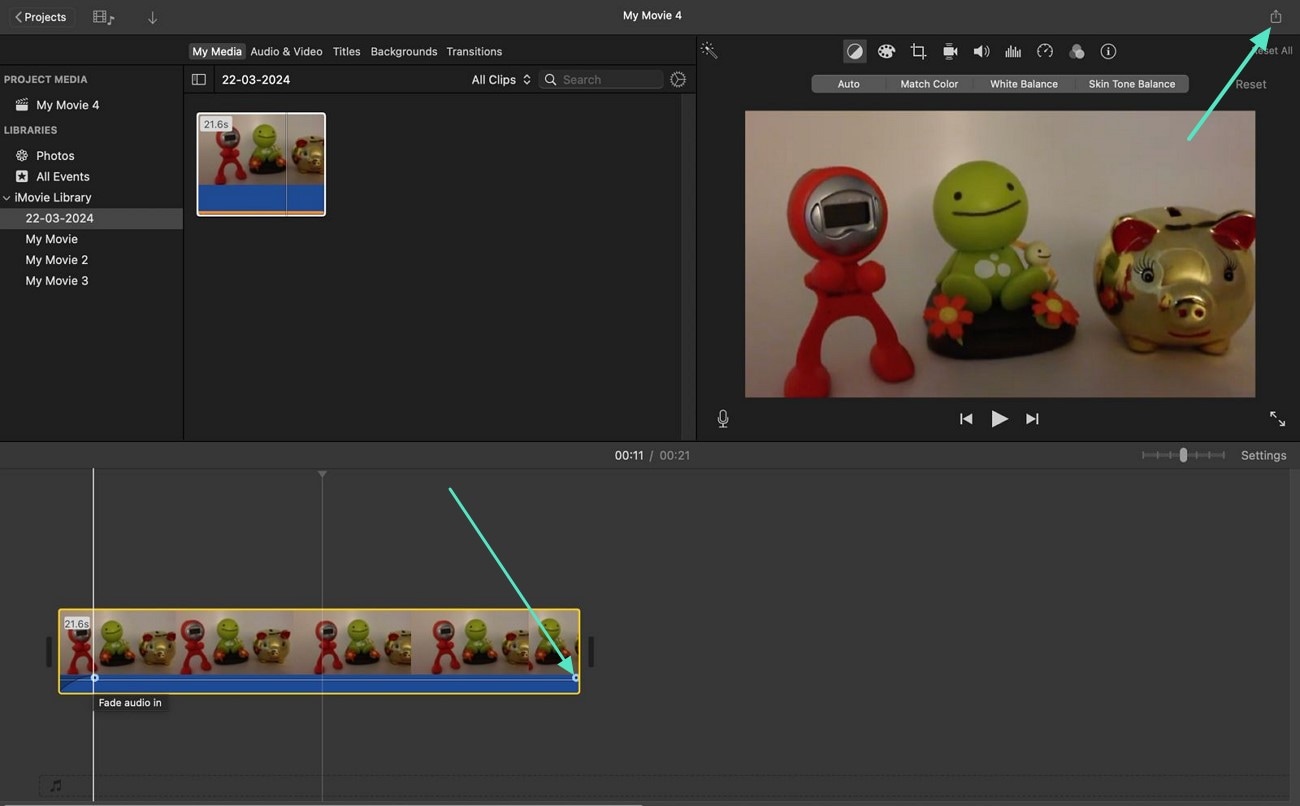
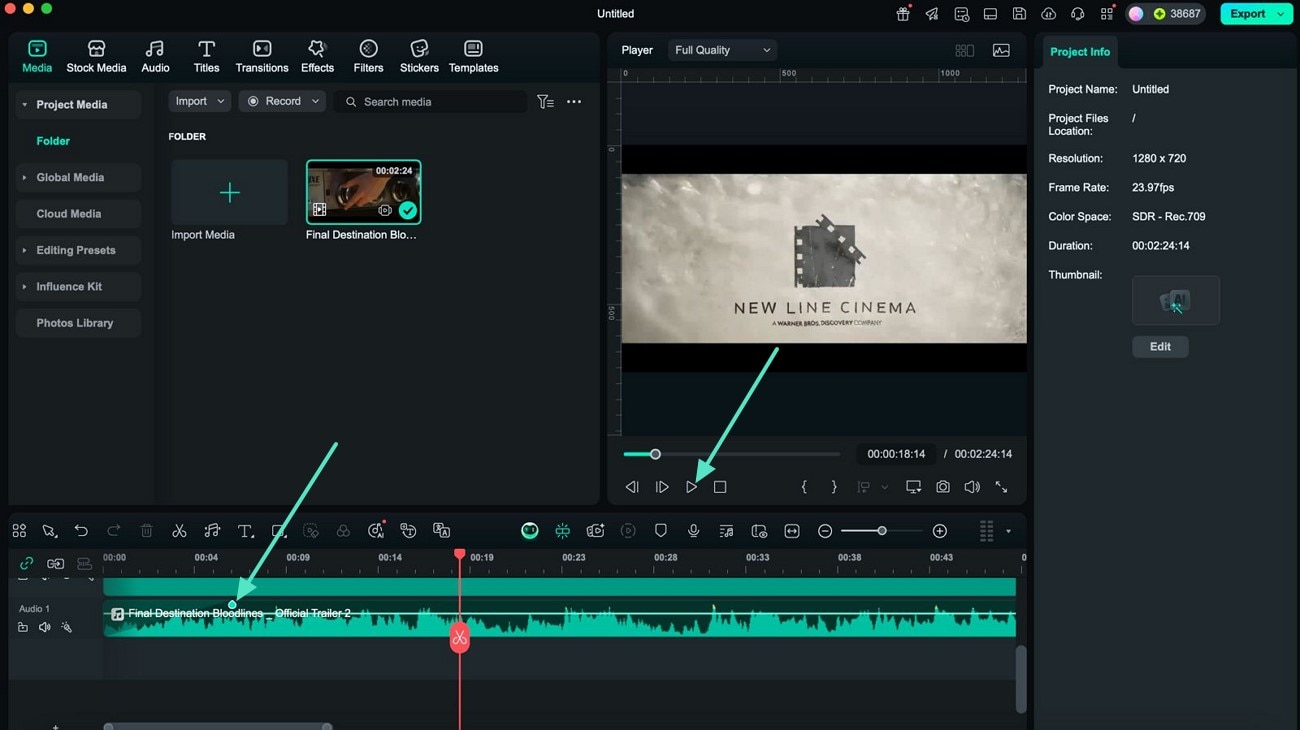
Step 1. To begin the process, launch iMovie on your Mac and import the video to add fades to the tool's editing timeline. Next, head to the timeline and drag the "Fade-In" pointer from the start according to your preferences.
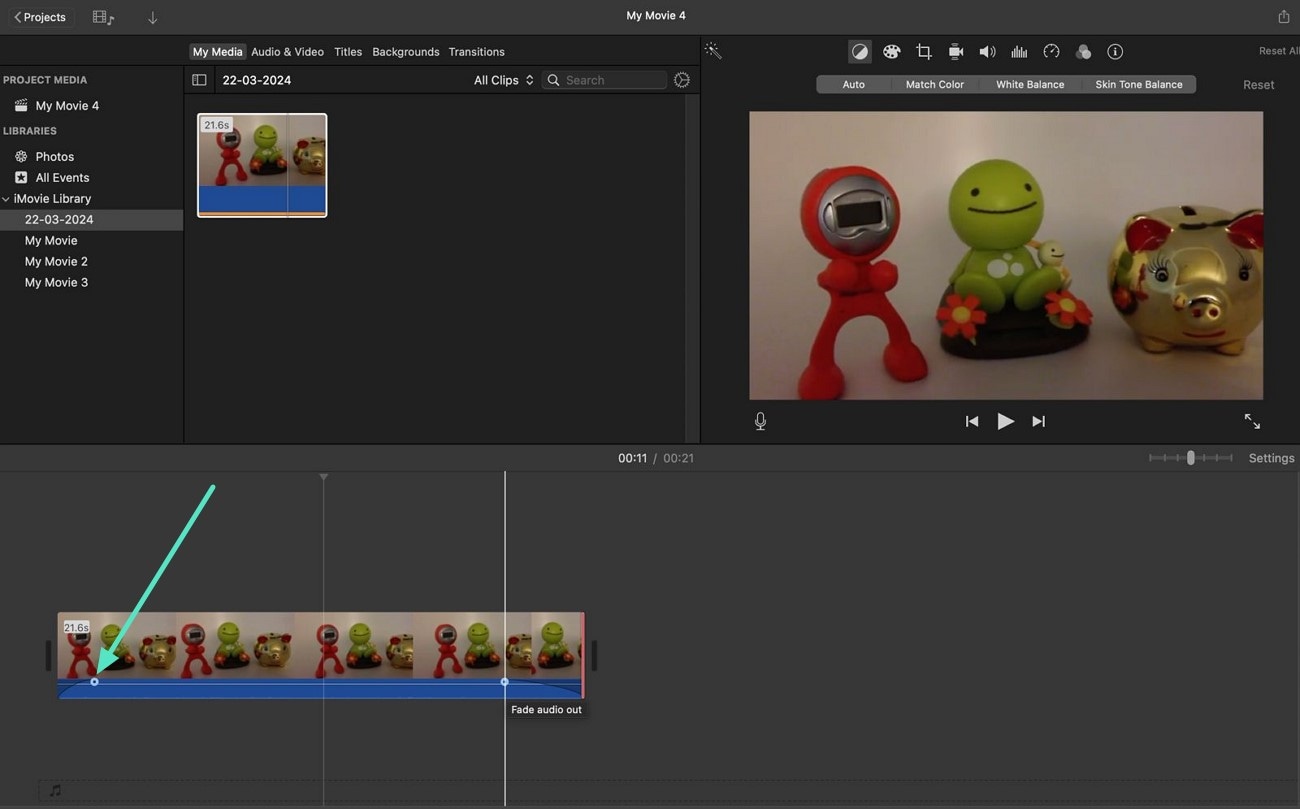
Step 2. To add the fade-out, head to the end of the timeline and drag the "Fade-Out" pointer inwards, creating a smooth transition. Apply the changes and save the video to your device by clicking on the "Export" icon located at the top-right corner.
Method 2. Add Fades From Project Settings
To add instant fade without any manual adjustments, use the Fade-In/Out options offered by this tool. These instant fades apply smooth audio transitions automatically to save you time while delivering professional results. The audio begins and ends with a gradual volume change, preventing abrupt starts and stops with just a click. Provided next are the instructions on how to fade out audio in iMovie instantly:
Instructions. Once the video is added to the editing timeline, locate the "Settings" option below the preview window and click on it to enable the settings window. Enable the checkboxes next to the "Fade In From Black" to "Fade Out To Black" options. This will automatically apply fades to the audio. Finally, export the video with fades to your device using the "Export" icon from the top-right corner.

You may also like:
- iMovie for Windows: 10 Best iMovie Alternatives for You
- How to Add Audio to Your Videos
- How to Add Video Effects in iMovie
Part 3. Simpler Ways to Add Fades in Music and Audio: Desktop & Mobile
Although iMovie offers audio fades, the complicated interface and lack of precision make users switch to its alternatives. One of the most reliable options that provides the utility of adding smooth fades to your video's audio is Wondershare Filmora. The tool provides the utility of audio and video enhancement using your PC and smartphone.
Step-by-Step Guide to Add Fades Using Filmora Desktop
As discussed, users can fade sound in an iMovie video conveniently using Wondershare Filmora. Mentioned next are the steps to insert fade-ins and fade-outs into your video using this efficient tool:
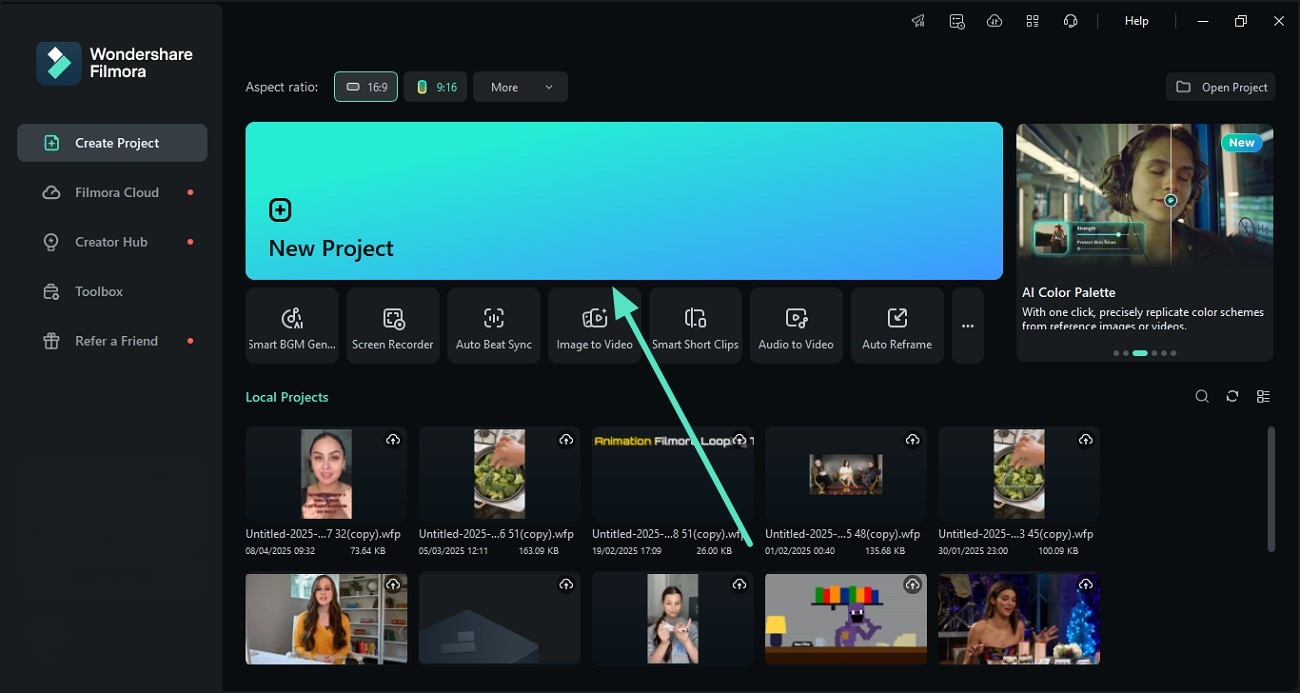
- Step 1. Initiate by Creating a New Project. After launching Filmora on your Mac, press the "New Project" button from the homepage of the tool. Next, add the video for which you want to add the fade effect and drag it to the timeline。
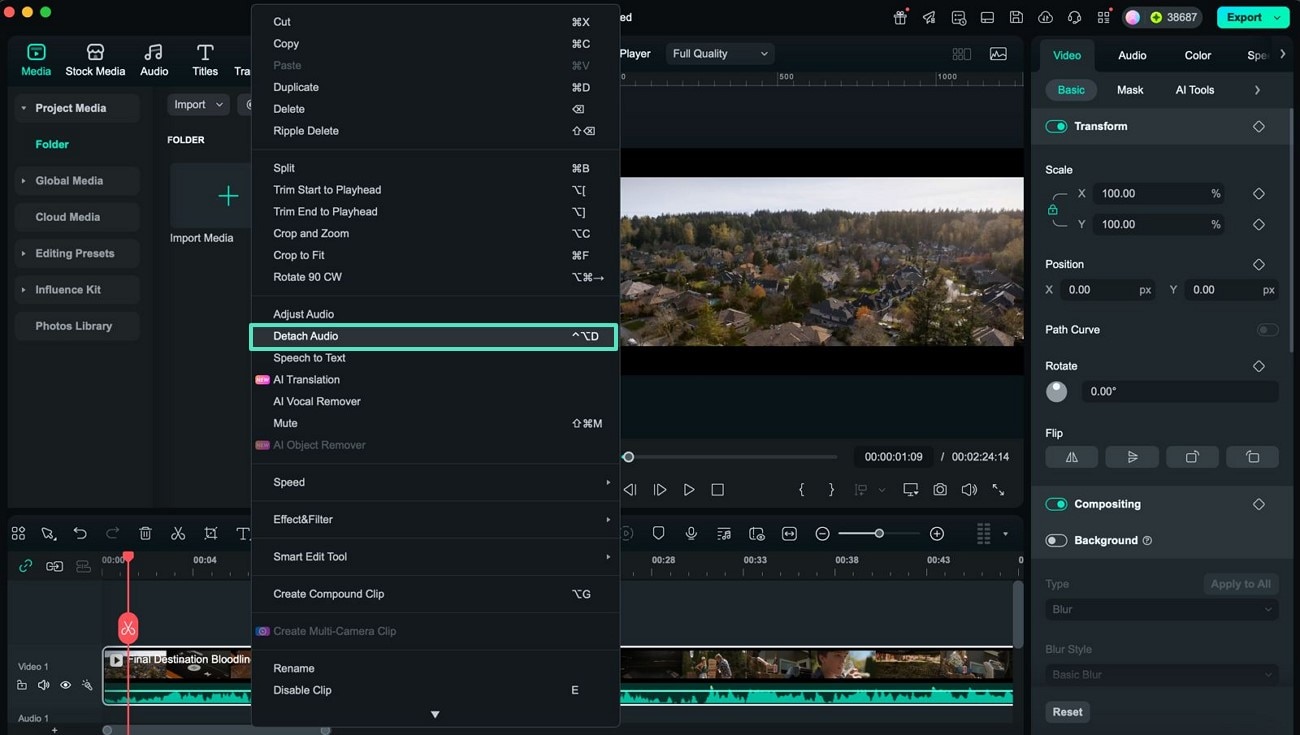
- Step 2. Extract Audio From Video. Right-click on the track to enable a list of options when the video is imported successfully. Find the "Detach Audio" option and click on it. This will extract the audio from the video and add it as a separate audio track on the timeline。
- Step 3. Apply Fade-In From the Track. Click on the small pointer located at the start of the track and drag it through to add the fade-in according to your preferences. Choose the "Play" icon within the preview window to review the transition。
- Step 4. Incorporate Fade-Out Effect To the Audio. Next, head to the end of the track and drag the pointer inwards to apply the fade-out effect according to your preferences。
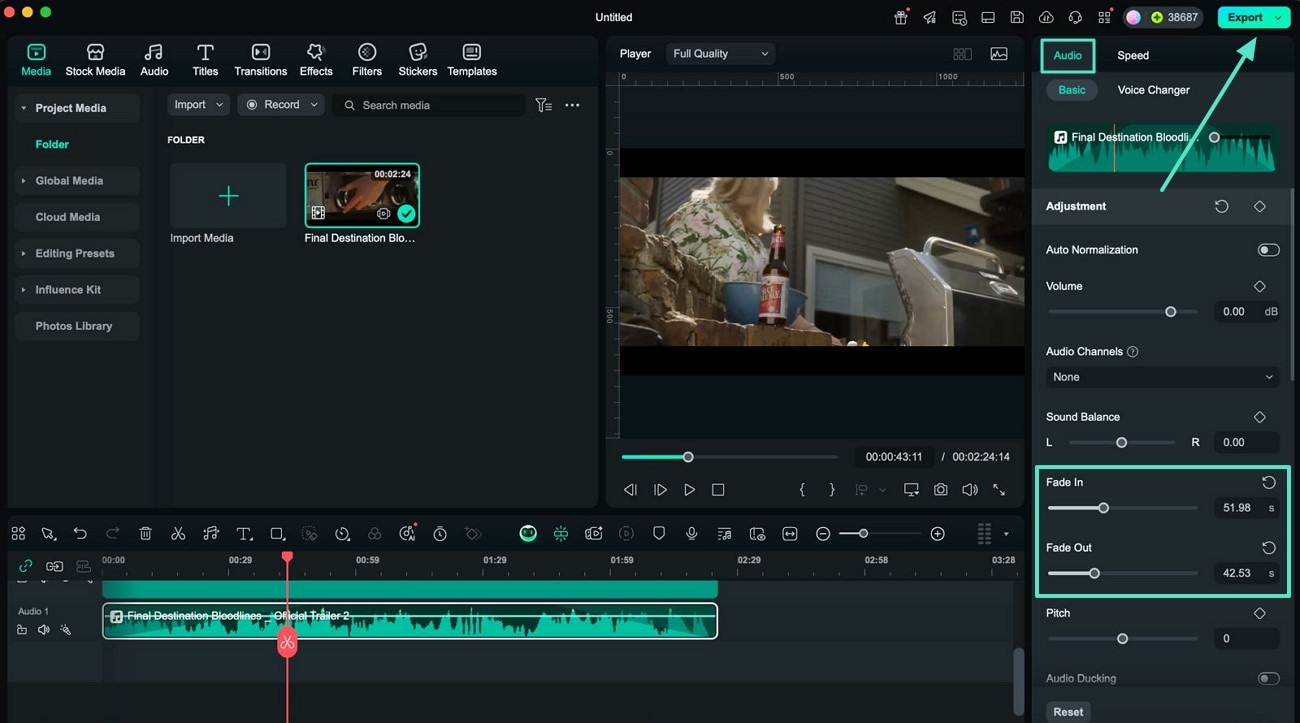
- Step 5. Access Audio Panel For Fade Ins/Outs. You can directly apply and adjust the fades by accessing the "Audio" panels on the right. Access the "Basic" section and add "Fade In" and "Fade Out" by adjusting the respective sliders. Conversely, acquire the timer next to the slider to add timing where you want the fades to be added. Finally, hit the "Export" button at the top of the screen to save your video once you are satisfied with the results。
 secure download

Detailed Steps on Adding Fades Using the Filmora App
Having discussed the step-by-step guide on applying fades using Filmora on your Mac, let us now explore the steps for adding these smooth fades using the Filmora App [iOS/Android]:
- Step 1. Start a New Project and Add a Video. Once you have launched the Filmora App, tap on the "New Project" option from the homepage. Now, import the video, head to the toolbar at the bottom and press the "Extract Audio" option. Once the audio is extracted, locate the "Fade" option and tap on it。
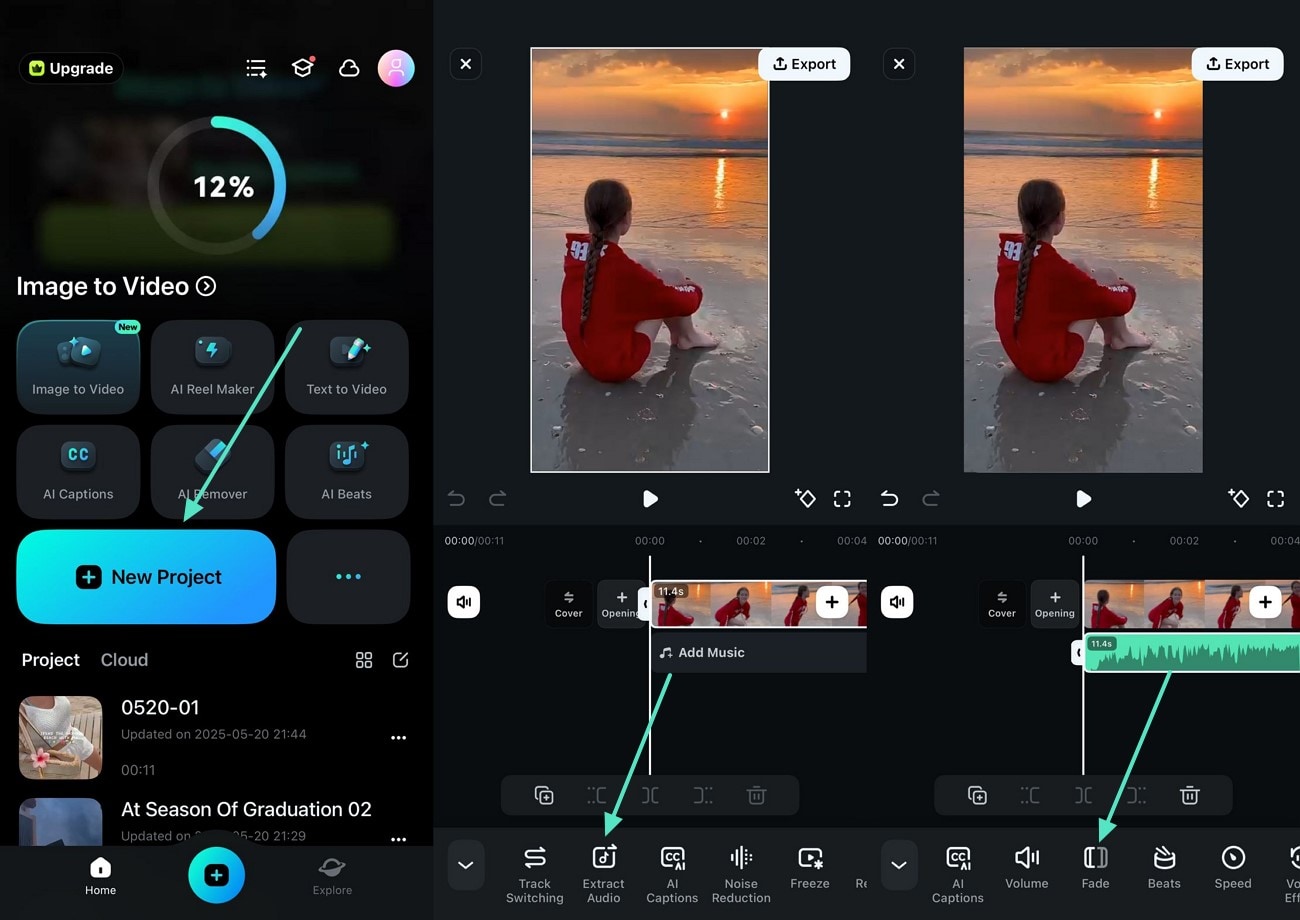
- Step 2. Apply Fades and Export the Video. Drag the "Fade In" and "Fade Out" sliders to add the sound dims according to your choice. Tap on the "Play" icon to review the fades and apply them by pressing the "Tick" icon. Once you are done, head to the top-right corner and press the "Export" button. Configure the output settings and hit the "Export" button to save the video to your smartphone。

secure download
Conclusion
To wrap it up, this article discussed various solutions on how to fade music and audio in iMovie on Mac. However, Wondershare Filmora is a more convenient option to add precise fades to the audio of your video. This all-in-one multimedia tool provides the ability to effortlessly insert dims into the music from desktop and mobile.
