For the Best Results, Use the Latest Version.
-
Preparations
-
Account
-
Get Started & Basic Settings
-
Compatibility & Tech Specs
-
Performance Settings
-
-
Creating Projects
-
Creating New Projects
-
-
Importing & Recording
-
Video Editing for Windows
-
Basic Video Editing
- Enable/Disable Clip in Windows
- Magnetic Timeline for Windows
- Drawing Tools fo Windows
- Dual Monitor Setup for Video Editing on Windows
- Select All Clips on Timeline for Windows
- Dual Monitor Setup for Video Editing on Mac
- Manage Timeline and Tracks
- Auto Ripple for Windows
- Split & trim video
- Crop & Pan & Zoom Video
- Compositing
- Change video playback speed
- Playing videos in reverse
- Mark In and Mark Out for Windows
- Markers for Windows
- Group editing
- Customizable Backgrounds for Videos and Images in Windows
- Video snapshot
- Using freeze frame
- Logo Reveal For Windows
- Apply auto enhance
- Applying drop shadow
- Adjustment layer for Windows
- Transforming
- Video Editing Ruler – Windows
-
Advanced Video Editing
-
AI-Powered Video Editing
- Smart Scene Cut for Windows
- Smart Short Clips for Windows
- AI Face Mosaic for Windows
- AI Video Enhancer
- AI Text-to-Video for Windows
- Planar Tracking
- AI Idea to Video for Windows
- Image to Video for Windows
- Instant Cutter Tool for Windows
- AI Extend
- AI Script to Video Guide for Windows
- AI Text-Based Editing for Windows
- AI Mate Editing for Windows
- Create with instant mode
- ChatGPT Plugin - AI Copywriting
- AI Smart Cutout
- Lens correction
- Auto reframe video
- AI Portrait Cutout
- Scene detection feature
- AI Smart Masking for Windows
- Make motion tracking
- Stabilization
- AI Video/Photo Object Remover for Windows
- AI Smart Search for Windows
- AI Skin Tone Protection for Windows
- AI Image for Windows
- Chroma key (green screen)
- Super Slow Motion with Optical Flow for Windows
- Video Denoise for Windows
-
-
Audio Editing for Windows
-
Basic Audio Editing
-
Advanced Audio Editing
-
AI-Powered Audio Editing
-
-
Text Editing for Windows
-
Basic Text Editing
-
Advanced Text Editing
-
AI-Powered Text Editing
-
-
Video Customizations
-
Video Effects
-
Audio Effects
-
Transitions
-
Stickers
-
Filters
-
Color Editing
-
Animations
-
Templates
-
Asset Center
-
-
Exporting & Share & Cloud Backup
AI Sound Effect
AI Sound Effect, powered by the advanced Tianmu 2.0 model, aims to automate and simplify the process of creating personalized video audio. By inputting descriptive keywords, you can generate high-quality, customized sound effects with a single click. This technology allows video creators to quickly and easily add suitable audio effects to your video clips.
For a complete overview of this feature, explore the details in the guide:
How to Generate Customized Sound Effects with Filmora
Here is a step-by-step guide for you:
Step 1: Launch Filmora and Create a New Project
After downloading Filmora, open the program and log in or sign up from the main menu. Next, go to the control panel on the left and click "Create Project." Then, choose the "New Project" tab from the menu that appears.
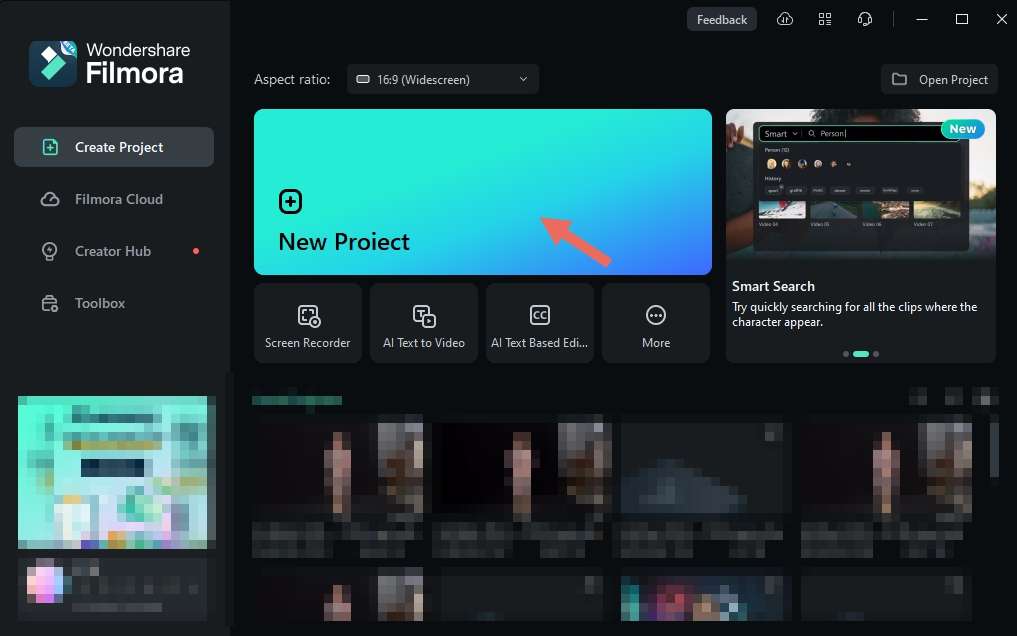
Step 2: Access the AI Sound Effect window
After selecting a new project, you'll be directed towards Filmora's main editing interface. From there, navigate towards the "Audio" tab in the top custom toolbar. Following that, hover towards the panel at the left, select "AI Sound Effect."
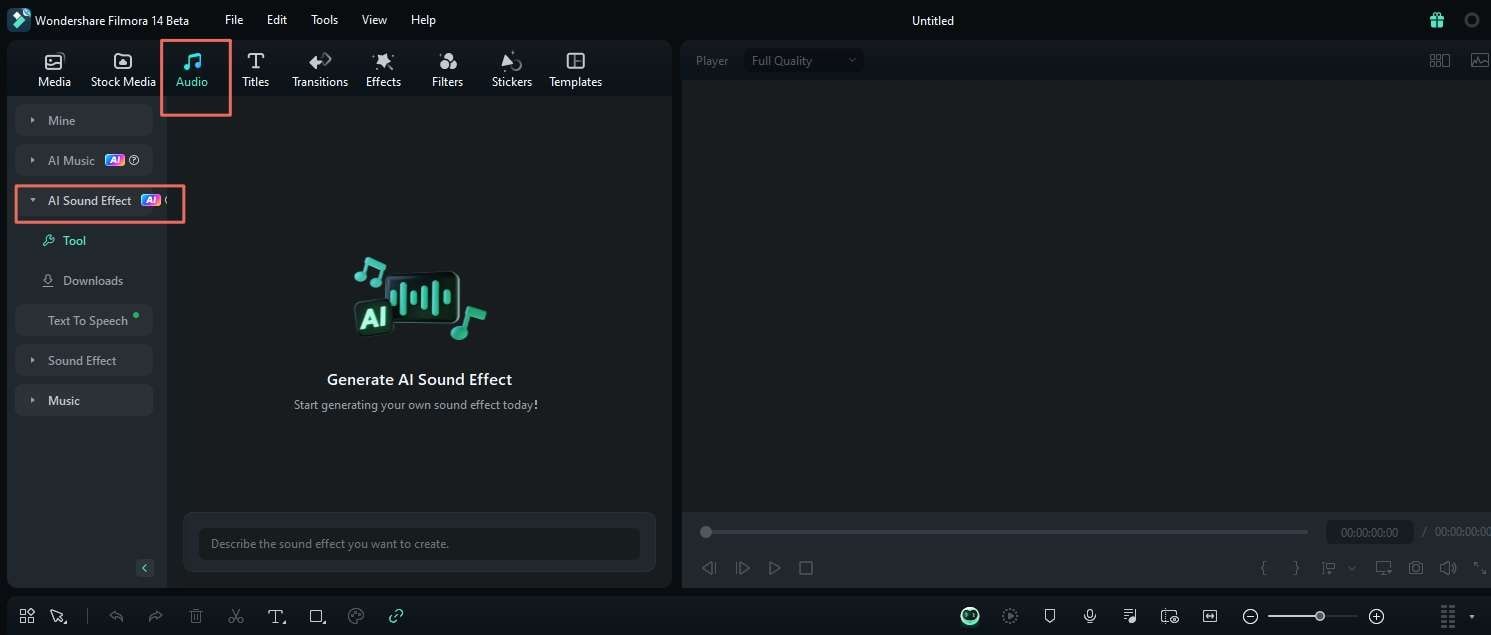
Step 3: Craft Your Prompt and Generate
The new interface provides powerful tools to help you create the perfect sound effect. You can either type your own description or use AI to get inspiration.
1. Describe Your Sound Effect
In the "Prompt" box, describe the sound effect you want to generate. Be as specific as you like. The prompt supports multiple languages and has a limit of 100 characters (or 50 Chinese characters).
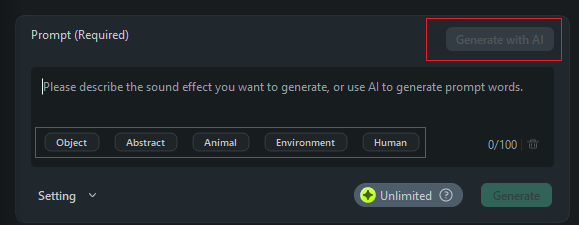
If you need some creative help, use one of the new features:
- Use Creative Tags: Click on tags like Object, Abstract, Animal, Environment, or Human to get ideas and add relevant keywords directly into the prompt box.
- Generate with AI: If you're not sure what to write, click the "Generate with AI" button. The AI will suggest a creative and detailed prompt for you, which you can then use or edit.
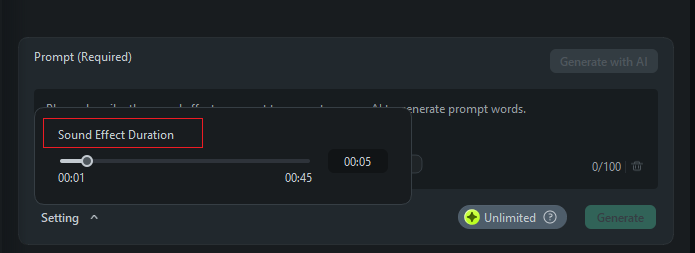
2. Adjust Settings and Generate
Set the desired duration of sound effects you want to create. Once you are ready, click “Generate.”
Note:
All prompts are automatically checked for sensitive content to ensure a safe creative environment.Step 4: Obtain Results
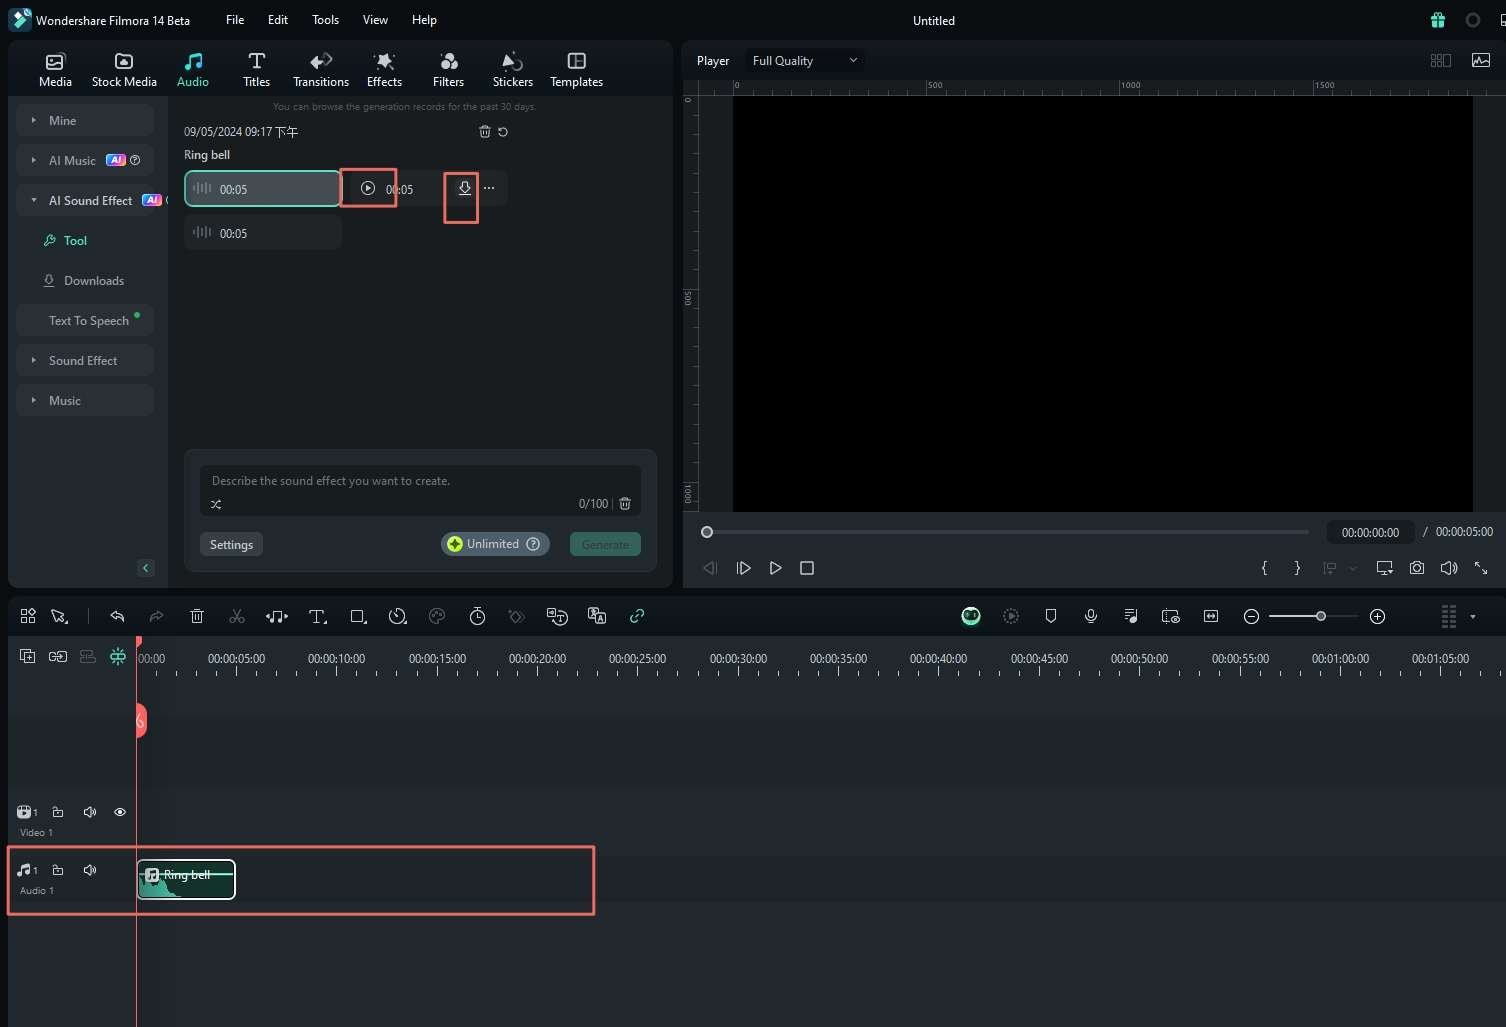
You can preview, download, and apply the generated sound effects to the timeline.
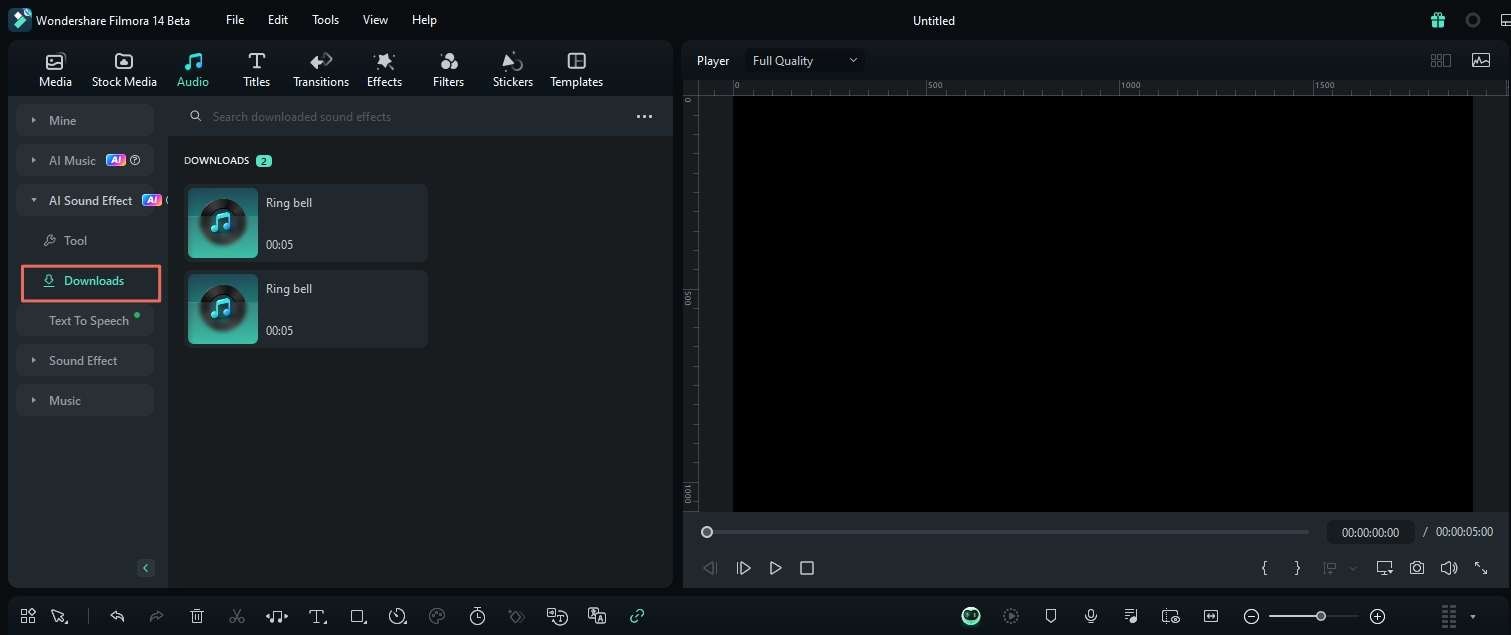
You can view the downloaded sound effects in the "Downloads."
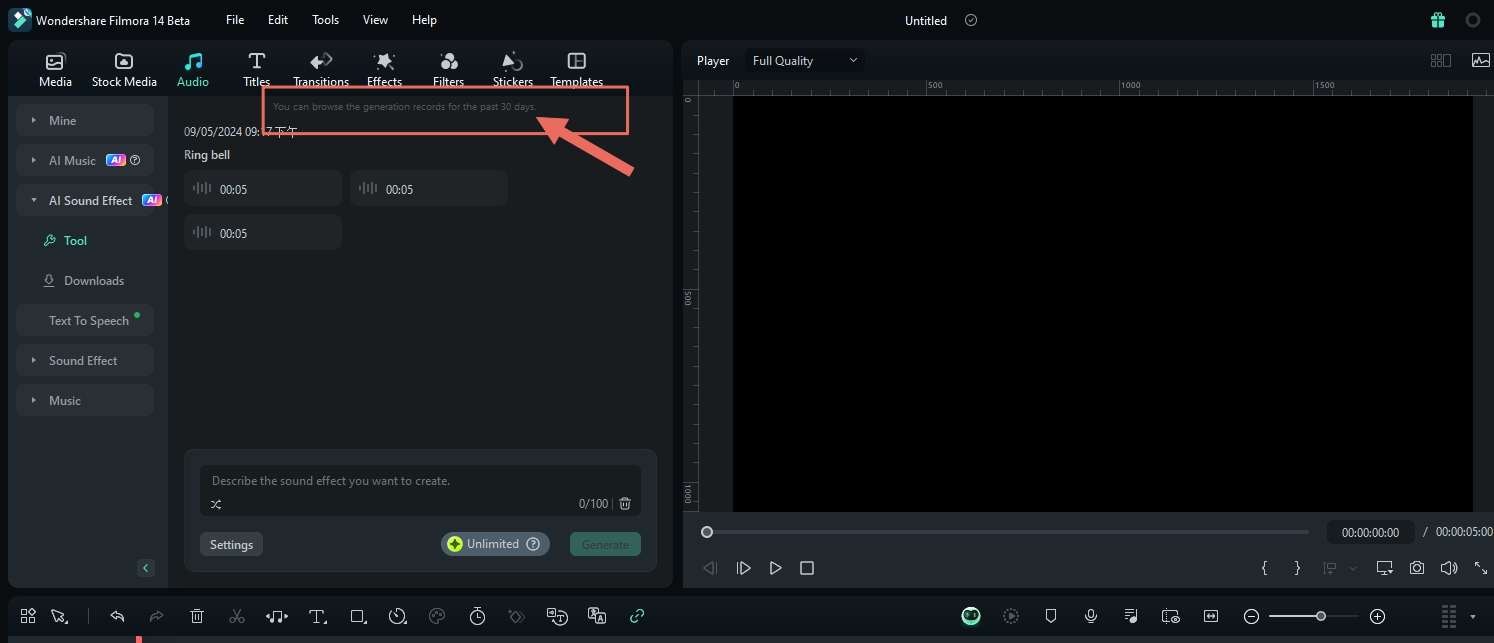
Note: The generated sound effect records can only be saved for 30 days. Therefore, if you are satisfied with the generated sound effects, please ensure you download and save them promptly.
Related Posts
Featured Articles
Best Drone Video Editing Software in 2025: Top Picks for Smooth, Cinematic Footage
Find the best drone video editing software for smooth and cinematic results. Compare the top tools, their features, and get tips to improve your video drone edits.
Top Photo Editing Apps for Instagram for Android and iOS Users
This guide brings you the best photo editing apps for enhancing your Instagram visuals, including their editing capabilities, pros, and cons. Keep reading to learn more.
How To Resize Video for TikTok: 3 Easy Methods
Find out how to easily resize your videos for TikTok using online tools and mobile apps, ensuring your content fits perfectly and stays high quality.
Recommended User Guide
AI Music Generator for Windows
With advanced versions come advanced features, and one of Wondershare Filmora's V13 innovations is AI Music Generation.
How to Execute AI Voice Cloning in Wondershare Filmora?
Do you wish to clone a video recording or tutorial in your voice? Using basic text presets and easy voice training, create a perfect clone of your voice.
AI Voice Enhancer
This guide helps you to improves audio clarity and quality by reducing noise and enhancing voice features.
