For the Best Results, Use the Latest Version.
-
Preparations
-
Account
-
Get Started & Basic Settings
-
Compatibility & Tech Specs
-
Performance Settings
-
-
Creating Projects
-
Creating New Projects
-
-
Importing & Recording
-
Video Editing for Windows
-
Basic Video Editing
- Enable/Disable Clip in Windows
- Magnetic Timeline for Windows
- Dual Monitor Setup for Video Editing on Windows
- Select All Clips on Timeline for Windows
- Manage Timeline and Tracks on Windows
- Auto Ripple for Windows
- Split & trim video
- Crop & Pan & Zoom Video
- Compositing
- Change Video Speed on Windows
- Playing videos in reverse
- Mark In and Mark Out for Windows
- Markers for Windows
- Group editing
- Customizable Backgrounds for Videos and Images in Windows
- Video snapshot
- Using freeze frame
- Logo Reveal For Windows
- Apply auto enhance
- Applying drop shadow
- Adjustment layer for Windows
- Transforming
- Video Editing Ruler – Windows
-
Advanced Video Editing
- Drawing Tools for Windows | Filmora Guide
- Create Multi-Camera Clip
- Compound Clip for Windows
- Multi-Clip Editing for Windows
- Filmora Motion Blur | Windows
- Filmora Flicker Removal Guide | Windows
- Apply mask to video
- Creating a PIP effect
- Keyframe Graph Editor for Windows
- Add animation keyframing for Windows
- Keyframe Path Curve for Windows
-
AI-Powered Video Editing
- Smart Scene Cut for Windows
- Smart Short Clips for Windows
- AI Face Mosaic for Windows
- Filmora AI Eye Contact- Windows
- AI Video Enhancer for Windows
- AI Text-to-Video for Windows
- Planar Tracking for Windows
- AI Idea to Video for Windows
- Filmora Image to Video for Windows
- Filmora Image to Prompt for Windows
- Instant Cutter Tool for Windows
- AI Extend
- Filmora AI Relight - Windows
- Filmora AI Image Enhancer Guide - Windows
- AI Script to Video Guide for Windows
- AI Text-Based Editing for Windows
- AI Mate Editing for Windows
- Create with instant mode
- ChatGPT Plugin - AI Copywriting
- AI Smart Cutout
- Lens correction on Windows
- Auto reframe video
- AI Portrait Cutout
- Scene detection feature
- AI Smart Masking for Windows
- Make motion tracking
- Video Stabilization for Windows
- AI Video/Photo Object Remover for Windows
- AI Smart Search for Windows
- AI Skin Tone Protection for Windows
- AI Image for Windows
- Chroma key (green screen)
- Super Slow Motion with Optical Flow for Windows
- Video Denoise for Windows
-
-
Audio Editing for Windows
-
Basic Audio Editing
-
Advanced Audio Editing
-
AI-Powered Audio Editing
-
-
Text Editing for Windows
-
Basic Text Editing
-
Advanced Text Editing
-
AI-Powered Text Editing
-
-
Video Customizations
-
Video Effects
-
Audio Effects
-
Transitions
-
Stickers
-
Filters
-
Color Editing
-
Animations
-
Templates
-
Asset Center
-
-
Exporting & Share & Cloud Backup
Add, Edit, and Customize Texts
Wondershare Filmora makes adding, editing, and customizing text simple and efficient. Users can insert titles, captions, and animated text with ease. It offers a wide range of fonts, colors, effects, and presets, allowing precise control over style, timing, and positioning to create visually engaging, professional-looking videos effortlessly.
To learn how to use this feature, read the steps provided next:
Index
Step 1. Begin by Creating a Project
To begin, launch Filmora on your device and create a new project. Next, import the video on which you want to add text and drag it to the editing timeline.
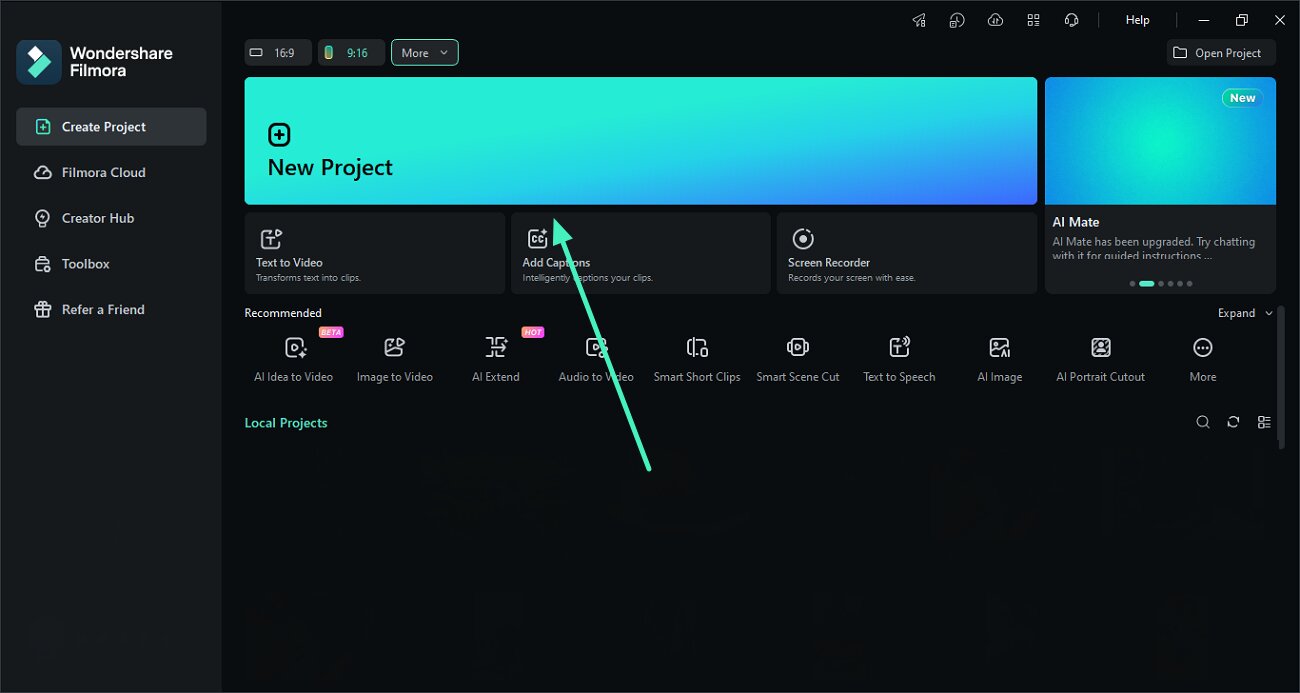
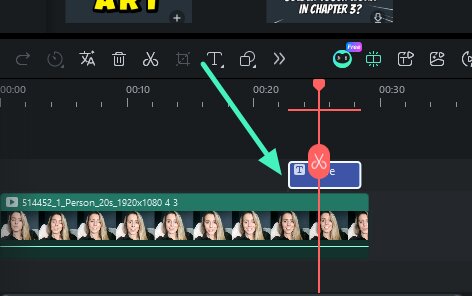
Step 2. Access the Titles Section
Now, acquire the Titles option from the menubar and choose the type of text from the options provided on the left.
Step 3. Select Text Type and Input Text
After choosing the preset from the text library, click the + icon to add the preset. Now, enable the Text section from the properties panel and input the desired text. You can also customize the text from the different options available within the properties panel.
Types of Filmora Titles
Title Effects
Filmora offers various types of title effects and templates for users to instantly select and start using them without starting from scratch. Some of the top titles are:
- 3D Titles
- Glow Text
- Neon
- Cinematic
- Handwriting
Title Templates
Different templates for titles are available to instantly apply them to social media or professional videos. You can find the templates in the left corner under the title template section. Most of the categories for templates applied by users are:
- Subtitles
- News
- Music
- Audio Driven Text
- End Credits
How to Edit Applied Text
Filmora also provides the ability to edit the applied text and adjust it according to your preferences. Here is how you can edit the added text:
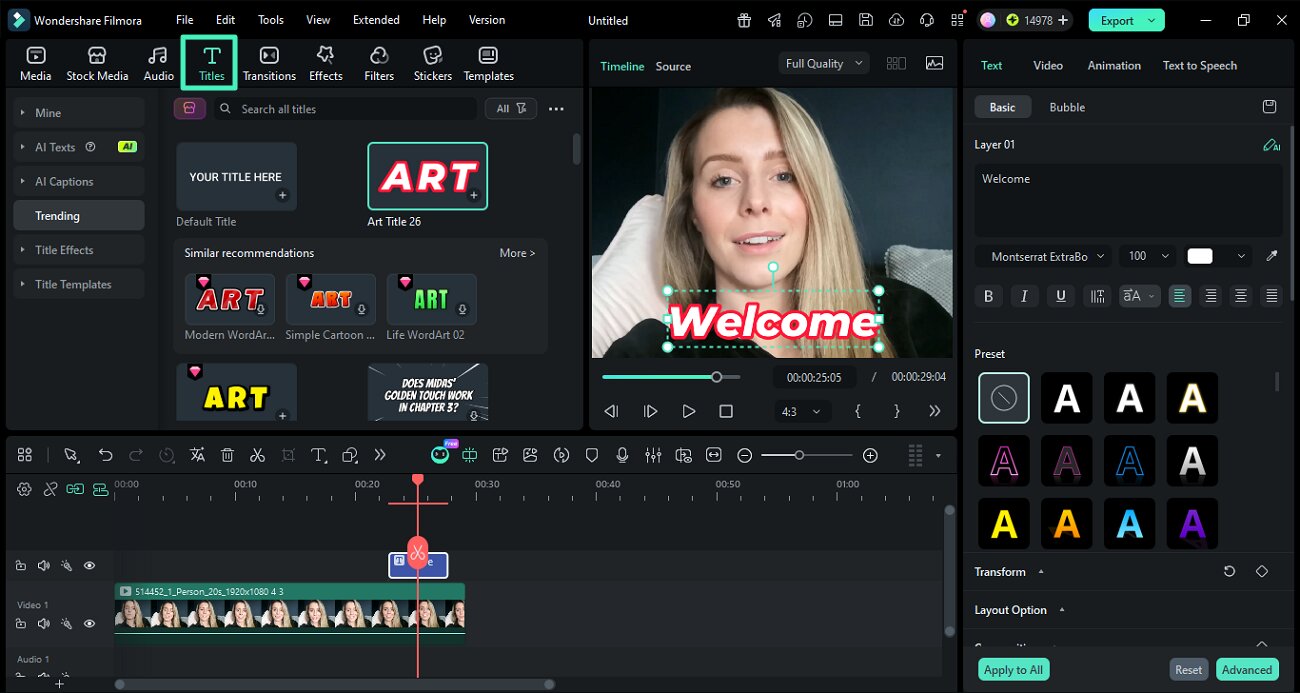
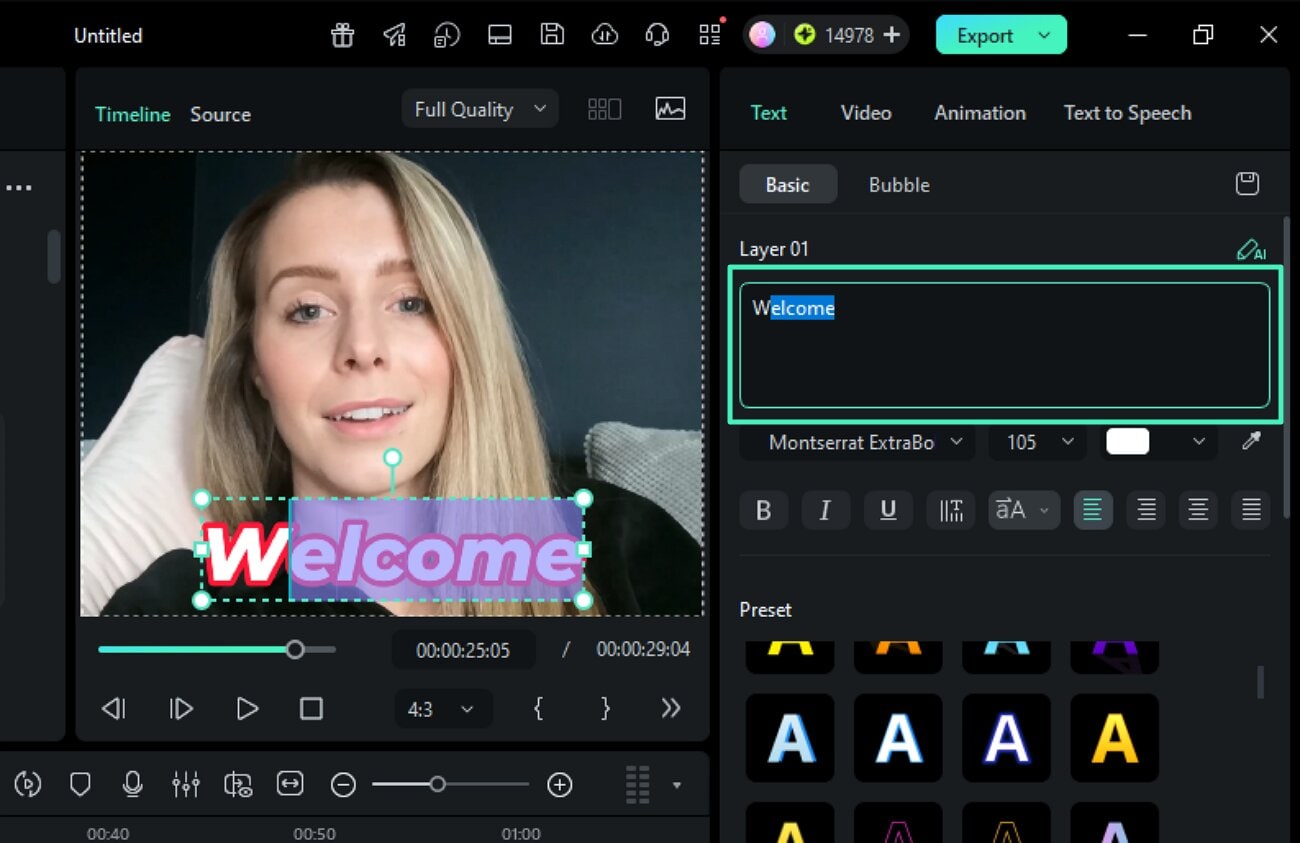
Step 1. Access the Properties Panel
To change or modify the text, head to the Properties panel and simply access the text box to make changes to the text.
Step 2. Change the Duration of Text Applied
To change the duration of the text to be applied to the video, access the text track on the timeline. Now drag the corners of the track to adjust the time of the text to appear on the screen.
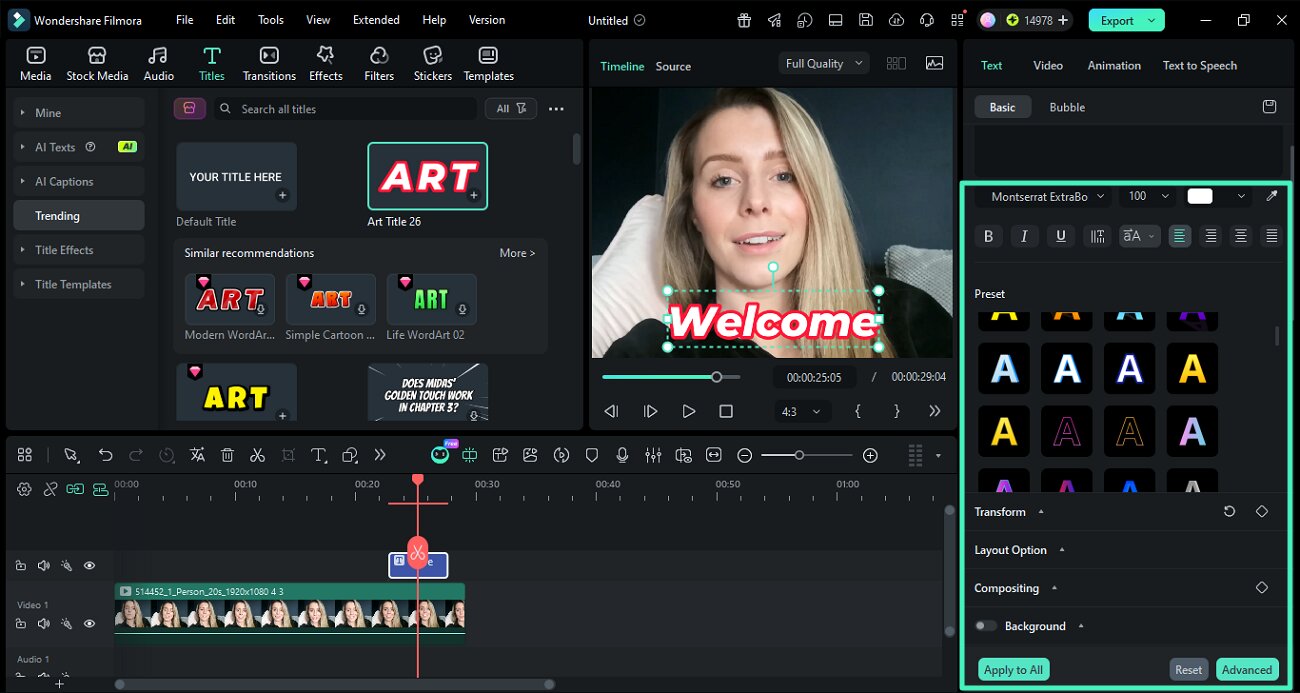
Step 3. Customize The Text Appearance
To change the appearance of the text, head to the section below the text box in the properties panel. You can change the font, text color, alignment, and letter case. You can also apply bold, italic, and underline effects to the text from here.

Apply Text Bubble
Users also get the ability to apply fun and creative text bubbles to their videos. Users can adjust the position, size, and duration of the text bubble as per their needs. Here is how you can apply it:
Step 1. Access the Bubble Section
After importing the video, head to the properties panel and enable the Bubble section next to Basic under the Text option.
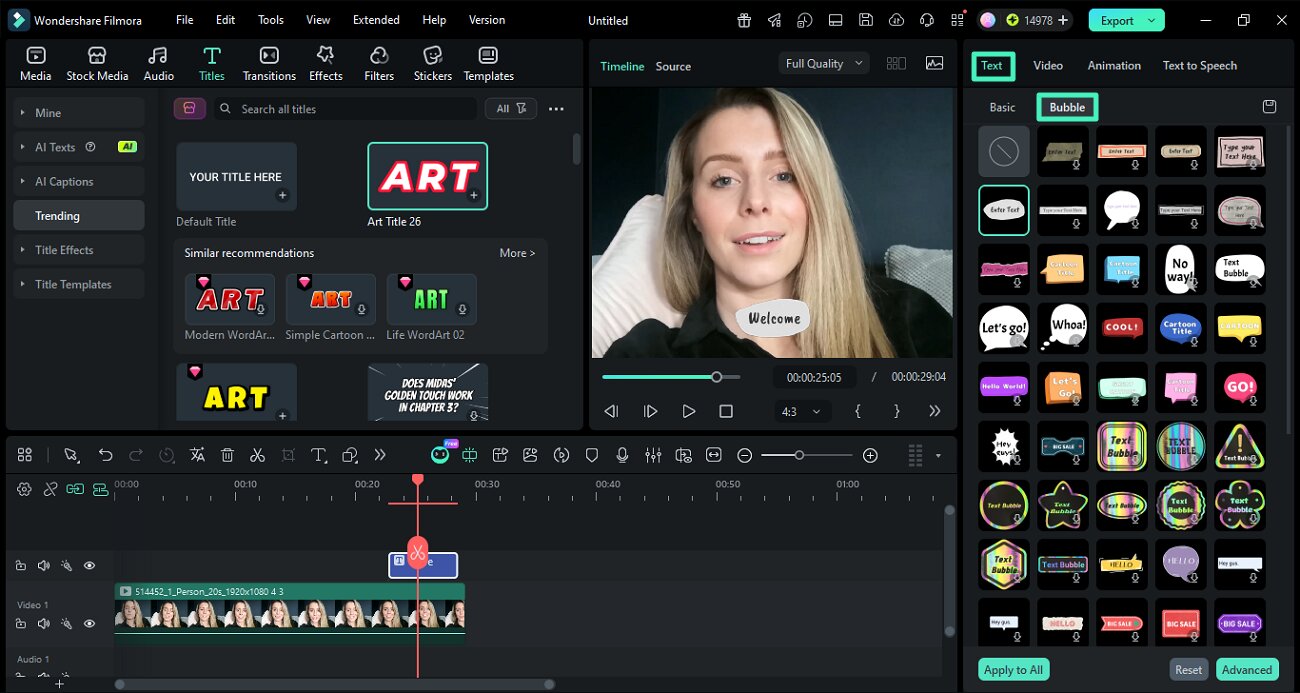
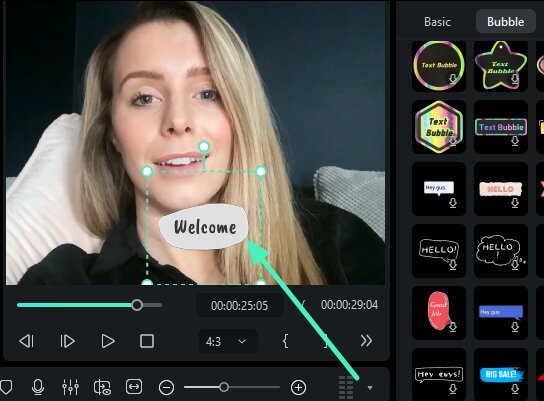
Step 2. Add Text in Bubble
When you select a specific bubble, it will appear within the preview window where you can change the position, size, and add text according to your preferences.
Stylize Applied Text
Filmora also lets you add different variations to the text, such as outline, shadow, and more. Follow the steps mentioned next to learn how to apply it:
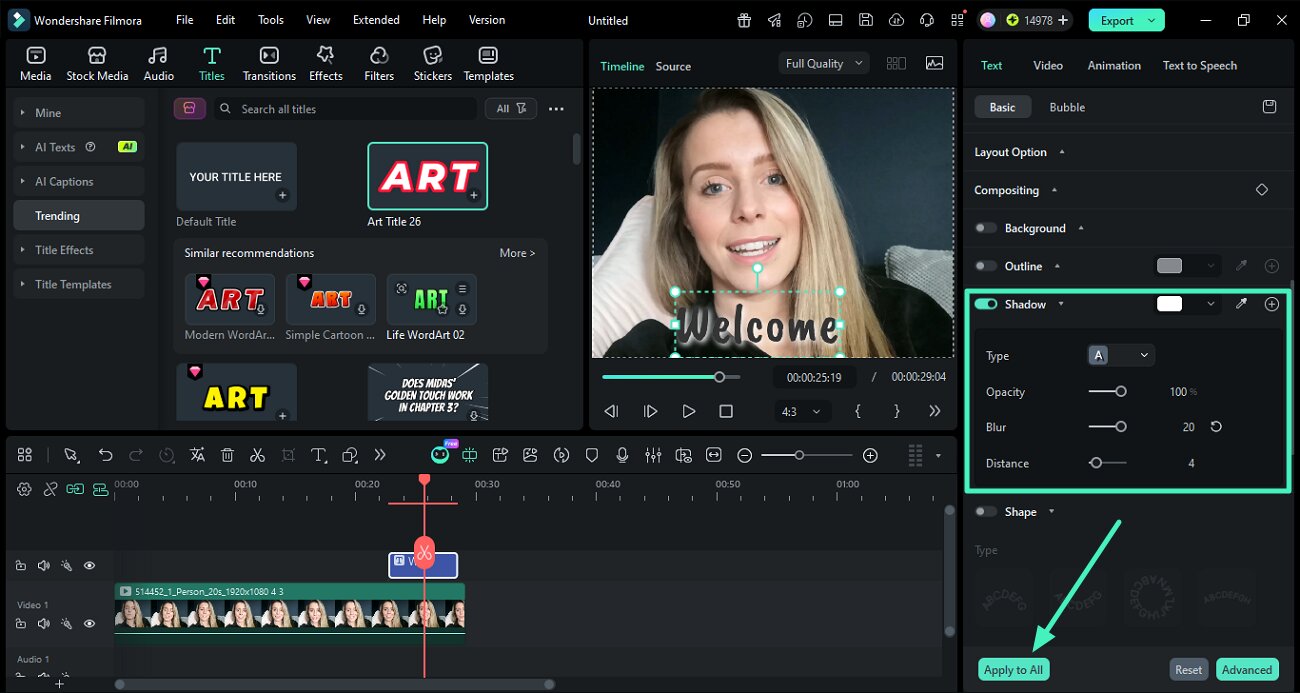
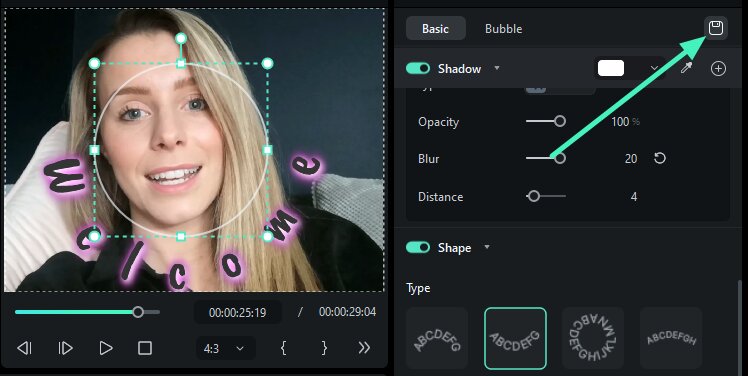
Step 1. Apply Text Shadow
Under the Basic section, locate the Shadow option and turn its toggle on. Now adjust the Opacity, Blur and Distance of the shadow according to your preferences. Click on the Apply to All button to apply the selected effect.
Step 2. Apply Text Shape
To transform text into different shapes, turn the toggle on for Shape and select the type from the options provided. Adjust the strength, duration, and loop by dragging the respective sliders.

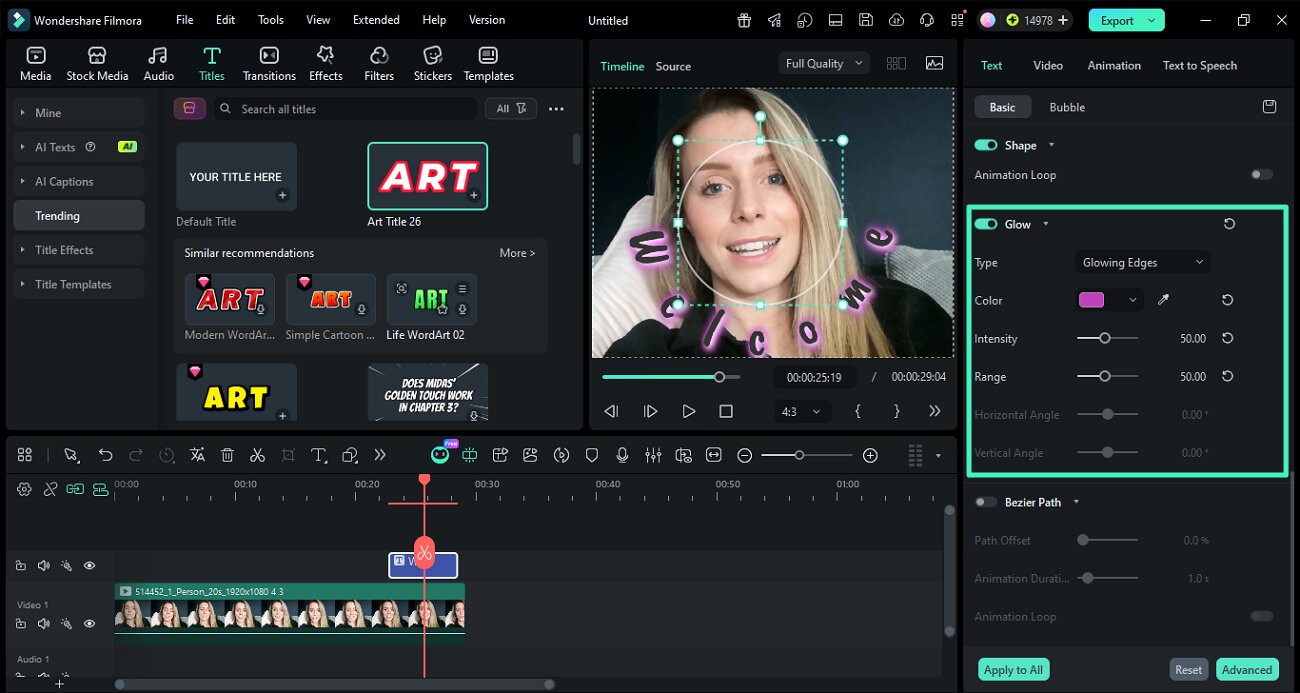
Step 3. Add Glow Effect
Turn the toggle on for the Glow option and select the type by expanding the menu. Change the color, intensity, and other elements using the options provided.
Save Text Preset
You can save the applied text settings as presets by clicking the Save icon located at the top right corner.
Delete Applied Text
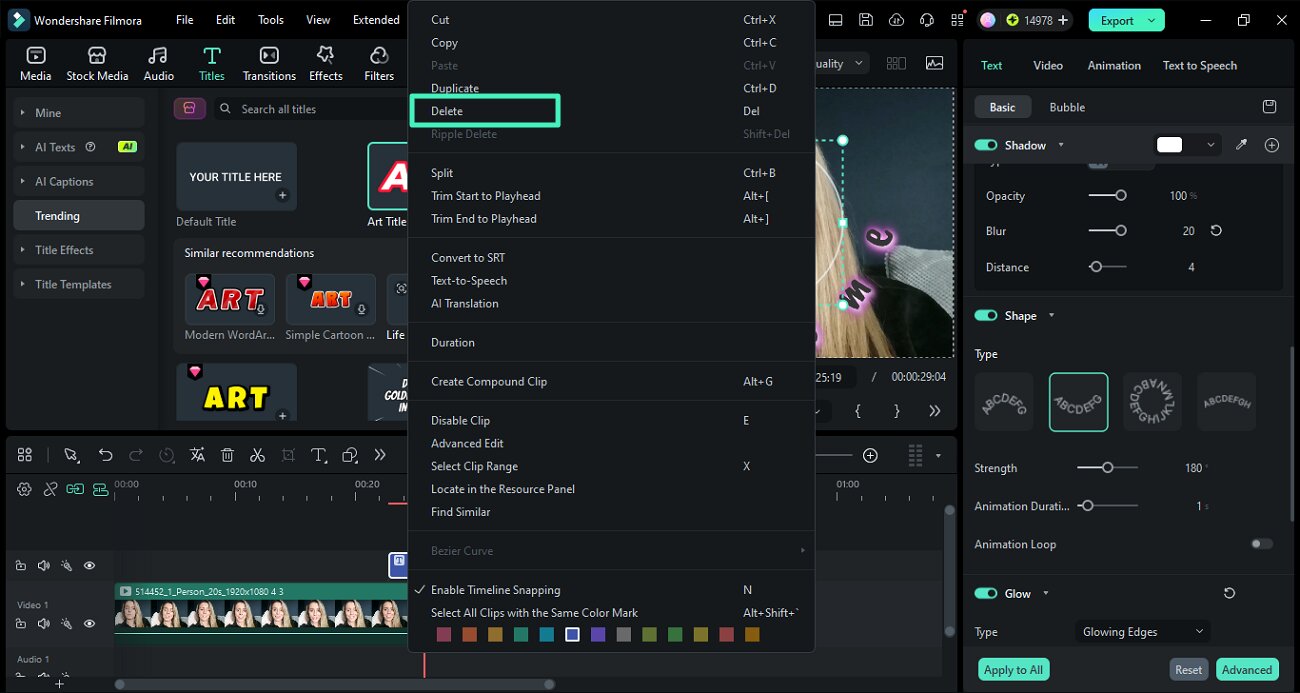
Users can delete the applied text by simply hitting the Delete key on their keyboards. Another way to remove the text is by selecting the text track and pressing the Delete option after right-clicking.
Add Titles to Favorite
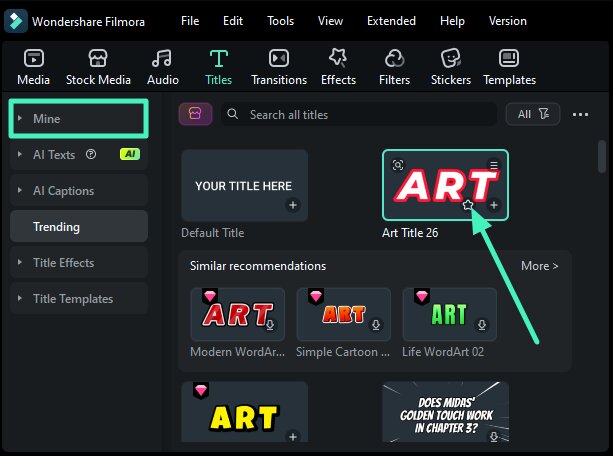
In the Titles panel, right-click any text style and select the option to add it to your favorites. Alternatively, hover over a text preset and click the Star icon in the top-right corner to mark it. Once selected, the star turns green. You can find all saved presets under Mine > Favorites.
Related Posts
Featured Articles
15 Best Children's Halloween Videos: Top Picks for Kids of All Ages
Looking for spooky videos that won’t give the kids nightmares? Find the best children’s Halloween videos and how to pick the right one for your kid’s age.
Best Options for Masking Videos Online for Free
Do you need to add masks to your videos? Do you want to avoid downloading editing software? This guide will delve into the best free online video masking tools.
How To Create Animated Clipart in PowerPoint
What is moving clipart called? Where can I find free animated clipart? How do you add animated clipart to the slide? Here are the answers to all your questions.
Recommended User Guide
Text animation
There are 80+ animation presets available in Filmora. Try to create your video!
