For the Best Results, Use the Latest Version.
-
Preparations
-
Account
-
Get Started & Basic Settings
-
Compatibility & Tech Specs
-
Performance Settings
-
-
Creating Projects
-
Creating New Projects
-
-
Importing & Recording
-
Video Editing for Windows
-
Basic Video Editing
- Enable/Disable Clip in Windows
- Magnetic Timeline for Windows
- Dual Monitor Setup for Video Editing on Windows
- Select All Clips on Timeline for Windows
- Manage Timeline and Tracks on Windows
- Auto Ripple for Windows
- Split & trim video
- Crop & Pan & Zoom Video
- Compositing
- Change video playback speed
- Playing videos in reverse
- Mark In and Mark Out for Windows
- Markers for Windows
- Group editing
- Customizable Backgrounds for Videos and Images in Windows
- Video snapshot
- Using freeze frame
- Logo Reveal For Windows
- Apply auto enhance
- Applying drop shadow
- Adjustment layer for Windows
- Transforming
- Video Editing Ruler – Windows
-
Advanced Video Editing
- Drawing Tools for Windows | Filmora Guide
- Create Multi-Camera Clip
- Compound Clip for Windows
- Multi-Clip Editing for Windows
- Filmora Motion Blur | Windows
- Filmora Flicker Removal Guide | Windows
- Apply mask to video
- Creating a PIP effect
- Keyframe Graph Editor for Windows
- Add animation keyframing for Windows
- Keyframe Path Curve for Windows
-
AI-Powered Video Editing
- Smart Scene Cut for Windows
- Smart Short Clips for Windows
- AI Face Mosaic for Windows
- Filmora AI Eye Contact- Windows
- AI Video Enhancer for Windows
- AI Text-to-Video for Windows
- Planar Tracking for Windows
- AI Idea to Video for Windows
- Filmora Image to Video for Windows
- Filmora Image to Prompt for Windows
- Instant Cutter Tool for Windows
- AI Extend
- Filmora AI Relight - Windows
- Filmora AI Image Enhancer Guide - Windows
- AI Script to Video Guide for Windows
- AI Text-Based Editing for Windows
- AI Mate Editing for Windows
- Create with instant mode
- ChatGPT Plugin - AI Copywriting
- AI Smart Cutout
- Lens correction on Windows
- Auto reframe video
- AI Portrait Cutout
- Scene detection feature
- AI Smart Masking for Windows
- Make motion tracking
- Video Stabilization for Windows
- AI Video/Photo Object Remover for Windows
- AI Smart Search for Windows
- AI Skin Tone Protection for Windows
- AI Image for Windows
- Chroma key (green screen)
- Super Slow Motion with Optical Flow for Windows
- Video Denoise for Windows
-
-
Audio Editing for Windows
-
Basic Audio Editing
-
Advanced Audio Editing
-
AI-Powered Audio Editing
-
-
Text Editing for Windows
-
Basic Text Editing
-
Advanced Text Editing
-
AI-Powered Text Editing
-
-
Video Customizations
-
Video Effects
-
Audio Effects
-
Transitions
-
Stickers
-
Filters
-
Color Editing
-
Animations
-
Templates
-
Asset Center
-
-
Exporting & Share & Cloud Backup
Group Editing
Filmora allows you to link clips together as a group so you can move them without changing the positions relative to each clip within the group.
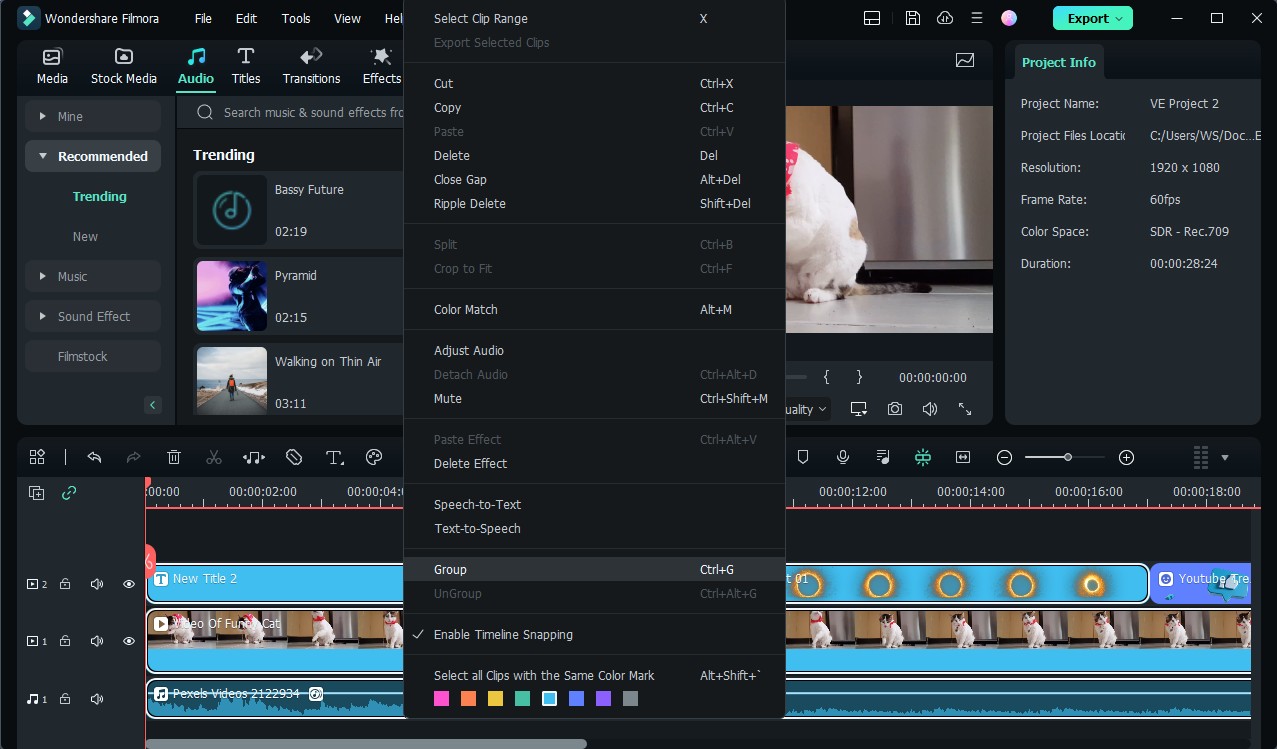
How to Group Clips
- To combine multiple clips into a group, hold the Ctrl key on your keyboard and click the clips that you want to group in the timeline.
- Then, right-click the clip and select Group from the context menu. You can also group them with shortcut Ctrl+G.
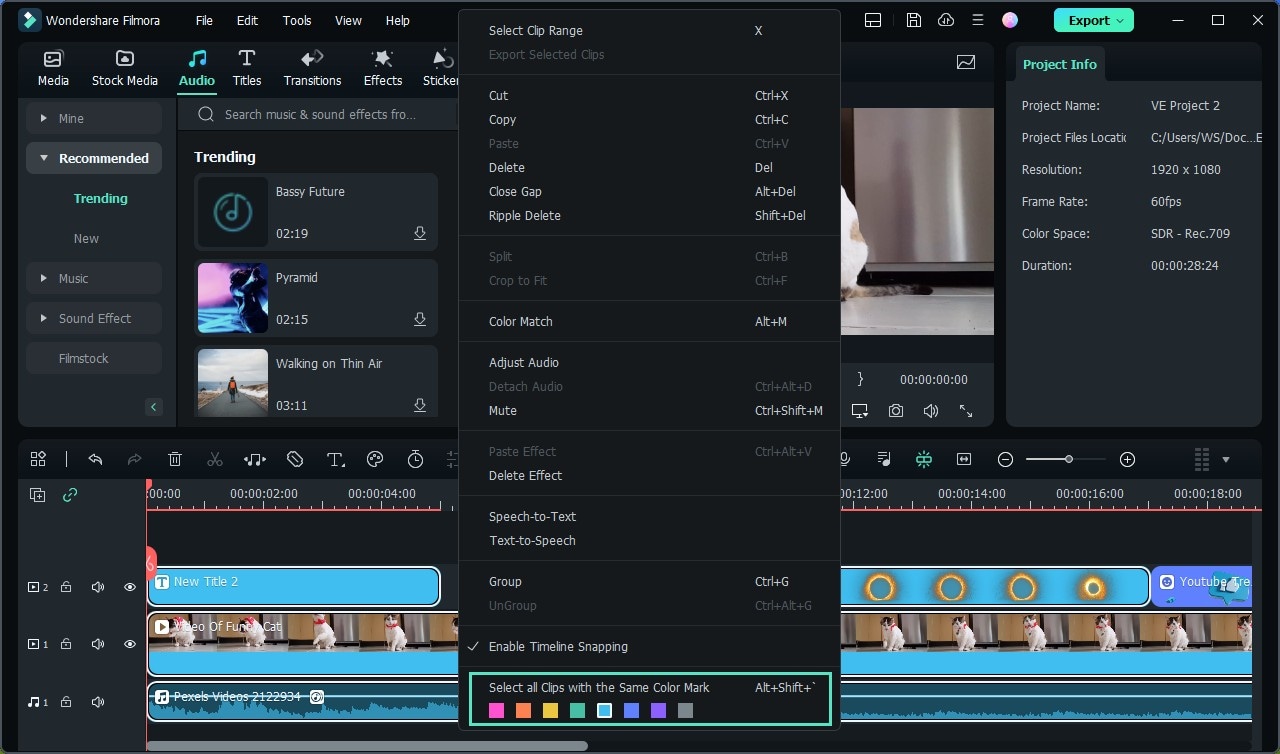
Mark Groups with Colors
- Besides using the group feature, you can now mark the clip in the same color. Currently, you can mark the clip with eight colors, including red, orange, yellow, green, Cyan, blue, purple, gray and white.
- Right click on the clip and select the option Select all clips with the same color mark, all clip in the same mark will be selected automatically, and then you can drag them as a group.
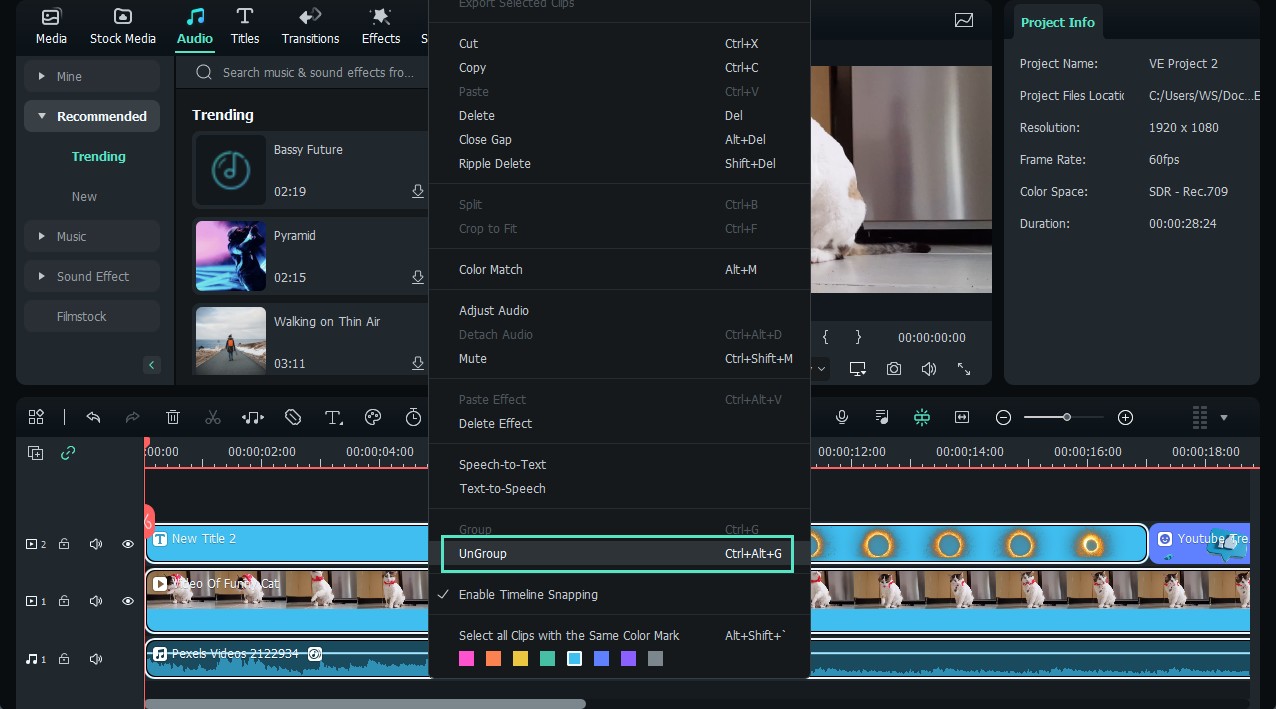
Ungrouping Clips
- To unlink your grouped clips, right-click one of the grouped clips in the timeline and select Ungroup.
- You can also ungroup them with shortcut Ctrl+Alt+G.
- Right click on the clip and select the option Select all clips with the same color mark, all clip in the same mark will be selected automatically, and then you can drag them as a group.
Related Posts
Featured Articles
Make Their Day Special: Children's Day Video Ideas Worth Capturing
Make this Children's Day extra special and surprise them with a video they'll love. We've got easy and fun Children's Day video ideas to help you make memories they'll never forget.
How to Extract Audio From MP4 – Best 5 Methods
Here are the top options to consider if you’re looking for the best methods for extracting audio from MP4 files.
Top 10 Video Editing Apps for Mobile 2026
Need help picking a video editing app? Don’t worry; our detailed review of the best video editing apps this year will help make that decision much more straightforward.
Recommended User Guide
Split & trim video
Learn how to use Split & Trim in FIlmora 11
Using freeze frame
Learn how to use Freeze Frame in Filmora 11
Markers for Windows
Here is the user guide for adding or removing marker on Filmora.
