For the Best Results, Use the Latest Version.
-
Preparations
-
Account
-
Get Started & Basic Settings
-
Compatibility & Tech Specs
-
Performance Settings
-
-
Creating Projects
-
Creating New Projects
-
-
Importing & Recording
-
Video Editing for Windows
-
Basic Video Editing
- Enable/Disable Clip in Windows
- Magnetic Timeline for Windows
- Drawing Tools fo Windows
- Dual Monitor Setup for Video Editing on Windows
- Select All Clips on Timeline for Windows
- Dual Monitor Setup for Video Editing on Mac
- Manage Timeline and Tracks
- Auto Ripple for Windows
- Split & trim video
- Crop & Pan & Zoom Video
- Compositing
- Change video playback speed
- Playing videos in reverse
- Mark In and Mark Out for Windows
- Markers for Windows
- Group editing
- Customizable Backgrounds for Videos and Images in Windows
- Video snapshot
- Using freeze frame
- Logo Reveal For Windows
- Apply auto enhance
- Applying drop shadow
- Adjustment layer for Windows
- Transforming
- Video Editing Ruler – Windows
-
Advanced Video Editing
-
AI-Powered Video Editing
- Smart Scene Cut for Windows
- Smart Short Clips for Windows
- AI Face Mosaic for Windows
- AI Video Enhancer
- AI Text-to-Video for Windows
- Planar Tracking
- AI Idea to Video for Windows
- Image to Video for Windows
- Instant Cutter Tool for Windows
- AI Extend
- AI Script to Video Guide for Windows
- AI Text-Based Editing for Windows
- AI Mate Editing for Windows
- Create with instant mode
- ChatGPT Plugin - AI Copywriting
- AI Smart Cutout
- Lens correction
- Auto reframe video
- AI Portrait Cutout
- Scene detection feature
- AI Smart Masking for Windows
- Make motion tracking
- Stabilization
- AI Video/Photo Object Remover for Windows
- AI Smart Search for Windows
- AI Skin Tone Protection for Windows
- AI Image for Windows
- Chroma key (green screen)
- Super Slow Motion with Optical Flow for Windows
- Video Denoise for Windows
-
-
Audio Editing for Windows
-
Basic Audio Editing
-
Advanced Audio Editing
-
AI-Powered Audio Editing
-
-
Text Editing for Windows
-
Basic Text Editing
-
Advanced Text Editing
-
AI-Powered Text Editing
-
-
Video Customizations
-
Video Effects
-
Audio Effects
-
Transitions
-
Stickers
-
Filters
-
Color Editing
-
Animations
-
Templates
-
Asset Center
-
-
Exporting & Share & Cloud Backup
Compositing
Note:
Wondershare Filmora provides a wide range of compositing tools. You can easily import composites into Filmora.To make an entire clip uniformly transparent or semi-transparent, use the Opacity effect in Compositing. You can set a selected clip’s opacity in video or image editing settings.
Composite Images and Videos
Add the image as an overlay, choose to adjust the opacity (transparency) and add a blending mode (i.e., have the video you can see through the image be darkened or tinted behind it).
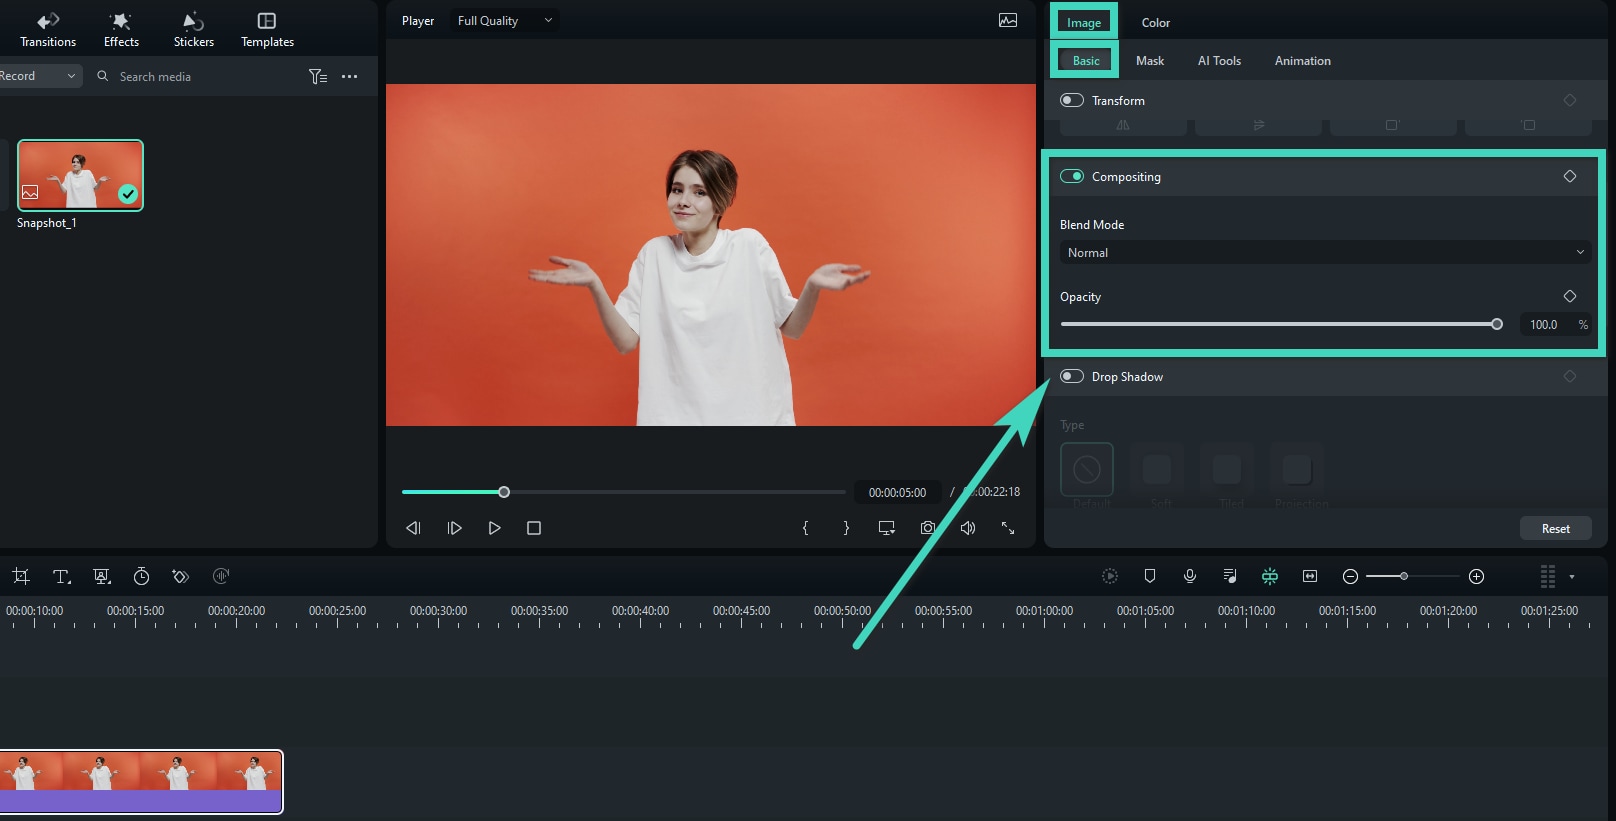
❶ Click the image to enter the Image Basic Settings and go to Compositing.
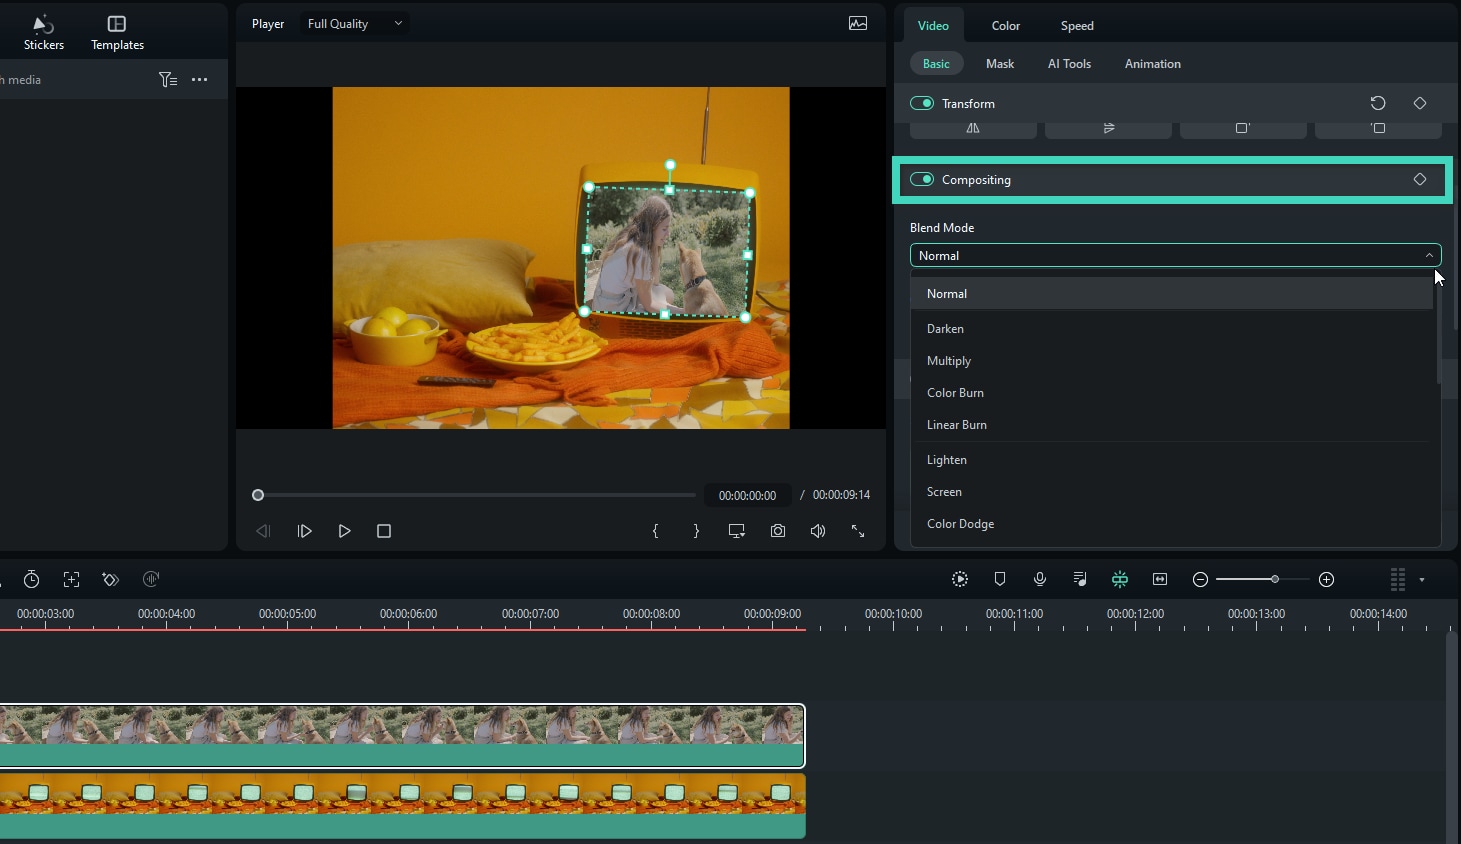
❷ Choose a blending mode from the drop-down menu (your options include Screen, Darken, Multiply, and more). You can also move the Opacity slider to adjust the image's transparency.

Apply Compositing Effects to Blend Videos
Click into the Compositing tab and select compositing to blend your main video with your PIP clip. Depending on how intense or subtle you want the effect to be, you can adjust your opacity.

Add Keyframes
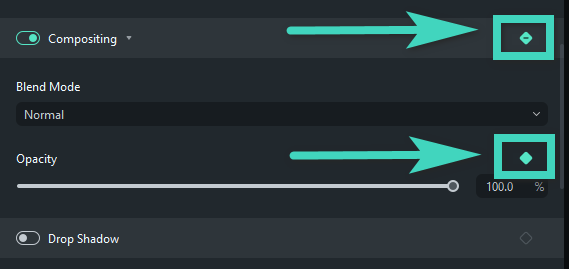
Click the diamond icon next to the Compositing tab to set a keyframe for all the parameters or the diamond next to Opacity to adjust the single parameter.

Related Posts
Featured Articles
Top 6 Drum Beat Creator Apps | Create Drum Beat Videos Easily
Whether to create a new beat or detect a beat in videos or MP3s, drum beat creator apps are your best bet. Our expert guide contains a list of the best drum beat applications.
Best Apps to Cut Videos in 2025: The Ultimate Top 10 List
Cut videos easily with the best apps to cut videos in 2025. Find the top 10 apps for seamless trimming, precise editing, and smooth transitions. Try the best software for video cutting today.
Best Free AI Movie Generators
Do you want to let your creativity take its toll and create movies based on your ideas? If the answer is yes, try these AI movie generators and watch your visions come to life.
Recommended User Guide
Mark In and Mark Out for Windows
In Filmora, users can mark in and mark out their clips to specify the region for editing, eliminating, exporting, and more.
Drawing Tools fo Windows
This guide tell you how to use Drawing Tools feature in Filmora for Mac.
Dual Monitor Setup for Video Editing on Windows
Master Filmora's Dual Monitor Setup for Video Editing for a professional dual-screen workflow. Preview raw media and pre-edit in a dedicated Source Monitor while simultaneously viewing your final output on a Timeline Monitor, enhancing efficiency and precise effect selection.
