For the Best Results, Use the Latest Version.
-
Preparations
-
Account
-
Get Started & Basic Settings
-
Compatibility & Tech Specs
-
Performance Settings
-
-
Creating Projects
-
Creating New Projects
-
-
Importing & Recording
-
Video Editing for Windows
-
Basic Video Editing
- Enable/Disable Clip in Windows
- Magnetic Timeline for Windows
- Drawing Tools fo Windows
- Dual Monitor Setup for Video Editing on Windows
- Select All Clips on Timeline for Windows
- Dual Monitor Setup for Video Editing on Mac
- Manage Timeline and Tracks
- Auto Ripple for Windows
- Split & trim video
- Crop & Pan & Zoom Video
- Compositing
- Change video playback speed
- Playing videos in reverse
- Mark In and Mark Out for Windows
- Markers for Windows
- Group editing
- Customizable Backgrounds for Videos and Images in Windows
- Video snapshot
- Using freeze frame
- Logo Reveal For Windows
- Apply auto enhance
- Applying drop shadow
- Adjustment layer for Windows
- Transforming
- Video Editing Ruler – Windows
-
Advanced Video Editing
-
AI-Powered Video Editing
- Smart Scene Cut for Windows
- Smart Short Clips for Windows
- AI Face Mosaic for Windows
- AI Video Enhancer
- AI Text-to-Video for Windows
- Planar Tracking
- AI Idea to Video for Windows
- Image to Video for Windows
- Instant Cutter Tool for Windows
- AI Extend
- AI Script to Video Guide for Windows
- AI Text-Based Editing for Windows
- AI Mate Editing for Windows
- Create with instant mode
- ChatGPT Plugin - AI Copywriting
- AI Smart Cutout
- Lens correction
- Auto reframe video
- AI Portrait Cutout
- Scene detection feature
- AI Smart Masking for Windows
- Make motion tracking
- Stabilization
- AI Video/Photo Object Remover for Windows
- AI Smart Search for Windows
- AI Skin Tone Protection for Windows
- AI Image for Windows
- Chroma key (green screen)
- Super Slow Motion with Optical Flow for Windows
- Video Denoise for Windows
-
-
Audio Editing for Windows
-
Basic Audio Editing
-
Advanced Audio Editing
-
AI-Powered Audio Editing
-
-
Text Editing for Windows
-
Basic Text Editing
-
Advanced Text Editing
-
AI-Powered Text Editing
-
-
Video Customizations
-
Video Effects
-
Audio Effects
-
Transitions
-
Stickers
-
Filters
-
Color Editing
-
Animations
-
Templates
-
Asset Center
-
-
Exporting & Share & Cloud Backup
Filters
Wondershare Filmora enables you to add as many filters as you want. You can add or customize the filters to create a brilliant video. Learn how to add, remove, customize, and favorite Filmora Filters.
Add Filters
There are three ways to add filters to a video:
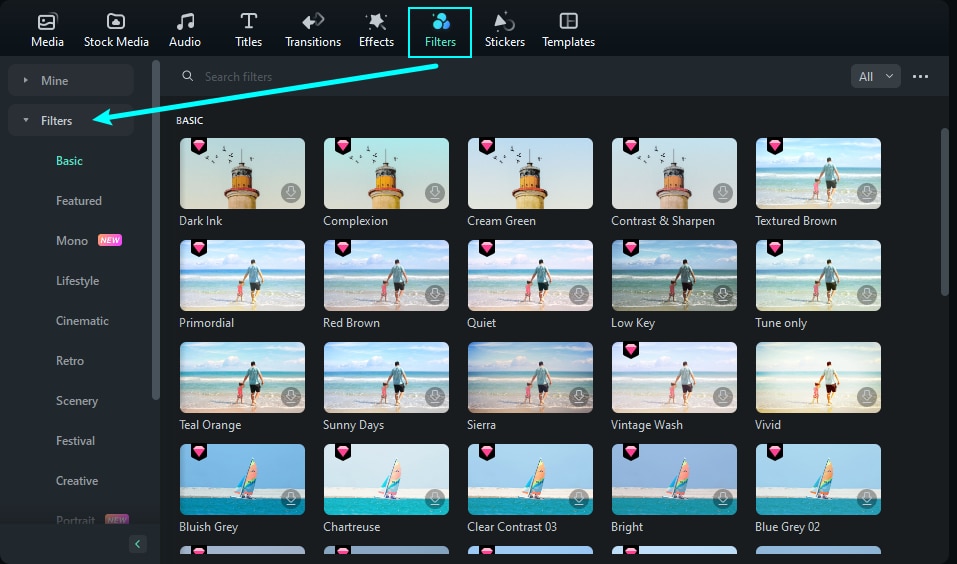
Method 1: Open your project, go to the Filters tab, and then select the filter that you want and add it to your project.
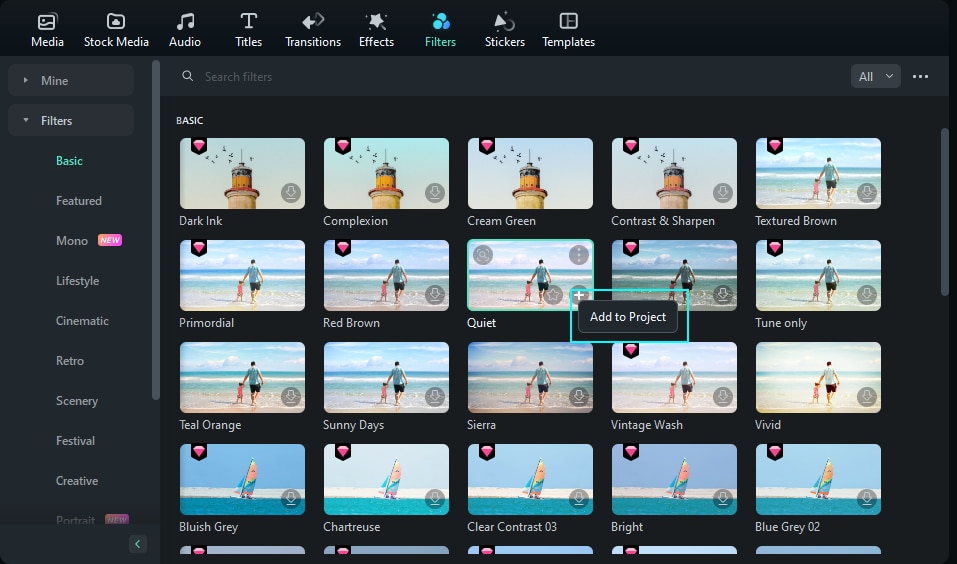
Method 2: Hover your mouse over the filter you want. When you see a Plus icon in the middle, click it. Then the filter will be added to the timeline.
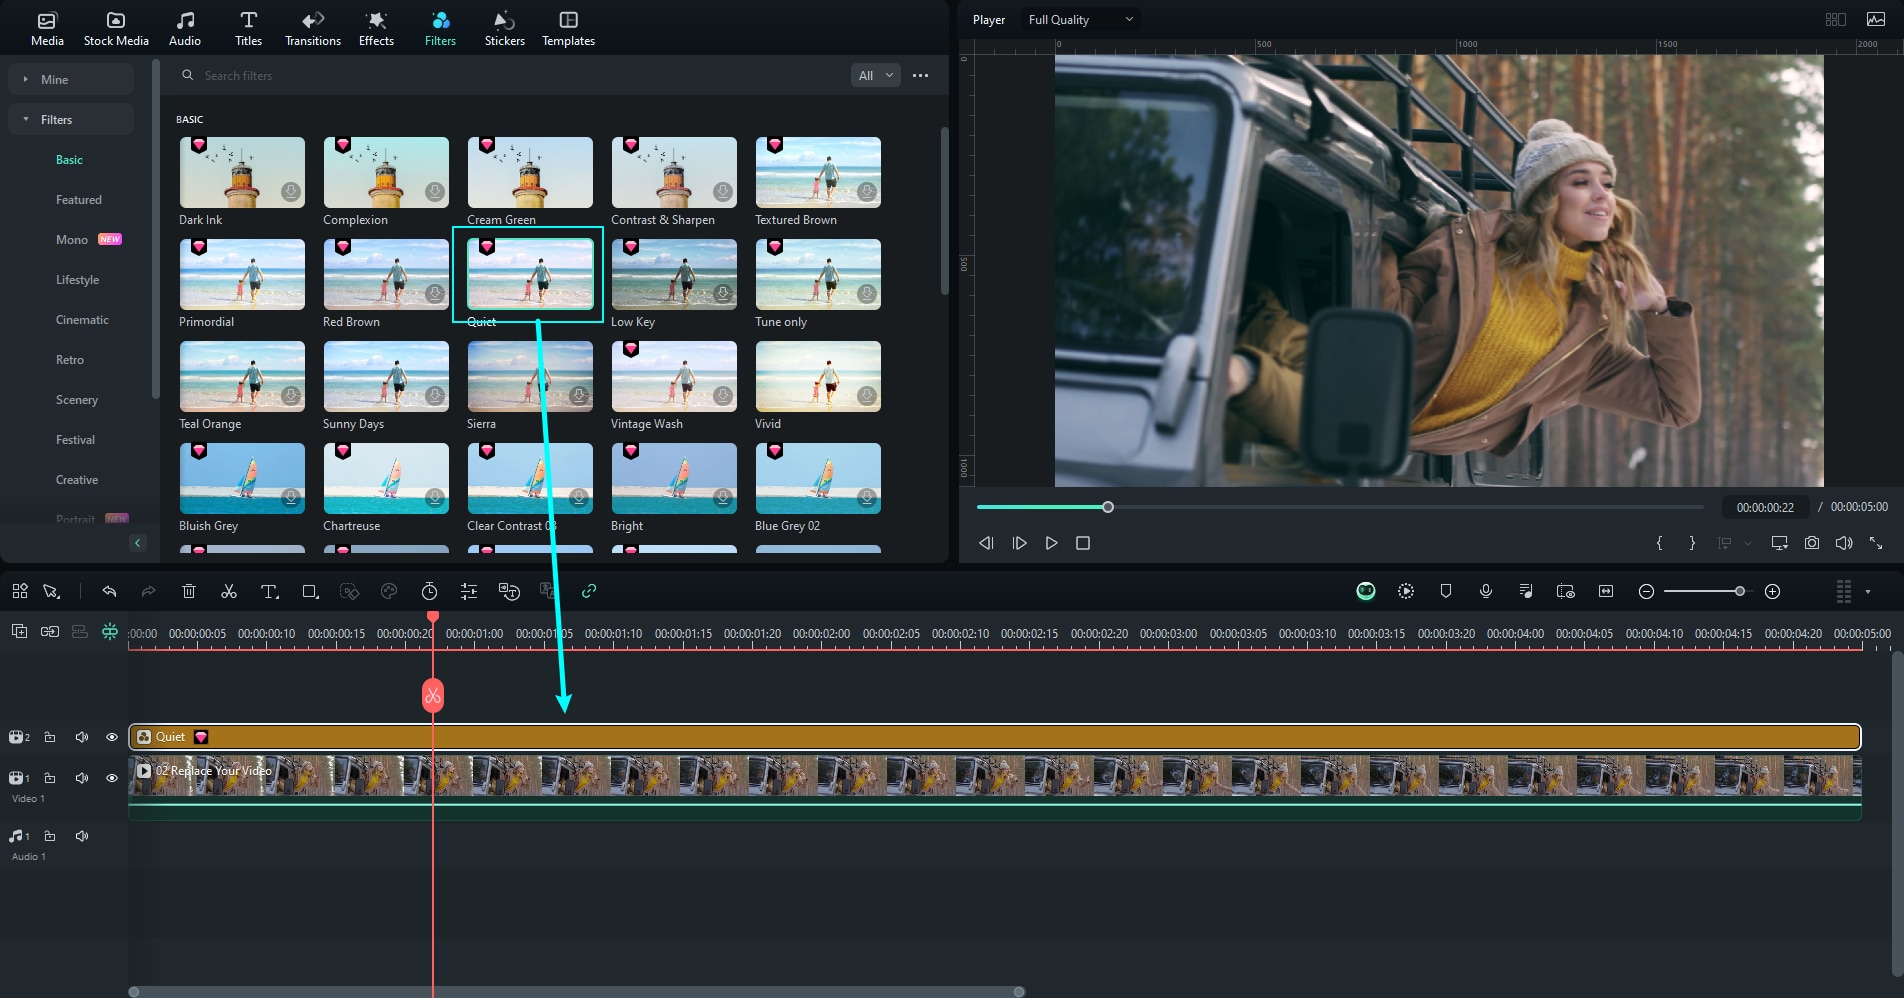
Method 3: Drag the filter and drop it directly onto the video clip in your timeline that you want to add it to. Filters will be applied to the whole video clip this way.
Note:
If you are editing a portrait (9:16) clip in a 16:9 video, you can add background blur filters to replace the black bars.Customize Filters
Wondershare Filmora enables you to change the duration or opacity of filters.
To change the duration
The default length is five seconds, but you can drag the edge of the effect in your timeline to change its duration.

To Change the Alpha Opacity of a Filter
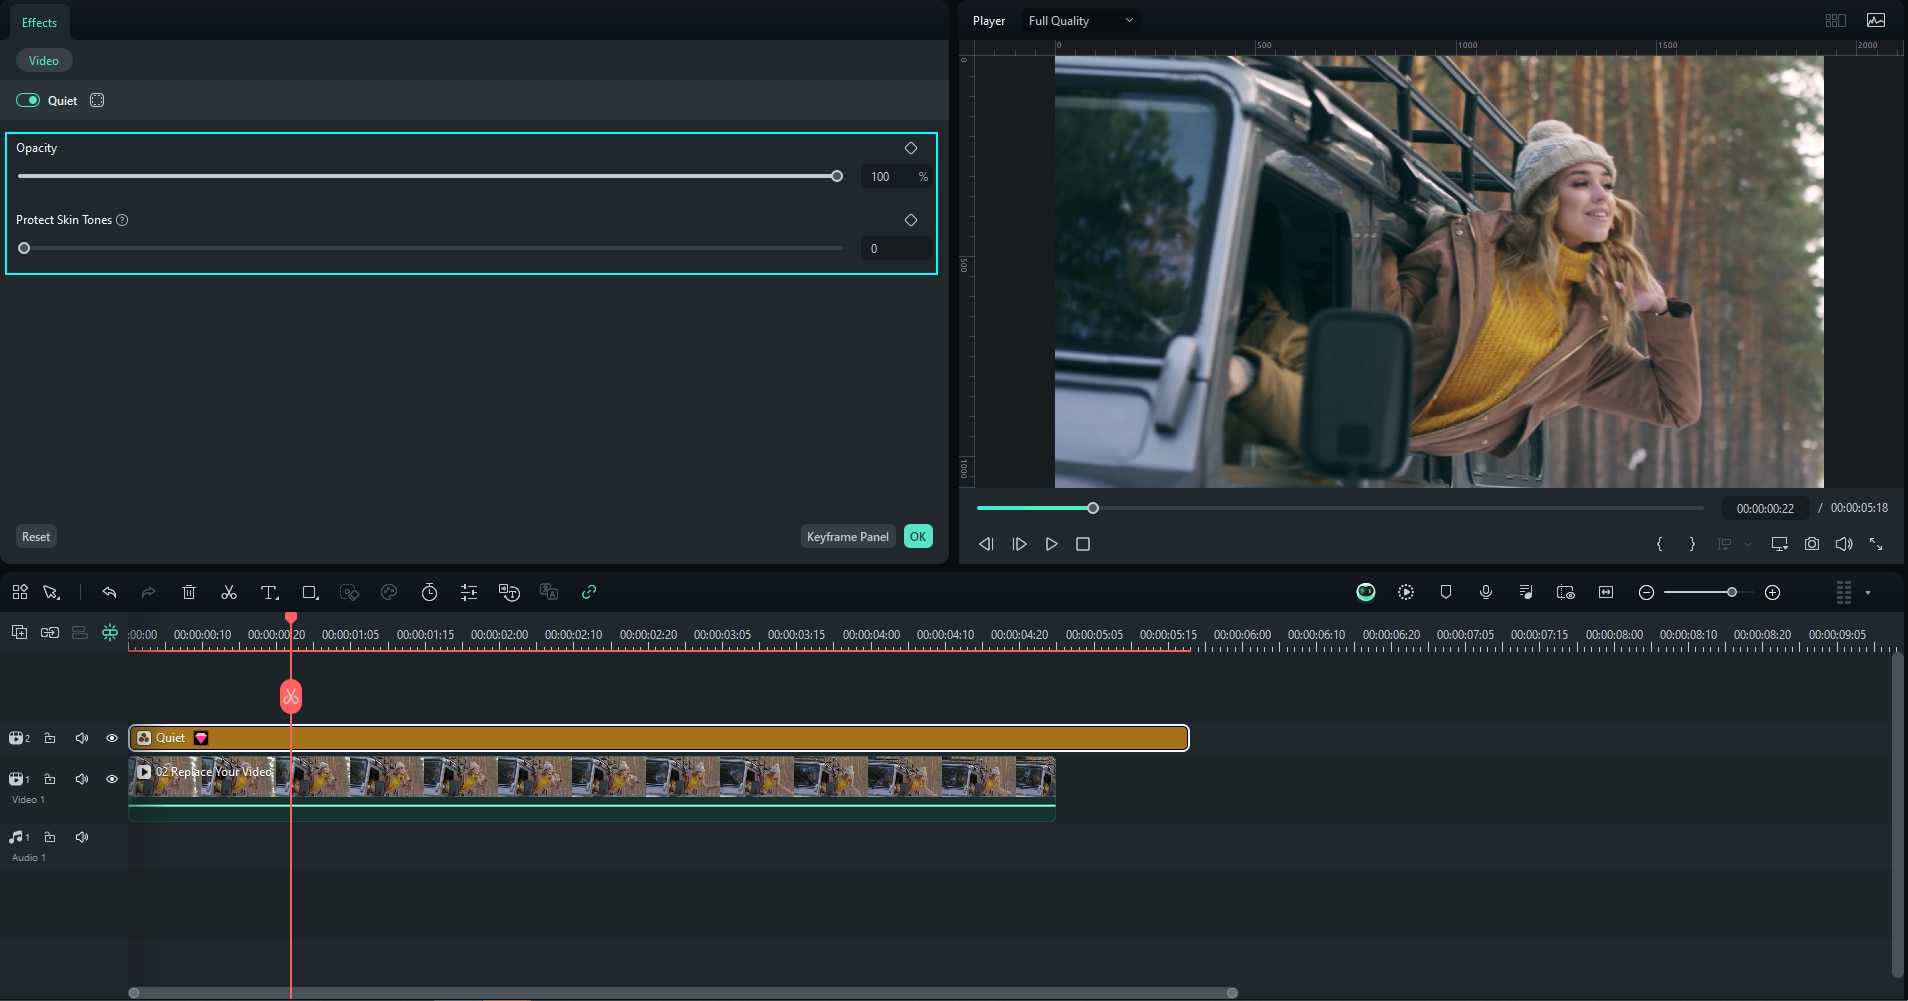
The alpha opacity (transparency) property can have a value of 0-100. A lower value makes the filter more transparent. Double-click on the filter in the timeline to customize its opacity. Then, you preview how your clip looks with the filter applied to it in the Preview Window.
Enable Protect skin tones and adjust the settings in the property panel if there are people in the video.
Favorite Filters
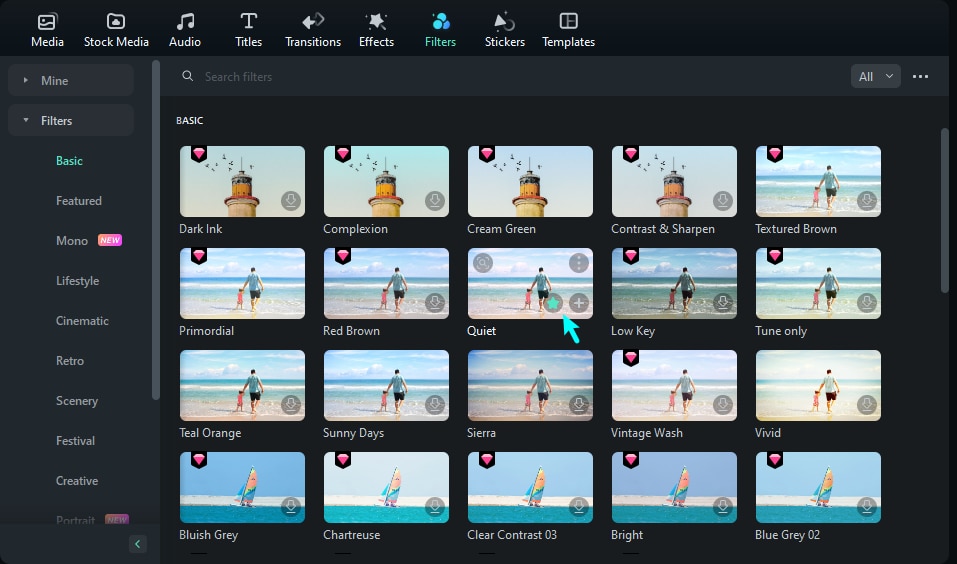
Click on the favorite filter and find the Star icon, click on it and turn the star to green.
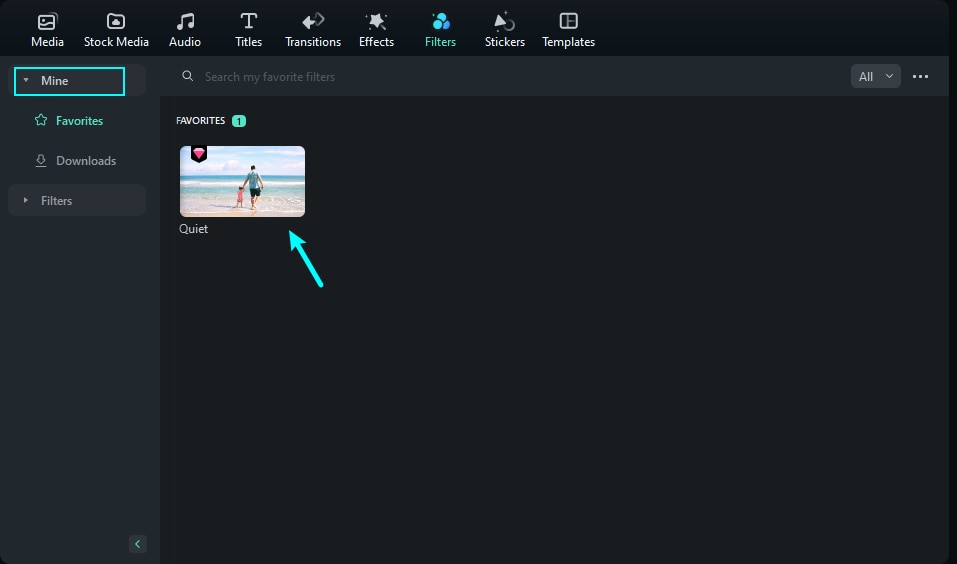
Then, go to the Mine-Favorite category to find it again quickly.
Remove Filters
There are two ways to remove filters from your project:
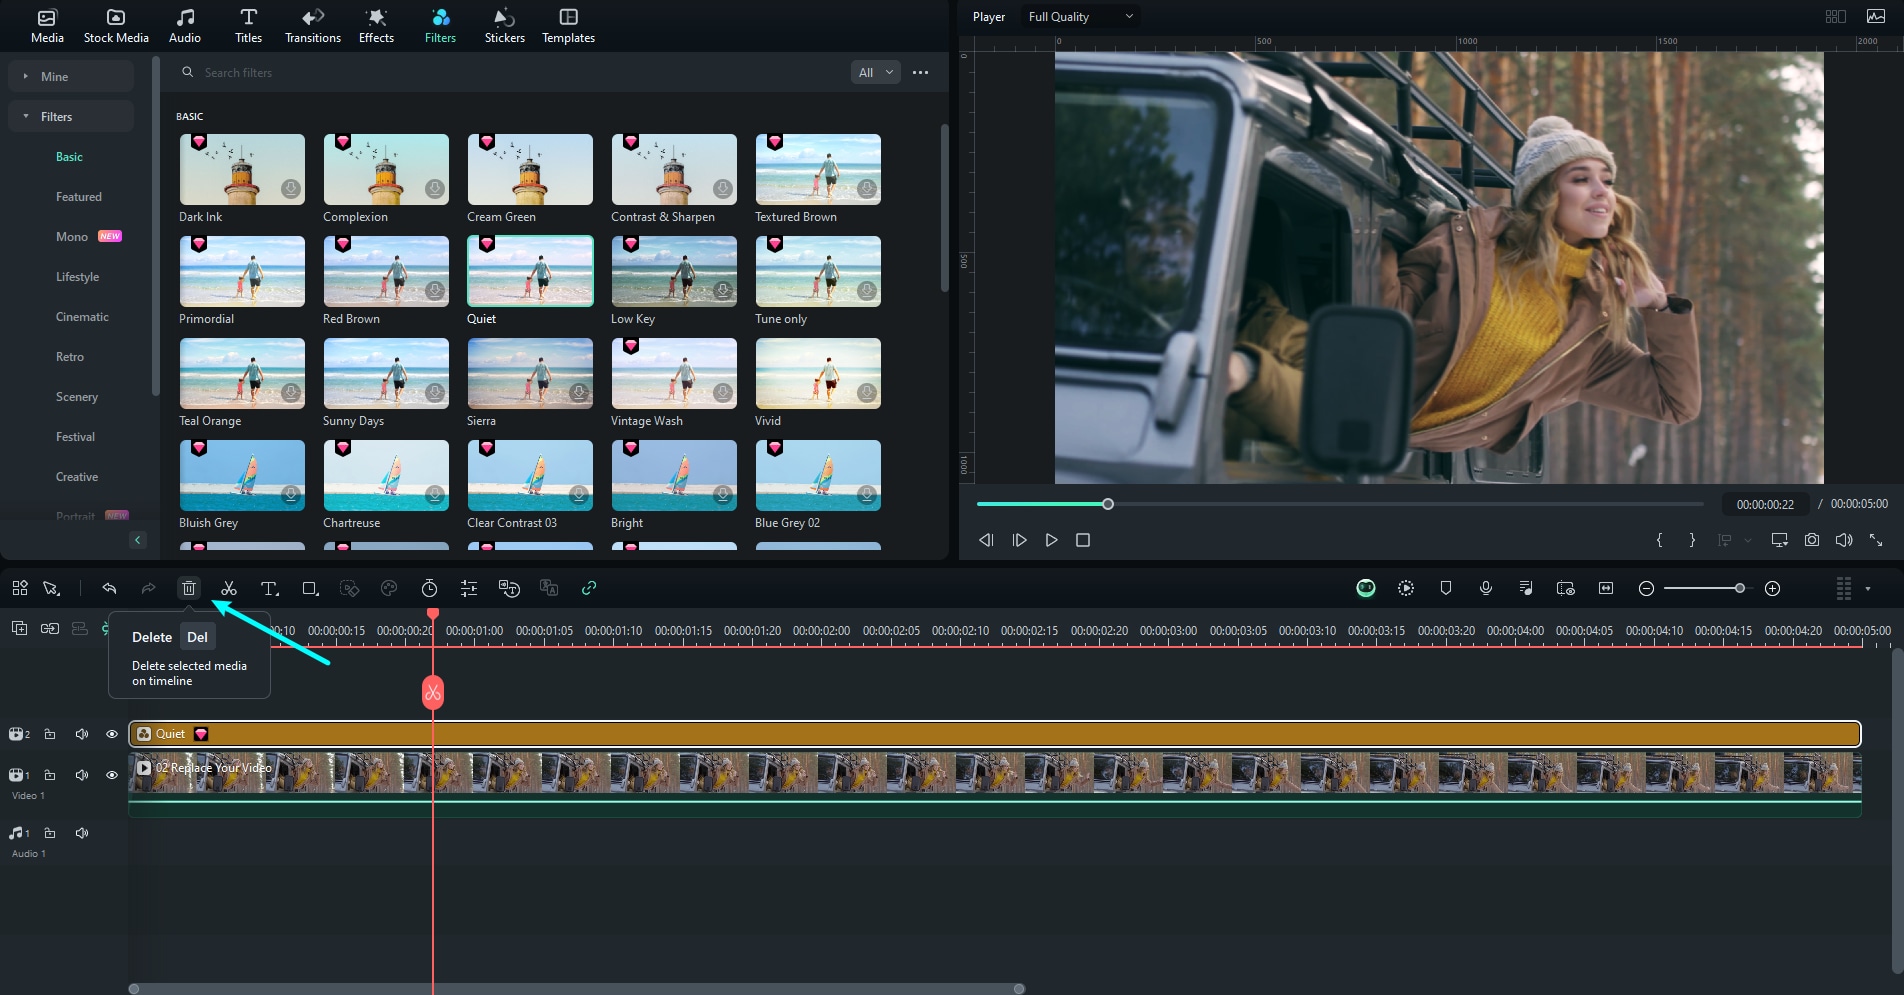
Method 1: Select the filter in the timeline and hit Delete on the toolbox.
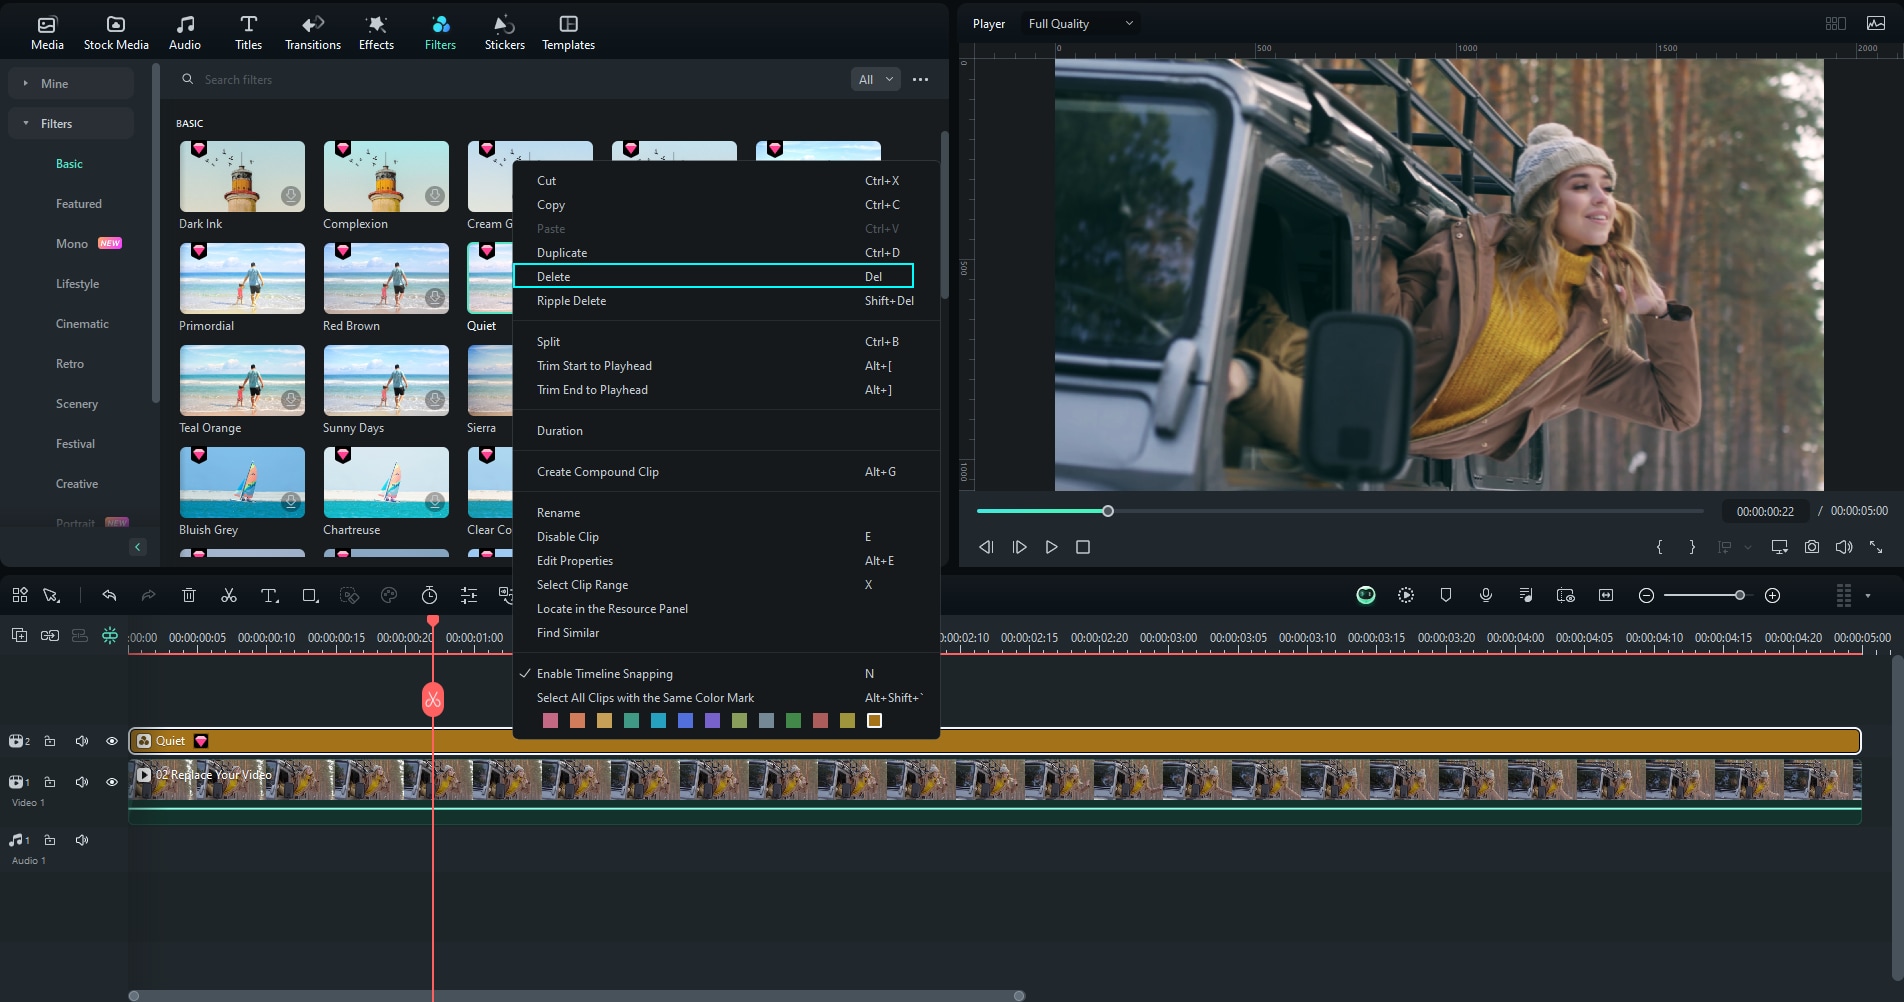
Method 2: Right-click on the filter in the timeline and select Delete from the menu. Note: If you're using Filmora 9 or 10, click here to learn how to add filters and overlays.
Related Posts
Featured Articles
Latest | Ranked The Best 5 AI Song Lyric Generators
What's the best lyric generator? We've picked 5 tools for you.
Cutout.Pro Video Enhancer: A Comprehensive Review & Alternative
Is Cutout.Pro free to use? Check our in-depth review for Cutout.Pro to know its price, features, and everything!
How to Add Subtitles in VLC Media Play
Find out how to add subtitles in the VLC media player on your Windows and Mac system with quick and simple instructions.
