For the Best Results, Use the Latest Version.
-
Preparations
-
Account
-
Get Started & Basic Settings
-
Compatibility & Tech Specs
-
Performance Settings
-
-
Creating Projects
-
Creating New Projects
-
-
Importing & Recording
-
Video Editing for Windows
-
Basic Video Editing
- Enable/Disable Clip in Windows
- Magnetic Timeline for Windows
- Dual Monitor Setup for Video Editing on Windows
- Select All Clips on Timeline for Windows
- Manage Timeline and Tracks on Windows
- Auto Ripple for Windows
- Split & trim video
- Crop & Pan & Zoom Video in Filmora for Windows
- Compositing
- Change Video Speed on Windows
- Playing videos in reverse
- Mark In and Mark Out for Windows
- Markers for Windows
- Group editing
- Customizable Backgrounds for Videos and Images in Windows
- Video snapshot
- Using Freeze Frame in Filmora for Windows
- Logo Reveal For Windows
- Auto Enhance in Filmora for Windows
- Applying drop shadow
- Adjustment layer for Windows
- Apply Transforming for Windows
- Video Editing Ruler – Windows
-
Advanced Video Editing
- Drawing Tools for Windows | Filmora Guide
- Create Multi-Camera Clip in Filmora for Windows
- Compound Clip for Windows
- Multi-Clip Editing for Windows
- Filmora Motion Blur | Windows
- Video Chapters in Filmora on Windows
- Filmora Flicker Removal Guide | Windows
- Multi-Frame in Filmora on Windows
- Masking in Filmora on Windows
- Creating a PIP Effect for Windows
- Keyframe Graph Editor for Windows
- Add animation keyframing for Windows
- Keyframe Path Curve for Windows
-
AI-Powered Video Editing
- Smart Scene Cut for Windows
- Smart Short Clips for Windows
- AI Face Mosaic for Windows
- Filmora AI Eye Contact- Windows
- AI Video Enhancer for Windows
- AI Text-to-Video for Windows
- Planar Tracking for Windows
- AI Idea to Video for Windows
- Filmora Image to Video for Windows
- Filmora Image to Prompt for Windows
- Instant Cutter Tool for Windows
- AI Extend
- Filmora AI Relight - Windows
- Filmora AI Image Enhancer Guide - Windows
- AI Script to Video Guide for Windows
- AI Text-Based Editing for Windows
- AI Mate Editing for Windows
- Instant Mode in Filmora
- ChatGPT Plugin - AI Copywriting
- AI Smart Cutout for Windows
- Lens correction on Windows
- Auto Reframe Video for Windows
- AI Portrait Cutout
- Scene detection feature
- AI Smart Masking for Windows
- Motion Tracking on Windows
- Video Stabilization for Windows
- AI Video/Photo Object Remover for Windows
- AI Smart Search for Windows
- AI Skin Tone Protection for Windows
- AI Image for Windows
- Chroma key (green screen)
- Super Slow Motion with Optical Flow for Windows
- Video Denoise for Windows
-
-
Audio Editing for Windows
-
Basic Audio Editing
-
Advanced Audio Editing
-
AI-Powered Audio Editing
- Auto synchronization
- AI Sound Effects in Filmora for Windows
- Smart BGM Generation on Windows
- AI Voice Enhancer in Filmora
- AI Voice Cloning in Wondershare Filmora
- AI Music Generator for Windows
- Audio To Video
- AI Vocal Remover for Windows
- AI Auto Beat Sync for Windows
- AI Audio Stretch for Windows
- AI Audio Denoise for Windows
- Silence Detection on Windows
-
-
Text Editing for Windows
-
Basic Text Editing
-
Advanced Text Editing
-
AI-Powered Text Editing
-
-
Video Customizations
-
Video Effects
-
Audio Effects
-
Transitions
-
Stickers
-
Filters
-
Color Editing
-
Animations
-
Templates
-
Asset Center
-
-
Exporting & Share & Cloud Backup
Filmora AI Script to Video on Windows
Filmora AI Script to Video on Windows is a powerful feature that transforms written scripts directly into engaging video content. This tool leverages advanced AI technology to automatically generate videos complete with animations, transitions, and customizable elements based on your textual input. The feature is integrated with the latest Google Veo-3 technology that adds relevant background score to your videos automatically.
Index
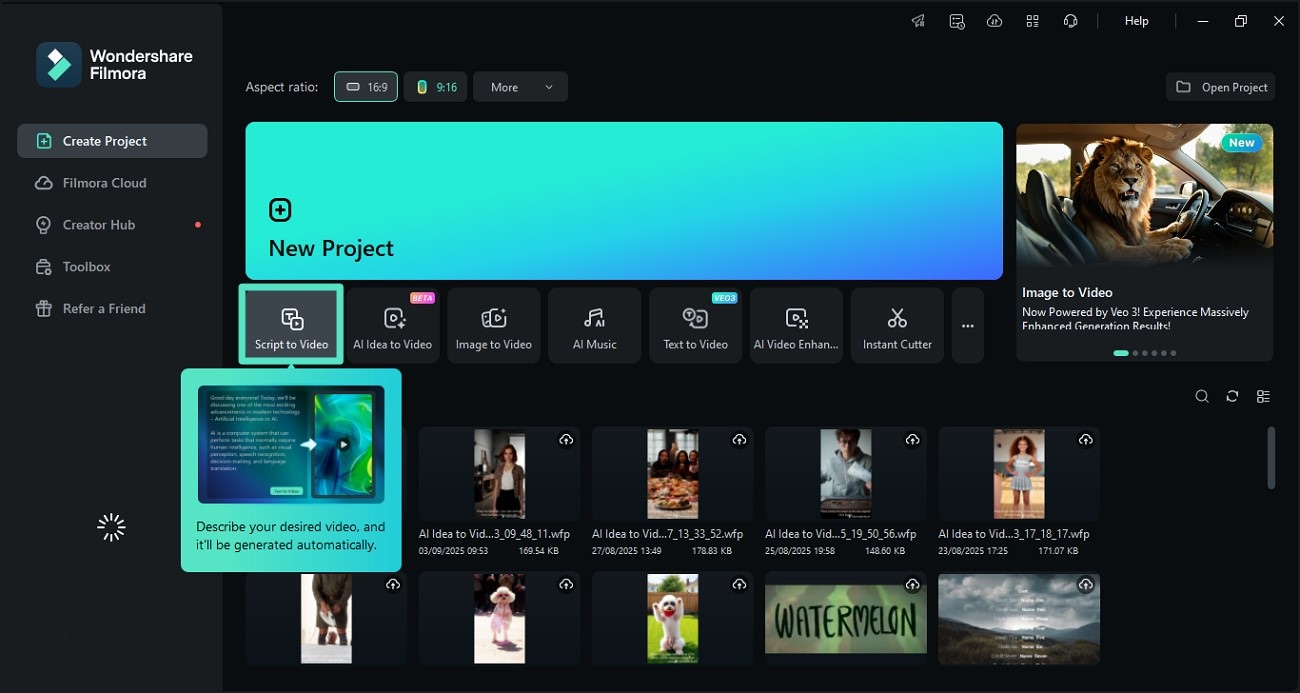
1. Acquire the AI Script to Video Feature
After launching Filmora, click on the AI Script to Video feature located on the homepage or the Toolbox on the left.
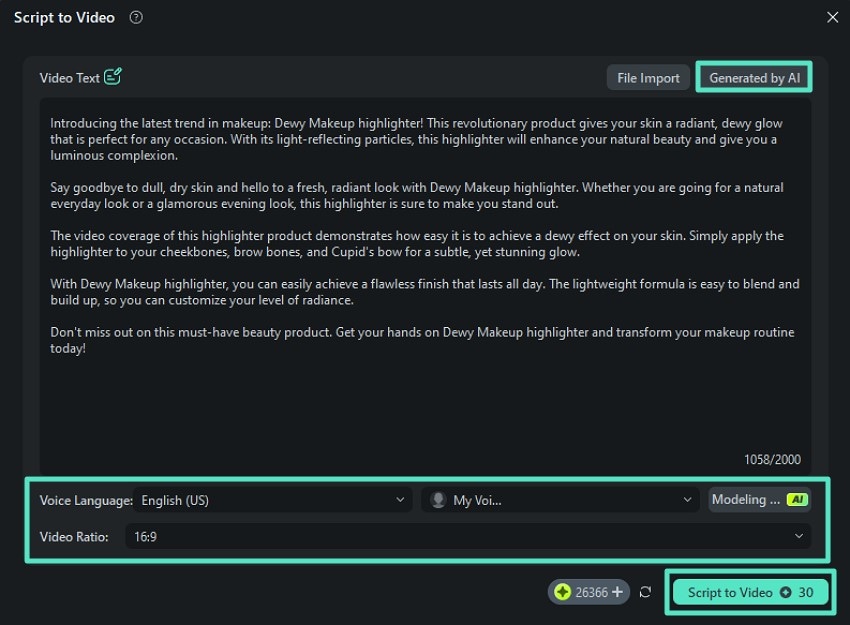
2. Input Script and Generate Video
As a new window opens on selection, add your script as text in the designated field. You can also generate a script using the Generate by AI option. Moving forward, select the voice language and choose a voice for voiceover. The platform allows you to instantly clone your voice using the AI Modeling option as well. After selecting the Video Ratio, hit the Script to Video button to execute the process.
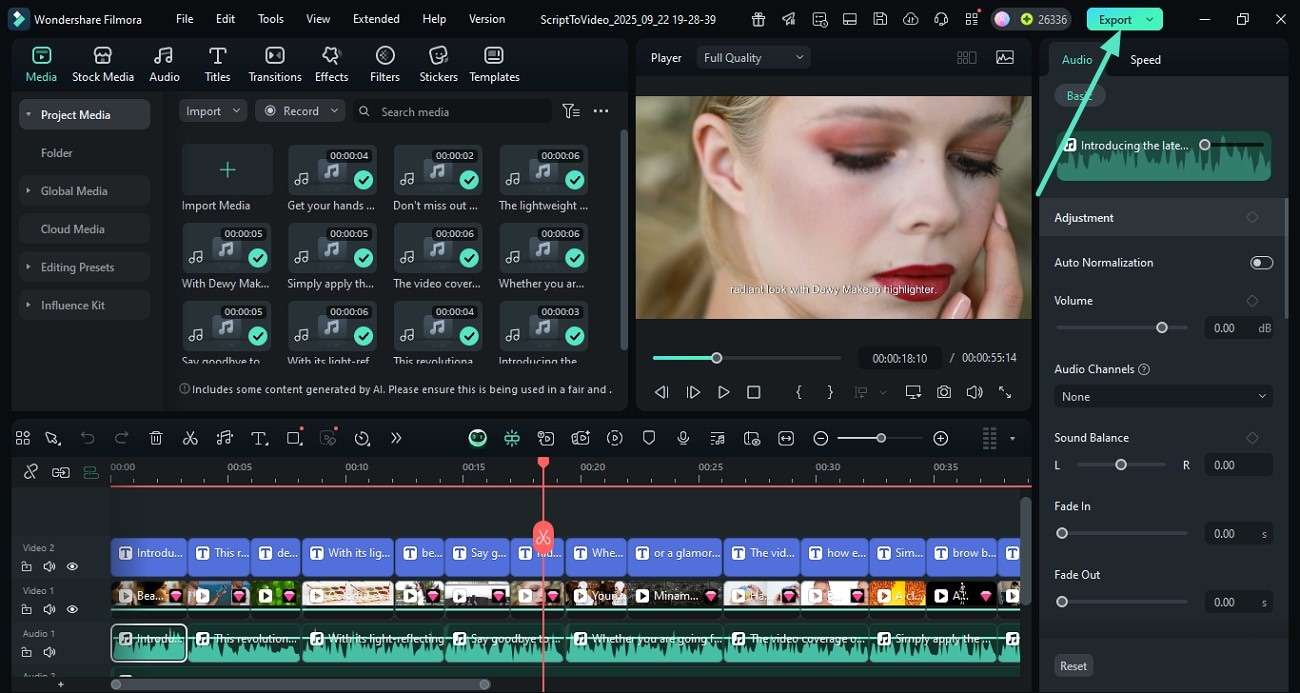
3. Review the Generated Video and Export
Once the video across your script is generated in the following interface, review it. Apply further enhancements if required using Filmora’s extensive functionalities. When you are satisfied with the results, hit the Export button located at the top-right corner to save the video.
Here is the generated video.
Related Posts
Featured Articles
A Guide to Beef Recipe Videos
Eager to learn how to make beef stew or other recipes like Beef Wellington? Start by watching beef stew YouTube recipes to visually learn how to make them.
How to Change Background Music in Videos: A Simple Guide
If you want to replace your video's soundtrack, check out our guide to learn how to change the background music in a video using powerful editors and free online tools.
A Quick Guide on How to Blur Faces in Windows Movie Maker [2026]
Learn how to blur faces in Windows Movie maker with a step-by-step guide in this article.
Recommended User Guide
Motion Tracking on Windows
The Motion Tracker tool lets you track movement in your video and have objects like elements, videos, images, and text follow that movement.
Super Slow Motion with Optical Flow for Windows
With Filmora's new upgrade, users can add slow motion to their videos and optimize them.
AI Mate Editing for Windows
AI assistants play an essential role during editing, and with Filmora's new AI Mate Editing feature, users can ask for valuable insights about their videos.
