For the Best Results, Use the Latest Version.
-
Preparations
-
Account
-
Get Started & Basic Settings
-
Compatibility & Tech Specs
-
Performance Settings
-
-
Creating Projects
-
Creating New Projects
-
-
Importing & Recording
-
Video Editing for Windows
-
Basic Video Editing
- Enable/Disable Clip in Windows
- Magnetic Timeline for Windows
- Dual Monitor Setup for Video Editing on Windows
- Select All Clips on Timeline for Windows
- Manage Timeline and Tracks on Windows
- Auto Ripple for Windows
- Split & trim video
- Crop & Pan & Zoom Video
- Compositing
- Change video playback speed
- Playing videos in reverse
- Mark In and Mark Out for Windows
- Markers for Windows
- Group editing
- Customizable Backgrounds for Videos and Images in Windows
- Video snapshot
- Using freeze frame
- Logo Reveal For Windows
- Apply auto enhance
- Applying drop shadow
- Adjustment layer for Windows
- Transforming
- Video Editing Ruler – Windows
-
Advanced Video Editing
- Drawing Tools for Windows | Filmora Guide
- Create Multi-Camera Clip
- Compound Clip for Windows
- Multi-Clip Editing for Windows
- Filmora Motion Blur | Windows
- Filmora Flicker Removal Guide | Windows
- Apply mask to video
- Creating a PIP effect
- Keyframe Graph Editor for Windows
- Add animation keyframing for Windows
- Keyframe Path Curve for Windows
-
AI-Powered Video Editing
- Smart Scene Cut for Windows
- Smart Short Clips for Windows
- AI Face Mosaic for Windows
- Filmora AI Eye Contact- Windows
- AI Video Enhancer for Windows
- AI Text-to-Video for Windows
- Planar Tracking for Windows
- AI Idea to Video for Windows
- Filmora Image to Video for Windows
- Filmora Image to Prompt for Windows
- Instant Cutter Tool for Windows
- AI Extend
- Filmora AI Relight - Windows
- Filmora AI Image Enhancer Guide - Windows
- AI Script to Video Guide for Windows
- AI Text-Based Editing for Windows
- AI Mate Editing for Windows
- Create with instant mode
- ChatGPT Plugin - AI Copywriting
- AI Smart Cutout
- Lens correction on Windows
- Auto reframe video
- AI Portrait Cutout
- Scene detection feature
- AI Smart Masking for Windows
- Make motion tracking
- Video Stabilization for Windows
- AI Video/Photo Object Remover for Windows
- AI Smart Search for Windows
- AI Skin Tone Protection for Windows
- AI Image for Windows
- Chroma key (green screen)
- Super Slow Motion with Optical Flow for Windows
- Video Denoise for Windows
-
-
Audio Editing for Windows
-
Basic Audio Editing
-
Advanced Audio Editing
-
AI-Powered Audio Editing
-
-
Text Editing for Windows
-
Basic Text Editing
-
Advanced Text Editing
-
AI-Powered Text Editing
-
-
Video Customizations
-
Video Effects
-
Audio Effects
-
Transitions
-
Stickers
-
Filters
-
Color Editing
-
Animations
-
Templates
-
Asset Center
-
-
Exporting & Share & Cloud Backup
Split & Trim Video
To remove unwanted parts from the video, you can split or trim the clip. You can split a video into two separate clips, trim off the beginning and/or ends of a video clip.
Note:
Trimming or splitting the media clip will not affect the original source media.Split Video Clip
Splits the selected clip. Position the Scrubber to where you want the clip to be split, and then click this button.
❶ Split Video with the Split Button in Timeline
Click the video in the timeline, drag the playhead to the position where you want to split, and click the split button on the playhead to create the split.

Note:
If you don’t select a specific track in your timeline, you will split all of the clips under your playhead. To split media in a single track, you need to select the track first and then click the Split button.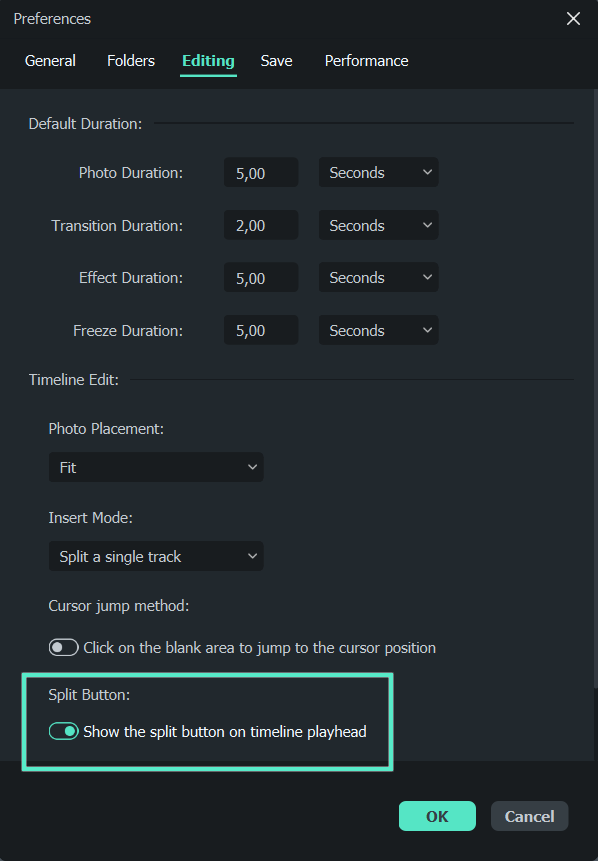
Note:
If you didn’t see the Split Button in the timeline, you can go to File -> Preferences -> Editing to show it.❷ Split Video into Parts with the Split icon
- Click the video in the timeline, and move the playhead to the position in the clip where you want to split it.
- Click the scissors icon above the timeline to separate it into two clips.
❸ Split Video with the Split Option
Select the video and place the playhead at the position where you want to split the clip, right-click and choose Split from the context menu.

Note:
You can also split large videos based on scenes. For more details, check Scene Detection.➍ Quick Split Mode
Import your video to the timeline, choose “Quick Split Mode” icon, and then click on the timeline to split your video.

Just choose the parts you want to split and then click the mouse to quickly split long clips with ease.

Trim Video
You can use the trim feature to remove unwanted segments at the beginning or the ends of the video.
❶ Trim with Mark In and Out in Preview Window
In the Preview window, you can use the Mark In and Mark Out points to break down a video into multiple segments without importing it to the timeline first.
- Double click the video in the Media Library to view it in the Preview window.
- Use the player controls to find where you want the trimmed clip to begin, and then click the Mark In button when you get the frame of the video that you want to use as the beginning point.
- Click the Mark Out button to set the point that you want it to be the end frame.
- Drag the clip from the Preview window to the timeline, the video segment you want to keep will be loaded in the timeline.
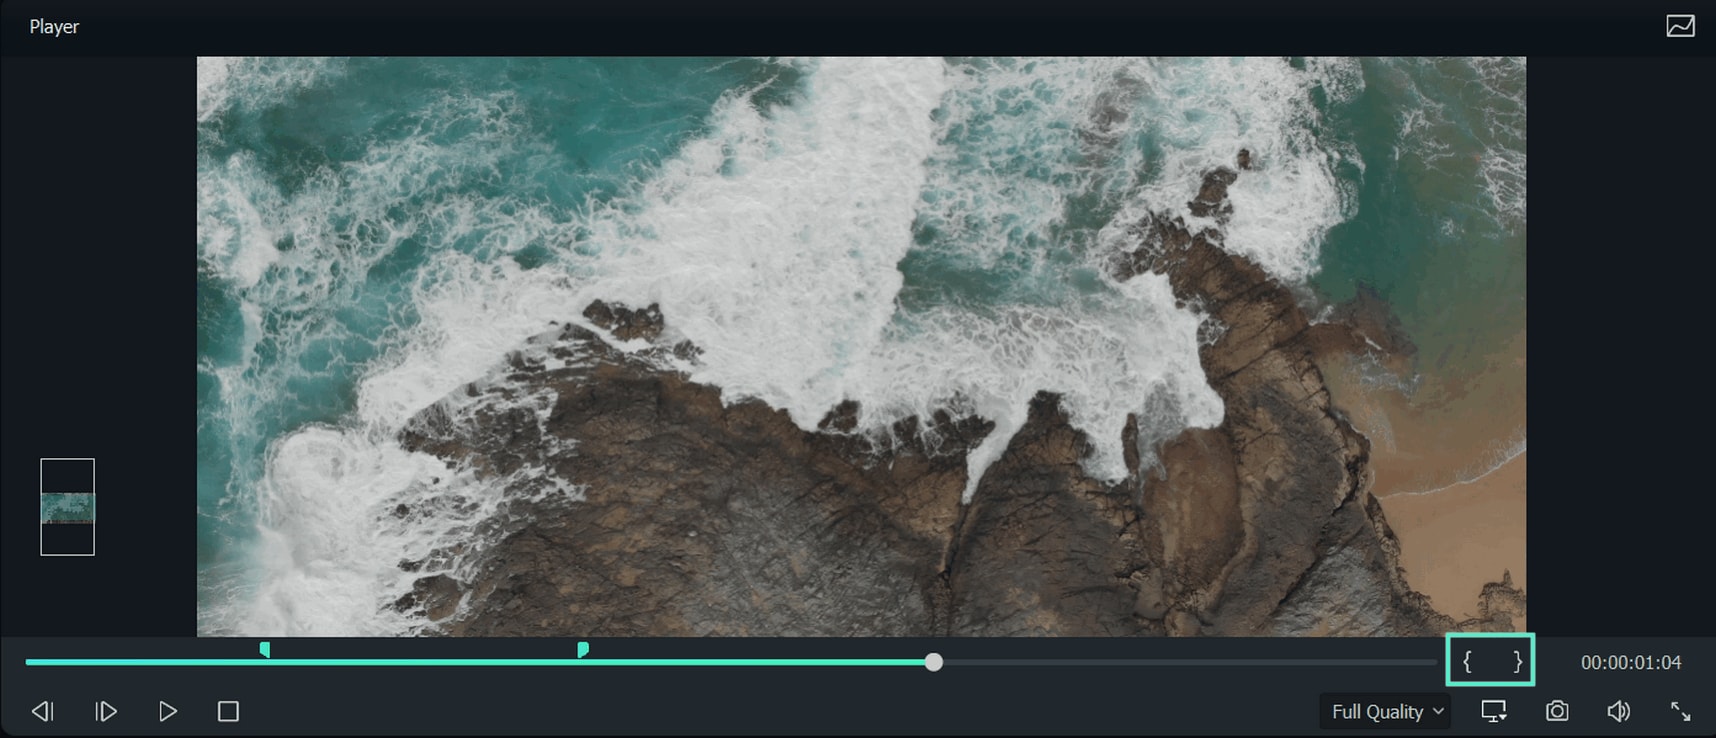
Note:
After you mark in and out points, you can always change your mind before you edit the clip into the timeline. Just drag the Mark In and Mark Out points to a new position in the Preview window.❷ Trim Video in Timeline
Select the video on the timeline you want to trim, hover your mouse over the left or right edge of the video until the trim tool shows.
Click and drag the edge of your clip forwards or backwards to trim off the unwanted portion.
Note:
Filmora also has an option for you to quick trim from the start or end of a clip. Move the Playhead on the frame want to trim, and right click on it to select Trim Start to Playhead or Trim End to Playhead under Trim context menu, depending on whether you want to delete what's behind the playhead or in front of it. If you're using Filmora 9 or 10, click here to learn how to trim a video.Related Posts
Featured Articles
What is the Razor Tool and How to Use the Premiere Pro Razor Tool?
Struggling with messy timelines when cutting clips in Premiere Pro? The Razor Tool (shortcut C) lets you cut video/audio precisely. Learn step-by-step use, key shortcuts (Ctrl+K/Cmd+K), fix gaps/pops, and try Filmora for easier cutting.
How to Apply the Ken Burns Effect in Premiere Pro + A Much Easier Alternative
The Ken Burns effect is very popular in filmmaking, especially if you are making documentaries. Learn how to apply it in Premiere Pro and Filmora.
5 Best Social Media Schedulers for Small Businesses
Are you a small business owner? Check out these 5 tools to streamline your social media posting schedule! Use this guide to grow your small business online.
Recommended User Guide
Video snapshot
Learn how to use Video Snapshot in FIlmora.
Playing videos in reverse
Learn how to play videos in reverse in Filmora 11
Apply auto enhance
Learn how to use Auto Enhance in Filmora 11
