For the Best Results, Use the Latest Version.
-
Preparations
-
Account
-
Get Started & Basic Settings
-
Compatibility & Tech Specs
-
Performance Settings
-
-
Creating Projects
-
Creating New Projects
-
-
Importing & Recording
-
Video Editing for Windows
-
Basic Video Editing
- Enable/Disable Clip in Windows
- Magnetic Timeline for Windows
- Dual Monitor Setup for Video Editing on Windows
- Select All Clips on Timeline for Windows
- Manage Timeline and Tracks on Windows
- Auto Ripple for Windows
- Split & trim video
- Crop & Pan & Zoom Video
- Compositing
- Change Video Speed on Windows
- Playing videos in reverse
- Mark In and Mark Out for Windows
- Markers for Windows
- Group editing
- Customizable Backgrounds for Videos and Images in Windows
- Video snapshot
- Using freeze frame
- Logo Reveal For Windows
- Auto Enhance in Filmora for Windows
- Applying drop shadow
- Adjustment layer for Windows
- Apply Transforming for Windows
- Video Editing Ruler – Windows
-
Advanced Video Editing
- Drawing Tools for Windows | Filmora Guide
- Create Multi-Camera Clip
- Compound Clip for Windows
- Multi-Clip Editing for Windows
- Filmora Motion Blur | Windows
- Filmora Flicker Removal Guide | Windows
- Apply mask to video
- Creating a PIP effect
- Keyframe Graph Editor for Windows
- Add animation keyframing for Windows
- Keyframe Path Curve for Windows
-
AI-Powered Video Editing
- Smart Scene Cut for Windows
- Smart Short Clips for Windows
- AI Face Mosaic for Windows
- Filmora AI Eye Contact- Windows
- AI Video Enhancer for Windows
- AI Text-to-Video for Windows
- Planar Tracking for Windows
- AI Idea to Video for Windows
- Filmora Image to Video for Windows
- Filmora Image to Prompt for Windows
- Instant Cutter Tool for Windows
- AI Extend
- Filmora AI Relight - Windows
- Filmora AI Image Enhancer Guide - Windows
- AI Script to Video Guide for Windows
- AI Text-Based Editing for Windows
- AI Mate Editing for Windows
- Create with instant mode
- ChatGPT Plugin - AI Copywriting
- AI Smart Cutout for Windows
- Lens correction on Windows
- Auto Reframe Video for Windows
- AI Portrait Cutout
- Scene detection feature
- AI Smart Masking for Windows
- Make motion tracking
- Video Stabilization for Windows
- AI Video/Photo Object Remover for Windows
- AI Smart Search for Windows
- AI Skin Tone Protection for Windows
- AI Image for Windows
- Chroma key (green screen)
- Super Slow Motion with Optical Flow for Windows
- Video Denoise for Windows
-
-
Audio Editing for Windows
-
Basic Audio Editing
-
Advanced Audio Editing
-
AI-Powered Audio Editing
- Auto synchronization
- AI Sound Effect
- Smart BGM Generation
- AI Voice Enhancer
- How to Execute AI Voice Cloning in Wondershare Filmora?
- AI Music Generator for Windows
- Audio To Video
- AI Vocal Remover for Windows
- AI Auto Beat Sync for Windows
- AI Audio Stretch for Windows
- AI Audio Denoise for Windows
- Silence detection
-
-
Text Editing for Windows
-
Basic Text Editing
-
Advanced Text Editing
-
AI-Powered Text Editing
-
-
Video Customizations
-
Video Effects
-
Audio Effects
-
Transitions
-
Stickers
-
Filters
-
Color Editing
-
Animations
-
Templates
-
Asset Center
-
-
Exporting & Share & Cloud Backup
Body Effects for Windows
The body effects feature in Wondershare Filmora adds dynamic visual enhancements that track and interact with a person’s movements in a video. With AI-powered motion tracking, it can apply glowing outlines, particle trails, neon effects, and stylized animations directly to the body. This makes content more engaging, especially for social media, dance videos, and creative storytelling.
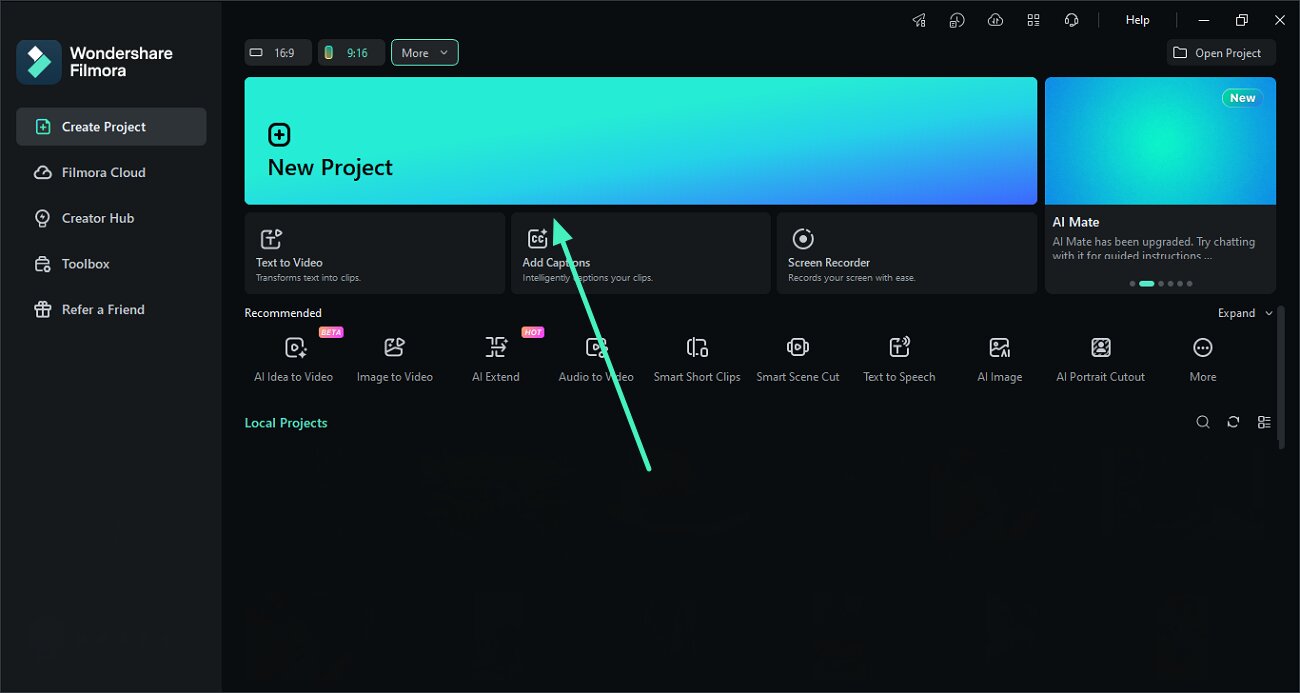
Step 1. Open New Project Add Audio
Once you run the newest Filmora version on your device, press the New Project option. Then upload the video clip you plan to apply body effect to and drag it onto the editing timeline workspace.
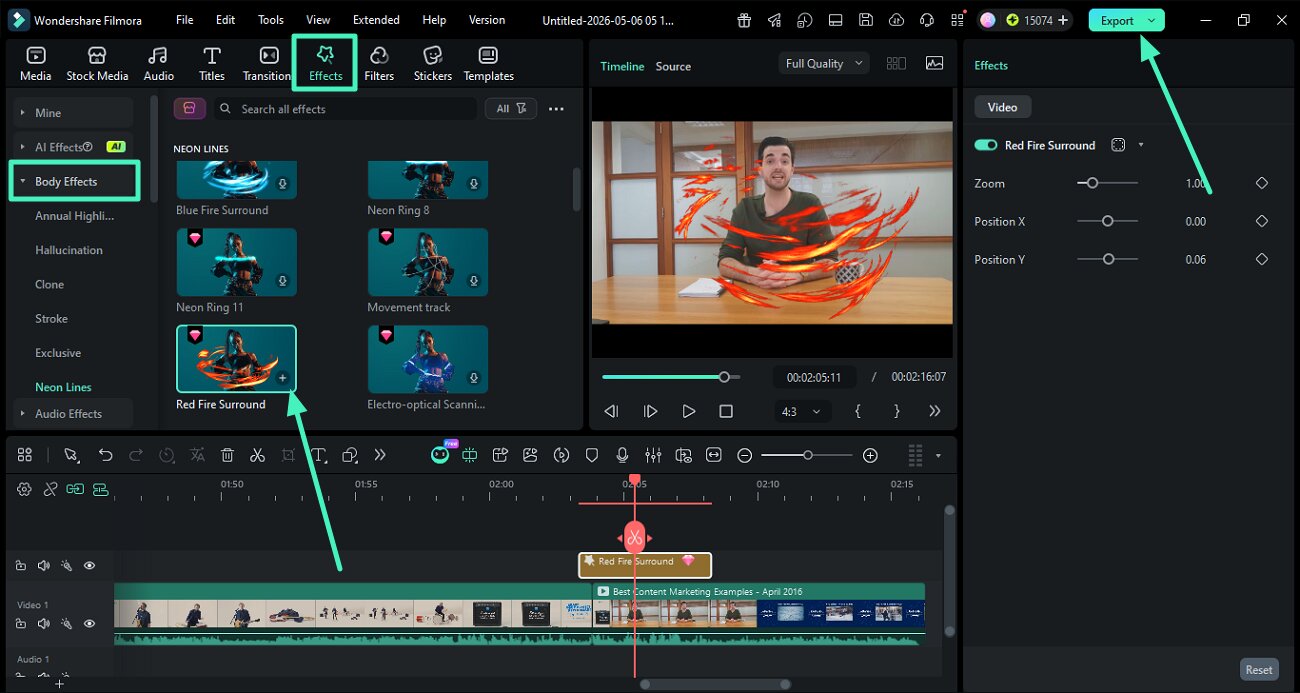
Step 2. Access Body Effect and Apply
In the editing interface of the tool, head to the menubar at the top and select the Effects option. Now, enable the Body Effects section from the left and scroll through the categories. Choose your favorite effect from there and apply it to the subject in the video using the + icon. Once done, hit the Export button to save the results.
Related Posts
Featured Articles
Create a Hype Video That Hits Hard with Free Music & AI Tools
Want to energize your audience, build excitement, and leave a strong impression? With Filmora’s AI tools and free music, creating a hype video has never been easier.
How to Add Clown Filter? Best 4 Methods
Do you want to see how you look if you apply a clown or joker filter on your face? You do not need professional expertise and can easily use a clown filter that helps you create a joker or crown look in just a click.
How to Record Messenger Calls – Top 6 Methods
Is it possible to record messenger calls? Check our best 6 methods to record messenger calls on any device.
Recommended User Guide
Mocha Filmora - For Windows
Here is the guide on how to use Mocha Plugin in Filmora on Windows.
Retouch Guide for Windows
Want to enhance the features and complexion of your videos with facial shots? Find out how Filmora's Retouch feature addresses such issues.
